I have told you several times already how much I love the Internet – this very blog would not exist if it wasn’t for it. On the other side, social networks sometimes make me sad – they make me think about lots of things sometimes.
For instance, I see people from my family sharing loads of photos and thoughts and… I feel like I don’t know those people. I did, in a very distant past, years and years ago, but life has changed so much and I no longer can relate to them – they are like complete strangers. I have a few close and dear friends I consider family much more than the people connected to me by blood – that is comforting, that puts my heart at ease. Those warm feelings make me feel good after dark thoughts cross my mind and usually I look for comfort in food form, too – not ideal, I know, but it is what it is.
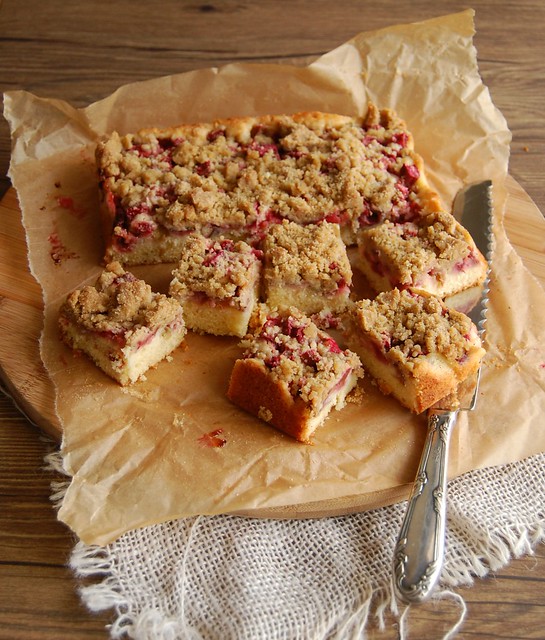
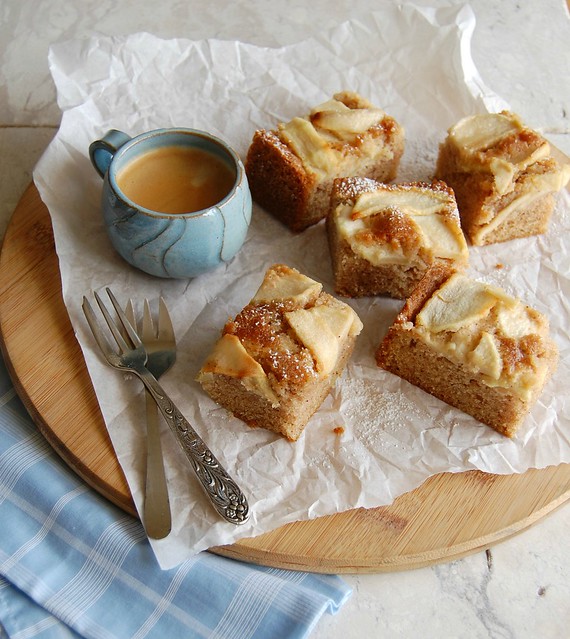
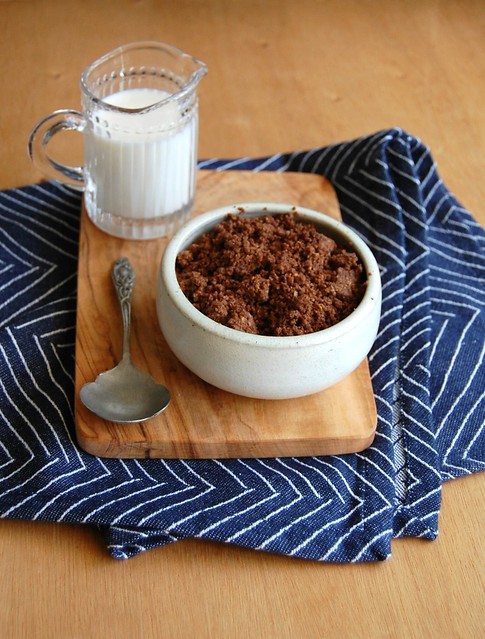
Aside from my mom’s rice pudding, nothing comforts me more than a good crumble, eaten straight from the oven with a little cold heavy cream on the side. This time I added almond meal and cocoa to the topping, creating a delicious and tropical combination with the bananas.
Banana, chocolate and peanut crumble
own creation
3 large bananas, ripe yet firm, sliced in 1cm coins
Crumble topping:
1/3 cup (46g) all purpose flour
¼ cup (25g) peanut meal
½ tablespoon unsweetened cocoa powder, sifted
2 tablespoons demerara sugar
¼ teaspoon baking powder
pinch of salt
1 ½ tablespoons (21g) unsalted butter, cold and chopped
Preheat the oven to 180°C/350°F. Divide the bananas between two 240ml capacity ovenproof ramekins or cups.
In a medium bowl, whisk together flour, peanut meal, cocoa, sugar, baking powder and salt. Add butter and using your fingertips, rub the ingredients together until mixture resembles breadcrumbs. Sprinkle over the bananas and bake for 20-25 minutes or until topping is golden and crispy.
Serve with heavy cream or vanilla ice cream.
Serves 2
Tuesday, November 22, 2016
Banana, chocolate and peanut crumble to comfort a sad heart
Monday, November 14, 2016
Strawberry rhubarb buckle and Mark Rylance
I have been able to catch up and watch all the Oscar movies of this year – it has not been a quick task but it certainly is a pleasant one. :)
One of the movies I have seen lately is Bridge of Spies – I was quite shocked when Mark Rylance’s name was announced as Best Actor in a Supporting Role and I know I was not the only one. I remembered him from Angels and Insects, a good movie I watched twenty years ago, but not much more than that, and I got very curious about his part alongside Tom Hanks.
The movie is… OK. Interesting story, but nothing out of this world (well, not a big fan of Spielberg here). And Mark Rylance’s performance is flat and silly - he should wrap his Oscar in bubble wrap and send it to Tom Hardy by Fedex. :)
I have a more interesting supporting “actor” here: strawberries – unlike Mr. Rylance, their flavor and smell work to create a super tasty buckle, in a beautiful combination with the rhubarb. I had trouble trying not to eat several squares in a row, so please be warned. :)
Strawberry rhubarb buckle
slightly adapted from here
Cake:
115g strawberries, trimmed and diced
225g rhubarb, trimmed and cut into 1cm pieces
¾ cup (150g) granulated sugar, divided use
1 cup (140g) all-purpose flour
¾ teaspoon baking powder
pinch of salt
85g unsalted butter, softened
finely grated zest of 1 small lemon
1 large egg
½ teaspoon pure vanilla extract
¼ cup sour cream*
Crumble topping:
½ cup (70g) all-purpose flour
2 tablespoons light brown sugar, packed
pinch of salt
2 tablespoons (28g) unsalted butter, melted
Butter a square 20cm (8in) baking pan, line it with foil, leaving an overhang on two opposite sides and butter the foil.
In a medium bowl, stir together the rhubarb, strawberries and ¼ cup (50g) granulated sugar. Let it macerate for 30 minutes – in the meantime, preheat the oven to 180°C/350°F.
Make the crumble topping: in a medium bowl, combine the flour, brown sugar, and salt. Using a fork, stir in the melted butter until mixture is crumbly. Refrigerate until needed.
Cake: in a large bowl, whisk together flour, baking powder, and salt.
In a stand mixer or another large bowl, beat the butter, lemon zest, and the remaining ½ cup (100g) of sugar until the mixture is light and fluffy. Beat in the egg and the vanilla. Add the flour mixture in 3 additions, alternating with the sour cream, beginning and ending with the flour mixture.
Transfer the batter to the prepared pan and smooth the top. Drain the macerated strawberries and rhubarb through a fine mesh strainer, discarding the liquid, and arrange them on top of the batter. Scatter the crumb topping on top.
Bake for about 50 minutes, or until the top is golden brown and a toothpick inserted in the middle comes out clean. Cool completely in the pan over a wire rack. Cut into squares for serving.
* homemade sour cream: to make 1 cup of sour cream, mix 1 cup (240ml) heavy cream with 2-3 teaspoons lemon juice in a bowl. Whisk until it starts to thicken. Cover with plastic wrap and leave at room temperature for 1 hour or until thicker (I usually leave mine on the counter overnight – except on very warm nights – and it turns out thick and silky in the following morning; refrigerate for a creamier texture)
Makes 16
Thursday, October 20, 2016
Linguine with creamy tomato, thyme, caper and bacon sauce
I believe that many of you reading me right now reach for a pasta package whenever there is the need of having food on the table in little to no time – I am guilty of that and I am not ashamed of it. :)
I make pasta often not only because of how fast it is: Joao and I love it and it is so versatile I can combine it with several different flavors and types of sauce. I saw this version of a tomato sauce on Olive magazine and it was so simple I had to try it: the sauce is delicious, the acidity of the tomatoes is softened by the addition of cream and the capers add a briny, salty touch to the sauce. Thyme is my favorite herb and one I love pairing with tomato.
Linguine with creamy tomato, thyme, caper and bacon sauce
slightly adapted from the always great Olive magazine
4 slices of bacon, cut into ½ cm pieces
2 large garlic cloves, crushed
6 sprigs of fresh thyme
1 x 400g can of chopped tomatoes
2 teaspoons granulated sugar
salt and freshly ground black pepper
2 tablespoons capers – soak them in cold water for 15 minutes before using, then drain
3 tablespoons heavy cream
200g linguine
In a medium saucepan, over high heat, cook the bacon, stirring occasionally, until crisp. Remove from the pan and set over paper towels. Remove the excess fat from the saucepan, leaving 1 tablespoon. On that fat, cook the garlic until fragrant, about 1 minute. Stir in the thyme and cook for 1 minute. Add the tomatoes, crush them with a potato masher, then fill the can by half with water and add to the tomatoes. Add the sugar, season with salt and pepper and cook partially covered, stirring occasionally, for about 20 minutes or until thickened.
In the meantime, cook the linguine in salted boiling water until al dente.
Stir in capers and cream and then cook for 3 minutes. Drain the linguine and toss with the sauce. Serve at once sprinkled with the bacon bits.
Serves 2
Friday, October 14, 2016
Spiced apple cake
I was telling you the other day about how the food magazines I subscribe to fulfill my need for new recipes and inspiration – they indeed to. I subscribe to a handful of magazines – the digital versions made it easy and cheaper and no more issues lost in the way (I got addicted). I had sworn that I would not subscribe to other magazines, but then I got an offer from Zinio to get 12 issues of Martha’s magazine for 5 dollars… I just did not resist it. ;)
The latest issue celebrates the fall and Thanksgiving, so among all the beautiful pies there I found this spiced apple cake, which was perfect for my Saturday baking: I had apples and heavy cream begging to be used. I tweaked the recipe just a little bit and ended up with a moist, tender and delicious cake – it perfumed my whole apartment for hours after it was baked.
I never tire of apple cakes and this one is definitely a keeper.
Spiced apple cake
slightly adapted from Martha’s magazine
2 Granny Smith apples (about 200g each)
juice of 1 large lime or 1 large lemon
2 cups (280g) all purpose flour
2 teaspoons baking powder
½ teaspoon baking soda
½ teaspoon table salt
1 teaspoon ground cinnamon
½ teaspoon ground ginger
½ cup (113g/1 stick) unsalted butter, melted and cooled
½ cup (120ml) canola oil
½ cup sour cream*
3 large eggs, room temperature
1 ¼ cups (250g) granulated sugar
1 teaspoon vanilla extract
2 tablespoons demerara sugar, for sprinkling over the apples
Preheat the oven to 180°C/350°F. Lightly butter a 20x30cm (12x8in) baking pan and line it with foil, leaving an overhang on two opposite sides. Butter the foil as well.
Peel and core the apples, then cut them in half and cut each half lengthwise in thin slices. Place them in a medium bowl and toss them in the lemon juice.
In a large bowl, whisk together flour, baking powder, baking soda, salt, cinnamon and ginger. Set aside. In a small bowl, mix together the butter, oil and sour cream.
In the bowl of an electric mixer, whisk eggs until light and thick. Gradually mix in the granulated sugar by the sides of the bowl, to avoid losing the air incorporated in the eggs – you do not want to disinflate the mixture. Whisk in the vanilla, then continue whisking until mixture is thick and glossy.
On slow speed, mix in the dry ingredients in two additions, alternating with the butter/oil/sour cream mixture. Mix only until combined – do not overmix.
Spread batter into prepared pan and smooth the top. Arrange the apple slices on top of the batter and push them into the batter slightly. Sprinkle with the demerara sugar. Bake for about 45 minutes or until golden and risen and a skewer inserted in the center of the cake comes out clean. Cool completely in the pan over a wire rack before serving.
* homemade sour cream: to make 1 cup of sour cream, mix 1 cup (240ml) heavy cream with 2-3 teaspoons lemon juice in a bowl. Whisk until it starts to thicken. Cover with plastic wrap and leave at room temperature for 1 hour or until thicker (I usually leave mine on the counter overnight – except on very warm nights – and it turns out thick and silky in the following morning; refrigerate for a creamier texture)
Serves 18
Thursday, October 6, 2016
Marjoram orange roast chicken
I was thinking the other day about how drastically I have decreased my cookbook purchase addiction – maybe because of how much bigger my workload is compared to years ago, maybe because the food magazines I subscribe fill that need for inspiration and new recipes, maybe because some books were such disappointments (I am speaking to you, Ms. Lawson)…
My last purchase, as far as I recall, was on Oct 20 last year – this is definitely a new world record or something. :)
However, when I saw that Diana Henry had a new book coming out, I could not wait until I had it in my hands, for I am a huge fan of her beautiful work, plus she is a total dear and have spoken to me on Twitter a few times, even saying “obrigada” in Portuguese once. <3
The book is stunning and the recipes look delicious – and are simple, like the name of the book says. I love that. I decided to start with a chicken recipe and used Diana’s as inspiration, however I made it even simpler than hers. It was indeed delicious and the chicken meat was falling off the bones after a night spent in the fridge swimming in the flavorsome marinade.
Maybe I am cured from my cookbook addiction? I don’t know. What I know is that next time Diana publishes a new cookbook I will have it on my Ipad on the very same day. ;)
Marjoram orange roast chicken
adapted from the beautiful Simple
handful of fresh marjoram leaves, chopped
3 garlic cloves, crushed then finely chopped
2 oranges
3 tablespoons extra virgin olive oil
salt and freshly ground black pepper
4 skin-on bone-in chicken thighs
In a bowl, mix the marjoram leaves, the garlic, finely grated zest and juice of 1 of the oranges, the olive oil, salt and pepper. Add the chicken and toss to coat. Cover with plastic wrap and refrigerate for at least 2 hours (overnight is great).
Preheat the oven to 200°C. Line a medium roasting tray with a double layer of foil and coat the foil with olive oil. Slice the remaining orange and arrange the slices on top of the foil. Arrange the chicken over the orange slices and pour over the marinade. Roast for about 60-80 minutes or until golden and cooked through – time might vary depending on how golden you like your chicken.
Serves 2