I have told you that I am a very visual person and that beautiful food photos get my attention instantly, and a while ago I found out that my husband is just like that too. :)
Now, every time I see something delicious on a magazine or cookbook I immediately show him the picture – that has made my life so much easier! :)
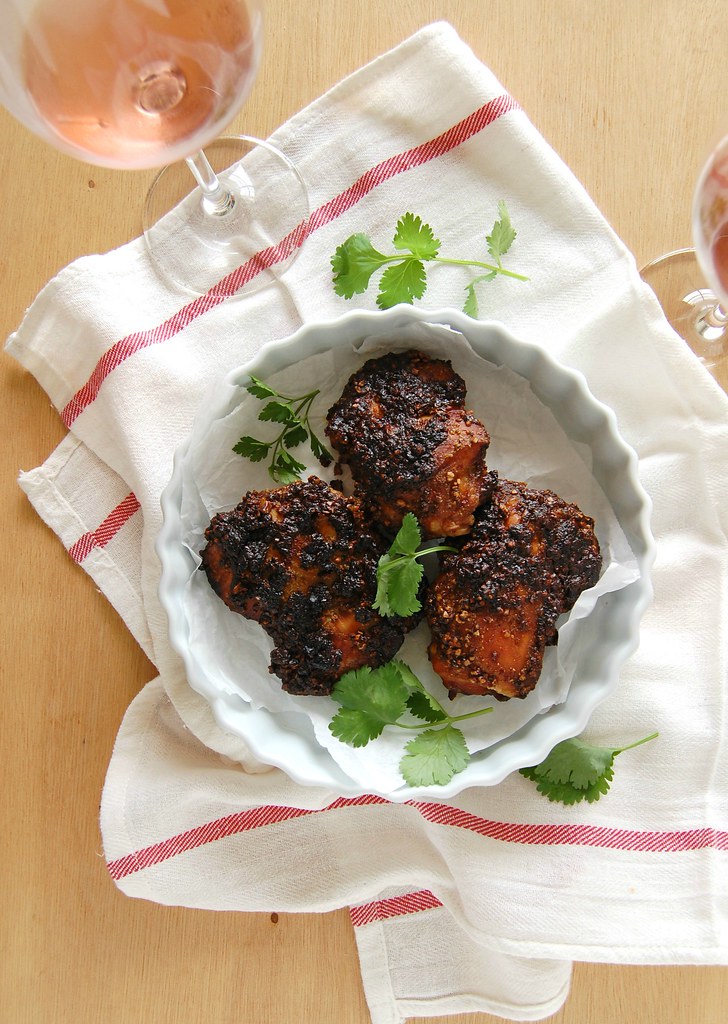
I was reading Bon Appétit the other day and saw this insanely golden chicken – it caught my eye right away. When I read it was marinated in mayonnaise I was even more curious about the recipe, so I lifted the IPad and told him (I might have screamed, I am not so sure): “LOOK at this chicken!” to what he replied: “please make it for lunch next weekend?” :D
So in a matter of minutes the menu was decided and I got to learn that marinating chicken with mayo makes it really, really tender and beautifully golden – and all those spices combined with the onion and garlic added a wonderful flavor to it.
Mayo marinated roast chicken
adapted from Bon Appétit magazine
1 large onion, peeled and quartered
3 garlic cloves
finely grated zest and juice of 1 lime
1 teaspoon smoked paprika
½ teaspoon ground cumin
pinch of cayenne pepper
salt and freshly ground black pepper
½ cup mayonnaise
4 skin-on, bone-in chicken thighs (about 1½ pounds total)
1 ½ tablespoons olive oil
Make the marinade: in a food processor, process onions, garlic, lime zest and juice, paprika, cumin and cayenne pepper until a rough purée forms. Transfer to a large baking dish and stir in salt, black pepper and mayonnaise. Add the chicken and toss to coat. Cover with plastic wrap and refrigerate for 4 hours (overnight is even better).
Preheat the oven to 200°C/400°F. Line a large and shallow baking dish with a double layer of foil and brush it with olive oil. Remove the chicken pieces from the marinade and scrape off the excess marinade. Place chicken onto the foil, skin side up, drizzle with the olive oil and roast for 60-70 minutes or until golden brown and cooked through.
Serve immediately – I served it with watercress salad, like it was on the magazine, and it was delicious
Serves 2
Tuesday, March 28, 2017
Mayo marinated roast chicken
Friday, August 8, 2014
Garlicky cashew chicken and curiosity
My love for roast chicken is so notorious that when I tell my husband I have no idea what to cook on the weekend he always says “how about roast chicken?” :D
If I’m not feeling very inspired, I just make Donna Hay’s chicken with chorizo because I know it’s delicious and my husband and I love it, but most of the times I like to vary because there are several great recipes out there just waiting to be prepared (and devoured).
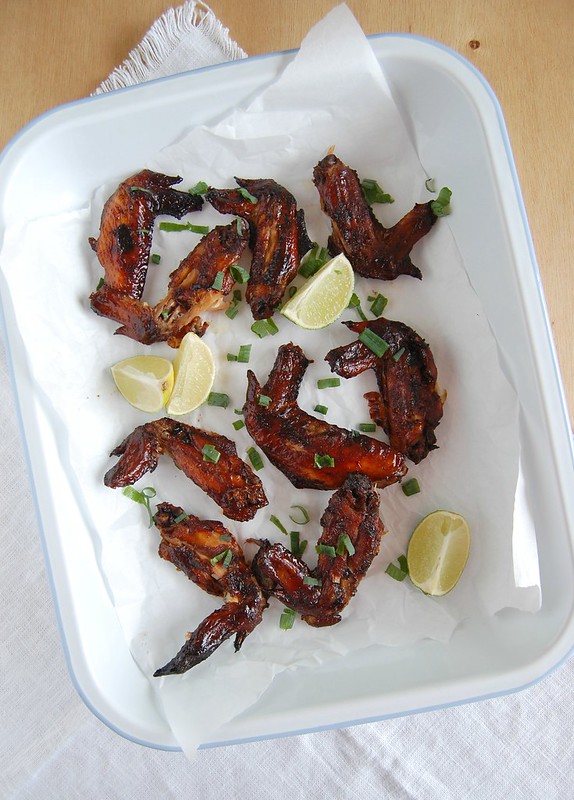
When I saw that Amanda Hessler’s recipe for barbecued chicken included a marinade made with cashew nuts I got immediately curious, especially because I could not imagine how it would turn out – some recipes feel familiar to me, and with others I try to imagine how they would taste even if I hadn’t tried them before, but not this one: I kept wondering how the nuts would flavor the chicken, and how they would behave combined with the cilantro and the soy sauce.
The only way to find that out was cooking the recipe, and that’s what I did.
(if someone tells you that Scorpios are curious, believe them). :)
The cashew nuts make the marinade very creamy and also make the chicken moist and golden without the need of too much oil. The cilantro and soy sauce add great flavor (don’t go overboard with the salt because both the soy sauce and the nuts are already salty). Would I make this chicken again? Yes, it tasted delicious, but I would add a bit more garlic next time – despite the name, it was not garlicky enough for me.
My husband still prefers Donna Hay’s chicken, though. :)
Garlicky cashew chicken
slightly adapted from the wonderful The Essential New York Times Cookbook: Classic Recipes for a New Century
1/3 cup roasted, salted cashew nuts
handful fresh cilantro leaves + a bit extra for serving
1 tablespoon canola oil
2 garlic cloves, roughly chopped
½ tablespoon soy sauce
½ teaspoon brown sugar, packed
juice of 1 large lime
salt and freshly ground black pepper
4 chicken pieces – use your favorites
In a blender or food processor, combine nuts, cilantro, oil, garlic, soy sauce, sugar and lime juice. Blend until smooth, scraping down sides as necessary. Taste and season with salt and pepper if desired.
Smear the chicken generously with the marinade. Cover with plastic and refrigerate for at least 3 hours (overnight is best).
Preheat the oven to 200°C/400°C. Line a roasting pan with a double layer of foil and brush it lightly with oil. Place the chicken onto the foil and drizzle with the remaining marinade.
Roast for about 1 hour or until cooked to your liking.
Serve sprinkled with fresh cilantro leaves.
Serves 2
Saturday, April 12, 2014
Sticky chicken wings and comfort zones
I admire people who step out of their comfort zone: it’s not an easy thing to do, not everyone’s ready for it, so kudos to those who do it. But at the same time I wonder that if you’re doing something really well, why not l keep doing it?
Life is about balance, I suppose.
That came to mind when I saw the poster for Cronenberg’s Maps to the Stars – there he is again, working with Robert Pattinson (the guy who made it impossible for me to watch more than 30 minutes of Cosmopolis). Oh, David, enough already – it’s fine to change things every now and then, I admire you for that, but cut the crap and go back to working with Viggo, please. Go back to that talented comfort zone, I beg of you.
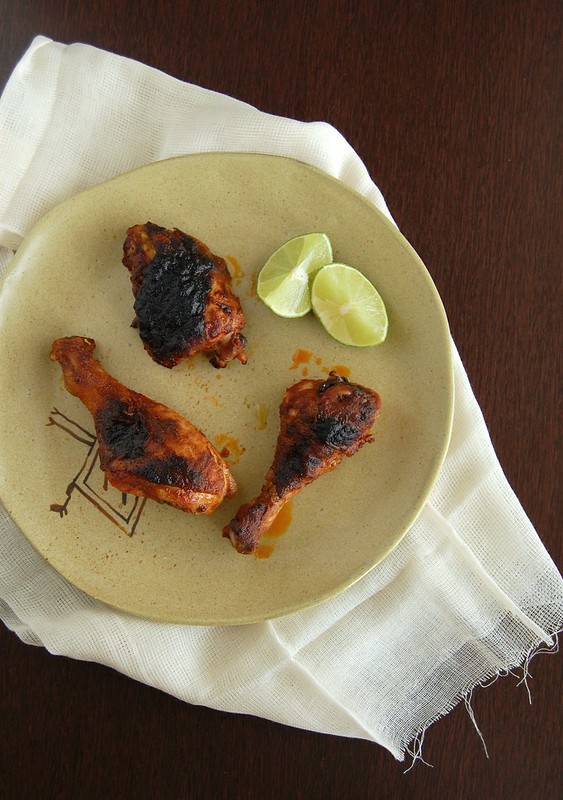
When I want something good for lunch and don’t have time to search around I stay in my foodie comfort zone and turn to the usual suspects: Nigella, Martha, Jamie – they rarely disappoint. Bill Granger is part of that list, too, with his always easy and delicious recipes, like these chicken wings that are dead simple to make and will have you licking your fingers as you eat them.
Sticky chicken wings
slightly adapted from the delicious Holiday
4 ½ tablespoons mirin
4 ½ tablespoons soy sauce
3 teaspoons granulated or caster sugar
2 large garlic cloves, minced
1 teaspoon freshly grated ginger
1 teaspoon ground cumin
juice of 1 lime
freshly ground black pepper
16 chicken wings, tips removed and halved at the joints
thinly sliced spring onions, to serve
Combine mirin, soy sauce, sugar, garlic, ginger, cumin, lime juice and black pepper in a shallow, non-metallic dish. Coat the chicken pieces with the marinade, cover with plastic wrap and refrigerate for at least 4 hours (or up to overnight).
Preheat oven to 200°C/400°F. Line a large baking sheet with a double layer of foil and brush the foil lightly with canola oil. Lift the chicken pieces from the marinade and place them onto the prepared sheet, without overlapping. Roast for 30 minutes, turning once.
Meanwhile, pour the marinade into a small saucepan and simmer until reduced by half. Pour it over the chicken and roast for 10-15 minutes longer or until chicken is sticky and deep golden brown. Sprinkle with the spring onions and serve at once.
Serves 4
Friday, April 4, 2014
Roast curry chicken, something strong and something milder
As I started reading the news about the books bound in human flesh discovered in Harvard I immediately thought of Sam Raimi and The Evil Dead, only to discover at the end of the piece that the writer had thought of them, too. :)
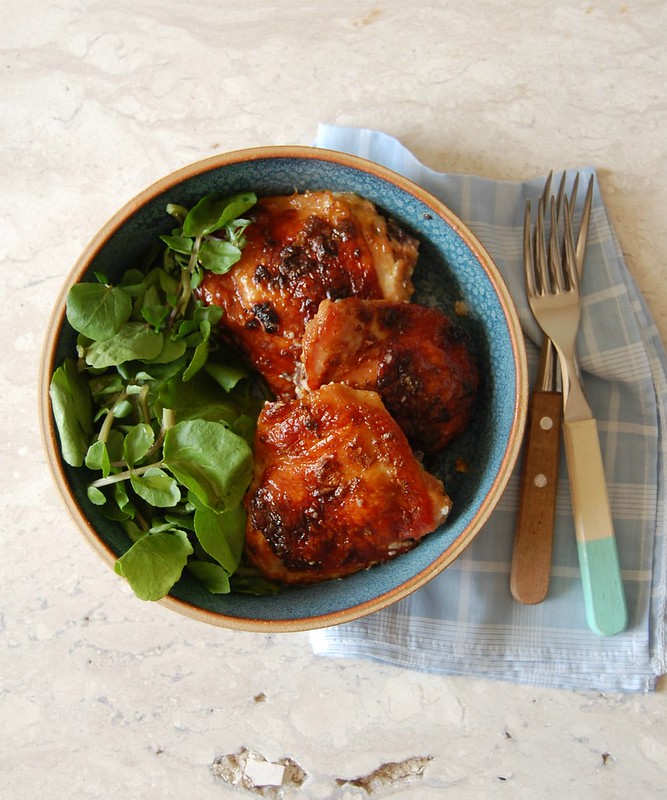
Movies are a matter of taste, just as food is: this über simple roast chicken, tenderized by the buttermilk and spiced by the red curry paste, is a nice idea even for busier days, since the oven does all the work – you just need time to let the marinade do its thing while the chicken rests in the refrigerator. However, not everyone likes super spicy food, and since curry pastes vary in heat, strength and intensity of flavor taste the one you have at hand before adding it to the marinade: it might be super strong as the 1981 movie, or a lot milder like the 2013 version. ;)
Roast curry chicken
adapted from the delicious and stunning Feed Me Now!
3 tablespoons whole milk
juice of 3 large limes
3 tablespoons red-curry paste*
2 garlic cloves, pound to a paste
salt and freshly ground black pepper
8 chicken pieces – use the ones you like the most
In a large shallow bowl, combine the milk and lime juice and set aside for 10 minutes (you’ll get buttermilk). Add the curry paste, garlic, salt and pepper and mix to combine. Add the chicken pieces, turn to coat, cover with plastic wrap and refrigerate for at least 4 hours or up to overnight.
Preheat the oven to 190°/375°F. Line a large roasting pan (large enough to hold the chicken pieces without overlapping) with a triple layer of foil and brush it lightly with oil. Arrange the chicken pieces side by side on top of the foil and pour over the marinade. Bake for about 60-70 minutes or until deep golden brown (cook it to your liking).
Serve immediately.
*curry pastes vary in heat, strength and intensity of flavor, so taste it before using it and adjust the amount accordingly – I used this one
Serves 4
Thursday, September 1, 2011
Avocado ice cream and things my mom would love
While certain things instantly remind me of my mom, others make me think of her because I am sure she would love them if she was around. The food shows I watch on a regular basis, for instance: I know that Bill and Nigella would be her favorites (not Gordon; mom hated swearing); dishes like these, because of her deep love for tomatoes; and this avocado ice cream, for all those afternoons when we shared a bowl of avocados sprinkled with sugar and lime juice after I’d finished my homework.
Avocado ice cream
slightly adapted from The Perfect Scoop, inspired by Ana Elisa’s ice cream
500g ripe avocados
½ cup + 1 tablespoon (112g) superfine sugar
¾ cup (180ml) sour cream*
1/3 cup (80ml) heavy cream
¼ cup (60ml) whole milk
1 tablespoon lime juice
generous pinch of salt
Slice the avocados in half and remove the pits. Scoop out the flesh with a spoon and cut into small pieces. Transfer to a blender or food processor, add the sugar, sour cream, heavy cream, milk, lime juice and salt and blitz until smooth. Taste the mixture and adjust the sugar and/or lime juice if necessary.
Freeze immediately in your ice cream maker according to the manufacturer’s instructions.
* homemade sour cream: to make 1 cup of sour cream, mix 1 cup (240ml) heavy cream with 2-3 teaspoons lemon juice in a bowl. Whisk until it starts to thicken. Cover with plastic wrap and leave at room temperature for 1 hour or until thicker
Makes 750ml
Wednesday, September 29, 2010
Piña Colada cake
This is the cake I made for my MIL’s birthday; I’d already set up my mind to bake a chocolate cake, but when I called her to ask which flavor she wanted she told me I was being kind enough to bake her the cake, so she would not choose the flavor – I should do that, instead; just what I needed to try a different cake from my favorite layer cake book. :D
I could not find canned pineapple in juice, so I bought it in syrup and adapted the filling. I thought the pineapple jam was delicious and the coconut buttercream almost addictive – but wasn’t all that happy about the cake layers. They tasted good, because of the massive amounts of brown sugar, but the texture was a bit heavy in my opinion. If you’re interested in making the piña colada cake, I suggest the cake layers from this recipe.
Piña Colada cake
adapted from Sky High: Irresistible Triple-Layer Cakes
Brown sugar cake:
3¾ cups (525g) cake flour*
1¾ teaspoons baking soda
1 teaspoon baking powder
½ teaspoon salt
2¼ cups (393g) packed light brown sugar
1 cup (226g/2 sticks) unsalted butter, at room temperature
1¾ cups (420ml) buttermilk
5 eggs
2 teaspoons vanilla extract
2/3 cups (160ml) rum (light, amber or dark), to assemble the cake
Pineapple filling:
1 can (560g/20oz) sliced pineapple in syrup
1 cup (200g) caster sugar
1/3 cup (80ml) freshly squeezed lime juice
3 tablespoons water
½ vanilla bean, split and seeds scraped with the back of a knife
Coconut buttercream:
3 eggs whites
pinch of salt
1 cup (200g) caster sugar
¼ cup (60ml) water
2½ sticks (280g/10oz) unsalted butter, at room temperature
2/3 cup (160ml) unsweetened coconut milk
Decoration:
½ cup (50g) sweetened shredded coconut, lightly toasted (if desired)
pineapple slice
Start by making the cakes: preheat the oven to 180°C/350°F. Butter three 22cm (9in) cake pans, line the base with baking paper and butter the paper as well.
Sift together the flour, baking soda, baking powder and salt into the large bowl of a stand mixer. Whisk gently to combine. Add the brown sugar, butter and 1½ cups of the buttermilk to the dry ingredients. With the mixer on low blend to incorporate. Raise the speed to medium and beat until light and fluffy, 2 to 3 minutes.
Whisk the eggs with the remaining ¼ cup buttermilk and the vanilla and add to the batter in 3 additions, scraping down the sides of the bowl well and beating only long enough to incorporate between additions. Divide the batter between the 3 pans.
Bake for 25-28 minutes or until a cake tester or wooden toothpick inserted in the center comes out clean. Let the layers cool in the pans for 10 minutes, then turn out onto wire racks, carefully peel off the paper and allow to cool completely.
Now, the pineapple filling: drain the pineapple and discard the syrup. Set aside 1 slice of pineapple (for decoration) and finely chop the other slices. Place in a medium saucepan with the sugar, lime juice and water. Add the vanilla seeds you scraped from the vanilla bean. Warm over a medium-low heat, stirring to dissolve the sugar, 2 to 3 minutes. Raise the heat to medium and simmer, stirring occasionally, until the juices have almost completely evaporated and turned jam-like in consistency. Let the filling cool completely before using. Can be made a day in advance and refrigerated.
Make the buttercream: put the eggs whites and salt in the bowl of an electric mixer fitted with a whip attachment so they are ready to go.
Combine the sugar and water in a small saucepan and place over a medium heat, stirring to dissolve the sugar. Bring to the boil and cook without stirring until the syrup reaches the sold boil stage, 114°C/238°F on a candy thermometer.
Beat the egg whites briefly at medium speed. Slowly add the hot syrup in a thin stream, being careful to avoid the beaters. Continue to whip until the meringue has cooled to body temperature.
With the mixer on low speed, gradually add the butter, several tablespoons at a time and continue to beat until a smooth fluffy frosting forms.
Add the coconut milk in several additions, scraping down the sides of the bowl well after each addition. Measure 1 cup of the buttercream and mix with the pineapple filling.
Assembling the cake: place one layer flat side up on a cake stand. Sprinkle a generous 3 tablespoons** rum over the cake. Spread half of the filling over the layer, leaving a small gap around the edge. Add the second layer, sprinkle with more rum and cover with the remaining filling. Top with the third layer and sprinkle with the remaining rum.
Frost the top and sides of the cake with the coconut buttercream. Decorate the sides of the cake with
the shredded coconut and top with the reserved pineapple slice.
* homemade cake flour: 1 cup (140g) all purpose flour minus 2 tablespoons + 2 tablespoons corn starch
** I used only 1 tablespoon of rum per cake layer
Serves 14-16 – I made 2/3 of the recipe above and used 20cm (8in) cake pans
Monday, July 12, 2010
Little strawberry meringue tarts
The strawberry maniac strikes again – and this time with pies topped with meringue. :)
I know I’ve been carried away by the strawberry season, but tell me: would you resist making such adorable little pies? I’m not that strong. :)
Little strawberry meringue tarts
adapted from Australian Gourmet Traveller
Filling:
400g strawberries, hulled and quartered
½ cup (88g) brown sugar, packed – you might need more depending on how sweet the strawberries are
1 vanilla bean, scraped seeds only
juice of ½ small orange
juice of ½ lime
Brown sugar pastry:
50g soft unsalted butter
50g brown sugar
1 egg
1 cup (140g) all purpose flour
Italian meringue:
¼ cup (50g) caster sugar
2 tablespoons (24g) demerara sugar
1 egg white
For brown sugar pastry, beat butter and brown sugar, using an electric mixer for 5 minutes or until pale, then add the egg and beat to combine. Add flour, beat until just combined, turn onto a lightly floured work surface, form into a disc, wrap in plastic wrap and refrigerate for 2 hours.
Meanwhile, place strawberries in a heavy-based saucepan. Add brown sugar, vanilla seeds and orange and lime juices and stir over medium heat until sugar dissolves. Bring to the boil, reduce heat to medium and cook for 5-8 minutes or until strawberries are soft and liquid is reduced. Set aside to cool, then refrigerate.
Preheat oven to 180°C/350°F. Roll pastry on a lightly floured surface to 2mm thick and use to line ten 6.5x3.5cm deep pie pans (see note), trim edges and pierce crust all over with fork. Refrigerate for 30 minutes. Butter the shiny side of a piece of aluminum foil (or use nonstick foil) and cut roughly into ten squares; place the foil squares, buttered side down, tightly against the crust. Bake blind for 10 minutes, then remove foil and bake for another 10 minutes or until golden and crisp. Cool for 5 minutes in pans, then remove from pans and place on a baking tray. Using a fork to remove some of the liquid, transfer strawberry mixture into pastry cases and set aside*.
For Italian meringue, combine sugars and 2 tablespoons water in a small saucepan and stir over low heat until sugar dissolves. Increase heat to high and cook until syrup reaches 115°C/239°F on a sugar thermometer, then remove from heat. Meanwhile, using an electric mixer, whisk egg white until soft peaks form, then, with motor running, slowly add hot syrup and whisk for 5 minutes. Spoon meringue over strawberry filling, forming into peaks. Place pies under a hot grill for 2-3 minutes or until meringue is golden or use a blowtorch to brown meringue lightly.
* since this is a very moist filling, assemble the tarts as close as possible to serving them - the juices in the filling will make the pastry soggy
Note: If you’re unable to find pie pans of this measurement, use individual fluted tart cases instead (they’ll hold less filling).
Serves 10
Tuesday, March 2, 2010
Pineapple mint sorbet and Saveur’s Best Food Blog Awards
I had a wonderful surprise yesterday: Technicolor Kitchen has been nominated for best baking and dessert blog on Saveur’s Best Food Blog Awards!! How amazing is that? I can hardly believe it. Please, vote for me! :)
Can you imagine how much I talked about last night? My poor husband. :)
I had to have a scoop of this sorbet to chill out – I adapted the amount of ingredients from a DH pineapple sorbet recipe, but the idea of adding mint was Joao’s.
Pineapple mint sorbet
adapted from Donna Hay magazine
1/3 cup + 2 ½ tablespoons (84g) caster sugar
½ cup (120ml) water
400g peeled pineapple
handful of mint leaves
3 tablespoons lime juice
Prepare the basic sorbet syrup: place sugar and water in a small saucepan over low heat and stir until the sugar is dissolved. Increase the heat and boil for 1 minute. Set aside to cool completely, then refrigerate for 1 hour.
Process the pineapple until you get a thick juice. Add the mint and process until finely chopped. Combine the pineapple juice, lime juice and syrup in a bowl and stir to combine.
Pour the mixture into an ice cream maker and follow the manufacturer’s instructions until the sorbet is just firm. Transfer to an airtight container and freeze for 3-4 hours.
Serves 8