Monday, September 3, 2018

Yogurt passion fruit cake

Bolo de iogurte e maracujá / Yogurt passion fruit cake

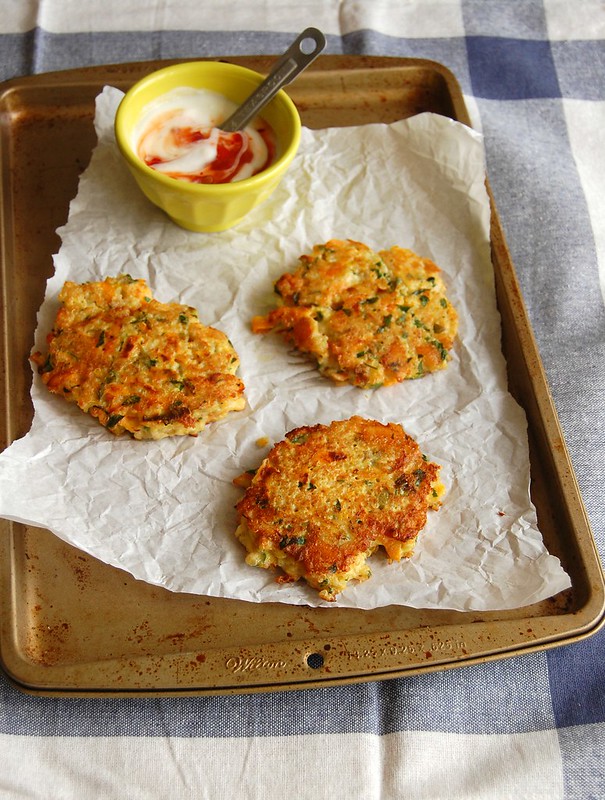
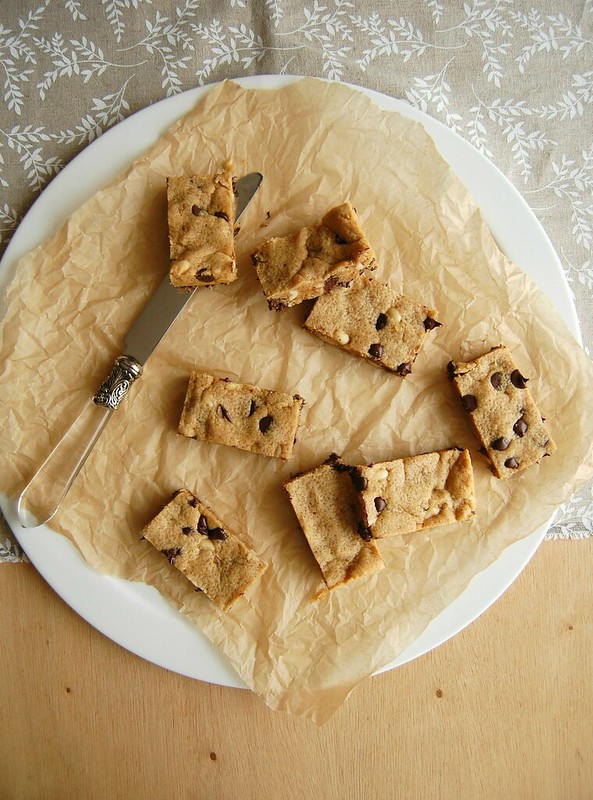
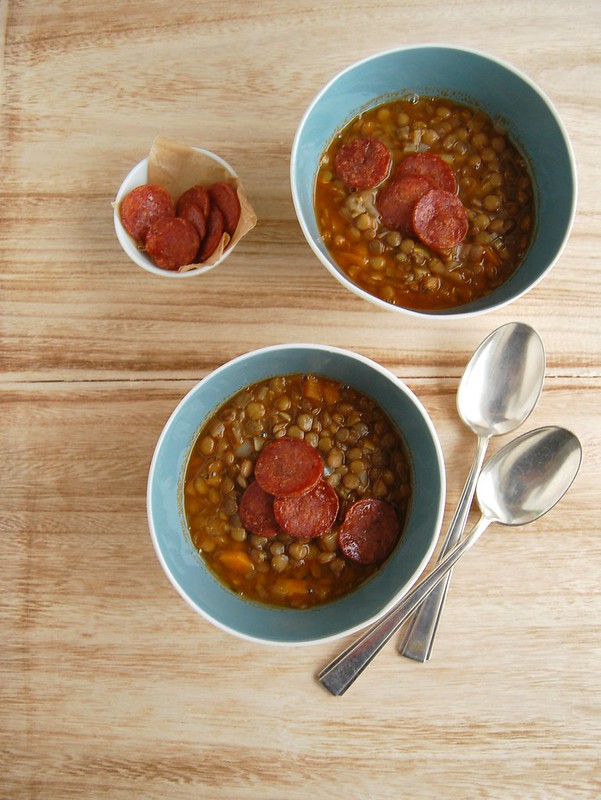
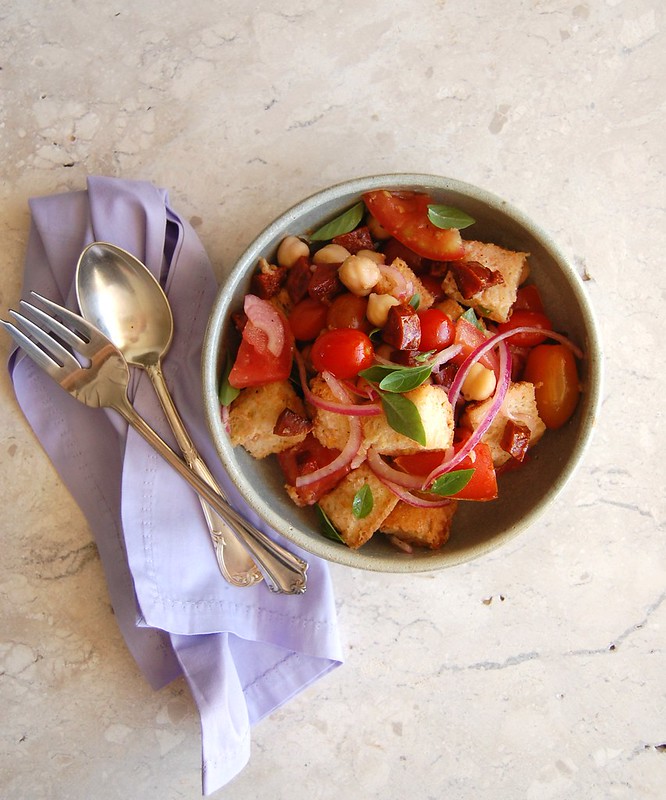
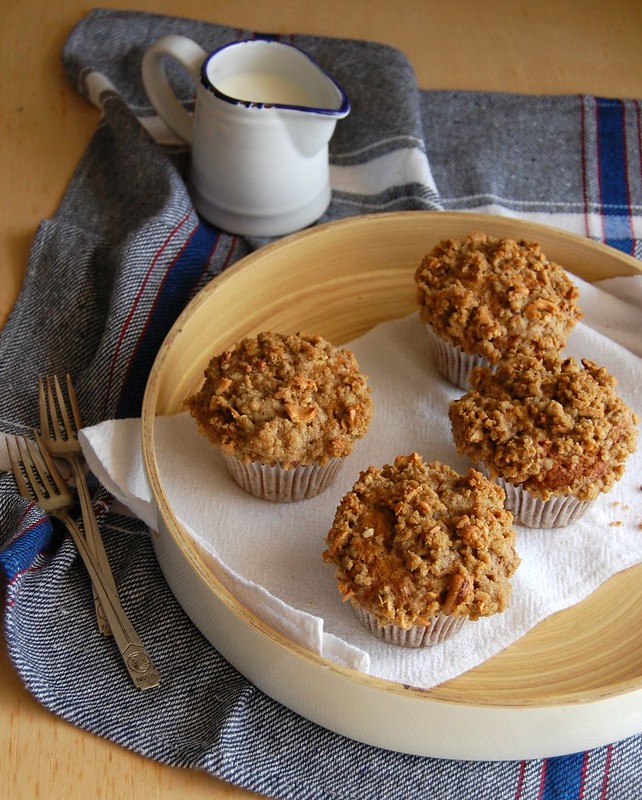
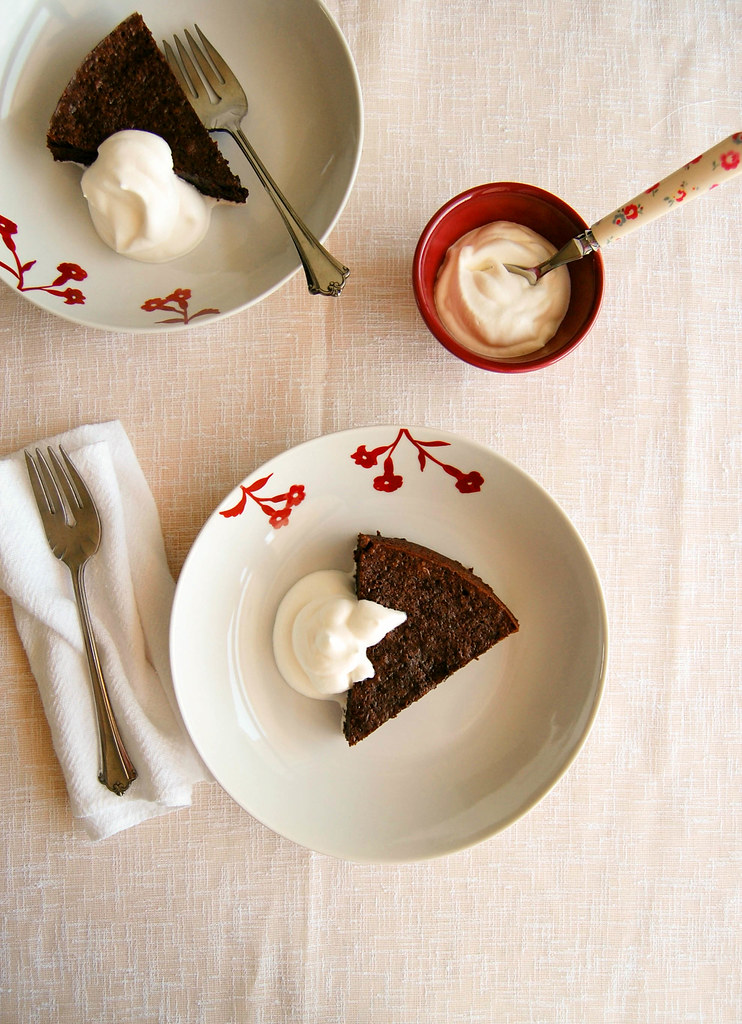
I have not posted on this blog in such a long time I wonder if there is still anyone around. Life is hectic and I no longer have time to write each recipe in two different languages, therefore I have focused on my blog written in Portuguese (and even there I have not been able to post regularly).

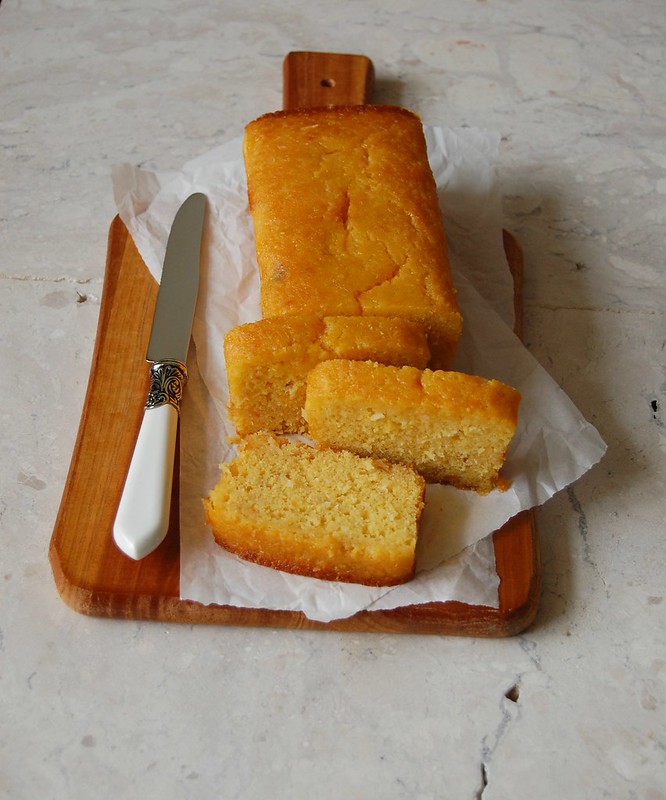
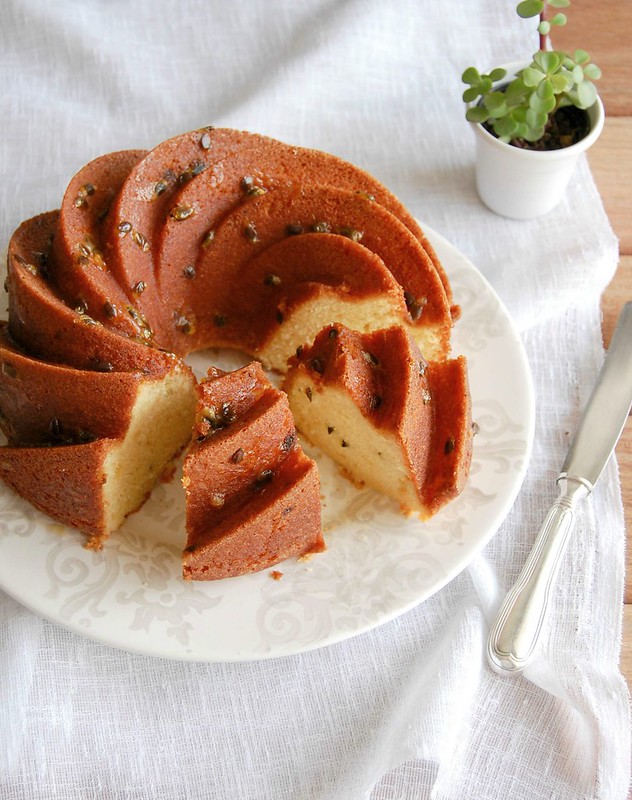
Cakes are probably my favorite thing to bake and that is why I bring you a cake recipe today, after all this time: it is adapted from several different recipes that are prepared using the yogurt empty package. Since those can vary quite a lot from one place to the other, I have used measuring cups/grams in order to make the recipe work for everyone, no matter where they live. I added passion fruit pulp with the seeds because I love how beautiful they make the cake look, but if you don’t like them just strain the pulp before using it in the recipe.

Yogurt passion fruit cake
adapted from several different recipes

Cake:
2 ¼ cups (315g) all purpose flour
2 teaspoons baking powder
pinch of salt
¾ cup plain whole milk yogurt
¾ cup (180ml) canola oil
1 ¾ cups (350g) granulated sugar
3 large eggs, room temperature
½ cup (120ml) passion fruit pulp, with the seeds
1 teaspoon vanilla extract

Syrup:
¼ cup (60ml) passion fruit pulp, with the seeds
2 tablespoons granulated sugar
1 tablespoon water

Preheat the oven to 350°F/180°C. Butter a 10-cup capacity Bundt pan.

In a large bowl, sift the flour, baking powder and salt. Add the remaining ingredients and mix with a wooden spoon just until smooth – do not overmix or the cake will be tough.
Transfer the batter to the prepared pan and smooth the surface. Bake for 40-50 minutes or until risen and golden and a skewer inserted in the center of the cake comes out clean. Cool in the pan over a wire rack for 20 minutes, then carefully unmold onto the rack.

In those 20 minutes, make the syrup: place all the ingredients in a small saucepan and cook over high heat, stirring until sugar is dissolved. Cook for further 4-5 minutes, stirring occasionally, until mixture is syrupy. Brush the hot syrup over the warm cake. Cool completely and serve.

Serves 10-12

Thursday, April 19, 2018

Quinoa, carrot and mozzarella fritters

Quinoa, carrot and mozzarella fritters / Bolinhos de quinoa, cenoura e mozarela

It took me a while to get on the quinoa bandwagon (I don’t really know why), but after I did I started making fritters with it quite often: with a salad they become a delicious and light lunch or dinner.

Here I have combined quinoa with other tasty ingredients such as carrots, mozzarella and olives – their saltiness goes really well with the sweetness of the carrots and the mozzarella. However, if you like intense flavors (I do), the mozzarella can be replaced with a stronger cheese.

Quinoa, carrot and mozzarella fritters
own recipe

1 small carrot, coarsely grated
150g cooked quinoa, drained and cooled
2 tablespoons finely grated parmesan
1 spring onion, sliced
2 tablespoons chopped fresh parsley leaves
1 tablespoon fresh thyme leaves
2 tablespoons chopped green olives
2 tablespoons all purpose flour
60g fresn mozzarella, finely chopped
2 large eggs
salt and freshly ground black pepper
canola oil, for frying

Place the carrot in a clean kitchen towel and squeeze to remove excess liquid. Transfer carrot to a large bowl and add the quinoa, parmesan, spring onion, parsley, thyme, olives, flour, mozzarella and eggs. Season with salt and pepper and stir until well combined.

Heat about ½ teaspoon oil in a large nonstick frying pan over medium heat. Pour about 2 tablespoons of batter per fritter and flatten with the back of a spoon, shaping the edges quickly to form a rough circle. Don’t overfill the frying pan. Cook for 2-3 minutes, then flip and cook until golden.

Serve immediately.

Makes about 10

Monday, April 16, 2018

Brownies with white chocolate and raspberries

Brownies with white chocolate and raspberries / Brownies com framboesa e chocolate branco

I think that whenever inspiration fails me when I want to bake something I bake brownies: I can’t think of any other baked good that is a hit with pretty much everyone I know. Not to mention that I absolutely love brownie batter: when I could still eat dairy I would always leave some batter left in the bowl for my own moment of happiness while the brownies were in the oven. :)

The brownies I bring you today combine the tart flavor of raspberries with the sweetness of white chocolate: nothing like sour or citrus kick to make white chocolate even more special. However, raspberries go well with all kinds of chocolates, so I have made this exact same recipe using both milk and dark chocolate chips to replace the white chocolate and it worked like a charm.

Brownies with white chocolate and raspberries
own recipe

¾ cup (170g) unsalted butter, chopped
¾ cup (150g) granulated sugar
½ cup (88g) light brown sugar, packed
1 cup (90g) unsweetened cocoa powder, sifted
1 teaspoon vanilla extract
2 large eggs, room temperature
1/3 cup (46g) all purpose flour
pinch of salt
¾ cup (75g) frozen raspberries, unthawed
100g white chocolate chips

Preheat the oven to 180°C/350°F. Butter a 20cm (8in) square pan, line it with foil leaving an overhang on two opposite sides, and butter the foil as well.

In a large saucepan over low heat, melt the butter. Remove from the heat and whisk in the sugars, cocoa and vanilla, followed by the eggs, one at a time, whisking well after each addition. Fold in the flour and salt. Fold in raspberries and white chocolate.

Spread batter into prepared pan and smooth the top. Bake for about 25-30 minutes or until a toothpick inserted in the center of the brownies comes out with moist crumbs. Cool completely in the pan over a wire rack. Cut into squares to serve.

Makes 16

Wednesday, April 11, 2018

Peanut butter and chocolate chip bars

Peanut butter and chocolate chip bars / Barrinhas de manteiga de amendoim e chocolate

Lately I have been using peanut butter as a way of increasing my protein intake: I buy the natural type made with roasted peanuts only and add a spoonful to smoothies and such.

That reminded me of these bars I made ages ago, when I bought natural peanut butter for the first time. The jar seemed to last too long and I wanted to make something delicious with it. These bars are easy to put together and peanut and chocolate are a match made in heaven.

Peanut butter and chocolate chip bars
own recipe, inspired by several others

1 cup (300g) natural peanut butter
½ cup (100g) granulated sugar
1 ¼ cups (175g) icing sugar, sifted
¼ cup (56g) unsalted butter, room temperature
½ teaspoon baking soda
pinch of salt
1 large egg
1 teaspoon vanilla extract
¾ cup (125g) dark chocolate chips
½ cup (70g) toasted peanuts, roughly chopped

Preheat the oven to 180°C/350°F. Line a 20x30cm (8x12in) baking pan with foil and lightly butter it.

In a food processor, process the peanut butter, sugars, butter, baking soda, salt, egg and vanilla until creamy. Transfer to a large bowl and stir in the chocolate chips and peanuts. Press dough into the prepared pan and bake for about 20 minutes or until lightly browned around the edges (the center will still be soft).

Cool completely over a wire rack. Cut into bars.

Makes 24

Thursday, April 5, 2018

Beef and ricotta meatballs

Almôndegas de carne e ricota / Beef and ricotta meatballs

Meatballs are a big hit at my house and you will find some in my freezer whenever. They constantly become a quick weeknight dinner paired with salad – I do that quite often.

My go-to meatball recipe is this, but after seeing the wonderful Nigel Slater making burgers with the addition of ricotta I thought I would give it a go with meatballs: they tasted delicious and were incredibly light in texture.

Unfortunately I am no longer able to eat ricotta, but this is such a great recipe I had to share it with you.

Beef and ricotta meatballs
adapted from here, with Nigel’s idea

½ large onion
2 large garlic cloves
300g beef mince
175g ricotta – I used homemade
1 large egg
3 tablespoons finely grated pecorino or parmesan
1 teaspoon table salt
freshly ground black pepper
2 teaspoons dried oregano
handful of fresh parsley leaves, chopped
1/3 cup breadcrumbs

Place onion and garlic in a food processor and process until finely chopped*. Transfer to a large bowl and add all the remaining ingredients, mixing well with your hands. With wet hands, shape the mixture into balls using 1 ½ tablespoons of mixture per meatball.

You can either cook the meatballs at the stovetop or bake them in a preheated 200°C/400°F oven for 20-25 minutes or until golden and cooked through.

* I’ve tried this recipe with chopped, processed and grated onions and to me the best way of using them is processed – chopped with a knife the onion pieces are too large (which makes rolling the meatballs more difficult) and grated the onion becomes too wet

Makes about 22

Tuesday, April 3, 2018

Lentil soup with crispy salami - waiting for fall to come

Lentil soup with spicy salami / Sopa de lentilha com salame crocante

Summer here is over, however someone forgot to tell Mother Nature about it: the weather continues to be hot leading to uncomfortable nights for those who like me do not own an air conditioner at home.

While I look forward to cooler days and nights, I felt like sharing with you one of my favorite soups, sort of like Kevin Costner in Field of Dreams: maybe if I post soups on the blog, fall will actually come. :)

This lentil soup is comforting, delicious and freezes well if you keep the fresh oregano out. If you want to keep it vegan it is just a matter of omitting the salami – I love it because it adds a crunchy, salty touch to the soup.

Lentil soup with crispy salami
own recipe

2 tablespoons olive oil
2 leeks, sliced in half lenghtwise for easier washing, then sliced in half moons
½ onion, finely diced
1 small carrot, finely diced
1 large garlic clove, minced
2 tablespoons tomato paste
1 cup (200g/7oz) dried green lentils, soaked in cold water for 20 minutes before cooking, then drained and rinsed
3 cups (720ml) vegetable stock, hot
2 cups (480ml) boiling water
2 bay leaves
handful of fresh oregano leaves
salt and freshly ground black pepper
100g (3½ oz) salami slices – if they are too large, cut them in half

In a large saucepan over medium heat, heat the olive oil. Add the leeks, onion and carrot and cook, stirring occasionally, until vegetables are soft, about 8 minutes. Stir in the garlic and cook for 1 minute only. Stir in the tomato paste and cook for 1 minute. Add the lentils, cook for 1 minute, then add the stock, water, bay leaves and oregano. When it starts to boil, cover partially, turn the heat down and cook, stirring occasionally, for 20-25 minutes or until lentils are soft, but not mushy. Season with salt and pepper, remove the bay leaves and remove from the heat.
Now the salami: heat a nonstick flying pan over high heat and grill the salami slices for a couple of minutes or until golden on both sides. Transfer to a plate lined with paper towels to remove excess fat. Cool completely.

Pour the soup into bowls and top with the salami slices. Serve immediately.

Serves 4-5

Tuesday, March 27, 2018

Cornmeal, coconut and marmalade cake

Cornmeal, coconut and marmalade cake / Bolo de fubá, coco e geleia de laranja

I bought Ottolenghi’s beautiful book ages ago and if I am not mistaken the first recipe I made from it was the semolina, coconut and marmalade cake – it is delicious and the recipe yields two cakes: you can enjoy one while making other people’s day better sharing the second loaf.

One day I wanted to make this cake again, however I did not have any semolina at home. I decided then to use corn flour instead and it worked beautifully. Feel free to use one or the other.

Cornmeal, coconut and marmalade cake
slightly adapted from the wonderful Jerusalem

Cake:
¾ cup (180ml) sunflower oil
finely grated zest of 1 orange
1 cup (240ml) freshly squeezed orange juice
160g orange marmalade
3 large eggs
70g granulated sugar
70g unsweetened desiccated coconut
90g all purpose flour
180g fine corn flour
2 tablespoons almond meal
2 teaspoons baking powder
pinch of salt

Soaking syrup:
¾ cup (150g) granulated sugar
140ml water
1 tablespoon orange blossom water

Preheat the oven to 180°C/350°F. Whisk together the oil, orange zest and juice, marmalade, and eggs until the marmalade dissolves. In a separate bowl, mix together all the dry ingredients and add to the wet ingredients. Mix until well combined. The mixture should be runny.
Butter or brush with oil, line two 1-lb loaf pans (8½x4½ in/22x11cm) with baking paper and butter the paper as well. Divide the filling evenly between them. Bake for 45-60 minutes, until a skewer inserted in a cake comes out clean and the tops turn an orangey brown.

Near the end of the baking time, place the syrup ingredients in a small saucepan and bring to a boil, then remove from the heat. As soon as the cakes come out of the oven, start brushing them with the hot syrup using a pastry brush; you’ll need to do this in a few goes, allowing the syrup to soak in for a minute or two before you carry on brushing with more syrup. Make sure you use up all the syrup and it is all absorbed into the cakes.
Cool completely on the pans over a wire rack.

Makes 2 cakes

Friday, March 23, 2018

Rye chocolate chip financiers

Rye chocolate chip financiers / Financiers de centeio com gotas de chocolate

Financiers are one of my downfalls: petite, delicate, but full of flavor, they are a great way of using leftover egg whites. I have been trying to make them using olive oil instead of butter, but the texture was a bit off, so more tests are necessary.

The recipe I bring you today is from ages ago (when I could still eat butter) and it is delicious: the rye flour makes the financiers a little bit heavier on texture, yet flavorsome, and the flavor of the rye flour goes really well with chocolate.

Rye chocolate chip financiers
own recipe

85g almond meal
¾ xícara (105g) icing sugar, sifted
3 tablespoons (30g) all purpose flour, sifted
3 tablespoons (30g) fine rye flour, sifted
pinch of salt
5 large egg whites
85g unsalted butter, melted and cooled
1 teaspoon vanilla extract
½ cup (85g) dark chocolate chips

In a medium bowl, whisk together the almond meal, icing sugar, all purpose flour, rye flour and salt. Whisk in the egg whites. Whisk in the butter and vanilla until smooth, then fold in the chocolate chips. Cover with plastic wrap and refrigerate for 1 hour.

Preheat the oven to 200°C. Butter ten 100ml-capacity molds or mini muffin pans.
Divide the batter among the prepared pans and smooth the top. Divide the berries among the pans, placing them on top of the batter and pushing them slightly into the batter. Bake for about 15 minutes or until golden and risen – a skewer in the center should come out clean.
Cool in the pans over a wire rack for 5 minutes, then carefully unmold and transfer to the rack, cooling completely.

Financiers are tastier on the day they are made, however they can be kept in an airtight container at room temperature for up to 2 days

Makes 10

Wednesday, March 21, 2018

Orecchiette with courgette and goat’s cheese sauce

Orecchiette with courgette and goat’s cheese sauce / Orecchiette com molho de abobrinha e queijo de cabra

This food stylist wannabe got crazy when she saw yellow courgettes in farmer’s market for the first time – until then I had only seen it on books, magazines and food TV shows. Of course I brought some home and immediately thought of something tasty and visually beautiful to make with it.

For this recipe I used red onion so I could have a nice color contrast, however after that day I made this pasta several other times using regular onions and courgettes and it was flavorsome anyway.

Orecchiette with courgette and goat’s cheese sauce
own recipe

2 tablespoons unsalted butter
1 teaspoon olive oil
½ large red onion, thinly sliced in half moons
1 large garlic clove, minced
1 courgette (about 350g/12oz), sliced in half lengthwise and then sliced into thin half moons
finely grated zest of 1 lime
handful of fresh marjoram leaves
2 tablespoons dry white wine
¼ cup (60ml) heavy cream
35g goat’s cheese, coarsely grated or crumbled
200g orecchiette pasta

Cook the pasta in plenty of boiling salted water until al dente (follow the instructions in the package). In the meantime, make the sauce: in a large frying pan, heat the butter and olive oil until butter is melted. Add the onion and cook, stirring occasionally, until softened. Stir in the garlic and cook for 1 minute only – do not let it burn or it will be bitter. Add the courgette and cook, stirring occasionally, for 5-7 minutes or until softened. Season with salt and pepper and stir in the lime zest and the marjoram. Add the wine and cook until it evaporates. Stir in the cream and the cheese and cook just until the cheese melts.

Drain the pasta, reserving some of the cooking water, and stir into the sauce – if sauce is too thick, stir in a bit of the cooking water to loosen it up. Serve immediately.

Serves 2

Other ideas: this recipe tastes great if gorgonzola and fresh oregano are used instead of goat’s cheese and marjoram.

Monday, March 12, 2018

Simple breakfast bread (dairy free)

Simple breakfast bread / Pão de forma do meu jeito

I wanted a bread recipe I could make sandwiches with, turn into toast for breakfast, and do everything we do with packaged white bread. I no longer buy that and most of the homemade versions I found called for milk or butter (or both). I thought of making Kim Boyce’s oatmeal bread, which is delicious, replacing the butter with olive oil, but the making of that recipe is not as straightforward as I needed it to be.

I reached out to King Arthur Flour’s website and I bring you my take on their white breakfast bread: a bit of whole meal flour, a bit of oats, no dairy. It is not a light bread and I like it that way, but the big surprise came when my 3-yeard old nephew saw the bread cooling on the counter and asked for some. I gave him a tiny piece, so sure that he would not enjoy such a dense kind of bread, but he devoured it in seconds and asked for seconds (and thirds). :)

Simple breakfast bread
slightly adapted from here

1 1/3 cups (320ml) lukewarm water
1 ½ teaspoons dried yeast
1 tablespoon demerara sugar – for the caramel flavor; use granulated if you prefer
½ tablespoon honey
1 ½ tablespoons extra virgin olive oil
3 cups (420g) all purpose flour
½ cup (70g) whole wheat flour
1/3 cup (30g) rolled oats
1 ½ teaspoons table salt

Place the water, yeast, sugar and honey in the bowl of an electric mixer fitted with the dough hook. Whisk with a fork and set aside until foamy. Add the olive oil, flours, oats and salt and knead for 8-10 minutes until a smooth and elastic dough forms. Transfer to a large bowl brushed with olive oil, cover with plastic wrap and set aside to prove for 1 ½ hours, or until doubled in size.

Brush with olive oil a 5-cup capacity loaf pan. Punch the dough to remove the excess of air and transfer to a slightly floured surface. Roll into a large rectangle, then fold it like a letter and fit into the prepared pan. Cover and set aside to prove again for 1 hour – in the meantime, preheat the oven to 200°C/400°F.
Bake for about 30 minutes or until golden brown – bread should sound hollow when tapped with your fingers. Cool in the pan over a wire rack for 5 minutes, then carefully unmold onto the rack to cool. Cool completely.

Makes about 10 slices

Monday, February 19, 2018

Pasta with onion and tomato sauce and the change in my cooking habits

Pasta with onion and tomato sauce / Macarrão com molho de tomate e cebola

I was talking to my husband the other day about how my cooking and baking have changed in the past year or so: I don’t bake as much anymore (lack of time + my lactose intolerance) and I also don’t test so many new recipes as I used to. Sometimes I flip through my books and magazines and the photos make me drool, however, I have been feeling the need of eating dishes I am familiar with.

I keep coming back to recipes I call “the classics” at my house, food that comforts and nourishes. Tomato sauce is something I make quite regularly (also to keep some in the freezer for emergencies or lazy days/nights), but there are times I vary it a bit (when I am not pressed for time) and make the recipe I bring you today: it is delicious and a hit with my husband and I – we are both dying hard onion fans. What I love to use with this sauce is orecchiette, for they are like small pools of sauce. :)

Pasta with onion and tomato sauce
slightly adapted from the wonderful Antonio Carluccio

2 tablespoons olive oil
2 medium onions (300g), peeled, cut in half and finely sliced into half-moons
1 tablespoon dry red wine
1 400g (14oz) can peeled chopped tomatoes
1 tablespoon tomato paste
1 teaspoon granulated sugar
1 bay leaf
salt and freshly ground black pepper
handful of fresh basil leaves
200g short pasta
finely grated parmesan or pecorino, to serve

Heat the oil in a large nonstick saucepan over medium-low heat, add the onions and fry them very gently until they become transparent and soft, about 20 minutes – stir occasionally so the onions do not catch in the pan. Add the wine and deglaze the pan. Add the tomatoes and tomato paste, followed by 1/3 of the can filled with water, the sugar, the bay leaf, season with salt and pepper and continue to cook, now on a low heat, for 15 minutes. Stir in the basil and turn of the heat.
In the meantime, cook the pasta in plenty of boiling salted water until al dente (follow the instructions in the package). Drain well, then mix with the sauce and stir to coat all the pasta. Serve immediately with finely grated parmesan or pecorino.

Serves 2

Thursday, February 8, 2018

Loaded potatoes with spinach, cheese and bacon

Loaded potatoes with spinach, bacon and cheese / Barquinhas de batata com espinafre, bacon e queijo

I work for a Swiss company and this week several of my peers from Switzerland have been asking me about/wishing me a good Carnival – it is funny because I am not a Carnival person (they do not know that), but I do enjoy the days off (Netflix, here I come!). :)

To me these loaded potatoes are perfect for lazy days: just a handful of ingredients, easy prepping, and delicious results. My versions lately have been dairy free: I skip the cheese and add a couple of teaspoons of nutritional yeast to the filling to get the cheesy flavor. Sometimes I sprinkle a bit of Pecorino on top as well for a salty touch, since that cheese does not cause me digestion problems.

Loaded potatoes with spinach, cheese and bacon
own recipe

4 large potatoes
6 bacon rashers, chopped
2 garlic cloves, minced
1 ¾ cups (120g) spinach leaves, packed
salt and freshly ground black pepper
¾ cup (75g) coarsely grated Canastra cheese*

Preheat the oven to 200°C/400°F. Line a medium baking sheet with foil.
Pierce the potatoes all over with a fork. Place them on the foil and bake for about 50 minutes or until potatoes are tender (remove them from the oven, but keep it on). When potatoes are warm enough to handle, cut them in half horizontally, remove some of the pulp and transfer to a bowl – do not carve the potatoes too much or the shells will be too thin and delicate to hold the filling. Place the potato shells back on top of the foil.

In a large nonstick frying pan, cook the bacon over high heat stirring occasionally until crisp. Add the garlic and cook for 1 minute. Add the spinach, season with salt and pepper, and cook until wilted, 3-4 minutes. Remove from the heat, stir in the potato pulp and mix. Stir in ½ cup of the cheese. Spoon filling back into each potato half and sprinkle with the remaining cheese. Bake for about 15 minutes or until top is golden.

* for this recipe I used a kind of cheese typical from Brazil called Canastra cheese. Feel free to replace it with cheddar or the cheese of your liking

Serves 4 with a green salad on the side

Tuesday, February 6, 2018

Vegetable tagine and some planning in the kitchen

Vegetable tagine / Tagine de legumes

There are times when work is pretty intense (like last week, for instance), and something I have been doing for those times is to have ready or almost ready meals in the fridge or freezer – it makes a huge difference. Planning is, indeed, everything.

Meatballs, tomato sauce, pesto sauce, soups, beef stews – these have been my usual suspects lately. Now I will add one more dish to my list: this vegetable tagine. It is delicious and freezes really well – just do not add the cilantro leaves in the end (do it right before serving it). I have made this tagine a couple of times already and sometimes I added green olives to it – it adds a nice saltiness to the tagine. I did not have any in the fridge on the day of the photo, but if you like olives like I do please consider my suggestion.

Vegetable tagine
own recipe, inspired for several around the web

1 ½ tablespoons olive oil
½ yellow pepper, finely diced
½ large onion, finely diced
3 garlic cloves, minced
1 ½ teaspoons ground cumin
1 teaspoon ground turmeric
½ teaspoon hot paprika – use the sweet kind if you don’t like spicy food
1 teaspoon Baharat
¼ cup dry white wine
1 medium carrot, peeled and cut into ½cm (¼in) slices (the ones in the photo are too thick, they take too long to cook)
1 sweet potato (about 250g/8oz), peeled and cut into 2cm cubes
200g (7oz) butternut squash, peeled and cut into 2cm cubes
1 400g (14oz) can peeled chopped tomatoes
2 cups boiling water, plus more if needed
2 bay leaves
1 small eggplant (about 250g/8oz), cut into 2cm cubes
salt and freshly ground black pepper
1 cup frozen peas, unthawed
handful of fresh cilantro leaves

Heat the olive oil in a large pan over high heat – a deep frying pan works well here. Add the yellow pepper and the onion and cook, stirring occasionally, until onion is translucent. Stir in the garlic and cook for 1 minute. Add the spices and cook until fragrant, 1 minute. Add the wine and scrape the brown bits around the pan with a wooden spoon. Add the carrot, sweet potato and butternut squash and cook, stirring occasionally, for 5 minutes. Add the peeled tomatoes and crush them with the back of the spoon. Add the water, bay leaves, stir in the eggplant, season with salt and pepper and cook, partially covered, for 30-35 minutes or until vegetables are tender, checking eventually - if the tagine starts to get dry, add more water. Stir in the peas, cover, remove from the heat and set aside for 5 minutes. Stir in the cilantro and serve.

Serves 4-5

Tuesday, January 30, 2018

Lemon and raisin oatmeal cookies

Lemon and raisin oatmeal cookies / Cookies de aveia, limão siciliano e passas

Days ago I was thinking (again) of certain ingredients and why they are so hated: aside from coconut and cilantro, I can’t think of anything that divides people as much as raisins do – at least here in Brazil. Every December there are hundreds of memes on Facebook and Twitter of either people saying how much they hate raisins and begging others not to add them to the Christmas dishes or people saying how much they love them, “please add raisins to everything”. It is crazy. :)

I like raisins and have nothing against them, but have to say I prefer them on sweet dishes rather than savory ones. In cookies they work beautifully and here, combined with lemon and oats, make them even more delicious.

Lemon and raisin oatmeal cookies
own recipe

¾ cup (105g) all purpose flour
½ teaspoon baking soda
pinch of salt
1/3 cup (67g) granulated sugar
1/3 cup (58g) light brown sugar, packed
finely grated zest of 2 lemons
½ cup (113g/1 stick) unsalted butter, room temperature
1 large egg, room temperature
½ teaspoon vanilla extract
1 1/3 cups (120g) rolled oats
1 cup (150g) raisins – use golden raisins if you prefer

Preheat the oven to 180°C/350°F. Line two large baking sheets with baking paper.

In a medium bowl, whisk together the flour, baking soda and salt. Set aside.
In the bowl of an electric mixer, rub sugars and lemon zest together with your fingertips until sugar is fragrant. Add the butter and beat until creamy and light – scrape the sides of the bowl occasionally throughout the making of the recipe. Beat in the egg and the vanilla. Add the flour mixture and the oats at once and mix on slow only until a dough forms. Stir in the raisins.

Roll 2 leveled tablespoons of dough per cookie into balls and place onto prepared sheets, 5cm (2in) apart. Bake for 12-14 minutes or until cookies are golden around the edges. Cool on the sheets for 5 minutes, then slide the paper with the cookies onto a wire rack to cool completely.

Makes 20

Friday, January 26, 2018

Panzanella with a Spanish touch - perfect for the weekend

Panzanella with a Spanish touch / Panzanella com um toque espanhol

I remember the first time I made panzanella at home: it was a revelation. Who could have thought that a salad made with stale bread would be so delicious? The Italians, of course. :)

As much as I love Italian food – half of the blood in my veins is Italian, after all – I have added a couple of Spanish touches to my panzanella: crispy chorizo, chickpeas, sherry vinegar in the dressing. The salad turned out wonderful and it is a beautiful idea for lunch or dinner in the really hot days we have been having in Sao Paulo (to make it even fresher, add 1 thinly sliced small Japanese cucumber sliced to the salad). It is also great for lazy weekends, like the one I plan to have. :)

Panzanella with a Spanish touch
own recipe

½ red onion, peeled and cut in half
1 tablespoon sherry vinegar
2 cups stale bread cubes (approximately 2cm each cube)
3 tablespoons extra virgin olive oil, divided use
2 large ripe tomatoes, seeded and coarsely chopped
1 cup cherry tomatoes, halved
100g chorizo, chopped in small cubes
¾ cup (127g) cooked and drained chickpeas
½ teaspoon Dijon mustard
salt and freshly ground black pepper
handful of fresh basil leaves

Thinly slice the onion, transfer to a small bowl and drizzle with the vinegar. Set aside for 15 minutes or until you get the other parts of the salad done.

Preheat the oven to 180°C/350°F. Line a medium baking sheet with baking paper or foil. Spread the bread cubes over the paper/foil and drizzle with 1 tablespoon of the olive oil. Bake for about 8 minutes or until bread is crispy and golden. Remove from the oven and set aside.
In the meantime, heat a nonstick frying pan over high heat. Add the chorizo and cook, stirring now and then, until crispy. Drain the chorizo over paper towels.

Transfer bread, chorizo, tomatoes and chickpeas to ta large bowl. Drain the onion (save the vinegar for the dressing) and stir into the salad. To the bowl with the vinegar, add the remaining 2 tablespoons olive oil, mustard, salt and pepper and whisk well. Pour over the salad, toss to combine and set aside for 30 minutes. Stir in the basil leaves and serve.

Serves 2

Thursday, January 25, 2018

Banana muffins with cashew nut streusel

Banana muffins with cashew nut streusel / Muffins de banana com farofinha de castanha de caju

Usually making baked goods with bananas is not easy at my house because my husband and I like the fruit so much we end up eating all the bananas before they get ripe enough for baking. However, when the weather is too hot (as it is currently) they get ripe overnight – these muffins are a great way to use them up.

I developed this recipe a long time ago, when I was still working on the book project. Lately I have been making it without the streusel (because of my lactose intolerance) and the muffins taste great anyway. However, if you can, make the muffins with the streusel because it makes them extra special.

Banana muffins with cashew nut streusel
own recipe

Streusel:
½ cup (70g) all purpose flour
½ cup (88g) light brown sugar, packed
¼ teaspoon ground cinnamon
pinch of table salt
5 tablespoons (70g) unsalted butter, cold and diced
2/3 cup unsalted cashew nuts, finely chopped

Muffins:
2 cups (280g) all purpose flour
1 ½ teaspoons baking soda
¼ teaspoon table salt
¼ teaspoon ground cinnamon
4 small very ripe bananas
¾ cup (150g) demerara sugar – used for color and caramel flavor; can be replaced with granulated sugar
½ cup (120ml) canola oil
2 large eggs, room temperature
1 teaspoon vanilla extract

Preheat the oven to 200°C/400°F. Line a 12-hole muffin with paper cases.

Streusel: in a small bowl, whisk the flour, sugar, cinnamon and salt. Add the butter and rub the ingredients together with your fingertips until mixture resembles coarse breadcrumbs. Using a fork, stir in the cashew nuts. Refrigerate while you make the muffin batter.

Muffins: in a large bowl, sift together the flour, baking soda, salt and cinnamon. Set aside. In a medium bowl, mash the bananas with a fork. Stir in the sugar, oil, eggs and vanilla. Pour over the dry ingredients and stir with a fork just until incorporated – do not overmix or your muffins will be tough. Divide the batter evenly among the paper cases and sprinkle the top with the streusel, pressing lightly with your fingers to make it stick to the batter. Bake for 20-25 minutes or until golden and risen and a skewer inserted on the center comes out clean. Cool in the pan over a wire rack for 5 minutes, then carefully unmold and transfer to the rack. Serve lukewarm or at room temperature.

Makes 12

Friday, January 19, 2018

Flourless chocolate peanut cake

Chocolate peanut cake (gluten free) / Bolo de chocolate e amendoim (sem farinha de trigo)

This morning I joked on Instagram that this week feels like it lasted 45 days already – I am completely exhausted and very happy it is Friday. \0/ To celebrate it, I bring you a recipe that is perfect for the weekend: a moist, delicious and almost creamy chocolate cake, to be served with whipped cream or ice cream.

This cake is similar to this one, which is also gluten free, however it is more flavorsome and moist. The recipe is easy to make and calls for peanuts, a very Brazilian and cheap ingredient that goes really well with chocolate.

Flourless chocolate peanut cake
own recipe

200g dark chocolate, 70% cocoa solids, finely chopped
¾ cup (170g) unsalted butter, chopped
1 cup (200g) granulated sugar
4 large eggs
1 teaspoon vanilla extract
2/3 cup (65g) peanut meal – very finely ground peanuts
pinch of salt
whipped cream or ice cream, to serve

Preheat the oven to 180°C/350°F. Butter a 20cm (8in) round cake pan with a removable bottom, line the bottom with a circle of baking paper and butter it as well.

In a large bowl, put chocolate and butter and melt them over a saucepan of barely simmering water (do not let the bottom of the bowl touch the water). Remove from the heat and cool slightly.
Add the sugar and whisk well. Whisk in the eggs, one at a time. Whisk in the vanilla.
Using a rubber spatula, fold in the peanut meal and salt. Pour into the prepared pan and bake for about 35 minutes or until the top of the cake is opaque que a skewer inserted in the center of the cake comes out still moist. Cool completely over a wire rack. Carefully remove from the pan and serve with whipped cream or ice cream.

Serves 8-10

Wednesday, January 10, 2018

Roasted garlic pecorino focaccia

Roasted garlic pecorino focaccia / Focaccia de alho assado e pecorino

I can say that after the lovely Ina my favorite Food Network presenter is Rachael Ray – she is fun and her food always looks good – even though most of the times her portions look too generous to me. :)

She constantly says how much she loves garlic and I always relate to that: I have a heavy hand with it comes to adding garlic to my food and usually double the amount requested in recipes (maybe that is why both my husband and I rarely have colds). And don’t even get me started on roasted garlic: I just love the stuff so much I had to mix it into a focaccia dough. It turned out delicious, but if you are not a fan of bold flavors you can tone this down by adding half the amount of garlic and replacing the pecorino with parmesan.

Roasted garlic pecorino focaccia / Focaccia de alho assado e pecorino


Roasted garlic pecorino focaccia
own recipe

For the roasted garlic:
1 large head of garlic, whole
1 tablespoon extra virgin olive oil

Dough:
2 teaspoons dried yeast
¼ teaspoon granulated sugar
300ml lukewarm water
3 tablespoons extra virgin olive oil, plus a little extra to drizzle over the focaccia
3 cups (455g) all purpose flour
1 teaspoon table salt
1/3 cup finely ground pecorino
2 tablespoons fresh thyme leaves

Preheat the oven to 180°C/350°F. Place the whole head of garlic in the center of a medium piece of foil. Drizzle with the olive oil and close the ends of the paper, pressing them together so the oil does not leak. Place the foil package in a small baking sheet and roast for about 45 minutes or until garlic is tender. Remove from the oven and leave to cool completely. When garlic is cold, remove the pulp from the skins and mash it with a fork to form a purée – save the olive oil left in the foil for later. Set the garlic aside.

In the large bowl of a stand mixer, combine the yeast, sugar and water and mix with a fork. Set aside for 5 minutes or until foamy. Add the olive oil, flour, salt and half of the pecorino and mix with the dough hook for 6-8 minutes or until an elastic and smooth dough forms – it kneading by hand, 10-12 minutes should do. Add the mashed garlic, half the thyme leaves and mix well. Transfer to a lightly oiled large bowl, cover with plastic wrap and set aside in a warm spot for 1 ½ hours or until doubled in volume.

Lightly brush a large baking sheet with olive oil. Carefully transfer the dough to the prepared sheet, gently so you don’t lose the air trapped in the dough. Shape it onto a 30x20cm (12x8in) oval. With lightly floured fingertips, pierce the dough in a few spots without pressing it too deep. Measure the olive oil left from roasting the garlic and add more olive oil until you have 1 tablespoon. Drizzle over the dough, then sprinkle it with the remaining thyme leaves and pecorino. Set aside in a warm place for about 20 minutes – in the meantime, preheat the oven to 200°C/400°F. Bake the focaccia for 25-30 or until golden brown. Remove from the oven and very carefully slide it onto a wire rack. Serve warm or at room temperature. The focaccia can be kept in an airtight container at room temperature for up to 2 days and tastes fresh again if reheated briefly in the oven.

Serves 8-10

Wednesday, January 3, 2018

Black Forest self-saucing pudding to start 2018

Black Forest self-saucing pudding / Bolo-pudim Floresta Negra

Happy New Year, everyone! :)

I haven’t posted anything new on the blog for quite a while, even though I have several great recipes to share with you: my workload last December tripled and I was working like crazy in order to get things done before taking a few vacation days. I had also promised myself that on those vacation days I would not seat in front of a computer and I am proud to have kept the promise – I really needed the time off. Of course I am only human and used my mobile to post and check Instagram and Twitter, but that was kept to a minimum and it was a lot less than I had expected.

I got back to work and because we still have some amazing cherries around I thought I’d share this self-saucing pudding with you: it is delicious and easy to put together. Here in Brazil cherries are easier to be found in the summer, but if you are facing winter don’t worry: this recipe is also great using frozen raspberries instead of the cherries – it will no longer be a Black Forest pudding, but it will taste great all the same.

Black Forest self-saucing pudding
own recipe

Batter:
¾ cup + 2 tablespoons (125g) all purpose flour
3 tablespoons unsweetened cocoa powder
1/3 cup (67g) granulated sugar
1 ¼ teaspoons baking powder
pinch of table salt
¼ cup (56g) unsalted butter, melted and cooled
1/3 cup (80ml) whole milk, room temperature
1 large egg
1 teaspoon vanilla extract
2 teaspoons cognac – use kirsch if you have it at home; or omit alcohol all together
1 cup (150g) fresh cherries, pitted and halved
¼ cup (42g) dark chocolate chips or chunks – I used one with 53% cocoa solids

Topping:
½ cup (88g) light brown sugar, packed
1 ½ tablespoons unsweetened cocoa powder
½ cup (120ml) boiling water
whipped cream or vanilla ice cream, to serve

Preheat the oven to 180°C/350°F. Lightly butter four 1-cup (240ml) capacity heatproof ramekins.

Start with the batter: in a medium bowl, whisk together the flour, cocoa, granulated sugar, baking powder and salt. Set aside.
In another medium bowl, whisk together the butter, milk, egg, vanilla and cognac. Pour over the dry ingredients and stir just until a thick batter forms. Stir in the cherries and chocolate. Divide batter evenly among the ramekins.

Topping: in a small bowl, combine brown sugar and cocoa. Sprinkle over the batter. Place the ramekins in a baking sheet, then pour 2 tablespoons boiling water over each ramekin, gently pouring it over the topping. Bake for 20-25 minutes or until mixture rises and a crust forms. Serve immediately with whipped cream or vanilla ice cream.

Serves 4

Related Posts with Thumbnails