Thursday, December 14, 2017

Piadina

Piadina

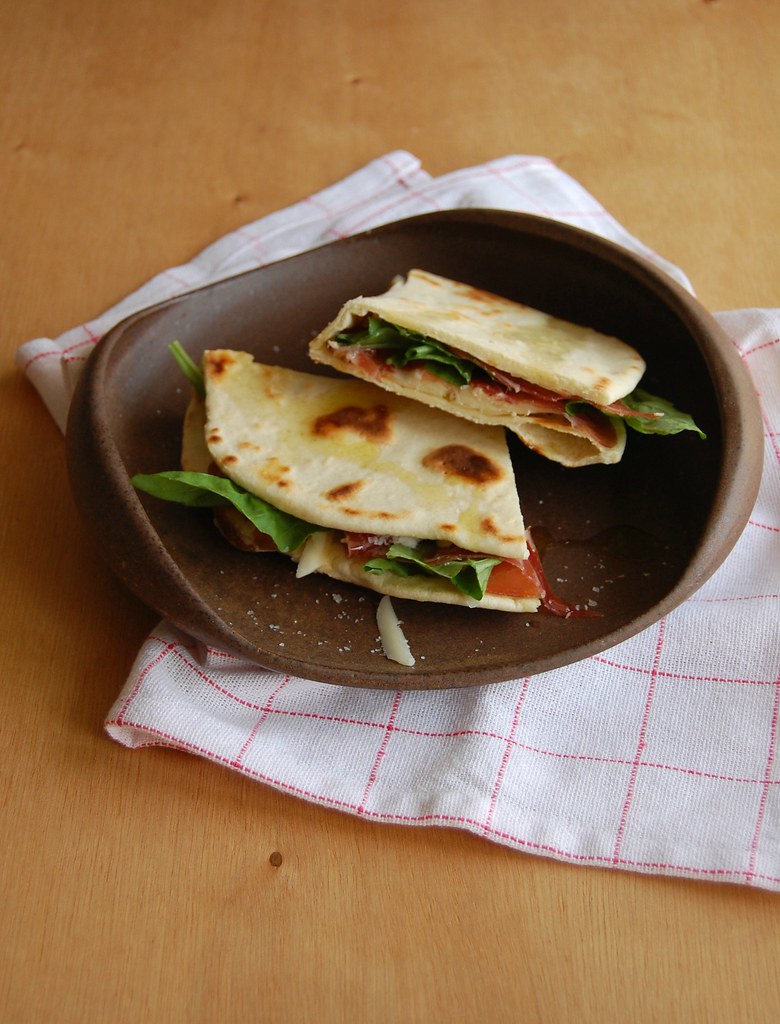
I haven’t cooked much lately but I still like to make something nice on the weekends, and also try new recipes. And even though my husband and I are not big sandwich eaters, there are Saturdays when I make piadina for lunch: the dough is quick put together and since it is made with baking powder instead of yeast it does not take long to proof – it just rests for 30 minutes while you get on with other things in the kitchen.

Piadina is also great for it is very democratic: you can fill it with whatever you like or have in the fridge.

Piadina
own recipe

Dough:
3 cups (420g) all purpose flour
1 teaspoon table salt
1 ½ teaspoons baking poder
3 tablespoons extra virgin olive oil
2/3 cup (160ml) whole milk, room temperature
½ cup (120ml) water, room temperature

Fillings:
cheeses, prosciutto, ham, salad leaves, whatever you like

In a large bowl, whisk the flour, salt and baking powder – whisk well to evenly distribute the baking powder and salt throughout the flour. Add the olive oil, the milk and the water and mix with a wooden spoon until a dough starts to form. Start kneading – with your hands or with an electric mixer attached with the dough hook – until an elastic and smooth dough forms, about 8 minutes using the mixer and 12 by hand. Shape dough into a ball, transfer to a large bowl lightly brushed with olive oil and cover with plastic wrap. Set aside at room temperature for 30 minutes.

Turn the dough into a lightly floured surface and divide it into 6 equal pieces – each one should be about 120g (4oz). Shape each portion into a ball and cover them with a clean kitchen towel to prevent them from drying out. Heat a large nonstick frying pan on high heat.

Working on a lightly floured surface, roll out each dough ball until you get a rough 23cm (9in) circle. Transfer the circle to the frying pan and cook for 2-3 minutes each side. When the piadina is cooked, slide it into a plate and cover with a clean kitchen towel. Cook the remaining dough the same way.

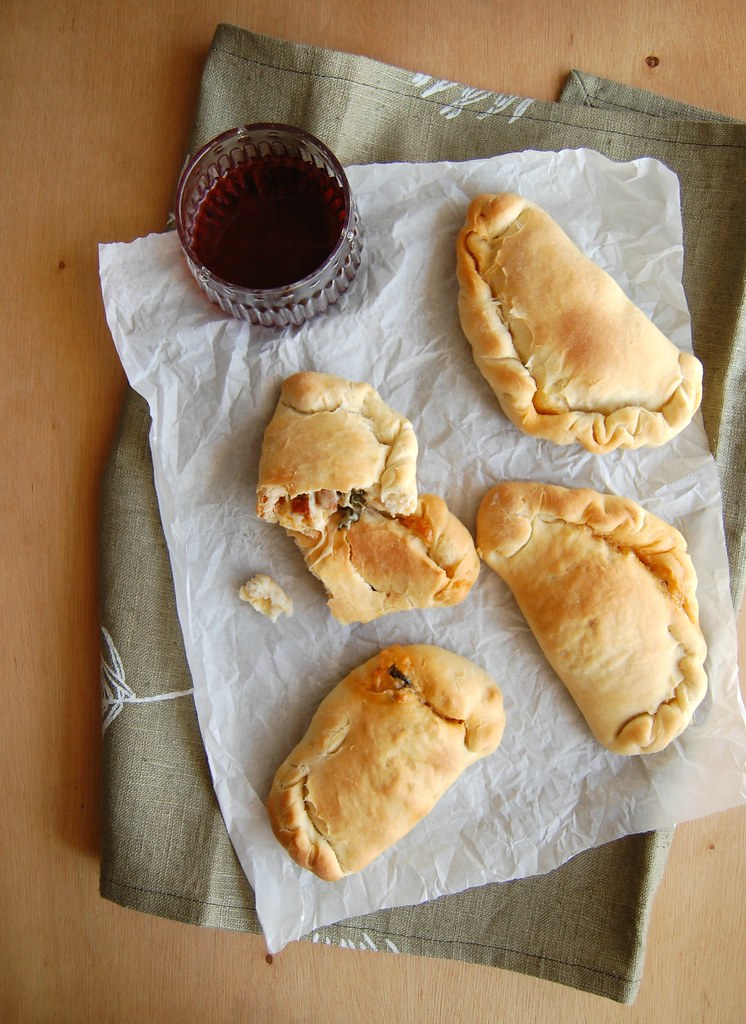
To serve, fill each piadinha with whatever you prefer and fold it in half – when I fill mine with cheese I place them back in the frying pan, over medium heat for a minute, until cheese is melted.
Serve immediately.

Makes 6


Wednesday, December 6, 2017

Cherry Eton Mess

Cherry Eton Mess / Merengue de cereja

The traditional Eton Mess, made with strawberries, is my husband’s favorite dessert (and I like it very much too). :) I took advantage of the amazing cherries we have here in Sao Paulo by the end of the year to give the dessert a new twist.

The recipe is easy, especially because I use store bought meringues – turning the oven on in December and January here in Brazil is a terrible idea. The hard part of making this dessert is refraining from eating all the cherries before even gathering the other ingredients. :D

Cherry Eton Mess
own recipe

Cherry compote:
¾ cup (150g) granulated sugar
1 star anise
3 tablespoons cold water
500g fresh cherries, pitted and halved

To assemble the dessert:
1 cup (240ml) heavy cream, cold
½ tablespoon icing sugar
2 ½ cups mini meringues – if they are large ones, break them into smaller pieces
100g fresh cherries, pitted and halved

Start by making the compote: place the sugar, water and star anise in a large, heavy saucepan over médium-high heat. Cook until caramelized, without stirring – just swirl the pan occasionally. Stir in the cherries and cook for 5 minutes. Remove from the heat, transfer to a heatproof bowl and discard the star anise. Cool completely.

To assemble the dessert: beat the cream with the icing sugar until soft peaks form. Set aside 4 large glasses (the ones on the photo are 400-ml capacity glasses). In each glass alternate layers of meringues, cherry compote and whipped cream, placing a few fresh cherries in between the layers as well. Serve cold.

Serves 4

Monday, December 4, 2017

Apple and coconut upside down cake

Upside down coconut and apple cake / Bolo invertido de maçã e coco

Apple cakes are truly favorites or mine – there are several recipes on the blog, including a version made with olive oil that I will repeat next weekend – and the upside down version is even more beautiful. The apple slices turn into a flavorsome layer and the coconut gives a nice tropical touch to the batter – it is a very tender and delicious cake.

The recipe is easy to put together – despite the look of the cake – and I find arranging the apple slices on the bottom of the pan therapeutic. Just be careful not to use a springform pan or one with a removable bottom: the sugar of the topping will melt in the oven and it might leek.

Upside down coconut and apple cake / Bolo invertido de maçã e coco

Apple and coconut upside down cake
own recipe

Apple layer:
1/3 cup (65g) granulated sugar
¼ teaspoon ground cinnamon
2 small Granny Smith apples, cored and thinly sliced

Cake:
1 ½ cups (210g) all purpose flour
1/3 cup (35g) desiccated unsweetened coconut
1 teaspoon baking powder
¼ teaspoon baking soda
pinch of table salt
¾ cup (150g) granulated sugar
½ cup (113g/1 stick) unsalted butter, softened
2 large eggs
1/3 cup (80ml) buttermilk*
1/3 cup (80ml) coconut milk
1 teaspoon vanilla extract

Preheat the oven to 180°C/350°F. Butter a round 20x7cm (8x2.5in) cake pan, line the bottom with a circle of baking paper and butter the paper as well – do not use a pan with a removable bottom because the sugar will melt in the oven and might leek. If your 20cm (8in) pan is not deep enough use a 23cm (9in) pan. In a small bowl, mix well sugar and cinnamon and sprinkle over the buttered paper. Arrange the apple slices on top. Set aside.

Cake: in a medium bowl, whisk together the flour, coconut, baking powder, baking soda and salt. Set aside. Using an electric mixer, cream butter and sugar until light and fluffy – scrape the sides of the bowl occasionally throughout the making of the recipe. Beat in the eggs, one at a time, beating well after each addition. Beat in the vanilla. On low speed, mix in the dry ingredients in three additions followed by the buttermilk, then the coconut milk. Mix only until incorporate – do not overmix. Spread the batter over the apple slices and smooth the top. Bake for about 50 minutes or until golden and risen and a skewer inserted in the center of the cake comes out clean. Cool in the pan over a wire rack for 1 hour, then carefully unmold onto a plate and peel off the paper. Serve on its own or with whipped cream.

* homemade buttermilk: to make 1 cup buttermilk place 1 tablespoon lemon juice in a 240ml-capacity measuring cup and complete with whole milk (room temperature). Wait 10 minutes for it to thicken slightly, then use the whole mixture in your recipe

Serves 8-10

Thursday, November 30, 2017

Gingerbread granola

Gingerbread granola / Granola de gingerbread

My favorite time of the year has arrived and my Christmas tree is already up – I have been thinking of the Christmas Eve menu already, planning the food and the drinks. However, unlike previous years, I don’t think I will be able to have my oh, so beloved Christmas series here on the blog – too much work, other priorities at the moment.

Having said that, I felt I had to bring you at least one recipe with a holiday touch and it is my gingerbread granola: filled with spices it will make your house smell like Christmas immediately.

Even if I am not able to bring you other holiday recipes aside from this granola, there is plenty of inspiration from previous years: it is just a matter of clicking on the Christmas tag here on the blog.

Gingerbread granola
own recipe

2 ½ cups (225g) rolled oats
¼ cup (40g) golden flaxseeds
¼ cup (35g) raw pumpkin seeds
½ cup (60g) flaked almonds
pinch of table salt
½ teaspoon freshly ground allspice
1 teaspoon ground cinnamon
1/8 teaspoon ground cloves
¼ teaspoon freshly ground nutmeg
½ teaspoon ground ginger
3 tablespoons canola oil
1/3 cup (80ml) agave or honey
½ teaspoon vanilla extract
½ cup (75g) dried cranberries, chopped in half if too large
½ cup (90g) dried apricots, diced

Preheat the oven to 180°C/350°F. Line a large baking sheet with foil.

In a large bowl, mix together the oats, flaxseeds, pumpkin seeds, almonds and salt. Set aside.
In a small bowl, whisk together the spices, oil, agave/honey and vanilla. Pour over dry ingredients and stir well to coat. Spread mixture over foil and bake for 10 minutes. Stir the granola around and bake for another 10 minutes – the granola will still be soft and will get crunchy once cooled. Remove from the oven and stir in the dried fruit. Let cool completely. Store in an airtight container at room temperature for up to 2 weeks.

Serves 6-8

Tuesday, November 28, 2017

Lime nutmeg snickerdoodles and Christmas gifts

Lime nutmeg snickerdoodles / Snickerdoodles de limão e noz-moscada

This is the time of the year when my colleagues and friends with kids tell me that they have to buy Christmas gifts for their children’s teachers, and since the kids have so many teachers these days they have to buy tons of presents. This is when I suggest them to make cookies or brownies, to wrap them up beautifully and there, gifts are ready. :)

These snickerdoodles may be a good idea for a holiday gift: starting with a traditional snickerdoodle recipe, I swapped the baking soda and cream of tartar for baking powder – since not everyone has cream of tartar around or wants to buy it – and added a touch of lime and nutmeg (instead of the most common cinnamon). The cookies turned out delicious and they smelled amazing while in the oven – you might have to bake an extra batch for your neighbors. :)

Lime nutmeg snickerdoodles
own recipe

Dough:
1 ½ cups (210g) all purpose flour
1 teaspoon baking powder
1/8 teaspoon table salt
¾ cup (150g) granulated sugar
finely grated zest of 2 limes
½ cup (1 stick/113g) unsalted butter, room temperature
1 large egg, room temperature
½ teaspoon vanilla extract

To roll the cookies:
¼ cup (50g) granulated sugar
finely grated zest of 1 lime
¼ teaspoon freshly ground nutmeg

In a medium bowl, whisk together the flour, baking powder and salt. Set aside.

In the bowl of an electric mixer, rub sugar and lime zest together with your fingertips until sugar is fragrant. Add the butter and beat until creamy and light – scrape the sides of the bowl occasionally throughout the making of the recipe. Beat in the egg and the vanilla. Add the dry ingredients at once and mix on slow only until a dough forms. Cover with plastic wrap and refrigerate for 30 minutes – in the meantime, preheat the oven to 180°C/350°F and line two large baking sheets with baking paper.

To roll the cookies: in a small bowl, rub sugar and lime zest together with your fingertips until sugar is fragrant. Stir in the nutmeg. Roll 2 leveled teaspoons of dough per cookie into balls and then roll the balls through the sugar. Place onto prepared sheets, 5cm (2in) apart. Bake for 10-12 minutes or until cookies are golden around the edges. Cool on the sheets for 5 minutes, then slide the paper with the cookies onto a wire rack to cool completely.

Makes about 35

Thursday, November 23, 2017

Gorgonzola and fresh oregano grissini

Gorgonzola and fresh oregano grissini / Grissini de orégano fresco e gorgonzola

At home we like nibbling very much, especially on weekends, and that came to my mind as I set up a plate of bread, cheese and fruit last Saturday for dinner: a glass of wine and the meal was perfect.
Sometimes we have guacamole with homemade tortillas, and of course there are days I don’t even want to enter the kitchen: those are the days for pizza. :)

If you are feeling a bit more enthusiastic than me lately please have a go at these grissini: they are absolutely delicious and great for the cheese/fruit platter (and with wine, too). :)

Gorgonzola and fresh oregano grissini
own recipe

1 teaspoon dried yeast
1 teaspoon granulated sugar
200ml lukewarm water
2 cups (280g) all purpose flour
1/3 cup (46g) whole wheat flour
3 tablespoons olive oil + a bit extra for brushing
1 teaspoon table salt
2 tablespoons fresh oregano leaves, packed
50g gorgonzola, coarsely grated or crumbled if too soft
3 tablespoons finely grated parmesan

In the bowl of an electric mixer fitted with the dough hook, mix the yeast, sugar and water with a fork. Set aside for about 5 minutes or until foamy. Add the flours, olive oil and salt. Mix on medium for about 8 minutes or until mixture turns into an elastic and smooth dough – if mixing by hand, 10-12 minutes should do it. Mix in the oregano and the gorgonzola, shape the dough into a ball and transfer to a large bowl lightly brushed with olive oil. Cover with plastic wrap and set aside to prove for 1 ½ hours, or until doubled in size.

Preheat the oven to 200°C/400°F. Line two large baking sheets with foil and brush it with olive oil.
Punch the dough to remove the excess air. Divide dough in 24 equal portions e roll each of them into a 30cm (12in) sausage shape – if dough is too stick, lightly flour your counter, but avoid too much flour or the dough will be tough and dry. Place the grissini onto the foil leaving 2cm (little less then 1in) between them. Brush them with olive oil, sprinkle with parmesan and bake for 20-25 minutes or until golden brown.
Transfer the sheets to a wire rack and cool completely.

Makes 24

Thursday, November 16, 2017

Peanut butter panna cotta with oat praliné

Peanut butter panna cotta with oat praliné / Panna cotta de amendoim com praliné de aveia

Months ago, when the doctor told me I was lactose intolerant I felt quite sad: I immediately thought of my deep love for cheese and how that would impact my food habits. However, days after that, it hit me really hard: many of the desserts I love so much are cream based, not to mention the ice creams…

I felt miserable.

Now I have learned to deal with it and it is not as bad as I thought it would be: I can replace some of the ingredients with lactose free versions, plus I always have located pills in my purse – they are not foolproof, but it is indeed better than nothing. I have yet to try making a panna cotta with lactose free heavy cream, and I might start with the one I bring you today: it is absolutely delicious and one of my favorite recipes from the times I was working on recipes for the cookbook.

Peanut butter panna cotta with oat praliné / Panna cotta de amendoim com praliné de aveia


Peanut butter panna cotta with oat praliné
panna cotta: own recipe, oat praliné adapted from this book

Panna cotta:
½ tablespoon powdered unflavored gelatin
2 tablespoons cold water
½ cup (150g) smooth peanut butter
2 tablespoons demerara sugar – I used demerata to enhance the caramel flavor; can be replaced by granulated sugar
pinch of salt
1 teaspoon vanilla extract
1 cup (240ml) heavy cream
1/3 cup (80ml) whole milk

Oat praliné:
½ cup (45g) rolled oats
1/3 cup (67g) demerara sugar – I used demerara to enhance the caramel flavor; can be replaced by granulated sugar

Set aside four ½-cup capacity (120ml) glasses or ramekins.

In a small bowl, mix together the gelatin and water. Set aside.
In a medium bowl, whisk together the peanut butter, sugar, salt and vanilla. In a small saucepan, heat the heavy cream and milk together until they start to boil. Remove from the heat and pour over the gelatin, whisking well to dissolve it. Pour this over the peanut butter mixture and whisk well until smooth. Pass through a fine sieve and divide the liquid among the four glasses. Refrigerate until firm, about 3 hours – the panna cotta can be kept in the fridge for up to 2 days, just keep it covered with plastic wrap so it does not dry out.

Now, make the praliné: line a baking sheet with a piece of foil. Spread the sugar in a medium frying pan and cook over medium heat, without stirring. When sugar starts to melt and get golden around the edges, stir gently using a rubber spatula until all the sugar is melted. As soon as that happens, remove the pan from the heat and add the oats, stirring to cover it well with the caramel. Quickly pour the mixture on top of the foil and spread as much as possible, creating a thin layer. Set aside to cool completely. When it is time to serve the panna cotta, break the praline into smaller pieces and place on top of the the panna cotta – do not do this ahead of time for the moisture in the panna cotta can dissolve the caramel of the praliné.

Serves 4

Tuesday, November 14, 2017

Red onion tarte tatin with rye pastry

Red onion tarte tatin with rye pastry / Tarte tatin de cebola roxa com massa de centeio

I was never a pie/tart maker (one look at the blog index can confirm that), but I do love pies and tarts: I just don’t have much time for them, I guess. Two things that have helped me with this matter is making the pastry in one day and assembling and baking the pie on the other, or keeping an extra batch of pastry in the freezer – nothing like having the pastry ready when you find beautiful veggies or fruits in the market: lunch, dinner or dessert are halfway there.

This pastry is delicious and flaky, very similar to the corn flour pastry I posted a while ago. The onions not only make the tarte tatin beautiful but also very flavorsome: the time in the stove top and then in the oven transform their acrid flavor into something sweet and mellow.

Red onion tarte tatin with rye pastry
own recipe

Pastry:
¾ cup (105g) all purpose flour
3 tablespoons (30g) fine rye flour
¼ teaspoon table salt
¼ cup unsalted butter, chilled and cubed
3 tablespoons sour cream, chilled*
1 tablespoon iced water

Filling:
2 red onions (approximately 250g/9oz in total)
2 tablespoons unsalted butter
½ teaspoon olive oil
5 fresh thyme sprigs
½ teaspoon demerara sugar
2 teaspoons balsamic vinegar
2 teaspoons dry red wine
salt and freshly ground black pepper

Start by making the pastry: in a food processor, pulse all purpose flour, rye flour and salt until well combined. Add the butter and pulse a few times until mixture resemble coarse breadcrumbs. Mix sour cream and water in a small bowl, then with the motor running, gradually add the mixture and process just until a dough forms. Form dough into a ball, wrap in plastic wrap and refrigerate for 1 hour.

20 minutes before the end of the resting time of the pastry, preheat the oven to 180°C/350°F and start prepping the onions: peel them and cut them in half lengthwise. Then slice the onions in to 1cm (roughly ½in) half-moons – if the slices are too thin they will melt in the oven. Set aside.
Heat a 22cm (9in) frying pan over medium heat – for this recipe you need a frying pan that can go into the oven. Add the butter and the olive oil, followed by the thyme sprigs – this way they will be on the top of the tart once you invert it. Remove the frying pan from the heat for one moment and arrange the onion slices on top of the thyme, placing the slices close together, for they will wilt slightly when cooked - cover the entire frying pan with the onion slices. Put the pan back on the heat and cook for 10 minutes, shaking the pan slightly instead of stirring the onions, to avoid them sticking to the bottom, but keeping them in place. Sprinkle with the sugar, drizzle with the balsamic vinegar and the wine, season with salt and pepper and cook for another minute. Turn off the heat and set aside.

Red onion tarte tatin with rye pastry / Tarte tatin de cebola roxa com massa de centeio

Place the dough onto large piece of baking paper, cover with another piece of paper and roll into a rough 24cm (9in) circle – work fast in order to keep the pastry chilled. Peel off the paper from the top, then roll the pastry into the rolling pin, very gently, then unroll it on top of the onions (be careful since the pan will still be hot). Tuck the pastry in, make a small hole in the center of the pastry so the hot air can escape, then bake the tart for 30-35 minutes or until golden brown. Remove from the heat and very gently loosen the pastry from the edges of the pan. Top the pan with a plate and carefully unmold the tart – don’t worry if any onion bits get stuck in the pan, just loosen them up with a spatula and arrange them back on top of the tart. Serve with a green salad.

* homemade sour cream: to make 1 cup of sour cream, mix 1 cup (240ml) heavy cream with 2-3 teaspoons lemon juice in a bowl. Whisk until it starts to thicken. Cover with plastic wrap and leave at room temperature for 1 hour or until thicker (I usually leave mine on the counter overnight – except on very warm nights – and it turns out thick and silky in the following morning; refrigerate for a creamier texture)

Serves 4 with a green salad on the side

Tuesday, November 7, 2017

Banana and blueberry crumble

Banana and blueberry crumble / Crumble de banana e mirtilo

I do not mean to sound like a broken record (again), but things have been a bit slow on this blog and that usually happens when things are everything but slow on this side of the screen. Too much work, all sorts of other things going on… And on top of that I have had almost no energy to cook or bake, let alone photograph and type posts.

Many times in the past I read my favorite food bloggers write about burnout syndrome and I think that maybe the time has come for me, too: I don’t know for sure and my mind sometimes is a blur, to be honest. I have just come back from a wonderful trip to NYC in which I had fabulous food in all sorts of ways, and I thought this would give me inspiration to go back to the kitchen, but honestly, that has not kicked in yet.

Anyway, on a sweeter note: I have baked this crumble several times in the past year and a half and it has become one of my favorites, so here is the recipe.

Banana and blueberry crumble
own recipe

¾ cup + 2 tablespoons (125g) all purpose flour
¼ cup (50g) demerara sugar
¼ teaspoon baking poder
pinch of salt
¼ teaspoon ground cinnamon
3 tablespoons (42g) unsalted butter, chilled and cubed
¼ cup (22g) rolled oats
¼ cup (25g) flaked almonds
4 bananas, about 140g/5oz each
1 cup (120g) blueberries, fresh or frozen (unthawed)

Preheat the oven to 180°C/350°F. Set aside four 1-cup (240m) heatproof ramekins – if you prefer, bake the crumble in one 1-liter heatproof baking dish.

Crumble topping: in a medium bowl, whisk together the flour, sugar, baking powder, salt and cinnamon. Add the butter and rub the ingredients together with your fingertips until mixture resembles coarse meal. Using a fork, stir in the oats and almonds. Freeze the mixture for 5 minutes while you prepare the fruit.

Cut the banana in round slices and divide among the ramekins. Sprinkle with the blueberries. Cover the fruit with the crumble topping and bake for 25-30 minutes or until topping is golden and blueberries are bubbling. Serve warm with ice cream or heavy cream.

The crumble topping can be kept tightly sealed in a plastic bag in the freezer for 1 month – whenever you feel like having a crumble for dessert, sprinkle the mixture over the fruit of your choice and bake – do not unthaw before using.

Serves 4

Wednesday, October 11, 2017

Pear, olive oil and chocolate cake

Pear, olive oil and chocolate cake / Bolo de pera, azeite de oliva e chocolate

I have been running around like a headless chicken lately, with loads of work and other things to solve. For that reason, I haven’t posted much and I am also behind with my personal emails.

I decided to stop by very quickly with an equally quick to make cake: put together in almost no time, it is a tender and delicious combination of fruit, olive oil and chocolate. Good for those weeks you have barely time to breathe but still want a slice of cake and a cup of coffee or tea at the end of a tough day.

Pear, olive oil and chocolate cake / Bolo de pera, azeite de oliva e chocolate

Pear, olive oil and chocolate cake
own recipe

2 large pears, about 200g (7oz.) each
lemon juice, for drizzling over the pears
1 ½ cups (210g) all purpose flour
2 teaspoons baking powder
½ teaspoon freshly grated nutmeg
1/8 teaspoon table salt
1 cup (200g) granulated sugar
2 large eggs, room temperature
½ cup (120ml) extra virgin olive oil
½ cup (130g) plain yogurt
1 teaspoon vanilla extract
50g dark chocolate, finely chopped – I used one with 70% cocoa solids

Preheat the oven to 180°C/350°F. Butter a tall 20cm (8in) round cake pan with a removable bottom or a springform pan*, line the bottom with a circle of baking paper and butter it as well.

Peel and core both pears, slice one thinly and dice the other. Drizzle with a little lemon juice to keep them from browning.
In a large bowl, whisk together the flour, baking powder, nutmeg, salt and sugar. In another bowl, whisk together the eggs, olive oil, yogurt and vanilla. Pour this mixture into the dry ingredients and mix until combined. Stir in the diced pear. Pour into prepared pan and smooth the top. Arrange the pear slices on top of the batter, then sprinkle evenly with the chocolate. Bake for about 50 minutes or until risen and golden and a skewer inserted in the center of the cake comes out clean. Cool completely in the pan over a wire rack.

* if your pan is not very tall, use a 9in (23cm) pan

Serves 6-8

Wednesday, October 4, 2017

Spinach, cheese and chorizo calzones

Spinach, cheese and chorizo calzones / Calzones de espinafre, queijo e chorizo

When I have difficult and/or very busy days I usually take a breather and go to People magazine’s website: I get to read about celebrities and for that I don’t need to use any of my brain cells. :D

Today I read about how Kim Cattrall “killed” the plans of a third SATC movie, and for that we all have to send Kim a big thank you card – the first movie was nice, but the second was absolutely ridiculous and just the thought of certain scenes makes me agonize all over again. Some of the comments suggest that the writers kill Samantha Jones and do the movie with the other three women instead, however I don’t find it a smart decision for the fun of the TV show was the four of them together, and Samantha was always my favorite character (followed very closely by Miranda).

I will borrow inspiration from SATC and present you these delicious calzones: the filling is a combination of spinach, cheese and chorizo and I beg of you not to remove any of the ingredients from it: the calzones would not be the same. The spinach and the cheese benefit intensely from the saltiness of the chorizo, however if you can’t find it bacon goes well here too.

Spinach, cheese and chorizo calzones
own recipe

Dough:
2 teaspoons dried yeast
½ teaspoon granulated sugar
1 ¼ cups (300ml) lukewarm water
2 tablespoons extra-virgin olive oil
3 ¼ cups (455g) all purpose flour
1 teaspoon salt

Filling:
¾ cup (105g) finely diced chorizo
2 large garlic cloves
2 cups (120g) fresh spinach leaves, packed
salt and freshly ground black pepper
2 cups (200g) coarsely ground yellow mozzarella*
extra virgin olive oil, for brushing the calzones

Start with the dough: in the bowl of an electric mixer fitted with the dough hook, mix the yeast, sugar and water with a fork. Set aside until foamy, about 5 minutes. Add the olive oil, flour and salt and mix for 6-8 minutes or until a soft and elastic dough forms. Shape dough into a ball and transfer to a lightly oiled bowl. Cover with plastic wrap and set aside to proof in a warm place for about 1 hour or until doubled in size.

In the meantime, make the filling: heat a large nonstick frying pan over high heat. Add the chorizo and cook stirring occasionally until the pieces are golden and crispy. Add the garlic and cook for 1 minute or until fragrant – do not let it burn or it will get bitter. Stir in the spinach leaves and cook until wilted. Season with salt and pepper – go easy on the salt for the chorizo is usually salty. Cool, then stir in the cheese.

Preheat the oven to 400°F/200°F. Line a large baking sheet with foil and brush it lightly with olive oil.
Divide the dough into 8 equal parts – each will be around 100g (3 ½ oz.). Roll out each portion of dough on a lightly floured surface until you get a rough 25cm (10in) circle. Place some of the filling on one side of the dough and fold the other half over, pinching the seams well to keep the filling inside. Repeat the process with the remaining dough and filling. Place the calzones onto the prepared sheet and brush them lightly with olive oil. Bake for 25-30 minutes or until golden. Serve immediately.

* the yellow mozzarella I used is not like fresh mozzarella balls, therefore it does not release too much liquid. Replace by cheddar or something similar texture wise.

Makes 8

Thursday, September 28, 2017

Stuffed zucchini, not like my grandma's

Stuffed zucchini / Barquinhas de abobrinha

One of the dishes that remind me of my grandmother the most is stuffed zucchini: she would make these quite often when she lived with us because my father liked it a lot.

I did not like meat growing up and back then I did not understand why my grandma would make this dish so often, but now that I am all grown up it makes a lot of sense to me: it is delicious – when prepared properly – and it makes things quite easier for the cook, since you only need a green salad on the side to call it a complete meal.

This is my version of stuffed zucchini: out with the mushy rice mixed with pale beef, in with with wine, tomatoes, fresh marjoram and gorgonzola – absolutely delicious (sorry, grandma). :)

Stuffed zucchini / Barquinhas de abobrinha

Stuffed zucchini
own recipe

4 zucchini, about 250g/8oz each
3 tablespoons extra virgin olive oil
1 onion, finely diced
3 garlic cloves, minced
400g (14oz) beef mince
salt and freshly ground black pepper
¼ cup (60ml) dry white wine
2 tablespoons tomato paste
2 ripe tomatoes, deseeded and chopped
handful of fresh marjoram leaves
150g (5oz) gorgonzola, coarsely grated or crumbled
finely ground parmesan, for serving

Preheat the oven to 200°C/400°F. Line a large baking sheet with foil and brush it with some of the olive oil.

Cut the zucchini in half lengthwise – you should then get 8 halves that look like little boats. With a small spoon, scrape some of the flesh – do not carve the zucchini halves too much or they will be too flimsy. Chop the flesh and set aside. Place the zucchini on the prepared sheet and brush the inside of each half with some of the olive oil.

Bake for 20 minutes – in the meantime, make the filling: heat the remaining olive oil in a large nonstick frying pan over high heat. Add the onion and cook, stirring occasionally, until translucent. Stir in the garlic and cook for 1 minute or until fragrant – do not let the garlic burn or it will turn bitter. Stir in the mince and cook, stirring occasionally, until golden. Season with salt and pepper – go easy on the salt since the cheeses can be salty. Stir in the wine and cook again for 2-3 minutes or until wine is reduced – using a wooden spoon, scrape the brown bits in the bottom of the saucepan for extra flavor. Stir in the tomato paste, chopped tomatoes, ¾ cup of the reserved zucchini flesh (you can freeze the remaining flesh and use it to make vegetable stock) and the marjoram. Cook for about 5 minutes or until tomatoes are soft. Remove from the heat, stir in the gorgonzola and divide the meat filling among the zucchini halves. Bake for 15 minutes. Sprinkle with the parmesan and serve immediately.

Serves 4

Wednesday, September 27, 2017

Apple cinnamon rolls with cream cheese icing

Apple cinnamon rolls with cream cheese icing / Pãezinhos de maçã e canela com cobertura de cream cheese

Baking bread is something I deeply enjoy, even though I have not done that much lately. Unless you have access to good artisanal bakeries (which are very few here in Sao Paulo), it is the only guaranteed way of having good bread on the table.

These apple rolls were my idea to turn the humble cinnamon roll into something even more special, to get people interested in them again – like Nic Pizzolatto casting Mahershala Ali for the third season of True Detective, after that not-so-great season 2. :D

I was very happy with the recipe: the rolls are tender and perfumed with cinnamon and the tangy icing compliments the apples beautifully. They disappeared quite quickly every time I made them, and next time I prepare this recipe I intend to use pears + nutmeg instead of apples + cinnamon – I believe it will be just as delicious.

Apple cinnamon rolls with cream cheese icing
own recipe

Dough:
200ml whole milk
¼ cup (56g) unsalted butter, room temperature and chopped
2 ¼ teaspoons (7g) dried yeast
¼ cup + 2 tablespoons (75g) granulated sugar
1 large egg, room temperature
pinch of salt
½ teaspoon vanilla extract
3 ¼ cups (455g) all purpose flour

Filling:
¼ cup (56g) unsalted butter, softened
4 Granny Smith apples (about 650g/1 ½ pounds), peeled, cored and cut into small dice*
¼ cup (50g) granulated sugar
¼ cup (44g) light brown sugar, packed
1 ½ teaspoons ground cinnamon

Icing:
½ cup (113g) cream cheese, very soft
¼ cup (56g) unsalted butter, very soft
1 teaspoon vanilla extract
1 cup (140g) icing sugar, sifted

Start by making the dough: in a small saucepan, heat milk until it starts to boil. Remove from the heat, stir in the butter and let it melt. Once the mixture is lukewarm, pour it into the bowl of an electric mixer and stir in the yeast and sugar. Set aside until foamy, about 5 minutes. Add the egg, salt, vanilla and flour and mix with the dough hook for 8-10 minutes or until smooth and elastic. Transfer to a lightly buttered large bowl and cover with plastic wrap. Set aside in a draft-free area until doubled in volume, about 1 ½ hours.

Generously butter a 20x30cm (8x12in, and 13x9in also works) baking pan. Set aside.
Transfer the dough to a lightly floured surface and roll it into a 30x40cm (12x16in) rectangle. Spread the butter over the dough leaving a 1cm (½in) border. In a medium bowl, stir the apples with the sugar and cinnamon until well coated, then spread evenly on top of the butter layer. Starting from the longest side, roll the dough into a tight cylinder, then slice into 12 equal pieces. Place the slices side-by-side in the prepared pan, cover loosely with a clean kitchen towel and set aside to prove again, 40-45 minutes – in the meantime, preheat the oven to 200°/400°F.

Bake the buns for 25-30 minutes or until risen and golden. Cool in the pan over a wire rack for 5 minutes, then carefully unmold the buns onto the rack. Now, make the icing: in a small bowl, whisk the ingredients together until smooth. Spread over the buns and set aside to cool completely, or serve them warm.

* it is important to keep the apple pieces small otherwise they will not bake properly inside the dough

Makes 12

Tuesday, September 26, 2017

My tuna salad sandwiches

My tuna salad sandwiches / O meu patê de atum

My husband and I are not people who swap meals for sandwiches very often – we do like our rice and beans, soups, pasta dishes, and now Joao has some serious competition on my Bolognese sauce, since my 2 ½ year-old nephew loves it as much as Joao does. <3

However, when burgers or tuna salad sandwiches are involved we are happy to have sandwiches for lunch or dinner, and more recently, the sardine rillette has become part of that small list. I did not imagine my husband liked tuna salad sandwiches until the day I made this recipe, which I have been making for over 20 years. He went crazy for the tuna salad and it instantly became part of our favorite things to eat on lazy weekends.

This tuna salad goes very well with all kinds of bread – including the soft rye bread I posted a while ago – but I find it very important to have the slices toasted if the kind of bread chosen is not very sturdy: it prevents the sandwiches from getting soggy.

My tuna salad sandwiches
own recipe

1 can of tuna preserved in water (120g/4oz drained weight)
1 carrot (about 100g/3oz) peeled and coarsely grated
1 small onion, finely diced*
handful of fresh flat leaf parsley leaves, finely chopped
½ cup green olives, pitted and chopped
1 teaspoon extra virgin olive oli
2/3 cup mayonnaise – homemade is even better
salt and freshly ground black pepper

Drain the tuna very well, then transfer to a large bowl and flake it with a fork. Mix in the carrot, onion, parsley and olives. Drizzle with the olive oil and mix well. Mix in the mayonnaise, season with salt and pepper and serve immediately with your favorite kind of bread.

* this recipe is delicious too if you replace the onion with celery

Makes 5-6 sandwiches using regular, white bread


Friday, September 15, 2017

Orange, cinnamon and clove cake and the second recipe I ever learned

Orange, cinnamon and clove cake / Bolo de laranja, canela e cravo

Most people who know me or read the blog know that the first recipe I ever learned how to make was a Brazilian cornmeal cake, the one I published a while ago. I was 11 years old and right then and there a whole new world opened up in front of me: from that day on I engaged in a relationship with food and cooking that changed my life for good.

What not everyone knows is that the second recipe I learned how to make was an orange cake – very simple, yet so delicious, I can almost smell it if I close my eyes for a moment. For that reason (aside from the fact that I am a citrus nut) orange cakes have a special place in my heart and I am always looking for new ways to make them.

The one I bring you today is perfumed with both cinnamon and cloves and the inspiration for this combo of flavors came from the sablés I posted a couple of years ago, when I was saying goodbye to my dear Peggy Olson.

Orange, cinnamon and clove cake
own recipe

2 cups (280g) all purpose flour
2 teaspoons baking powder
1/8 teaspoon table salt
1 teaspoon ground cinnamon
¼ teaspoon ground cloves
1 cup (200g) granulated sugar
finely grated zest of 2 oranges
¾ cup (170g) unsalted butter, softened
2 large eggs, room temperature
½ teaspoon vanilla extract
1 cup (240ml) sour cream*
Icing sugar, for dusting the cake

Preheat the oven to 180°C/350°F. Butter and flour a 2-liter capacity Bundt pan.
In a medium bowl, whisk together the flour, baking powder, salt and spices. Set aside.
In the bowl of an electric mixer, combine granulated sugar and orange zest and rub them together until sugar is fragrant. Add the butter and using the mixer beat until creamy and light in color – scrape the sides of the bowl occasionally throughout the making of the recipe. Beat in the eggs, one at a time, beating well after each addition. Beat in the vanilla.

On slow speed, beat in the dry ingredients in three additions, alternating with the sour cream in two additions (start and end with the dry ingredients). Beat just until incorporated. Pour into prepared pan and smooth the top. Bake for 40-45 minutes or until cake is golden and risen and a skewer inserted in the center comes out clean. Cool in the pan over a wire rack for 20 minutes, then carefully unmold onto the rack and cool completely.
Dust with icing sugar before serving.

* homemade sour cream: to make 1 cup of sour cream, mix 1 cup (240ml) heavy cream with 2-3 teaspoons lemon juice in a bowl. Whisk until it starts to thicken. Cover with plastic wrap and leave at room temperature for 1 hour or until thicker (I usually leave mine on the counter overnight – except on very warm nights – and it turns out thick and silky in the following morning; refrigerate for a creamier texture)

Serves 8

Wednesday, September 13, 2017

Asparagus and gorgonzola galette with corn flour pastry and creative days

Asparagus and gorgonzola galette with corn flour pastry / Galette de aspargo e gorgonzola com massa de fubá

I could start several posts with “when I was still working on the book project” because during that time I exercised my creativity almost on a daily basis. Everything I saw was a source of inspiration, and a trip to the grocery store or the farmers’ market would turn into an idea, that turned into a recipe, that turned into several tests in my kitchen. Several times my husband and I ate the tests for lunch, and whoever came to my house would be served cake or cookies I had been working on – everyone became my guinea pigs. :)

I was at the grocery store with my husband one day when I saw beautiful asparagus – I brought them home with the idea of making a frittata, but I decided for a galette instead: I love galettes, they are my favorite kind of tart – they are easy to put together (no blind baking involved) and they always look stunning.

We ate this galette for lunch 3 times – I was going to make it a few times anyway to test the recipe in different occasions, however it tasted so delicious that making it again never felt like a chore.

Asparagus and gorgonzola galette with corn flour pastry
own recipe

Pastry:
1 cup + 1 tablespoon (150g) all purpose flour
¼ cup (35g) corn flour (finely ground cornmeal, not corn starch)
¼ teaspoon table salt
100g unsalted butter, very cold and diced
¼ cup (60ml) sour cream*, very cold
2 tablespoons iced water

Filling:
100g fresh ricotta – I use homemade
50g gorgonzola, coarsely grated or crumbled
1 tablespoon sour cream
salt and freshly ground black pepper
200g fresh asparagus, already trimmed

Egg wash:
1 egg yolk whisked with 1 teaspoon sour cream

Start by making the pastry: in a food processor, pulse all purpose flour, corn flour and salt until well combined. Add the butter and pulse a few times until mixture resemble coarse breadcrumbs. Mix sour cream and water in a small bowl, then with the motor running, gradually add the mixture and process just until a dough forms. Form dough into a ball, wrap in plastic wrap and refrigerate for 1 hour.

Place the dough onto large piece of baking paper, cover with another piece of paper and roll into a rough 20x35cm (8x14in) rectangle. Slide the paper with pastry into a baking sheet and remove the paper from the top. In a medium bowl, whisk together the ricotta, gorgonzola, heavy cream until a paste forms. Season with salt and pepper (go easy on the salt since gongonzola can be salty). Spread the dough with the filling leaving a 2.5cm (1in) border. Arrange the asparagus on top of the filling, pressing them slightly to adhere. Carefully fold one edge in towards the center of the filling and continue folding all the way round, bringing the edge of the pastry towards and over the filling/asparagus. Freeze the galette for 15 minutes – in the meantime, preheat the oven to 200°C/400°F.

Brush the pastry with the egg wash and bake for 30-40 minutes or until pastry is golden. Serve warm.

* homemade sour cream: to make 1 cup of sour cream, mix 1 cup (240ml) heavy cream with 2-3 teaspoons lemon juice in a bowl. Whisk until it starts to thicken. Cover with plastic wrap and leave at room temperature for 1 hour or until thicker (I usually leave mine on the counter overnight – except on very warm nights – and it turns out thick and silky in the following morning; refrigerate for a creamier texture)

Serves 4 with a green salad on the side

Tuesday, September 12, 2017

Tangerine Prosecco gelatin and a scary movie

Tangerine prosecco gelatin / Gelatina de tangerina e prosecco

I am not very brave when it comes to horror films, but after watching the teaser for It I really wanted to watch the movie. My husband asked if I was sure this was a good idea, and I told him that I would be OK since I am not afraid of clowns.
A few minutes into the movie and I was scared as hell and with my eyes closed. :D To be honest I did not recall the 1990 movie being so scary. :S

As promised, I bring you today a recipe that calls for the tangerine juice left from making the financiers I posted yesterday – and the color of the gelatin reminds me of Beverly’s beautiful hair (I was impressed at how much the young Sophia Lillis looks like Amy Adams). I added Prosecco to the gelatin to make this an adult dessert, but if you don’t drink alcohol or want to make this for kids just replace the Prosecco with more tangerine juice.

Tangerine Prosecco gelatin
own recipe

1 ¼ teaspoons gelatin powder
1 ½ tablespoons water
200ml fresh tangerine juice, strained
1 tablespoon granulated sugar
100ml Prosecco
whipped cream, for serving (optional)

In a small bowl, combine the gelatin with the water. Set aside.
In a medium saucepan combine the tangerine juice and sugar and stir over low heat until sugar is dissolved and mixture is lukewarm. Remove from the heat and whisk in the Prosecco, followed by the gelatin. Set aside to cool for 10 minutes. Strain mixture through a fine sieve into four ½-cup capacity glasses. Refrigerate for 3-4 hours or until set.
Serve with a dollop of the whipped cream.

Serves 4


Monday, September 11, 2017

Tangerine coconut financiers, videos and texts

Coconut tangerine financiers / Financiers de coco e tangerina

I was talking to my husband the other day about why I still blog, after eleven years. I was telling him how people are drawn to videos nowadays and that everyone says that blogs are a thing of the past.

The conversation started because I wanted to read reviews about a hair product and all I could find was videos about it. I did not want videos, I wanted text, and there were hardly any. Until that day I used to tell my husband that I did not make recipe videos because I do not have time for them (which is true), but I suddenly realized that I actually don’t like recipe videos (with very few exceptions) – I prefer text whenever possible. I like to read people’s ideas, and it makes me happy when they read me too.

These financiers are a result of replacing almond meal with desiccated coconut, and such a tropical flavor paired beautifully with the citrus touch from the tangerines. This recipe goes to those of you who still feel that blogs are worth reading, and I hope you come back later this week: I will post another recipe using the juice of these very tangerines, since in the financiers you will only use the zest.

Tangerine coconut financiers
own recipe

3 tablespoons (30g) all purpose flour
2/3 cup (67g) desiccated unsweetened coconut
½ cup (70g) icing sugar, sifted
pinch of salt
finely grated zest of 2 tangerines
3 egg whites (84g)
1/3 cup (75g) unsalted butter, melted and cooled
½ teaspoon vanilla extract

In a medium bowl, whisk together the flour, coconut, icing sugar, salt and tangerine zest. Whisk in the egg whites. Whisk in the butter and vanilla until smooth. Cover with plastic wrap and refrigerate for 1 hour.

Preheat the oven to 200°C. Butter twelve 2-tablespoon capacity molds or mini muffin pans.
Divide the batter among the prepared pans and smooth the top. Bake for about 10 minutes or until golden and risen – a skewer in the center should come out clean.
Cool in the pans over a wire rack for 5 minutes, then carefully unmold and transfer to the rack, cooling completely.

Makes 12

Wednesday, September 6, 2017

Banana and chocolate cake with coconut glaze for a lazy holiday

Banana and chocolate cake with coconut glaze / Bolo de banana e chocolate com glacê de coco

Tomorrow is a national holiday in Brazil and I really need some time off – the past few weeks have been intense workwise. For that reason, I bring you today a very short post, but with a delicious cake: the recipe is very straightforward too and can be done without any electric equipment – perfect for the lazy days ahead.

Banana and chocolate cake with coconut glaze
own recipe

Cake:
2 cups (280g) all purpose flour
¾ cup (67g) unsweetened cocoa powder (I used Dutch cocoa powder)
¾ teaspoon baking powder
1 ½ teaspoons baking soda
½ teaspoon ground cinnamon
½ teaspoon table salt
2 cups (400g) granulated sugar
3 large eggs
¾ cup (180ml) canola oil
½ cup (130g) plain yogurt
1 teaspoon vanilla extract
3 ripe bananas, mashed with a fork

Glaze:
1 cup (140) confectioners’ sugar, sifted
2 tablespoons coconut milk
¼ cup (25) toasted coconut, for sprinkling over the cake

Preheat the oven to 180°C/350°F. Butter a 12-cup capacity Bundt pan.
In a medium bowl, sift together the flour, cocoa, baking powder, baking soda, cinnamon and salt. Set aside.
In a large bowl, whisk together the sugar, eggs, oil, yogurt and vanilla until smooth. Mix in the bananas. Fold in the dry ingredients just until incorporated – do not overmix. Pour into the prepared pan and bake for about 50 minutes or until risen and a skewer inserted in the cake comes out clean. Cool in the pan over a wire rack for 20 minutes, then carefully unmold onto the rack and cool completely.

Glaze: place the sugar in a small bowl and gradually whisk in the coconut milk, mixing until you get a drizzable consistency – for a thicker glaze, use less milk. Pour over the cake and sprinkle with the toasted coconut.

Serves 10-12

Tuesday, September 5, 2017

Zucchini, bacon and cheese clafoutis

Zucchini, bacon and cheese clafoutis / Clafoutis de abobrinha, queijo e bacon

Those of you around here for a while know that the other habitant of my house used to be a very picky eater until he spent (precious) days in China - one of the things he did not eat back then was heavy cream (!).

That has luckily changed and many times in the warmer months, when we wanted something light but still delicious I made savory clafoutis for lunch and served with a big salad. Joao’s favorite mix of flavors is the one I bring you today: the salty bits of bacon pair wonderfully well with the cheese and the zucchini. My favorite clafoutis is the one made exactly like this, however swapping the zucchini for a handlful of button mushrooms that get browned in a drizzle of the leftover bacon fat before being added to the batter. If you ever try any of the versions I will love to hear your comments about it.

Zucchini, bacon and cheese clafoutis
own creation

2 slices of bacon, chopped
2 large eggs, room temperature
1/3 cup (80ml) heavy cream
1/3 cup (80ml) whole milk, room temperature
½ cup (70g) all purpose flour
1/3 cup gruyere cheese, coarsely grated
1 medium zucchini (about 200g/7oz), in small dice
2 sprigs of fresh thyme, leaves only
salt and freshly ground black pepper

Preheat the oven to 190°C/375°F. Set aside a 1-liter capacity heatproof baking dish – the one on the photo is 20cm (8in) wide and 3.5cm (1 1/3in) deep.

Heat a small nonstick frying pan over high heat and cook the bacon, stirring occasionally so the pieces brown evenly. As soon as they are crispy, remove them from the saucepan using a slotted spoon and transfer to a plate lined with paper towels. Use some of the rendered fat to grease the insides of the baking dish.

In a medium bowl, whisk the eggs, cream and milk until smooth. Add the flour and whisk until smooth again. Stir in the cheese, zucchini and thyme leaves, then season with salt and pepper. Pour into the prepared baking dish and sprinkle with the bacon bits.
Bake for 35-40 minutes or until puffed and golden. Serve immediately.

Serves 2-3 (depending on what is served with it)

Friday, September 1, 2017

Brown butter rye choc chip cookies - another great recipe with rye flour

Brown butter rye choc chip cookies / Cookies de manteiga queimada, centeio e chocolate

My confessed love for the fine rye flour has been resulting in several great recipes in the past months, and it makes me really happy that my dear and lovely reader Ellen from the U.S., together with several other readers of my Brazilian blog have been enjoying one of them: the soft rye bread I posted a while ago.

It is my favorite recipe made with rye – and it does taste exceptionally good paired with the sardine rillette, it is like they were made for each other. However, the bread has been closely followed by the cookies I bring you today: the combination of the nutty rye flavor with brown butter and dark chocolate is one the most delicious out there – trust me. ;)

Brown butter rye choc chip cookies
own recipe

½ cup (113g/1 stick) unsalted butter, diced
1 cup + 2 tablespoons (160g) all purpose flour
½ cup (70g) fine rye flour – the one I mentioned on this post
¾ teaspoon baking soda
1/8 teaspoon table salt
¼ cup (50g) granulated sugar
¾ cup (131g) light brown sugar, packed
2 large eggs
1 teaspoon vanilla extract
150g dark chocolate, coarsely chopped or in chips – I used one with 70% cocoa solids

Start by making the brown butter: place the butter in a small saucepan (avoid using dark nonstick since that way you will not be able to see the color of the butter clearly). Cook over medium heat until butter is golden and smells nutty, swirling the saucepan around a few times – butter can burn very quickly, to keep an eye on it. Remove from the heat and transfer to a heatproof bowl to cool completely.

Now, the cookies: preheat the oven to 150°C/350°F. Line two large baking sheets with baking paper.

In a medium bowl, whisk together the all purpose flour, rye flour, baking soda and salt. Set aside. Place brown butter and sugars in the bowl of an electric mixer. Beat until creamy and light in color – scrape the sides of the bowl occasionally throughout the recipe making. Beat in the eggs, one at a time, beating well after each addition. Beat in the vanilla. On low speed, gradually add the dry ingredients and mix only until a dough forms – do not overmix. Stir in the chocolate pieces. If day is too hot, refrigerate dough for 30 minutes before baking.

Drop 2 leveled tablespoons of dough per cookie onto the prepared pans, 5cm (2in) apart. Bake the cookies for 12-14 minutes, or until they’re golden-brown around the edges. Cool in the pans over a wire rack for 5 minutes, then slide the papers with the cookies onto the rack and cool completely.
Store the cookies in an airtight container at room temperature for up to 3 days.

Makes about 23

Thursday, August 31, 2017

Zucchini and chorizo risotto - a truly delicious recipe

Zucchini and chorizo risotto / Risoto de abobrinha e chorizo

You might think that I obsess over sweet ingredients only – and taking a look at the blog, who can blame you? :) – but some savory ingredients make me so happy I want to include them in just about anything. Chorizo is one of them: ever since I tried it for the first time I have been using it in several dishes, always with delicious results.

I make risottos often and it was only a matter of time before I added chorizo to them, however, I was trying to play with different textures and wanted to add layers to my risotto. Adding the crunchy bits of chorizo on top was one of the ideas, which turned out to be a win/win situation, since I used the fat rendered from the chorizo to coat the rice and removing it from the saucepan before adding the liquid I avoided it from going soft. I also wanted two different textures for the zucchini, so half of it was thinly sliced and grilled – which added a nice smoky flavor – and the other half was incorporated in the risotto. I do not mean to brag, but this is one of the most delicious dishes I have ever cooked.

Zucchini and chorizo risotto
own recipe

Grilled zucchini:
1 large zucchini (about 200g/7oz)
olive oil
salt

For the risotto:
50g (2oz) chorizo sausage, in small cubes
1 ½ tablespoons unsalted butter – divided use
½ small onion, finely diced
1 sprig of fresh thyme
¾ cup (165g) Arborio or Carnaroli rice
¼ cup (60ml) dry white wine
3 cups (720ml) hot vegetable stock
salt and freshly ground black pepper
50g (2oz) Canastra cheese, coarsely grated*
2 tablespoons finely grated parmesan cheese

Slice half the zucchini into thin slices and dice the remaining in to small cubes. Set the cubes aside (they will go in the risotto). Drizzle the zucchini slices with just a bit of oil and season with salt. Heat a large nonstick skillet or frying pan over medium-high heat and grill the zucchini slices for 1-2 minutes each side or just until golden. Set aside on a plate.

Heat the chorizo cubes in a medium saucepan over medium-high heat, stirring occasionally so the pieces brown evenly. As soon as they are crispy, remove them from the saucepan using a slotted spoon and transfer to a plate lined with paper towels. Add ½ tablespoon of the butter to the saucepan , followed by the onions and sprinkle with a little salt. Cook, stirring occasionally, until onion is translucent. Add the zucchini cubes and the thyme sprig and cook for 2 minutes. Add the rice and cook for 2-3 minutes, stirring, until rice is nicely coated in the fat. Stir in the wine and cook until it evaporates. Stir in the hot stock, 1 ladleful at a time, and continue to cook, stirring until all the stock is absorbed, before adding more stock.

Repeat this until all the stock has been used, the rice is al dente and the risotto is thick and glossy – about 20 minutes (you might not use all the stock). Season with salt and pepper, but go easy on the salt since chorizo and parmesan might be salty.
When the rice is al dente, remove the thyme sprig and stir in the cheeses and the remaining 1 tablespoon of butter. Check the seasoning, put the lid on and wait 2 minutes. Transfer the risotto to the serving plates, top each with the grilled zucchini slices and the crispy chorizo and serve immediately.

* for this recipe I used a kind of cheese typical from Brazil called Canastra cheese. Feel free to replace it with Grana Padano, more parmesan or any other cheese you like – just keep in mind that chorizo can be salty, so very salty cheeses might not go well in this recipe

Serves 2

Wednesday, August 30, 2017

Coconut apple galette - coconut, again :)

Coconut apple coconut galette / Galette de coco e maçã

Even though it is a controversial ingredient/flavor, I do love coconut and when I was working on the book project I tried to include it in several different recipes – not only I got delicious results out of it, but it was much cheaper than my lemon frenzy. :)

I made muffins, cakes, crumbles, popsicles and cookies using coconut, and I cannot wait to share more with you: today I bring you a galette, in which I replaced part of the flour with desiccated coconut. I paired the lovely coconutty pastry with apples and added a touch of both lime (in zest and juice form) and cinnamon to the fruit – it tasted and smelled delicious.

This galette is wonderful either warm or at room temperature, but I urge you to try it warm with vanilla ice cream on the side – it is truly heavenly.

Coconut apple galette
own recipe

Pastry:
1 ¾ cups (245g) all purpose flour
1/3 cup (33g) unsweetened desiccated coconut
2 tablespoons granulated sugar
pinch of salt
¾ cup (170g) unsalted butter, chilled and diced
1/3 cup (80ml) iced water

Filling:
4 Granny Smith apples (about 700g/1 ½ pounds), peeled, cored, cut in half then thinly sliced
¼ cup (50g) granulated sugar
finely grated zest of 1 lime
freshly squeezed juice of ½ lime
½ teaspoon ground cinnamon

Egg wash:
1 egg yolk + 1 teaspoon whole milk, room temperature, whisked well together in a small bowl

Start by making the pastry: in a food processor, pulse flour, coconut, sugar and salt until well combined. Add the butter and pulse a few times until mixture resemble coarse breadcrumbs. With the motor running, gradually add the water and mix just until a dough forms. Form dough into a ball, wrap in plastic wrap and refrigerate for 1 hour.

Preheat the oven to 200°C/400°F. Place the dough onto large piece of baking paper, cover with another piece of paper and roll into a rough 30cm (12in) circle. Slide the paper into a baking sheet.

Place the apples in a bowl with the sugar, lime zest and juice and cinnamon and toss to combine. Arrange the apple slices on the center of the dough – arrange them as you please. I prefer to put them side by side, that way the heat can circulate better through the fruit and tart bakes more evenly. Carefully fold one edge in towards the center of the fruit and continue folding all the way round, bringing the edge of the pastry towards and over the apple slices. Brush the pastry with the egg wash and bake for about 40 minutes or until pastry is golden. Serve warm or at room temperature.

Serves 6-8

Tuesday, August 29, 2017

Orange olive oil waffles

Orange olive oil waffles / Waffles de laranja e azeite de oliva

I do not make waffles very often because my husband does not like them, leaving me to eat the whole batch alone (not pretty), but since I like them a lot I am always interested in trying new flavors and toppings. A bit of research led me to the fact that the key to get crispier, crunchier on the outside waffles was to use oil instead of butter, and it actually worked.

Now that I no longer can eat regular dairy I have been making my waffles like the ones I bring you today, with olive oil and lactose-free milk, but if you prefer the butter flavor over the crispy texture it is just a matter of replacing the olive oil with melted unsalted butter.

I absolutely love the combination of orange and blueberries – one of my favorite flavor combos – so it is my duty to tell you that the waffles taste amazing served with the baked blueberry jam I posted a couple of years ago (it works well with frozen, thawed blueberries when fresh ones are not available).

Orange olive oil waffles
own recipe

2 tablespoons granulated sugar
finely grated zest of 1 large orange
1 ¼ cups all purpose flour
2 teaspoons baking powder
pinch of salt
1 large egg
¼ cup (60ml) extra virgin olive oil
¾ cup (180ml) whole milk, room temperature
½ teaspoon vanilla extract

In a medium bowl, place the sugar and orange zest and rub them together with your fingertips until sugar is fragrant. Add the flour, baking powder and salt and whisk well.
In a small bowl, whisk together the egg, olive oil, milk and vanilla. Pour over the dry ingredients and stir just until incorporated – do not overmix.

Heat a waffle iron until very hot; lightly coat with nonstick spray – my waffle maker is nonstick, so I do not coat it.
Working in batches, cook waffles until golden and cooked through. Transfer to a wire rack set inside a baking sheet and keep warm in oven until ready to serve.

Makes 5-6 waffles

Friday, August 25, 2017

Hasselback baby eggplants

Hasselback baby eggplants / Mini berinjelas Hasselback

If you have been reading me for a while now you probably know that I am a huge fan of Nigella Lawson – I was lucky enough to meet her a few years ago and got one of my books autographed. She is the one who, ages ago, introduced me to Hasselback potatoes, a recipe I find not only delicious but also really pretty.

When I was still working on the book project, I thought one day: “why not Hasselback other veggies, too?”. One day, at the farmer’s market, I saw these beautiful baby eggplants and the Hasselback feeling came back to my mind. To make things more interesting, there had to be cheese, of course, but a strong flavored one. A drizzle of garlic oil turned everything into a delicious and perfumed side dish – if my husband saw this post he would strike the word “perfumed” off, for that and “gorgonzola” cannot be in the same sentence as far as he is concerned. :D

Hasselback baby eggplants / Mini berinjelas Hasselback

Hasselback baby eggplants
own creation

12 baby eggplants (about 600g/little less than 1 ½ pounds)
4 ½ tablespoons extra virgin olive oil
1 large garlic clove
salt and freshly ground black pepper
75g gorgonzola cheese, firm enough to be sliced

Preheat the oven to 200°C/400°F. Tear 12 pieces of foil, about 20x20cm (8x8in) each, then crumple each one of them formatting into little nests – they will be the support for each eggplant, that way they don’t roll around the baking sheet.
Place the foil nests on a large baking sheet and brush their cavities with a little of the olive oil. Set aside.

In a mortar and pestle, place the garlic and salt and pound until a paste forms. Add the black pepper and the remaining olive oil and mix well.

Place each eggplant on a wooden spoon and cut into slices without going through the end – you want the eggplant to remain whole. Cut the gorgonzola into thin slices and place them inside the slits in the eggplants – make sure the cheese slices are thin enough to fit into the eggplants. Place the eggplants into the foil nests and drizzle with the garlic oil. Bake for about 25 minutes or until eggplants are tender.

Serves 4 as a side dish

Wednesday, August 23, 2017

Brownies with white chocolate chips and cocoa nibs

Brownies com chocolate branco e nibs de cacau / Brownies with white chocolate chips and cocoa nibs

One can tell that I am crazy for brownies by the amount of brownie recipes on this blog, however in my defense I have to say that I do not bake them for my own pleasure only: every time I want to make someone’s day better I give brownies as gifts (some of my friends already know that very well). :)

I had a small package of cocoa nibs at home and wanted to use them in a nice recipe – since they are on the bitter side, I thought that pairing them with the sweetness of white chocolate would work well - the creamy, gooey brownies are the perfectly vessel for that flavor encounter, and I added a touch of dark cocoa powder to the batter for extra richness.

Brownies with white chocolate chips and cocoa nibs
own recipe

¾ cup (170g) unsalted butter, softened and chopped
170g dark chocolate, finely chopped – I used one with 53% cocoa solids
1 cup (200g) granulated sugar
1 teaspoon vanilla extract
3 large eggs, room temperature
¾ cup (105g) all purpose flour
1/3 cup (30g) unsweetened cocoa powder, sifted
¼ teaspoon baking powder
1/8 teaspoon table salt
100g white chocolate chips
1/3 cup (40g) cocoa nibs

Preheat the oven to 180°C/350°F. Butter a 20cm (8in) square pan, line it with foil leaving an overhang on two opposite sides, and butter the foil as well.

In a large bowl set over a saucepan of simmering water (do not let the bottom of the bowl touch the water) combine butter and chocolate and stir occasionally until both are melted. Remove from the heat and cool slightly. Whisk in sugar and vanilla. Whisk in the eggs, one at a time, until smooth. Stir in the flour, cocoa, baking powder and salt, mixing just until incorporated. Stir in the white chocolate chips and cocoa nibs.

Spread batter into prepared pan and smooth the top. Bake for about 20 minutes or until a toothpick inserted in the center of the brownies comes out with moist crumbs. Cool completely in the pan over a wire rack. Cut into squares to serve.

Makes 16

Monday, August 21, 2017

Roasted tomato and red lentil soup and freezing feet

Roasted tomato and red lentil soup / Sopa de tomates assados e lentilha vermelha

I believe that one of the reasons why my love for the winter has considerably decreased is the fact that at least here in Sao Paulo we are not actually prepared for cold temperatures: there is no heat inside most of houses and apartments, stores and restaurants – one suffers with the cold both outside and inside. Taking a shower is a nightmare, getting dressed another one. :S

As I type this recipe on a very cold Sunday with a piping hot mug of tea by my side, my feet are covered in two pairs of socks and yet they feel like two ice cubes. I dream of nicer weather, and while that does not happen I make soup – this is simple, delicious and the heat turns the tomatoes into gold even if they are not at their peak, while the lentils make the soup thicker and more fulfilling.

Roasted tomato and red lentil soup
own recipe

For the roasted tomatoes:
8 ripe Italian tomatoes, cut in half lengthwise
1 tablespoon extra virgin olive oil
salt and freshly ground black pepper
3 sprigs fresh oregano
2 bay leaves

For the soup:
1 ½ tablespoons unsalted butter
½ teaspoon extra virgin olive oil
1 large leek, white part only, finely sliced
1 large garlic clove, minced
3 cups (720ml) vegetable stock, hot
salt and freshly ground black pepper
½ cup (100g) dried red lentils

Preheat the oven to 200°C/400°F. Line a large baking sheet with foil.
Place the tomatoes on top of the foil, cut side up, drizzle with the olive oil and sprinkle with the salt and pepper. Place the oregano and the bay leaves on top of the tomatoes and roast for 40 minutes or until very tender. Remove from the oven and discard the oregano and bay leaves.

Start the soup: melt the butter with the olive oil in a large saucepan over medium-high heat. Add the leeks and cook, stirring occasionally, until tender, about 5 minutes. Stir in the garlic and cook just until fragrant, 1 minute. Add the tomatoes with any juices from the sheet. Add the vegetable stock, then blitz with a stick blender until smooth. Stir in the lentils and cook until they are tender, about 10 minutes. Check seasoning and serve.

Serves 4-6

Wednesday, August 16, 2017

Coconut sour cream buns and polarizing flavors

Coconut sour cream buns / Pãezinhos de coco e creme azedo (sour cream)

I thought I was crazy for sweets until I started working at my current job, two years ago: my coworkers are addicted to all kinds of sweets, and being a Swiss company you can imagine the ridiculous amounts of chocolate coming every time someone travels from headquarters to Sao Paulo. :)

One of the executives at the office keeps a jar of candy on top of his desk, and the group is welcome to get some whenever a sugar high is needed. Everyone that travels brings candy for the jar, which I find very nice and generous. Last week we started a debate about flavors because of the jar: my boss reached out for some candy, and since she does not speak Portuguese I warned her that those were coconut-filled candy bars. She told me she loved coconut, and then someone else replied that they hated it, while another person said they loved it too, and my boss said she believed that coconut is one of those flavors that polarize people: you either love it or hate it – like cilantro. :)

I am part of the coconut fan club for I love it in absolutely anything, including savory dishes. For that reason I wanted to come up with a recipe for buns made with coconut, but no only in the filling, as most recipes I have seen – I wanted a double splash of coconut, both in the dough and in the filling. I came up with these delicious buns that look super cute by being baked in a muffin pan, and they taste oh, so good. The addition of both sour cream and butter to the dough makes them insanely tender.

Coconut sour cream buns
own recipe

Dough:
2 ¼ teaspoons dried yeast
¼ cup (50g) granulated sugar
½ cup (120ml) lukewarm water
½ cup (120ml) sour cream*
1 large egg yolk
2 ½ cups (350g) all purpose flour
pinch of salt
1/3 cup (33g) unsweetened desiccated coconut
½ teaspoon vanilla extract
¼ cup (56g) unsalted butter, very soft

Filling:
¼ cup (56g) unsalted butter, very soft
2/3 cup (66g) unsweetened flaked coconut
4 tablespoons demerara sugar

For the egg wash and sprinkling the buns:
1 egg, + 1 teaspoon water, lightly beaten with a fork
3 tablespoons unsweetened flaked coconut

Start by making the dough: in the large bowl of an electric mixer fitted with the dough attachment, mix yeast, pinch of the sugar and water with a fork. Set aside until foamy, about 5 minutes. Add the sour cream, yolk, remaining sugar, flour, salt, coconut and vanilla and mix for 8-10 minutes or until smooth and elastic. Gradually beat in the butter, 1 tablespoon at a time, mixing well after each addition – dough will be soft. Transfer to a lightly buttered large bowl and cover with plastic wrap. Set aside in a draft-free area until doubled in volume, about 1 ½ hours.

Generously butter a 12-hole nonstick muffin pan. Set aside.
Transfer the dough to a lightly floured surface and roll it into a 30x40cm (12x16in) rectangle. Spread the butter over the dough leaving a 1cm (½in) border. Sprinkle the butter with the sugar, then with the coconut. Starting from the longest side, roll the dough into a tight cylinder, then slice into 12 equal pieces. Place each piece into a cavity of the muffin pan. Cover loosely with a clean kitchen towel and set aside to prove again, 40-45 minutes – in the meantime, preheat the oven to 200°C/400°F.

Brush the rolls with the egg wash and sprinkle with the coconut. Bake for about 25 minutes or until risen and golden. Cool in the pan over a wire rack for 5 minutes, then carefully unmold the buns and transfer them to the rack to cool completely (they are delicious served warm, too).

* homemade sour cream: to make 1 cup of sour cream, mix 1 cup (240ml) heavy cream with 2-3 teaspoons lemon juice in a bowl. Whisk until it starts to thicken. Cover with plastic wrap and leave at room temperature for 1 hour or until thicker (I usually leave mine on the counter overnight – except on very warm nights – and it turns out thick and silky in the following morning; refrigerate for a creamier texture)

Makes 12

Friday, August 11, 2017

Orange, blueberry and olive oil muffins and a lactose problem

Orange, blueberry and olive oil muffins / Muffins de laranja, mirtilo e azeite de oliva

I know how rare it is nowadays to post recipes on the blog on two consecutive days, and I am still running around like a headless chicken trying to do everything I have to do lately, but since next week will be even busier than the week ending today I decided to go crazy and bring you these muffins: again a speedy recipe, but a very delicious one. These muffins are golden and really moist, very tender and perfumed with orange zest.

I am a complete sucker for citrus as you all know and in these muffins the orange flavor compliments the blueberries in the most wonderful way. The addition of olive oil is a nice surprise, not to mention that this became my go-to muffin recipe after I was diagnosed as lactose intolerant, a month ago or so: I have made it using lactose-free milk with good results (next time I will try making them using almond milk).

Orange, blueberry and olive oil muffins
own recipe

¾ cup (150g) granulated sugar
finely grated zest of 2 oranges
1 ½ cups (210g) all purpose flour
2 teaspoons baking powder
1/8 teaspoon table salt
1 large egg, room temperature
½ cup (120ml) whole milk, room temperature
1/3 cup (80ml) extra virgin olive oil
½ teaspoon vanilla extract
1 cup (140g) blueberries, fresh or frozen (unthawed)

Preheat the oven to 200°C/400°F. Line a 12-hole muffin pan with 8 paper cases. Fill the empty cavities halfway through with water (this will prevent the pan from warping).

In a large bowl, place sugar and orange zest and rub them together with your fingertips until sugar is fragrant. Whisk in the flour, baking powder and salt.
In a medium bowl, whisk together the egg, milk, olive oil and vanilla until smooth. Pour over dry ingredients and stir lightly with a fork just until combined – do not overmix or your muffins will be tough; muffin batter is not smooth as cake batter.
Stir in the berries. Divide the batter among the paper cases, then bake for about 20 minutes or until risen and golden and a skewer inserted in the center comes out clean. Cool in the pan over a wire rack for 5 minutes, then carefully remove the muffins from the pan and transfer to the rack. Cool completely or serve warm.

Makes 8

Thursday, August 10, 2017

Peanut cinnamon amaretti and no time for blogging

Peanut cinnamon amaretti / Amaretti de amendoim com um toque de canela

My days have been pretty busy lately, and I guess that some of you already know that given my disappearing from the blog. :)

However, I wanted to stop by quickly today and give you a recipe that I simply adore - and that is also quick to put together: the amaretti I make by replacing the almonds with a very Brazilian ingredient, peanuts, and adding a touch of cinnamon. Let’s call this an Italian-Brazilian cookie (I do like to mix and match countries in my kitchen). :) They go wonderfully with coffee and tea, and are also delicious broken into smaller pieces and sprinkled on top of ice cream.

Peanut amaretti
own recipe

2 ½ cups (250g) peanut meal (finely ground peanuts)
1 cup (200g) granulated sugar
½ teaspoon ground cinnamon
pinch of salt
2 large egg whites (56g)
½ teaspoon vanilla extract

Preheat the oven to 180°C/350°F. Line two large baking sheets with baking paper.
In a large bowl, whisk together the peanut meal, sugar, cinnamon and salt. Add the egg whites and the vanilla and mix until a dough forms.

Roll 2 teaspoons of dough per cookie into balls and place onto prepared sheets 2.5cm (1in) apart. Press down slightly with your fingers. Bake for 15 minutes or until golden. Cool in the sheets over a wire rack.

Cookies can be kept in an airtight container at room temperature for up to 2 weeks.

Makes about 35

Wednesday, August 2, 2017

Broccolini, caramelized onions and mozzarella frittata, or eggs are my kitchen heroes

Broccolini, caramelized onions and mozzarella frittata / Frittata de brócolis, cebola caramelizada e mozarela fresca

I can surely say that eggs are one of my favorite things to eat and to cook with: I love how tasty, healthy and versatile they are. No matter how empty your fridge and cupboards are, if you have eggs on hand you have dinner, and usually quickly.

I make frittatas quite often for in them I can use whatever I have begging to be used in the fridge. The one I bring you today is one of my favorite combo flavors, and I sometimes buy broccolini and/or mozzarella especially to make it – the broccolini tastes amazing paired with the gooey pieces of cheese, but to me what really makes this dish are the sweet, delicious onions, so take your time to caramelize them, even if it sounds like a boring chore, I assure you it is worth it. I have used fresh oregano to replace thyme a couple of times and it worked beautifully, too.

Broccolini, caramelized onions and mozzarella frittata
own recipe

½ large onion, thinly sliced
1 tablespoon olive oil
½ teaspoon granulated sugar
salt
1 ½ cups (60g) broccolini florets
3 large eggs, room temperature
freshly ground black pepper
2 teaspoons fresh thyme leaves
1/3 cup (60g) fresh mozzarella

Preheat the oven to 200°C/400°F. Heat the olive oil in a 20cm (8in) frying pan over medium heat – make sure you use a frying pan that can go into the oven. Add the onions and stir to coat them in the oil. Sprinkle with the sugar and a pinch of salt, then lower the heat and cook, stirring occasionally, for about 20 minutes or until onions are golden brown and soft.

Stir in the broccolini and cook, stirring occasionally, for 2 minutes. In the meantime, crack the eggs in a medium bowl, season with salt and pepper and whisk. Whisk in the thyme leaves. Give the broccolini and onions a good stir to avoid the onions being all in the bottom of the pan, then pour over the egg mixture. Tear the mozzarella into pieces and place them around on top of the eggs. Cook on the stove over low heat for 2 minutes without stirring, then transfer to the oven and cook for 8 minutes, or until puffed up and golden. Serve immediately.

Serves 2

Related Posts with Thumbnails