Showing posts with label chocolate. Show all posts

Friday, August 9, 2024

Chocolate berry pots

Potinhos de chocolate com frutas vermelhas / Chocolate berry pots

It has been so insanely hot here in São Paulo lately, in the middle of the winter, to the point of affecting my mood: I know that not everyone is into cold days like me, and I also know that I live in a tropical country where it feels like summer 9 months per year, but the three winter months have been my refuge since I was a kid, the part of the year when I felt better, energized, happy about the weather. That is over, and it might be over forever, which makes me really, really sad. 

Having said that, those of you who have been around for long know that I make warm desserts even with temperatures above 30°C (86°F) and I also have to tell you that I have soup for dinner even in the summer (and I don’t like cold soups): last Saturday I made two huge pots of soup and frozen them for the week. Having soup for dinner and sweating, but all good. 😊

These chocolate pots are a very easy to make dessert, are ready very quickly and they’re delicious too! They are creamy in the middle, like chocolate fondants, and have a brownie-like crust around – I used berries and white chocolate to make them richer (I always have these berries in my freezer to make smoothies), but of course you can make the recipe without them, and also replace the white chocolate with milk chocolate, for instance.


Chocolate berry pots

own recipe


¼ cup (35g) all purpose flour

¼ teaspoon baking powder

pinch of salt

50g dark chocolate, chopped

3 tablespoons (42g) unsalted butter, chopped (at room temperature it will melt faster)

¼ cup (50g) granulated sugar

1 large egg, room temperature

1 teaspoon vanilla extract

¼ cup (42g) white chocolate chips (feel free to use chopped white chocolate if you prefer)

50g frozen berries, unthawed


Preheat the oven to 200°C/400°F. Butter three ½ cup capacity ovenproof ramekins.

In a small bowl, whisk together flour, baking powder and salt. Set aside.

In a small heatproof bowl, combine the dark chocolate and butter, place it over a saucepan of simmering water (do not let the bottom of the bowl touch the water) and stir until melted. Remove from the heat and let it cool slightly. When lukewarm, add the sugar and whisk very well. Add the egg and whisk vigorously – the batter will become shiny and thick. Whisk in the vanilla.

Add the dry ingredients and mix with a spatula until incorporated. Stir in the white chocolate and the berries and then divide the batter evenly among the ramekins – you can add a few more berries on top if you like before baking. Place the ramekins in a baking sheet and bake for 15-17 minutes or until a toothpick inserted in the middle comes out with a little batter on it (the pots are creamy on the center, like chocolate fondants).

Remove from the oven, let it cool for about 10 minutes and serve – you can place each ramekin in a small dish to serve and avoid burned fingers. 😊


Serves 3

Wednesday, May 22, 2024

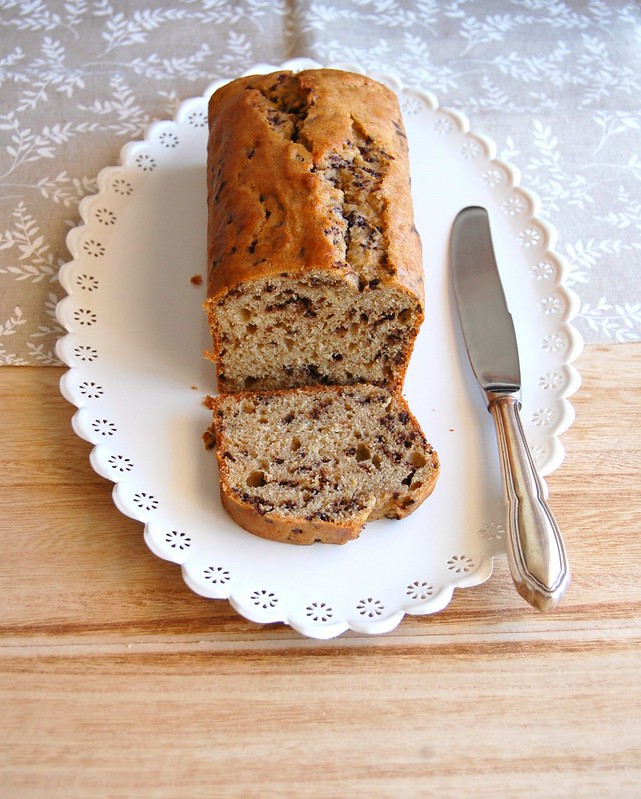
Pear, chocolate and yogurt cake and nostalgia


Bolo de iogurte, pera e chocolate


To me it is fun to go through my old photos for the Instagram #tbt: I don’t have many of them, but the ones I have always put a smile on my face. Weeks ago I posted a photo of my pre-adolescent self on my great-aunt Angelica’s kitchen:


This is the kitchen where I baked my first cake, and where I started to learn how to cook. I have so many wonderful memories from there, I was so happy in that house! I used to spend my weekends there to escape the awful and sad environment I had at home. My aunty and her daughter, my cousin Soraia, filled me with love, support, guidance… They helped me become who I am today. I was feeling so nostalgic with that photo that I felt like baking a cake! <3


Ever since baking the first variation of the Epicurious’ yogurt cake it has been inevitable: when I think of baking a cake I think of that perfect and so versatile recipe. Easy to make, minimal washing up, no mixer required, simple ingredients… and the result is always a delicious, tender and moist cake! I have made so many different versions of it that I lost track of how many.


Decided to create yet another version of that recipe, I gathered all the basic ingredients and reached out for some small pears I had purchased a couple of days before: they were not as sweet as I’d expected, so a bit of heat would do them good. I love pears with nutmeg, so I added a bit to the cake batter as well. While preparing the cake pan, I kept thinking of what would go well with the pears and dark chocolate came to mind: I chopped some, keeping the pieces a bit larger than I usually would.


The flavors matched perfectly, the melted chocolate pieces inside the cake are a gift in each bite and the pear cores on top are there just because I wanted to make the cake more beautiful: you can skip that step if you want, no worries.


Pear, chocolate and yogurt cake

another version I created for Epicurious’ perfect French yogurt cake


3 small pears (220g in total)

1 ½ cups (210g) all-purpose flour

2 teaspoons baking powder

¼ teaspoon freshly ground nutmeg

½ teaspoon table salt

¾ cup + 2 tablespoons (175g in total) granulated sugar

¾ cup (180g) plain unsweetened yogurt

½ cup (120ml) flavorless vegetable oil

2 large eggs, room temperature

1 teaspoon vanilla extract

100g dark chocolate, coarsely chopped (you can use chips if you prefer) – I used one with 64% cocoa solids


Preheat oven to 180C/350°F. Brush with oil a 6-cup capacity loaf pan (22x11cm/8.5x4.5in), line with baking paper leaving an overhang in the two longer sides and brush the paper as well.


Core the pears, remove the seeds and cut into about 1cm-cubes – in case you want to decorate the cake as I decorated mine, slice 2 of the 3 pears vertically close to the core, leaving the cores and the stems intact. Chop the remaining parts of pears in cubes.


In a medium bowl, whisk together the all purpose flour, baking powder, nutmeg and salt. Set aside.


In a large bowl, whisk together sugar, yogurt, oil, eggs and vanilla until smooth. Fold in reserved dry ingredients keeping 1 tablespoon in the bowl – if batter is too lumpy, whisk for a few seconds; do not overmix or the cake will become tough. Add chocolate to the bowl with the remaining dry ingredients, mix well, then fold into the batter – dusting the chocolate chips/chunks with the flour mixture will prevent them from sinking to the bottom of the cake.


Pour the batter into prepared pan and smooth the top. If decorating the cake as I did, arrange the cores on top of the batter and press slightly. Bake for 50-55 minutes, or until a skewer or toothpick inserted into center of the cake comes out clean.


Let cake cool in pan on a wire rack for 15 minutes. Carefully and using the paper as a guide, remove cake from pan and transfer to the rack to cool completely.


The cake can be stored in an airtight container at room temperature for up to 4 days.


Serves 8-10

Monday, September 14, 2020

Chocolate yogurt cake for busy days

Bolo de iogurte e chocolate

The past few weeks have been quite busy and I haven’t had much time to bake or write on the blog – lots going on at work, and this never ending quarantine makes most of my days emotionally exhausting. 

I want, however, to share this recipe with you, for I am sure that sometimes a slice of cake and a cup of tea can make the day a little bit better: again, I have used the Epicurious yogurt cake recipe, but this time I turned it into a chocolate cake. Easy to make, moist, tender and delicious, this might become your go-to chocolate cake for busy days, just like it has become mine.

The apple yogurt cake continues to be my favorite version of the Epicurious recipe, but there are times when only chocolate will do, right? :)

Bolo de iogurte e chocolate

Chocolate yogurt cake

once again, adapted from the Epicurious yogurt cake


1 ¼ cups (175g) all-purpose flour

1/3 cup (30g) Dutch processed cocoa powder

2 teaspoons baking powder

½ teaspoon ground cinnamon

¼ teaspoon table salt

1 cup (200g) granulated sugar

¾ cup (180g) plain yogurt – I used sheep’s milk yogurt

½ cup (120ml) vegetable oil – I used canola

2 large eggs, room temperature

1 teaspoon vanilla extract


Preheat oven to 180C/350°F. Lightly brush a 6-cup capacity loaf pan with oil, line it with baking paper and then brush the paper as well.

In a medium bowl, whisk together the flour, cocoa, baking powder, cinnamon and salt. Set aside.

In a large bowl, whisk together sugar, yogurt, oil, eggs and vanilla until smooth. Fold in reserved dry ingredients – if batter is too lumpy, whisk for a few seconds – do not overmix or the cake will become tough.

Pour the batter into prepared pan and smooth the top. Bake for 50-55 minutes, or until a skewer or toothpick inserted into center of the cake comes out clean.

Let cake cool in pan on a wire rack for 15 minutes. Carefully and using the paper as a guide, remove cake from pan and transfer to the rack to cool completely.

The cake can be stored in an airtight container at room temperature for up to 3 days.


Serves 8


Monday, August 10, 2020

Anthill banana cake and something new in our house

Bolo formigueiro de banana

These are insane times we are living in – and in Brazil, for more reasons than the pandemic only – and many things are changed. However, I’ll tell you about something small, but important to me: my husband has discovered the joy of having a slice of cake in the middle of the afternoon. He was never fond of sweets and never tried my baked goods or desserts, but nowadays he asks me to bake a cake, or cookies, so he can take a break between lunch and dinner and enjoy something sweet with his espresso.

It might seem silly, but for me it was a very nice surprise, in these crazy days. 

Therefore, I have been baking once a week, a cake or sometimes cookies, and he looks at me with those Puss in Boots’ eyes asking if he can have something delicious with his coffee. :) My heart is filled with joy.

One of the cakes I baked recently was the one I bring you today, a banana cake with chocolate sprinkles as the Brazilian anthill cake. I had to adapt the recipe to yield a small cake since I had only 1 ripe banana at home. The cake turned out moist, tender and perfumed the entire apartment while it was in the oven. 

Bolo formigueiro de banana

Anthill banana cake

adapted from this recipe


1 large very ripe banana (150g/5oz weighed before peeling)

2 eggs, room temperature

65g light brown sugar

100ml vegetable oil – I used canola

1 teaspoon vanilla extract

185g all purpose flour

1 ¾ teaspoons baking poder

½ teaspoon ground cinnamon

pinch of salt

3 tablespoons chocolate sprinkles


Preheat the oven to 180°C/350°F. Lightly brush with vegetable oil a small loaf pan - 22x10cm, 4 ½ cups capacity – line it with baking paper and brush the paper as well.

In a medium bowl, mash the banana with a fork. Add the eggs, sugar, oil and vanilla and whisk well. Add the flour, baking powder, cinnamon and salt and fold with a spatula – do not overmix or the cake will turn out tough. Stir in the chocolate sprinkles. Pour into the prepared pan and smooth the top. Bake for about 40 minutes or until golden and risen and a skewer inserted in the center of the cake comes out clean.

Cool in the pan over a wire rack for 20 minutes, then carefully unmold using the paper as guide. Transfer to the rack and cool completely.

Serves 6-7 slices

Thursday, July 2, 2020

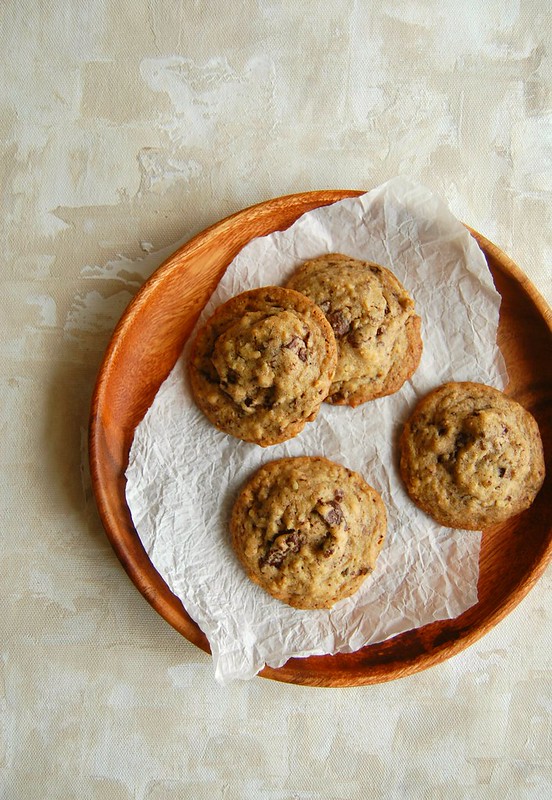
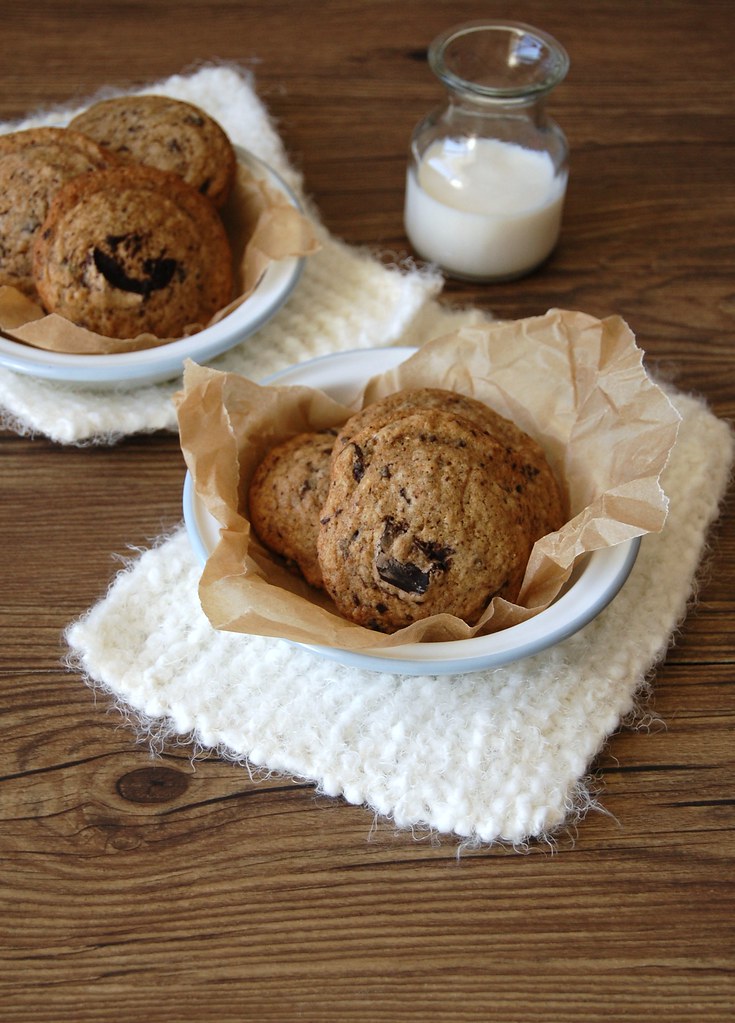
Chocolate chip cookies with oats

Cookies com pedaços de chocolate e aveia / Chocolate chip cookies with oats

I made these cookies last week and the inspiration was something very simple: while I was grabbing a can of chickpeas in the cupboard to make a soup, I saw the jar of oats right next to it, and thought that I hadn’t baked cookies in a very long time. Some more searching through the bags, jars and cans and I found some very good dark chocolate begging to be used.

It is a simple cookie but the bitterness of the chocolate really makes it. There is not a lot of oats in the recipe, but I do feel virtuous eating my cookies and thinking that they have a little bit of goodness in them, from the oats and from the chocolate. These days, isolated and feeling blue, thinking positive is one of the things I try to do the most.

Chocolate chip cookies with oats
slightly adapted from Donna Hay

1 ½ cups (210g) all purpose flour
½ cup (44g) rolled oats
½ teaspoon baking powder
¼ teaspoon table salt
¼ teaspoon ground cinnamon
2/3 cup (150g) unsalted butter, softened
½ cup (100g) granulated sugar
2/3 cup (116g) light brown sugar, packed
1 large egg, room temperature
2 teaspoons vanilla extract
200g dark chocolate, chopped – I used one with 70% cocoa solids

Preheat oven to 180°C (350°F). Line two large baking sheets with baking paper.
In a medium bowl, whisk together the flour, oats, baking powder, salt and cinnamon. Set aside.
Place the butter, sugars and vanilla in the bowl of an electric mixer and beat until light and creamy – scrape the sides of the bowl occasionally throughout the making of the recipe. Add the egg and beat until well combined. Add the dry ingredients and mix on low speed just until incorporated and a dough forms. Fold through the chocolate pieces.

Roll 2 leveled tablespoons of dough per cookie into balls and place onto prepared sheets, 5cm (2in) apart. Bake for about 14 minutes or until cookies are golden around the edges. Cool on the sheets for 5 minutes, then slide the paper with the cookies onto a wire rack to cool completely.

Makes about 28 cookies

Wednesday, May 6, 2020

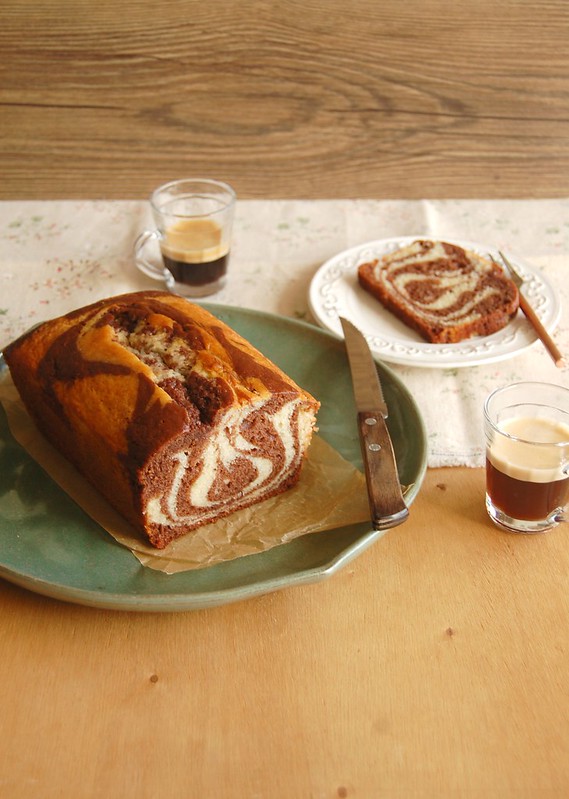
Yogurt marble cake

Bolo mármore de iogurte

Hello everyone – it makes me really happy that after all this time without posting here there are still people who read me. Thank you. <3


I haven’t baked much lately, for now I have no one to share the baked goods with – my husband does not like sweets and I don’t want to end up eating everything myself… But I felt like baking a cake these days and even Joao had two slices of this cake – he told me it paired perfectly with an espresso. Success! :)

I used sheep milk yogurt because of my lactose intolerance, but feel free to use regular yogurt instead, like the original recipe calls for. The cake turned out moist, tender and delicious.


Bolo mármore de iogurte

Yogurt marble cake
slightly adapted from Epicurious

1 ½ cups (210g) all-purpose flour
2 teaspoons baking powder
¼ teaspoon table salt
1 cup (200g) granulated sugar
¾ cup (180g) plain yogurt – I used sheep milk yogurt
½ cup (120ml) vegetable oil – I used canola
2 large eggs, room temperature
1 teaspoon vanilla extract
2 tablespoons unsweetened cocoa powder, sifted

Preheat oven to 180C/350°F. Lightly brush a 6-cup capacity loaf pan with oil, line it with baking paper and then brush the paper as well.
In a medium bowl, whisk together the flour, baking powder and salt. Set aside.
In a large bowl, whisk together the sugar, yogurt, oil, eggs and vanilla until smooth. Fold in reserved dry ingredients just to blend – if batter is too lumpy, whisk for a few seconds.
Pour half of the batter into another bowl and to this half add the cocoa powder and stir to combine. Pour both batters into the prepared pan, alternating the colors to get a nice marbled effect. With a small spatula or blunt knife, swirl the batters slightly. Smooth the top and bake for 50-55 minutes, or until a skewer or toothpick inserted into center of the cake comes out clean.
Let cake cool in pan on a wire rack for 15 minutes. Carefully and using the paper as a guide, remove cake from pan and transfer to the rack to cool completely.

The cake can be stored in an airtight container at room temperature for up to 3 days.

Serves 8

Wednesday, April 11, 2018

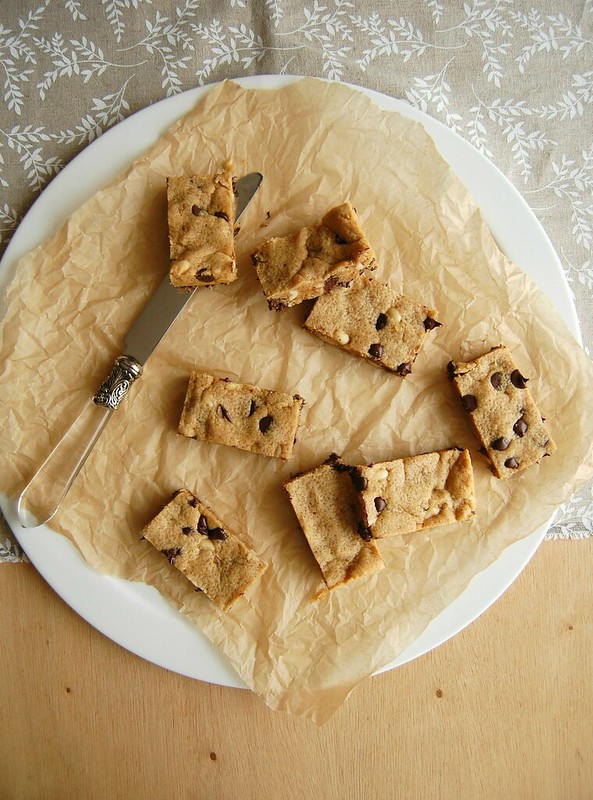
Peanut butter and chocolate chip bars

Peanut butter and chocolate chip bars / Barrinhas de manteiga de amendoim e chocolate

Lately I have been using peanut butter as a way of increasing my protein intake: I buy the natural type made with roasted peanuts only and add a spoonful to smoothies and such.

That reminded me of these bars I made ages ago, when I bought natural peanut butter for the first time. The jar seemed to last too long and I wanted to make something delicious with it. These bars are easy to put together and peanut and chocolate are a match made in heaven.

Peanut butter and chocolate chip bars
own recipe, inspired by several others

1 cup (300g) natural peanut butter
½ cup (100g) granulated sugar
1 ¼ cups (175g) icing sugar, sifted
¼ cup (56g) unsalted butter, room temperature
½ teaspoon baking soda
pinch of salt
1 large egg
1 teaspoon vanilla extract
¾ cup (125g) dark chocolate chips
½ cup (70g) toasted peanuts, roughly chopped

Preheat the oven to 180°C/350°F. Line a 20x30cm (8x12in) baking pan with foil and lightly butter it.

In a food processor, process the peanut butter, sugars, butter, baking soda, salt, egg and vanilla until creamy. Transfer to a large bowl and stir in the chocolate chips and peanuts. Press dough into the prepared pan and bake for about 20 minutes or until lightly browned around the edges (the center will still be soft).

Cool completely over a wire rack. Cut into bars.

Makes 24

Friday, March 23, 2018

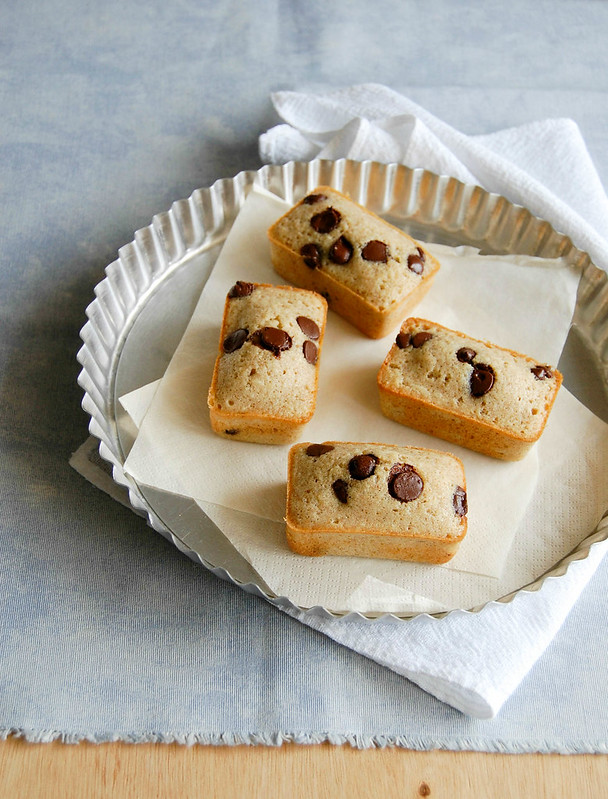
Rye chocolate chip financiers

Rye chocolate chip financiers / Financiers de centeio com gotas de chocolate

Financiers are one of my downfalls: petite, delicate, but full of flavor, they are a great way of using leftover egg whites. I have been trying to make them using olive oil instead of butter, but the texture was a bit off, so more tests are necessary.

The recipe I bring you today is from ages ago (when I could still eat butter) and it is delicious: the rye flour makes the financiers a little bit heavier on texture, yet flavorsome, and the flavor of the rye flour goes really well with chocolate.

Rye chocolate chip financiers
own recipe

85g almond meal
¾ xícara (105g) icing sugar, sifted
3 tablespoons (30g) all purpose flour, sifted
3 tablespoons (30g) fine rye flour, sifted
pinch of salt
5 large egg whites
85g unsalted butter, melted and cooled
1 teaspoon vanilla extract
½ cup (85g) dark chocolate chips

In a medium bowl, whisk together the almond meal, icing sugar, all purpose flour, rye flour and salt. Whisk in the egg whites. Whisk in the butter and vanilla until smooth, then fold in the chocolate chips. Cover with plastic wrap and refrigerate for 1 hour.

Preheat the oven to 200°C. Butter ten 100ml-capacity molds or mini muffin pans.
Divide the batter among the prepared pans and smooth the top. Divide the berries among the pans, placing them on top of the batter and pushing them slightly into the batter. Bake for about 15 minutes or until golden and risen – a skewer in the center should come out clean.
Cool in the pans over a wire rack for 5 minutes, then carefully unmold and transfer to the rack, cooling completely.

Financiers are tastier on the day they are made, however they can be kept in an airtight container at room temperature for up to 2 days

Makes 10

Friday, January 19, 2018

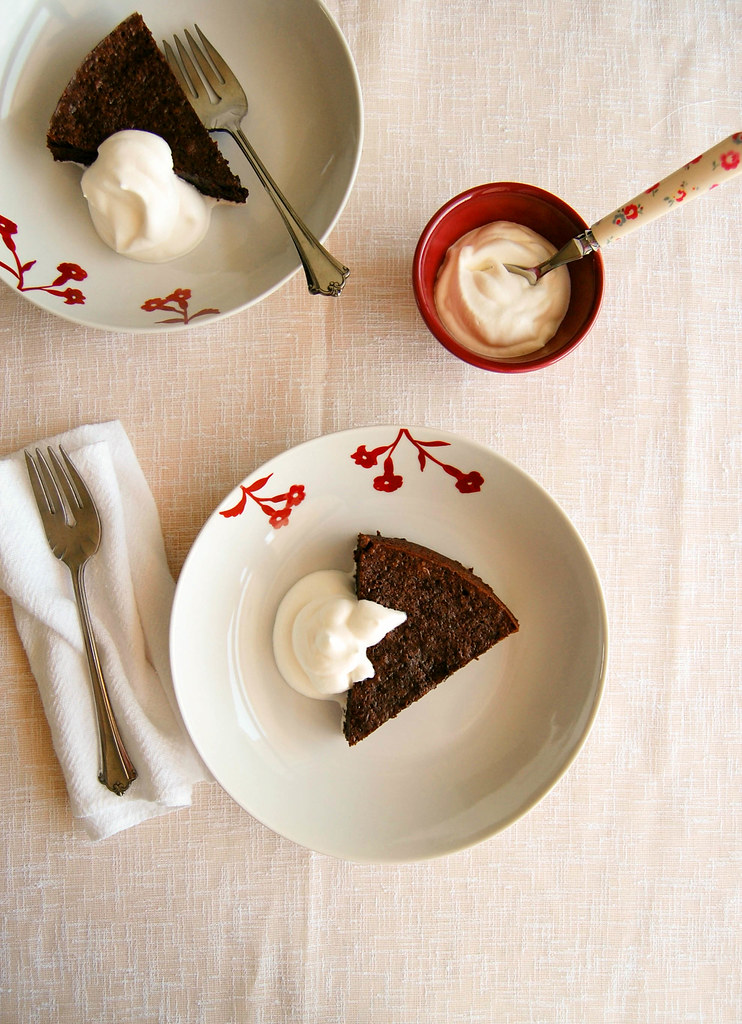
Flourless chocolate peanut cake

Chocolate peanut cake (gluten free) / Bolo de chocolate e amendoim (sem farinha de trigo)

This morning I joked on Instagram that this week feels like it lasted 45 days already – I am completely exhausted and very happy it is Friday. \0/ To celebrate it, I bring you a recipe that is perfect for the weekend: a moist, delicious and almost creamy chocolate cake, to be served with whipped cream or ice cream.

This cake is similar to this one, which is also gluten free, however it is more flavorsome and moist. The recipe is easy to make and calls for peanuts, a very Brazilian and cheap ingredient that goes really well with chocolate.

Flourless chocolate peanut cake
own recipe

200g dark chocolate, 70% cocoa solids, finely chopped
¾ cup (170g) unsalted butter, chopped
1 cup (200g) granulated sugar
4 large eggs
1 teaspoon vanilla extract
2/3 cup (65g) peanut meal – very finely ground peanuts
pinch of salt
whipped cream or ice cream, to serve

Preheat the oven to 180°C/350°F. Butter a 20cm (8in) round cake pan with a removable bottom, line the bottom with a circle of baking paper and butter it as well.

In a large bowl, put chocolate and butter and melt them over a saucepan of barely simmering water (do not let the bottom of the bowl touch the water). Remove from the heat and cool slightly.
Add the sugar and whisk well. Whisk in the eggs, one at a time. Whisk in the vanilla.
Using a rubber spatula, fold in the peanut meal and salt. Pour into the prepared pan and bake for about 35 minutes or until the top of the cake is opaque que a skewer inserted in the center of the cake comes out still moist. Cool completely over a wire rack. Carefully remove from the pan and serve with whipped cream or ice cream.

Serves 8-10

Wednesday, January 3, 2018

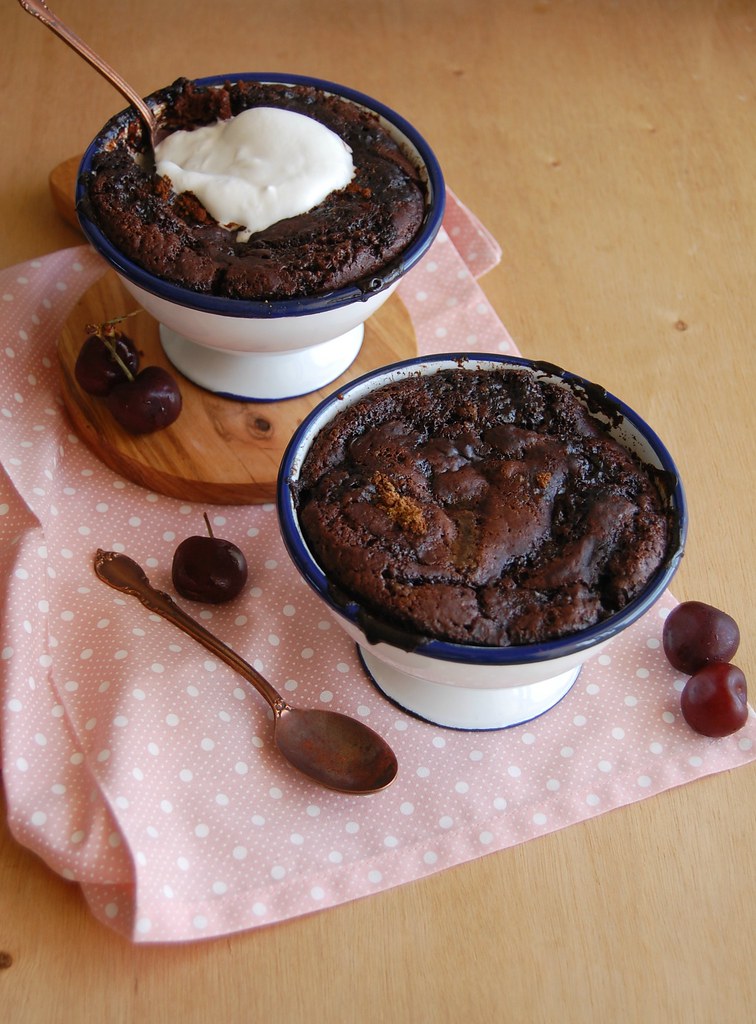
Black Forest self-saucing pudding to start 2018

Black Forest self-saucing pudding / Bolo-pudim Floresta Negra

Happy New Year, everyone! :)

I haven’t posted anything new on the blog for quite a while, even though I have several great recipes to share with you: my workload last December tripled and I was working like crazy in order to get things done before taking a few vacation days. I had also promised myself that on those vacation days I would not seat in front of a computer and I am proud to have kept the promise – I really needed the time off. Of course I am only human and used my mobile to post and check Instagram and Twitter, but that was kept to a minimum and it was a lot less than I had expected.

I got back to work and because we still have some amazing cherries around I thought I’d share this self-saucing pudding with you: it is delicious and easy to put together. Here in Brazil cherries are easier to be found in the summer, but if you are facing winter don’t worry: this recipe is also great using frozen raspberries instead of the cherries – it will no longer be a Black Forest pudding, but it will taste great all the same.

Black Forest self-saucing pudding
own recipe

Batter:
¾ cup + 2 tablespoons (125g) all purpose flour
3 tablespoons unsweetened cocoa powder
1/3 cup (67g) granulated sugar
1 ¼ teaspoons baking powder
pinch of table salt
¼ cup (56g) unsalted butter, melted and cooled
1/3 cup (80ml) whole milk, room temperature
1 large egg
1 teaspoon vanilla extract
2 teaspoons cognac – use kirsch if you have it at home; or omit alcohol all together
1 cup (150g) fresh cherries, pitted and halved
¼ cup (42g) dark chocolate chips or chunks – I used one with 53% cocoa solids

Topping:
½ cup (88g) light brown sugar, packed
1 ½ tablespoons unsweetened cocoa powder
½ cup (120ml) boiling water
whipped cream or vanilla ice cream, to serve

Preheat the oven to 180°C/350°F. Lightly butter four 1-cup (240ml) capacity heatproof ramekins.

Start with the batter: in a medium bowl, whisk together the flour, cocoa, granulated sugar, baking powder and salt. Set aside.
In another medium bowl, whisk together the butter, milk, egg, vanilla and cognac. Pour over the dry ingredients and stir just until a thick batter forms. Stir in the cherries and chocolate. Divide batter evenly among the ramekins.

Topping: in a small bowl, combine brown sugar and cocoa. Sprinkle over the batter. Place the ramekins in a baking sheet, then pour 2 tablespoons boiling water over each ramekin, gently pouring it over the topping. Bake for 20-25 minutes or until mixture rises and a crust forms. Serve immediately with whipped cream or vanilla ice cream.

Serves 4

Wednesday, October 11, 2017

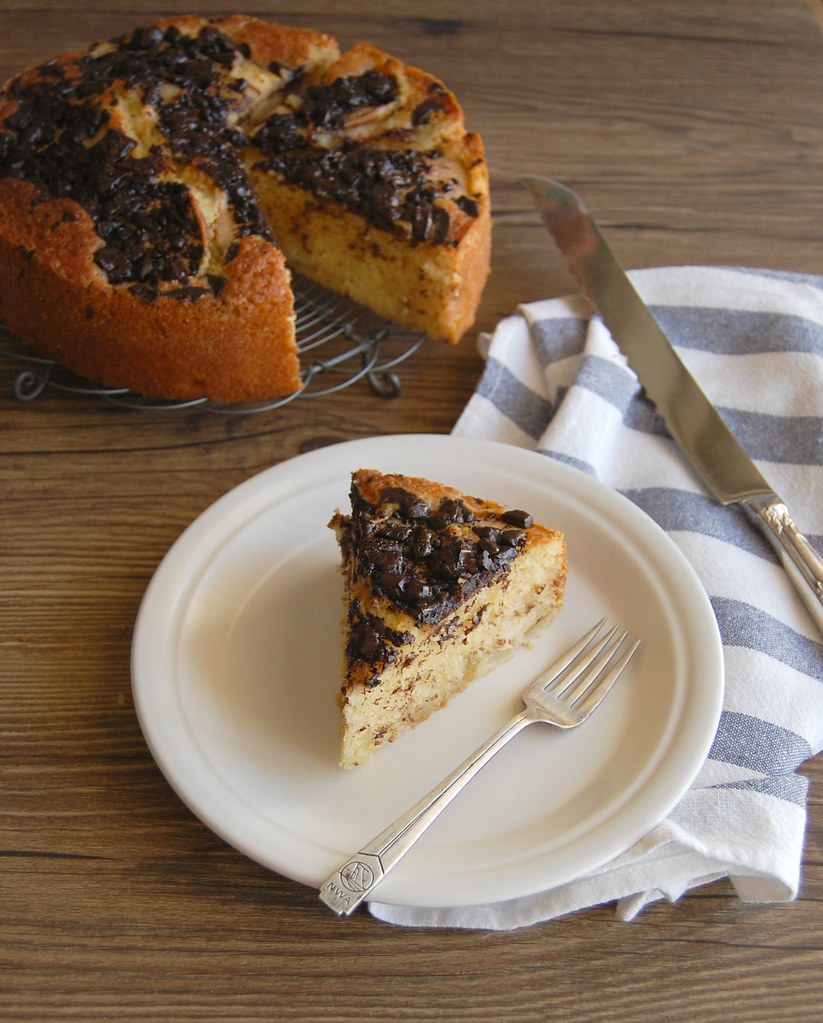
Pear, olive oil and chocolate cake

Pear, olive oil and chocolate cake / Bolo de pera, azeite de oliva e chocolate

I have been running around like a headless chicken lately, with loads of work and other things to solve. For that reason, I haven’t posted much and I am also behind with my personal emails.

I decided to stop by very quickly with an equally quick to make cake: put together in almost no time, it is a tender and delicious combination of fruit, olive oil and chocolate. Good for those weeks you have barely time to breathe but still want a slice of cake and a cup of coffee or tea at the end of a tough day.

Pear, olive oil and chocolate cake / Bolo de pera, azeite de oliva e chocolate

Pear, olive oil and chocolate cake
own recipe

2 large pears, about 200g (7oz.) each
lemon juice, for drizzling over the pears
1 ½ cups (210g) all purpose flour
2 teaspoons baking powder
½ teaspoon freshly grated nutmeg
1/8 teaspoon table salt
1 cup (200g) granulated sugar
2 large eggs, room temperature
½ cup (120ml) extra virgin olive oil
½ cup (130g) plain yogurt
1 teaspoon vanilla extract
50g dark chocolate, finely chopped – I used one with 70% cocoa solids

Preheat the oven to 180°C/350°F. Butter a tall 20cm (8in) round cake pan with a removable bottom or a springform pan*, line the bottom with a circle of baking paper and butter it as well.

Peel and core both pears, slice one thinly and dice the other. Drizzle with a little lemon juice to keep them from browning.
In a large bowl, whisk together the flour, baking powder, nutmeg, salt and sugar. In another bowl, whisk together the eggs, olive oil, yogurt and vanilla. Pour this mixture into the dry ingredients and mix until combined. Stir in the diced pear. Pour into prepared pan and smooth the top. Arrange the pear slices on top of the batter, then sprinkle evenly with the chocolate. Bake for about 50 minutes or until risen and golden and a skewer inserted in the center of the cake comes out clean. Cool completely in the pan over a wire rack.

* if your pan is not very tall, use a 9in (23cm) pan

Serves 6-8

Wednesday, September 6, 2017

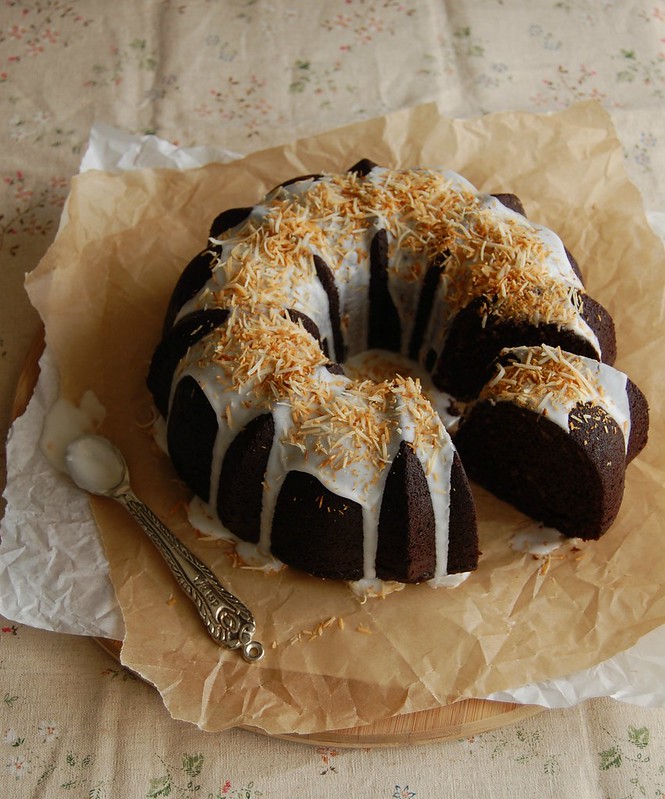
Banana and chocolate cake with coconut glaze for a lazy holiday

Banana and chocolate cake with coconut glaze / Bolo de banana e chocolate com glacê de coco

Tomorrow is a national holiday in Brazil and I really need some time off – the past few weeks have been intense workwise. For that reason, I bring you today a very short post, but with a delicious cake: the recipe is very straightforward too and can be done without any electric equipment – perfect for the lazy days ahead.

Banana and chocolate cake with coconut glaze
own recipe

Cake:
2 cups (280g) all purpose flour
¾ cup (67g) unsweetened cocoa powder (I used Dutch cocoa powder)
¾ teaspoon baking powder
1 ½ teaspoons baking soda
½ teaspoon ground cinnamon
½ teaspoon table salt
2 cups (400g) granulated sugar
3 large eggs
¾ cup (180ml) canola oil
½ cup (130g) plain yogurt
1 teaspoon vanilla extract
3 ripe bananas, mashed with a fork

Glaze:
1 cup (140) confectioners’ sugar, sifted
2 tablespoons coconut milk
¼ cup (25) toasted coconut, for sprinkling over the cake

Preheat the oven to 180°C/350°F. Butter a 12-cup capacity Bundt pan.
In a medium bowl, sift together the flour, cocoa, baking powder, baking soda, cinnamon and salt. Set aside.
In a large bowl, whisk together the sugar, eggs, oil, yogurt and vanilla until smooth. Mix in the bananas. Fold in the dry ingredients just until incorporated – do not overmix. Pour into the prepared pan and bake for about 50 minutes or until risen and a skewer inserted in the cake comes out clean. Cool in the pan over a wire rack for 20 minutes, then carefully unmold onto the rack and cool completely.

Glaze: place the sugar in a small bowl and gradually whisk in the coconut milk, mixing until you get a drizzable consistency – for a thicker glaze, use less milk. Pour over the cake and sprinkle with the toasted coconut.

Serves 10-12

Friday, September 1, 2017

Brown butter rye choc chip cookies - another great recipe with rye flour

Brown butter rye choc chip cookies / Cookies de manteiga queimada, centeio e chocolate

My confessed love for the fine rye flour has been resulting in several great recipes in the past months, and it makes me really happy that my dear and lovely reader Ellen from the U.S., together with several other readers of my Brazilian blog have been enjoying one of them: the soft rye bread I posted a while ago.

It is my favorite recipe made with rye – and it does taste exceptionally good paired with the sardine rillette, it is like they were made for each other. However, the bread has been closely followed by the cookies I bring you today: the combination of the nutty rye flavor with brown butter and dark chocolate is one the most delicious out there – trust me. ;)

Brown butter rye choc chip cookies
own recipe

½ cup (113g/1 stick) unsalted butter, diced
1 cup + 2 tablespoons (160g) all purpose flour
½ cup (70g) fine rye flour – the one I mentioned on this post
¾ teaspoon baking soda
1/8 teaspoon table salt
¼ cup (50g) granulated sugar
¾ cup (131g) light brown sugar, packed
2 large eggs
1 teaspoon vanilla extract
150g dark chocolate, coarsely chopped or in chips – I used one with 70% cocoa solids

Start by making the brown butter: place the butter in a small saucepan (avoid using dark nonstick since that way you will not be able to see the color of the butter clearly). Cook over medium heat until butter is golden and smells nutty, swirling the saucepan around a few times – butter can burn very quickly, to keep an eye on it. Remove from the heat and transfer to a heatproof bowl to cool completely.

Now, the cookies: preheat the oven to 150°C/350°F. Line two large baking sheets with baking paper.

In a medium bowl, whisk together the all purpose flour, rye flour, baking soda and salt. Set aside. Place brown butter and sugars in the bowl of an electric mixer. Beat until creamy and light in color – scrape the sides of the bowl occasionally throughout the recipe making. Beat in the eggs, one at a time, beating well after each addition. Beat in the vanilla. On low speed, gradually add the dry ingredients and mix only until a dough forms – do not overmix. Stir in the chocolate pieces. If day is too hot, refrigerate dough for 30 minutes before baking.

Drop 2 leveled tablespoons of dough per cookie onto the prepared pans, 5cm (2in) apart. Bake the cookies for 12-14 minutes, or until they’re golden-brown around the edges. Cool in the pans over a wire rack for 5 minutes, then slide the papers with the cookies onto the rack and cool completely.
Store the cookies in an airtight container at room temperature for up to 3 days.

Makes about 23

Wednesday, August 23, 2017

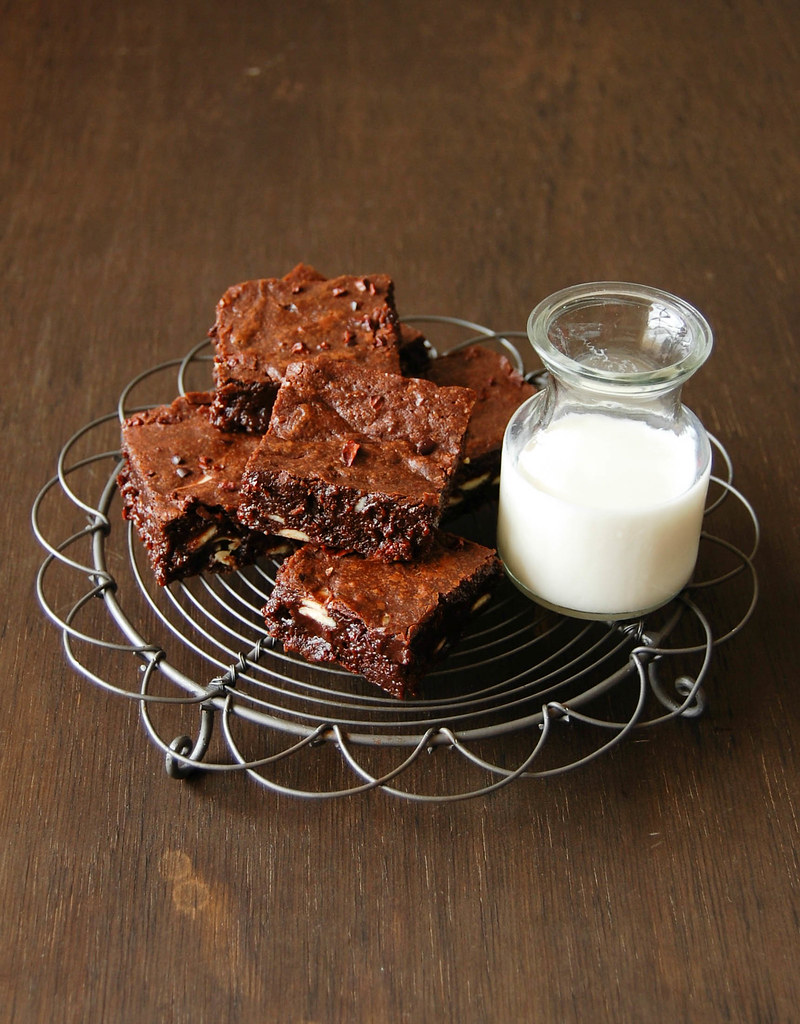
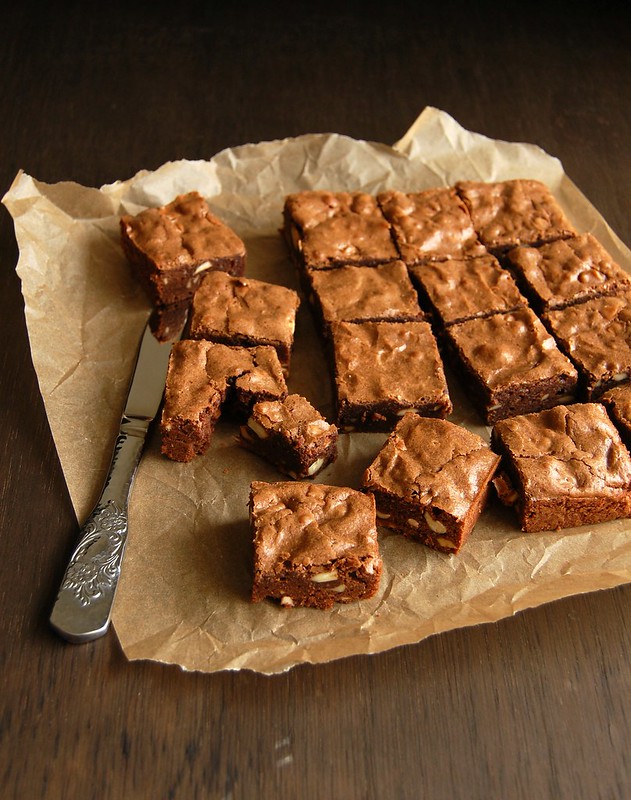
Brownies with white chocolate chips and cocoa nibs

Brownies com chocolate branco e nibs de cacau / Brownies with white chocolate chips and cocoa nibs

One can tell that I am crazy for brownies by the amount of brownie recipes on this blog, however in my defense I have to say that I do not bake them for my own pleasure only: every time I want to make someone’s day better I give brownies as gifts (some of my friends already know that very well). :)

I had a small package of cocoa nibs at home and wanted to use them in a nice recipe – since they are on the bitter side, I thought that pairing them with the sweetness of white chocolate would work well - the creamy, gooey brownies are the perfectly vessel for that flavor encounter, and I added a touch of dark cocoa powder to the batter for extra richness.

Brownies with white chocolate chips and cocoa nibs
own recipe

¾ cup (170g) unsalted butter, softened and chopped
170g dark chocolate, finely chopped – I used one with 53% cocoa solids
1 cup (200g) granulated sugar
1 teaspoon vanilla extract
3 large eggs, room temperature
¾ cup (105g) all purpose flour
1/3 cup (30g) unsweetened cocoa powder, sifted
¼ teaspoon baking powder
1/8 teaspoon table salt
100g white chocolate chips
1/3 cup (40g) cocoa nibs

Preheat the oven to 180°C/350°F. Butter a 20cm (8in) square pan, line it with foil leaving an overhang on two opposite sides, and butter the foil as well.

In a large bowl set over a saucepan of simmering water (do not let the bottom of the bowl touch the water) combine butter and chocolate and stir occasionally until both are melted. Remove from the heat and cool slightly. Whisk in sugar and vanilla. Whisk in the eggs, one at a time, until smooth. Stir in the flour, cocoa, baking powder and salt, mixing just until incorporated. Stir in the white chocolate chips and cocoa nibs.

Spread batter into prepared pan and smooth the top. Bake for about 20 minutes or until a toothpick inserted in the center of the brownies comes out with moist crumbs. Cool completely in the pan over a wire rack. Cut into squares to serve.

Makes 16

Saturday, May 27, 2017

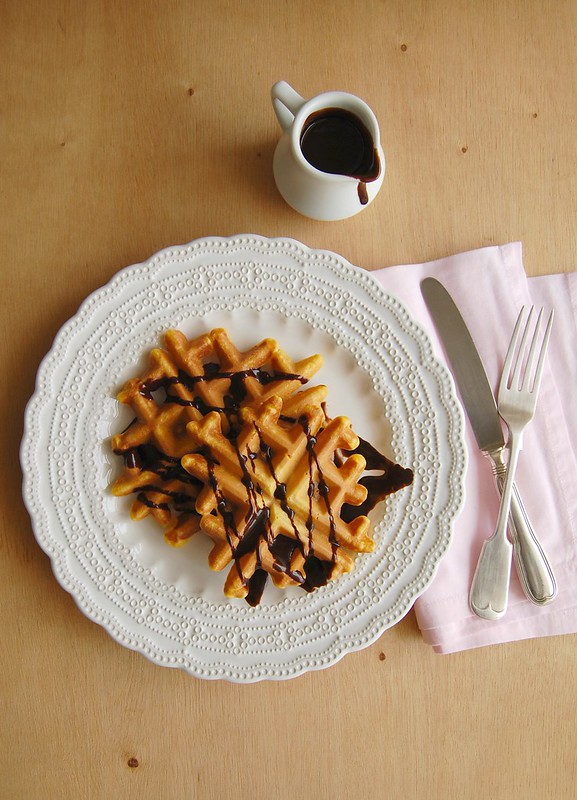
Brazilian carrot cake waffles with chocolate glaze

Brazilian carrot cake waffles with chocolate glaze / Waffles de cenoura com calda de chocolate

One of the childhood memories I most cherish is the image of my mom in the kitchen baking cakes – she was a hell of a cook but was also famous for her sweet treats.

The two cakes I remember the most are the chocolate cake and the carrot cake – the Brazilian carrot cake, with chocolate glaze: oh, so delicious (there is a recipe here for those of you not familiar with it).

One day I got myself thinking about mom’s carrot cake, but I would not have time to bake it. Since I wanted instant gratification I decided to tweak the recipe ever so slightly and turned the cake into waffles – they were really good!

I have been making these sometimes ever since, for they are super quick and fuss free to make – instant gratification with a touch of nostalgia.

Brazilian carrot cake waffles with chocolate glaze
own creation

Waffles:
2 small carrots (200g/7oz), peeled and chopped
2 large eggs
½ cup (100g) granulated sugar
1/3 cup (80ml) canola oil
1 cup (140g) all purpose flour
½ teaspoon baking powder
pinch of salt

Chocolate glaze:
1/3 cup (30g) unsweetened cocoa powder, sifted
¼ cup (50g) granulated sugar
2 tablespoons (28g) unsalted butter, room temperature
¼ cup (60ml) whole milk, room temperature

Waffles: place the carrots, eggs and oil in a blender and blitz until smooth. Transfer to a large bowl and whisk in the flour, baking powder and salt until a smooth batter forms.

Heat a waffle iron until very hot; lightly coat with nonstick spray – my waffle maker is nonstick, so I don’t coat it.
Working in batches, cook waffles until golden and cooked through. Transfer to a wire rack set inside a baking sheet and keep warm in oven until ready to serve.
Serve waffles with the chocolate glaze.

Chocolate glaze: place all the ingredients in a small saucepan and cook over high heat, whisking constantly, until mixture starts to boil. Cook, whisking constantly, for 2-3 minutes or until slightly thickened. Remove from the heat and set aside for 5 minutes – glaze will thicken a bit more as it cools. Serve over waffles.

Serves about 6

Thursday, May 25, 2017

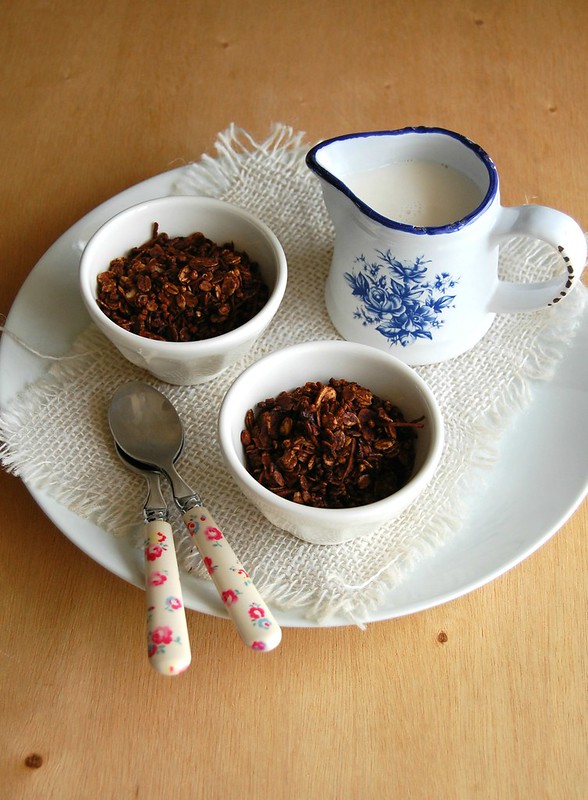
Chocolate granola to make breakfast even more delicious

Chocolate granola / Granola de chocolate

I know that for those of us who like to cook making things from scratch is actually fun and does not feel like a burden, but even for those who are not very fond of cooking I would recommend making their own granola – the difference in quality is huge, you have complete control over the ingredients (especially sugar) and can tweak flavors as you wish, creating delicious types of granola.

I have been making this chocolate granola for a couple of years now for it is so insanely delicious and very easy to put together – it is my favorite granola, hands down, the tastiest I have ever tried. The only real challenge is to NOT eat the entire batch while it cools down – be warned. :)

Chocolate granola
own recipe, inspired for several others I saw online

400g jumbo oats
100g sweetened coconut flakes
50g flaked hazelnuts or almonds
¼ teaspoon ground cinnamon
1/8 teaspoon table salt
½ cup (45g) unsweetened cocoa powder, sifted
1/3 cup (80ml) extra virgin olive oil
3 tablespoons light brown sugar, packed
1/3 cup (100g) agave or honey – I prefer agave here because its flavor is more subtle, letting the chocolate flavor shine
½ teaspoon vanilla extract
50g dark chocolate (70% cocoa solids), finely chopped

Preheat the oven to 180°C/350°F. Line a large baking sheet with foil.

In a large bowl, mix together the oats, coconut, nuts, cinnamon and salt. Set aside.
In a small saucepan, combine cocoa, oil, sugar and agave (or honey) and whisk over medium heat until melted and sugar is dissolved. Remove from the heat and whisk in the vanilla.

Pour over dry ingredients and stir well to coat. Spread mixture over foil and bake for 15 minutes. Stir the granola around and bake for another 15 minutes – the granola will still be soft and will get crunchy once cooled. Remove from the oven and sprinkle with the chopped chocolate. Wait 1 minute for it to melt, then mix everything together. Let cool completely. Store in an airtight container at room temperature for up to 2 weeks.

Serves 8-10

Thursday, April 13, 2017

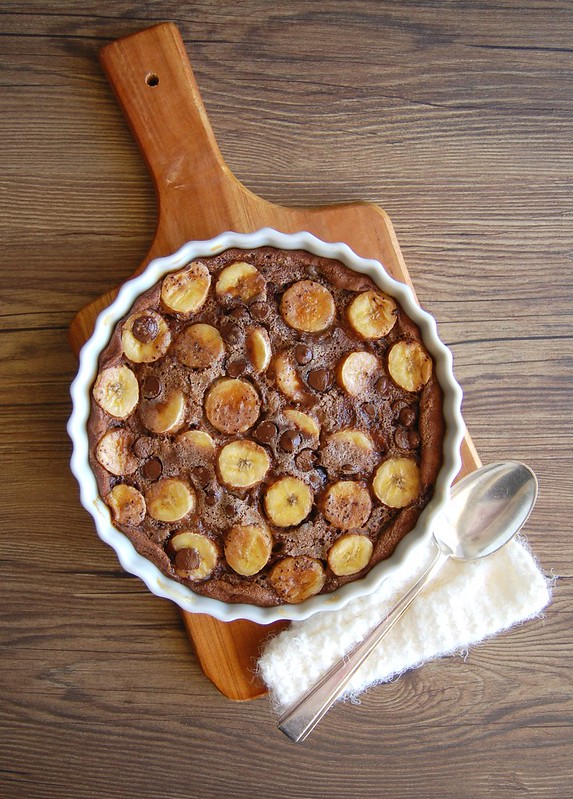
Chocolate and banana clafoutis to celebrate Easter

Banana and chocolate clafoutis / Clafoutis de banana e chocolate

We are a couple of days away from Easter and to celebrate it I have brought you a delicious dessert I created months ago – I love, love, love clafloutis and I wanted to add a tropical twist to this traditional French dessert. Passion fruit and white chocolate came to my mind – it is a beautiful flavor combination – but since the pulp is too moist it would not work. So I switched to bananas and changed the white chocolate for a dark one so the combination would not be too sweet.

It was absolutely delicious! I have made this recipe several times since then for it is so simple to put together and the result is so wonderful.

I wish you all a beautiful Easter break! xx

Chocolate and banana clafoutis
own creation

2 large eggs
¼ cup (50g) granulated sugar
1 teaspoon vanilla extract
2 tablespoons all purpose flour
1 tablespoon unsweetened cocoa poder, sifted
pinch of ground cinnamon
pinch of salt
¼ cup (60ml) whole milk, room temperature
¼ cup (60ml) heavy cream
2 bananas (about 250g in total), sliced
¼ cup (42g) dark chocolate chips – the one I used has 53% cocoa solids
1 colher (sopa) demerara sugar

Preheat the oven to 180°C. Butter a 1-liter capacity heatproof baking dish – the one on the photo is 20cm wide and 3.5cm deep.

In a medium bowl, whisk the eggs, granulated sugar and vanilla until smooth. Add the flour, cocoa, cinnamon and salt and whisk until smooth again. Whisk in milk and heavy cream. Pour into the prepared baking dish. Spread the banana slices and the chocolate chips over the mixture. Sprinkle with the demerara sugar.

Bake for 25-30 minutes or until puffed, golden and a nice crust forms from the demerara sugar. Serve immediately.

Serves 4-5

Thursday, March 30, 2017

Chocolate cashew brownies for another budget-friendly Easter

Chocolate cashew brownies / Brownies com castanha de caju

Close to paying bills and getting up early in the morning to go to work nothing makes me feel more like an adult than realizing that time really flies – saying it out loud every so often basically turns me into my grandmother. :D

Days ago I thought about what I would make to celebrate Easter this year and I remembered these chocolate cookies – when I searched them on the blog I was surprised to find out that the post is from two years ago!
I read the post and well, I continue refusing to buy expensive chocolate Easter eggs – so on top of getting old I am still cheap. :D

Brownies are a hit with everyone I know, not to mention how easy to make they are: out of a 20cm square pan you get 16 brownies and wrapped nicely you easily have 3-4 gifts covered – I have used cashew nuts for I wanted the brownies to have a Brazilian touch, but feel free to replace them with any other nut you fancy.

Chocolate cashew brownies
own creation

½ cup (113g/1 stick) unsalted butter, softened and chopped
100g dark chocolate, finely chopped – I used one with 53% cocoa solids
¾ cup (130g) light brown sugar, packed
1/3 cup (67g) granulated sugar
2 large eggs, room temperature
1 teaspoon vanilla extract
1 cup (140g) all purpose flour
1/8 teaspoon table salt
¾ cup (105g) unsalted cashew nuts, toasted and cooled

Preheat the oven to 180°C/350°F. Butter a 20cm (8in) square pan, line it with foil leaving an overhang on two opposite sides, and butter the foil as well.

In a large saucepan, combine butter and chocolate and cook over low heat, stirring, until both are melted. Remove from the heat and cool slightly. Whisk in both sugars. Whisk in the eggs, one at a time, until smooth. Stir in the vanilla, flour and salt, mixing just until incorporated. Stir in the nuts.
Spread batter into prepared pan and smooth the top. Bake for about 20 minutes or until a toothpick inserted in the center of the brownies comes out with moist crumbs. Cool completely in the pan over a wire rack. Cut into squares to serve.

Makes 16

Friday, March 3, 2017

One bowl chocolate cake for my nephew

One bowl chocolate cake / Bolo de chocolate de uma tigela só, ou "Bolo Pinguinho"

Up until two years ago my apartment was a home of two adults with no kids: glass objects here and there, pointy drawer handles… Now, there are safety nets on the balcony and on the windows and the glass objects get moved to a very high shelter every time our favorite visitor – my baby nephew – is around.

My husband and I went from not knowing we had any cartoon channels on the cable TV to knowing them by heart. :)

I came to learn that there is a cartoon called Peppa Pig and one day, after my nephew saw a chocolate cake on one of the episodes he immediately asked for one, or “boo cuatche” as he says. :) I had no butter at home, so a quick search brought me this recipe. It is insanely easy to put together and tastes absolutely amazing – and even after two days the texture was still amazing, kept in an airtight container at room temperature.

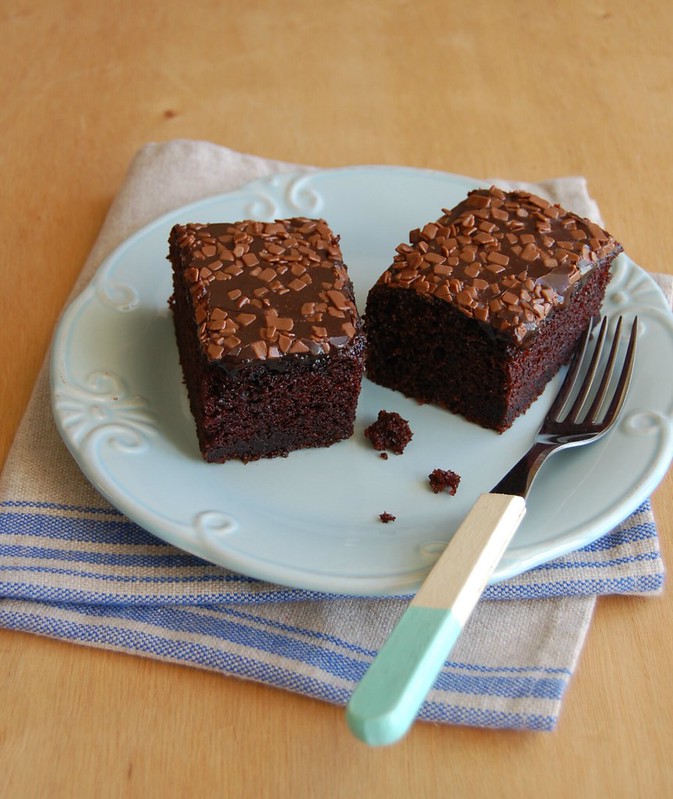
From that day on I have made this cake several times – I thought it was about time I shared it with you. This recipe is a keeper and has become a family’s favorite. For the one on the photo I used some chocolate sprinkles I had left from making brigadeiros for my nephew's birthday party.

One bowl chocolate cake
cake slightly adapted from here, the icing I don’t remember where I got it from

Cake:
2 cups (280g) all-purpose flour
½ cup (45g) unsweetened Dutch process cocoa powder
2 teaspoons baking soda
1 teaspoon baking powder
½ teaspoon table salt
½ teaspoon ground cinnamon
1 ¾ cups (350g) granulated sugar
2 large eggs, lightly beaten with a fork
1 cup (240ml) canola oil
1 cup (240ml) buttermilk*
2 teaspoons instant coffee granules
1 cup (240ml) hot water

Icing:
3 tablespoons (42g) unsalted butter, softened
3 tablespoons heavy cream
1 ½ tablespoons unsweetened Dutch process cocoa, sifted
1 cup (140g) icing sugar, sifted

Cake: preheat oven to 180°C/350°F. Butter or oil a 20x30cm (8x12in) deep baking pan (if your 8x12in pan is not 5cm deep, use a 13x9in pan).

In a large bowl, sift together the flour, cocoa, baking soda, baking powder, salt and cinnamon. Stir in sugar. Stir in the eggs, oil and buttermilk. Dissolve the coffee into the hot water and stir into the batter, mixing until combined.
Transfer batter to prepared pan. Bake 35-40 minutes or until a toothpick inserted in center comes out clean. When cake has cooled for 20 minutes, make the icing: in a small saucepan, place butter, cream and cocoa and stir over medium heat until melted. When it starts to boil, turn off the heat and whisk in the icing sugar. Spread over warm cake and let cool completely in the pan over a wire rack.

*homemade buttermilk: to make 1 cup buttermilk place 1 tablespoon lemon juice in a 240ml-capacity measuring cup and complete with whole milk (room temperature). Wait 10 minutes for it to thicken, then use the whole mixture in your recipe

Serves 16-20


Wednesday, February 8, 2017

Chocolate chip, crystallized peel and cranberry cookies + a hug as a gift

Chocolate, crystallized peel and cranberry cookies / Cookies com gotas de chocolate, laranja cristalizada e cranberries

As the year started and I got back from my week off, I started working on things around the house, maybe trying to clear my mind as I cleared the cupboards and the closet, I don’t know. :)

As I checked the ingredients in my cupboard, I found a bit of crystallized orange peel left from my holiday baking and right next to it I saw a jar of dried cranberries – I immediately thought of putting them together in cookies, and added a bit of dark chocolate for balance. The cookies tasted great and I turned them into a gift for a colleague who is going through hard times now – I hope she felt a bit better with the cookies and the big hug I gave her then.

Chocolate chip, crystallized peel and cranberry cookies
slightly adapted from BBC Good Food

225g all purpose flour
½ teaspoon baking soda
¼ teaspoon ground cinnamon
pinch of salt
150g unsalted butter, room temperature
80g light brown sugar
80g demerara sugar
1 teaspoon vanilla extract
1 large egg
120g dark chocolate chip or chunks
50g crystallized orange peel, chopped
100g dried cranberries

Preheat the oven to 180°C/350°F. Line two large baking sheets with baking paper.

In a medium bowl, whisk together flour, baking soda, cinnamon and salt. Set aside.
In a large bowl, using an electric mixer, beat butter and sugars together until creamy and light. Beat in the vanilla extract and egg. On slow speed, beat in the dry ingredients and mix only until incorporate. Stir in the chocolate, crystallized orange peel and cranberries.

Drop 2 leveled tablespoons of dough per cookie onto the prepared pans, 5cm (2in) apart. Bake the cookies for about 12 minutes, or until they’re golden-brown around the edges. Cool in the pans over a wire rack for 5 minutes, then slide the papers with the cookies onto the rack and cool completely.
Store the cookies in an airtight container at room temperature for up to 3 days.

Makes about 25

Related Posts with Thumbnails