Showing posts with label cinnamon. Show all posts

Wednesday, January 29, 2025

Banana and dulce de leche pots: in the oven or in the Air Fryer

Potinhos de banana e doce de leite


If you have been around here long enough you know that I love baking, and I love baking with fruit: it makes me happy to transform less than perfect apples, pears, peaches and plums into cakes, muffins, galettes. Sometimes I look forward to the weekend so I can make a new recipe with fruit, but then I end up eating them all before the Saturday begins. 😊

Bananas are such a favorite of mine, but living in a tropical country can be very tricky to keep them from becoming ripe too quickly: it has been really hot here since the beginning of the year and my baking list just gets larger and larger as I postpone making them to avoid turning the oven on (it is already hard enough to use the stove).

These pots are a wonderful way of using ripe bananas, especially when you don’t have enough of them to make a large cake: only one large banana is required for this recipe. I have made this recipes several times in the past months and it works very well both using a regular oven and the Air Fryer: the only slightly difference is that the tops of the pots get more browned when using the Air Fryer.


Banana and dulce de leche pots

own recipe


¼ cup (35g) all-purpose flour

1/3 cup (33g) cashew nut flour (replace with almond flour if you like)

¼ teaspoon ground cinnamon

½ teaspoon baking powder

pinch of salt

1 large, very ripe banana (100g weighed with the peel)

1 large egg, room temp

3 tablespoons neutral vegetable oil

2 tablespoons granulated sugar

1 teaspoon vanilla extract

4 tablespoons dulce de leche


Preheat the oven to 200°C (400°F) or the Air Fryer to 180° (350°F). Brush 4 heatproof 1-cup capacity ramekins with oil. Set aside.

In a small bowl, whisk together the all-purpose flour, cashew nut flour, cinnamon, baking powder and salt. In another medium bowl, whisk well together the banana, sugar, oil, egg and vanilla. Stir in the dry ingredients – do not overmix.

Pour 1 heaping tablespoon of batter into each ramekin, then top the center of the batter with 1 tablespoon of dulce de leche. Divide the remaining batter evenly onto the ramekins, topping the dulce de leche.

Oven: transfer the ramekins to a medium baking sheet, then bake for about 15 minutes or until golden brown and a skewer inserted in the center comes out clean.

Air Fryer: transfer the ramekins to the Air Fryer, carefully not to get burned, and bake for 8-10 minutes or until golden brown (do the same test with the skewer).

Serve warm, with ice cream, whipped cream or plan yogurt if you like.


Serves 4

Tuesday, May 4, 2021

Cocoa waffles with caramelized bananas

Waffles de cacau com bananas caramelizadas

Sometimes I think about how many times we change our minds throughout different phases of life, ages, etc. I always say that I don’t get a tattoo because I am not able to like something forever – I would probably regret the tattoo right after getting inked.

When I was younger I thought that breakfast in bed was oh, so cool: the romcoms I watched as a teenager gave me the impression that having breakfast in bed was truly romantic. Now, at the age of 42, I don’t want to eat anything in bed – dirty sheets, crumbs prickling me at night? Thanks, but no thanks. :)

So I would rather have my breakfast on the table, and for the weekend, when I have more time, waffles go really well: I love this recipe for I believe chocolate and bananas are a match made in heaven. And of course you can serve these waffles as dessert, too.


Cocoa waffles with caramelized bananas

own recipe


Waffles:

1 cup (140g) all purpose flour

3 tablespoons unsweetened cocoa powder

½ teaspoon baking powder

¼ teaspoon baking soda

pinch of table salt

3 tablespoons granulated sugar

¼ cup (56g) unsalted butter, melted and cooled – for crispier waffles, replace butter with olive oil or canola oil

1 cup (240ml) buttermilk

1 teaspoon vanilla extract


Caramelized bananas:

2 ½ tablespoons - 35g – unsalted butter

1 ½ tablespoons granulated sugar

¼ teaspoon ground cinnamon

4 medium bananas, sliced in coins

1 ½ tablespoons whisky, Marsala, rum or water (if you don’t want to use booze)


In a large bowl, sift the flour, cocoa, baking powder, baking soda and salt. Set aside.

In a medium bowl, whisk together the sugar, butter, buttermilk and vanilla. Pour over the dry ingredients and fold until incorporated – batter will be sort of lumpy, that is OK.

Heat a waffle iron. Add about 1/3 cup of batter per waffle (adjust the amount of batter depending on the size of your machine), then cook following the manufacturer's instructions, until the waffles are golden brown.

While the waffles cook, prepare the bananas: melt butter in a large nonstick frying pan over high heat. Add the sugar and the cinnamon and mix with a spatula until sugar starts to melt. Add the bananas and cook them ever so slightly on both sides until golden. Add the booze (if using) carefully not to get burned. Mix to dissolve the caramel in the frying pan and cook for another minute. Remove from the heat and serve immediately with the waffles.

Serves 4

Tuesday, April 20, 2021

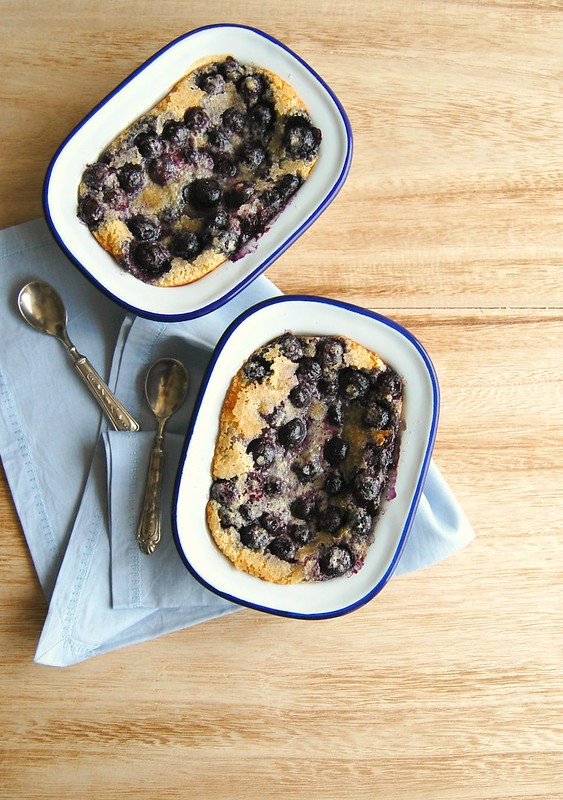
Blueberry clafoutis

Clafoutis de mirtilo


On a blueberry state of mind after themuffins I posted last week, I bring you a delicious and simple to make clafoutis with these wonderful berries: if you are on the bottom half of the globe like I am, the temperature is perfect for warm desserts as this one. 

I am a sucker for clafoutis, both sweet and savory, for I believe it is such a versatile recipe that can be tailored to whatever you have at hand. A handful of ingredients, most of them staples of every kitchen, plus fruits or vegetables to boot – sounds perfect to me!

I love blueberries and cinnamon together, I think they are a perfect pair, but this clafoutis is also delicious with cardamom instead – freshly ground is best.


Blueberry clafoutis

own recipe


2 large eggs, room temperature

1/3 cup (66g) granulated sugar

1 teaspoon vanilla extract

3 tablespoons all purpose flour

pinch of salt

pinch of ground cinnamon

¼ cup (60ml) whole milk, room temperature

¼ cup (60ml) heavy cream

¾ cup (100g) blueberries, fresh or frozen (unthawed)

1 tablespoon demerara sugar, for sprinkling


Preheat the oven to 180°C/350°F. Butter two 1-cup (240ml) capacity ovenproof shallow dishes.

In a medium bowl, whisk together the eggs and granulated sugar until creamy and pale, like eggnog. Whisk in the vanilla. With a rubber spatula, gently fold in the flour, salt and cinnamon, until mixture is smooth. Fold in mil and cream. Divide mixture between the prepared dishes and sprinkle with the blueberries. Sprinkle with the demerara sugar.

Bake for about 25 minutes, or until puffed and golden. Serve immediately.


Serves 2

Friday, February 26, 2021

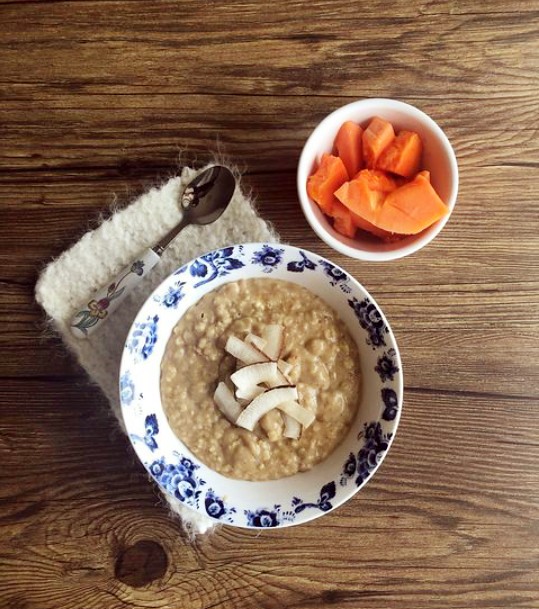
Oatmeal porridge - comfort food for troubled times

Mingau de aveia


I have a small notebook in which I write down food ideas I want to test and also the recipes I make at home, so I can then post them here on the blog. The poor notebook has been so forgotten lately it is almost getting dusty, for I haven’t made anything new, but I keep it on the coffee table, with my iPad and my cell phone charger, hoping that maybe, sometime, I’ll look at it and feel like testing new recipes again.

This is how things are going here, some days seem slower and/or longer than others, sometimes I feel a little bit more energy, while other times I have less disposition, but everyday seems like the previous one, very “Groundhog Day” indeed. At least workwise things are truly great, working with a new boss since September 2020, a wonderful woman who is beautiful both on the inside and out, and that makes me eager to face this never-ending quarantine.

I want vaccines, but there aren’t hardly any, I want a better government for my country, which is not possible right now. I want to get up in the morning without feeling I am in an episode of “The Handmaid’s Tale” – not possible now either.

As far as food goes, things are a bit boring around here: very basic recipes, preferably quick dishes that do not result in a sink full of dishes to do. Lots of pasta and salads

Sometimes at night I don’t feel like eating, even when I exercise, which generally makes me hungry. To avoid going to bed on an empty stomach, I make myself some porridge: quick, easy and so comforting – it is like being hugged on the inside. I top it with chia seeds, coconut chips or cashew nuts and serve it with some fruit on the side. It is not a traditional dinner, but it comforts me and makes me feel fed and happy.


Oatmeal porridge

own recipe


¼ cup (25g) rolled oats

½ cup (120ml) milk or plant-based milk – I like to use cashew nut milk, it is so creamy!

¼ cup (60ml) cold water

pinch of salt

sugar, to taste – you can replace it with honey or agave

pinch of ground cinnamon, or 1 teaspoon unsweetened cocoa powder


Place all the ingredients in a small saucepan and cook over medium heat, stirring a few times to dissolve the sugar. When it starts to boil, reduce the heat and stir constantly until mixture thickens. Cook for 2-3 minutes, depending on how thick you want the porridge.

Transfer to a bowl and serve.

Serves 1


Monday, September 14, 2020

Chocolate yogurt cake for busy days

Bolo de iogurte e chocolate

The past few weeks have been quite busy and I haven’t had much time to bake or write on the blog – lots going on at work, and this never ending quarantine makes most of my days emotionally exhausting. 

I want, however, to share this recipe with you, for I am sure that sometimes a slice of cake and a cup of tea can make the day a little bit better: again, I have used the Epicurious yogurt cake recipe, but this time I turned it into a chocolate cake. Easy to make, moist, tender and delicious, this might become your go-to chocolate cake for busy days, just like it has become mine.

The apple yogurt cake continues to be my favorite version of the Epicurious recipe, but there are times when only chocolate will do, right? :)

Bolo de iogurte e chocolate

Chocolate yogurt cake

once again, adapted from the Epicurious yogurt cake


1 ¼ cups (175g) all-purpose flour

1/3 cup (30g) Dutch processed cocoa powder

2 teaspoons baking powder

½ teaspoon ground cinnamon

¼ teaspoon table salt

1 cup (200g) granulated sugar

¾ cup (180g) plain yogurt – I used sheep’s milk yogurt

½ cup (120ml) vegetable oil – I used canola

2 large eggs, room temperature

1 teaspoon vanilla extract


Preheat oven to 180C/350°F. Lightly brush a 6-cup capacity loaf pan with oil, line it with baking paper and then brush the paper as well.

In a medium bowl, whisk together the flour, cocoa, baking powder, cinnamon and salt. Set aside.

In a large bowl, whisk together sugar, yogurt, oil, eggs and vanilla until smooth. Fold in reserved dry ingredients – if batter is too lumpy, whisk for a few seconds – do not overmix or the cake will become tough.

Pour the batter into prepared pan and smooth the top. Bake for 50-55 minutes, or until a skewer or toothpick inserted into center of the cake comes out clean.

Let cake cool in pan on a wire rack for 15 minutes. Carefully and using the paper as a guide, remove cake from pan and transfer to the rack to cool completely.

The cake can be stored in an airtight container at room temperature for up to 3 days.


Serves 8


Friday, August 28, 2020

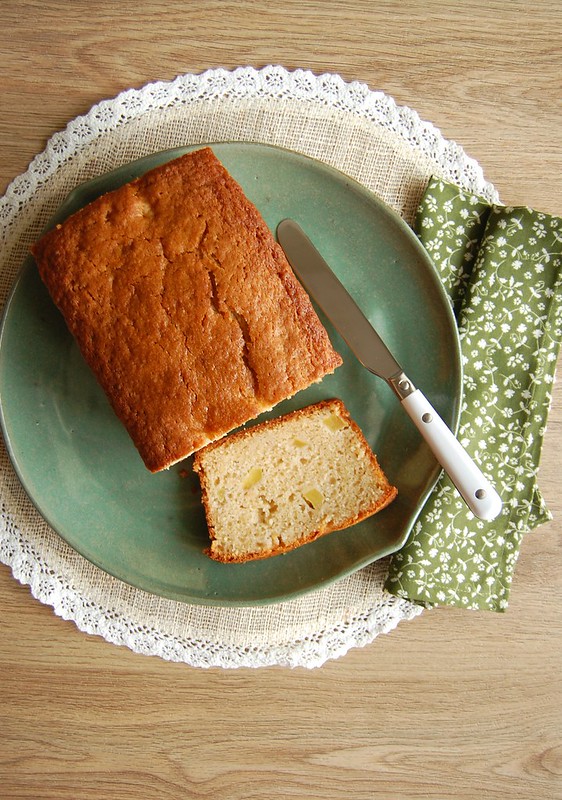
Apple yogurt cake

Bolo de iogurte e maçã

I have been in love with Epicurious’ yogurt cake ever since quarantine started: versatile and delicious, easy to make – no need to wait for the butter to soften when you feel like baking! I have made this recipe in several different ways and all turned out wonderful: marble cake, orange with chocolate sprinkles, lime with poppy seeds, Rangpur lime with coconut…

When I found two small apples in my fridge that had been forgotten there for weeks I immediately knew I wanted to make cake with them, and I did not think twice to decide on which recipe I would use. A little bit of cinnamon, the classic pairing with apples, and the cake perfumed the entire apartment. The cake turned out moist, very tender and absolutely delicious.

My heart belongs to citrus flavors, as you know, but this apple cake won me over – of all the versions I have made, it was the tastier. My husband, who definitely does not have a sweet tooth, saw the cake cooling on the counter and asked me for a slice, while it was still hot from the oven – he told me he could not resist the smell. At that moment I knew this recipe was a winner and a keeper.


Apple yogurt cake

slightly adapted from Epicurious, again


1 ½ cups (210g) all-purpose flour

2 teaspoons baking powder

¾ teaspoon ground cinnamon

¼ teaspoon table salt

1 cup (200g) granulated sugar

¾ cup (180g) plain yogurt – I used sheep’s milk yogurt

½ cup (120ml) vegetable oil – I used canola

2 large eggs, room temperature

1 teaspoon vanilla extract

2 small Gala apples (100g each, weighed before peeling and coring), peeled, cored and diced in 1cm pieces – I used two apples that had been completely forgotten in my fridge for weeks


Preheat oven to 180C/350°F. Lightly brush a 6-cup capacity loaf pan with oil, line it with baking paper and then brush the paper as well.

In a medium bowl, whisk together the flour, baking powder, cinnamon and salt. Set aside.

In a large bowl, whisk together sugar, yogurt, oil, eggs and vanilla until smooth. Fold in reserved dry ingredient – if batter is too lumpy, whisk for a few seconds – do not overmix or the cake will become tough. Stir in the apples.

Pour the batter into prepared pan and smooth the top. Bake for 50-55 minutes, or until a skewer or toothpick inserted into center of the cake comes out clean.

Let cake cool in pan on a wire rack for 15 minutes. Carefully and using the paper as a guide, remove cake from pan and transfer to the rack to cool completely.

The cake can be stored in an airtight container at room temperature for up to 3 days.


Serves 8

Thursday, July 2, 2020

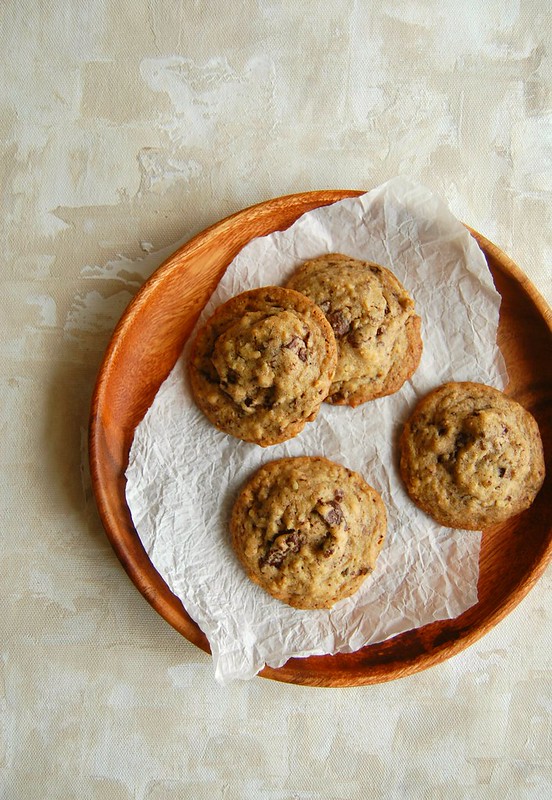
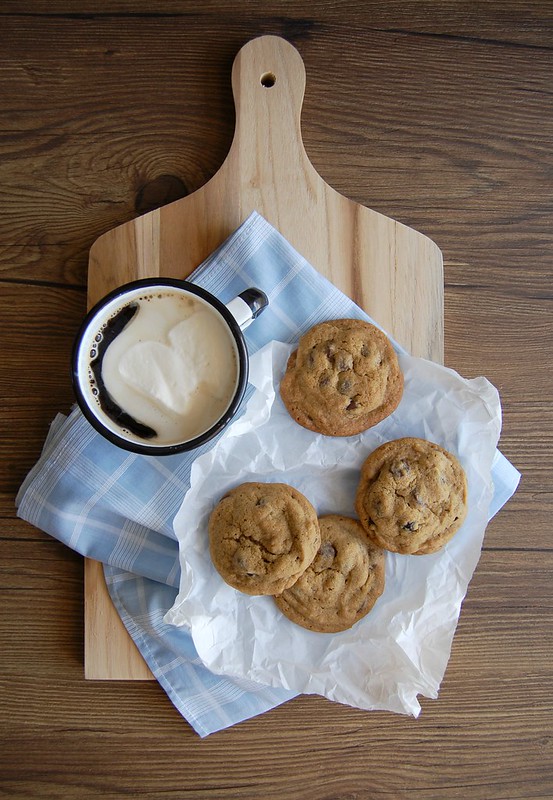
Chocolate chip cookies with oats

Cookies com pedaços de chocolate e aveia / Chocolate chip cookies with oats

I made these cookies last week and the inspiration was something very simple: while I was grabbing a can of chickpeas in the cupboard to make a soup, I saw the jar of oats right next to it, and thought that I hadn’t baked cookies in a very long time. Some more searching through the bags, jars and cans and I found some very good dark chocolate begging to be used.

It is a simple cookie but the bitterness of the chocolate really makes it. There is not a lot of oats in the recipe, but I do feel virtuous eating my cookies and thinking that they have a little bit of goodness in them, from the oats and from the chocolate. These days, isolated and feeling blue, thinking positive is one of the things I try to do the most.

Chocolate chip cookies with oats
slightly adapted from Donna Hay

1 ½ cups (210g) all purpose flour
½ cup (44g) rolled oats
½ teaspoon baking powder
¼ teaspoon table salt
¼ teaspoon ground cinnamon
2/3 cup (150g) unsalted butter, softened
½ cup (100g) granulated sugar
2/3 cup (116g) light brown sugar, packed
1 large egg, room temperature
2 teaspoons vanilla extract
200g dark chocolate, chopped – I used one with 70% cocoa solids

Preheat oven to 180°C (350°F). Line two large baking sheets with baking paper.
In a medium bowl, whisk together the flour, oats, baking powder, salt and cinnamon. Set aside.
Place the butter, sugars and vanilla in the bowl of an electric mixer and beat until light and creamy – scrape the sides of the bowl occasionally throughout the making of the recipe. Add the egg and beat until well combined. Add the dry ingredients and mix on low speed just until incorporated and a dough forms. Fold through the chocolate pieces.

Roll 2 leveled tablespoons of dough per cookie into balls and place onto prepared sheets, 5cm (2in) apart. Bake for about 14 minutes or until cookies are golden around the edges. Cool on the sheets for 5 minutes, then slide the paper with the cookies onto a wire rack to cool completely.

Makes about 28 cookies

Thursday, January 25, 2018

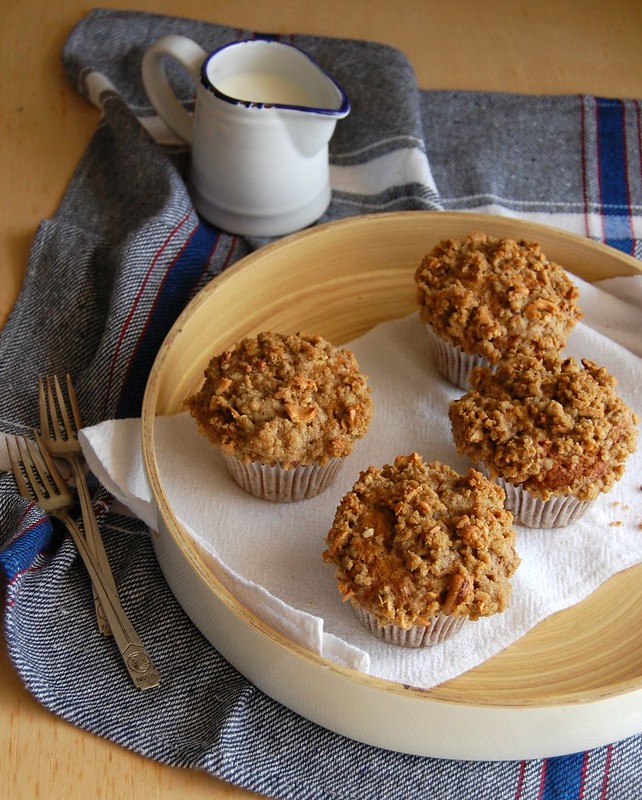
Banana muffins with cashew nut streusel

Banana muffins with cashew nut streusel / Muffins de banana com farofinha de castanha de caju

Usually making baked goods with bananas is not easy at my house because my husband and I like the fruit so much we end up eating all the bananas before they get ripe enough for baking. However, when the weather is too hot (as it is currently) they get ripe overnight – these muffins are a great way to use them up.

I developed this recipe a long time ago, when I was still working on the book project. Lately I have been making it without the streusel (because of my lactose intolerance) and the muffins taste great anyway. However, if you can, make the muffins with the streusel because it makes them extra special.

Banana muffins with cashew nut streusel
own recipe

Streusel:
½ cup (70g) all purpose flour
½ cup (88g) light brown sugar, packed
¼ teaspoon ground cinnamon
pinch of table salt
5 tablespoons (70g) unsalted butter, cold and diced
2/3 cup unsalted cashew nuts, finely chopped

Muffins:
2 cups (280g) all purpose flour
1 ½ teaspoons baking soda
¼ teaspoon table salt
¼ teaspoon ground cinnamon
4 small very ripe bananas
¾ cup (150g) demerara sugar – used for color and caramel flavor; can be replaced with granulated sugar
½ cup (120ml) canola oil
2 large eggs, room temperature
1 teaspoon vanilla extract

Preheat the oven to 200°C/400°F. Line a 12-hole muffin with paper cases.

Streusel: in a small bowl, whisk the flour, sugar, cinnamon and salt. Add the butter and rub the ingredients together with your fingertips until mixture resembles coarse breadcrumbs. Using a fork, stir in the cashew nuts. Refrigerate while you make the muffin batter.

Muffins: in a large bowl, sift together the flour, baking soda, salt and cinnamon. Set aside. In a medium bowl, mash the bananas with a fork. Stir in the sugar, oil, eggs and vanilla. Pour over the dry ingredients and stir with a fork just until incorporated – do not overmix or your muffins will be tough. Divide the batter evenly among the paper cases and sprinkle the top with the streusel, pressing lightly with your fingers to make it stick to the batter. Bake for 20-25 minutes or until golden and risen and a skewer inserted on the center comes out clean. Cool in the pan over a wire rack for 5 minutes, then carefully unmold and transfer to the rack. Serve lukewarm or at room temperature.

Makes 12

Monday, December 4, 2017

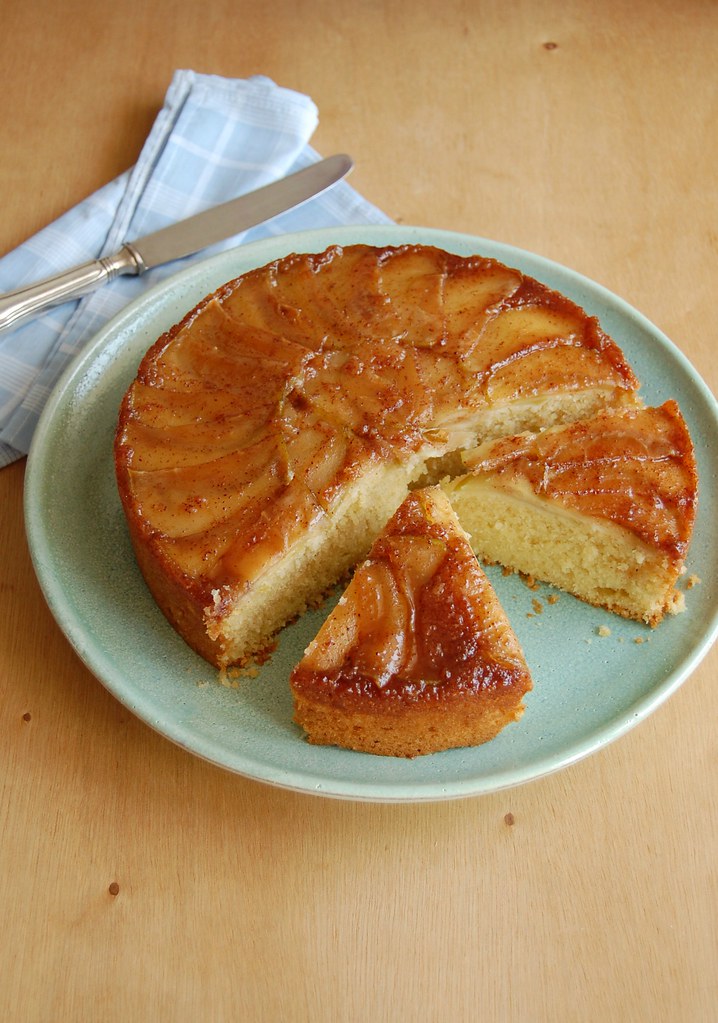
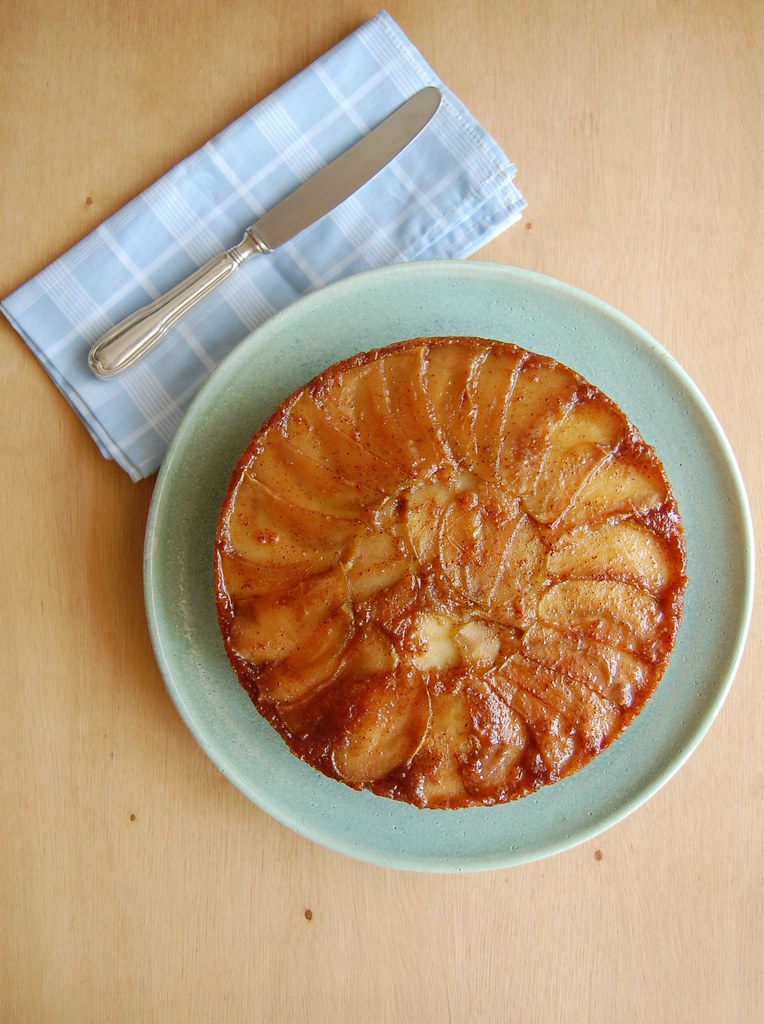
Apple and coconut upside down cake

Upside down coconut and apple cake / Bolo invertido de maçã e coco

Apple cakes are truly favorites or mine – there are several recipes on the blog, including a version made with olive oil that I will repeat next weekend – and the upside down version is even more beautiful. The apple slices turn into a flavorsome layer and the coconut gives a nice tropical touch to the batter – it is a very tender and delicious cake.

The recipe is easy to put together – despite the look of the cake – and I find arranging the apple slices on the bottom of the pan therapeutic. Just be careful not to use a springform pan or one with a removable bottom: the sugar of the topping will melt in the oven and it might leek.

Upside down coconut and apple cake / Bolo invertido de maçã e coco

Apple and coconut upside down cake
own recipe

Apple layer:
1/3 cup (65g) granulated sugar
¼ teaspoon ground cinnamon
2 small Granny Smith apples, cored and thinly sliced

Cake:
1 ½ cups (210g) all purpose flour
1/3 cup (35g) desiccated unsweetened coconut
1 teaspoon baking powder
¼ teaspoon baking soda
pinch of table salt
¾ cup (150g) granulated sugar
½ cup (113g/1 stick) unsalted butter, softened
2 large eggs
1/3 cup (80ml) buttermilk*
1/3 cup (80ml) coconut milk
1 teaspoon vanilla extract

Preheat the oven to 180°C/350°F. Butter a round 20x7cm (8x2.5in) cake pan, line the bottom with a circle of baking paper and butter the paper as well – do not use a pan with a removable bottom because the sugar will melt in the oven and might leek. If your 20cm (8in) pan is not deep enough use a 23cm (9in) pan. In a small bowl, mix well sugar and cinnamon and sprinkle over the buttered paper. Arrange the apple slices on top. Set aside.

Cake: in a medium bowl, whisk together the flour, coconut, baking powder, baking soda and salt. Set aside. Using an electric mixer, cream butter and sugar until light and fluffy – scrape the sides of the bowl occasionally throughout the making of the recipe. Beat in the eggs, one at a time, beating well after each addition. Beat in the vanilla. On low speed, mix in the dry ingredients in three additions followed by the buttermilk, then the coconut milk. Mix only until incorporate – do not overmix. Spread the batter over the apple slices and smooth the top. Bake for about 50 minutes or until golden and risen and a skewer inserted in the center of the cake comes out clean. Cool in the pan over a wire rack for 1 hour, then carefully unmold onto a plate and peel off the paper. Serve on its own or with whipped cream.

* homemade buttermilk: to make 1 cup buttermilk place 1 tablespoon lemon juice in a 240ml-capacity measuring cup and complete with whole milk (room temperature). Wait 10 minutes for it to thicken slightly, then use the whole mixture in your recipe

Serves 8-10

Thursday, November 30, 2017

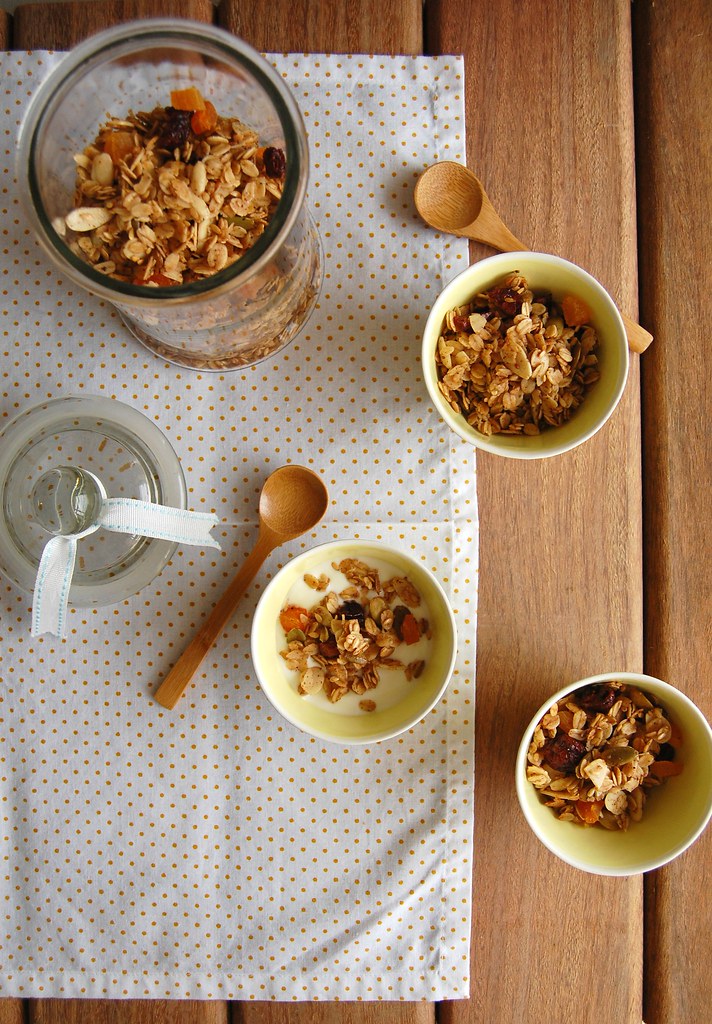
Gingerbread granola

Gingerbread granola / Granola de gingerbread

My favorite time of the year has arrived and my Christmas tree is already up – I have been thinking of the Christmas Eve menu already, planning the food and the drinks. However, unlike previous years, I don’t think I will be able to have my oh, so beloved Christmas series here on the blog – too much work, other priorities at the moment.

Having said that, I felt I had to bring you at least one recipe with a holiday touch and it is my gingerbread granola: filled with spices it will make your house smell like Christmas immediately.

Even if I am not able to bring you other holiday recipes aside from this granola, there is plenty of inspiration from previous years: it is just a matter of clicking on the Christmas tag here on the blog.

Gingerbread granola
own recipe

2 ½ cups (225g) rolled oats
¼ cup (40g) golden flaxseeds
¼ cup (35g) raw pumpkin seeds
½ cup (60g) flaked almonds
pinch of table salt
½ teaspoon freshly ground allspice
1 teaspoon ground cinnamon
1/8 teaspoon ground cloves
¼ teaspoon freshly ground nutmeg
½ teaspoon ground ginger
3 tablespoons canola oil
1/3 cup (80ml) agave or honey
½ teaspoon vanilla extract
½ cup (75g) dried cranberries, chopped in half if too large
½ cup (90g) dried apricots, diced

Preheat the oven to 180°C/350°F. Line a large baking sheet with foil.

In a large bowl, mix together the oats, flaxseeds, pumpkin seeds, almonds and salt. Set aside.
In a small bowl, whisk together the spices, oil, agave/honey and vanilla. Pour over dry ingredients and stir well to coat. Spread mixture over foil and bake for 10 minutes. Stir the granola around and bake for another 10 minutes – the granola will still be soft and will get crunchy once cooled. Remove from the oven and stir in the dried fruit. Let cool completely. Store in an airtight container at room temperature for up to 2 weeks.

Serves 6-8

Tuesday, November 7, 2017

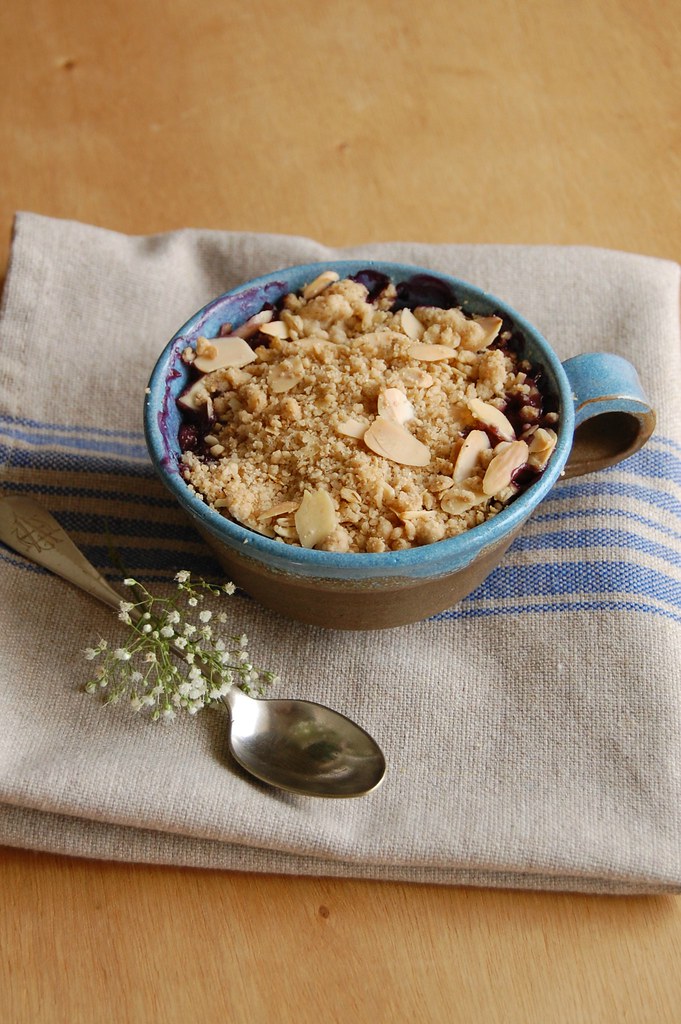
Banana and blueberry crumble

Banana and blueberry crumble / Crumble de banana e mirtilo

I do not mean to sound like a broken record (again), but things have been a bit slow on this blog and that usually happens when things are everything but slow on this side of the screen. Too much work, all sorts of other things going on… And on top of that I have had almost no energy to cook or bake, let alone photograph and type posts.

Many times in the past I read my favorite food bloggers write about burnout syndrome and I think that maybe the time has come for me, too: I don’t know for sure and my mind sometimes is a blur, to be honest. I have just come back from a wonderful trip to NYC in which I had fabulous food in all sorts of ways, and I thought this would give me inspiration to go back to the kitchen, but honestly, that has not kicked in yet.

Anyway, on a sweeter note: I have baked this crumble several times in the past year and a half and it has become one of my favorites, so here is the recipe.

Banana and blueberry crumble
own recipe

¾ cup + 2 tablespoons (125g) all purpose flour
¼ cup (50g) demerara sugar
¼ teaspoon baking poder
pinch of salt
¼ teaspoon ground cinnamon
3 tablespoons (42g) unsalted butter, chilled and cubed
¼ cup (22g) rolled oats
¼ cup (25g) flaked almonds
4 bananas, about 140g/5oz each
1 cup (120g) blueberries, fresh or frozen (unthawed)

Preheat the oven to 180°C/350°F. Set aside four 1-cup (240m) heatproof ramekins – if you prefer, bake the crumble in one 1-liter heatproof baking dish.

Crumble topping: in a medium bowl, whisk together the flour, sugar, baking powder, salt and cinnamon. Add the butter and rub the ingredients together with your fingertips until mixture resembles coarse meal. Using a fork, stir in the oats and almonds. Freeze the mixture for 5 minutes while you prepare the fruit.

Cut the banana in round slices and divide among the ramekins. Sprinkle with the blueberries. Cover the fruit with the crumble topping and bake for 25-30 minutes or until topping is golden and blueberries are bubbling. Serve warm with ice cream or heavy cream.

The crumble topping can be kept tightly sealed in a plastic bag in the freezer for 1 month – whenever you feel like having a crumble for dessert, sprinkle the mixture over the fruit of your choice and bake – do not unthaw before using.

Serves 4

Wednesday, September 27, 2017

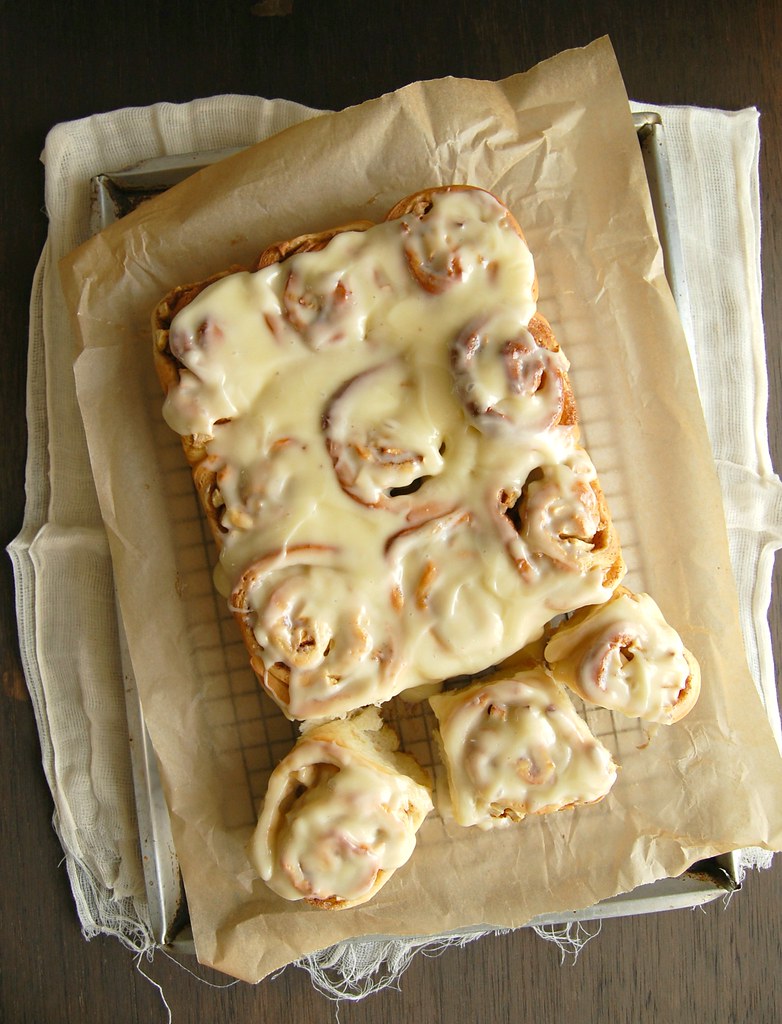
Apple cinnamon rolls with cream cheese icing

Apple cinnamon rolls with cream cheese icing / Pãezinhos de maçã e canela com cobertura de cream cheese

Baking bread is something I deeply enjoy, even though I have not done that much lately. Unless you have access to good artisanal bakeries (which are very few here in Sao Paulo), it is the only guaranteed way of having good bread on the table.

These apple rolls were my idea to turn the humble cinnamon roll into something even more special, to get people interested in them again – like Nic Pizzolatto casting Mahershala Ali for the third season of True Detective, after that not-so-great season 2. :D

I was very happy with the recipe: the rolls are tender and perfumed with cinnamon and the tangy icing compliments the apples beautifully. They disappeared quite quickly every time I made them, and next time I prepare this recipe I intend to use pears + nutmeg instead of apples + cinnamon – I believe it will be just as delicious.

Apple cinnamon rolls with cream cheese icing
own recipe

Dough:
200ml whole milk
¼ cup (56g) unsalted butter, room temperature and chopped
2 ¼ teaspoons (7g) dried yeast
¼ cup + 2 tablespoons (75g) granulated sugar
1 large egg, room temperature
pinch of salt
½ teaspoon vanilla extract
3 ¼ cups (455g) all purpose flour

Filling:
¼ cup (56g) unsalted butter, softened
4 Granny Smith apples (about 650g/1 ½ pounds), peeled, cored and cut into small dice*
¼ cup (50g) granulated sugar
¼ cup (44g) light brown sugar, packed
1 ½ teaspoons ground cinnamon

Icing:
½ cup (113g) cream cheese, very soft
¼ cup (56g) unsalted butter, very soft
1 teaspoon vanilla extract
1 cup (140g) icing sugar, sifted

Start by making the dough: in a small saucepan, heat milk until it starts to boil. Remove from the heat, stir in the butter and let it melt. Once the mixture is lukewarm, pour it into the bowl of an electric mixer and stir in the yeast and sugar. Set aside until foamy, about 5 minutes. Add the egg, salt, vanilla and flour and mix with the dough hook for 8-10 minutes or until smooth and elastic. Transfer to a lightly buttered large bowl and cover with plastic wrap. Set aside in a draft-free area until doubled in volume, about 1 ½ hours.

Generously butter a 20x30cm (8x12in, and 13x9in also works) baking pan. Set aside.
Transfer the dough to a lightly floured surface and roll it into a 30x40cm (12x16in) rectangle. Spread the butter over the dough leaving a 1cm (½in) border. In a medium bowl, stir the apples with the sugar and cinnamon until well coated, then spread evenly on top of the butter layer. Starting from the longest side, roll the dough into a tight cylinder, then slice into 12 equal pieces. Place the slices side-by-side in the prepared pan, cover loosely with a clean kitchen towel and set aside to prove again, 40-45 minutes – in the meantime, preheat the oven to 200°/400°F.

Bake the buns for 25-30 minutes or until risen and golden. Cool in the pan over a wire rack for 5 minutes, then carefully unmold the buns onto the rack. Now, make the icing: in a small bowl, whisk the ingredients together until smooth. Spread over the buns and set aside to cool completely, or serve them warm.

* it is important to keep the apple pieces small otherwise they will not bake properly inside the dough

Makes 12

Friday, September 15, 2017

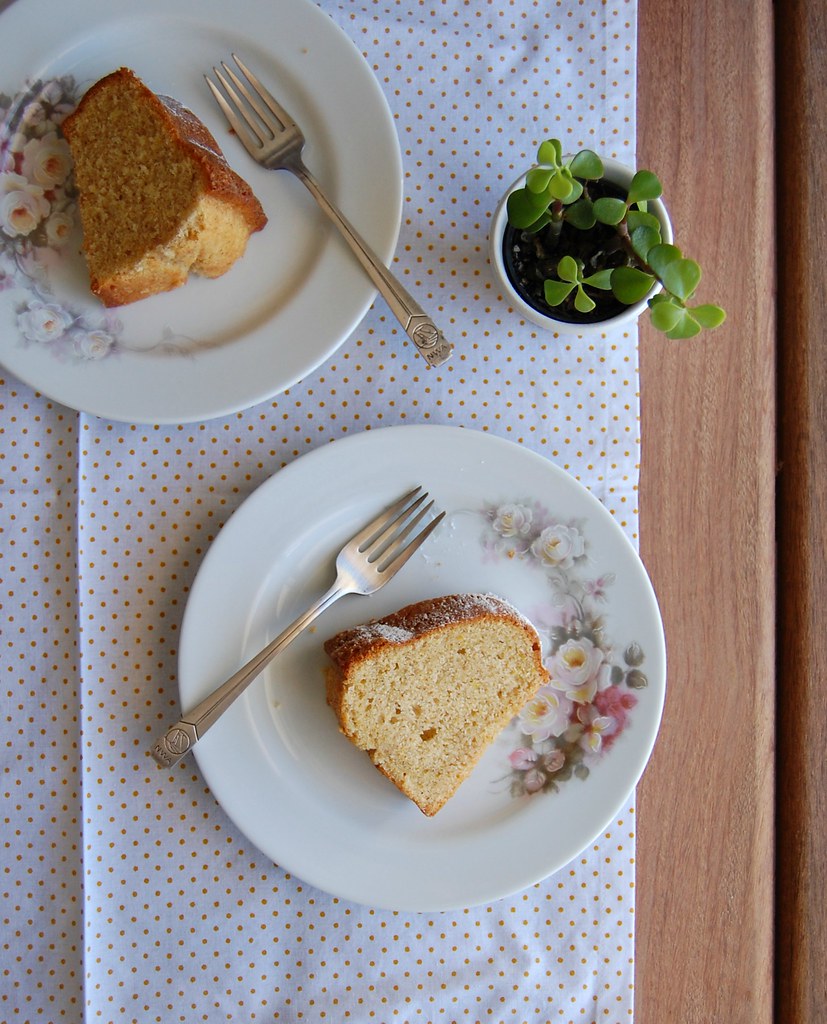
Orange, cinnamon and clove cake and the second recipe I ever learned

Orange, cinnamon and clove cake / Bolo de laranja, canela e cravo

Most people who know me or read the blog know that the first recipe I ever learned how to make was a Brazilian cornmeal cake, the one I published a while ago. I was 11 years old and right then and there a whole new world opened up in front of me: from that day on I engaged in a relationship with food and cooking that changed my life for good.

What not everyone knows is that the second recipe I learned how to make was an orange cake – very simple, yet so delicious, I can almost smell it if I close my eyes for a moment. For that reason (aside from the fact that I am a citrus nut) orange cakes have a special place in my heart and I am always looking for new ways to make them.

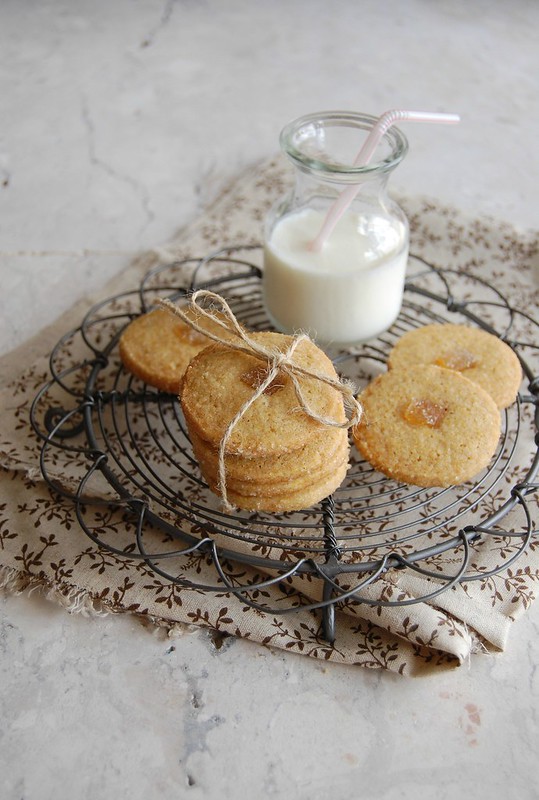
The one I bring you today is perfumed with both cinnamon and cloves and the inspiration for this combo of flavors came from the sablés I posted a couple of years ago, when I was saying goodbye to my dear Peggy Olson.

Orange, cinnamon and clove cake
own recipe

2 cups (280g) all purpose flour
2 teaspoons baking powder
1/8 teaspoon table salt
1 teaspoon ground cinnamon
¼ teaspoon ground cloves
1 cup (200g) granulated sugar
finely grated zest of 2 oranges
¾ cup (170g) unsalted butter, softened
2 large eggs, room temperature
½ teaspoon vanilla extract
1 cup (240ml) sour cream*
Icing sugar, for dusting the cake

Preheat the oven to 180°C/350°F. Butter and flour a 2-liter capacity Bundt pan.
In a medium bowl, whisk together the flour, baking powder, salt and spices. Set aside.
In the bowl of an electric mixer, combine granulated sugar and orange zest and rub them together until sugar is fragrant. Add the butter and using the mixer beat until creamy and light in color – scrape the sides of the bowl occasionally throughout the making of the recipe. Beat in the eggs, one at a time, beating well after each addition. Beat in the vanilla.

On slow speed, beat in the dry ingredients in three additions, alternating with the sour cream in two additions (start and end with the dry ingredients). Beat just until incorporated. Pour into prepared pan and smooth the top. Bake for 40-45 minutes or until cake is golden and risen and a skewer inserted in the center comes out clean. Cool in the pan over a wire rack for 20 minutes, then carefully unmold onto the rack and cool completely.
Dust with icing sugar before serving.

* homemade sour cream: to make 1 cup of sour cream, mix 1 cup (240ml) heavy cream with 2-3 teaspoons lemon juice in a bowl. Whisk until it starts to thicken. Cover with plastic wrap and leave at room temperature for 1 hour or until thicker (I usually leave mine on the counter overnight – except on very warm nights – and it turns out thick and silky in the following morning; refrigerate for a creamier texture)

Serves 8

Thursday, August 10, 2017

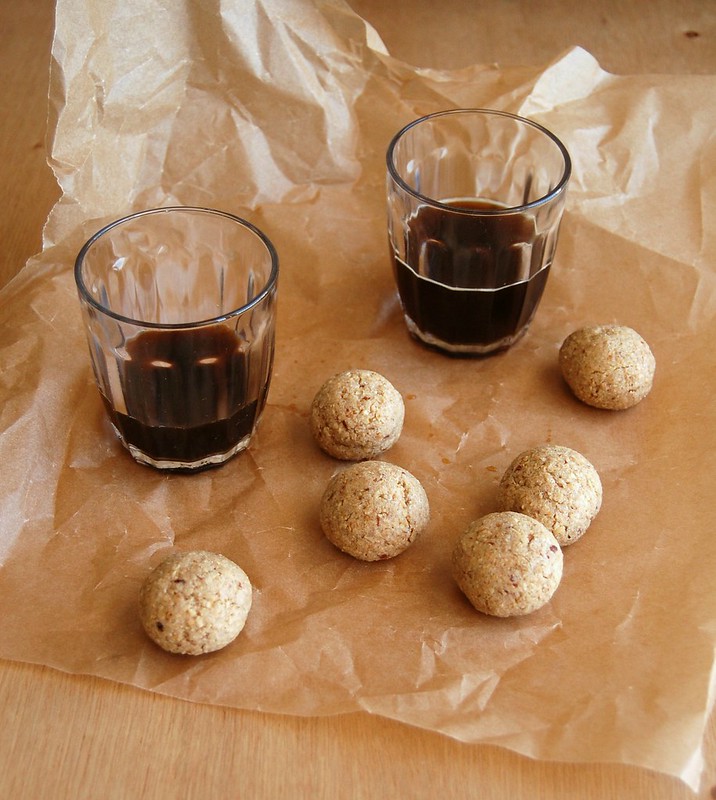
Peanut cinnamon amaretti and no time for blogging

Peanut cinnamon amaretti / Amaretti de amendoim com um toque de canela

My days have been pretty busy lately, and I guess that some of you already know that given my disappearing from the blog. :)

However, I wanted to stop by quickly today and give you a recipe that I simply adore - and that is also quick to put together: the amaretti I make by replacing the almonds with a very Brazilian ingredient, peanuts, and adding a touch of cinnamon. Let’s call this an Italian-Brazilian cookie (I do like to mix and match countries in my kitchen). :) They go wonderfully with coffee and tea, and are also delicious broken into smaller pieces and sprinkled on top of ice cream.

Peanut amaretti
own recipe

2 ½ cups (250g) peanut meal (finely ground peanuts)
1 cup (200g) granulated sugar
½ teaspoon ground cinnamon
pinch of salt
2 large egg whites (56g)
½ teaspoon vanilla extract

Preheat the oven to 180°C/350°F. Line two large baking sheets with baking paper.
In a large bowl, whisk together the peanut meal, sugar, cinnamon and salt. Add the egg whites and the vanilla and mix until a dough forms.

Roll 2 teaspoons of dough per cookie into balls and place onto prepared sheets 2.5cm (1in) apart. Press down slightly with your fingers. Bake for 15 minutes or until golden. Cool in the sheets over a wire rack.

Cookies can be kept in an airtight container at room temperature for up to 2 weeks.

Makes about 35

Friday, June 23, 2017

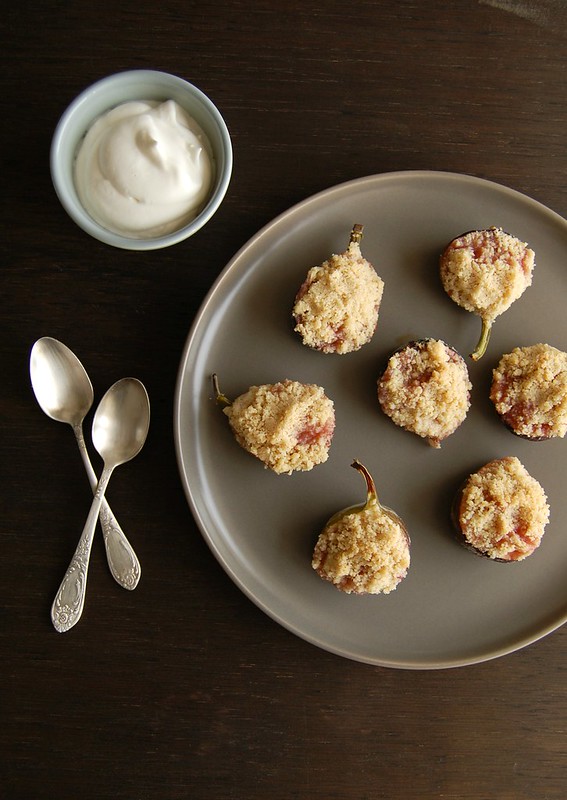
Baked figs with streusel topping and Marsala whipped cream and the reason why we like certain things

Baked figs with streusel topping and Marsala whipped cream / Figos assados com cobertura de farofinha e chantilly de Marsala

Do you ever wonder why you like certain things?

I was making lunch the other day and listening to some music – Toto’s Rosanna was playing. My husband said “I did not know you liked Toto”. I replied “I like this song, because I had an English teacher that loved it, for her name was Rosana”. She was one of the best teachers I had, and on top of that I found her so, so beautiful: she was a redhead and covered with freckles – it was then, at the age of 15, that I started liking my own freckles for until that moment I felt completely awkward with them (no one else in my family, at school or at my street had freckles).

Because of my teacher Rosana I stopped covering my arms in long sleeves even when it was insanely hot. Because of her I stopped hating the way my face looked with freckles everywhere – she never knew that, but she had a big part in my acceptance of my own features. That is why I think of her when I listen to “Rosanna” and my heart is filled with joy.

Now, the figs… I like figs because I first tried them in my godmother’s house, maybe at around 7 or so. The smell of the fruit takes me back to the days I spent with her – figs and peppermint tea, it is impossible for me to try these things without thinking of my godmother. She died a long time ago, however I have lots of fond memories of her.

My godmother was a very sophisticated woman who had travelled the world, so I believe she would like this dessert very much – the figs sort of turn into a creamy jam while in the oven and the Marsala whipped cream pairs beautifully with them. I don’t think the fruit skin benefits from the heat, though, therefore I recommend you eat the pulp and the crumble topping using a spoon and consider the skin a vessel for the deliciousness only. :)

Baked figs with streusel topping and Marsala whipped cream
own creation

For the figs:
6 small figs
½ cup (70g) all purpose flour
3 tablespoons demerara sugar
3 tablespoons (42g) unsalted butter, cold and diced
¼ teaspoon ground cinnamon
pinch of salt

Marsala whipped cream:
½ heavy cream, very cold
1 tablespoon granulated sugar
1 teaspoon Marsala

Preheat the oven to 200°C. Line a small baking sheet with foil.

In a small bowl, combine flour, sugar, salt and cinnamon. Add the butter and rub ingredients with your fingertips until mixture resembles coarse breadcrumbs.
Cut figs in half lengthwise and place them cut side up on top of the foil. Sprinkle the crumble topping over each fig half, packing it slightly with your fingers to make it adhere to the fruit. Bake for 20-25 minutes or until crumble is golden.

In the meantime, place the cream, sugar and Marsala in a small bowl and whisk until soft peaks form. Serve the figs warm with the whipped cream.

Serves 4


Wednesday, June 21, 2017

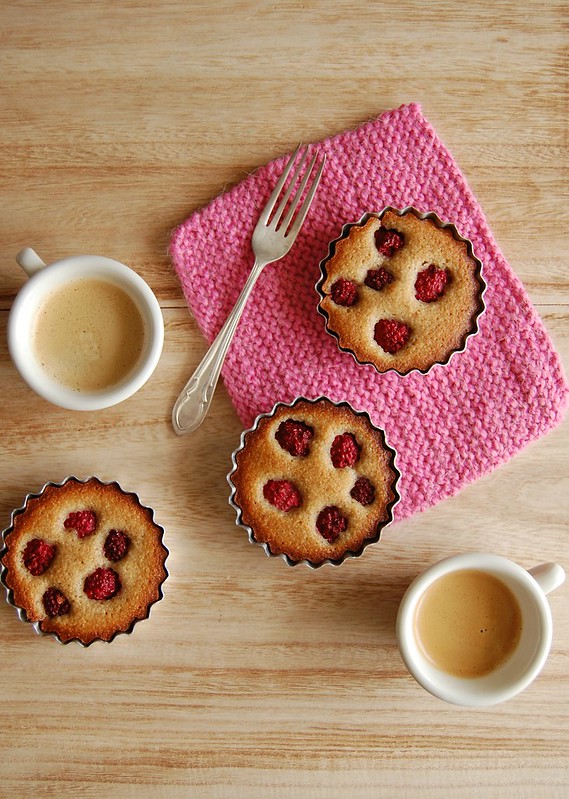
Blackberry rye financiers and going crazy with ingredients

Blackberry rye financiers / Financiers de centeio e amora

I know many people hate to go to the grocery store, but I must confess that to me that is a lot of fun (you can go ahead and call me crazy, no hard feelings). :)

My husband finds it funny that I can get really, really excited about a beautiful fruit or certain new products – a couple of weeks ago I saw a jar of lemon marmalade on the shelf and screamed at him “LOOK AT THIS!!” from the other side of the aisle – it is a good thing he knows me well and does not mind being stared at by strangers. :)

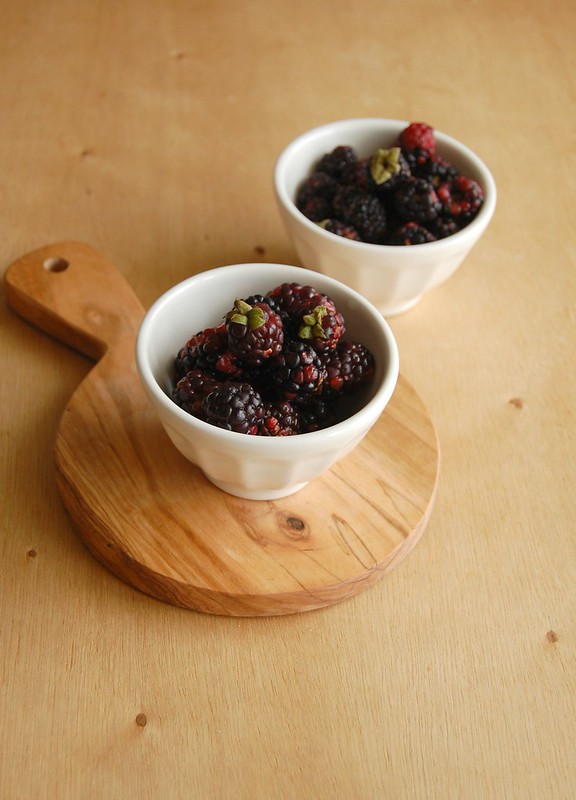
Another discreet moment *ahem* happened months ago, when I saw these teeny tiny blackberries in the supermarket – they looked so adorable I had to bring them home. My idea was to eat them with yogurt for breakfast, however they were really sour, even for me. So half of them became a crumble and the other half were added to these financiers, in which I replaced the all purpose flour for fine rye flour (the flour I mentioned here). It was such a beautiful combo of flavors I was very happy with the result – not to mention how cute the financiers look. <3

Blackberry rye financiers / Financiers de centeio e amora

Blackberry rye financiers
own recipe

¾ cup (75g) almond meal
2 ½ tablespoons (25g) fine rye flour (the same kind I describe here)
½ cup (70g) icing sugar, sifted
1/8 teaspoon ground cinnamon
pinch of salt
3 egg whites (84g)
1/3 cup (75g) unsalted butter, melted and cooled
2 teaspoons Amaretto
½ teaspoon vanilla extract
¾ cup (90g) small blackberries

In a medium bowl, whisk together the almond meal, rye flour, icing sugar, cinnamon and salt. Whisk in the egg whites. Whisk in the butter, Amaretto and vanilla until smooth. Cover with plastic wrap and refrigerate for 1 hour.

Preheat the oven to 200°C. Butter eight 100ml-capacity molds or mini muffin pans.
Divide the batter among the prepared pans and smooth the top. Divide the berries among the pans, placing them on top of the batter and pushing them slightly into the batter. Bake for about 15 minutes or until golden and risen – a skewer in the center should come out clean.
Cool in the pans over a wire rack for 5 minutes, then carefully unmold and transfer to the rack, cooling completely.

Makes 8

Thursday, May 25, 2017

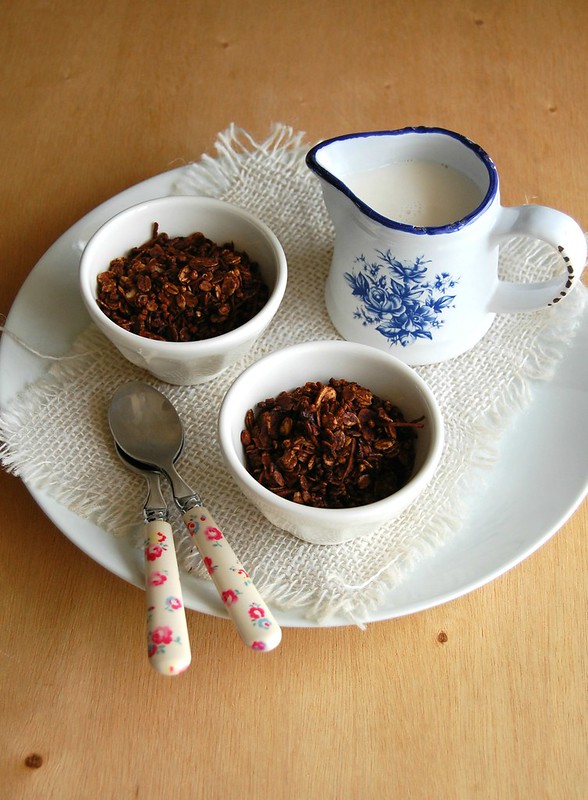
Chocolate granola to make breakfast even more delicious

Chocolate granola / Granola de chocolate

I know that for those of us who like to cook making things from scratch is actually fun and does not feel like a burden, but even for those who are not very fond of cooking I would recommend making their own granola – the difference in quality is huge, you have complete control over the ingredients (especially sugar) and can tweak flavors as you wish, creating delicious types of granola.

I have been making this chocolate granola for a couple of years now for it is so insanely delicious and very easy to put together – it is my favorite granola, hands down, the tastiest I have ever tried. The only real challenge is to NOT eat the entire batch while it cools down – be warned. :)

Chocolate granola
own recipe, inspired for several others I saw online

400g jumbo oats
100g sweetened coconut flakes
50g flaked hazelnuts or almonds
¼ teaspoon ground cinnamon
1/8 teaspoon table salt
½ cup (45g) unsweetened cocoa powder, sifted
1/3 cup (80ml) extra virgin olive oil
3 tablespoons light brown sugar, packed
1/3 cup (100g) agave or honey – I prefer agave here because its flavor is more subtle, letting the chocolate flavor shine
½ teaspoon vanilla extract
50g dark chocolate (70% cocoa solids), finely chopped

Preheat the oven to 180°C/350°F. Line a large baking sheet with foil.

In a large bowl, mix together the oats, coconut, nuts, cinnamon and salt. Set aside.
In a small saucepan, combine cocoa, oil, sugar and agave (or honey) and whisk over medium heat until melted and sugar is dissolved. Remove from the heat and whisk in the vanilla.

Pour over dry ingredients and stir well to coat. Spread mixture over foil and bake for 15 minutes. Stir the granola around and bake for another 15 minutes – the granola will still be soft and will get crunchy once cooled. Remove from the oven and sprinkle with the chopped chocolate. Wait 1 minute for it to melt, then mix everything together. Let cool completely. Store in an airtight container at room temperature for up to 2 weeks.

Serves 8-10

Thursday, March 9, 2017

Clementine spiced cookies

Clementine spiced cookies / Biscoitos de tangerina e especiarias

I think one can say I am addicted to baking cookies – as you have probably noticed already – and for a good while now slice and bake cookies have been my favorites: they are easy to make and the uncooked dough can spend some time in the fridge or in the freezer waiting for the right moment to be baked.

Even though the dough can be kept for a good while before baking, I hardly ever keep it that long: I prefer to bake lots of cookies at once and eat them and also share them with my family and friends – a “spreading joy” operation, let’s say. :)

These cookies, deliciously fragrant from the tangerine zest and with a kick from the spices, will make your kitchen smell like heaven. The almond meal makes them quite delicate and tricky to be transported, so for a bit firmer – but still wonderful – cookies omit the almond meal and use a total of 175g all purpose flour.

Clementine spiced cookies
slightly adapted from Annie Rigg's breathtakingly beautiful book

1 cup + 1 tablespoon (150g) all purpose flour
¼ cup (25g) almond meal
¼ teaspoon baking powder
¼ teaspoon baking soda
½ teaspoon ground ginger
¼ teaspoon ground cinnamon
pinch of freshly ground nutmeg
pinch of salt
finely grated zest of 2 clementines
¼ cup (50g) granulated sugar
½ cup (113g/1 stick) unsalted butter, room temperature
1 tablespoon honey
½ teaspoon vanilla extract
2-3 pieces of crystallized ginger, cut into small dice

In a medium bowl, whisk together flour, almond meal, baking powder, baking soda, ginger, cinnamon, nutmeg and salt. Set aside.
Put zest and sugar to the bowl of an electric mixer and rub them together with your fingertips until sugar is fragrant. Add the butter and using the mixer beat ingredients together until creamy and light in color. Beat in the honey and vanilla. Turn off the mixer and mix in the dry ingredients using a rubber spatula just until a dough forms – do not overmix.

Place the dough on a large piece of parchment paper; shape into a log. Fold parchment over dough; using a ruler, roll and press into a 3.5cm (1.4in) log – like Martha does here. Wrap in parchment. Chill in the fridge until very firm, about 4 hours or overnight.

Preheat oven to 180°C/350°F; line two large baking sheets with baking paper.
Unwrap the dough log and cut into 5mm (¼in) thick rounds; space 2.5cm (1in) apart onto prepared sheets. Gently press a piece of crystallized ginger in the center of each cookie. Bake until golden brown around the edges, 10-12 minutes. Cool on the sheets for 5 minutes, then carefully slide the paper with the cookies onto a wire rack and cool completely.

Makes about 30

Wednesday, February 8, 2017

Chocolate chip, crystallized peel and cranberry cookies + a hug as a gift

Chocolate, crystallized peel and cranberry cookies / Cookies com gotas de chocolate, laranja cristalizada e cranberries

As the year started and I got back from my week off, I started working on things around the house, maybe trying to clear my mind as I cleared the cupboards and the closet, I don’t know. :)

As I checked the ingredients in my cupboard, I found a bit of crystallized orange peel left from my holiday baking and right next to it I saw a jar of dried cranberries – I immediately thought of putting them together in cookies, and added a bit of dark chocolate for balance. The cookies tasted great and I turned them into a gift for a colleague who is going through hard times now – I hope she felt a bit better with the cookies and the big hug I gave her then.

Chocolate chip, crystallized peel and cranberry cookies
slightly adapted from BBC Good Food

225g all purpose flour
½ teaspoon baking soda
¼ teaspoon ground cinnamon
pinch of salt
150g unsalted butter, room temperature
80g light brown sugar
80g demerara sugar
1 teaspoon vanilla extract
1 large egg
120g dark chocolate chip or chunks
50g crystallized orange peel, chopped
100g dried cranberries

Preheat the oven to 180°C/350°F. Line two large baking sheets with baking paper.

In a medium bowl, whisk together flour, baking soda, cinnamon and salt. Set aside.
In a large bowl, using an electric mixer, beat butter and sugars together until creamy and light. Beat in the vanilla extract and egg. On slow speed, beat in the dry ingredients and mix only until incorporate. Stir in the chocolate, crystallized orange peel and cranberries.

Drop 2 leveled tablespoons of dough per cookie onto the prepared pans, 5cm (2in) apart. Bake the cookies for about 12 minutes, or until they’re golden-brown around the edges. Cool in the pans over a wire rack for 5 minutes, then slide the papers with the cookies onto the rack and cool completely.
Store the cookies in an airtight container at room temperature for up to 3 days.

Makes about 25

Thursday, December 22, 2016

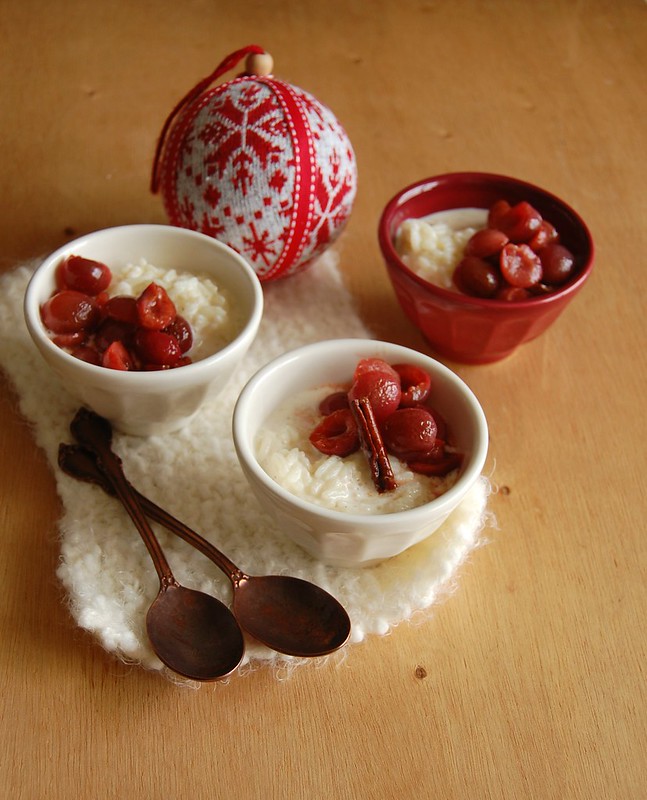
Eggnog rice pudding with roasted cherries and the reason why I love Christmas so much

Eggnog rice pudding with roasted cherries / Arroz doce de eggnog com cerejas assadas

I think it is fair to say that the main reason why I love Christmas so much is because it reminds me of my mom: she loved it and I can’t forget all the preparation around the house while the holiday songs were playing on the record player. Because of that, I decided to finish my Christmas series this year with a recipe that I make every time I miss her more than my heart can bear: rice pudding.

Unfortunately this is not her recipe – once my father got married again his wife made sure everything related to my mother got destroyed and tossed away, and the recipe notebooks were then gone forever – but it doesn’t matter: it reminds me a lot of rainy afternoons with piping hot rice pudding and cartoons on TV.

This time I served it cold because of the delicious roasted cherries I paired with it, and I added nutmeg and brandy to evoke the flavors of eggnog – it was delicious and it filled my heart with joy.

I wish you all a happy holiday season and a wonderful New Year – thank you for keeping me company all this time! xx

Eggnog rice pudding with roasted cherries
own creation

Roasted cherries:
150g fresh cherries
1 ½ tablespoons granulated sugar
juice of ½ large orange, freshly squeezed
1 small cinnamon stick

Rice pudding:
½ cup (110g) long grain rice
3 cups (720ml) whole milk
½ cup sweetened condensed milk
pinch of salt
½ teaspoon freshly ground nutmeg
1 tablespoon brandy
1 teaspoon vanilla extract

Start with the cherries: preheat the oven to 200°C/400°F. Cut cherries in half and remove the pits. Place them in a 4-cup shallow heatproof dish, stir in the sugar, orange juice and cinnamon stick, then roast for 20 minutes or until fruit is bubbly. Let cool completely, then cover and refrigerate.

While the cherries are roasting, make the rice: place the rice in a colander and wash it under the tap with cold water, rubbing the grains with your fingers until water runs clear. Set aside to drain for 10 minutes.
Place the rice, milk, sweetened condensed milk and salt in a medium saucepan and cook over high heat, stirring, until mixture starts to boil. Turn down the heat, add the nutmeg, brandy and vanilla and cook, stirring so mixture doesn’t catch in the bottom of the saucepan, until rice is tender, about 20 minutes. Set aside to cool, then cover and refrigerate.

Serve the rice pudding with the cherries on the side.

Serves 4


Related Posts with Thumbnails