Showing posts with label cheesecake. Show all posts

Monday, November 23, 2015

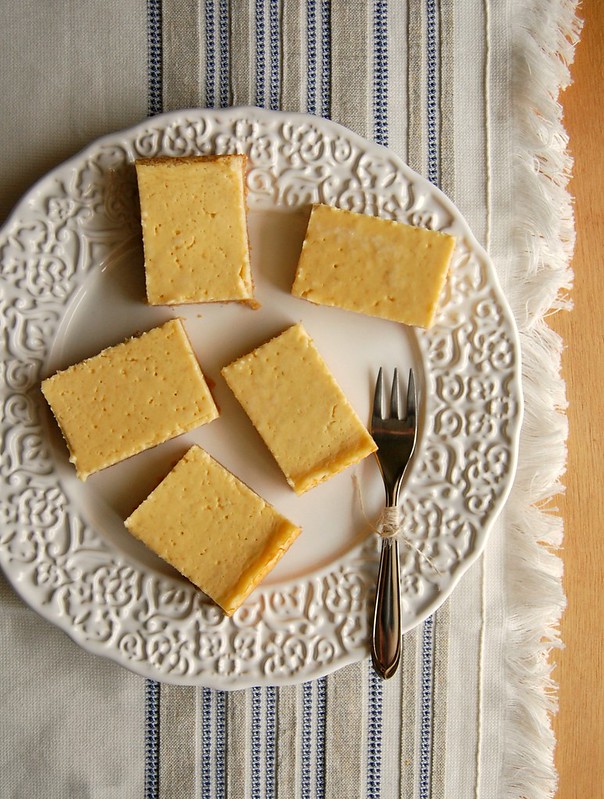
Yogurt lime cheesecake bars

Yogurt lime cheesecake bars / Barrinhas de cheesecake de limão e iogurte

Every time I discover something nice I like to share it with you, being related to food or not – and what makes me happy is that many of you feel the same, and I can ask you about something as far from the kitchen subject as a good product suggestion for frizzy hair that I get many answers – so, thank you. <3

Frizzy hair crisis almost averted – with the help of my Brazilian readers over on Facebook – now it’s my turn to share something special with you: one of my favorite food magazines, one that I use over and over again for both recipes and inspiration has now launched a beautiful website, packed with lots of delicious recipes and stunning photos – I hope you enjoy it!

Even though I rely on Delicious Australia very often, most of the times I tweak the recipes here and there, and this cheesecake slice is no exception: 200g of cookies would be swimming in 175g of butter, so I changed the recipe slightly and was very pleased with the result.

Yogurt lime cheesecake bars
slightly adapted from the wonderful Delicious Australia

Base:
200g digestive cookies
85g unsalted butter, softened

Topping:
½ cup + 2 tablespoons (125g) granulated sugar
finely grated zest of 2 limes
300g thick Greek-style yogurt
300g cream cheese, room temperature
3 eggs
½ teaspoon vanilla extract
pinch of salt
icing sugar, for dusting

Preheat oven to 180°C/350°F. Lightly butter a 20x30cm (8x12in) baking pan, line it with foil leaving an overhang in two opposite sides and butter it as well.

Place the cookies in a bowl of a food processor and blitz until finely crushed. Add the butter and pulse until mixture resembles wet sand. Press firmly into base of pan. Chill for 15 minutes.

In a large bowl, rub sugar and lime zest with your fingerprints until sugar is fragrant. Add the yogurt and cream cheese and whisk to combine. Whisk in the eggs, one at a time, until smooth. Stir in the vanilla and salt, then pour over base. Bake for 20-25 minutes until set and slightly golden around edges. Cool, then chill until set. Dust with icing sugar and cut into bars to serve.

Makes 24

Thursday, September 18, 2014

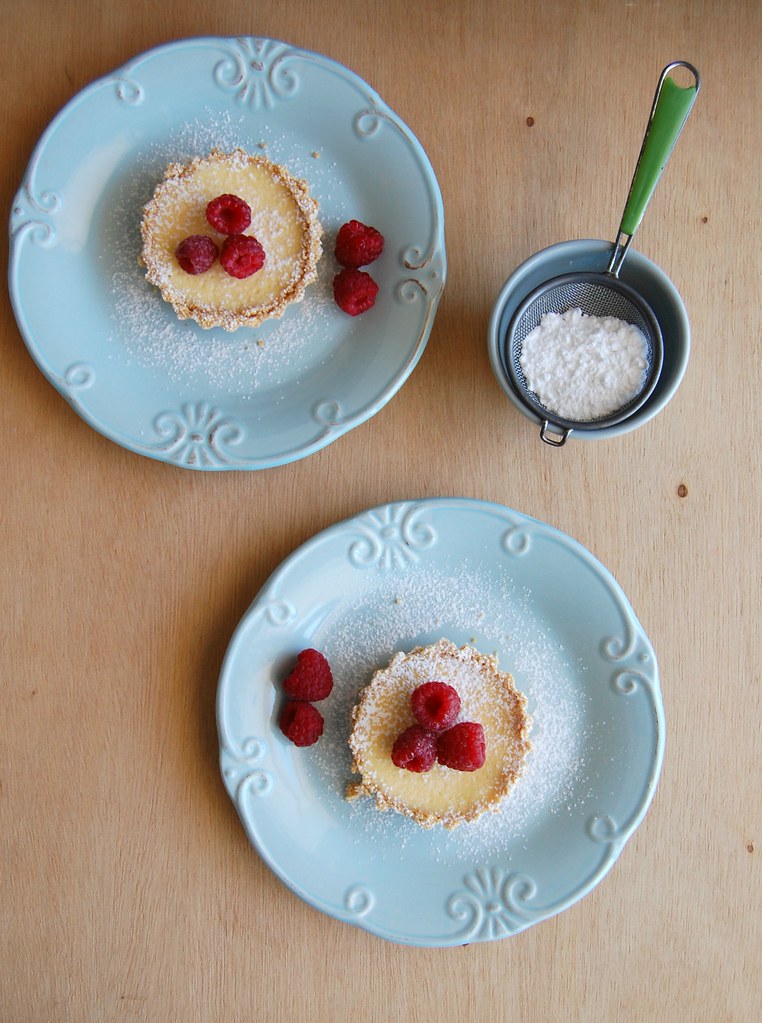
Lemon cheesecake tartlets - recipe with a video

Lemon cheesecake tartlets / Tortinhas de cheesecake de limão siciliano

Months ago, my sister told me she had to do a project for school: she and her colleagues would have to create a recipe video and she asked for my help. :)

The kids – they’re twenty years old, I call them kids – came to my house on a Saturday and we had an amazing afternoon together. We recorded the video – actually, they recorded me making tartlets – and it was a lot of fun (and a lot of work, too).

By the end of the session, I served cake and cookies to my guests and they told my sister that from that moment on they wanted to do all the future projects at my house. :D

So here it is: the video and the recipe right after it. I hope you enjoy watching my freckled hands in action! :)


Lemon cheesecake tartlets
slightly adapted from the always beautiful Donna Hay magazine

Base:
100g digestive cookies
30g unsalted butter, melted and cooled

Filling:
1 cup cream cheese, room temperature
1/3 cup granulated sugar
¼ cup sour cream*
pinch of salt
½ teaspoon vanilla extract
finely grated zest of 1 lemon
1 egg
100g raspberries

Butter six 8cm-tartlet pans (with removable bottoms). Place the cookies in a food processor and blitz until ground. Add the butter and process to combine. With your fingertips, press the mixture into the pans and refrigerate for 30 minutes.
Preheat the oven to 150°C/300°F. In a medium bowl, whisk together the cream cheese, sugar, sour cream, salt, vanilla and lemon zest. Whisk in the egg, then pour it over the base. Bake for 15 minutes or until slightly firm. Cool completely then refrigerate for 1 hour.
Dust with icing sugar, pop with the raspberries and serve.

* homemade sour cream: to make 1 cup of sour cream, mix 1 cup (240ml) heavy cream with 2-3 teaspoons lemon juice in a bowl. Whisk until it starts to thicken. Cover with plastic wrap and leave at room temperature for 1 hour or until thicker (I usually leave mine on the counter overnight – except on very warm nights – and it turns out thick and silky in the following morning; refrigerate for a creamier texture)

Makes 6

Monday, December 9, 2013

Eggnog bars and messing up with iconic things

Eggnog bars / Barrinhas de eggnog

Many people I know are against remakes – I’m not; there are wonderful remakes out there – some are even superior to the originals – and there are bad ones, too. That’s life, right?

I think it’s hard to deal with traditional and iconic characters (unless you’re David Fincher), and maybe some of them should be left alone in all their glory. Chloë Grace Moretz has done a disservice to her career by very poorly portraying a character that Sissy Spacek elevated to perfection, and Carrie is such a bad movie in general that not even the goddess Julianne Moore can save it (and that, to me, says a lot).

Let’s mess with traditional and iconic things in a better way, shall we? Let’s get a celebrated Christmas drink and turn it into cakes, cookies and cheesecake bars – I don’t think anyone will be disappointed. ;)

Eggnog bars
slightly adapted from the wonderful The Good Cookie: Over 250 delicious recipes, from simple to sublime

Crust:
150g digestive cookies
¾ teaspoon ground cinnamon
9 tablespoons (125g) unsalted butter, melted

Filling:
335g (12oz) cream cheese, softened
2/3 cup (133g) granulated sugar
2 teaspoons cornstarch
1 large egg
2 large egg yolks
1/3 cup (80ml) heavy cream
3 tablespoons brandy
1 ½ teaspoons vanilla extract
¼ teaspoon freshly grated nutmeg + a bit extra for sprinkling on top of the bars before serving

Crust: position oven rack in the center of oven; preheat to 180°C/350°F.Lightly butter a 20x30cm (12x8in) baking pan, line it with foil so that the foil extends 5cm (2in) beyond the short ends of the pan; lightly butter the foil.
In a food processor, blitz the cookies until ground. Pulse in the cinnamon. With the motor running, add the butter and process until combined. Transfer crumbs to prepared pan and press into the bottom of the pan. Bake for 8-10 minutes, or until it is slightly puffed and set.
Cool slightly over a wire rack while you make the filling. Decrease oven temperature to 160°C/325°F.

Filling: in the bowl of an electric mixer, using the paddle attachment, beat the cream cheese and sugar at medium speed until smooth and light, about 1 minute. Beat in the cornstarch; add the egg and egg yolks, one at a time, beating until blended and scraping down sides of bowl as needed. Beat in the heavy cream, brandy, vanilla, and nutmeg. Scrape filling into the slightly cooled crust; bake for 15-20 minutes, until the filling is set. Cool completely over wire rack, then refrigerate.
Before serving, sprinkle with freshly grated nutmeg and cut into bars.

Makes 24

Thursday, May 30, 2013

German chocolate cheesecake bars

German choc cheesecake bars / Barrinhas de cheesecake com chocolate, coco, pecãs e doce de leite

I love making cheesecakes but hardly ever remember to buy cream cheese. And there are times when I happily bring home cream cheese packets only to remember, upon arriving, that there are no cookies for the cheesecake base. That's me - I can remember lines from a movie I saw 10 years ago but can't write a proper grocery list. :)
Last week, however, I managed to buy all the necessary ingredients on the same day. I wanted a special cheesecake and I knew exactly where to look for it: the lovely "Tea with Bea" has several cheesecake recipes and they all look amazing. These bars are delicious and since they are very rich a little goes a long way: you can share them with your family and friends.

German chocolate cheesecake bars
slightly adapted from the oh, so beautiful Tea With Bea

Base:
150g digestive cookies
45g unsalted butter, melted

Filling:
400g cream cheese, room temperature
½ cup (100g) granulated sugar
1 egg
2 tablespoons corn starch
½ cup (120ml) heavy cream
1 teaspoon vanilla extract

Topping:
½ cup (120ml) heavy cream
1 tablespoon honey
175g dark chocolate, chopped – I used one with 53% cocoa solids
½ teaspoon vanilla extract
pinch of salt
37g unsalted butter, cold, cubed
4 tablespoons sweetened shredded coconut, lightly toasted and cooled
½ cup (55g) pecans, lightly toasted, cooled and coarsely chopped
¼ cup dulce de leche

Preheat oven to 150°C/300°F. Lightly butter a 20cm (8in) square cake pan, line it with foil leaving two overhangs in opposite sides and butter the foil as well.
Crust: place the cookies in a food process and process until finely ground. Add the butter and process until the mixture resembles wet sand. Transfer to the base of the prepared pan and press it firmly with your hands. Refrigerate it while you make the filling.
In a large bowl, stir the cream cheese with a spatula to loosen it up a little. Add the sugar and mix until smooth. Add the egg, mix to combine. Sift the corn starch over the mixture and whisk until combined, removing any lumps. Stir in the heavy cream and the vanilla. Pour over the base and bake for about 35 minutes or until slightly jiggly in the center and the top doesn’t look shiny or wet anymore. Remove from the oven and cool completely in the pan over a wire rack. Refrigerate for at least 4 hours or overnight.

Topping: place the cream and honey in a small saucepan and heat over medium heat, stirring to dissolve the honey. Heat until it starts to boil, remove from the heat and immediately add the chocolate. Set aside for 1 minute, then gently stir until melted. Stir in the salt, vanilla and butter, and mix until butter is completely melted. Cool to room temperature – the mixture will thicken as it cools (do not refrigerate).
Spread the chocolate mixture over the cheesecake. Sprinkle with the coconut, then the pecans. Spread the dulce de leche on top by the spoonfuls.
Carefully remove from the pan using the foil and cut into squares or bars.

Makes 16

Thursday, October 18, 2012

White chocolate cheesecake with passion fruit sauce

White chocolate cheesecake with passion fruit syrup / Cheesecake de chocolate branco com calda de maracujá

The sour² cake I published the other day was just the beginning of a passion fruit frenzy: not only because I love the fruit but also because I got hypnotized by its amazing smell and brought home too many at once. :D

I’m always inclined to mix white chocolate with citrus flavors because the acidity seems to cut through the sweetness like no other flavors do – that is why I could not resist Valli Little’s gorgeous cheesecake, but me being me, I slightly adapted the recipe to make mini versions of it. :D

White chocolate cheesecake with passion fruit sauce
slightly adapted from the always amazing Delicious - Australia

100g shortbread biscuits
3 tablespoons unsalted butter, melted
75g white chocolate
2 gelatin leaves
2 tablespoons whole milk
250g cream cheese, softened
½ can (198g) sweetened condensed milk
2/3 cup (160ml) heavy cream
1/3 cup passion fruit pulp
1/3 cup (66g) granulated sugar
¼ cup (60ml) water

Lightly butter four 1-cup capacity mini cake pans with removable bottoms.
For the base, place the cookies in a food processor and blitz until ground. Add the butter, pulse to combine, then press into the base of the cake pans. Chill for 30 minutes.
Filling: place chocolate in a bowl set over a pan of simmering water (don’t let the bowl touch the water), stirring until melted and smooth. Cool to room temperature.
Soak the gelatin leaves in cold water for 5 minutes. Meanwhile, heat milk in a small saucepan over medium-high heat until just below boiling point then remove from the heat. Squeeze excess water from the gelatin leaves and add leaves to the hot milk, stirring until dissolved. Set aside.
Whiz cream cheese, condensed milk and milk mixture in a food processor until smooth. Add chocolate and pulse to combine. Whisk cream to soft peaks, then fold into chocolate mixture. Pour over cookie base. Chill for 6 hours or overnight.
Syrup: pulse the passion fruit pulp in a food processor a few times to separate the pulp from the seeds. Strain, reserving seeds and juice. Set aside.
Place sugar and water in a small saucepan over low heat, stirring to dissolve sugar. Increase heat to medium-low and cook, swirling the pan occasionally and brushing down the sides with a damp pastry brush, for3-4 minutes until a golden caramel. Add passion fruit juice and 2 tablespoons cold water (be careful as it may spit), reduce heat to low and stir until smooth and syrupy. Cool slightly, then stir in some of the reserved seeds (to taste). Chill until ready to serve.
Serve the cheesecake drizzled with passion fruit sauce.

Makes 4

Sunday, August 5, 2012

Cheesecake swirled chocolate cake

Cheesecake swirled chocolate cake / Bolo de chocolate com recheio de cheesecake

I have something to write about Christopher Nolan, but that involves some "TDKR" spoilers - if you haven't seen the movie yet, scroll down for the recipe.

* spoilers *

Many of the people I have talked with about "TDKR" think that Nolan should return for another Batman movie, especially because of the way "TDKR" ended, but I disagree ; As much as I love the three films he superbly directed - and you know I am a fanatic for his trilogy - I believe that it is a cycle that ended beautifully and now it's time for him to move on as a director. That is very clear to me when I think of the amazing films he has made aside from the Batman trilogy - he even made me like Robin Williams! - and I would be absolutely thrilled to watch more films like the fantastic "The Prestige".

* end of spoilers *

I love the idea of a cake that comes out of the pan already filled, and for someone who adores cheesecake like I do this chocolate cake is just perfect.

Cheesecake swirled chocolate cake
from a lovely book I bought ages ago and hadn’t used in years

Cheesecake swirl:
225g (8oz) cream cheese, softened
¼ cup (50g) granulated sugar
1 teaspoon vanilla extract
1 egg

Cake:
2 eggs
2 cups (400g) granulated sugar
1 cup (240ml) canola oil
1 teaspoon vanilla extract
3 cups (420g) all purpose flour
2/3 cup (60g) unsweetened cocoa
2 teaspoons baking soda
½ teaspoon salt
1 cup (240ml) buttermilk*

Preheat oven to 180°C/350°F. Butter and flour a 12-cup capacity Bundt pan.
Cheesecake swirl: in a medium bowl, mix together the cream the cheese, sugar and vanilla with a whisk until creamy and smooth. Beat in the egg. Set aside.
Cake: in the large bowl of an electric mixer, using the paddle attachment, beat the eggs, sugar, oil and vanilla until thick and smooth. In another bowl, stir together the flour, cocoa, baking soda and salt. Add the dry ingredients to the egg mixture alternately with the buttermilk and beat until smooth. Spoon 2/3 of the chocolate batter into prepared pan. Using the back of a spoon, make a trough in the batter, all the way around the pan. Carefully spoon the cheese mixture into the trough. Gently cover the filling with the remaining chocolate batter and smooth the top. Bake for 60-70 minutes or until a toothpick inserted in center comes out clean. Let cool in the pan, over a wire rack, for 15 minutes, then turn onto the rack. Cool completely before serving.

* homemade buttermilk: to make 1 cup buttermilk place 1 tablespoon lemon juice in a 240ml-capacity measuring cup and complete with whole milk (room temperature). Wait 10 minutes for it to thicken slightly, then use the whole mixture in your recipe

Serves 10-12

Sunday, July 22, 2012

Chocolate peanut butter cheesecake bars + "Man of Steel"

Chocolate peanut butter cheesecake squares / Quadradinhos de cheesecake de manteiga de amendoim e chocolate

I've just had a delightful surprise during my daily visit to "Awards Daily": the lovely Sasha Stone posted not one, but two versions of the "Man of Steel" teaser, one voiced over by Kevin Costner (Jonathan Kent) and the other by the always amazing Russel Crowe, who will be playing Jor-El - if that isn't reason enough to anxiously wait for that movie I do not know what is. :)

The beautiful teaser comes with some cheesecake, a delicious peanut butter version by the always amazing Nigella Lawson.
To me, the chocolate glaze was unnecessary on the dulce de leche cheesecake bars I made a while ago, but here it’s perfect: the peanut butter has a slightly salty flavor and the milk chocolate compliments it beautifully.

Chocolate peanut butter cheesecake bars
adapted from the magnificent Nigella Kitchen: Recipes from the Heart of the Home

Base:
140g digestive biscuits
2 ½ tablespoons (35g) unsalted butter, softened

Filling:
300g cream cheese
2 eggs
2 egg yolks
2/3 cup (133g) granulated sugar
1/3 cup (80ml) sour cream*
2/3 cup smooth peanut butter

Topping:
2/3 cup (160ml) sour cream
2/3 cup (120g) milk chocolate chips
1 ½ tablespoons brown sugar

Preheat the oven to 160°C/325°F. Lightly butter a 20cm (8in) square baking pan then line the bottom and sides with 2 pieces of foil, leaving a 5cm (2in) overhang on two opposite sides. Butter the foil as well.
Base: process the biscuits until ground then add the butter; process again until mixture resembles wet sand. Turn it out into the prepared pan and press into the bottom to make the crust. Put in the fridge while you make the filling.
Filing: place the cream cheese, eggs, egg yolks, sugar, sour cream, peanut butter and vanilla in the clean bowl of the food processor and process until very smooth. Pour into the base bake for 1 hour, though check after 50 minutes: the top – only – should feel set and dry.
Take the cheesecake out of the oven while you make the topping.
Warm the sour cream and chocolate with the brown sugar gently in a small saucepan over a low heat, whisking to blend in the chocolate as it melts, and then take off the heat. Spoon and spread the topping very gently over the top of the cheesecake, then put it back in the oven for a final 10 minutes**.
Once out of the oven, let the cheesecake cool completely in the pan over a wire rack, then cover and refrigerate overnight.
Carefully lift cheesecake from pan using foil overhangs and cut into 16 squares.

* homemade sour cream: to make 1 cup of sour cream, mix 1 cup (240ml) heavy cream with 2-3 teaspoons lemon juice in a bowl. Whisk until it starts to thicken. Cover with plastic wrap and leave at room temperature for 1 hour or until thicker (I usually leave mine on the counter overnight – except on very warm nights – and it turns out thick and silky in the following morning; refrigerate for a creamier texture)

** mine looked exactly the same after 10 minutes, so I baked it for 22 (until matte and firmer)

Makes 16

Friday, May 4, 2012

Dulce de leche cheesecake squares + some great villains

Dulce de leche cheesecake squares / Quadradinhos de cheesecake de doce de leite

I’ve already told you how much I adore Christian Bale and I think he’s a perfect Batman but after watching the trailers for “The Dark Knight Rises” – cannot wait for July to come! – I have the feeling that he’ll be eclipsed by Tom Hardy on the movie just as he was eclipsed by Cillian Murphy and Heath Ledger on “Batman Begins” and “The Dark Knight”, respectively. I love it when great actors are cast for great characters – that’s how it should always be – and Christopher Nolan has been doing a wonderful job in his movies, with just a few exceptions (Carrie Ann Moss, Al Pacino), but I feel sorry for Bale, poor thing. :)

The original recipe for these super delicious cheesecake squares called for a chocolate glaze but I did not want it to eclipse the dulce de leche flavor; after having one square I felt that omitting the glaze had been the right decision: the cheesecake tasted wonderful and very rich, it did not need any embellishments.

Dulce de leche cheesecake squares / Quadradinhos de cheesecake de doce de leite

Dulce de leche cheesecake squares
slightly adapted from the wonderful Gourmet Today: More than 1000 All-New Recipes for the Contemporary Kitchen

Crust:
100g (3½oz) digestive biscuits
2 tablespoons sugar
pinch of salt
3 tablespoons (42g) unsalted butter, melted

Filling:
1 teaspoon unflavored gelatin
¼ cup (60ml) whole milk
225g (8oz) cream cheese, softened
2 large eggs
¼ teaspoon salt
1 teaspoon vanilla extract
1 cup (350g/12½oz) dulce de leche

Crust: put oven rack in middle position and preheat oven to 160°C/325°F. Lightly butter a 20cm (8in) square baking pan then line the bottom and sides with 2 pieces of foil, leaving a 5cm (2in) overhang on two opposite sides. Butter the foil as well.
Finely grind cookies with sugar and salt in a food processor. With motor running, add butter, blending until combined. Press mixture evenly onto bottom of baking pan. Bake 10 minutes, then cool in pan on a rack 5 minutes.
Filling: sprinkle gelatin over milk in a small bowl and let stand 2 minutes to soften. In an electric mixer, with the wire attachment, beat together cream cheese, eggs, salt, gelatin mixture and vanilla until well combined, about 2 minutes, then stir in dulce de leche gently but thoroughly. Pour filling over crust, smoothing top, then bake in a hot water bath in oven until center is just set, about 45 minutes. Cool cheesecake completely in pan on rack, about 2 hours. Chill, covered, at least 6 hours.

Carefully lift cheesecake from pan using foil overhang and cut into 16 squares.

Makes 16

Friday, November 18, 2011

Vanilla bean and blueberry mini cheesecakes

Vanilla bean and blueberry mini cheesecakes / Mini cheesecakes de baunilha e mirtilos

My initial idea was to make Nigella’s peanut butter cheesecake – that was why I bought several packages of cream cheese after all. Peanut butter cheesecake with a milk chocolate glaze... Yum, yum. But I had a surprise after opening the peanut butter jar: it was almost empty; I was furious for a couple of seconds then remembered that I’d had several spoonfuls of peanut butter lately. Too many, I guess. So I went after another cheesecake recipe and found one on my currently favorite dessert bible. The blueberries were the icing on the cake (I apologize for the lame pun – I just couldn’t help it). ;)

Vanilla bean and blueberry mini cheesecakes
adapted from the wonderful Bon Appetit Desserts: The Cookbook for All Things Sweet and Wonderful

Crust:
1 cup (100g) graham cracker or digestive cookies crumbs
2 tablespoons sugar
¼ cup (56g) unsalted butter, melted

Filling:
300g cream cheese, room temperature
½ cup (100g) sugar
1 vanilla bean, split lengthwise, seeds removed with the back of the knife
2 large eggs
½ cup (120ml) sour cream*
generous ½ cup fresh blueberries

Start by making the crust: preheat the oven to 180°C/350°F. Butter four 1-cup (240ml) capacity mini cake pans (mine have removable bottoms).
Mix graham cracker crumbs and sugar in processor. Add melted butter; process until crumbs are evenly moistened. Press crumb mixture onto bottom (not sides) of prepared pans. Place pans onto a baking sheet and bake until crust is set and deep golden, 6-8 minutes. Cool crust while making filling. Maintain oven temperature.
Now, the filling: place the cream cheese, sugar, vanilla seeds, eggs and sour cream in the bowl of a food processor and process until smooth. Divide the filling evenly among pans. Sprinkle the filling with the blueberries. Bake until set around edges, and center moves slightly when pan is gently shaken, 25-30 minutes. Cool completely over a wire rack then refrigerate uncovered for 3-4 hour or overnight. Carefully unmold and serve.

* homemade sour cream: to make 1 cup of sour cream, mix 1 cup (240ml) heavy cream with 2-3 teaspoons lemon juice in a bowl. Whisk until it starts to thicken. Cover with plastic wrap and leave at room temperature for 1 hour or until thicker (I left mine on the counter overnight – on a cold night – and it was beautifully thick and silky the next morning)

Makes 4

Tuesday, July 12, 2011

Strawberry cheesecake ice cream and a very, very scary movie

Strawberry cheesecake ice cream / Sorvete de cheesecake de morango

I’ve come to the conclusion that my courage, these days, is pretty much having ice cream (the one on the photo, delicious) in very cold days.

My sister wanted to watch “Insidious” and since I cannot say “no” to her I went along. I spent most of the movie with my eyes closed and that did not stop me from having nightmares about it for days. She left the theater laughing and told me the movie was not scary at all, while I drove home secretly wishing my husband were there already so I would not have to take a shower alone in the apartment. :S

And to think that I watched “The Entity” in my teenage years... What a shame. :D

Strawberry cheesecake ice cream / Sorvete de cheesecake de morango

Strawberry cheesecake ice cream
adapted from the always fantastic and delicious The Perfect Scoop, inspired by the beautiful Beyond the Plate

Cheesecake ice cream:
225g (8oz) cream cheese
¼ cup (60ml) whole milk
1 ¼ cups (300ml) heavy cream
finely grated zest of 1 lemon
1 tablespoon lemon juice
2/3 cup (133g) superfine sugar
pinch of salt

Strawberry sauce:
250g strawberries, hulled
1 ½ tablespoons superfine sugar, or to taste
2 teaspoons freshly squeezed lemon juice

Cut the cream cheese into small pieces and place into a blender or food processor. Add the milk, heavy cream, lemon zest and juice, sugar and salt and blitz until smooth. Chill the mixture thoroughly in the refrigerator. Meanwhile, make the strawberry sauce: purée the strawberries in a blender with the sugar and lemon juice until smooth. Press the purée through a fine strainer to remove the seeds. Chill.
Freeze the cheesecake mixture in your ice cream maker following the manufacturer’s instructions. By the end of churning time add the strawberry sauce gradually to the ice cream maker to have some of it mixed into the cream and some of it creating a marbled effect. Transfer to an airtight container and freeze for at least 4 hours before serving.

Makes about 3 cups (750ml)

Friday, April 15, 2011

Mini raspberry cheesecakes and trusting your instincts

Mini raspberry cheesecakes / Mini cheesecakes de framboesa

Something I’ve been trying to do more often is to trust my instincts, but sometimes I fail miserably at doing so – and deeply regret it afterwards.

Take this recipe, for instance: the mini cheesecakes looked adorable on the book, but after reading the recipe I wasn’t so keen on the idea of making the batter using an electric mixer – it would add too much air to the mixture, so a food processor would be a better choice. I decided to trust Bill Granger instead of my instincts and the result was that the cheesecakes, while in the oven, puffed up and looked beautiful, but after cooling they sort of collapsed – too much air in the batter.

Let’s hope the cheesecakes teach me a lesson. :)
Anyway, they tasted delicious, that’s why I’m posting the recipe here.

Mini raspberry cheesecakes
adapted from Feed Me Now

Base:
100g digestive or shortbread cookies
½ cup (50g) ground almonds
¼ cup (56g) unsalted butter, melted

Filling:
400g cream cheese, room temperature
½ cup (120ml) sour cream*
½ cup + 1 tablespoon (112g) caster (superfine) sugar
1 egg
1 egg yolk
½ teaspoon vanilla extract
finely grated zest of 1 lemon
120g raspberries, fresh or frozen – I used frozen, unthawed
icing sugar, for dusting

Preheat the oven to 180°C/350°F. Line a 12-hole, 125ml capacity muffin pan with paper cases.
Process the cookies in a food processor until you have fine crumbs. Transfer the crumbs to a medium bowl, add the ground almonds and melted butter and stir to combine. Press 1 tablespoon of the mixture into the base of each paper case. Refrigerate.
Make the filling: beat the cream cheese, sour cream and caster sugar until light and fluffy. Add the egg, then the egg yolk, vanilla and lemon zest, beating well after each addition. Spoon the mixture over the bases, then divide the raspberries on top.
Bake for 20 minutes or until puffed and starting to color. Cool completely then refrigerate.
Carefully remove the cheesecakes from the paper cases, sprinkle with icing sugar and serve.

* homemade sour cream: mix ½ cup (120ml) heavy cream with 2 teaspoons lemon juice in a bowl. Cover with plastic wrap and leave in room temperature for 1 hour or until it thickens

Makes 12 – I halved the recipe above, used 1/3-cup (80ml) capacity muffins pans and got 9 mini cheesecakes

Wednesday, January 5, 2011

Plum tray bake with a cheesecake ripple

Plum tray bake with a cheesecake ripple / Bolo de ameixa com mesclado de cheesecake

There was a rumor on Twitter last month saying that delicious would end – I was in complete panic because I find the tool extremely useful; luckily, it appears to be just that: a rumor.

How else would I have “remembered” this delicious cake – I mean, extremely delicious – bookmarked on Oct, 7, 2008? ;)

Plum tray bake with a cheesecake ripple / Bolo de ameixa com mesclado de cheesecake

Plum tray bake with a cheesecake ripple
adapted from here

Cheesecake ripple:
200g cream cheese
1 teaspoon vanilla bean paste or extract
3 tablespoons caster (superfine) sugar

Cake:
3 eggs
175g unsalted butter, softened
1 cup (175g) light brown sugar, packed
1 ½ cups (210g) all purpose flour
1 ½ teaspoons baking powder
generous pinch of salt
1 teaspoon vanilla extract
400g ripe plums, halved, stoned and roughly chopped

Preheat the oven to 180°C/350°F. Butter a 28x18cm shallow baking pan, line with baking parchment, making sure that the paper comes higher than the rim of the pan, and butter the paper as well.
In a medium bowl, using an electric mixer, beat the cream cheese until soft and creamy. Add the vanilla bean paste or extract and caster sugar and beat until smooth. Set aside.
Place the eggs, butter, brown sugar, flour, baking powder, salt and vanilla in a separate bowl. Beat for about 2 minutes until pale and creamy.
Spread half of the cake batter mixture onto the base of the prepared pan, then dollop half of the cream cheese mixture over it, spreading an uneven swirl through the base mixture. Scatter with half of the plums. Spoon the remaining cake batter on top and dot with the rest of the cream cheese.
Scatter with the remaining plums then bake for about 45 minutes until risen and just firm to touch – when cooked, the surface of this tray bake should feel just firm to the touch, but bear in mind that it will firm-up slightly as it cools; if over baked, it will lose its moist texture.
Leave to cool in the pan before cutting into pieces. Serve warm or cold, with ice cream.

Serves 10 – I made 2/3 of the recipe above and used a 20cm (8in) square pan

Friday, December 3, 2010

Cheesecake swirl chocolate brownies

Cheesecake swirl chocolate brownies / Brownies com mesclado de cheesecake

I’ve been on a White Rabbit vibe these days – feeling terrible late with lots of things to do before I’m officially on vacation.

I’ll leave you with these brownies while I try to deal with my chaotic day. :)

Cheesecake swirl chocolate brownies
from Donna Hay magazine

200g dark chocolate, chopped
250g unsalted butter, room temperature, chopped
1 ¾ cups (306g) brown sugar, packed
4 eggs
1 ½ teaspoons vanilla extract
1 1/3 cups + 1 tablespoon (196g) all purpose flour, sifted
¼ teaspoon baking powder, sifted
1/3 cup (30g) cocoa, sifted
pinch of salt

Cheesecake swirl:
250g cream cheese, softened
1/3 cup + ½ tablespoon (73g) caster (superfine) sugar
2 eggs

Preheat the oven to 180°C/350°F; lightly butter a 22cm (9in) square pan and line the bottom and sides with foil, leaving an overhang on two opposite sides. Butter foil as well.
Place chocolate and butter in a large saucepan over low heat and stir until smooth. Set aside to cool for 2 minutes, then add the sugar, eggs and vanilla and whisk well to combine. Add the flour, baking powder, cocoa and salt and whisk until smooth. Pour into the prepared pan and set aside.
Make the cheesecake swirl: place the cream cheese, sugar and eggs in the bowl of a food processor and process until smooth. Place large spoonfuls of the cheesecake mixture on top of the chocolate mixture and, using a butter knife, swirl to partially combine – you want a marbled effect, so do not overmix.
Bake for 50 minutes or until set.

Makes 12 – I made 2/3 of the recipe above and used a 20cm (8in) square pan

Thursday, October 28, 2010

Vanilla cheesecake with blueberry lemon sauce

Vanilla cheesecake with blueberry lemon sauce / Cheesecake de baunilha com calda de mirtilo e limão siciliano

I told you I had an addiction – if you did not believe me then, you might start believing me now. :D

There is one thing different, however: this time I went for blueberries instead of blackberries, as in Natalie’s recipe. Just don’t ask me which one I like more – you know I have trouble picking favorites. :D

Vanilla cheesecake with blueberry lemon sauce
from Donna Hay magazine and here

Base:
125g digestive/shortbread cookies – I used these, Ana’s suggestion
½ cup (50g) almond meal (ground almonds)
3 tablespoons (42g) unsalted butter, melted

Cheesecake:
370g ricotta
370g cream cheese
1 1/3 cups (267g) caster sugar
3 eggs
2 teaspoons vanilla extract

Blueberry lemon syrup:
1 cup blueberries, fresh or frozen
¾ cup (150g) caster sugar
1 tablespoon lemon zest
3 tablespoons lemon juice
¼ cup (60ml) water
1 tablespoon corn starch

Preheat the oven to 140°C/285°F.
Make the base: process cookies in a food processor until crushed. Add the almond meal and butter and process until combined. Grease a round 22cm springform pan*. Press the crumb mix over the base and refrigerate.
Place the ricotta and cream cheese in a food processor and process until smooth. Add the sugar, eggs and vanilla and process until combined and smooth. Pour the mixture over the base and bake for 55-60 minutes or until set.
In the meantime, make the sauce: combine the blueberries, sugar, lemon zest and juice in a non-reactive saucepan. Whisk together the water and cornstarch in a small bowl and add to the saucepan. Turn the heat on to medium and let simmer until thickened, about 10 – 12 minutes – while the mixture is simmering, squash the berries with a fork. Let cool completely.
Remove the cheesecake from the oven and allow to cool in the pan. Serve with the sauce.

* I made 2/3 of the recipe above (for the base and cheesecake) and used a loose-bottomed 20cm (8in) round cake pan

Serves 8-10

Monday, August 30, 2010

Cheesecake ice cream with blackberry lemon swirl

Cheesecake ice cream with blackberry lemon swirl / Sorvete de cheesecake com mesclado de amora e limão siciliano

After very cold weeks we’ve been having 30°C (86°F) days here in Sao Paulo – not very wintery, I admit it, but perfect for ice cream. :)

I bookmarked this delicious recipe last year but never made it during summer – that’s what happens when one has too many recipes on their “to try” list: lots of wonderful ideas to try, but not enough time to do it. :)

I tweaked Natalie’s recipe just a little to use the blackberries and lemons I had around, but she did not mind at all. :)

Cheesecake ice cream with blackberry lemon swirl / Sorvete de cheesecake com mesclado de amora e limão siciliano

Cheesecake ice cream with blackberry lemon swirl

Blackberry lemon swirl:
generous ½ cup blackberries, fresh or frozen – I used frozen, unthawed
½ cup (50g) caster sugar
1 ½ tablespoons lemon juice
finely grazed zest of 1 lemon
¼ cup (60ml) water
1 tablespoon corn starch

Cheesecake ice cream:
112g (4oz) cream cheese, room temperature
1 cup (200g) caster sugar
1 large egg
½ teaspoon vanilla extract
¾ cup (180ml) whole milk
2 teaspoons lemon zest
1 ½ cups (360ml) heavy cream

Start by making the blackberry lemon swirl: combine blackberries, sugar, lemon juice and zest in a small nonreactive saucepan. In a small bowl, whisk together the water and cornstarch and add to the saucepan. Cook over medium heat, stirring occasionally, until it comes to a boil and thickens – while you stir, break the blackberries with a fork so they dissolve into the jam.
Let cool completely.

Now, the cheesecake ice cream: in the bowl of an electric mixer, beat together the cream cheese and sugar until fluffy and smooth. Add the egg and vanilla, mix until creamy and set aside.
Bring the milk to a boil over medium-low heat. Remove from the heat and add ¼ cup of the milk to the cream cheese mixture and mix until combined and smooth. Continue with 2 more quarter cups of milk and then add the entire mixture back to the pan with the rest of the milk.
Stir over medium-low heat until thickened slightly (should take around 3 minutes). Remove from heat, strain mixture and cool for 10 minutes. Combine the zest, heavy cream and cream cheese mixture together then refrigerate for 1 hour. Pour into your ice cream machine and freeze according to manufactures instructions.
When ice cream is thickened and finished freezing, slowly pour in the blackberry lemon syrup and let ‘swirl’ a few times in the machine before turning off - you can also do this by creating layers of the ice cream to a container and adding the syrup between layers , then swirl with a knife a few times.

Serves 6-8

Monday, August 9, 2010

Vanilla and macadamia crumble mini cheesecakes

Vanilla and macadamia crumble mini cheesecakes / Mini cheesecakes de baunilha com cobertura crumble de macadâmia

Let me start today’s post by ashamedly confessing that I doubted Donna Hay. I did, I must admit it. I made these cheesecakes and they looked so cute in the oven, I thought that adding the crumble topping would ruin them. But I’d already melted the butter, so I carried on with the recipe.
The topping is delicious and goes perfectly well with the smooth, creamy cheesecakes.

Donna, my dear, I will never doubt you again. :)

Vanilla and macadamia crumble mini cheesecakes / Mini cheesecakes de baunilha com cobertura crumble de macadâmia

Vanilla and macadamia crumble mini cheesecakes
from Donna Hay magazine

370g ricotta
300g cream cheese
1 1/3 cups (267g) caster sugar
3 eggs
2 teaspoons vanilla extract

Base:
125g digestive/shortbread cookies
½ cup (50g) almond meal (ground almonds)
45g unsalted butter, melted

Crumble topping:
100g digestive/shortbread cookies
½ cup (70g) unsalted macadamias
2 teaspoons vanilla extract
2 tablespoons brown sugar, packed
50g unsalted butter, melted

Preheat the oven to 140°C/285°F.
Make the base: process cookies in a food processor until crushed. Add the almond meal and butter and process until combined. Grease a round 22cm springform pan and line the base with baking paper. Press the crumb mix over the base and refrigerate (I left it in the fridge overnight).
Place the ricotta and cream cheese, in a food processor and process until smooth. Add the sugar, eggs and vanilla and process until combined and smooth. Pour the mixture over the base and bake for 1 hour and 10 minutes or until set.
In the meantime, make the crumble topping: place the cookies, macadamias, vanilla, sugar and butter in a food processor and process until roughly chopped.
After baking the cheesecake for 1 hour and 10 minutes, top it with the crumble mixture and bake for a further 10 minutes or until top is golden. Allow to cool in the pan, then serve.

Serves 8-10 – I halved the recipe above, used 1/3 cup (80ml) capacity mini pans (with removable bottoms) and got 9 mini cheesecakes (baked for 25 minutes, pans only buttered, I did not line the bases with paper)

Friday, January 29, 2010

Lemon coconut mini cheesecakes

Lemon coconut mini cheesecakes / Mini cheesecakes de limão siciliano e coco

I’ve read that “Monk” is about to end – its last season is about to start here in Brazil. Can’t say I’m sad – I’ve tried watching the show several times, but it’s really not my cup of tea; I don’t see what all the fuss is about – or all the awards, for that matter.

I used to feel the same way about cheesecakes, until I made this recipe – now I want to try each and every cheesecake flavor out there. :)

Lemon coconut mini cheesecakes / Mini cheesecakes de limão siciliano e coco

Lemon coconut mini cheesecakes
adapted from Donna Hay magazine

Base:
75g digestive cookies
1/3 cup (30g) unsweetened desiccated coconut
2 tablespoons (28g) unsalted butter, melted

Filling:
175g ricotta
175g cream cheese
¾ cup + 1 tablespoon (162g) caster sugar
2 eggs
1 teaspoon vanilla extract
finely grated zest of 2 lemons
1 tablespoon lemon juice

Preheat the oven to 160°C/300°F.
To make the base, process the cookies in a food processor until finely crushed. Add the coconut and butter and process until combined.
Butter fourteen 1/3 cup (80ml) capacity mini cheesecake pans (with removable bottoms). Press the mixture over the base of each pan and refrigerate.
Process the ricotta and cream cheese until smooth. Add the sugar, eggs, vanilla, lemon zest and juice and process until combined. Pour the mixture over the bases and bake for 15-20 minutes or until set.
Allow to cool, then refrigerate. Carefully remove from the pans and top with coconut curls to serve.

Makes 14

Wednesday, May 20, 2009

Passion fruit cheesecake squares

Passion fruit cheesecake squares / Quadradinhos de cheesecake de maracujá

To me, passion fruit is such a magical ingredient – I love its color, taste, smell... Slice one passion fruit in half and in a couple of seconds your kitchen will be completely taken by that delicious aroma. So revigorating.

In a gray day like today – and by gray I don’t mean only the color of the sky – I wish I still had some of those cheesecake squares around.

Passion fruit cheesecake squares / Quadradinhos de cheesecake de maracujá

Passion fruit cheesecake squares
from Donna Hay magazine

250g plain sweet cookies
180g unsalted butter, melted
250g ricotta cheese – I used homemade
250g cream cheese, softened
½ cup (100g) caster sugar
1 tablespoon finely grated lemon zest
3 eggs
¾ cup (180ml) passion fruit pulp

Place the cookies in the bowl of a food processor and process until they resemble fine breadcrumbs – I placed them in a sturdy plastic bag and crushed with a rolling pin. Add the butter and mix to combine. Press the mixture into the base of a 20x30cm lightly greased rectangular pan lined with baking paper. Refrigerate for 30 minutes or until firm and cold.

Preheat the oven to 160ºC/320ºF. Place the ricotta, cream cheese, caster sugar and lemon zest in the bowl of a food processor and process until smooth – I used an electric mixer.
Gradually add the eggs, processing well after each addition. Fold through the passion fruit pulp and pour mixture over the base. Bake for 25-30 minutes or until set.
Allow to cool completely; carefully slice to serve.

Serves 8 – I made 2/3 of the recipe and used a 20cm square pan

Passion fruit cheesecake squares / Quadradinhos de cheesecake de maracujá

Related Posts with Thumbnails