Showing posts with label sweetened condensed milk. Show all posts

Thursday, December 22, 2016

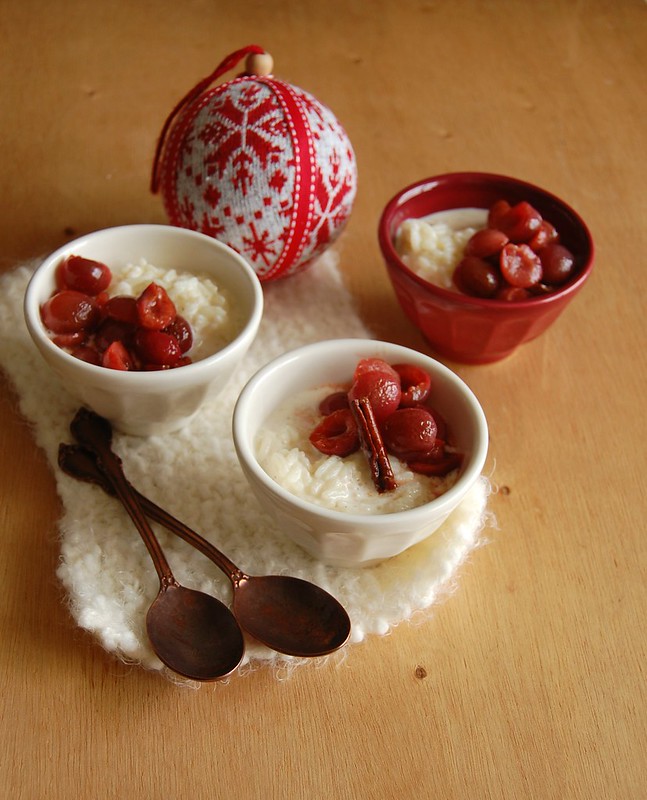
Eggnog rice pudding with roasted cherries and the reason why I love Christmas so much

Eggnog rice pudding with roasted cherries / Arroz doce de eggnog com cerejas assadas

I think it is fair to say that the main reason why I love Christmas so much is because it reminds me of my mom: she loved it and I can’t forget all the preparation around the house while the holiday songs were playing on the record player. Because of that, I decided to finish my Christmas series this year with a recipe that I make every time I miss her more than my heart can bear: rice pudding.

Unfortunately this is not her recipe – once my father got married again his wife made sure everything related to my mother got destroyed and tossed away, and the recipe notebooks were then gone forever – but it doesn’t matter: it reminds me a lot of rainy afternoons with piping hot rice pudding and cartoons on TV.

This time I served it cold because of the delicious roasted cherries I paired with it, and I added nutmeg and brandy to evoke the flavors of eggnog – it was delicious and it filled my heart with joy.

I wish you all a happy holiday season and a wonderful New Year – thank you for keeping me company all this time! xx

Eggnog rice pudding with roasted cherries
own creation

Roasted cherries:
150g fresh cherries
1 ½ tablespoons granulated sugar
juice of ½ large orange, freshly squeezed
1 small cinnamon stick

Rice pudding:
½ cup (110g) long grain rice
3 cups (720ml) whole milk
½ cup sweetened condensed milk
pinch of salt
½ teaspoon freshly ground nutmeg
1 tablespoon brandy
1 teaspoon vanilla extract

Start with the cherries: preheat the oven to 200°C/400°F. Cut cherries in half and remove the pits. Place them in a 4-cup shallow heatproof dish, stir in the sugar, orange juice and cinnamon stick, then roast for 20 minutes or until fruit is bubbly. Let cool completely, then cover and refrigerate.

While the cherries are roasting, make the rice: place the rice in a colander and wash it under the tap with cold water, rubbing the grains with your fingers until water runs clear. Set aside to drain for 10 minutes.
Place the rice, milk, sweetened condensed milk and salt in a medium saucepan and cook over high heat, stirring, until mixture starts to boil. Turn down the heat, add the nutmeg, brandy and vanilla and cook, stirring so mixture doesn’t catch in the bottom of the saucepan, until rice is tender, about 20 minutes. Set aside to cool, then cover and refrigerate.

Serve the rice pudding with the cherries on the side.

Serves 4


Monday, February 23, 2015

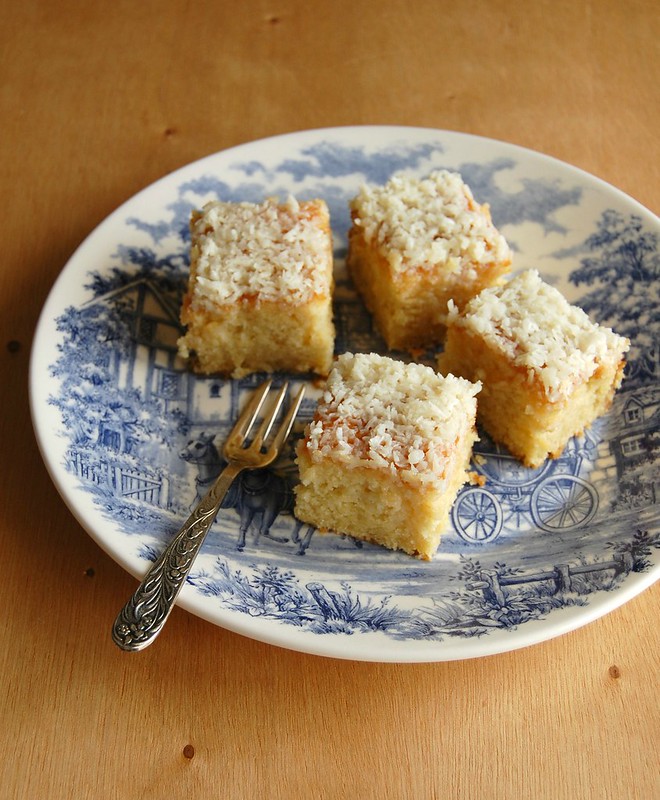
Moist coconut cake - a recipe straight from the 80s

Bolo toalha felpuda / Moist coconut cake

I was a kid in the 80s and back then there was a time when every birthday cake was the same here in São Paulo (I’m not sure it happened in other parts of the country): it was a very moist coconut cake, drenched in sweetened condensed milk – Brazilian desserts tend to be very sweet and we are crazy about sweetened condensed milk – cut into squares and wrapped individually in a piece of foil; the pieces would then go into a large Styrofoam box, decorated accordingly to the theme of the party.

I know that might sound a bit weird for non-Brazilians, but that kind of cake was all the rage here for years. And if you think that is strange, wait till you hear how the cake is called: toalha felpuda, something that can be translated like “fluffy towel”.

:D

My sister-in-law was talking about this cake the other day, of how much she wanted to eat it and all, and since I’m more than willing to make sweets for people I like I told her I would make a toalha felpuda especially for her: it turned out moist and fluffy, just as I remembered from my childhood, but I ditched the foil wrapping and placed the cake squares in an airtight container – it can be served at room temperature or chilled, like in the good old days.

Moist coconut cake (toalha felpuda)
slightly adapted from Nestlé’s Brazilian website

Cake:
2 cups (280g) all purpose flour
1 tablespoon baking powder
150g unsalted butter, softened
1 ¾ cups (350g) granulated sugar
4 eggs, separated
1 teaspoon vanilla extract
½ cup (120ml) whole milk, room temperature
200ml coconut milk
pinch of salt

Topping:
1 cup (100g) desiccated unsweetened coconut
½ cup (120ml) whole milk, room temperature
1 can (395g) sweetened condensed milk

Cake: preheat the oven to 180°C/350°F. Butter and flour a 23x32cm (13x9in) metal pan*.

In a medium bowl, sift together flour and baking powder. Set aside.
Using an electric mixer, cream butter and sugar until light and fluffy. Beat in the yolks, one at a time, beating well after each addition. Scrape the sides of the bowl occasionally. Beat in the vanilla. On low speed, beat in the sifted ingredients in three additions, alternating with the milk and coconut milk (one addition each). In a clean bowl, whisk the egg whites with the salt until firm peaks form. Fold the egg whites gently into the cake batter. Pour batter into prepared pan and bake for about 40 minutes or until risen and golden and a skewer inserted in the center of the cake comes out clean.

While the cake is baking, start making the topping: in a medium bowl, stir together the coconut and the milk and leave to hydrate. When the cake is baked, add the sweetened condensed milk to the coconut and milk mixture and stir to combine. As soon as the cake is out of the oven, prick it all over with a fork and pour over the topping, gradually, until the cake absorbs all of it. Cool completely, then cut into squares to serve.

* I made the exact recipe above using a 20x30cm (8x12in) baking pan and baked the cake for 55 minutes

Makes 24

Monday, December 15, 2014

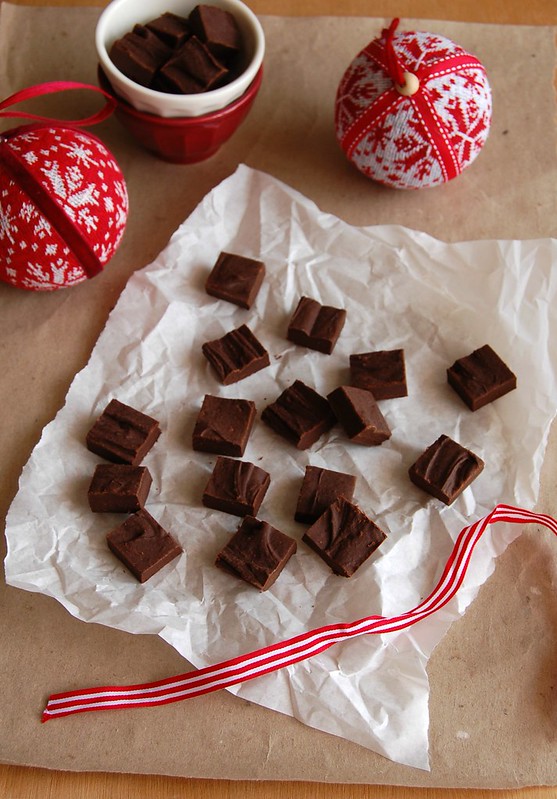
Spiced chocolate fudge

Spiced chocolate fudge / Fudge de chocolate e especiarias

It is always a joy for me to do the Christmas series here on the blog: the baked goods are delicious and they make my apartment smell wonderful, too. :)

There is, however, a problem: there are so many great recipes I have a hard time choosing what to prepare. On top of the cookbooks, the Christmas themed magazines start to arrive packed with beautiful suggestions for the holidays and it becomes even more difficult for me to decide which recipes – let’s not forget the time when I saved a recipe for almost a year so I could feature it on the following Xmas series (yes, I am that crazy). :D

I already had a list of recipes to prep this year and wasn’t planning on changing it, but when the Christmas edition of Donna Hay magazine arrived I had to add this fudge to the list: everyone loves chocolate and it goes so well with spices – not to mention the recipe yields a ton, which is fantastic when there are many people to feed.

Donna’s recipe was a bit fiddly, so I borrowed her idea of adding spices to fudge and used a much simpler recipe with great results.

Spiced chocolate fudge
adapted from here and Donna Hay Magazine

335g (120oz) dark chocolate, finely chopped – I used one with 53% cocoa solids
2/3 cup sweetened condensed milk
1 tablespoon water
1 teaspoon vanilla
1 teaspoon freshly ground allspice
½ teaspoon ground cinnamon
seeds of 4 cardamom pods finely ground
¼ teaspoon ground cloves
pinch of salt

Line a square 20cm (8in) baking pan with baking paper; set aside. Place chocolate, sweetened condensed milk and water in a small saucepan and melt over low heat, stirring.

Remove from the heat and stir in the vanilla, spices and salt. Pour mixture onto prepared pan and smooth the surface. Chill fudge about 30 minutes or until firm. Cut into small squares.

Makes 64

Friday, November 8, 2013

Caramel and chocolate bars and turning things interesting for adults

Caramel and chocolate bars / Barrinhas de caramelo e chocolate

Long ago, many years before vampires were “in” (or were turned into creatures that walk around in broad day light), a very respected filmmaker made a masterpiece out of Bram Stoker’s book, and my favorite actor set the bar high for anyone else ever to play a vampire again.

Little over twenty years later a very interesting movie trailer gets released, in which Tilda Swinton and Tom Hiddleston play vampires – apparently dark ones, nothing covered in glitter, thank heavens. :D Both of them look absolutely amazing in Only Lovers Left Alive and now I cannot wait to watch the movie. I don’t think anyone will ever be able to match Gary Oldman playing a vampire, but I really believe that Tilda and Hiddles can seriously make those creatures of the night interesting again for us, adults. :)

I’m not a spokesperson for super healthy food – I do buy and eat processed food sometimes, and I am sure you remember my baked goods filled with chopped Oreos and Snickers. :) However, candy bars are not my cup of tea: I often find them too sweet, even the ones I used to love as a kid. Bill Granger’s bars, with layers of cookie, caramel and chocolate, are a great way to turn a certain candy bar interesting for us, adults – and the salt sprinkled on top makes all the difference in these addictive little morsels of deliciousness. :D

Caramel and chocolate bars
slightly adapted from the delicious and beautiful Holiday (I bought mine here)

Crust:
125g all-purpose flour
1 teaspoon baking powder
1 cup (90g) sweetened flaked coconut
½ cup (100g) granulated sugar
125g unsalted butter, melted

Filling:
100g unsalted butter
100g brown sugar
1 can (395g) sweetened condensed milk
2 tablespoons corn syrup
1 teaspoon vanilla extract

Topping:
150g dark chocolate – I used one with 53% cocoa solids
flaked sea salt, to taste (I used Maldon as suggested by Bill)

Preheat the oven to 180°C/350°F. Lightly butter a 20x30cm (12x8in) baking pan, line it with foil leaving an overhand in two opposite sides, then butter the foil as well.
Crust: in a large bowl, combine the flour, baking powder, coconut, sugar and melted butter and mix until a dough forms. Press this mixture into the bottom of the prepared pan and bake for 12-15 minutes or until lightly golden.
While the base is in the oven, prepare the filling by placing all the ingredients into a medium saucepan. Cook over a low heat while stirring, until all the sugar has dissolved. Turn up the heat, bring to the boil, then reduce the heat to low and cook for 5 minutes, constantly stirring, until it has turned a light golden color. Pour this evenly over the cooked base and bake for 10 minutes. Remove from the oven. Cool completely over a wire rack.

Melt the chocolate in a heatproof bowl over gently simmering water (do not let the bottom of the bowl touch the water). Once melted, pour onto the caramel and spread evenly. Allow the chocolate to set before sprinkling over the sea salt. Cut into squares or bars.

Makes 24

Wednesday, June 19, 2013

Pb & jelly bars + a TV show I deeply love

Pb & jelly bars / Barrinhas de manteiga de amendoim e geléia

One of my all time favorite TV shows is “Law & Order: Criminal Intent” – I began watching the show because of Vincent D’Onofrio and ended up addicted to it. I hated it when they added Chris Noth to the equation and completely abandoned the show when Jeff Goldblum took over – without Goren and Eames things weren’t interesting anymore.

With the help of my good buddy Netflix I’ve been watching the show from the beginning, from the very first episode, and enjoying it a lot: there are episodes I did not see back in the day when they were aired here and some of them I could barely remember (I’d forgotten how the whole Nicole Wallace thing had started, for instance). It’s such a joy to watch a talented actor in action – not many can be proud of their big break the way D’Onofrio can, and to be thanked during an Oscar speech having nothing do to with the movie in question is even for fewer – and it doesn’t hurt when they’re eye candy as well: if he’s your type you should really watch him dance with a very lucky lady in one of the show episodes: jump to 2:13. You’re welcome. ;)

Peanut butter and jam, such a classic combination: a very American thing I learned of when I started reading food blogs, many years ago. In these bars – which are dead easy to make – the combo is lovely and the flavors perfectly complement each other: Goren and Eames in food form. :D

Pb & jelly bars
slightly adapted from here

125g unsalted butter, melted
70g light brown sugar
½ teaspoon vanilla extract
200g all purpose flour
1 ¼ teaspoons baking powder
pinch of salt
½ heaping cup raspberry jam
395g can sweetened condensed milk
1/3 cup + 2 tablespoons crunchy peanut butter
1 cup unsalted peanuts*

Preheat oven to 180°C/350°F. Lightly butter a 20x30 (8x12in) baking pan, line it with allowing a 2cm overhang on all sides, and butter the foil as well.
Combine butter, sugar and vanilla in a bowl. Sift flour, baking powder and salt over butter mixture. Stir until well combined. Press mixture onto the bottom of the prepared pan. Bake for 12 minutes or until golden. Remove from oven. Set aside for 5 minutes to cool.
Spread jam evenly over base. Place condensed milk, peanut butter and peanuts in a bowl. Stir until just combined. Pour milk mixture evenly over jam. Bake for 30 minutes or until edges are deep golden and center is just firm to touch. Cool completely in pan. Cut into bars.

* I had only salted peanuts at home, so I rinsed them thoroughly under cold water then patted them dry with paper towels

Makes 24

Saturday, February 2, 2013

Limoncello & lime popsicles

Limoncello and lime popsicles / Picolés de limão e limoncello

Once you have a bottle of homemade limoncello in your pantry you have to use it, right? I've been adding it to lemon cakes regularly, especially when the recipe calls for lemon extract, with great results. And it went really well in these, too, which I call "popsicles for grown ups" - delicious and very easy to make.

Limoncello & lime popsicles
from the always amazing Delicious - Australia

½ cup (120ml) heavy cream, whipped until thick
1 395g can sweetened condensed milk
¼ cup (60ml) limoncello – I used homemade
finely grated zest of 2 limes
½ cup (120ml) lime juice

Combine all the ingredients in a bowl, folding gently to combine. Pour into twelve 1/3-cup capacity popsicle molds, then freeze for 1-2 hours until firm but not completely frozen. Insert a popsicle stick into each mould. Freeze for at least another 2 hours or overnight until firm.

Makes 12

Thursday, November 15, 2012

Double chocolate cookies (made with sweetened condensed milk)

Double chocolate cookies (made with sweetened condensed milk) / Cookies duplos de chocolate (feitos com leite condensado)

After a time consuming cake I thought you deserved an easy recipe, and these cookies are very, very easy; I have made tons of chocolate chip cookies so far but what made me curious about these was the sweetened condensed milk based dough - I'll just warn you that it is going to be very difficult not to eat the dough right out of the fridge by spoonful. :D

Double chocolate cookies (made with sweetened condensed milk)
from the great Delicious Magazine

200g good quality dark chocolate (minimum 50% cocoa solids)
50g unsalted butter
397g can sweetened condensed milk
1 teaspoon vanilla extract
225g all purpose flour
1½ teaspoons baking powder
pinch of salt
100g white chocolate chips or chunks

Break up the chocolate and gently melt it along with the butter in a bowl set over a pan of simmering water, stirring occasionally. Stir in the condensed milk and vanilla, remove from the heat and cool completely. Mix in the flour, baking powder, salt and chocolate buttons and chill the mixture until firm enough to handle*.
Preheat the oven to 180°C/350°F. Line two large baking sheets with baking paper.
Place leveled tablespoons of the mixture 5cm (2in) apart onto prepared sheets. Bake for 12-15 minutes – the cookies should still look soft and will glisten. Don't overbake them as they soon become very hard. Cool in the sheets over a wire rack for 5 minutes, then carefully remove the cookies with a palette knife and cool on the rack.

* do not let it get too stiff – my dough was so hard it broke my cookie scoop :(

Makes about 45

Saturday, October 20, 2012

Tangerine butter cake

Tangerine butter cake / Bolo amanteigado de tangerina

Looking for a simple cake recipe, I found this golden and delicious cake - it is the perfect companion for a cup of tea; it was a great way to use up the sweetened condensed milk left from the cheesecake making, as well a a wonderful way to put to good use some tangerines I'd had in the fridge for more than one week.

Tangerine butter cake
slightly adapted from Dan Lepard's column at the Guardian

Cake:
2 large eggs, separated
pinch of salt
¾ cup (150g) granulated sugar, divided use
100g unsalted butter, melted
125g condensed milk
finely grated zest of 2 tangerines
½ cup (120ml) tangerine juice
1 teaspoon vanilla extract
2 cups (280g) all purpose flour
2 teaspoons baking powder

Icing:
¾ cup (105g) icing sugar
finely grated zest of 1 tangerine
about 1½ tablespoons tangerine juice

Preheat the oven to 180°C/350°C. Lightly butter a 22x12cm (9x5in) loaf pan, line it with baking paper and butter the paper as well.
Using an electric mixer, beat the egg whites and salt until frothy. Gradually add 2 tablespoons of the sugar then beat until a soft meringue forms. Set aside.
In a large bowl, whisk together the melted butter, condensed milk, the remaining sugar, egg yolks, tangerine zest and juice and vanilla until smooth. Sift together the flour and baking powder over the batter and beat until smooth. Fold through the meringue quickly and evenly. Transfer the batter to the prepared pan and smooth the top.
Bake for 40-45 minutes or until golden and risen and a skewer inserted in the center of the cake comes out clean. Cool in the pan over a wire rack for 10 minutes, then carefully unmold. Remove the paper and cool completely on the rack.
Icing: sift the sugar into a small bowl and stir in the zest. Gradually add the juice, stirring until a pourable consistency (add more juice or water if necessary). Pour over the cake and set aside for 30 minutes to set.

Serves 6-8

Wednesday, October 10, 2012

Lemon & honey Anzac tart

Lemon and honey anzac tart / Torta anzac de mel e limão siciliano

Lemon tarts – or lemon bars, for that matter – are not something exactly new on this blog, but since they’re among the most delicious desserts out there I never tire of baking them. When I saw the Australian Delicious lemon tart version with a crust made of Anzac cookies I had to bake it and I’m glad I did: the tart is wonderful and not difficult to make. I believe that store-bought ANZAC cookies are easy to find Down Under, but not in Brazil – so if you can’t find the cookies where you live either, do not worry: I’ll share the recipe I used to make mine.

Lemon & honey Anzac tart
from the fabulous Delicious - Australia

300g Anzac cookies – recipe follows
3 tablespoons unsalted butter, melted
3 tablespoons honey + some extra to serve
finely grated zest of 2 lemons
2/3 cup (160ml) freshly squeezed lemon juice
395g can sweetened condensed milk
½ cup (120ml) heavy cream
4 eggs
whipped cream, to serve

Lightly butter a 22x4cm round loose-bottomed tart pan*.
Place cookies in a food processor and whiz until fine crumbs. Gradually add butter and pulse until the mixture resembles damp sand – add butter gradually because depending on how buttery the cookies are you might not even need all the butter. Press crumb mixture into the base and sides of prepared pan. Chill for 30 minutes or until firm.
Preheat the oven to 170°C/338°F. Place honey, lemon zest and juice, condensed milk, cream and eggs in a bowl and whisk gently until combined. Pour into the tart case and bake for 35 minutes or until just set but the centre still has a gentle wobble. Cool in the pan to room temperature, then place in the fridge and chill for at least 2 hours or until cold and set.
To serve, slice the tart and drizzle with thickened cream and extra honey.

* my pan was the right diameter but wasn’t deep enough, so I made the exact amount of base but halved the filling recipe; my tart was done after 15 minutes in the oven

Serves 6-8

ANZAC cookies / Biscoitos ANZAC

ANZAC cookies
from the always wonderful Modern Classics 2

1 cup (115g) rolled oats
1 cup (140g) all purpose flour
½ cup (100g) granulated sugar
¾ cup (75g) desiccated coconut
2 tablespoons golden syrup
½ cup + 1 tablespoon (127g) unsalted butter
1 teaspoon baking soda
1 tablespoon hot water

Preheat oven to 180°C/350°F; line two large baking sheets with baking paper.
In a large bowl mix the oats, flour, sugar and coconut. Place the golden syrup and butter in a saucepan over low heat and stir until melted. Mix the baking soda with the water and add to the butter mixture. Add to the dry ingredients and mix well. Place tablespoons of the mixture onto prepared sheets 5cm (2in) apart. Flatten slightly. Bake for 8–10 minutes or until golden brown.
Cool on sheets for 5 minutes, then transfer to wire racks to cool completely.

Makes 22 – I rolled 2 leveled tablespoons of dough per cookie and got 20

Saturday, October 8, 2011

Caramel crumb bars and recipes perfect for sharing

Caramel crumb bars / Barrinhas de caramelo

Every time I want to bake something for my coworkers I look for recipes that yield a lot – I want them to eat and have seconds if they feel like it (the sweet tooth in me finds that kind of thing important). :D
Therefore cakes, bars and brownies baked in a 13x9in pan are perfect – like these delicious caramel bars that so far have been the quickest baked goods to disappear at the office (beating these brownies’ record).

Do you have a great recipe that feeds a crowd? Maybe from one of the books I own? I would love to know. ;)

Caramel crumb bars
from the delicious Saveur

Crust:
1 cup (224g/2 sticks) unsalted butter, softened
½ cup (100g) granulated sugar
1 teaspoon vanilla extract
1/8 teaspoon salt
2 ½ cups (350g) all purpose flour, divided use

Filling:
¼ cup (56g) unsalted butter, softened
¼ cup packed brown sugar
1 tablespoon light corn syrup
1 395g (14oz) can sweetened condensed milk

Preheat the oven to 180°C/350°F. Lightly butter a 32x22cm (13x9in) baking pan, line with foil, butter and flour the paper and the sides of the baking pan*.
Start by making the crust: in a mixer fitted with the paddle attachment, beat together the butter, sugar, vanilla, and salt until creamy. Add 2 ¼ cups (315g) flour; mix. Transfer ¾ of the dough to pan; press into bottom; chill. Rub remaining dough and remaining ¼ cup (35g) flour into large crumbles; refrigerate. Make the filling: combine butter, brown sugar, syrup, and sweetened condensed milk in a 2-qt. heavy saucepan. Cook, stirring, over medium-high heat until thick and creamy and the mixture pulls away from the sides and bottom of the saucepan, 8–10 minutes. Pour over dough; scatter crumbles over top. Bake until golden, 25–30 minutes (mine needed 40). Let cool. Cut into bars.

* I made the exact recipe above using a 20x30cm (8x12in) baking pan with a removable bottom – therefore, I just buttered and floured the pan, without the need of using foil

Makes 32

Monday, April 25, 2011

Chocolate lime pie + popsicles on the side

Chocolate lime pie / Torta de limão e chocolate

A couple of days after talking to you about intuition I had an insight while making this pie: since the tart pan I was using was a bit smaller than the one called for on the recipe, there was some filling left. I stared at the velvety cream and thought it would taste amazing as some sort of frozen dessert – I immediately poured the cream into my popsicle molds and ended up with totally addictive treats; I think they were even better than the tart itself, but please do not tell Ms. Lawson I said so. ;)

Chocolate lime pie
again from the wonderful Nigella Kitchen

Base:
3 cups Graham-crackers or digestive cookies crumbs
1 tablespoon unsweetened cocoa powder
4 tablespoons (56g) unsalted butter, softened
¼ cup bittersweet chocolate chips

Filling:
1 x 395g (14oz) can sweetened condensed milk, better if chilled
4-5 limes, to give approximately 2 tablespoons finely grated zest + ¾ cup (180ml) juice
1 ¼ cups (300ml) heavy cream
1 square bittersweet chocolate

Lightly butter a 23cm (9in) fluted tart pan, 5cm (2in) deep, with a removable bottom.
Put the crackers, cocoa powder, butter and chocolate chips in the bowl of a food processor and process until a sandy mixture forms. Transfer to the prepared tart pan and press onto the base and sides. Refrigerate while you make the filling.
Pour the condensed milk into the large bowl of an electric mixer. Zest the limes into a bowl, tightly cover with plastic wrap and set aside for decorating the tart later. Squeeze the juice of the limes until you get the required amount. Add the juice to the condensed milk and mix to combine.
Pour the heavy cream into the mixture and whisk in medium-high speed until thick. Spread over the tart base and refrigerate again for 4 hours or until filling is very firm (refrigerate for longer if your condensed milk was not chilled).
Before serving, grate the chocolate over the filling and sprinkle with the lime zest. Serve immediately – do not keep the pie out of the refrigerator for long.

Serves 6-8 – my tart pan wasn’t very deep, so there was some filling left; I made popsicles with it and they turned out delicious. :D

Wednesday, November 25, 2009

Spiced brigadeiros

Spiced brigadeiros / Brigadeiros de especiarias

When I was little and heard people saying that “time flies”, I’d usually think “what are these people talking about?” – I guess it only started feeling that way to me after I turned 20. Now my baby sister is a year away from going to college... Well, you get the picture. :D

Holiday season is here again – even though sometimes it seems that Christmas was last month – and my tree is already decorated; time to start thinking about the food.
To me, spices are a synonym of holiday food and I thought that adding them to a Brazilian candy would make a wonderful combination – I was pretty glad with the result, especially after my last squashed brigadeiros. :)

I used Paula’s wonderful brigadeiro recipe as a guide and substituted the chocolate for cinnamon, cloves and nutmeg.

Spiced brigadeiros / Brigadeiros de especiarias

Spiced brigadeiros

1 can (395g) sweetened condensed milk
1/3 cup (80ml) heavy (whipping) cream
½ heaping tablespoon all purpose flour
1 tablespoon unsalted butter + a bit extra for buttering the plate
1/8 teaspoon freshly grated nutmeg
1/8 teaspoon ground cloves
½ teaspoon ground cinnamon
granulated sugar, for rolling the candy

Butter a large plate and set aside.
Mix the condensed milk, cream, flour, 1 tablespoon butter, nutmeg, cloves and cinnamon in a saucepan and cook over low heat, stirring constantly, until thickened, about 15 minutes – when the bottom of the pan starts to show and the mixture is a bit thicker, remove from heat and immediately pour into the prepared plate. Set aside to cool completely, then refrigerate to make rolling easier.
Roll small portions of candy into balls (lightly butter your palms to do it), roll through the granulated sugar and place into fluted paper cups.

Makes 32

Spiced brigadeiros / Brigadeiros de especiarias

Monday, August 3, 2009

Lime tartlets

Lime tartlets / Tortinhas de limão

I’m such a softie - just can’t say “no” to my sister.

She finally stopped by and we spent last Saturday together. When I told her I was going to make sfiha – because she loves it – she replied: “It’s been ages since I last had lime tart...” :D

I wanted something different from my last lemon tart and for that I combined Deb’s fantastic sweet tart shell (it doesn’t shrink!) and Nigella's fresh lime filling. If my sister is any indication – she asked to take some tartlets home – this recipe is a keeper. :D

Lime tartlets / Tortinhas de limão

Lime tartlets

Tart shells:
1 ½ cups (210g) all-purpose flour
½ cup (70g) confectioner’s sugar
¼ teaspoon salt
126g (1 stick + 1 tablespoon) very cold (or frozen) unsalted butter, cut into small pieces
1 large egg

Lime filling:
finely grated zest and juice of 2 limes
¾ can (295g/10.5oz) sweetened condensed milk
2/3 cup (160ml) heavy cream

Start by making the shells: pulse the flour, sugar and salt together in the bowl of a food processor. Scatter the pieces of butter over the dry ingredients and pulse until the butter is coarsely cut in. (You’re looking for some pieces the size of oatmeal flakes and some the size of peas.) Stir the egg with a fork, just to break it up, and add it a little at a time, pulsing after each addition. When the egg is in, process in long pulses – about 10 seconds each – until the dough, which will look granular soon after the egg is added, forms clumps and curds. Just before you reach this stage, the sound of the machine working the dough will change–heads up – I used my Kitchen Aid with the paddle attachment in the whole process.
Turn the dough out onto a work surface and, very lightly and sparingly, knead the dough just to incorporate any dry ingredients that might have escaped mixing. Chill the dough, wrapped in plastic, for about 2 hours before rolling.

To roll the dough: butter twelve 9cm (3 ½in) tartlet pans with removable bottoms - alternatively, use one 22cm (9in) tart pan. Roll out small portions of chilled dough on floured sheet of parchment paper to 11.5cm (4 ½in) rounds, lifting and turning dough occasionally to free from paper. (Alternately, you can roll this out between two pieces of plastic, though flour the dough a bit anyway.). Transfer dough into prepared tartlet pans and seal any cracks in dough. Fold overhang in, making double-thick sides, and if too thick, push the dough down with your fingers towards the bottom of the pan. Pierce crust all over with fork.

Freeze the crusts for at least 30 minutes, preferably longer, before baking.

Preheat the oven to 190ºC/375ºF. Butter the shiny side of a piece of aluminum foil (or use nonstick foil) and cut roughly into twelve squares; place the foil squares, buttered side down, tightly against the crust. And here is the very best part: Since you froze the crust, you can bake it without weights. Put the tartlet pans on a large baking sheet and bake the crusts for 20 to 25 minutes, or until lightly golden.
Carefully remove the foil. If the crust has puffed, press it down gently with the back of a spoon. Bake the crust about 10 minutes longer to fully bake it, or until it is firm and golden brown, brown being the important word: a pale crust doesn’t have a lot of flavor. Transfer the pans to a rack and cool the crusts to room temperature

Do ahead: the dough can be wrapped and kept in the refrigerator for up to 5 days or frozen for up to 2 months. While the fully baked crust can be packed airtight and frozen for up to 2 months, the flavor will be fresher bake it directly from the freezer, already rolled out.

Filling: using an electric mixer, whisk all the ingredients in a large bowl until thick and creamy. Pour into the baked and cooled tart shells and chill for a further 30 minutes or until set.

Makes 12

Lime tartlets / Tortinhas de limão

Friday, June 5, 2009

Lavender brigadeiro

Lavender brigadeiro

Something’s happened to me and I might be scarred for life... I can’t make brigadeiros! :(

The last couple of times I made the recipe it never firmed up enough to be rolled into balls. And this time was no different – I had this mad idea of replacing chocolate for lavender buds and it actually tasted good, but the minute I placed the candy balls into the paper cups they started to spread... Not pretty. :(

I tried saving the recipe by placing the brigadeiro dough into tiny cups, like I did for my sister’s birthday party – except that I meant to do so that day.

But I still have hope – after watching these four adorable kids making the traditional brigadeiros I’m ready to try again. :)

Lavender brigadeiro

Lavender brigadeiro
own creation

1 can (395g) sweetened condensed milk
2 teaspoons edible dried lavender buds
1 tablespoon unsalted butter + a bit extra for buttering the plate

Butter a large plate and set aside.
Place the lavender buds in a mortar and crush using a pestle.
Mix the condensed milk, ground lavender and 1 tablespoon butter in a saucepan and cook over low heat, stirring constantly – when the bottom of the pan starts to show and the mixture is a bit thicker, remove from heat and immediately pour into the prepared plate. Set aside to cool completely.
To serve, place 2.5cm (1 inch) portions into individual small cups or tiny bowls, or roll into balls (lightly butter your palms to do it), roll through granulated sugar and place into fluted paper cups.

Serves 10

Lavender brigadeiro

Friday, April 3, 2009

Pistachio brigadeiro

Pistachio brigadeiro

As most of you know, I’m a huge movie fan – hence the name I chose for my blog. But I also love reading, even though these days I don’t read as much as I used to.

Unlike many people, one thing I don’t stress about is when books become movies – to me, it’s very clear that they are two completely different means of communication and one can never be exactly like the other. The book author has one point of view that may not be shared by the screenwriter and the director. It’s someone’s version about someone else’s work – it will never be the same but that doesn’t have to be something bad: I had tears in my eyes this morning after watching Jose Saramago’s reaction to Fernando Meirelles’ take on “Blindness”.

Now I give you my take on Brazilian chef Morena Leite’s pistachio brigadeiro – it is not exactly like hers, but still delicious.

Pistachio brigadeiro

Pistachio brigadeiro

100g unsalted, shelled pistachios
1 can (395g) sweetened condensed milk
1 tablespoon unsalted butter + a bit extra for buttering the plate

Butter a large plate and set aside.
Place the pistachios in a food processor and grind until it resembles wet sand.
Mix the condensed milk, butter and ground pistachios in a saucepan and cook over low heat, stirring constantly – when the bottom of the pan starts to show and the mixture is a bit thicker, remove from heat and immediately pour into the prepared plate. Set aside to cool completely.
To serve, place 2.5cm (1 inch) portions into individual serving spoons or roll into balls and place in a serving dish.

Serves 10-12

Pistachio brigadeiro

Wednesday, March 25, 2009

Lime fudge with macadamia nuts

Lime fudge with macadamia nuts

Kitchen tools – those around here crazy about them please raise your hand. :D

Good cookware and tools can really help you get better results in cooking and baking – for instance, I can’t imagine my kitchen without my wonderful Kitchen Aid mixer; for a citrus lover like me, a Microplane zester is a must-have.
And to make it all perfect, gorgeous dinnerware to serve the food prepared with love – even people who don’t like/don’t know how to cook are pleased to eat at a beautifully set table.

Speaking of citrus, I’m still on a lime kick. And I would never have thought it would go so well with macadamias.

Lime fudge with macadamia nuts

Lime fudge with macadamia nuts
slightly adapted from here

3 cups (465g) white chocolate, finely chopped
14-ounce (395g) can sweetened condensed milk
3 teaspoons finely grated lime zest
3 tablespoons lime juice – freshly squeezed is better
1 cup chopped macadamia nuts (toasted if desired)

Line a square 20cm (8in) baking pan with foil, extending foil over the edges of pan. Butter foil; set aside.

Stir white chocolate and sweetened condensed milk in a large heavy saucepan over low heat just until chocolate is melted and mixture is smooth. Remove from heat. Stir in lime zest and juice. Stir in the macadamia nuts. Spread mixture evenly into the prepared pan.

Cover and chill for two hours or until firm. Lift the fudge from pan using edges of foil. Peel off foil and use a knife to cut fudge into pieces. Store in an airtight container at room temperature for up to one week or in the freezer for up to 2 months.

Makes 64 small squares

Lime fudge with macadamia nuts

Tuesday, February 17, 2009

Sweet corn ice cream

Sweet corn ice cream

Food bloggers love sharing recipes and I am no exception – I have made tons of recipes from other blogs and it’s a huge pleasure for me when people try the recipes I post here. It’s a great exchange and I feel lucky to be part of it.

What makes me even happier is being able to show my foreign readers a bit about the food we eat here in Brazil, or at least in the region I live. I once got an email from Marta - a lady from New Zealand - asking about my butternut squash compote. And a few months ago the compote was featured on Apartment Therapy – The Kitchn. Faith prepared the recipe, adding her own twist, and liked it!

I give you now a very Brazilian ice cream flavor – it’s common to use corn in sweet recipes here (remember my corn fudge?). I slightly adapted a recipe from Nestlé’s Brazilian website – a touch of cinnamon and the ice cream reminded me of curau.

Sweet corn ice cream

Sweet corn ice cream

1 can (200g) corn kernels, drained and rinsed
1 ¼ cups (300ml) whole milk
1 can (395g) sweetened condensed milk
1 cup (240ml) heavy cream
¼ teaspoon ground cinnamon
pinch of salt

Place the kernels and milk in a blender and blend until smooth. Push mixture through a sieve and put it back in the blender. Add the sweetened condensed milk, heavy cream, cinnamon and salt and blend.
Pour into a metal/glass bowl, cover and refrigerate for at least 2 hours, then freeze in your ice cream maker according to the manufacturer’s instructions.
Transfer ice cream to an airtight container and put in the freezer until firm, at least 4 hours, before serving.

Serves 8-10

Sweet corn ice cream

Wednesday, November 5, 2008

Sweetened condensed milk cake

Sweetened condensed milk cake

Wow, almost a week without a new recipe around here... You guys must be bored to tears with my crepe photo. :)

A stomach flu kept me away from cooking, posting and reading my favorite blogs. But now I’m feeling well again – thanks to tons of medicine and rest – and eager to go to the kitchen.

This is something I baked before I got sick; you know I can’t resist recipes with sweetened condensed milk – right, Lynn? – and the thought of a cake made with it instead of sugar was too good for me to pass.

It’s a very light and sort of spongy cake. No decadent fillings or icings – just a simple cake, to be enjoyed with a cup of coffee or tea. Or a glass of orange juice on a hot day.

Sweetened condensed milk cake

Sweetened condensed milk cake
from a Brazilian cookbook

1 can (395g) sweetened condensed milk
4 eggs
120g all purpose flour
½ tablespoon baking powder
50g unsalted butter, melted and cooled
icing sugar, for dusting

Preheat the oven to 180ºC/350ºF; generously butter a 22cm* (9in) ring cake pan.
Place all the ingredients in a large bowl and mix well. Pour the batter into prepared pan and bake for 20 minutes, or until risen and a skewer inserted in the cake comes out clean (my cake took 35 minutes to bake).
Remove from the oven and place on a wire rack to cool completely before unmolding.
Dust with icing sugar before serving.

* I used a 20cm (8 in) pan.

Serves 10-12

Related Posts with Thumbnails