Showing posts with label corn flour. Show all posts

Monday, April 8, 2024

Apple blueberry bars and 2024 resolutions


Barrinhas de maçã e mirtilo / Apple blueberry bars

My dear and lovely readers, I hope you are all well and having a very nice year so far. It has been a very, very long time since I last posted something on this blog, so I would be surprised if anyone stopped by, but anyway I would like to talk to you today about New Year’s resolutions (in April – I know, I know). 😊

In the beginning of 2023 I made a list of resolutions for that year and I kept it very small to avoid frustrations: I wanted to finish writing my e-book (in Portuguese) and publish it (did it on June 2), to exercise more often (still to be improved in 2024, but I started and it was very good for me) and to treat myself more kindly than I used to (this is a work in progress so it is on the 2024 list as well).

To my surprise, the e-book has sold many copies, I have received several emails and messages from people who bought it saying they loved it, also received photos of some of the recipes being prepared at my readers’ homes… It was one of the best things I had in my whole life.

By early January this year I decided to write again the list of resolutions, and again I would keep it small: one of them was to keep blogging, at least once a month, even though blogs cannot compete nowadays with Instagram and TikTok (I must be honest and say that I don’t even know how to use the latter, I’m too old for that). So far I have managed to keep that promise for my blog in Portuguese (I even posted twice back in February), therefore I will do the same with this blog in English.

I’ll start with these delicious apple blueberry bars, that were meant to be blueberry bars only, but when I checked my freezer, I saw that my blueberry stash was not as big as I thought. One look at my counter and the beautiful apples I had brought home a couple of days before almost smiled at me, begging to be used: they were the perfect pair for the blueberries and the bars turned out wonderful.


Apple blueberry bars

own recipe


Crust and topping:

2 cups (280g) all purpose flour

1/3 cup (46g) fine corn flour/corn meal (not corn starch) – if you cannot find it, replace with all purpose flour

¼ teaspoon ground cinnamon

¼ teaspoon fine salt

1/3 cup + 1 tablespoon (total of 78g) granulated sugar

¾ cup (170g) unsalted butter, melted and cooled


Filling:

2 medium Gala apples (total of 250g)

1 cup (150g) blueberries, fresh or frozen (unthawed)

¼ cup (50g) granulated sugar

1 teaspoon corn starch

pinch of salt

½ tablespoon lime or lemon juice


Preheat the oven to 180°C/350°F. Lightly brush a 20cm (8in) square baking pan with butter, line it with foil leaving an overhang in two opposite sides and butter the foil as well. Set aside.


In a medium bowl whisk together the all purpose flour, corn flour, cinnamon, salt and sugar. Add the butter and whisk it in using a fork until you get coarse breadcrumbs texture. Transfer 2/3 of this mixture to the prepared pan and spread it evenly on the bottom. Press the mixture down onto the bottom of the pan (using your fingertips or a small measuring cup) to make the crust of the bars. Freeze the base and the remaining mixture for 10 minutes while you prep the fruit.


Core the apples, remove the seeds and cut into 1cm (little less than ½ inch) cubes. Transfer to a medium bowl, add the blueberries, sugar, corn starch, salt and lime/lemon juice and mix to combine.

Remove the pan and bowl from the freezer. Spread the fruit evenly over the base and sprinkle over the remaining mixture – you can squeeze portions of the mixture in your hand to create different sizes of crumbles if you like.


Bake for 35-40 minutes or until golden. Remove from the oven and let cool completely over a wire rack before slicing and serving.


Makes 16


Thursday, May 14, 2020

Apple crumble with corn flour and orange and my eating habits during quarantine

Crumble de maçã com fubá e laranja / Apple crumble with corn flour and orange

I don’t know about you guys, but during this quarantine my eating habits have varied a lot: breakfast with homemade bread and fruit, followed by lunch, also homemade, the very Brazilian combo of rice & beans with vegetables on the side, and sometimes beef or chicken (usually once or twice a week, tops). When it comes to dinner… my will power is usually gone.

Some days I make soup, some days I make a hearty salad with beans and eggs, but there are days I crave food that makes me feel hugged – that is when my dinner becomes pizza (homemade, because I am too afraid to order), or a nice loaf of bread with cheeses and some wine. If there are avocados dinner is guacamole. And on top of all that my cravings for sweets are now daily, and no longer only during my PMS days.

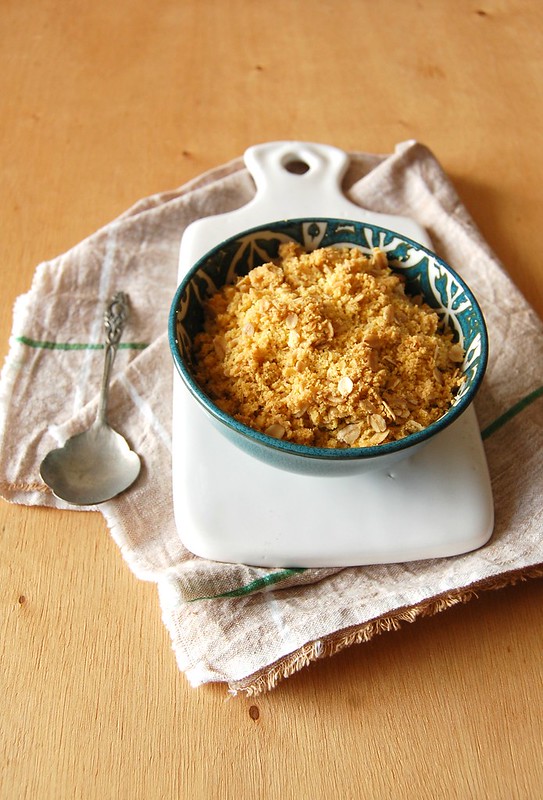
In the very few times I went out for groceries I brought home some chocolate, but my stash sometimes vanishes in no time at all. In one of those days I was desperate for something sweet I used one apple that had been in the fridge forever to make a crumble, my favorite dessert. To make the recipe a little bit more interesting, I replaced the all purpose flour with corn flour (finer than cornmeal, but this would also work) and added orange zest – it turned out delicious!

I share the recipe with you today and I hope you like it as much as I did – I am sure this crumble topping would also be delicious with other fruit, like bananas or pears: use whatever you have at hand.

Apple crumble with corn flour and orange
own recipe

Crumble topping:
2 tablespoons demerara sugar – I use it for the crunch, but it can be replaced by granulated sugar
finely grated zest of 1 orange
½ cup (70g) corn flour – it is finer than cornmeal, but the latter works just as fine
1/8 teaspoon baking powder
pinch of salt
2 ½ tablespoons (35g) unsalted butter, cold and diced
¼ cup (22g) rolled oats

Filling:
2 medium Granny Smith apples
2 tablespoons granulated sugar
¼ teaspoon ground cinnamon

Preheat the oven to 350°F/180°C. Have ready two 1-cup capacity each heatproof bowls.

Topping: in a medium bowl, rub together the sugar and orange zest until sugar is fragrant. Add the corn flour, baking powder and salt. Add the butter and rub the ingredients with your fingertips until mixture resembles coarse meal. With a fork, stir in the oats. Freeze the mixture while you prepared the apples: peel and core the apples. Cut them into small dice and transfer to a medium bowl. Add the sugar and cinnamon and stir to coat. Divide the apples between the two dishes and sprinkle with the crumble topping. Bake for about 30 minutes or until topping is golden brown. Serve warm.

The crumble topping might be frozen for up to 1 month in a tightly sealed plastic bag.

Serves 2

Tuesday, March 27, 2018

Cornmeal, coconut and marmalade cake

Cornmeal, coconut and marmalade cake / Bolo de fubá, coco e geleia de laranja

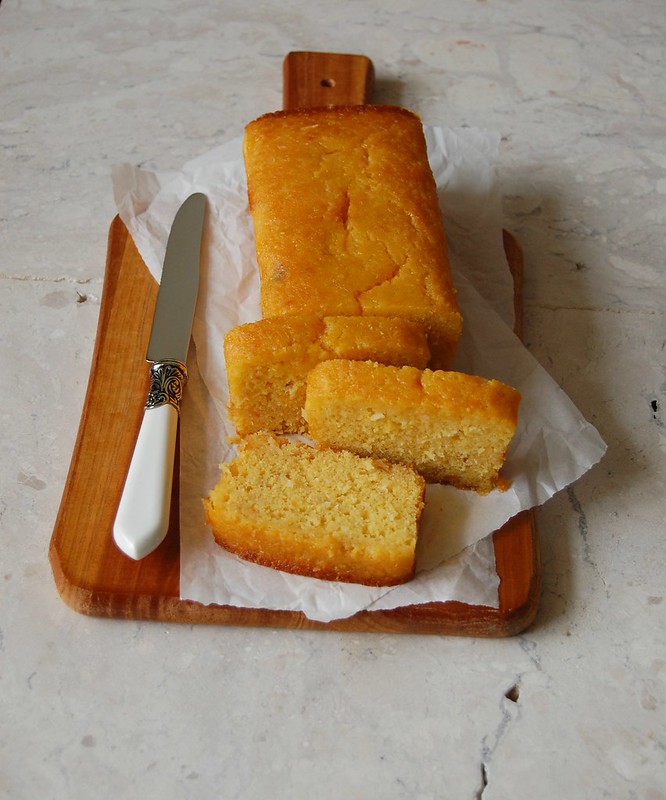
I bought Ottolenghi’s beautiful book ages ago and if I am not mistaken the first recipe I made from it was the semolina, coconut and marmalade cake – it is delicious and the recipe yields two cakes: you can enjoy one while making other people’s day better sharing the second loaf.

One day I wanted to make this cake again, however I did not have any semolina at home. I decided then to use corn flour instead and it worked beautifully. Feel free to use one or the other.

Cornmeal, coconut and marmalade cake
slightly adapted from the wonderful Jerusalem

Cake:
¾ cup (180ml) sunflower oil
finely grated zest of 1 orange
1 cup (240ml) freshly squeezed orange juice
160g orange marmalade
3 large eggs
70g granulated sugar
70g unsweetened desiccated coconut
90g all purpose flour
180g fine corn flour
2 tablespoons almond meal
2 teaspoons baking powder
pinch of salt

Soaking syrup:
¾ cup (150g) granulated sugar
140ml water
1 tablespoon orange blossom water

Preheat the oven to 180°C/350°F. Whisk together the oil, orange zest and juice, marmalade, and eggs until the marmalade dissolves. In a separate bowl, mix together all the dry ingredients and add to the wet ingredients. Mix until well combined. The mixture should be runny.
Butter or brush with oil, line two 1-lb loaf pans (8½x4½ in/22x11cm) with baking paper and butter the paper as well. Divide the filling evenly between them. Bake for 45-60 minutes, until a skewer inserted in a cake comes out clean and the tops turn an orangey brown.

Near the end of the baking time, place the syrup ingredients in a small saucepan and bring to a boil, then remove from the heat. As soon as the cakes come out of the oven, start brushing them with the hot syrup using a pastry brush; you’ll need to do this in a few goes, allowing the syrup to soak in for a minute or two before you carry on brushing with more syrup. Make sure you use up all the syrup and it is all absorbed into the cakes.
Cool completely on the pans over a wire rack.

Makes 2 cakes

Wednesday, September 13, 2017

Asparagus and gorgonzola galette with corn flour pastry and creative days

Asparagus and gorgonzola galette with corn flour pastry / Galette de aspargo e gorgonzola com massa de fubá

I could start several posts with “when I was still working on the book project” because during that time I exercised my creativity almost on a daily basis. Everything I saw was a source of inspiration, and a trip to the grocery store or the farmers’ market would turn into an idea, that turned into a recipe, that turned into several tests in my kitchen. Several times my husband and I ate the tests for lunch, and whoever came to my house would be served cake or cookies I had been working on – everyone became my guinea pigs. :)

I was at the grocery store with my husband one day when I saw beautiful asparagus – I brought them home with the idea of making a frittata, but I decided for a galette instead: I love galettes, they are my favorite kind of tart – they are easy to put together (no blind baking involved) and they always look stunning.

We ate this galette for lunch 3 times – I was going to make it a few times anyway to test the recipe in different occasions, however it tasted so delicious that making it again never felt like a chore.

Asparagus and gorgonzola galette with corn flour pastry
own recipe

Pastry:
1 cup + 1 tablespoon (150g) all purpose flour
¼ cup (35g) corn flour (finely ground cornmeal, not corn starch)
¼ teaspoon table salt
100g unsalted butter, very cold and diced
¼ cup (60ml) sour cream*, very cold
2 tablespoons iced water

Filling:
100g fresh ricotta – I use homemade
50g gorgonzola, coarsely grated or crumbled
1 tablespoon sour cream
salt and freshly ground black pepper
200g fresh asparagus, already trimmed

Egg wash:
1 egg yolk whisked with 1 teaspoon sour cream

Start by making the pastry: in a food processor, pulse all purpose flour, corn flour and salt until well combined. Add the butter and pulse a few times until mixture resemble coarse breadcrumbs. Mix sour cream and water in a small bowl, then with the motor running, gradually add the mixture and process just until a dough forms. Form dough into a ball, wrap in plastic wrap and refrigerate for 1 hour.

Place the dough onto large piece of baking paper, cover with another piece of paper and roll into a rough 20x35cm (8x14in) rectangle. Slide the paper with pastry into a baking sheet and remove the paper from the top. In a medium bowl, whisk together the ricotta, gorgonzola, heavy cream until a paste forms. Season with salt and pepper (go easy on the salt since gongonzola can be salty). Spread the dough with the filling leaving a 2.5cm (1in) border. Arrange the asparagus on top of the filling, pressing them slightly to adhere. Carefully fold one edge in towards the center of the filling and continue folding all the way round, bringing the edge of the pastry towards and over the filling/asparagus. Freeze the galette for 15 minutes – in the meantime, preheat the oven to 200°C/400°F.

Brush the pastry with the egg wash and bake for 30-40 minutes or until pastry is golden. Serve warm.

* homemade sour cream: to make 1 cup of sour cream, mix 1 cup (240ml) heavy cream with 2-3 teaspoons lemon juice in a bowl. Whisk until it starts to thicken. Cover with plastic wrap and leave at room temperature for 1 hour or until thicker (I usually leave mine on the counter overnight – except on very warm nights – and it turns out thick and silky in the following morning; refrigerate for a creamier texture)

Serves 4 with a green salad on the side

Monday, January 11, 2016

Simple cornmeal cake, or "bolo de fubá"

Cornmeal cake / Bolo de fubá do Panelinha

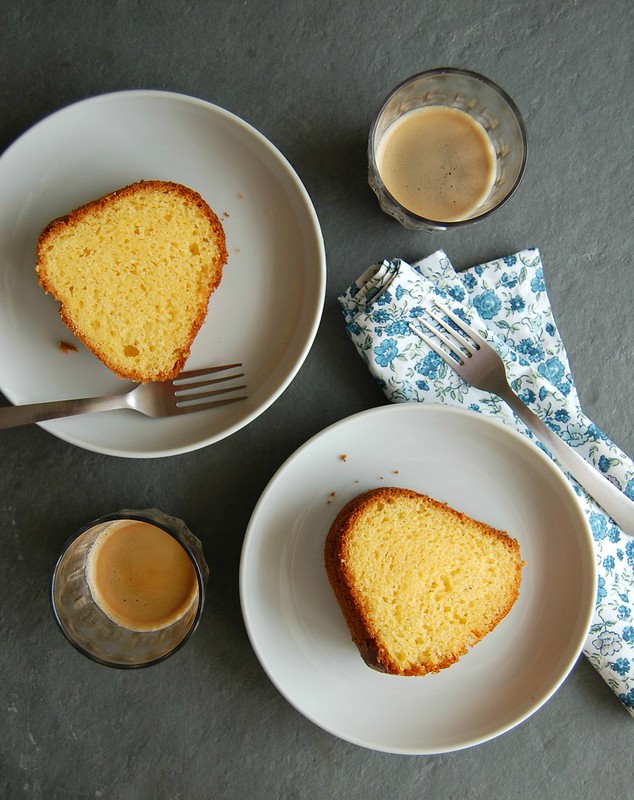
The first cake I ever made was a cornmeal one, made with corn flour (not corn starch - the same corn flour used in these tartlets), which is a very common ingredient here in Brazil. “Bolo de fubá” is one of the most beloved cakes we have here, a favorite of many and it goes particularly well with coffee – I was always a tea kind of girl, coffee is something I have learned to enjoy in the past few months.
I guess I was feeling a big nostalgic last week, for I felt a sudden urge to bake a bolo de fubá – so here it is. It is a very simple cake, prepared with the help of a blender, also something very common here in Brazil. It is also best served on the day it is made, and it tastes delicious still warm from the oven - I should know, because I ate several slices in a row – shame on me. :)

Simple cornmeal cake ("bolo de fubá")
slightly adapted from here

soft unsalted butter, to prep the pan
1 cup (140g) all purpose flour
1 ½ cups (210g) corn flour (fine cornmeal - fubá) – not corn starch, the same corn flour used in these tartlets
pinch of salt
4 large eggs
1 cup (240ml) canola oil
1 cup (200g) granulated sugar
1 cup (240ml) plain yogurt
1 tablespoon baking powder

Preheat the oven to 180°C/350°F. Butter and flour a 25cm, 10-cup capacity (10in) Bundt or ring pan.

In a large bowl, sift together the all purpose flour, corn flour and salt. Set aside.
Place the eggs, oil, sugar and yogurt in a blender and mix until smooth, about 5 minutes. Pour over the dry ingredients in the bowl and whisk gently until smooth. Whisk in the baking powder.
Pour batter into prepared pan. Bake for 30-35 minutes or until golden and risen and a skewer inserted in the center of the cake comes out clean. Cool in the pan over a wire rack for 15 minutes, then carefully unmold onto the rack and cool completely (this cake tastes absolutely delicious warm).

This cake is best served on the same day it is made – I found it a bit on the dry side on the following day.

Serves 10-12

Friday, February 28, 2014

Cornmeal-pistachio biscotti and going back to dramaville

Cornmeal-pistachio biscotti / Biscotti de fubá e pistache

I try not to be such a creature of habit sometimes but apparently I fail miserably at it. After watching dark drama after dark drama, I felt I needed to take a breather – it was time for a comedy. To avoid repeating the mistake of months ago, I asked the lovely Amanda for some tips on comedies, and despite being a drama kind of gal like me she commented something about Community, Parks and Recreation (that one I already adore) and 30 Rock – I’ve read tons about the latter but never watched it, so I decided to start with it.

I watched the pilot and found it funny and clever; however, by the end of it I felt there was something missing – maybe the tight muscles or the teeth clenching, I don’t know. One day later I was back to dramaville, this time accompanied by Hellboy and Peggy Bundy – if that isn’t sheer perfection I don’t know what is. :D

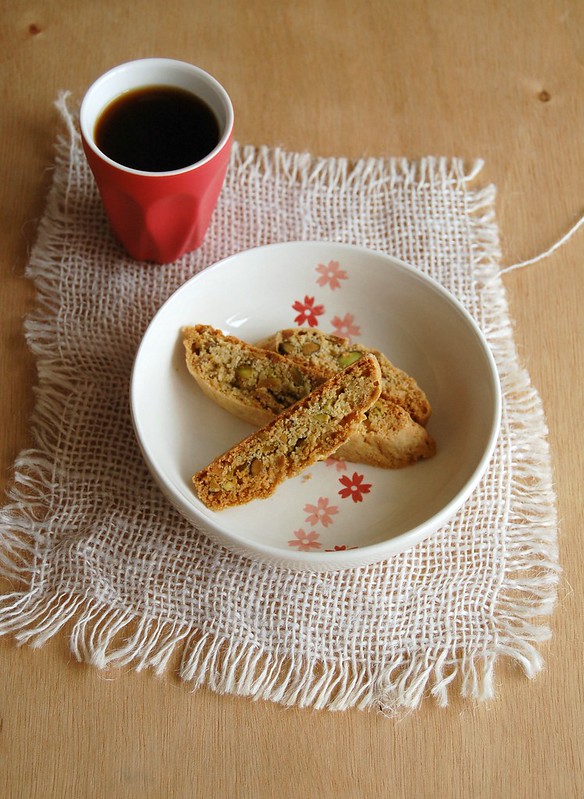
Every time I feel like baking cookies I have to fight the urge of making biscotti – they are easy to make, taste great and can be kept in an airtight container for a good while – what’s not to love? I sometimes manage to vary a little but end up going back to my addiction – this time I was lured in by the addition of cornmeal to the dough, which turned out to be a delicious idea.

Cornmeal-pistachio biscotti
slightly adapted from The Zuni Cafe Cookbook

125g pistachios
¼ cup (56g) cold unsalted butter
½ cup + 2 tablespoons (125g) granulated sugar
1 large cold egg
1 teaspoon vanilla extract
2 teaspoons Amaretto
1 ¼ cups (155g) all-purpose flour
2 tablespoons fine cornmeal – I used corn flour (not corn starch)
1 teaspoon baking powder
¼ teaspoon table salt

Preheat oven to 165°C/325°F. Line a large baking sheet with baking paper.
Roast the pistachios on a small baking sheet until they are fragrant. Finely chop ¼ cup of the nuts; coarsely chop the remainder.
In a medium bowl, barely cream the butter with the sugar. Beat in the egg, vanilla and Amaretto.
In a separate bowl, combine the nuts, flour, cornmeal, baking powder and salt. Add to the butter mixture and mix until homogenous.
Divide the dough in half. Roll the dough into logs about 2.5cm (1in) in diameter. The dough should be cold enough to handle without difficulty, though you may need to dust the counter with a little additional flour if the logs start to stick.
Place the logs on the baking sheet, spacing them at least a few inches apart; they will swell considerably. Bake until slightly brown and firm on the surface, but yielding to light pressure, 15-20 minutes. Rotate the pan if they are browning unevenly. Don’t underbake, or the baking powder will not complete its job, and the cookies will be hard and dense rather than crisp and with a great coarse texture.
Slide the paper with the logs to a wire rack and let cool for 5-8 minutes. Turn the oven temperature to 180°C/350°F.
Slice the logs on an angle about 1.25cm (½in) thick. Line the warm baking sheet with baking paper. Place the biscotti cut side down on sheet and bake for another 5 minutes or so to brown lightly. Cool completely, then store in an airtight container.

Makes about 30

Monday, November 11, 2013

Orange cornmeal financiers - a French-Brazilian culinary experiment

Orange cornmeal financiers / Financiers de fubá e laranja

The weather here in Sao Paulo seems to be in a roller coaster lately – in some days the temperature reaches 30°C (86°F) only to drop to 17°C (62°F) on the following morning. I prefer the cold weather but I do have something stashed in the freezer for the screaming hot periods: I made David Lebovitz’s amazing chocolate ice cream and poured it into Popsicle molds instead of churning it in the ice cream maker – the result was so good my husband is currently addicted to it. :D

With the ice cream production on full speed, my stash of frozen egg whites is regular again and that made me think of financiers once more. This time, however, I decided to add a Brazilian touch to the French treat by replacing the all purpose flour with corn flour (not corn starch), adding a touch of citrus zest to brighten up the flavor – I don’t mean to brag about my idea, but it turned out to be excellent (modesty mode off). :D

Orange cornmeal financiers
adapted from the great Simply Bill

85g almond meal (finely ground almonds)
135g icing sugar, sifted
55g corn flour (not corn starch)
pinch of salt
finely grated zest of 1 large orange
5 egg whites
95g unsalted butter, melted and cooled
1 teaspoon vanilla extract
icing sugar, for dusting

In a large bowl, combine the almond meal, icing sugar, corn flour, salt and zest. Stir in the egg whites until just combined. Stir in the melted butter and the vanilla. Cover and refrigerate the batter for 1 hour.
Preheat the oven to 180°C/350°F. Butter and flour ten 100ml capacity mini cake or muffin pans.
Pour the batter in the pans. Bake for 15-20 minutes or until golden - the financiers should spring back when touched. Remove from the oven and leave in the pan for 2 minutes before turning out onto a wire rack to cool. Dust with icing sugar to serve.
Financiers are best served the day they’re made, but can be stored in an airtight container for up to 2 days.

Makes 10

Friday, September 6, 2013

Lemon and blueberry cornmeal cake

Lemon and blueberry cornmeal cake / Bolo de fubá, limão siciliano e mirtilos

Even though I’ve been very focused on my inventory project (two years now, wow) I still love to go around the supermarket aisles to see if there’s anything new I haven’t tried yet – my husband says that if we went grocery shopping at the same time with the same list on our hands he’d be finished in half the time (and he’s right). :D

Weeks ago I discovered a new brand of corn products, a Brazilian one, and those products are made of non-transgenic corn. I found that such a wonderful thing that I couldn’t resist and brought home a bag of corn flour, which was used to make Clarice’s beautiful cake. Since the cake turned out so good, I was inspired to bake again with that corn flour, this time using a recipe that originally called for polenta. The cake turned out delicious and really tender, with the blueberries popping like small bubbles of jam at every bite – I found the cake so good on its own I skipped the icing entirely.

Lemon and blueberry cornmeal cake
slightly adapted from here

225g unsalted butter, very soft
225g granulated sugar
4 large eggs
finely grated zest of 2 large lemons
4 tablespoons lemon juice
½ teaspoon vanilla extract
100g corn flour (not corn starch)
150g all purpose flour
1½ teaspoons baking powder
pinch of salt
200g blueberries, fresh or frozen (unthawed)
icing sugar, for dusting

Preheat oven to 180°C/350°F. Lightly butter a 20x30cm (8x12in) baking pan and line it with baking paper, buttering the paper as well*.
Using an electric mixer, cream butter and sugar light and fluffy, about 3 minutes. Beat in the eggs, one at a time, beating well after each addition. Scrape the sides of the bowl after each addition. Beat in the lemon zest and vanilla. Fold in the corn flour, all purpose flour, baking powder, salt and lemon juice to make a smooth batter. Carefully fold in half the blueberries. Spoon mixture into the prepared tin and level the surface. Scatter over remaining blueberries.
Bake for about 40minutes or until golden and a skewer inserted into the centre comes out clean. Cool completely in the pan over a wire rack. Dust with icing sugar and cut into squares to serve.

* I used a pan with a removable bottom, so I just buttered and floured it – I did not use baking paper to line it

Serves 20

Monday, August 19, 2013

Cornmeal cake with passion fruit glaze and a childhood memory

Cornmeal cake with passion fruit glaze / Bolo de fubá com calda de maracujá

Days ago, while remembering my childhood and my beginning as a cook, I thought of the first cake I ever made and it occurred to me that I hadn’t made it in years. Many years. It was a bolo de fubá, a cake made with corn flour (not corn starch), a sort of very fine cornmeal – I instantly craved that cake but no longer had the recipe. Luckily, I knew exactly where to find a great recipe for it: my lovely friend Clarice adores bolo de fubá and she has plenty of recipes on her beautiful blog. With her help, I picked one and it was absolutely delicious.

I don’t know how difficult it would be for people outside Brazil to find corn flour, but I believe that in the U.S. it might be found since Kim Boyce has some recipes with the ingredient on her amazing "Good to the Grain".

Since cornmeal cakes are great paired with citrus flavors I decided to drizzle my bolo de fubá with a passion fruit glaze – it was a very tasty addition, but the cake is equally wonderful without it, too.

Cornmeal cake with passion fruit glaze
slightly adapted from my dear friend Clarice

Cake:
1 cup (140g) all purpose flour
1 cup (150g) corn flour (not corn starch)
1 rounded tablespoon baking powder
pinch of salt
4 large eggs
1 ½ cups (300g) granulated sugar
¾ cup (180ml) canola oil
1 cup (240ml) boiling whole milk

Glaze:
½ cup (70g) confectioners’ sugar
1-2 tablespoons passion fruit juice

Cake: preheat the oven to 180°C/350°F. Butter and flour a 12-cup capacity Bundt pan (the one I used holds 10 cups and I had to bake the excess batter in a 1-cup capacity small pan).
In a medium bowl, sift together the all purpose flour, corn flour, baking powder and salt. Set aside.
Using an electric mixer with the whisk attachment, whisk the eggs for a couple of minutes. Gradually add the sugar, whisking, then whisk until thick and glossy. Gradually add the oil, whisking. Turn off the mixer, then sift the dry ingredients once again directly onto the egg mixture. Fold in gently with a spatula, then fold in the milk – the batter will be very thin. Pour into the prepared pan and tap the sides of the pan with your hands to remove any air bubbles. Bake for about 50 minutes or until golden and risen and a skewer inserted in the center of the cake comes out clean. Cool in the pan over a wire rack for 10 minute, then carefully unmold onto the rack and cool completely.

Glaze: sift the confectioners’ sugar into a small bowl and add the juice, stirring, until you get the desired consistency. Pour over the cooled cake.

Serves 10-12

Tuesday, November 9, 2010

Rhubarb tarts

Rhubarb tarts / Tortinhas de ruibarbo

A dear friend of mine once blogged about “good envy” – is there such thing? I mean, can we associate envy with a positive adjective, even if it’s to show admiration for someone/something?

An example: during all these years into blogging I’ve been “envying” my lovely friends from Europe and USA for having lots of rhubarb around; now I could finally find it here in São Paulo (thank you, Ana!) and it is absolutely delicious! :D

A non-food related example: I “envy” the Argentineans for their wonderful movies, far superior than ours – and they have Darín, too. ♥

What do you think? Can I call that feeling “good envy”? Any suggestions? :D

rhubarb tarts8

Rhubarb tarts
from Good to the Grain

Rhubarb compote:
2 pounds (900g) rhubarb stalks
1 ¼ cups (218g) dark brown sugar, packed

Dough:
1 cup (135g) corn flour
1 cup (140g) all purpose flour
½ cup (82g) fine cornmeal
¼ cup + 2 tablespoons (74g) caster sugar
½ teaspoon salt
½ cup (1 stick/113g) unsalted butter, cold, cut into 1.25cm (½ inch) pieces
¼ cup (60ml) + 2 tablespoons heavy cream
2 egg yolks

Start by making the compote: rinse the rhubarb stalks and trim off the very ends. Unless the stalks are very slender, cut them in half lengthwise. Cut the rhubarb on the diagonal into a little less than 2cm (¾ inch) chunks. You’ll have about 6 cups of rhubarb; set 2 cups aside and put the remaining 4 cups in a medium heavy-bottomed saucepan (with about 4 liter/5 quart capacity).
Add the brown sugar to the saucepan, give the mixture a few stirs, cover, and turn the heat to medium-low (it’s important to begin slowly so the rhubarb warms up and begins to release its liquid). Cook the rhubarb for about 15 minutes, covered, until the mixture is saucy. Remove the cover and increase the heat to medium. Cook for 15-17 minutes, stirring continuously, until the rhubarb is completely broken down and thick enough that a spoon leaves a trail at the bottom of the pan.
Add the remaining rhubarb to the saucepan and stir to combine. Immediately pour the compote out onto a large plate or baking dish to cool.
The compote will keep in the fridge for up to 1 week.
Now, the dough: sift the dry ingredients into the bowl of an electric mixer, pouring back into the bowl any bits of grain or other ingredients that may remain in the sifter.
Add the butter and using the paddle attachment mix on low speed and mix to break up the butter. Increase the speed to medium and mix until the butter is as coarse as cornmeal. Add the heavy cream and the egg yolks and mix just until combined – the mixture will appear crumbly, but when squeezed between your fingers it will become one mass.
Now, shape the tarts: divide the dough into 10 equal pieces. Lightly flour a work surface, grab one piece of dough and using the heel of your hand flatten it into a 13cm (5in) circle.
Spoon ¼ cup of the rhubarb compote into the center of the circle of dough. Fold the edge of the dough toward the filing and up, to create a ruffled edge. Slice a metal spatula underneath the tart and transfer to a baking sheet. Continue with the remaining dough, then place the tarts in the freezer to rest until firm, at least 1 hour. Preheat the oven to 190°C/375°F and line two baking sheets with baking paper. Place the tarts onto the prepared pans and bake for about 35 minutes or until the tarts are brown and the filling is bubbling and thick.
Tarts can be eaten warm or at room temperature; they can be kept for up to 2 days if tightly wrapped in plastic.

Makes 10 – I made 1/3 of the recipe above, got 3 tarts and ¼ cup of the compote left

Related Posts with Thumbnails