Showing posts with label fudge. Show all posts

Wednesday, June 1, 2016

Oh-so-easy peanut butter fudge

Oh so easy peanut butter fudge / Fudge de amendoim facílimo

Like many of you reading me right now (I am sure), I am the kind of person who has fun at the grocery store and supermarkets – I know that for many people going to such places is one very cruel way of torture, but I absolutely love it. And then there are the supermarkets where you find huge packages of products – a whole new level of fun! My heart is filled with joy when I think that in my cupboard right now there is a 5kg-package of sugar just waiting to become cake/bread/dessert on the weekend. :)

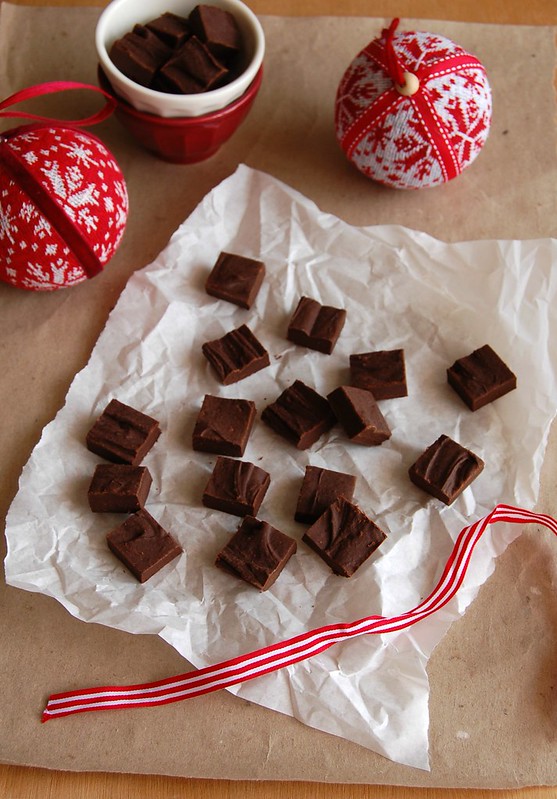
I do, also, buy things that I use much less than I use sugar, like peanut butter, for example, but how could I resist buying an 800g-jar of pb for the same price I’d seen a half this size jar? Naturally I brought it home and now I have been making some (or should I say many?) delicious recipes with it, like this fugde: it is really, really easy and can be put together in a matter of moments. You just need some patience to let it set before cutting it into small squares. I thought I would have to send these to friends in order not to eat them all myself, but my husband tried one and it was impossible to stop him from eating the whole thing himself – the same husband that doesn’t like sweets. :D

Oh-so-easy peanut butter fudge
slightly adapted from Lucy Cufflin

¼ cup (56g) unsalted butter
1 cup (200g) demerara sugar
3 tablespoons whole milk
generous 1/3 cup (100g) smooth peanut butter
1 teaspoon vanilla extract
pinch of salt
¾ cup (105g) icing sugar, sifted – you might not use all of it

Line a 20x10cm (8x4in) loaf pan with baking paper.
Put the butter, sugar and milk in a large saucepan over a gentle heat. Stir very gently until the all the sugar has dissolved.
Once the sugar has dissolved, bring to the boil and, without stirring, cook for 3 minutes. Remove from the heat and stir in the peanut butter, vanilla extract and salt. When well mixed, gradually add the icing sugar, beating with a wooden spoon – the mixture should be smooth and creamy, not dry (if too dry, add a few drops of water and stir vigorously).
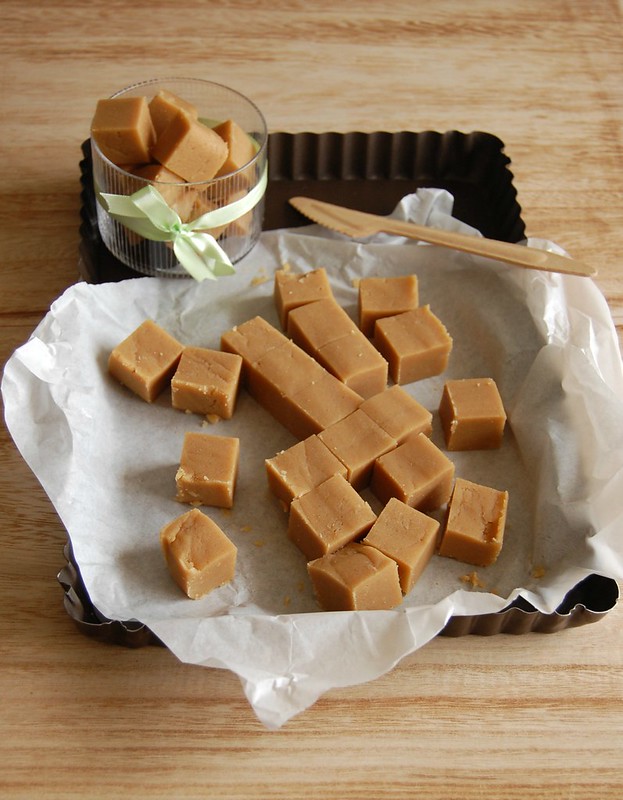
Spoon the fudge into the prepared pan, press it down using an offset spatula or the back of a spoon and level the surface. Leave to cool, uncovered, for 4-5 hours or overnight.
Lift out the fudge in its paper and cut into neat, even squares – it can be stored in an airtight container at room temperature for up to two weeks.

Makes 36

Monday, December 15, 2014

Spiced chocolate fudge

Spiced chocolate fudge / Fudge de chocolate e especiarias

It is always a joy for me to do the Christmas series here on the blog: the baked goods are delicious and they make my apartment smell wonderful, too. :)

There is, however, a problem: there are so many great recipes I have a hard time choosing what to prepare. On top of the cookbooks, the Christmas themed magazines start to arrive packed with beautiful suggestions for the holidays and it becomes even more difficult for me to decide which recipes – let’s not forget the time when I saved a recipe for almost a year so I could feature it on the following Xmas series (yes, I am that crazy). :D

I already had a list of recipes to prep this year and wasn’t planning on changing it, but when the Christmas edition of Donna Hay magazine arrived I had to add this fudge to the list: everyone loves chocolate and it goes so well with spices – not to mention the recipe yields a ton, which is fantastic when there are many people to feed.

Donna’s recipe was a bit fiddly, so I borrowed her idea of adding spices to fudge and used a much simpler recipe with great results.

Spiced chocolate fudge
adapted from here and Donna Hay Magazine

335g (120oz) dark chocolate, finely chopped – I used one with 53% cocoa solids
2/3 cup sweetened condensed milk
1 tablespoon water
1 teaspoon vanilla
1 teaspoon freshly ground allspice
½ teaspoon ground cinnamon
seeds of 4 cardamom pods finely ground
¼ teaspoon ground cloves
pinch of salt

Line a square 20cm (8in) baking pan with baking paper; set aside. Place chocolate, sweetened condensed milk and water in a small saucepan and melt over low heat, stirring.

Remove from the heat and stir in the vanilla, spices and salt. Pour mixture onto prepared pan and smooth the surface. Chill fudge about 30 minutes or until firm. Cut into small squares.

Makes 64

Monday, September 14, 2009

Pear and chocolate fudge tartlets

Pear and chocolate fudge tartlets / Tortinhas de fudge de chocolate com pêra

My brother and I got a dog when we were 4 and 6, respectively – I found the following photograph while going through some of our old stuff at my father’s:

Xuxinha

That’s me and Xuxa (her name), when I was about 9 years old. :D

My brother used to feed her just about anything – every time he was eating something, he’d share it with her, and that included bread, yogurt, and all kinds of sweets. But chocolate was her favorite. :)

She is no longer with us – my brother had a fever for days when she died – but I’m sure she would love these chocolatey tartlets. :D

Pear and chocolate fudge tartlets / Tortinhas de fudge de chocolate com pêra

Pear and chocolate fudge tartlets
slightly adapted from Australian Gourmet Traveller

Chocolate pastry:
¾ cup (105g) all purpose flour
50g pure icing sugar
½ cup (45g) Dutch-processed cocoa powder, plus extra for dusting
pinch of salt
60g unsalted butter, slightly cold, coarsely chopped
1 egg

Pear topping:
1 cup (200g) caster sugar
5cm piece of ginger, coarsely chopped
2 Packham pears, peeled, halved and cored
pouring cream, to serve

Chocolate filling:
100g dark chocolate, chopped - 70% cocoa solids
100g unsalted butter, room temperature, coarsely chopped
2 eggs
½ cup (100g) caster sugar
½ cup + 1 tablespoon (80g) all purpose flour, sifted
½ cup (45g) Dutch-processed cocoa powder, sifted

For chocolate pastry, pulse flour, icing sugar, cocoa and salt in a food processor to combine. Add butter and process until fine crumbs form. Add egg and 1 tablespoon water and pulse until dough just comes together – I used my Kitchen Aid with the paddle attachment.
Transfer to a lightly floured work surface, form into a disc, then wrap in plastic wrap and refrigerate until firm (about 1 hour).

Make the pear topping: combine sugar, ginger and 200ml water in a saucepan and bring to the boil. Reduce heat to low, add pear and cook until soft (5-7 minutes). Using a slotted spoon, remove pear and slice each half lengthways – you should get about 6-7 slices out of each half. Set aside until required.*

Grease eight 9cm-brioche molds and dust with cocoa. Divide pastry into 8 even pieces and roll each piece between two pieces lightly floured baking paper to approximately 12cm in diameter. Line moulds with pastry and trim excess. Prick dough all over with a fork. Refrigerate until firm and chilled (about 30 minutes).

Preheat oven to 190ºC/374ºF. Place molds on a baking sheet and bake for 10 minutes. Set aside. Reduce oven to 160ºC/320ºF.

Meanwhile, for chocolate filling, melt chocolate and butter in a heatproof bowl placed over a saucepan of simmering water. In a separate bowl, whisk eggs and sugar to combine. Add flour and cocoa, whisking to combine, then whisk in chocolate mixture. Using a plastic spatula, fold mixture until smooth and glossy.
Divide filling among molds and bake until tops begin to appear dry (30-35 minutes)**. Cool slightly, turn out molds and serve topped with pear and cream.

* the pears turned dark as soon as taken out of the syrup – a sprinkle of lemon juice should solve the problem

** a friend of mine who tried the tartlets told me they would taste even better with a creamier filling – less time in the oven next time

Makes 8 – I used 9cm tartlet pans and got 11 tartlets (just buttered them well – did not dust with cocoa)

Wednesday, March 25, 2009

Lime fudge with macadamia nuts

Lime fudge with macadamia nuts

Kitchen tools – those around here crazy about them please raise your hand. :D

Good cookware and tools can really help you get better results in cooking and baking – for instance, I can’t imagine my kitchen without my wonderful Kitchen Aid mixer; for a citrus lover like me, a Microplane zester is a must-have.
And to make it all perfect, gorgeous dinnerware to serve the food prepared with love – even people who don’t like/don’t know how to cook are pleased to eat at a beautifully set table.

Speaking of citrus, I’m still on a lime kick. And I would never have thought it would go so well with macadamias.

Lime fudge with macadamia nuts

Lime fudge with macadamia nuts
slightly adapted from here

3 cups (465g) white chocolate, finely chopped
14-ounce (395g) can sweetened condensed milk
3 teaspoons finely grated lime zest
3 tablespoons lime juice – freshly squeezed is better
1 cup chopped macadamia nuts (toasted if desired)

Line a square 20cm (8in) baking pan with foil, extending foil over the edges of pan. Butter foil; set aside.

Stir white chocolate and sweetened condensed milk in a large heavy saucepan over low heat just until chocolate is melted and mixture is smooth. Remove from heat. Stir in lime zest and juice. Stir in the macadamia nuts. Spread mixture evenly into the prepared pan.

Cover and chill for two hours or until firm. Lift the fudge from pan using edges of foil. Peel off foil and use a knife to cut fudge into pieces. Store in an airtight container at room temperature for up to one week or in the freezer for up to 2 months.

Makes 64 small squares

Lime fudge with macadamia nuts

Monday, September 1, 2008

Little hazelnut tartlets with caramel fudge icing

Little hazelnut tartlets with caramel fudge icing

Bad hair days. Those merciless, cruel days when you look in the mirror and all you see is a member of some band from the 80s.
We can have bad hair days when it comes to cooking, can’t we? This recipe qualifies as one.

In some pans, the batter overflew and the ones that didn’t delivered funny-looking tartlets. To make me feel even worse, the icing wasn’t spoonable as the one on the original recipe.

Before you start thinking “what the heck is she posting this for?” and my friend gets mad at me again, let me tell you that these tartlets were delicious. Delicious. Worth all the hair I pulled out while they were in the oven. :)

I’m completely hooked on the Australian Gourmet Traveller’s website, so get ready to see lots of their recipes around here.

Little hazelnut tartlets with caramel fudge icing

Little hazelnut tartlets with caramel fudge icing
from Australian Gourmet Traveller

100g cold butter, coarsely chopped
1 vanilla bean, scraped seeds only
3 egg whites
180g pure icing sugar, sieved
70g hazelnut meal
50g plain flour
finely grated zest of 1 orange
crème fraîche, to serve

Caramel fudge icing:
330g light brown sugar
100ml pouring cream
1 tablespoon light corn syrup
20g butter, room temperature

Butter and flour 4 12cm-diameter fluted tart pans*; set aside.

Cook butter and vanilla seeds in a small saucepan over medium-high heat until dark nut brown in color (4-5 minutes), then set aside until completely cool.

Preheat oven to 170ºC/338ºF. Using an electric mixer, whisk egg whites until soft peaks form, gradually add icing sugar, whisking continuously until thick and glossy. Fold in hazelnut meal, flour and orange rind, then cooled butter. Divide among the prepared pans and bake until golden (20-25 minutes). Stand for 5 minutes, then remove from moulds and cool on a wire rack.

For caramel fudge icing, combine ingredients in a saucepan and stir over medium-high heat until butter melts and sugar dissolves (2-3 minutes). Bring to the boil and cook until mixture reaches 114ºC/237ºF on a candy thermometer (4-5 minutes).Transfer to an electric mixer, add 80ml of hot water and whisk until glossy. Working quickly, spoon onto tarts and stand until set. Serve with crème fraîche – I served it with whipped cream.

* I used 8.5cm pans and ended up with 8 tarts

Serves 4

Thursday, November 8, 2007

Fabulous five-minute fudge

Fabulous Five-Minute Fudge

One of my Brazilian blogger friends – a very witty and smart one, by the way – wrote a post a couple of months ago about how much her mother likes to prepare homemade gifts – food, to be more specific. There’s a kind of pie she makes for her friends and coworkers that is so famous I wish I lived nearby so she could bake one for me, too. :D

Fabulous Five-Minute Fudge

I like to made food gifts for my friends, and I’m sure many of you do, too. I’m always thinking of baking cookies for one, making candy for another…

I wanted to send a gift to a friend and the lovely Lynn helped me choose what to send. She suggested brownies or fudge – they would be easier to pack and sturdy enough to be mailed. I used this recipe – and what a wonderful website that is. So many great recipes and beautiful photos that it is almost impossible to choose one…

Ju, dear, it was wonderful to know you liked the gift!

Fabulous Five-Minute Fudge

Fabulous five-minute fudge

2 cups (12oz/336g) semisweet chocolate pieces
2/3 cup sweetened condensed milk (196g/one-half of a 14-ounce can)
1 tablespoon water
¾ cup (90g) chopped walnuts, toasted if desired
1 teaspoon vanilla

Line a cookie sheet with waxed paper; set aside. In a medium microwave-safe bowl, combine chocolate pieces, sweetened condensed milk, and water.

Microwave, uncovered, on 100% power (high) for 1 minute; stir. Microwave about 1 minute more, or until chocolate is melted and mixture is smooth, stirring every 30 seconds. Stir in nuts and vanilla. Pour mixture onto prepared cookie sheet and spread it into a 22x15cm* (9x6-inch) rectangle, or drop mixture by rounded teaspoons onto prepared cookie sheet.

Chill fudge about 30 minutes or until firm. Cut into 3.5cm (approx. 1-1/2-inch) squares

Makes 24 pieces

* I used a 27x15 cm baking sheet and spread the fudge completely inside it – I got 28 squares.

Fabulous Five-Minute Fudge

Tuesday, October 23, 2007

Sweetened condensed milk cocada

Sweetened condensed milk cocada

Going through one of my cookbooks in search of a salad recipe, I “accidentally” opened it in the sweet chapter. :)

In one of his twice a year sudden urges for sweets, João saw a photo of cocada (a very traditional candy made of coconut) and asked me to make it.
As I would not be able to find freshly grated coconut to make that specific recipe, I remembered something I had seen on a dear friend’s blog – a fantastic cocada recipe that called for sweetened condensed milk.

The cocadas were simply wonderful! I had only 1 – the horror, the horror – but João ate several.
While mixing the ingredients in the pan, I thought the dough was a bit dry and decided to add a little milk. On the following day, I wrote to my friend and she told me that after you start cooking the mixture it comes together correctly.

Anyway, the recipe worked perfectly and has already become one of this blog’s favorites.

Sweetened condensed milk cocada

Sweetened condensed milk cocada

1 can sweetened condensed milk (395g)
2 cans granulated sugar – use the empty condensed milk can to measure it
200g unsweetened desiccated coconut
1 teaspoon unsalted butter, room temperature
6 tablespoons milk – I used 1% fat, the one I had at home

Grease a 30x20 cm baking pan with butter. Set aside.
Mix the condensed milk, sugar, coconut, butter and milk in a heavy-bottom saucepan and cook over medium-low heat, stirring constantly – when the bottom of the pan starts to show and the mixture is a bit thicker (20-25 minutes), remove from heat and immediately pour the mixture into the prepared pan.
Set aside to cool and then cut into squares.

Makes 38 pieces

Sunday, May 20, 2007

Corn fudge

Corn fudge

I had to make a recipe with corn to take part in one event for blogs written in Portuguese. You guys might think “Corn? So easy!” – but that’s the whole point: I wanted to make something different, unusual. Something new.

It took me forever to choose something but I finally did: this corn fudge, which I found at the Brazilian Nestlé website.

It’s similar to brigadeiro, but flavored with corn instead of chocolate. A pinch of cinnamon reminds us of curau – a sort of corn pudding I’ll be making soon to share with you here.

Different and new, indeed, and also delicious.

Corn fudge

1 can (200g) corn kernels, drained and rinsed
1 can (395g) sweetened condensed milk
1 ½ tablespoons milk – I used low fat
2 tablespoons unsalted butter
½ teaspoon ground cinnamon
butter, for greasing
granulated sugar, to coat the fudge balls

Place the corn kernels and the milk in a blender or food processor and purée them. Push the purée through a sieve and place it in a medium saucepan. Add the condensed milk, cinnamon and butter and mix well.
Cook over low heat, stirring constantly until the bottom of the pan starts to show – it will be thicker and bubbly (20 minutes). Remove from heat, pour in a greased plate and set aside to cool completely.
Grease your hands with a bit of butter and roll portions of fudge into balls – this will be easier if you refrigerate the fudge.
Roll them in the granulated sugar and place in small fluted paper cups.
Decorate them as you wish – I had some extra kernels so I used them (an idea I saw at the website, too) and I also used cloves.

Makes 40-45

Corn fudge

Related Posts with Thumbnails