Showing posts with label onions. Show all posts

Tuesday, November 14, 2017

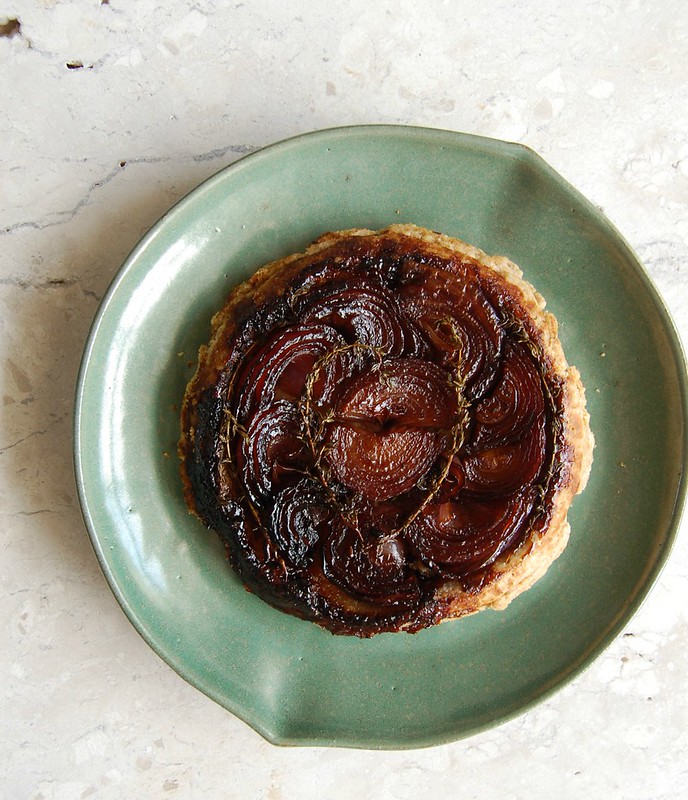
Red onion tarte tatin with rye pastry

Red onion tarte tatin with rye pastry / Tarte tatin de cebola roxa com massa de centeio

I was never a pie/tart maker (one look at the blog index can confirm that), but I do love pies and tarts: I just don’t have much time for them, I guess. Two things that have helped me with this matter is making the pastry in one day and assembling and baking the pie on the other, or keeping an extra batch of pastry in the freezer – nothing like having the pastry ready when you find beautiful veggies or fruits in the market: lunch, dinner or dessert are halfway there.

This pastry is delicious and flaky, very similar to the corn flour pastry I posted a while ago. The onions not only make the tarte tatin beautiful but also very flavorsome: the time in the stove top and then in the oven transform their acrid flavor into something sweet and mellow.

Red onion tarte tatin with rye pastry
own recipe

Pastry:
¾ cup (105g) all purpose flour
3 tablespoons (30g) fine rye flour
¼ teaspoon table salt
¼ cup unsalted butter, chilled and cubed
3 tablespoons sour cream, chilled*
1 tablespoon iced water

Filling:
2 red onions (approximately 250g/9oz in total)
2 tablespoons unsalted butter
½ teaspoon olive oil
5 fresh thyme sprigs
½ teaspoon demerara sugar
2 teaspoons balsamic vinegar
2 teaspoons dry red wine
salt and freshly ground black pepper

Start by making the pastry: in a food processor, pulse all purpose flour, rye flour and salt until well combined. Add the butter and pulse a few times until mixture resemble coarse breadcrumbs. Mix sour cream and water in a small bowl, then with the motor running, gradually add the mixture and process just until a dough forms. Form dough into a ball, wrap in plastic wrap and refrigerate for 1 hour.

20 minutes before the end of the resting time of the pastry, preheat the oven to 180°C/350°F and start prepping the onions: peel them and cut them in half lengthwise. Then slice the onions in to 1cm (roughly ½in) half-moons – if the slices are too thin they will melt in the oven. Set aside.
Heat a 22cm (9in) frying pan over medium heat – for this recipe you need a frying pan that can go into the oven. Add the butter and the olive oil, followed by the thyme sprigs – this way they will be on the top of the tart once you invert it. Remove the frying pan from the heat for one moment and arrange the onion slices on top of the thyme, placing the slices close together, for they will wilt slightly when cooked - cover the entire frying pan with the onion slices. Put the pan back on the heat and cook for 10 minutes, shaking the pan slightly instead of stirring the onions, to avoid them sticking to the bottom, but keeping them in place. Sprinkle with the sugar, drizzle with the balsamic vinegar and the wine, season with salt and pepper and cook for another minute. Turn off the heat and set aside.
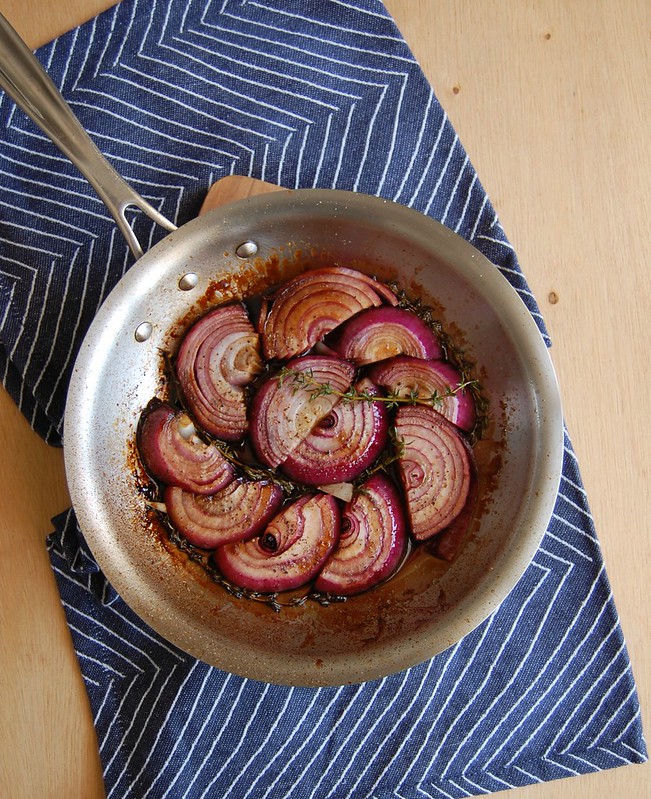
Red onion tarte tatin with rye pastry / Tarte tatin de cebola roxa com massa de centeio

Place the dough onto large piece of baking paper, cover with another piece of paper and roll into a rough 24cm (9in) circle – work fast in order to keep the pastry chilled. Peel off the paper from the top, then roll the pastry into the rolling pin, very gently, then unroll it on top of the onions (be careful since the pan will still be hot). Tuck the pastry in, make a small hole in the center of the pastry so the hot air can escape, then bake the tart for 30-35 minutes or until golden brown. Remove from the heat and very gently loosen the pastry from the edges of the pan. Top the pan with a plate and carefully unmold the tart – don’t worry if any onion bits get stuck in the pan, just loosen them up with a spatula and arrange them back on top of the tart. Serve with a green salad.

* homemade sour cream: to make 1 cup of sour cream, mix 1 cup (240ml) heavy cream with 2-3 teaspoons lemon juice in a bowl. Whisk until it starts to thicken. Cover with plastic wrap and leave at room temperature for 1 hour or until thicker (I usually leave mine on the counter overnight – except on very warm nights – and it turns out thick and silky in the following morning; refrigerate for a creamier texture)

Serves 4 with a green salad on the side

Wednesday, August 2, 2017

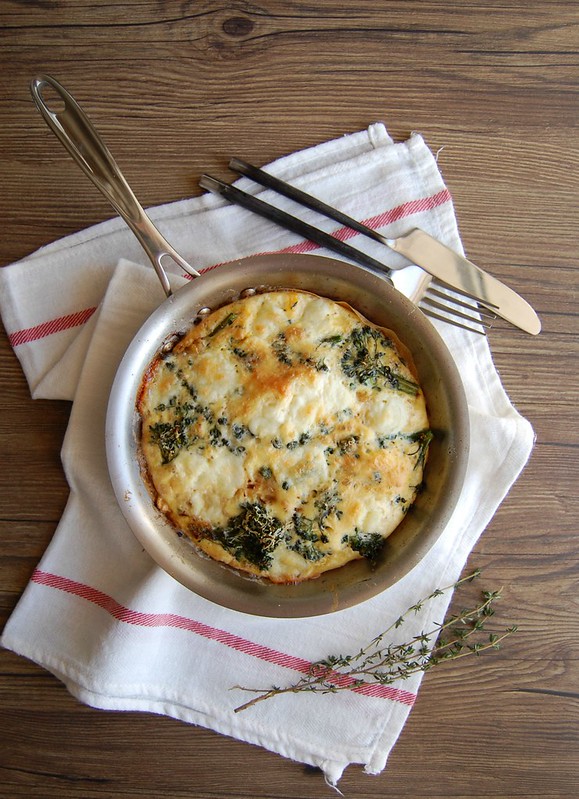
Broccolini, caramelized onions and mozzarella frittata, or eggs are my kitchen heroes

Broccolini, caramelized onions and mozzarella frittata / Frittata de brócolis, cebola caramelizada e mozarela fresca

I can surely say that eggs are one of my favorite things to eat and to cook with: I love how tasty, healthy and versatile they are. No matter how empty your fridge and cupboards are, if you have eggs on hand you have dinner, and usually quickly.

I make frittatas quite often for in them I can use whatever I have begging to be used in the fridge. The one I bring you today is one of my favorite combo flavors, and I sometimes buy broccolini and/or mozzarella especially to make it – the broccolini tastes amazing paired with the gooey pieces of cheese, but to me what really makes this dish are the sweet, delicious onions, so take your time to caramelize them, even if it sounds like a boring chore, I assure you it is worth it. I have used fresh oregano to replace thyme a couple of times and it worked beautifully, too.

Broccolini, caramelized onions and mozzarella frittata
own recipe

½ large onion, thinly sliced
1 tablespoon olive oil
½ teaspoon granulated sugar
salt
1 ½ cups (60g) broccolini florets
3 large eggs, room temperature
freshly ground black pepper
2 teaspoons fresh thyme leaves
1/3 cup (60g) fresh mozzarella

Preheat the oven to 200°C/400°F. Heat the olive oil in a 20cm (8in) frying pan over medium heat – make sure you use a frying pan that can go into the oven. Add the onions and stir to coat them in the oil. Sprinkle with the sugar and a pinch of salt, then lower the heat and cook, stirring occasionally, for about 20 minutes or until onions are golden brown and soft.

Stir in the broccolini and cook, stirring occasionally, for 2 minutes. In the meantime, crack the eggs in a medium bowl, season with salt and pepper and whisk. Whisk in the thyme leaves. Give the broccolini and onions a good stir to avoid the onions being all in the bottom of the pan, then pour over the egg mixture. Tear the mozzarella into pieces and place them around on top of the eggs. Cook on the stove over low heat for 2 minutes without stirring, then transfer to the oven and cook for 8 minutes, or until puffed up and golden. Serve immediately.

Serves 2

Friday, August 22, 2014

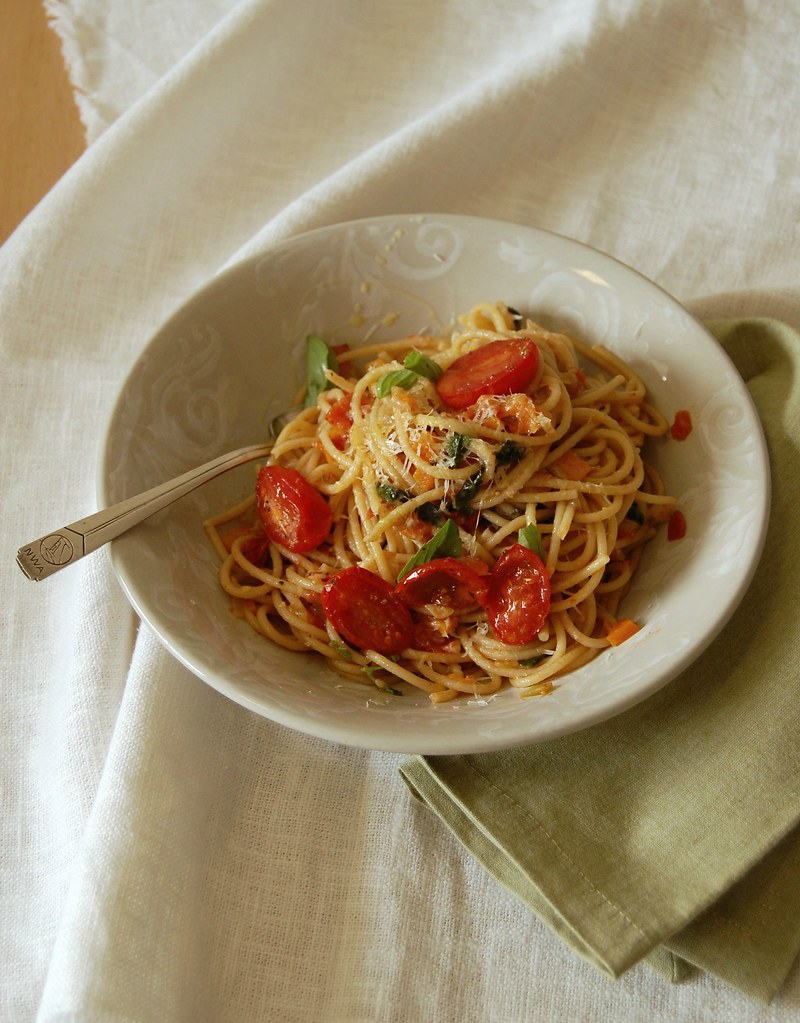
Wholemeal pasta with vegetable sauce - food with my husband's suggestion

Wholemeal pasta with vegetable sauce / Espaguete integral com molho de legumes

I’ve always believed that one’s love for food is a growing thing: the more you eat, the more you love food (if it is good, obviously).

My sister, for instance, grew up eating different kinds of food, from salads to cake, and nowadays she is not afraid to try something new – she might not like it, but at least she’ll give it a try before saying no. I like to think that she got that from me, that I played an important part in the past so she hasn’t become a picky adult.

My husband, on the other hand, was picky for many, many years and I’m glad he’s been leaving that behind. I’m glad it’s been a natural thing for him and that I have never forced anything – I think that’s the kind of discovery worth doing on one’s own.

I will say, however, that cooking is nowadays much more pleasant.

He’s come from “I don’t like fish” and “is there cilantro in this???” to making suggestions to recipes: as I flipped through Carluccio's cookbook the other day, I showed him a beautiful photo of spaghetti with a vegetable sauce (I’m not the only visual person in the family), then waited for his reaction – he said “that looks good – why don’t you add some cherry tomatoes to it?”

That coming from the guy who used to avoid tomatoes of all kinds like the plague. :)

So I made the pasta and followed Joao’s suggestion, but roasted the cherry tomatoes till they were soft and tender – that way they would mingle with the spaghetti better. His idea was pretty delicious, I have to say. :)

Wholemeal pasta with vegetable sauce
slightly adapted from the wonderful Pasta: The Essential New Collection from the Master of Italian Cookery

200g cherry tomatoes
extra-virgin olive oil, for drizzling
salt and freshly ground black pepper
300g dried wholemeal spaghetti
handful fresh basil leaves, torn
60g parmesan, freshly grated

Sauce:
6 tablespoons olive oil
2 onions, finely chopped
4 fat garlic cloves, finely chopped
2 medium carrots, peeled and very finely chopped
2 celery stalks, very finely chopped
4 medium ripe tomatoes, seeds removed, finely chopped

Preheat the grill in the oven. Cut the cherry tomatoes lengthwise and place them cut side up onto a baking sheet. Drizzle with the extra-virgin olive oil and sprinkle with salt and pepper. Grill for about 10 minutes or until soft. Set aside.

In the meantime, make the sauce: heat the oil in a large saucepan and fry all the vegetables until soft, 10-15 minutes – season with salt and pepper halfway through the cooking time.

Cook the spaghetti in plenty of boiling salted water for about 8–10 minutes (follow the instructions on the packet), or until al dente. Drain, save some of the cooking water, and mix the spaghetti with the sauce, basil and parmesan (the cheese will make the sauce creamier) – add a bit of the cooking water if necessary. Transfer to warmed plates, top with the cherry tomatoes and serve at once.

Serves 4

Friday, January 10, 2014

Baked sausages with tomatoes, peppers and onions, a movie, many tears and a wish

Baked sausages with tomatoes, peppers and onions / Linguiça assada com tomate, pimentão e cebola

The subject of traveling in time has produced a handful of movies, some interesting, some hideous. Last night I watched another movie about it, by far the most beautiful one: a movie that made me cry like a baby (there were so many tears I had to dry them on my cardigan sleeve), that made me think of many things in life and that made me wish I could, too, go back in time.

I kept thinking of how incredible it would be to go back to my past and started imagining my mother and I in our kitchen – with the table where I used to do my homework while she did the dishes after lunch – and pictured us both cooking: I was chopping some onions, she was grilling a steak. And the funny thing is that in my head I wasn’t a kid: I was a 35-year-old adult, as I am today, standing next to her, who looked like she did when I was five. And another funny thing is that I don’t know why I thought of her grilling a steak since I hated it as a child – I usually ate my steak stone cold after seating on the table for hours, forbidden to leave as long as there was food on my plate. :)

Because Richard Curtis made me think of my mom a lot more than I already do every day, I decided to share this delicious recipe with you today: as a good German descendant, she loved pork (and cabbage – boy, she just loved the stuff) and I am sure she would go crazy for sausages cooked this way – the meat portions get golden and crispy on the outside, while tender and juicy within, and the thyme adds a wonderful touch.

Baked sausages with tomatoes, peppers and onions
from Bill Granger’s TV show “Bill’s Notting Hill Kitchen”

2 onions, peeled, halved, and each half cut into 4 pieces
1 large red pepper, seeds removed, cut into chunks
6 cloves of garlic, unpeeled
200g cherry tomatoes
extra virgin olive oil, for drizzling
salt and freshly ground black pepper
4 sausages
5-6 fresh thyme sprigs
handful black olives

Preheat the oven to 200°C/400°F. Place the onions, pepper, garlic and tomatoes in a medium roasting pan or ovenproof dish, drizzle with a little olive oil and season with salt and pepper. Mix to coat. Remove the sausage from their skins in portions (about the size of a meatball) and place over the vegetables. Scatter with the thyme sprigs, drizzle with a little more oil and bake for about 1 hour, turning the sausage halfway through cooking time so the pieces are golden all over. Remove from the oven, scatter with the black olives and serve.

Serves 2 generously

Thursday, January 3, 2013

Roast onion tart and giveaway winners

Roast onion tart / Torta de cebolas assadas

Hello, everyone!

A new year has begun and to kick things off in a great way I have the list of the giveaway winners! The comments were drawn using Random.com. Please send me an email (patricia [dot] scarpin [at] gmail.com) with your first and last names and your magazine of choice until January, 10th, 2013:

- Silvana
- KJB
- Kyrsten
- Laura (Tutti Dolci)
- Isla Bonita

Congratulations!

***

I don’t know about you, but year beginnings are pretty busy to me – therefore, I’ll leave you with an easy and delicious tart, a recipe I’ve made twice already.

Roast onion tart
from the always yummy and beautiful Australian Gourmet Traveller

¼ cup (60ml) extra-virgin olive oil
2 tablespoons red wine vinegar
1 tablespoon fresh thyme leaves
finely grated rind of 1 lemon
2 red onions, thinly sliced horizontally
2 onions, thinly sliced horizontally
350g puff pastry sheet
1 egg, lightly beaten with a fork, for brushing
85g creamy goat’s cheese*

Preheat oven to 180°C/350°F. Line a large baking sheet with baking paper.
Combine oil, vinegar, thyme and lemon zest in a small bowl and season to taste. Place onion slices in a single layer on prepared sheet, keeping slices intact (don't separate into rings). Drizzle over half the oil mixture and roast until very tender and lightly browned (20-25 minutes), cool to room temperature.
Turn oven temperature to 200°C/400°C.
Trim pastry to a 20x25cm (8x10in) rectangle and place on a baking sheet lined with baking paper. Score a 1cm border partway through pastry, prick inside border with a fork, brush edges with the beaten egg. Spread goat's cheese within border, arrange roast onions on top, bake until pastry is risen, golden and cooked through (about 20 minutes). Drizzle over remaining oil mixture, serve hot with a leaf salad.

* I’ve made this tart twice, and once I used homemade ricotta seasoned with salt, freshly ground black pepper and lemon juice – it worked out fine

Serves 4

Friday, May 25, 2012

Roast sweet potato and goat’s cheese salad

Roast sweet potato and goat's cheese salad / Salada de batata-doce assada e queijo de cabra

I was a kid who loved salads and I have my mom to thank for that – I was never the kid who pushed the arugula leaves to the side of the plate, much to the contrary: I was the kid who would eat a tomato as someone would eat an apple between meals. But a whole new world opened up to me when I started collecting cookbooks: it was then that I learned that the salads I already loved could become even more interesting and delicious, that I could add fruit and cheese and nuts to my salads and they would be not only more flavorful but also more nutritious.

This beautiful salad, absolutely yummy and filling, was slightly adapted from Lucas Hollweg’s stunning cookbook – a book I plan on using to exhaustion.

Try placing a tiny bit of each element of the salad into the same forkful and you will create the perfect bite - Rose Morgan's style. :)

Roast sweet potato and goat’s cheese salad
slightly adapted from the glorious Good Things to Eat (mine was bought here)

1 cup whole blanched almonds
750g sweet potatoes
2 onions, peeled and cut into eight
2 teaspoons cumin seeds
2 garlic cloves, unpeeled
finely grated zest of 1 orange
juice of ½ the orange
4 tablespoons extra-virgin olive oil
salt and freshly ground black pepper
2 teaspoons lemon juice
4 cups arugula leaves, packed
200g soft white rindless goat’s cheese

Preheat the oven to 180°C/350°F. Place the almonds in a small baking sheet and toast until fragrant and golden, stirring once or twice, 6-8 minutes. Set aside to cool completely (leave the oven on).
Peel the sweet potatoes and cut into 2cm chunks. Place in a roasting pan, add the onions, cumin, garlic and orange zest. Drizzle with 2 tablespoons of the olive oil, sprinkle with salt and pepper and toss to combine. Roast for 35-40 minutes, turning them over halfway through, or until sweet potatoes and onions are tender. Set aside to cool completely.

Remove the garlic and remove the pulp out of the skins. Transfer pulp to a small bowl and mash with a fork. Add the orange juice, lemon juice, salt, freshly ground black pepper and mix well. Mix in 2 tablespoons of the olive oil.
Arrange the arugula leaves in the plates and scatter with the sweet potato mixture. Sprinkle with the almonds and scatter around the goat cheese pieces. Drizzle with the dressing and serve at once.

Serves 4

Friday, November 7, 2008

Polenta-crusted roasted ratatouille tart

Polenta-crusted roasted ratatouille tart

Thank you all for your comments and concern – your positive thoughts and kind words were very important for my getting better, for sure!

I have been thinking a lot about sweets lately – due to Christmas coming and the gifts I want to make for my friends and colleagues. I have so many recipes bookmarked I don’t even know where to start, really...

I found this recipe going through cookie and candy recipes for the holidays. I have no idea why it was filed in my sweet folder, but I considered it a sign. I’d rather have a sign like this than the one Francesca had in Tuscany. Eeew! :)

Polenta-crusted roasted ratatouille tart

Polenta-crusted roasted ratatouille tart
slightly adapted from here and here

Crust:
1 cup (155g) instant polenta
½ cup (70g) all purpose flour
¼ teaspoon + a pinch of salt
3 tablespoons cold, unsalted butter, in cubes
3 tablespoons olive oil
4-5 tablespoons water

Filling:
3 tablespoons olive oil
½ large onion, thinly sliced
1 small eggplant, sliced
1 small zucchini, sliced
2 tomatoes, sliced
salt and freshly ground black pepper
dried oregano
fresh oregano leaves, to taste
1 ½ cups shredded mozzarella cheese – I used the yellow mozzarella we have here, made with cow’s milk and that looks similar to Monterrey Jack cheese
3 tablespoons freshly grated Parmesan

Start with the filling: preheat the oven to 200ºC/400ºC. Heat 1 tablespoon of olive oil in a pan over medium heat; sauté onion until soft, about 5 to 6 minutes. Spray 2 baking trays with cooking spray. Arrange the eggplant, zucchini and tomato slices on the trays in a single layer and brush with the remaining olive oil. Season with salt and pepper, sprinkle the tomatoes with dried oregano and roast the vegetables until soft but not browned, about 15 minutes. Remove the vegetables from oven and cool.

Now, the crust: lower the oven temperature to 180ºC/350ºF.
Combine polenta, flour and salt in the bowl of a food processor – I used my Kitchen Aid with the paddle attachment. Pulse to incorporate. Add butter and oil and pulse about 20 times, until mixture resembles small pebbles. Add water and pulse until mixture forms a loose dough. Remove dough from processor and press into bottom and sides of a lightly oiled 24cm tart pan with a removable bottom (my pan doesn’t have very high sides).
Press aluminum foil or baking paper over the dough weigh down with uncooked rice, beans or pie weights. Place tart pan on a baking sheet and bake for 10-12 minutes. Remove from oven and remove rice and foil. Return to oven, rise the temperature to 200ºC/400ºF and bake for an additional 5-8 minutes, or until no longer shiny and wet. Remove from oven and let cool.

Lower the oven temperature to 180ºC/350ºF.
Lay the eggplant slices on the bottom of tart; cover with 1/3 of the mozzarella cheese and some of oregano leaves. Add the zucchini and onion, top with another 1/3 of the mozzarella and oregano, then the tomatoes. Top with rest of the mozzarella cheese, oregano leaves and the parmesan. Bake for 25 to 30 minutes, or until cheese is melted and vegetables have further wilted.
Remove from oven and let cool for 5 minutes before unmolding it. Serve warm.

Serves 6

Wednesday, May 7, 2008

Tyler and Agdah's meatballs

Tyler and Agdah's meatballs

I’m sure that most of you have your favorite meatball recipe – perhaps even a family classic. But these were such a hit at home I had to share them with you.

My dear fellow Brazilian blogger Adgah posted these meatballs a while ago and they looked so delicious – the exact kind of food Joao is crazy for. She adapted this recipe, from Tyler Florence, and I followed her version (which is the one I’m posting here).
I had a few myself and the mix of cooked onions, parsley and basil gives the meatballs a wonderful flavor – not to mention that melting cheese is always a winner in my book.

And I was right about Joao – he loved these.

Tyler and Agdah's meatballs

Tyler and Agdah's meatballs

olive oil
1 onion, chopped
2 garlic cloves, smashed*
2 tablespoons roughly chopped fresh parsley leaves
a handful of basil, chopped
1 cup (240ml) milk
2 very thick slices firm white bread, crusts removed – I used whole wheat bread
1kg ground beef
1 large egg
1 cup freshly grated parmesan
salt and freshly ground black pepper
200g mozzarella cheese, cut into chunks – I used the yellow mozzarella we have here, made from cow’s milk and used as pizza topping

Heat 3 tablespoons oil in an ovenproof skillet over medium heat. Add the onion, garlic, and parsley and cook until the vegetables are soft but still translucent, about 10 minutes. Take the pan off the heat and let cool.

Pour enough milk over the bread in a bowl to moisten and let it soak while the onions are cooling. Combine the meats in a large bowl. Add the egg and parmesan and season generously with salt and pepper. Use your hands to squeeze the excess milk out of the bread and add that to the bowl along with the cooled onion mixture. (Hang onto the pan - you'll need it to cook the meatballs.) Gently combine all the ingredients with your hands or with a spoon until just mixed together. Don't overwork or the meatballs will be tough. Divide into 10 equal pieces and shape them into 10 nice looking meatballs.

Preheat the oven to 175ºC/350ºF.

Heat a bit of olive oil in the frying pan over medium heat and brown the meatballs on all sides, about 10 minutes – be careful not to tear them apart. Put them into a baking dish and bake until the meatballs are cooked through, about 15 minutes.

* instead of the cloves, I used a garlic infused olive oil I made a couple of weeks ago (I got the idea from one episode of "Nigella Express")

Makes 10 – I used 1 heaping tablespoon of beef mixture to format each meatball and got 40; half of them were eaten fresh and the others were frozen (while still raw).

Thursday, April 17, 2008

Sfiha

Sfihas

Besides the cake, I made savory snacks for the boys’ birthday get together at my house last month. Simple yet good food, easy and quick to put together, because they’d arrive at lunch time and I would not have much time to cook. So I went for mini carne louca sandwiches and sfihas.

As much as it sounds like a big cliché, Brazil is a melting pot and we have been influenced by many different cultures. Our food is a great example of that. Italian, Portuguese, Japanese – you’ll find all those flavors in our menu. Not to mention the dishes we inherited from the indians (Brazil’s first habitants) and from the slaves that came from Africa centuries ago.

There’s also a large Syrian-Lebanese community here (at least in Sao Paulo), so sfihas are extremely popular. These are so delicious, I’m sure you’ll love them – I did, even though I can’t stand beef. And my Italian/Portuguese/German family loved them, too.

Sfihas

Sfiha

Filling:
½ kg (17 ½ oz) ground beef
2 ripe tomatoes, seeds removed, finely diced
½ onion, finely diced
½ cup chopped parsley
2 teaspoons salt
juice of 1 lime
freshly ground black pepper*

Dough:
30g fresh yeast
500ml warm milk – I used 1% fat
3 tablespoons sugar
1 ½ teaspoons salt
2 tablespoons vegetable oil
5 ½ cups (about 780g) all-purpose flour – I used only 730g

Start with the filling: place all the ingredients in a large bowl and mix well until smooth. Set aside.

Preheat the oven to 220ºC/428ºF.

Now, the dough: place the yeast in a large bowl and add the milk. Mix well with a fork until the yeast is dissolved. Add the sugar, salt and oil. Start adding the flour, gradually, mixing with a wooden spoon until a smooth dough forms. Cover with a clean kitchen towel and let it rest for 5 minutes. Turn dough onto a lightly floured surface and knead it for about 5 minutes. Take small portions of dough – the size of a walnut – and make them into balls. Place onto a floured baking sheet, cover with a kitchen towel and set aside for another 5 minutes.
Using your fingers – I used a rolling pin, it was a lot easier – open each dough ball into a circle. Place ½ tablespoon of beef filling** into the center of the circle. Fold in the lower third of the circle towards the center of the sfiha, then the left and right thirds of the circle, forming a triangle. Pinch the ends together to seal the filling inside.
Place the sfihas, 1 inch apart, onto an oiled baking sheet.
Bake for about 30 minutes or until golden.

If you prefer your sfihas softer, place them inside a pot right after they’re out of the oven and put the lid on (I did not do that).
You can also use an egg wash on the sfihas before baking them, which I think is completely unnecessary.

* the original recipe calls for 1 teaspoon bahrat; I didn’t have any in my pantry, that’s why I used black pepper instead.

** the ground beef is used raw in the filling and releases water and blood after being mixed with the other ingredients. To prevent the dough from being watery, I placed the filling inside a colander over a bowl and squeezed the small portions of filling between my fingers to get rid of any excess liquid before putting them in each dough circle.

Makes 60

Sfihas

Related Posts with Thumbnails