Showing posts with label fresh herbs. Show all posts

Tuesday, April 27, 2021

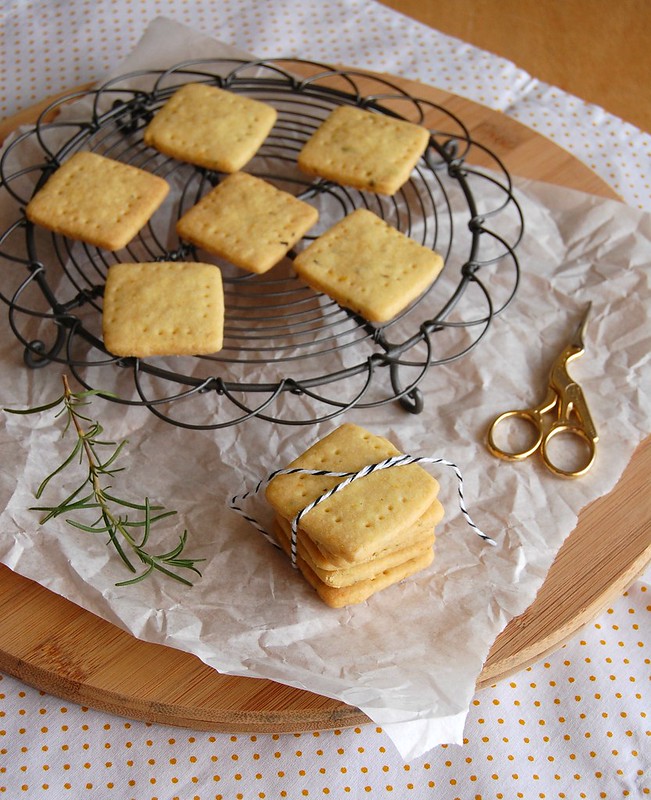
Orange and thyme sablés and my love for herbs

Sablés de laranja e tomilho


One of the things I liked the most when I started cooking recipes from different new sources – books, magazines, foodblogs – was learning how to use fresh herbs: until then, I was used to parsley and chives, which are highly popular in Brazilian houses, but not much more than that. 

The first time I added basil to a tomato sauce it was a revelation: it was amazing how much more delicious it tasted! After basil, I became friends with rosemary, sage, mint, marjoram (which I love, even though is not super easy to find), oregano, cilantro, and my absolute favorite: thyme.

I sometimes hear people saying that it goes well with beef, or lamb, but I have used thyme in so many recipes, combined with so many different types of produce and ingredients, and it has worked wonderfully every time. I love it with roasted vegetables, tomato sauce, dishes with cheese and cream, chicken, fish, chickpeas… Really, the sky is the limit for me.

One of my favorite recipes with thyme is actually sweet: these melt-in-your-mouth sables are delicious and might turn you into a thyme-fan, if you are not one yet.


Orange and thyme sablés

own recipe


Dough: 

½ teaspoons fresh thyme leaves

finely grated zest of 2 large oranges

¾ cup (150g) granulated sugar

1 cup (226g) unsalted butter, room temp.

1 large egg, room temp.

½ teaspoon vanilla extract

2 teaspoons Cointreau (optional)

2 ¾ cups (385g) all purpose flour

½ teaspoon table salt


To roll the dough log:

2 tablespoons granulated sugar – demerara works wonders here too


Place the thyme, orange zest and sugar in a mortar and pestle or a mini food processor and crush/grind until sugar is fragrant. Transfer mixture to the bowl of an electric mixer, add butter and cream until light and fluffy – scrape the sides of the bowl occasionally throughout the making of the recipe. Beat in the egg, beating well after the addition. Beat in the vanilla and the Cointreau (if using). In low speed, beat in the flour and salt and mix just until a dough forms – do not overmix.

Divide the dough into two equal parts. Place each on a large piece of parchment paper; shape dough into logs. Fold parchment over dough; using a ruler, roll and press into a 3.5 cm (1.4in) log – like Martha does here. Wrap in parchment. Chill in the fridge until very firm, about 3 hours (the dough logs can be kept in the fridge for up to 3 days or stored in the freezer for up to 1 month.)

Preheat oven to 180°C/350°F; line two large baking sheets with baking paper.

Unwrap one log at a time (keep the other in the fridge) and roll it through the sugar, pressing ever so slightly to help adhere. Cut log into 5mm (about ¼in) thick rounds; space 5cm (2in) apart onto prepared sheets. Bake until golden brown around the edges, 12-15 minutes. Cool on the sheets for 5 minutes, then slide the paper with the cookies onto a wire rack and cool completely. Repeat the process with the remaining dough log.

Packed airtight, the cookies will keep for about 5 days at room temperature or in the freezer for a month.

Makes about 48 cookies

Tuesday, April 3, 2018

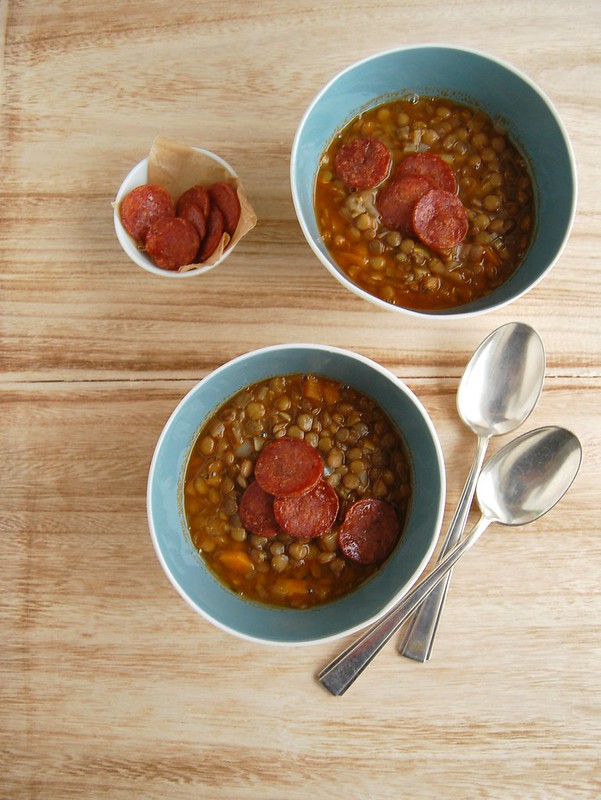
Lentil soup with crispy salami - waiting for fall to come

Lentil soup with spicy salami / Sopa de lentilha com salame crocante

Summer here is over, however someone forgot to tell Mother Nature about it: the weather continues to be hot leading to uncomfortable nights for those who like me do not own an air conditioner at home.

While I look forward to cooler days and nights, I felt like sharing with you one of my favorite soups, sort of like Kevin Costner in Field of Dreams: maybe if I post soups on the blog, fall will actually come. :)

This lentil soup is comforting, delicious and freezes well if you keep the fresh oregano out. If you want to keep it vegan it is just a matter of omitting the salami – I love it because it adds a crunchy, salty touch to the soup.

Lentil soup with crispy salami
own recipe

2 tablespoons olive oil
2 leeks, sliced in half lenghtwise for easier washing, then sliced in half moons
½ onion, finely diced
1 small carrot, finely diced
1 large garlic clove, minced
2 tablespoons tomato paste
1 cup (200g/7oz) dried green lentils, soaked in cold water for 20 minutes before cooking, then drained and rinsed
3 cups (720ml) vegetable stock, hot
2 cups (480ml) boiling water
2 bay leaves
handful of fresh oregano leaves
salt and freshly ground black pepper
100g (3½ oz) salami slices – if they are too large, cut them in half

In a large saucepan over medium heat, heat the olive oil. Add the leeks, onion and carrot and cook, stirring occasionally, until vegetables are soft, about 8 minutes. Stir in the garlic and cook for 1 minute only. Stir in the tomato paste and cook for 1 minute. Add the lentils, cook for 1 minute, then add the stock, water, bay leaves and oregano. When it starts to boil, cover partially, turn the heat down and cook, stirring occasionally, for 20-25 minutes or until lentils are soft, but not mushy. Season with salt and pepper, remove the bay leaves and remove from the heat.
Now the salami: heat a nonstick flying pan over high heat and grill the salami slices for a couple of minutes or until golden on both sides. Transfer to a plate lined with paper towels to remove excess fat. Cool completely.

Pour the soup into bowls and top with the salami slices. Serve immediately.

Serves 4-5

Wednesday, March 21, 2018

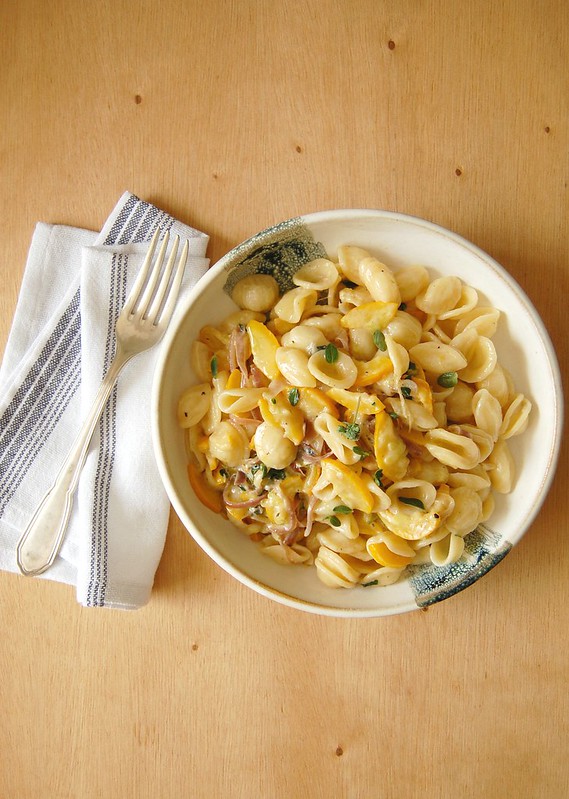
Orecchiette with courgette and goat’s cheese sauce

Orecchiette with courgette and goat’s cheese sauce / Orecchiette com molho de abobrinha e queijo de cabra

This food stylist wannabe got crazy when she saw yellow courgettes in farmer’s market for the first time – until then I had only seen it on books, magazines and food TV shows. Of course I brought some home and immediately thought of something tasty and visually beautiful to make with it.

For this recipe I used red onion so I could have a nice color contrast, however after that day I made this pasta several other times using regular onions and courgettes and it was flavorsome anyway.

Orecchiette with courgette and goat’s cheese sauce
own recipe

2 tablespoons unsalted butter
1 teaspoon olive oil
½ large red onion, thinly sliced in half moons
1 large garlic clove, minced
1 courgette (about 350g/12oz), sliced in half lengthwise and then sliced into thin half moons
finely grated zest of 1 lime
handful of fresh marjoram leaves
2 tablespoons dry white wine
¼ cup (60ml) heavy cream
35g goat’s cheese, coarsely grated or crumbled
200g orecchiette pasta

Cook the pasta in plenty of boiling salted water until al dente (follow the instructions in the package). In the meantime, make the sauce: in a large frying pan, heat the butter and olive oil until butter is melted. Add the onion and cook, stirring occasionally, until softened. Stir in the garlic and cook for 1 minute only – do not let it burn or it will be bitter. Add the courgette and cook, stirring occasionally, for 5-7 minutes or until softened. Season with salt and pepper and stir in the lime zest and the marjoram. Add the wine and cook until it evaporates. Stir in the cream and the cheese and cook just until the cheese melts.

Drain the pasta, reserving some of the cooking water, and stir into the sauce – if sauce is too thick, stir in a bit of the cooking water to loosen it up. Serve immediately.

Serves 2

Other ideas: this recipe tastes great if gorgonzola and fresh oregano are used instead of goat’s cheese and marjoram.

Friday, January 26, 2018

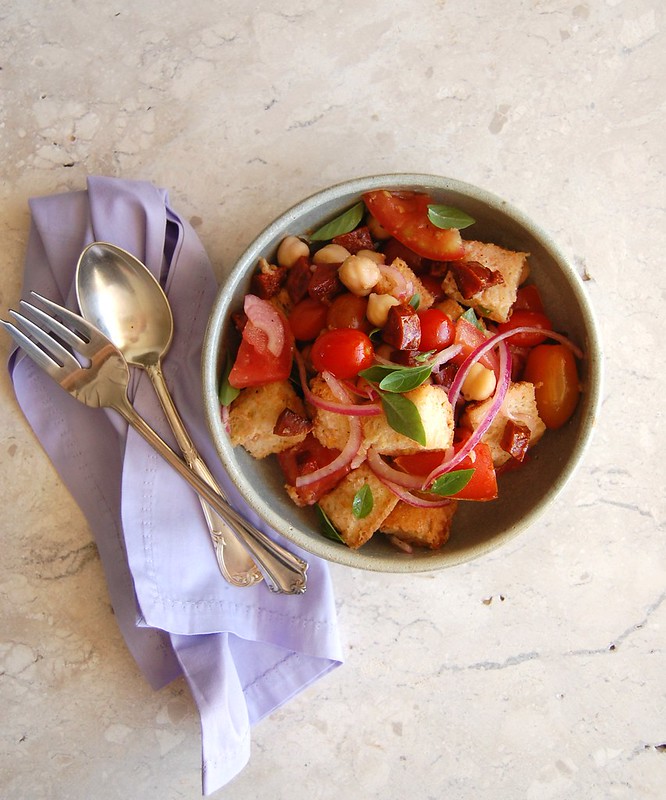
Panzanella with a Spanish touch - perfect for the weekend

Panzanella with a Spanish touch / Panzanella com um toque espanhol

I remember the first time I made panzanella at home: it was a revelation. Who could have thought that a salad made with stale bread would be so delicious? The Italians, of course. :)

As much as I love Italian food – half of the blood in my veins is Italian, after all – I have added a couple of Spanish touches to my panzanella: crispy chorizo, chickpeas, sherry vinegar in the dressing. The salad turned out wonderful and it is a beautiful idea for lunch or dinner in the really hot days we have been having in Sao Paulo (to make it even fresher, add 1 thinly sliced small Japanese cucumber sliced to the salad). It is also great for lazy weekends, like the one I plan to have. :)

Panzanella with a Spanish touch
own recipe

½ red onion, peeled and cut in half
1 tablespoon sherry vinegar
2 cups stale bread cubes (approximately 2cm each cube)
3 tablespoons extra virgin olive oil, divided use
2 large ripe tomatoes, seeded and coarsely chopped
1 cup cherry tomatoes, halved
100g chorizo, chopped in small cubes
¾ cup (127g) cooked and drained chickpeas
½ teaspoon Dijon mustard
salt and freshly ground black pepper
handful of fresh basil leaves

Thinly slice the onion, transfer to a small bowl and drizzle with the vinegar. Set aside for 15 minutes or until you get the other parts of the salad done.

Preheat the oven to 180°C/350°F. Line a medium baking sheet with baking paper or foil. Spread the bread cubes over the paper/foil and drizzle with 1 tablespoon of the olive oil. Bake for about 8 minutes or until bread is crispy and golden. Remove from the oven and set aside.
In the meantime, heat a nonstick frying pan over high heat. Add the chorizo and cook, stirring now and then, until crispy. Drain the chorizo over paper towels.

Transfer bread, chorizo, tomatoes and chickpeas to ta large bowl. Drain the onion (save the vinegar for the dressing) and stir into the salad. To the bowl with the vinegar, add the remaining 2 tablespoons olive oil, mustard, salt and pepper and whisk well. Pour over the salad, toss to combine and set aside for 30 minutes. Stir in the basil leaves and serve.

Serves 2

Wednesday, January 10, 2018

Roasted garlic pecorino focaccia

Roasted garlic pecorino focaccia / Focaccia de alho assado e pecorino

I can say that after the lovely Ina my favorite Food Network presenter is Rachael Ray – she is fun and her food always looks good – even though most of the times her portions look too generous to me. :)

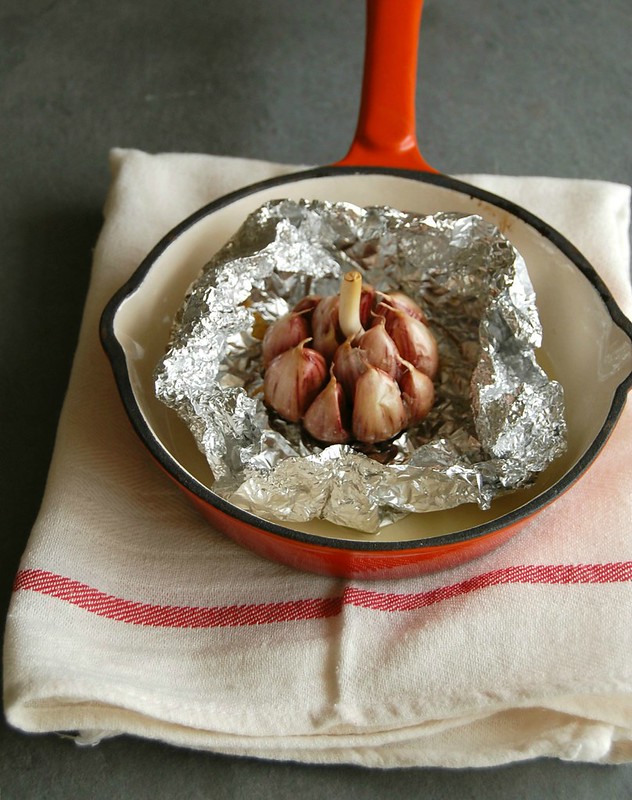
She constantly says how much she loves garlic and I always relate to that: I have a heavy hand with it comes to adding garlic to my food and usually double the amount requested in recipes (maybe that is why both my husband and I rarely have colds). And don’t even get me started on roasted garlic: I just love the stuff so much I had to mix it into a focaccia dough. It turned out delicious, but if you are not a fan of bold flavors you can tone this down by adding half the amount of garlic and replacing the pecorino with parmesan.

Roasted garlic pecorino focaccia / Focaccia de alho assado e pecorino


Roasted garlic pecorino focaccia
own recipe

For the roasted garlic:
1 large head of garlic, whole
1 tablespoon extra virgin olive oil

Dough:
2 teaspoons dried yeast
¼ teaspoon granulated sugar
300ml lukewarm water
3 tablespoons extra virgin olive oil, plus a little extra to drizzle over the focaccia
3 cups (455g) all purpose flour
1 teaspoon table salt
1/3 cup finely ground pecorino
2 tablespoons fresh thyme leaves

Preheat the oven to 180°C/350°F. Place the whole head of garlic in the center of a medium piece of foil. Drizzle with the olive oil and close the ends of the paper, pressing them together so the oil does not leak. Place the foil package in a small baking sheet and roast for about 45 minutes or until garlic is tender. Remove from the oven and leave to cool completely. When garlic is cold, remove the pulp from the skins and mash it with a fork to form a purée – save the olive oil left in the foil for later. Set the garlic aside.

In the large bowl of a stand mixer, combine the yeast, sugar and water and mix with a fork. Set aside for 5 minutes or until foamy. Add the olive oil, flour, salt and half of the pecorino and mix with the dough hook for 6-8 minutes or until an elastic and smooth dough forms – it kneading by hand, 10-12 minutes should do. Add the mashed garlic, half the thyme leaves and mix well. Transfer to a lightly oiled large bowl, cover with plastic wrap and set aside in a warm spot for 1 ½ hours or until doubled in volume.

Lightly brush a large baking sheet with olive oil. Carefully transfer the dough to the prepared sheet, gently so you don’t lose the air trapped in the dough. Shape it onto a 30x20cm (12x8in) oval. With lightly floured fingertips, pierce the dough in a few spots without pressing it too deep. Measure the olive oil left from roasting the garlic and add more olive oil until you have 1 tablespoon. Drizzle over the dough, then sprinkle it with the remaining thyme leaves and pecorino. Set aside in a warm place for about 20 minutes – in the meantime, preheat the oven to 200°C/400°F. Bake the focaccia for 25-30 or until golden brown. Remove from the oven and very carefully slide it onto a wire rack. Serve warm or at room temperature. The focaccia can be kept in an airtight container at room temperature for up to 2 days and tastes fresh again if reheated briefly in the oven.

Serves 8-10

Thursday, November 23, 2017

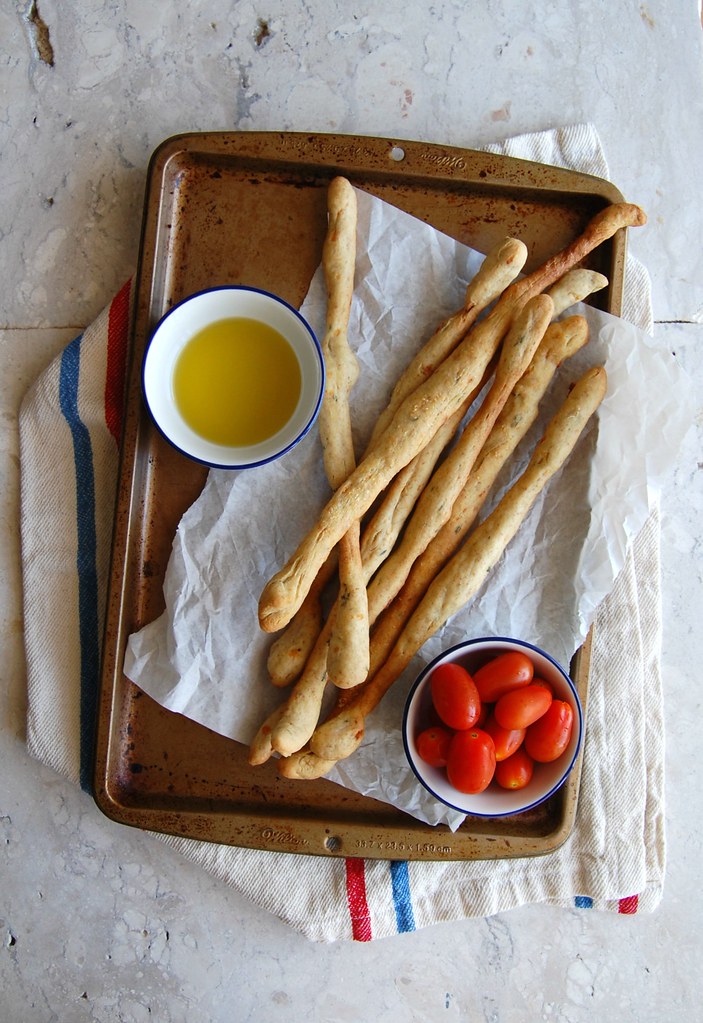
Gorgonzola and fresh oregano grissini

Gorgonzola and fresh oregano grissini / Grissini de orégano fresco e gorgonzola

At home we like nibbling very much, especially on weekends, and that came to my mind as I set up a plate of bread, cheese and fruit last Saturday for dinner: a glass of wine and the meal was perfect.
Sometimes we have guacamole with homemade tortillas, and of course there are days I don’t even want to enter the kitchen: those are the days for pizza. :)

If you are feeling a bit more enthusiastic than me lately please have a go at these grissini: they are absolutely delicious and great for the cheese/fruit platter (and with wine, too). :)

Gorgonzola and fresh oregano grissini
own recipe

1 teaspoon dried yeast
1 teaspoon granulated sugar
200ml lukewarm water
2 cups (280g) all purpose flour
1/3 cup (46g) whole wheat flour
3 tablespoons olive oil + a bit extra for brushing
1 teaspoon table salt
2 tablespoons fresh oregano leaves, packed
50g gorgonzola, coarsely grated or crumbled if too soft
3 tablespoons finely grated parmesan

In the bowl of an electric mixer fitted with the dough hook, mix the yeast, sugar and water with a fork. Set aside for about 5 minutes or until foamy. Add the flours, olive oil and salt. Mix on medium for about 8 minutes or until mixture turns into an elastic and smooth dough – if mixing by hand, 10-12 minutes should do it. Mix in the oregano and the gorgonzola, shape the dough into a ball and transfer to a large bowl lightly brushed with olive oil. Cover with plastic wrap and set aside to prove for 1 ½ hours, or until doubled in size.

Preheat the oven to 200°C/400°F. Line two large baking sheets with foil and brush it with olive oil.
Punch the dough to remove the excess air. Divide dough in 24 equal portions e roll each of them into a 30cm (12in) sausage shape – if dough is too stick, lightly flour your counter, but avoid too much flour or the dough will be tough and dry. Place the grissini onto the foil leaving 2cm (little less then 1in) between them. Brush them with olive oil, sprinkle with parmesan and bake for 20-25 minutes or until golden brown.
Transfer the sheets to a wire rack and cool completely.

Makes 24

Thursday, September 28, 2017

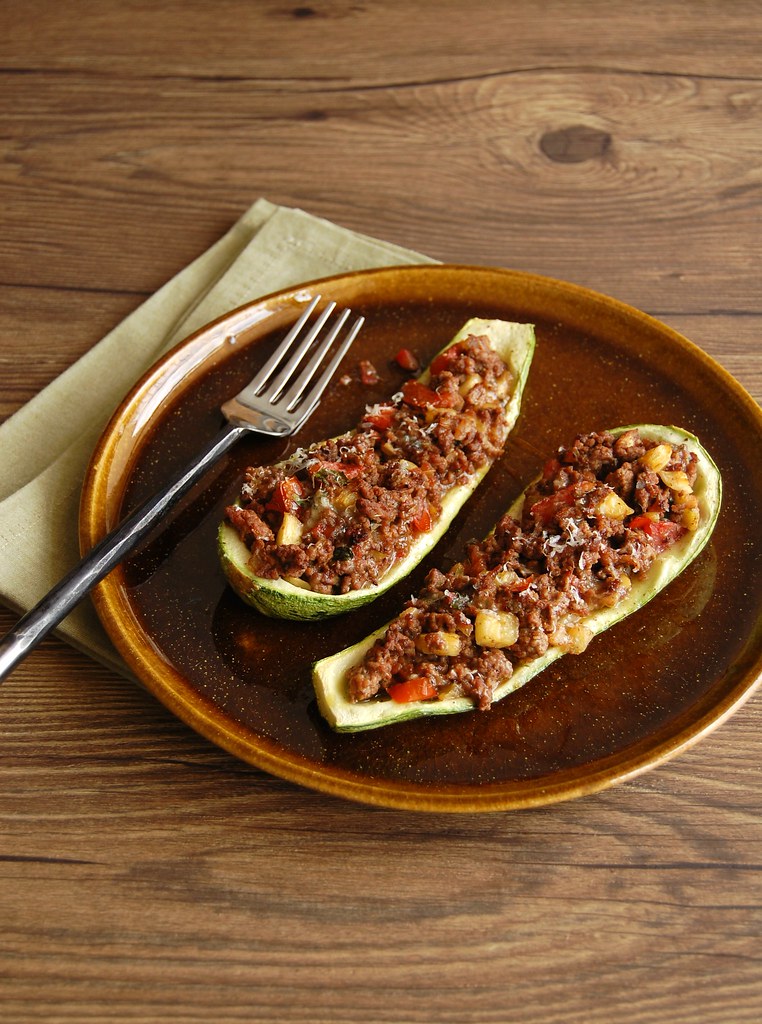
Stuffed zucchini, not like my grandma's

Stuffed zucchini / Barquinhas de abobrinha

One of the dishes that remind me of my grandmother the most is stuffed zucchini: she would make these quite often when she lived with us because my father liked it a lot.

I did not like meat growing up and back then I did not understand why my grandma would make this dish so often, but now that I am all grown up it makes a lot of sense to me: it is delicious – when prepared properly – and it makes things quite easier for the cook, since you only need a green salad on the side to call it a complete meal.

This is my version of stuffed zucchini: out with the mushy rice mixed with pale beef, in with with wine, tomatoes, fresh marjoram and gorgonzola – absolutely delicious (sorry, grandma). :)

Stuffed zucchini / Barquinhas de abobrinha

Stuffed zucchini
own recipe

4 zucchini, about 250g/8oz each
3 tablespoons extra virgin olive oil
1 onion, finely diced
3 garlic cloves, minced
400g (14oz) beef mince
salt and freshly ground black pepper
¼ cup (60ml) dry white wine
2 tablespoons tomato paste
2 ripe tomatoes, deseeded and chopped
handful of fresh marjoram leaves
150g (5oz) gorgonzola, coarsely grated or crumbled
finely ground parmesan, for serving

Preheat the oven to 200°C/400°F. Line a large baking sheet with foil and brush it with some of the olive oil.

Cut the zucchini in half lengthwise – you should then get 8 halves that look like little boats. With a small spoon, scrape some of the flesh – do not carve the zucchini halves too much or they will be too flimsy. Chop the flesh and set aside. Place the zucchini on the prepared sheet and brush the inside of each half with some of the olive oil.

Bake for 20 minutes – in the meantime, make the filling: heat the remaining olive oil in a large nonstick frying pan over high heat. Add the onion and cook, stirring occasionally, until translucent. Stir in the garlic and cook for 1 minute or until fragrant – do not let the garlic burn or it will turn bitter. Stir in the mince and cook, stirring occasionally, until golden. Season with salt and pepper – go easy on the salt since the cheeses can be salty. Stir in the wine and cook again for 2-3 minutes or until wine is reduced – using a wooden spoon, scrape the brown bits in the bottom of the saucepan for extra flavor. Stir in the tomato paste, chopped tomatoes, ¾ cup of the reserved zucchini flesh (you can freeze the remaining flesh and use it to make vegetable stock) and the marjoram. Cook for about 5 minutes or until tomatoes are soft. Remove from the heat, stir in the gorgonzola and divide the meat filling among the zucchini halves. Bake for 15 minutes. Sprinkle with the parmesan and serve immediately.

Serves 4

Monday, August 21, 2017

Roasted tomato and red lentil soup and freezing feet

Roasted tomato and red lentil soup / Sopa de tomates assados e lentilha vermelha

I believe that one of the reasons why my love for the winter has considerably decreased is the fact that at least here in Sao Paulo we are not actually prepared for cold temperatures: there is no heat inside most of houses and apartments, stores and restaurants – one suffers with the cold both outside and inside. Taking a shower is a nightmare, getting dressed another one. :S

As I type this recipe on a very cold Sunday with a piping hot mug of tea by my side, my feet are covered in two pairs of socks and yet they feel like two ice cubes. I dream of nicer weather, and while that does not happen I make soup – this is simple, delicious and the heat turns the tomatoes into gold even if they are not at their peak, while the lentils make the soup thicker and more fulfilling.

Roasted tomato and red lentil soup
own recipe

For the roasted tomatoes:
8 ripe Italian tomatoes, cut in half lengthwise
1 tablespoon extra virgin olive oil
salt and freshly ground black pepper
3 sprigs fresh oregano
2 bay leaves

For the soup:
1 ½ tablespoons unsalted butter
½ teaspoon extra virgin olive oil
1 large leek, white part only, finely sliced
1 large garlic clove, minced
3 cups (720ml) vegetable stock, hot
salt and freshly ground black pepper
½ cup (100g) dried red lentils

Preheat the oven to 200°C/400°F. Line a large baking sheet with foil.
Place the tomatoes on top of the foil, cut side up, drizzle with the olive oil and sprinkle with the salt and pepper. Place the oregano and the bay leaves on top of the tomatoes and roast for 40 minutes or until very tender. Remove from the oven and discard the oregano and bay leaves.

Start the soup: melt the butter with the olive oil in a large saucepan over medium-high heat. Add the leeks and cook, stirring occasionally, until tender, about 5 minutes. Stir in the garlic and cook just until fragrant, 1 minute. Add the tomatoes with any juices from the sheet. Add the vegetable stock, then blitz with a stick blender until smooth. Stir in the lentils and cook until they are tender, about 10 minutes. Check seasoning and serve.

Serves 4-6

Wednesday, August 2, 2017

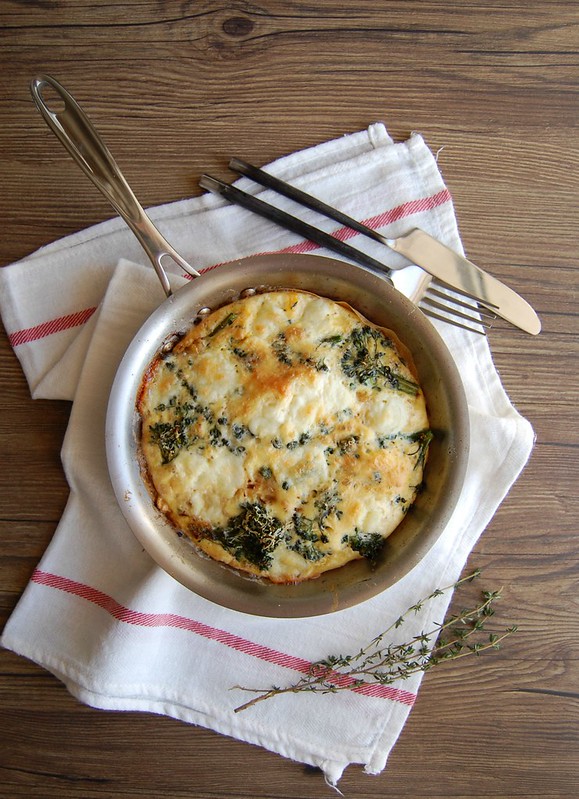
Broccolini, caramelized onions and mozzarella frittata, or eggs are my kitchen heroes

Broccolini, caramelized onions and mozzarella frittata / Frittata de brócolis, cebola caramelizada e mozarela fresca

I can surely say that eggs are one of my favorite things to eat and to cook with: I love how tasty, healthy and versatile they are. No matter how empty your fridge and cupboards are, if you have eggs on hand you have dinner, and usually quickly.

I make frittatas quite often for in them I can use whatever I have begging to be used in the fridge. The one I bring you today is one of my favorite combo flavors, and I sometimes buy broccolini and/or mozzarella especially to make it – the broccolini tastes amazing paired with the gooey pieces of cheese, but to me what really makes this dish are the sweet, delicious onions, so take your time to caramelize them, even if it sounds like a boring chore, I assure you it is worth it. I have used fresh oregano to replace thyme a couple of times and it worked beautifully, too.

Broccolini, caramelized onions and mozzarella frittata
own recipe

½ large onion, thinly sliced
1 tablespoon olive oil
½ teaspoon granulated sugar
salt
1 ½ cups (60g) broccolini florets
3 large eggs, room temperature
freshly ground black pepper
2 teaspoons fresh thyme leaves
1/3 cup (60g) fresh mozzarella

Preheat the oven to 200°C/400°F. Heat the olive oil in a 20cm (8in) frying pan over medium heat – make sure you use a frying pan that can go into the oven. Add the onions and stir to coat them in the oil. Sprinkle with the sugar and a pinch of salt, then lower the heat and cook, stirring occasionally, for about 20 minutes or until onions are golden brown and soft.

Stir in the broccolini and cook, stirring occasionally, for 2 minutes. In the meantime, crack the eggs in a medium bowl, season with salt and pepper and whisk. Whisk in the thyme leaves. Give the broccolini and onions a good stir to avoid the onions being all in the bottom of the pan, then pour over the egg mixture. Tear the mozzarella into pieces and place them around on top of the eggs. Cook on the stove over low heat for 2 minutes without stirring, then transfer to the oven and cook for 8 minutes, or until puffed up and golden. Serve immediately.

Serves 2

Friday, May 5, 2017

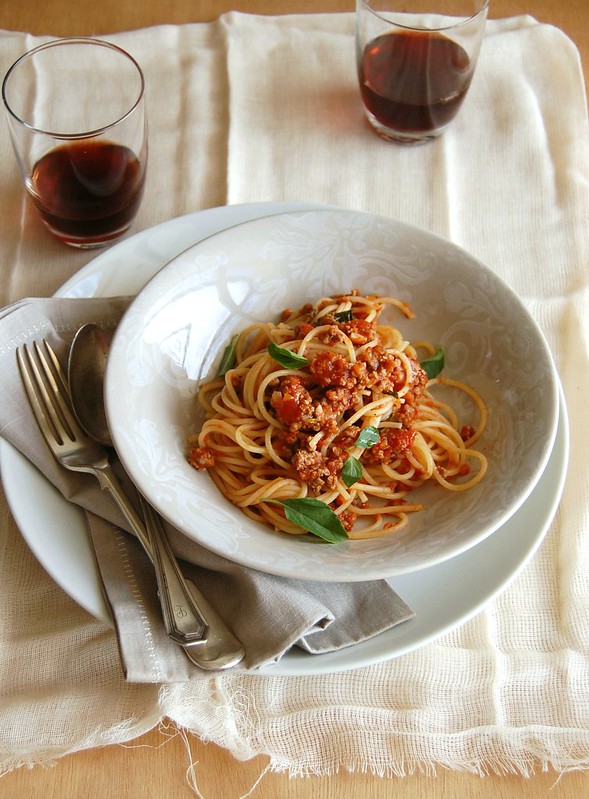
My Bolognese sauce, as per my husband's request

My Bolognese sauce / O meu bolonhesa

I started blogging about food in 2006 (sometimes I find it hard to believe I am still here, to be honest) and for years now many people have written to me to tell me they learned how to cook with me (Brazilians, since I write in Portuguese, too). Every time I read the emails I feel joy in my heart, for I know how liberating learning how to cook can be – it was for me.

So here we are, almost eleven years later, and this time the “revolution” is happening in my home: my husband has been learning how to cook. :) It started with sandwiches, it evolved to salads and soups (very good salads and soups, by the way) and days ago he tried to make one of our favorite dishes: Bolognese sauce. I arrived home late after a tiresome day at the office and smelled something wonderful when the elevator door opened – for a moment I thought the smell could be coming from my neighbors’, but those people, besides being incredibly noisy and rude, don’t cook food that smell that great. :)

For my surprise, the smell was coming from my apartment and as I walked in I found my husband smiling at me: “surprise! I made your Bolognese sauce!” – I helped him cook the linguine and we had a delicious dinner.

He then told me he was a bit confused during the preparation of the sauce and that he had searched the blog to make sure he remembered all the steps – “I could not find the recipe on TK”, he said, and I told him I had not published it here. He said “it’s about time”, so here we are: I am sharing with you my Bolognese sauce – and I call it “my Bolognese” because I know it is not the most authentic one out there, but it is the one I have been making for years and that my husband loves so much. I don’t always have carrots and/or celery at home for the sofrito, so onions and garlic are the aromatics of choice; also, I hardly ever have 3 hours to wait for the sauce to come together, so mine is ready in 30 minutes or so. I hope you give it a go and if you do, please let me know how it went.

My Bolognese sauce
own recipe

1 ½ tablespoons olive oil
1 large onion, finely diced
3 large garlic cloves, minced
250g beef mince
salt and freshly ground black pepper
¼ cup (60ml) dry red wine
1 tablespoon tomato paste
1 400g (14oz) can peeled tomatoes
1 tablespoon granulated sugar
2 bay leaves
5 sprigs of fresh thyme
handful of fresh basil leaves or fresh oregano leaves
300g linguine

In a medium saucepan, heat the olive oil over medium-high heat. Add the onion and cook until translucent, 4-5 minutes. Add the garlic, cook for 1-2 minutes or until fragrant, then add the beef and break it down with the spoon into smaller pieces. Cook, stirring occasionally, until beef is well browned. Season with salt and pepper. Stir in the wine and cook again for 2-3 minutes or until wine is reduced – using a wooden spoon, scrape the brown bits in the bottom of the saucepan for extra flavor.

Add the tomato paste and cook for 1 minute. Stir in the canned tomatoes and smash them with a potato masher. Fill ¾ of the can with water, swirl it around and add to the saucepan. Season again with salt and pepper, add the sugar, the bay leaves, the thyme and cook over low heat, stirring occasionally, for about 30 minutes or until thickened. Add the basil/oregano, stir to combine, remove the bay leaves and the thyme sprigs, cover and remove from the heat.
Cook linguine in a large pot of salted boiling water until al dente. Drain and stir in the sauce. Serve immediately.

Serves 3

Thursday, October 20, 2016

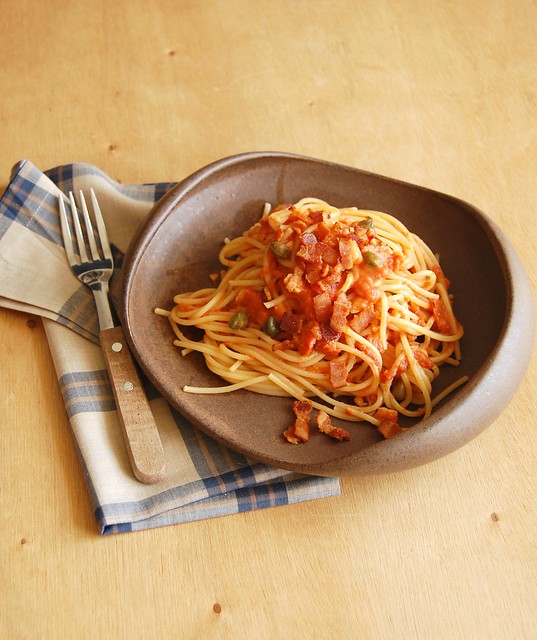
Linguine with creamy tomato, thyme, caper and bacon sauce

Linguine with creamy tomato, caper, thyme and bacon sauce / Linguine com molho cremoso de tomate, alcaparra, tomilho e bacon

I believe that many of you reading me right now reach for a pasta package whenever there is the need of having food on the table in little to no time – I am guilty of that and I am not ashamed of it. :)

I make pasta often not only because of how fast it is: Joao and I love it and it is so versatile I can combine it with several different flavors and types of sauce. I saw this version of a tomato sauce on Olive magazine and it was so simple I had to try it: the sauce is delicious, the acidity of the tomatoes is softened by the addition of cream and the capers add a briny, salty touch to the sauce. Thyme is my favorite herb and one I love pairing with tomato.

Linguine with creamy tomato, thyme, caper and bacon sauce
slightly adapted from the always great Olive magazine

4 slices of bacon, cut into ½ cm pieces
2 large garlic cloves, crushed
6 sprigs of fresh thyme
1 x 400g can of chopped tomatoes
2 teaspoons granulated sugar
salt and freshly ground black pepper
2 tablespoons capers – soak them in cold water for 15 minutes before using, then drain
3 tablespoons heavy cream
200g linguine

In a medium saucepan, over high heat, cook the bacon, stirring occasionally, until crisp. Remove from the pan and set over paper towels. Remove the excess fat from the saucepan, leaving 1 tablespoon. On that fat, cook the garlic until fragrant, about 1 minute. Stir in the thyme and cook for 1 minute. Add the tomatoes, crush them with a potato masher, then fill the can by half with water and add to the tomatoes. Add the sugar, season with salt and pepper and cook partially covered, stirring occasionally, for about 20 minutes or until thickened.

In the meantime, cook the linguine in salted boiling water until al dente.

Stir in capers and cream and then cook for 3 minutes. Drain the linguine and toss with the sauce. Serve at once sprinkled with the bacon bits.

Serves 2

Thursday, October 6, 2016

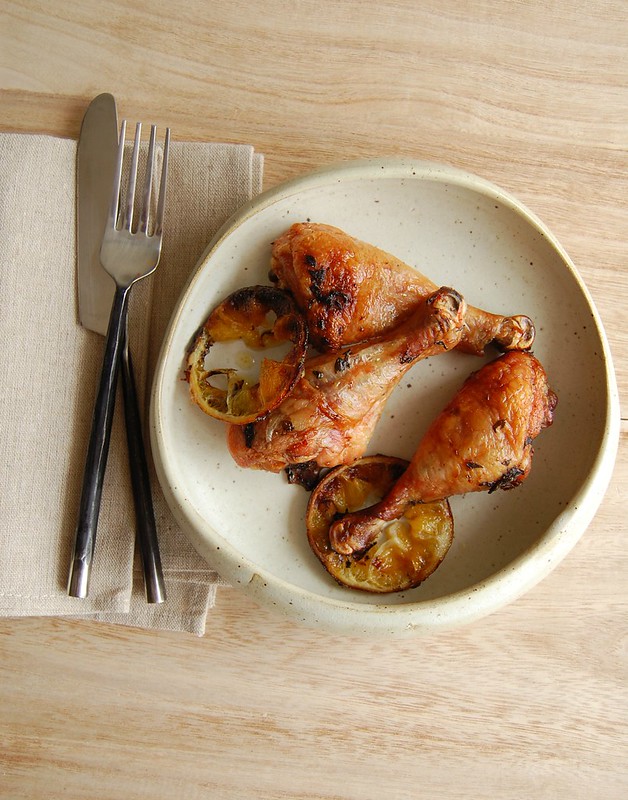
Marjoram orange roast chicken

Marjoram orange roast chicken / Frango assado com manjerona e laranja

I was thinking the other day about how drastically I have decreased my cookbook purchase addiction – maybe because of how much bigger my workload is compared to years ago, maybe because the food magazines I subscribe fill that need for inspiration and new recipes, maybe because some books were such disappointments (I am speaking to you, Ms. Lawson)…

My last purchase, as far as I recall, was on Oct 20 last year – this is definitely a new world record or something. :)
However, when I saw that Diana Henry had a new book coming out, I could not wait until I had it in my hands, for I am a huge fan of her beautiful work, plus she is a total dear and have spoken to me on Twitter a few times, even saying “obrigada” in Portuguese once. <3

The book is stunning and the recipes look delicious – and are simple, like the name of the book says. I love that. I decided to start with a chicken recipe and used Diana’s as inspiration, however I made it even simpler than hers. It was indeed delicious and the chicken meat was falling off the bones after a night spent in the fridge swimming in the flavorsome marinade.

Maybe I am cured from my cookbook addiction? I don’t know. What I know is that next time Diana publishes a new cookbook I will have it on my Ipad on the very same day. ;)

Marjoram orange roast chicken
adapted from the beautiful Simple

handful of fresh marjoram leaves, chopped
3 garlic cloves, crushed then finely chopped
2 oranges
3 tablespoons extra virgin olive oil
salt and freshly ground black pepper
4 skin-on bone-in chicken thighs

In a bowl, mix the marjoram leaves, the garlic, finely grated zest and juice of 1 of the oranges, the olive oil, salt and pepper. Add the chicken and toss to coat. Cover with plastic wrap and refrigerate for at least 2 hours (overnight is great).

Preheat the oven to 200°C. Line a medium roasting tray with a double layer of foil and coat the foil with olive oil. Slice the remaining orange and arrange the slices on top of the foil. Arrange the chicken over the orange slices and pour over the marinade. Roast for about 60-80 minutes or until golden and cooked through – time might vary depending on how golden you like your chicken.

Serves 2

Friday, November 14, 2014

Orange rosemary shortbread - becoming friends with rosemary

Orange rosemary shortbread / Amanteigados de laranja e alecrim

I have to start this text by confessing that it took me months (a quick look at Amazon shows me that I purchased the book in January, so almost a year) to make these cookies, all because I was a coward: I was afraid that all that rosemary in the dough would make the cookies taste weird.

I am thirty-five six years old and rosemary scares the bejeesus out of me: I always think that the food will end up tasting like soap. :S

I love cooking with herbs and will gladly add thyme, oregano, basil, marjoram, parsley, even cilantro to recipes without too much thought about it, for they make everything so much more delicious, but when it comes to rosemary I just can’t do it, and every time I watch Jamie Oliver adding tons of rosemary to his recipes I feel sort of desperate, my brain screams “it’s too much, too much!”. :)

I decided it was time to stop this nonsense and bought a small vase of rosemary to gradually start using the herb in my cooking, and these cookies were my first attempt at getting to know the rosemary better: they turned out delicious, the herb flavor perfectly complimented by the orange.

I feel a lot braver now. ;)

Orange rosemary shortbread
slightly adapted from the beautiful and delicious National Trust Simply Baking

½ cup (100g) granulated sugar
2 teaspoons finely chopped rosemary leaves
finely grated zest of 2 oranges
1 cup (225g/2 sticks) unsalted butter, softened
1 teaspoon vanilla extract
340g all purpose flour - I used 290g all purpose flour + 50g millet flour
pinch of salt

Preheat the oven to 180°C/350°F. Line two large baking sheets with baking paper.

Put the sugar and rosemary in a food processor and whiz until the rosemary is very finely chopped. Transfer sugar to the bowl of an electric mixer, add the orange zest and rub them together with your fingertips until sugar is fragrant. Add the butter and vanilla and beat with the mixer until pale and creamy. On low speed, beat in flour and salt. Wrap the dough in plastic and refrigerate for 20 minutes.

Roll out dough between two sheets of baking paper until 3mm thick. Use a 4cm (1½in) cookie cutter to cut out cookies – if the dough gets too soft, place it in the freezer for 5 minutes. Place cookies onto prepared sheets 2,5cm (1in) apart and prick them with a fork. Bake until lightly golden on the edges, 10-12 minutes.
Cool completely on the sheets over a wire rack. Remove carefully from the paper.

Makes about 60

Thursday, July 31, 2014

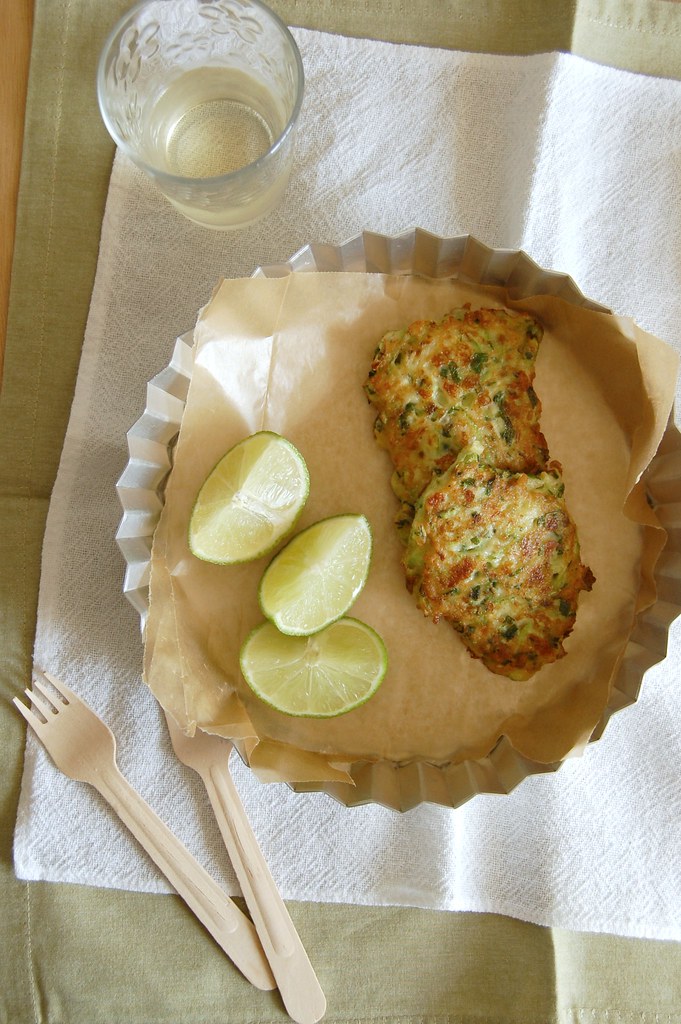
Courgette and feta fritters, a crazy trailer and a versatile young actor

Courgette and feta fritters / Bolinhos de abobrinha e feta

Unfortunately I don’t have time to read all the websites and blogs I like (and I’m sure you don’t either so thank you for stopping by, I really appreciate it), but not a day goes by that I don’t visit IMDb for news on the world of cinema.

Yesterday, in one of those visits, I watched the trailer for Horns and it immediately became one of the most interesting/craziest trailers I have even seen. Daniel Radcliffe’s choices in movies and theater have been very diverse and I find it honorable that he’s interested in doing such different things, stretching himself as an actor: he does controversial, he does dark comedy, and romantic comedy as well – who can forget him staring in Equus years ago? So young, yet so versatile – I really admire that.

Daniel is versatile, all right, and so are fritters: they can be pretty much made with any vegetable in your fridge and it’s a nice vessel for them if there’s any picky eater around. These courgette fritters turned out delicious and tender – they were fast to prepare and vanished even faster. :D

Courgette and feta fritters
slightly adapted from two great sources: A Girl Called Jack: 100 Delicious Budget Recipes and Nigella Fresh

1 large courgette
1 spring onion, finely chopped
handful parsley leaves, chopped
1 egg, lightly beaten with a fork
50g feta cheese, grated
2 tablespoons all purpose flour
salt and freshly ground black pepper
canola oil, for frying

Coarsely grate the courgette and spread it onto a clean kitchen towel. Set aside for 20 minutes to get rid of any excess moisture.
Transfer the courgette to a large mixing bowl, add the spring onion, parsley, egg, feta and flour, season with salt and pepper and stir to combine. If batter is too thin, add a bit more flour.

Heat a drizzle of oil in a large nonstick frying pan. Dollop two tablespoons of batter per fritter, flatten with the back of a spoon and shape the edges quickly to form a rough circle. Don’t overfill the frying pan. Cook for about 2 minutes, then flip and cook until golden. Transfer to a plate lined with paper towels. Repeat the process with remaining batter.

Serve at once with lime wedges.

Makes 6

Thursday, July 10, 2014

Leek, carrot and potato soup or "my soup", according to my husband

Leek, carrot and potato soup / Sopa de alho-poró, batata e cenoura

Soups and winter go perfectly together, right? I make soups quite often during the colder months, and when I do I usually make a large batch so we can have it for dinner two days in a row. I have noticed that most soups, and the one I bring you today especially, taste even better the next day, so there’s another reason for making extra soup. :)

I like to vary when it comes to food and soup is no exception, but this is my husband’s favorite soup: whenever he wants me to cook it he says “why don’t you make your soup tonight?”, and I know that by my soup he means the vegetable soup I’ve been making for as long as I can remember. I have made this soup with and without the leek (just onions and garlic), with squashed added in the mix, with and without the pasta and rice replacing it, you name it. The fresh oregano is a recent addition: I’d always made this soup with parsley only, but on a given day I did not want the oregano bunch to go to waste and ended up adding it to the soup – after that, it became indispensable.

This is a very simple, yet versatile recipe and you can adjust it to make it your own. I used butter because I can’t resist using it with leeks, but you can omit that for a vegan soup.

We love having this soup with some crusty bread on the side, but it would be a crime for me not to suggest Barbara Lynch’s grilled cheese, too. :)

Leek, carrot and potato soup
own creation

1 tablespoon unsalted butter
½ tablespoon olive oil
1 leek, white part only, chopped
½ large onion, finely diced
2 fat garlic cloves, minced
2 ripe tomatoes, seeds removed, finely chopped
3 carrots, in small cubes
3 potatoes, in small cubes
boiling water, enough to cover the vegetables
salt and freshly ground black pepper
handful fresh oregano leaves
handful fresh parsley leaves, chopped
1 cup cooked small shaped pasta, such as ditalini*

Heat butter and olive oil in a large saucepan over medium-high heat. Add the leek and onion and cook until transparent, stirring occasionally. Add the garlic and cook until fragrant. Add the tomatoes and a pinch of salt and cook until they are mushy. Add the carrots and potatoes and stir to combine. Cover with boiling water and season with salt and pepper. When the soup comes to a boil, reduce the heat to medium-low, cover partially and cook until vegetables are tender, 10-15 minutes.
With an immersion blender, blitz the soup for a couple of seconds – you want the mixture to be half chunky, half smooth. Add the oregano and parsley, check the seasoning.
Divide the pasta among the serving bowls, top with the soup and serve.

* Once the pasta is in the soup it won’t stop swelling – that is why I cook it separately and add it only to the bowls when serving and not to the entire batch of soup

Serves 4

Friday, May 2, 2014

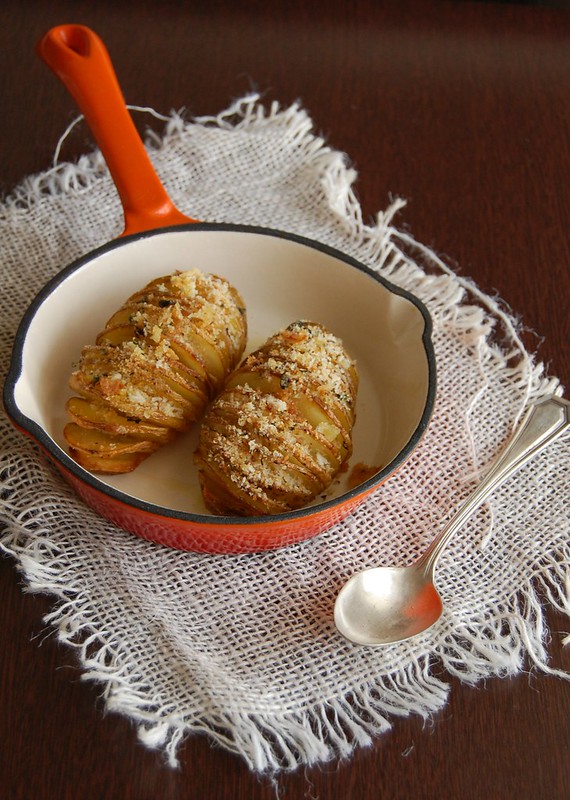
Hasselback potatoes with oregano and lemon crumbs, a great song and simple things

Hasselback potatoes with oregano and lemon crumbs / Batatas hasselback com crostinha de limão siciliano e orégano

Some songs have been favorites of mine for as long as I can remember, and I never get tired of listening to them.

As I was listening to “Sweet Sixteen” yesterday I kept thinking of the beauty of the song’s arrangement, and of how simple it is, with just a couple of instruments. Then I listened to it four or five times in a row, savoring those chords. It is truly a beautiful song (despite the sad story behind it), one that I first listened to when I was a kid and that I’m pretty sure I’ll be listening to when I’m 70.

From time to time I write here about simple things, how great they are to me. I guess that one doesn’t need much to create something beautiful like Billy Idol’s song, and that can be applied to food. Like cakes, simple savory dishes are also something close to my heart, something I feel like eating on a daily basis, and adding a twist here and there doesn’t change their essence – it just makes them even more delicious.

In today’s recipe, the humble potato, a root veggie I love (the German blood in my veins is probably responsible for part of that love) gets transformed into a flower, with full of flavor petals. The potatoes would be delicious already roasted with olive oil, salt and pepper only, but the zesty crumbs on top makes them extra special and irresistible.

Hasselback potatoes with oregano and lemon crumbs
slightly adapted from the always delicious Olive magazine

8 small potatoes
olive oil
salt and freshly ground black pepper
1 tablespoon fresh oregano, finely chopped
2 tablespoons dried breadcrumbs
finely grated zest of 1 lemon

Preheat the oven to 200°C/400°F.
Place the potatoes on a wooden spoon then slice downwards thinly until the knife touches the spoon (don’t slice all the way through).
Place the potatoes cut side up on a roasting pan and brush with some oil – making sure the oil drips among the slices – then season with salt and pepper. Roast for 50 minutes.
Mix the oregano, breadcrumbs, lemon zest in a small bowl, season with salt and pepper, then sprinkle over the potatoes and roast them for another 10 minutes or until topping is golden and potatoes are tender.

Serves 4

Friday, January 31, 2014

Lemon and thyme cake, another TV show and being wrong about things

Lemon and thyme cake / Bolo de limão siciliano e tomilho

I thought it would take me a long time to get addicted to a TV show again after Breaking Bad, but the quality of a few drama series was so high I immediately got hooked. I enjoyed Rectify enormously, but with only six episodes I finished watching it in no time. Then there was a pause for some of this year’s Oscar nominated films, and then I started watching Masters of Sex – when I was in NYC last September there were billboards all over the city of three shows: The Blacklist, Masters of Sex and Mom – that got me curious. Both the husband and I enjoyed Raymond Reddington’s saga but I found Mom poorly written and offensive – I must be getting old because I can’t find the idea of a pregnant teenager funny at all.

Therefore, I moved on to Masters of Sex and found out that it is one of the best TV shows ever made, with writing and acting on a very high level and an interesting subject to boot. I already knew that Michael Sheen is a really fine actor – and that is again confirmed with the show – but the surprise to me was Lizzy Kaplan: I’d seen her on Hot Tub Time Machine – which is no big deal – so I was amazed by her acting skills (not to mention how drop dead gorgeous she is).

I usually shy away from cakes made with herbs – especially rosemary, which I find too overpowering – but when I saw Nigel Slater make this cake I decided to give it a go: the morning after I watched his show I was in the kitchen, baking his recipe and perfuming the whole apartment with lemon and thyme. It turned out delicious and moist and the thyme adds another dimension to the lemon flavor without tasting herby.

I don’t mind being wrong about things when the result is good: it took me almost no time at all to survive the end of Breaking Bad, and I want to bake Nigel’s lemon and thyme cake every weekend. :)

Lemon and thyme cake
slightly adapted from the always fantastic Nigel Slater

Cake:
100g all purpose flour
1 teaspoon baking powder
pinch of salt
100g ground almonds
1 teaspoon thyme leaves, packed
200g granulated sugar
200g unsalted butter, softened
finely grated zest of 2 large lemons
4 eggs
½ teaspoon vanilla extract

Syrup:
4 tablespoons granulated sugar
juice of the 2 lemons used in the cake batter
½ teaspoon thyme leaves, packed

Pre-heat the oven to 180°C/350°F. Lightly butter a 900g/2lb loaf pan, line it with baking paper and butter the paper as well.
Cake: in a medium bowl, sift together the flour, baking powder and salt, then stir in the almond meal. Set aside. Using a pestle and mortar, crush the thyme leaves with the some of the sugar until the leaves are finely ground and the sugar turns green and perfumed. Using an electric mixer, cream the butter, the thyme sugar, remaining sugar and lemon zest until pale and fluffy. Beat in the eggs, one a time, beating well after each addition. Scrape the sides of the bowl occasionally. Beat in the vanilla. On low speed, gradually mix in the dry ingredients.
Transfer the batter to the prepared pan and bake for about 45 minutes, or until golden and a skewer inserted in the center comes out clean.

When the cake is almost baked, make the syrup: in a small saucepan, combine the sugar and lemon juice. Cook over medium heat until sugar is dissolved, add the thyme and cook for 1 minute. Remove from the heat.
As soon as the cake is out of the oven, prick it all over with a toothpick or skewer and gradually pour the syrup, waiting for the cake to absorb it. Cool completely before unmolding and serving.

Serves 6-8

Friday, November 15, 2013

Beef meatloaf with spaghetti sauce

Beef meatloaf with spaghetti sauce / Bolo de carne com molho de tomate e espaguete

Jamie’s Money Saving Meals hasn’t been aired here in Brazil yet but luckily for me there are some episodes available on You Tube – I have watched six of them (not sure if there are more) and really liked the concept: the food looks delicious and not at all hard to prepare, and when I saw him making meatloaf with tomato sauce and spaghetti I knew exactly what would be the next Sunday lunch at my house. :)

I found the recipe online and tweaked it a bit to make it more what my husband and I like – we’re not huge pork eaters, though we wouldn’t want to live in a world without bacon. :) The meatloaf goes really well with the pasta and leftovers (if there are any) are delicious in sandwich form (I like mine with a spoonful of Dijon mustard).

Beef meatloaf with spaghetti sauce
slightly adapted from here

Meatloaf:
3 carrots
extra-virgin olive oil
½ onion, finely chopped
500g beef mince
60g fresh breadcrumbs
1 heaping teaspoon dried oregano
handful of fresh oregano, chopped
handful of fresh parsley leaves, chopped
30g feta cheese, grated
1 large egg
a few drops of Tabasco
salt and freshly ground black pepper

Sauce and pasta:
½ tablespoon olive oil
1 onion, finely chopped
1 teaspoon dried oregano
2 cloves of garlic, minced
1 x 700ml jar of passata
1 teaspoon sugar
salt and freshly ground black pepper
handful of fresh basil leaves, torn
handful of fresh oregano leaves

For assembling the dish:
30g Cheddar cheese
400g dried spaghetti

Preheat the oven to 200°C/400°F. Peel the carrots, quarter lengthways, then place in a 20x30cm (8x12in) roasting tray, drizzle with the oil and bake for 10 minutes. Meanwhile, heat 2 teaspoons olive oil in a small saucepan and cook the onions, adding a pinch of salt, until translucent. Cool. Transfer to a large bowl, add the beef, breadcrumbs, dried and fresh oregano, parsley, feta, egg, Tabasco, salt and pepper. Mix lightly with your hands (don’t overmix or the meatloaf will be tough), then shape into a loaf (roughly 20cm long). Make a space in the middle of the tray with the carrots and add the meatloaf. Cook for a further 25 minutes, or until the meatloaf is golden and cooked through.
While the meatloaf is in the oven, make the sauce: in a medium saucepan, heat the olive oil. Add the onion and the dried oregano and cook until slightly golden, then add the garlic and cook until fragrant. Add the passata (with a splash of water from the empty jar), the sugar, season with salt and pepper and cook for 15-20 minutes or until slightly thickened. Stir in the herbs, cover and remove from the heat.

Have a large saucepan of salted boiling water ready (for the spaghetti).

Remove the tray from the oven and carefully pour the sauce around the meatloaf. Top the meatloaf with a spoonful of tomato sauce, then the grated Cheddar and pop the meatloaf back into the oven for a further 5 to 10 minutes, or until golden and delicious, and the sauce is bubbling. Meanwhile, cook the spaghetti according to packet instructions, then drain. Serve it with the sauce in the baking tray and the meatloaf.

Serves 4

Monday, November 4, 2013

Zucchini keftedes and to each their own

Zucchini keftedes / Keftedes de abobrinha

Every time I watch “The Great British Bake Off” (thanks to some really nice people who post the episodes on YouTube) I get cranky about the contestants’ lack of hygiene – all that touching of hair, then touching of the floor, then touching the food drives me crazy! I feel sorry for the judges who have to eat the baked goods. There was an episode in which a cake or something was sliced and a hair could be clearly seen on the close up – I think it was one of Cathryn’s sweets (season 3), if I’m not mistaken. Eeew. :S

To make things even more unappetizing for me the last episode I watched had the contestants baking with suet, which is something I wouldn’t eat no matter the amount of sugar and fruit added (that said, I have always wanted to make a roly-poly, replacing the suet for butter or vegetable shortening or using this suet-free version from Gourmet Traveller).

While eating suet is not part of my plans, my husband wouldn’t try anything with zucchini (to each their own, right?), and telling him a hundred times how delicious that vegetable is wasn’t really helping. Things changed when he tried these keftedes – the minute I started frying the balls the kitchen was filled with a wonderful smell, sort of like when someone is making grilled cheese and some of the cheese slips off the bread and touches the screaming hot frying pan; that got him immediately interested – he bit into one fritter, looked at me and said: “I’ll grab the Tabasco and a very cold beer”. :D

Zucchini keftedes
slightly adapted from the beautiful Full of Flavor: How to Create Like a Chef

450g (1 pound) zucchini, trimmed and coarsely grated
2 tablespoons grated onion
100g feta cheese, crumbled
¾ cup finely grated parmesan
3 tablespoons chopped parsley
2 tablespoons chopped fresh oregano
2 eggs, lightly beaten with a fork
6-8 tablespoons fresh breadcrumbs
salt and freshly ground black pepper
all purpose flour, seasoned with salt, for dusting
canola oil, for frying

Blanch the zucchini in boiling water for 2 minutes. Drain and squeeze dry in a cloth (I let the zucchini cool a little before doing that because it was impossible to handle such a hot kitchen towel).
Place the olive oil in a small saucepan, add the onions with a pinch of salt and cook until soft and translucent. Transfer to a large bowl and let cool. Add the zucchini, feta, parmesan, parsley, oregano, eggs and half the breadcrumbs. Season with salt and pepper, then mix to combine. If the mixture is too wet, gradually add more breadcrumbs. Cover and refrigerate for 1 hour.
Taste the seasoning before frying the keftedes. Shape the mixture into 2.5cm (1in) balls, then roll into the flour*.
Heat the oil in a medium saucepan and fry the balls in batches until golden. Drain in paper towels and serve immediately.

* the hubby suggested that rolling the keftedes in breadcrumbs instead of all purpose would make them even nicer on the outside and although I haven’t tried doing that I agree with him.

Makes about 20

Friday, June 14, 2013

Pine-nut cookies with thyme

Pine-nut cookies with thyme

My memory for grocery lists might not be the best around, but certain recipes stick to my head and I count the days until I make them. I saw these pine-nut cookies on Martha's website and thought they were really interesting, since it's a regular cookie dough - made by creaming butter and sugar together - but there's the addition of herbs, pine-nuts and olive oil, ingredients usually used in savory recipes. Pine nuts are absurdly expensive here in Brazil, but I brought home some from a "Whole Foods" I visited in NY - they were perfect for these cookies.

Pine-nut cookies with thyme
slightly adapted from Martha

3 ½ teaspoons fresh thyme leaves
¼ cup pine nuts, toasted and cooled, plus more for topping cookies
2 ¼ cups (315g) all-purpose flour
1 teaspoon baking soda
½ teaspoon ground ginger
1/8 teaspoon table salt
10 tablespoons (140g/1 ¼ sticks) unsalted butter, softened
1 cup + 2 tablespoons (224g) granulated sugar
2 tablespoons extra-virgin olive oil
3 tablespoons heavy cream
1 large egg

Preheat oven to 180°C/350°F. Finely chop thyme in a food processor. Add pine nuts; pulse until coarsely ground. Transfer to a large bowl. Whisk in 2 cups (280g) of the flour, baking soda, ginger, and salt; set aside.
Put butter and granulated sugar into the bowl of an electric mixer fitted with the paddle attachment. Mix on high speed until pale and fluffy, about 5 minutes. Mix in oil. Reduce speed to low. Mix in flour mixture. Add cream; mix until well combined, about 2 minutes. Mix in egg, then remaining ¼ cup (35g) flour.
Shape dough into 2cm (¾in) balls, and space 5cm (2in) apart on baking sheets lined with parchment paper. Flatten slightly with fingers, and top each with a pine nut.
Bake cookies, rotating sheets halfway through, until edges are golden, about 13 minutes. Let cool 10 minutes on sheets on wire racks. Transfer cookies to racks to cool completely.
Cookies can be stored in airtight containers up to 3 days.

Makes about 6 ½ dozen – I halved the recipe above, used 1 ½ teaspoons of dough per cookie and got 60

Related Posts with Thumbnails