Showing posts with label pecorino. Show all posts

Wednesday, January 10, 2018

Roasted garlic pecorino focaccia

Roasted garlic pecorino focaccia / Focaccia de alho assado e pecorino

I can say that after the lovely Ina my favorite Food Network presenter is Rachael Ray – she is fun and her food always looks good – even though most of the times her portions look too generous to me. :)

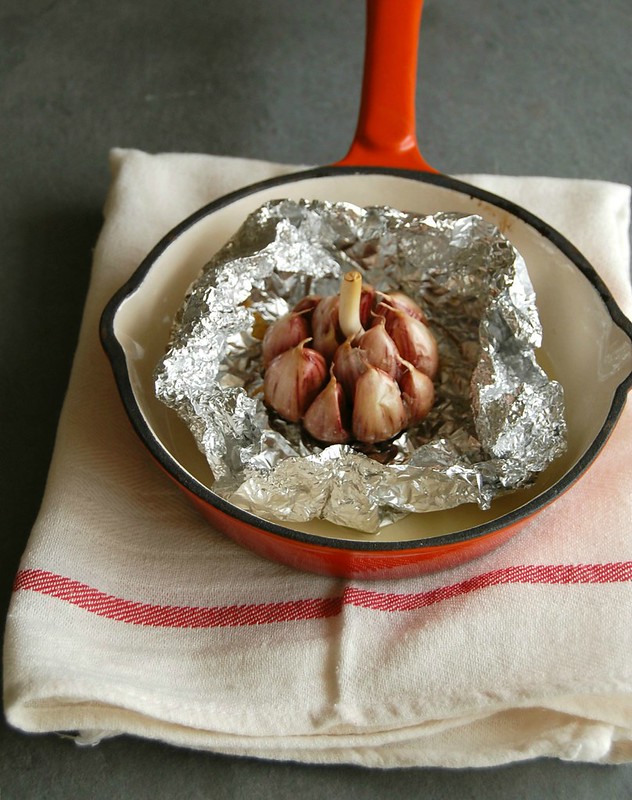
She constantly says how much she loves garlic and I always relate to that: I have a heavy hand with it comes to adding garlic to my food and usually double the amount requested in recipes (maybe that is why both my husband and I rarely have colds). And don’t even get me started on roasted garlic: I just love the stuff so much I had to mix it into a focaccia dough. It turned out delicious, but if you are not a fan of bold flavors you can tone this down by adding half the amount of garlic and replacing the pecorino with parmesan.
Roasted garlic pecorino focaccia / Focaccia de alho assado e pecorino


Roasted garlic pecorino focaccia
own recipe

For the roasted garlic:
1 large head of garlic, whole
1 tablespoon extra virgin olive oil

Dough:
2 teaspoons dried yeast
¼ teaspoon granulated sugar
300ml lukewarm water
3 tablespoons extra virgin olive oil, plus a little extra to drizzle over the focaccia
3 cups (455g) all purpose flour
1 teaspoon table salt
1/3 cup finely ground pecorino
2 tablespoons fresh thyme leaves

Preheat the oven to 180°C/350°F. Place the whole head of garlic in the center of a medium piece of foil. Drizzle with the olive oil and close the ends of the paper, pressing them together so the oil does not leak. Place the foil package in a small baking sheet and roast for about 45 minutes or until garlic is tender. Remove from the oven and leave to cool completely. When garlic is cold, remove the pulp from the skins and mash it with a fork to form a purée – save the olive oil left in the foil for later. Set the garlic aside.

In the large bowl of a stand mixer, combine the yeast, sugar and water and mix with a fork. Set aside for 5 minutes or until foamy. Add the olive oil, flour, salt and half of the pecorino and mix with the dough hook for 6-8 minutes or until an elastic and smooth dough forms – it kneading by hand, 10-12 minutes should do. Add the mashed garlic, half the thyme leaves and mix well. Transfer to a lightly oiled large bowl, cover with plastic wrap and set aside in a warm spot for 1 ½ hours or until doubled in volume.

Lightly brush a large baking sheet with olive oil. Carefully transfer the dough to the prepared sheet, gently so you don’t lose the air trapped in the dough. Shape it onto a 30x20cm (12x8in) oval. With lightly floured fingertips, pierce the dough in a few spots without pressing it too deep. Measure the olive oil left from roasting the garlic and add more olive oil until you have 1 tablespoon. Drizzle over the dough, then sprinkle it with the remaining thyme leaves and pecorino. Set aside in a warm place for about 20 minutes – in the meantime, preheat the oven to 200°C/400°F. Bake the focaccia for 25-30 or until golden brown. Remove from the oven and very carefully slide it onto a wire rack. Serve warm or at room temperature. The focaccia can be kept in an airtight container at room temperature for up to 2 days and tastes fresh again if reheated briefly in the oven.

Serves 8-10

Tuesday, March 21, 2017

Pesto and cheese rolls and family traditions

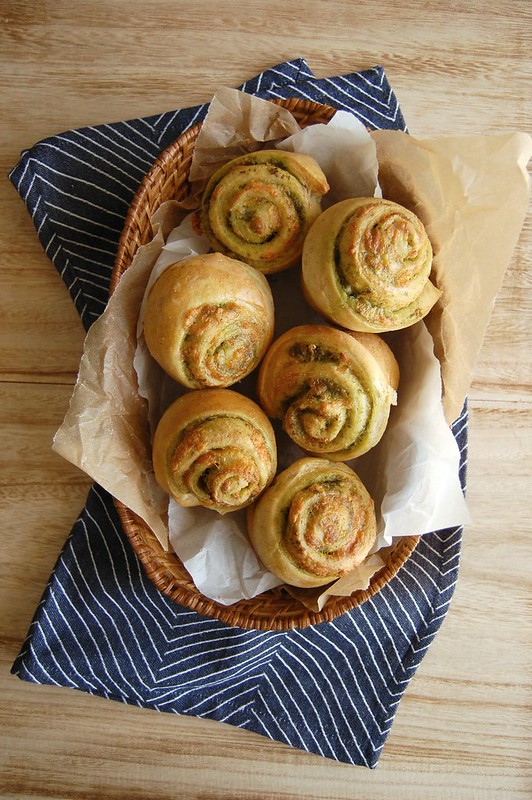
Pesto and cheese rolls / Pãezinhos recheados de pesto e queijo

Yesterday I started thinking about family traditions and how some of them go from one generation to the other, sometimes without us even noticing.

My brother and I have become much closer since my nephew was born, and that brings me a lot of joy. So on weekends we are inevitably all together, either they come to visit Joao and I or we visit them – I love that. It reminds me of when I was little and we would go for Sunday lunches at my grandmother’s or my aunt and uncle from the country side would come to spend the day with us – we are doing exactly what our parents did almost forty years ago and that happened so naturally I only thought of it now.

One of the times they came to visit us I had just finished baking these pesto rolls – they smelled wonderful and I thought the adults would love them, but to my surprise my nephew was the one that enjoyed them the most. I had no idea he would like bread filled with pesto – I thought he would find the flavor too strong or something like that – but I was wrong. Therefore I bring you these today and hope you the adults reading me like them as much as the little one at home did. :)

Pesto and cheese rolls
own creation

Dough:
¼ cup (60ml) lukewarm water
¾ cup (180ml) lukewarm whole milk
½ teaspoon granulated sugar
2 ¼ teaspoons dried yeast
1 large egg
2 tablespoons (28g) unsalted butter, melted and cooled
2 tablespoons extra virgin olive oil
¾ teaspoon table salt
2 ¼ cups (315g) all purpose flour
½ cup (70g) whole wheat flour

Filling:
½ cup (40g) fresh basil leaves, packed
2 tablespoons finely ground pecorino
1 small garlic clove
2 tablespoons pine nuts
¼ cup (60ml) extra virgin olive oil
freshly ground black pepper
200g shredded cheese – I used one kind of mozzarela we find here in Brazil that is yellow and drier than fresh mozzarela; replace with cheddar

Egg wash:
1 egg + ½ teaspoon water, beaten with a fork

Start by making the dough: in the bowl of an electric mixer fitted with the dough hook, mix together with a fork the water, milk, sugar and yeast. Set aside until foamy, about 5 minutes. Add the egg, butter, olive oil, salt and flours and mix on medium speed until a smooth and elastic dough forms, about 8 minutes. Transfer to a buttered bowl, cover with plastic wrap and set aside on a warm spot until doubled in size, about 1 ½ hours.

Filling: place the basil, pecorino, garlic, pine nuts, olive oil and black pepper in a blender or food processor and blitz until a paste forms – I don’t add any salt for the cheeses are already salty. Set aside. Brush a 12-hole muffin pan with butter.

Knock down the dough to remove any excess air. Roll it on a lightly floured surface until you get a 30x50cm (12x20in) rectangle. Spread the pesto over the dough, leaving a 1cm (½in) border. Sprinkle evenly with the shredded cheese. Beginning with the longer side, roll the dough tightly like a cylinder. Cut into 12 slices and place each slice, cut side up, inside a hole in the muffin pan. Cover with a clean kitchen towel and let rise again for 40-60 minutes – in the meantime, preheat the oven to 200°C.

Brush the rolls with the egg wash and bake for 20-25 minutes or until deeply golden and cooked through. Cool in the pan over a wire rack for 5 minutes, then carefully unmold each roll and transfer to the wire rack. Serve warm or at room temperature.

Rolls can be kept in an airtight container at room temperature for up to 3 days. Reheat them in a 180°C oven for 8-10 minutes before serving if desired.

Makes 12

Wednesday, February 17, 2016

Cherry tomato pasta and no time at all

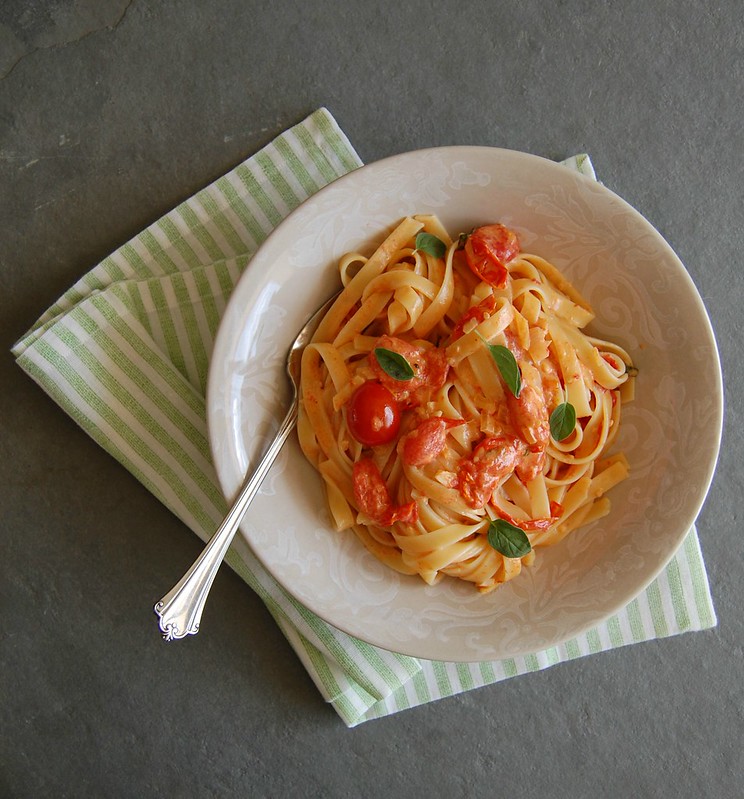
Cherry tomato pasta / Macarrão com molho de tomate cereja

I guess it goes without saying that the frequency I post around here is a good thermometer of the amount of work I have: if I disappear you can imagine that I got swallowed by my job… :(

There are some things I wanted to write about like a couple of movies and TV shows I have watched, the Oscar that Leo will finally win this year, but I unfortunately have no time for that now – this will be a quick post and the recipe is even quicker: a very simple pasta dish and the sauce is made with cherry tomatoes. It is super fast, but absolutely delicious – it has become the perfect weeknight dish for me and I am sure many of you will feel the same way about it.

Cherry tomato pasta
slightly adapted from the always fantastic Gourmet Traveller magazine

1 tablespoon extra-virgin olive oil
700g small cherry or grape tomatoes, whole
1 small onion, finely chopped
4 garlic cloves, finely chopped
handful of fresh marjoram leaves
300ml heavy cream
salt and freshl y ground black pepper
400g fettuccine
finely grated pecorino or parmesan, to serve

Heat oil in a large frying pan, add the tomatoes and cook over high heat until blistered and golden, stirring occasionally (3-5 minutes). Reduce heat to medium, add onion and garlic and sauté until tender, stirring occasionally (3-5 minutes). Reduce heat to low, stir in marjoram and simmer until slightly thickened (2-3 minutes). Add cream, stir to combine, then season to taste and cook for another 2 minutes. Remove from the heat.

In the meantime, cook pasta in boiling salted water until al dente. Drain and add to tomato sauce. Toss to combine and serve immediately with pecorino or parmesan.

Serves 4

Thursday, April 30, 2015

Penne with tomato and chickpea sauce - simple, honest food

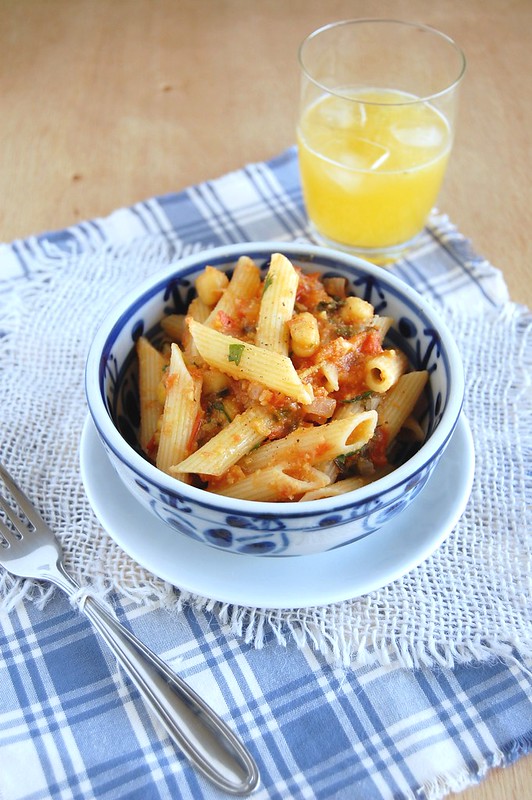
Penne with tomato and chickpea sauce / Penne com molho de tomate e grão de bico

Because I like to try new recipes and new dishes I look for inspiration everywhere, even in cuisines I would never adopt as a way of life, such as vegan, for instance: I understand that there are great vegan recipes out there and I have made some myself, but I don’t intend to spend my life without milk, eggs, honey, butter or cheese – it’s just not who I am.

Having said that, I got curious when I read a recipe on Andrew Carmellini’s beautiful Urban Italian for a dish pasta that was rich without having loads of butter and cream – yes, I won’t give up on cream, that is for sure, but that doesn’t mean I have to eat it every single day. I am a sucker for pasta dishes, so I gave it a go and it turned out delicious: the chickpea puree thickens the tomato sauce in a lovely way, making it velvety, and the bacon (that I used instead of the sausages called for in the original recipe) adds a nice, salty touch.
This is simple, no fuss, honest food that I am eager to eat on a daily basis – I could not expect less from the guy responsible for the best gnocchi.

Penne with tomato and chickpea sauce
adapted from the delicious Urban Italian: Simple Recipes and True Stories from a Life in Food

1 can (420g/15oz) chickpeas
½ tablespoon olive oil
2 bacon rashers, finely sliced
3 cups your favorite tomato sauce – mine is here
½ teaspoon fennel seeds, ground
salt and freshly ground black pepper to taste
¼ teaspoon red pepper flakes
400g penne
2 tablespoons unsalted butter
2 teaspoons extra virgin olive oil
1 cup grated pecorino cheese

Drain the chickpeas well, reserving the liquid. Blend half the chickpeas (about 1 cup) and half their liquid on high until the mixture forms a smooth paste, about 1 minute.
Heat the olive oil in a large saucepan over high heat. Add the bacon and cook until crisp. Add the tomato sauce and stir to combine. Add the chickpea puree and the fennel seeds and stir to combine. Season to taste, then cook over medium heat stirring occasionally until the mixture forms a loose sauce and the flavors are combined, about 15 minutes. Stir in the pepper flakes and the remaining chickpeas and remove from the heat.

Cook the penne in a large saucepan of salted boiling water until al dente. Drain but do not rinse the pasta.
Return the rigatoni to the pot. Add the sauce and cook on medium-high heat, mixing well, until the pasta is well coated, about 1 minute. Remove the pot from the heat and stir in the butter, olive oil and half the pecorino cheese. Transfer the pasta and sauce to a large serving dish and top with the rest of the pecorino cheese and serve immediately.

Serves 4

Tuesday, July 29, 2014

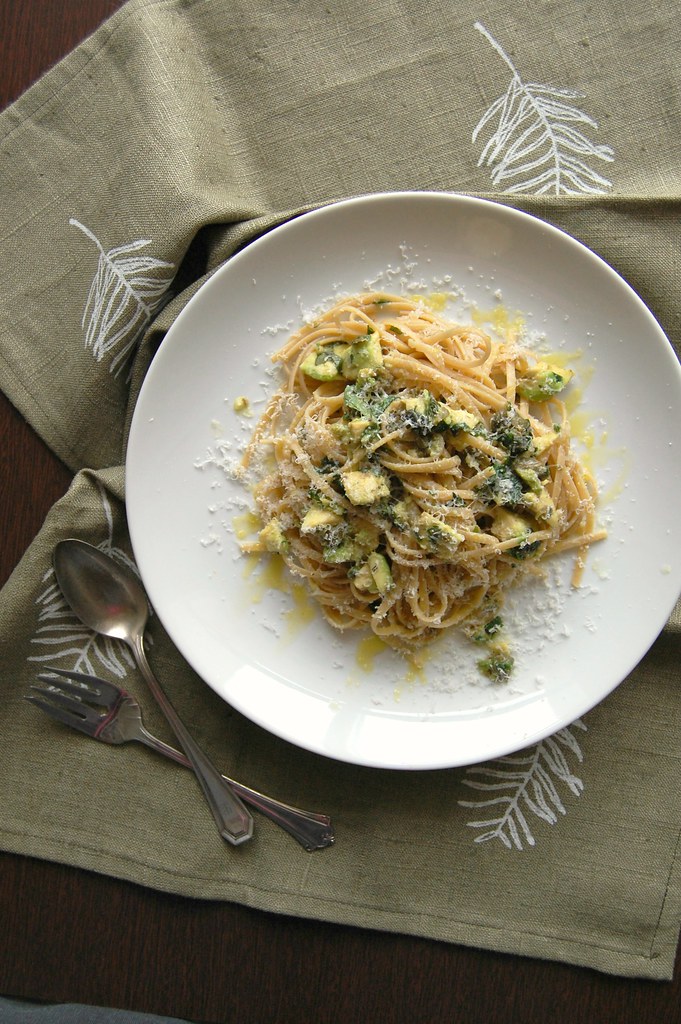
Avocado and lemon zest linguine - becoming good friends with whole wheat pasta

Avocado and lemon zest linguine / Linguine com limão siciliano e avocado

I guess that once we get old and start feeling more comfortable in our own skin what others think doesn’t matter much – what you feel or like or want should come first. I like to believe that.

Back in high school it was all about being trendy and cool or, in other words, doing and saying what others did. I remember going to a concert with my friends a couple of times, it was a cover band that played Elvis Presley’s songs, but I never liked Elvis – I just pretended I liked it so I could fit in, since all the girls kept saying how great Elvis was (lucky for me the concerts were free). I was so bored one of the nights I started doing my Physics homework right there (the concerts were held on Friday evenings, and we would go right after school).

That did not do any good for my “cool reputation”, I’ll tell you that. :)

Up until months ago I would tell everyone how awful whole wheat pasta was, and make faces when people brought the subject up. Then, while reading a recipe that called for that kind of pasta, it suddenly hit me: I was just replicating other people’s opinions. I had, indeed, had my share of bad whole wheat pasta dishes, but as someone who’s been cooking for as long as I have I should know better – I should know that maybe, and just maybe, there was something wrong with what I’d tasted. It could have been a case of bad pasta or bad recipe (or both).

I continue to avoid Elvis like the plague, but I have become good friends with whole wheat pasta. :)

Things we do and say now and then, sometimes without putting much thought to them. I have been there, you probably have, too. We’re humans, we say stupid things sometimes, we follow wrong people. We make mistakes.

Nobody’s perfect.

But this pasta dish is (and I would never have thought of pairing avocado and pasta). :)

Avocado and lemon zest linguine
slightly adapted from the wonderful A Modern Way to Eat: Over 200 Satisfying, Everyday Vegetarian Recipes (That Will Make You Feel Amazing)

400g whole wheat linguine
2 tablespoons olive oil
4 tablespoons capers in brine, coarsely chopped
2 cloves of garlic, minced
finely grated zest of 2 lemons + juice of ½ a lemon
a handful basil leaves, coarsely chopped
a handful parsley leaves, coarsely chopped
2 ripe avocados
1-2 tablespoons extra-virgin olive oil
freshly grated pecorino, for serving

Cook the linguine in a saucepan of boiling salted water until al dente (follow the instructions on the package).
In the meantime make the sauce: heat the olive oil in a large nonstick frying pan on a medium heat, then add the capers and garlic and cook until fragrant. Add the lemon zest and the herbs, mix to combine and remove from the heat.
Halve and destone the avocados, then use a knife to make criss-cross cuts through the flesh, chopping it inside the skin. Use a spoon to scoop out each half into the pan, and stir to mix all the flavors together. Before you drain the pasta, scoop out half a mugful of the pasta water. Drain the pasta, add it to the frying pan and return it to medium heat, tossing to combine. Drizzle with the lemon juice and extra-virgin olive oil, season with salt and pepper, and add a splash of the cooking water if necessary.
Serve at once, sprinkled with the cheese.

Serves 4

Thursday, July 24, 2014

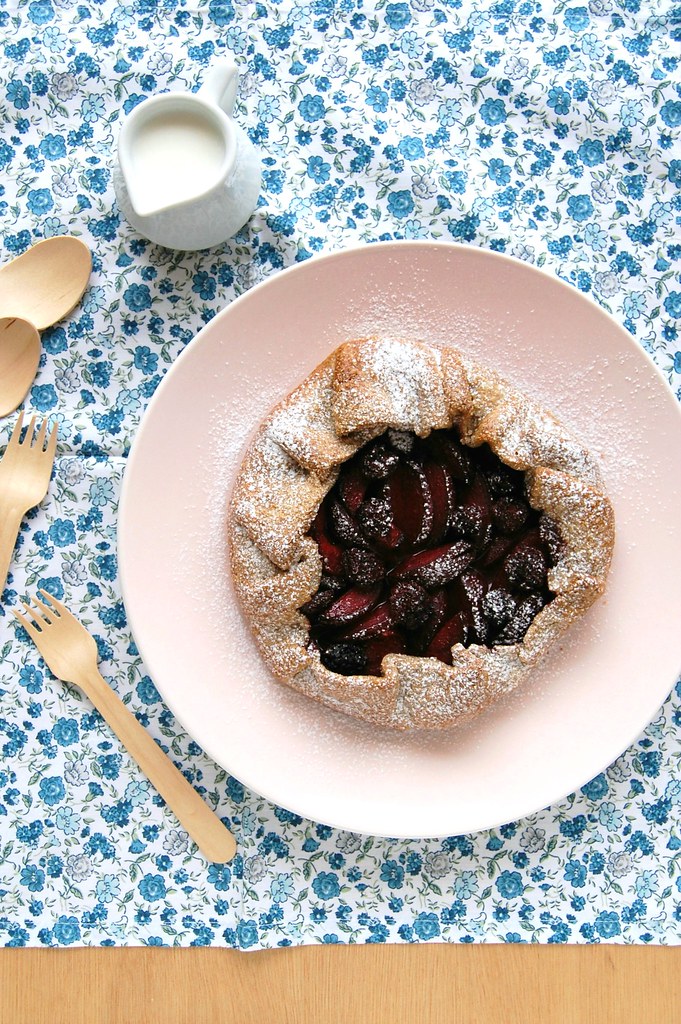
One fantastic rye pastry, two tarts: leek and cheese galette and plum and blackberry galette

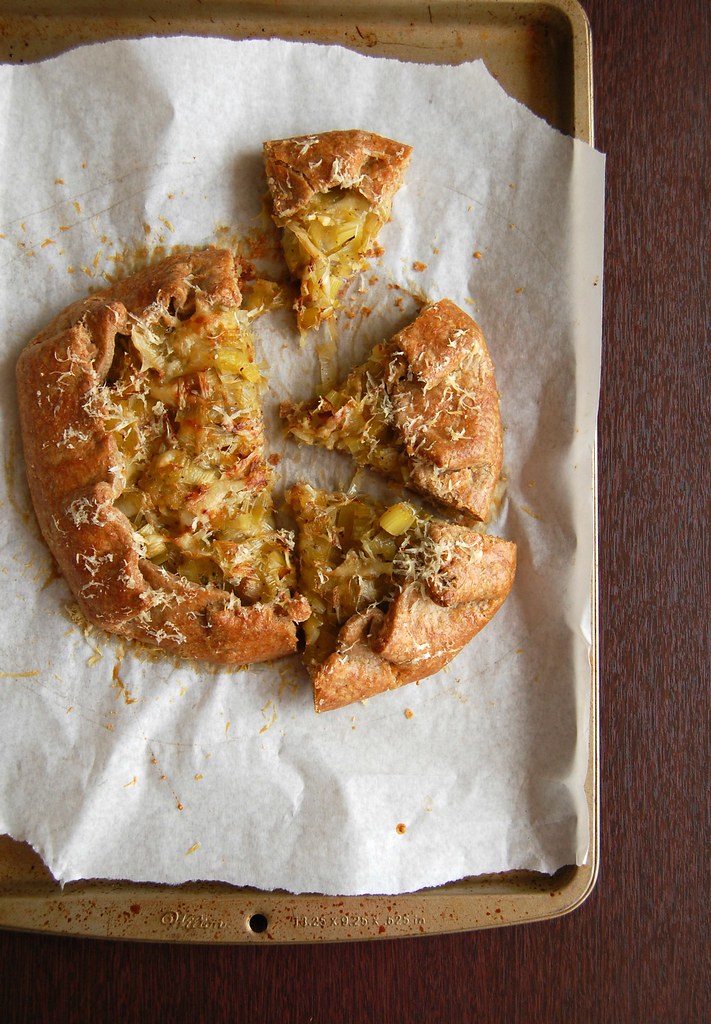
Leek and cheese galette (with rye pastry) / Galette de alho-poró e queijo (com massa de centeio)

One of the things I find most magical and fascinating about cooking is that even if you’ve been doing it for a long time – in my case, nearly 25 years – there always something new to try, or a new way to try something you already love: food is dynamic.

After making those delicious jam bars with rye flour, I began searching for other ways to incorporate the beloved ingredient in my baking and saw these beautiful apricot galettes in one of my favorite books (and one of the most beautiful I own, too). I like Amber Rose’s approach to food and everything I had made from her cookbook had turned out great until then, so I was really looking forward to trying her rye pastry.
It was a revelation.

As I ate pieces of the galettes, first the savory, then the sweet, I was mesmerized: how could that be so delicious?

Making the pastry was easy using a food processor, and as I rolled and folded it I kept thinking that the result would be a very flaky pastry, which is something I love – it indeed turned out flaky, and so tasty. Divine, actually.

When I placed the two little packages of pastry in the fridge for their final rest, I saw the leeks I’d bought for soup and had a sudden urge: instead of making two plum tarts, why not make one sweet and one savory? Dinner and dessert with one pastry recipe = perfection. :)

I cooked the leeks with some white wine (me and my love for booze) and paired it with cheese for the savory galette – it turned out amazing. The plum tart was really good, too. The rye pastry, besides being flavorsome and flaky, was great paired with both savory and sweet fillings. The recipe is a keeper and I hope you give it a go – I cannot wait to make it again with different fillings: tomatoes, goat’s cheese and thyme is a combo I would love to try with this pastry, and I bet that apples and pears would be lovely with it, too.

Plum and blackberry galette (with rye pastry) / Galette de ameixa e amora (com massa de centeio)

Rye pastry (enough to make both tarts)
slightly adapted from the beautiful and delicious beyond words Love, Bake, Nourish: Healthier cakes and desserts full of fruit and flavor

120g rye flour
120g all purpose flour
1 teaspoon sugar
½ teaspoon table salt
175g unsalted butter, cold and in small cubes
1 teaspoon white wine vinegar
7-8 tablespoons ice-cold water
1 egg, lightly beaten with a fork, for brushing

Plum and blackberry filling
adapted from the same cookbook

4 plums, each cut in eighths
½ tablespoon honey
pinch ground cinnamon
8 frozen blackberries
demerara sugar, for sprinkling

Leek and cheese filling
own creation

1 large leek, white part only, sliced
1 tablespoon unsalted butter
1 teaspoon olive oil
salt and freshly ground black pepper
1 ½ tablespoons white wine
60g gruyere, grated
1 tablespoon finely grated pecorino or parmesan, for sprinkling

Start by making the pastry: place the flours, salt and sugar in a food processor and blitz to combine. Add the butter and pulse until the mixture resembles coarse meal. Add the vinegar and half the water and pulse until a dough starts to form – add more water if necessary, but do it gradually. Form a ball with the dough, wrap in plastic wrap and refrigerate for 1 hour.
Unwrap the dough, place on a lightly floured surface, and roll into an oblong shape about 20x28cm (8x11in) - don't worry if the dough is still a little crumbly; it will come together with the rolling.
Fold the dough into thirds (as if you were folding a letter), roll out to its original oblong shape, and then fold into thirds again. Repeat the process, then divide the dough in half, wrap each in plastic wrap and return to the fridge for at least 1 hour or overnight.

When ready to make the tarts, place each piece of dough onto large piece of baking paper and roll into a rough 25cm (10in) circle. Transfer each to a baking sheet.

Fruit tart: put the plums in a bowl with the honey and the cinnamon and toss to combine. Arrange the fruit on the center of the dough, top with the blackberries and drizzle with the juices left in the bowl (if there’s too much, use only half to avoid a soggy crust). Carefully fold one edge in towards the center of the fruit and continue folding all the way round, bringing the edge of the pastry towards and over the filling. Place the sheet in the freezer for 30 minutes – in the meantime, preheat the oven to 180°C/350°F.

Savory tart: heat the butter and oil in a large nonstick frying pan. Add the leeks and cook until fragrant and beginning to turn golden, stirring occasionally. Season with salt and pepper, add the wine and cook until it evaporates, 2-3 minutes. Cool.
Arrange the gruyere on the center of the dough, top with the cooled leeks, then fold one edge in towards the center of the filling and continue folding all the way round, bringing the edge of the pastry towards and over the filling. Place the sheet in the freezer for 30 minutes – in the meantime, preheat the oven to 180°C/350°F.

Brush the tarts with the egg wash (only the pastry). For the sweet one, sprinkle with demerara sugar. For the savory one, sprinkle with the pecorino.

Bake for 35-40 minutes or until golden brown. Both tarts are delicious both warm and at room temperature.

Serves 4 (each)

Wednesday, June 25, 2014

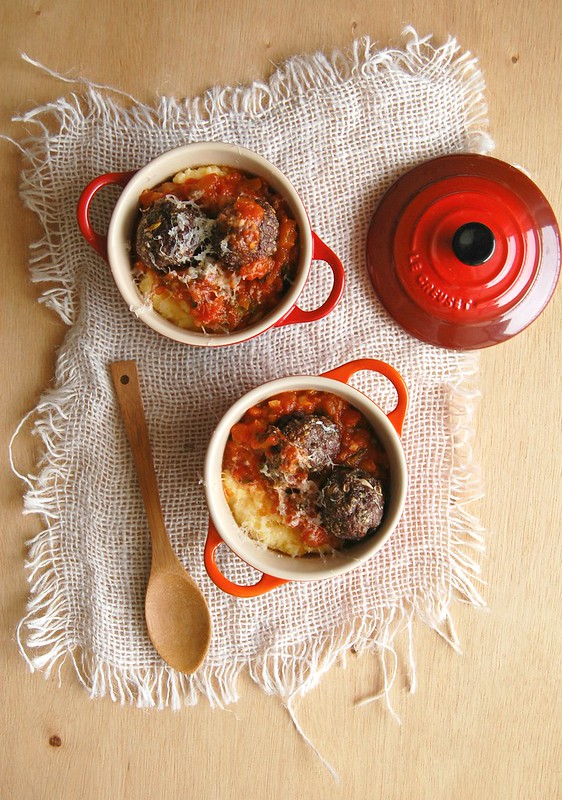
Beef, lemon and pecorino meatballs and favorite TV characters

Beef, lemon and pecorino meatballs / Almôndegas com limão siciliano e pecorino

As I finished watching season 5 of Sons of Anarchy, I started thinking about favorite characters in TV series – I have some favorites myself, characters I supported and cheered for (or still do) even if they’re not the nicest people around (hello, Walter White). :)

When it comes to SoA, for instance, it is agonizing to have a favorite character – let’s just say that Kurt Sutter and George R. R. Martin could easily be best friends – but even so Chibs is the one I like the most, I just adore him and his accent. <3 Samantha Jones and Peggy Olson are my favorites in SATC and Mad Men, respectively, and although everyone in Seinfeld was really funny George Costanza was and will always be my #1. :)


Do you have favorite TV characters? I would love to hear about it.


I have favorites when it comes to food, too: meatballs have a very special place in my heart, and the hubby loves them too. I am always interested in trying new meatball recipes, especially ones with a twist like Ottolenghi’s leek meatballs I made the other day. The ones I bring you today are delish, very easy to make, and here the cheese acts both as seasoning and binding agent – no need to add breadcrumbs and eggs. I served them with tomato sauce and Andrew Carmellini’s polenta because it was a very cold day, but I am sure the meatballs would be great as a snack with a bit of Tabasco and a glass of very cold beer on a summer day.

A bit of a warning, though: all that cheese melting in the oven will smell so good you’ll want to dive in as soon as the meatballs are ready – trust me on that. :)

Beef, lemon and pecorino meatballs
slightly adapted from the delicious Olive magazine

400g beef mince
½ red onion, grated
1 garlic clove, minced
finely grated zest of ½ lemon
handful fresh oregano leaves, chopped
30g finely grated pecorino
salt and freshly ground black pepper – I used ½ teaspoon of salt, be careful because pecorino is already salty

Preheat the oven to 200°C/400°F. Line a large baking sheet with a double layer of foil. Brush the foil with vegetable oil.
Place the beef, onion, garlic, zest, oregano, pecorino, salt and pepper in a large bowl and mix to combine (I prefer to use my hand to do that). Shape mixture into balls (the job becomes easier if you lightly wet the palms of your hands). Place the meatballs onto the prepared sheet and bake until golden and cooked through (about 20 minutes).
Serve with tomato sauce or whatever strikes your fancy. :)

Makes about 18

Wednesday, June 18, 2014

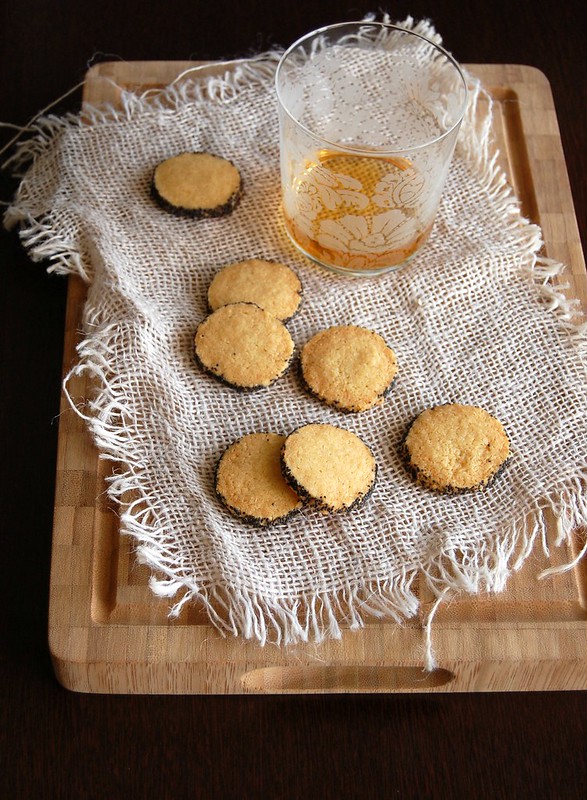
Spicy pecorino cookies - another great recipe for entertaining

Spicy pecorino cookies / Biscoitos apimentados de pecorino

The panna cotta I posted the other day is a good recipe for entertaining, but it’s not the only one: I like to serve canapés or small bites so my guests don’t starve while the pizzas are in the oven (or don’t get dizzy from the drinks). :)

These savory cookies are delicious and can be made ahead – in fact, you can keep the dough log in the freezer for up to 1 month and slice and bake the cookies whenever you want. I used pecorino because I love its sharp and strong flavor, but parmesan is a good replacement here (it is the cheese used in the original recipe). The poppy seeds add a nice crunchy texture, and as much as I love that next time I make these cookies I’ll omit them: they’re likely to get stuck in people’s teeth, and that’s not an elegant thing to do to guests. ;)

Spicy pecorino cookies
slightly adapted from the oh, so beautiful Seasonal Baking

85g finely grated pecorino (if using a milder cheese, add a pinch of salt to the recipe)
85g all purpose flour
2 pinches cayenne pepper, or to taste
80g unsalted butter, chilled and chopped
1 tablespoon olive oil
1 tablespoon poppy seeds

In a large bowl, mix the pecorino, flour and cayenne. Mix in the butter and olive oil and, with your fingertips, gently work everything together. If it is too crumbly, add a drop more olive oil. Place the dough on a piece of parchment paper. Fold parchment over dough; using a ruler, roll and press into a log – like Martha does here. Sprinkle the log all around with the poppy seeds, making sure they stick to it. Wrap in parchment. Refrigerate for 2 hours or until very firm.

Preheat the oven to 180°C/350°F. Line a large baking sheet with baking paper.
Cut the log into thin slices and place 2.5cm (1in) apart on the sheet. Bake for 10– 15 minutes or until golden around the edges. Cool in the sheets.

Makes about 30

Wednesday, September 11, 2013

Umbrian cheese bread and ignoring one instruction on the recipe

Umbrian cheese bread / Pão de queijos da Úmbria

When it comes to cooking or baking one thing I have learned over the years is to read the entire recipe before actually making it – that has saved me a lot of trouble in the kitchen and a lot of frustration, too, and it’s a habit I highly recommend you to acquire.

Days ago I decided to put the cheeses in my fridge to some good use by baking Nick Malgieri’s wonderful bread – I sat down and carefully read the entire recipe, top to bottom. Off to the kitchen I went and a while later the bread perfumed my house while in the oven: it turned out delicious, crusty on the outside and tender on the inside, with an amazing cheese flavor. After placing the bread onto the wire rack I remembered Malgieri’s instructions to cool the bread completely before serving it and I had a big laugh: that was never going to happen. :D

Umbrian cheese bread
slightly adapted from Nick Malgieri's Bread: Over 60 Breads, Rolls and Cakes plus Delicious Recipes Using Them

3 teaspoons dried yeast
¼ cup (60ml) slightly warm water
400g all purpose flour
½ cup (113g/1 stick) unsalted butter, room temperature, chopped
5 large eggs
80g parmesan cheese, finely grated
40g pecorino Romano, finely grated
80g gruyère, cut into 5mm dice
½ teaspoon table salt
¼ teaspoon freshly ground black pepper

In a small bowl, whisk together the yeast and water. Set aside until bubbly.
In the bowl of an electric mixer fitted with the paddle attachment, combine flour and butter and beat on medium-low speed until the mixture resembles breadcrumbs and no large portions of butter are visible. Switch to the dough hook. Add the eggs and the yeast mixture to the bowl and mix on low for 1 minute to combine, then add the cheeses, salt and pepper. Mix on low-medium until the dough is smooth and elastic, about 5 minutes. Cover the bowl with plastic wrap and let the dough ferment until it starts to puff, 15-20 minutes (mine needed 35 minutes). In the meantime, butter a 20cm (8in) deep round cake pan, line the bottom with a circle of baking paper and butter the paper as well.
Scrape the dough into the prepared pan and cover with slightly oiled plastic wrap. Let it rise until it reaches the top of the pan, about 45 minutes – while that happens, preheat the oven to 180°C/350°F.
Bake the bread until deeply golden and well risen, about 30 minutes. Cool in the pan for 5 minutes, then carefully unmold and remove the paper. Transfer to a wire rack. Serve warm (this bread also reheats well at a 180°C/350°F oven for a few minutes).

Serves 8-10

Friday, May 22, 2009

Summertime tagliatelle, in the middle of fall

Summertime tagliatelle / Tagliatelle de verão

My dad sometimes tells me funny/cute stories about my mom and I especially like the ones about her weird pregnancy cravings, like the day she felt like cooking and eating a rooster – no, I’m not kidding. :D

She’d crave ice cream desperately in the middle of the winter and would get under 2-3 blankets to eat it.

Everyone that knows me and knew my mom says that we look exactly the same and they say that we have a lot in common, too, when it comes to personality. Maybe they are right, because I felt like eating summertime pasta in a very cold day. :D

Summertime tagliatelle / Tagliatelle de verão

Summertime tagliatelle
slightly adapted from Cook with Jamie

115g (4oz) pine nuts
juice and zest of 2 lemons
a bunch of fresh flat-leaf parsley, leaves picked
¾ cup (180ml) extra virgin olive oil
1 ½ cups (150g) Parmesan cheese, freshly grated, plus extra for shaving
½ cup (50g) pecorino cheese, freshly grated
salt and freshly ground black pepper
500g good-quality tagliarini or tagliatelle

Smash up half of the pine nuts to a paste, then put it into a big heatproof bowl with the rest of the whole pine nuts, the lemon juice and zest, and the extra virgin olive oil. Stir and add the Parmesan and pecorino. Season with some freshly ground black pepper.

Put a large pot of salted water on to boil for your pasta. Sit the sauce bowl on top of the pan while the water’s heating up – this will take the chill out of the sauce and warm it through slightly. When the water starts to boil, remove the bowl and add your pasta to the water. Cook it according to the packet instructions then drain in a colander, reserving a little of the cooking water. Toss the pasta with the sauce and a little of the reserved cooking water to help loosen it up a bit. The heat from the pasta will melt the cheese, allowing all the lovely sauce to coat it. If you find the sauce is too thick then add a little more water. It’s not supposed to thick – it should be more a dressing than a sauce.

Serve with a little extra Parmesan shaved over the top and a sprinkle of parsley leaves. Eat immediately.

Serves 4

Summertime tagliatelle / Tagliatelle de verão

Related Posts with Thumbnails