Showing posts with label white wine. Show all posts

Monday, August 31, 2020

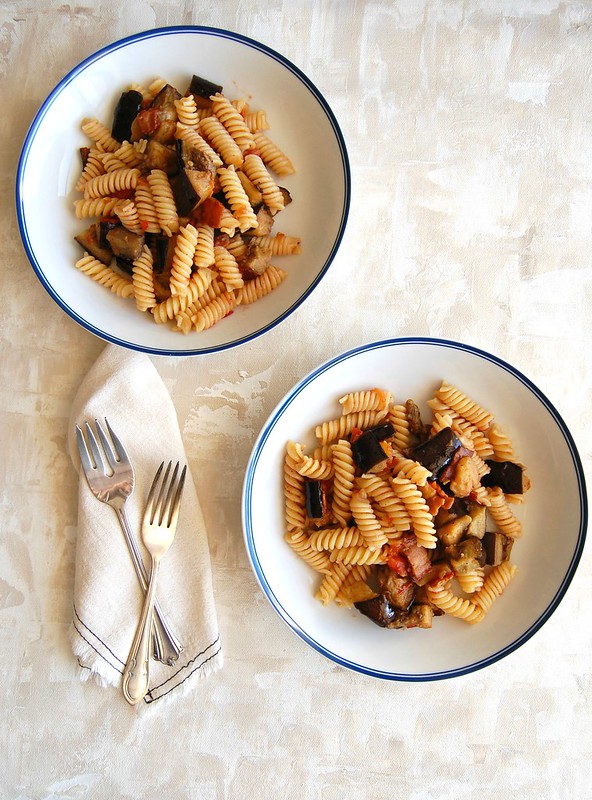
Roasted eggplant bacon pasta

Macarrão com berinjela assada e bacon / Roasted eggplant bacon pasta

Even though Joao and I are not vegans or vegetarians, most of our meals revolve around vegetables, and there are several occasions when we eat vegan or vegetarian lunches and dinners – it has been like this for many years now and it happened very naturally. We both love vegetables and I am always searching for new ways to prepare them.

I like pretty much all veggies except for sweet potatoes, and Joao does not like cauliflower, but he loved the cauliflower balls I made the other day. I guess it is just a matter of making vegetables interesting, instead of simply boiling them in water. Roasting is one of the cooking methods I use the most and it seems to make all vegetables delicious.

I still cook beef and chicken sometimes – once a week, tops – and I like to use a little bacon here and there, occasionally, for flavor, or to enhance a dish that is based on vegetables. This pasta has a very meaty texture because of the eggplant, and the bacon just makes it more interesting – the saltiness matches the roasted eggplant perfectly, and the tomato makes everything moist.

I made this recipe on a Saturday for lunch and we devoured it with some crusty bread – it is rather simple and does not call for many ingredients, but the result is very tasty.


Roasted eggplant bacon pasta

own recipe


1 medium eggplant (380g), diced in 2.5cm (1in) cubes

2 tablespoons extra virgin olive oil

salt and freshly ground black pepper

180g fusilli or other short pasta of your preference

4 slices of bacon

1 large garlic clove, minced

1 large ripe tomato, deseeded and finely diced

2 tablespoons dry white wine


Preheat the oven to 200°C/400°F. Line a large baking sheet with foil.

Place the eggplant on the foil, drizzle with the olive oil, season with salt and pepper and roast for 15 minutes. Toss the pieces around, carefully not to pierce the foil, then roast for another 15 minutes.

In the meantime, cook the pasta in a large saucepan of boiling salted water until al dente.

Heat a large nonstick frying pan over high heat and add the bacon, cooking until crispy and the fat is rendered. Add the garlic and cook for 1 minute – do not let it burn or it will turn bitter. Add the tomato, season with salt and pepper (go easy on the salt because of the bacon) and cook, stirring occasionally, until tomatoes release their juices, 2-3 minutes. Add the wine and cook for 1 minute. Add the roasted eggplants and stir well.

Drain the pasta, reserving ½ cup of the cooking liquid. Add the pasta to the sauce and cook for 1 minute – if sauce is too thick or dry, add some of the reserved pasta water and stir – I did not have any fresh herbs at home, but do add fresh basil if you have some at hand.

Serve immediately.

Serves 2
Wednesday, March 21, 2018

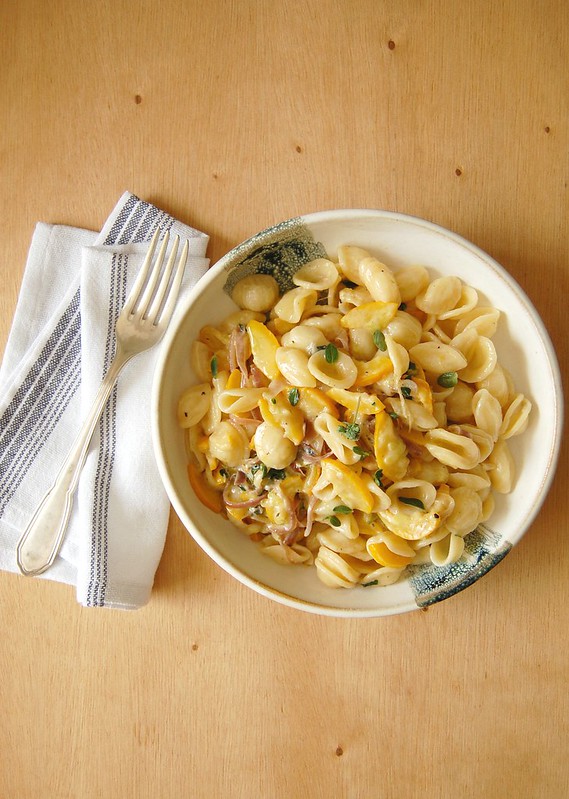
Orecchiette with courgette and goat’s cheese sauce

Orecchiette with courgette and goat’s cheese sauce / Orecchiette com molho de abobrinha e queijo de cabra

This food stylist wannabe got crazy when she saw yellow courgettes in farmer’s market for the first time – until then I had only seen it on books, magazines and food TV shows. Of course I brought some home and immediately thought of something tasty and visually beautiful to make with it.

For this recipe I used red onion so I could have a nice color contrast, however after that day I made this pasta several other times using regular onions and courgettes and it was flavorsome anyway.

Orecchiette with courgette and goat’s cheese sauce
own recipe

2 tablespoons unsalted butter
1 teaspoon olive oil
½ large red onion, thinly sliced in half moons
1 large garlic clove, minced
1 courgette (about 350g/12oz), sliced in half lengthwise and then sliced into thin half moons
finely grated zest of 1 lime
handful of fresh marjoram leaves
2 tablespoons dry white wine
¼ cup (60ml) heavy cream
35g goat’s cheese, coarsely grated or crumbled
200g orecchiette pasta

Cook the pasta in plenty of boiling salted water until al dente (follow the instructions in the package). In the meantime, make the sauce: in a large frying pan, heat the butter and olive oil until butter is melted. Add the onion and cook, stirring occasionally, until softened. Stir in the garlic and cook for 1 minute only – do not let it burn or it will be bitter. Add the courgette and cook, stirring occasionally, for 5-7 minutes or until softened. Season with salt and pepper and stir in the lime zest and the marjoram. Add the wine and cook until it evaporates. Stir in the cream and the cheese and cook just until the cheese melts.

Drain the pasta, reserving some of the cooking water, and stir into the sauce – if sauce is too thick, stir in a bit of the cooking water to loosen it up. Serve immediately.

Serves 2

Other ideas: this recipe tastes great if gorgonzola and fresh oregano are used instead of goat’s cheese and marjoram.

Thursday, September 28, 2017

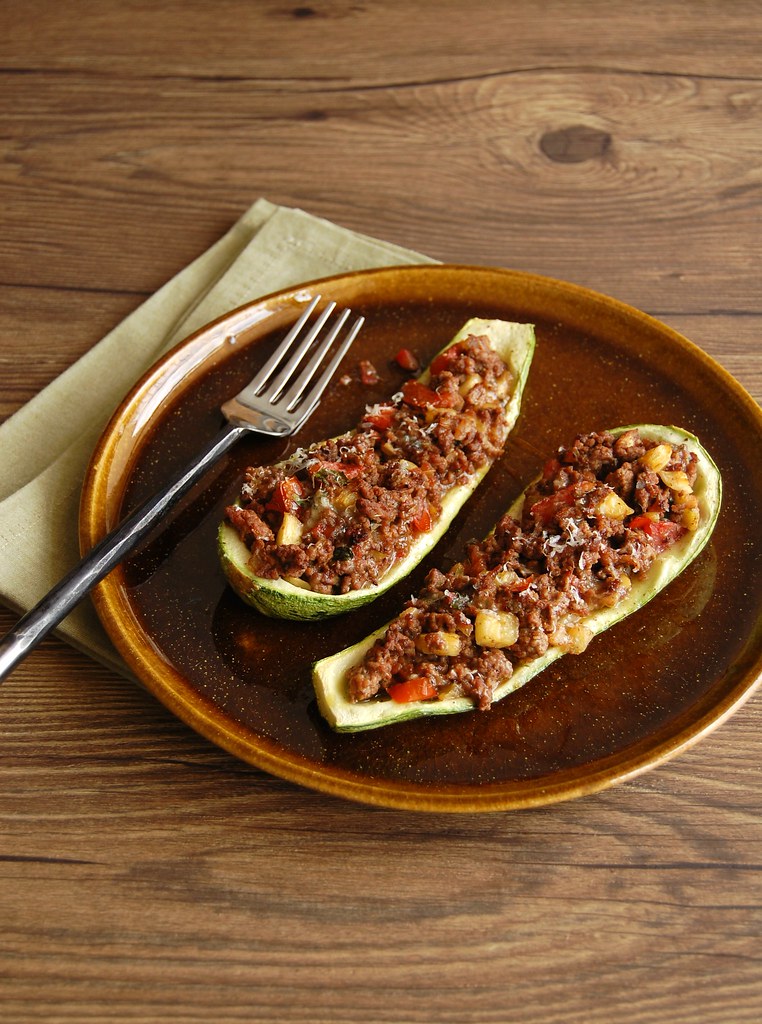
Stuffed zucchini, not like my grandma's

Stuffed zucchini / Barquinhas de abobrinha

One of the dishes that remind me of my grandmother the most is stuffed zucchini: she would make these quite often when she lived with us because my father liked it a lot.

I did not like meat growing up and back then I did not understand why my grandma would make this dish so often, but now that I am all grown up it makes a lot of sense to me: it is delicious – when prepared properly – and it makes things quite easier for the cook, since you only need a green salad on the side to call it a complete meal.

This is my version of stuffed zucchini: out with the mushy rice mixed with pale beef, in with with wine, tomatoes, fresh marjoram and gorgonzola – absolutely delicious (sorry, grandma). :)

Stuffed zucchini / Barquinhas de abobrinha

Stuffed zucchini
own recipe

4 zucchini, about 250g/8oz each
3 tablespoons extra virgin olive oil
1 onion, finely diced
3 garlic cloves, minced
400g (14oz) beef mince
salt and freshly ground black pepper
¼ cup (60ml) dry white wine
2 tablespoons tomato paste
2 ripe tomatoes, deseeded and chopped
handful of fresh marjoram leaves
150g (5oz) gorgonzola, coarsely grated or crumbled
finely ground parmesan, for serving

Preheat the oven to 200°C/400°F. Line a large baking sheet with foil and brush it with some of the olive oil.

Cut the zucchini in half lengthwise – you should then get 8 halves that look like little boats. With a small spoon, scrape some of the flesh – do not carve the zucchini halves too much or they will be too flimsy. Chop the flesh and set aside. Place the zucchini on the prepared sheet and brush the inside of each half with some of the olive oil.

Bake for 20 minutes – in the meantime, make the filling: heat the remaining olive oil in a large nonstick frying pan over high heat. Add the onion and cook, stirring occasionally, until translucent. Stir in the garlic and cook for 1 minute or until fragrant – do not let the garlic burn or it will turn bitter. Stir in the mince and cook, stirring occasionally, until golden. Season with salt and pepper – go easy on the salt since the cheeses can be salty. Stir in the wine and cook again for 2-3 minutes or until wine is reduced – using a wooden spoon, scrape the brown bits in the bottom of the saucepan for extra flavor. Stir in the tomato paste, chopped tomatoes, ¾ cup of the reserved zucchini flesh (you can freeze the remaining flesh and use it to make vegetable stock) and the marjoram. Cook for about 5 minutes or until tomatoes are soft. Remove from the heat, stir in the gorgonzola and divide the meat filling among the zucchini halves. Bake for 15 minutes. Sprinkle with the parmesan and serve immediately.

Serves 4

Wednesday, June 4, 2014

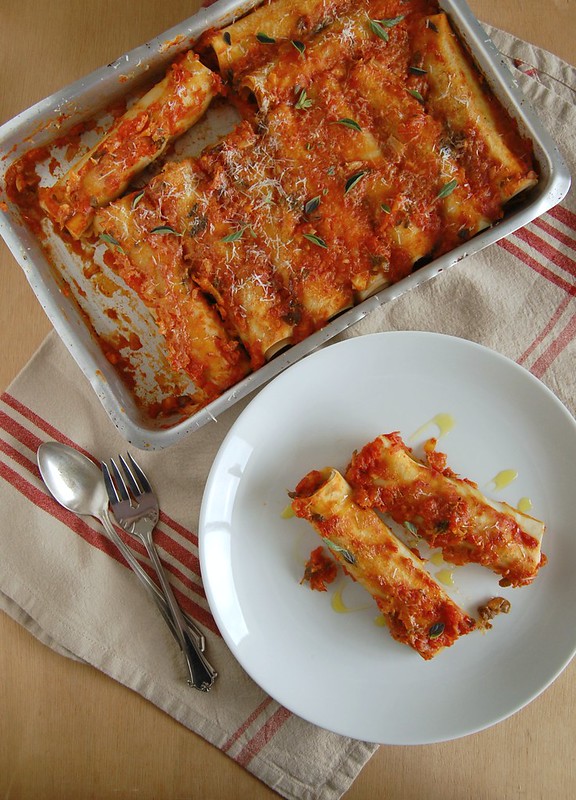
Beef and mushroom cannelloni and things worth trying

Beef and mushroom cannelloni / Canelone de carne e cogumelo

When I look at this recipe I think of the phrase “when life gives you lemons, make lemonade”, but in a slightly different way: if your husband tried mushrooms for the first time and liked it, add them to your food every chance you get. :D

After the success I had with the vegetarian bolognese, I could not wait to cook with mushrooms again, and the inspiration came right from the first pages of this wonderful cookbook – I am the kind of person so crazy for mince that buys a cookbook on the subject. :)
After I finished cooking the filling, it smelled and tasted so good I felt like eating it with some bread, sloppy joe style, and it could have been tossed with some spaghetti, too, for a very quick meal (just some ideas if you’re not in the mood for rolling cannelloni).

For years my husband did not understand my love for TV series, and of course he wouldn’t because he had never given the shows a try. That changed when I got him to watch The Blacklist with me – he got hooked on Raymond Reddington’s adventures as much as I did, and he liked the show so much we now watch Resurrection together as well.

I guess that in life one should try things before knocking them, either if they’re food or TV shows – and this dish I bring you today is well worth trying.

Beef and mushroom cannelloni
adapted from the great Mincespiration!

tomato sauce, made with 1 ½ cans (400g each can) peeled chopped tomatoes (save the remaining ½ can for the filling), warm

olive oil
200g button mushrooms, wiped and chopped
salt and freshly ground black pepper
300g beef mince
1 onion, finely chopped
3 fat garlic cloves, crushed
80ml white wine
½ can peeled chopped tomatoes
handful fresh oregano leaves
500g fresh lasagna sheets
about 50g Parmesan cheese, finely grated

Preheat the oven to 200°C/400°F.
Heat 1 teaspoon olive oil in a large non-stick frying pan and fry the mushrooms until browned. Season with salt and pepper. Remove the mushrooms from the pan and set them aside. Using the same pan, add a little more oil and fry the beef for 4-5 minutes until browned. Add the onion and garlic and continue cooking for 2-3 minutes. Season with salt and pepper. Pour in the wine and cook until the liquid is reduced by half, then add the chopped tomatoes and the oregano and cook for 5 minutes, stirring occasionally. Put the mushrooms back in the pan and cook for 1 minute or until liquid is almost completely absorbed. Remove from the heat and cool slightly.

Spread half the tomato sauce on the bottom of a 20x30cm (8x12in) baking dish or pan.
Lay a sheet of lasagna on a board, spoon on some filling, top with a little parmesan and roll up, forming a cylinder. Repeat with the remaining pasta sheets and filling. Place the cannelloni in the baking dish on top of the tomato, the cover with the remaining sauce and sprinkle with the remaining parmesan. Bake for about 30 minutes or until bubbly and pasta is cooked.

Serves 5-6


Friday, February 25, 2011

President Clinton’s oatmeal cookies

President Clinton’s oatmeal cookies / Cookies de aveia do Presidente Clinton

I swear I’m not trying to get a job as an oatmeal poster girl, and I’d already decided on which oatmeal cookies were my favorite, but tell me: would you resist making a recipe with such great reputation? :)

These cookies are so delicious I regretted halving the recipe. Mr. Clinton’s taste in cookies is far superior to his taste in... Never mind. :D

President Clinton’s oatmeal cookies / Cookies de aveia do Presidente Clinton

President Clinton’s oatmeal cookies
from Desserts by the Yard

Fat raisins:
1 ½ cups (232g) golden raisins
¾ cup (180ml) dry white wine
3 tablespoons fresh orange juice
1 ½ tablespoons dark rum
3 tablespoons caster (superfine) sugar

Cookies:
1 ½ cups (210g) all purpose flour
1 teaspoon baking soda
1 ¾ sticks (198g) unsalted butter, room temperature
1 cup (200g) granulated sugar
1 cup (175g) light brown sugar, packed
1 ½ teaspoons freshly grated nutmeg
¾ teaspoon ground cinnamon
2 large eggs, room temperature
3 cups (354g) rolled oats
1 recipe (1 ½ cups) fat raisins

Start by preparing the fat raisins: combine the raisins, wine, orange juice, rum and sugar in a small heavy saucepan; bring just to a boil over medium heat, stirring all the while. Lower the heat so that the liquid is at a bare simmer and poach for 20 minutes.
Remove from the heat, cover the pan with plastic wrap and allow to cool completely. If not using right away, transfer to an airtight container and store in the refrigerator for up to 2 weeks.

Now, the cookies: preheat the oven to 180°C/350°F; line two large baking sheets with baking paper.
Sift together the flour and baking soda and set aside.
In the bowl of a stand mixer fitted with the paddle attachment, or in a large bowl with a hand mixer, cream the butter on high speed until lemony yellow, about 2 minutes. Scrape down the sides of the bowl and the paddle/beaters. Add the granulated sugar, brown sugar, nutmeg and cinnamon. Beat until creamy and scrape the sides of the bowl.
Add the eggs, one at a time, scraping the bowl after each addition. Beat on low speed for 15-30 seconds or until the eggs are incorporated. On low speed, add the sifted ingredients, beating until they’re absorbed. Mix in the oats and raisins.
Place 1 leveled tablespoon of dough per cookie onto prepared sheets, 5cm (2in) apart. Bake for 10 minutes, rotate the baking sheet, then bake for another 5-8 minutes or until nicely browned. Carefully slice the baking paper off the sheet and directly onto your work surface. Cool completely.
Cookies will keep for up to 3 days in an airtight container at room temperature.

Makes 80 small cookies (about 5cm/2in each) – I halved the recipe above and regret it (the cookies were too good!)

Monday, January 24, 2011

Linguine with peas and lemon - and our 6th anniversary

Linguine with peas and lemon / Linguine com ervilhas e limão siciliano

Joao and I celebrated our sixth anniversary last Saturday with a magnificent dinner – great food, some wine... Just beautiful. But all that indulgence called for a simple lunch on the following day – and this recipe instantly popped in to my mind: it’s so good – and quick – I’ve made it three times already.

Linguine with peas and lemon
from Holiday

1½ tablespoons olive oil
2 tablespoons (28g) butter
2 garlic cloves, crushed
¾ cup (180ml) white wine
1 teaspoon finely grated lemon zest
½ cup (120ml) heavy cream
salt and freshly ground black pepper
400g linguine
2 cups fresh shelled peas – I used frozen
freshly grated parmesan, to serve

Heat the oil and butter in a large frying pan over medium heat. Add the garlic and cook, stirring for 1 minute.
Pour in the white wine and simmer until reduced by half. Stir in the lemon zest and cream and simmer for a further 3-4 minutes until slightly reduced; season with salt and pepper.
Meanwhile, cook the pasta in a large pan of slightly boiling water according to the packet instructions or until al dente, adding the peas for the last 3 minutes of the cooking time. Drain well and toss the hot pasta with the sauce.
Serve immediately with grated parmesan.

Serves 4

Friday, November 27, 2009

Teriyaki chicken noodle salad

Teriyaki chicken noodle salad / Salada de macarrão oriental com frango teriyaki

Having a little sister is a lot of fun but it also brings upon you a strong sense of responsibility.
One day, when she was 3, we were at McDonald’s – the horror, the horror – because she wanted a burger. While I was ordering the food, she told the clerk she wanted her burger without the beef! I’d recently stopped eating meat but did not even know she knew about it – until then, I’d never thought that I could actually influence someone else. And that’s why I try really hard to be a good role model for her.

I must confess I was never interested in Asian food – out of sheer ignorance – but that changed after spending time with my lovely friend Valentina; we had such delicious meals that I came home decided to add an Asian spin to my cooking. This salad was my first attempt – a wonderful influence by you, Tina. :)

Teriyaki chicken noodle salad / Salada de macarrão oriental com frango teriyaki

Teriyaki chicken noodle salad
from Donna Hay magazine

1/3 cup (80ml) soy sauce
¼ cup (44g) brown sugar
½ cup (120ml) dry white wine
6 chicken thigh fillets, trimmed – I used breast
270g soba noodles, cooked and drained
2 Japanese cucumbers, thinly sliced
2 spring onions (scallions), sliced
1 cup coriander leaves
¼ cup (60ml) rice vinegar
salt

Place the soy sauce, sugar and wine in a non-metallic bowl and stir until sugar is dissolved. Add the chicken and toss to coat.*
Heat a non-stick frying pan over high heat. Cook the chicken, reserving the marinade, for 1-2 minutes each side. Add the marinade to the pan and cook for a further 3-4 minutes or until the chicken is cooked through and sticky – add a little water, if necessary. Slice and set aside.
Place the noodles, cucumber, onion, coriander, vinegar and salt in a bowl and toss until well combined. Divide the noodle salad between bowls and top with the sliced chicken to serve.

* I recommend marinating the chicken for longer – 30 minutes or so – for a deeper flavor

Serves 4

Related Posts with Thumbnails