Last week I was finally able to watch the movie I’d been talking about for almost a year and I’ve come to the conclusion that it was directed by the wrong person: Bennett Miller played it too safe, directing in a very bureaucratic way, almost automatic, while such a dark and surprising story with fantastic acting deserved someone much more dedicated to the project.
As I watched the movie I kept thinking of how wonderful it would have been in the hands of Scorsese or Fincher, or even Cuarón.
Steve Carell, Mark Ruffalo and Channing Tatum are quite something in this movie and I was especially stunned by the latter: he portrays this character with such urge, with such passion and dedication that it turned out completely different from everything he’d done before, and even though I find Mark Ruffalo a terrific actor all the supporting actor nominations should have gone to Tatum.
Carell is equally wonderful, a whole new person thanks not only to the meticulous make up work but also for making the viewer forget completely who he is – I adore him in just about anything and he really shines when given a dramatic role (it is impossible to forget how sublime he was in Little Miss Sunshine). I’ll be rooting for him on February, 22, even though I know that Eddie Redmayne has taken the world by storm.
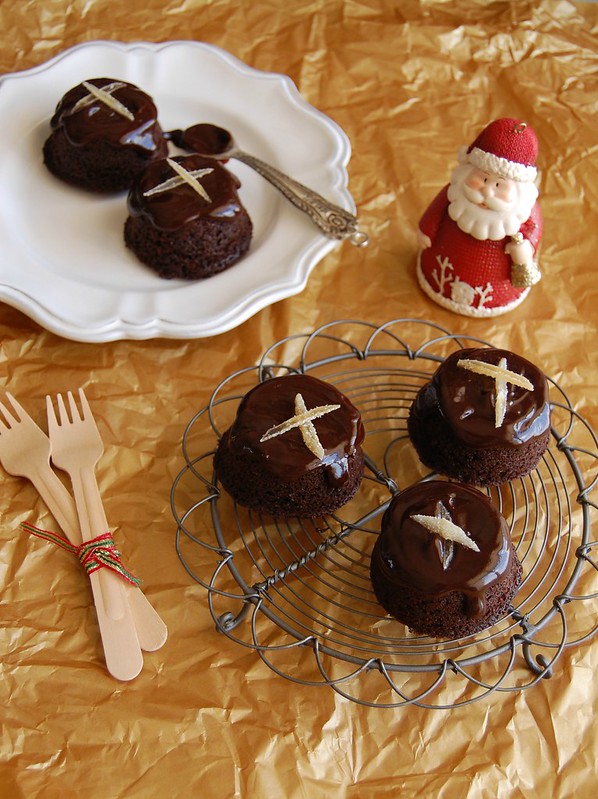
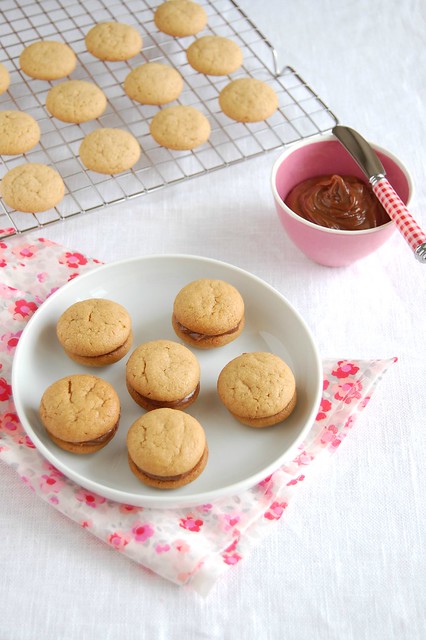
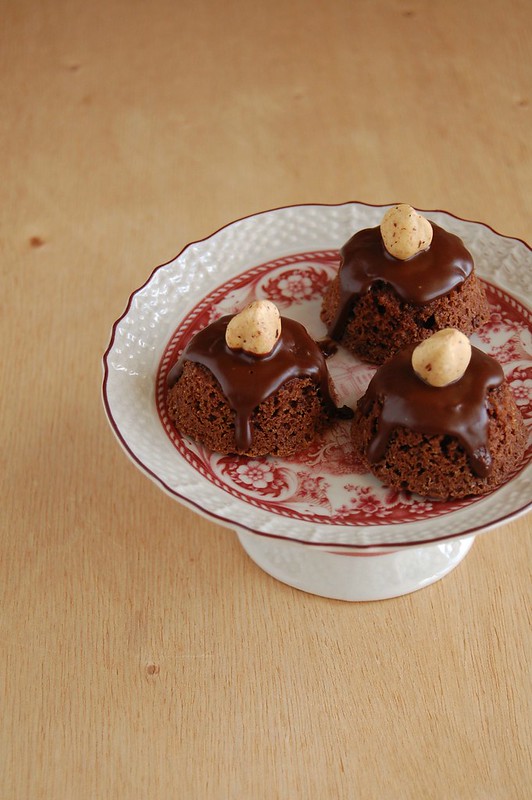
Foxcatcher is a good movie but not a great one, and I consider that a waste of a good story and great acting. I don’t like waste, not in movies and especially not in my kitchen, that is why I made these adorable mini cakes to use up the hazelnut meal that was about to go rancid in my freezer – they turned out super cute and oh, so delicious.
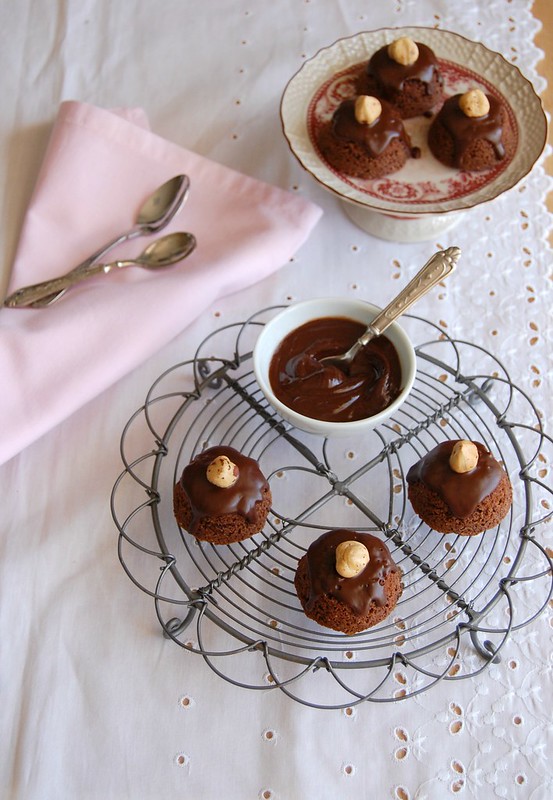
Chocolate hazelnut kisses
slightly adapted from here
Cakes:
120g dark chocolate, finely chopped – I used one with 53% cocoa solids
100g granulated sugar
95g unsalted butter, softened
3 eggs, separated
100g hazelnut meal
1 teaspoon strong coffee
1 teaspoon rum
½ teaspoon vanilla extract
Ganache:
100g dark chocolate
50g unsalted butter
24 hazelnuts, roasted and shelled, to decorate
Preheat the oven to 180°C/350°F. Butter a 24-hole mini muffin pan.
Melt the chocolate in a bowl over a saucepan of simmering water, then leave to cool. Beat the sugar and butter until light and fluffy, then add the egg yolks, beating well after each addition. Add the melted chocolate and mix well, then fold in the hazelnut meal, coffee, rum and vanilla.
Whisk the egg whites until they form soft peaks. Fold a third into the chocolate mixture to loosen it, then fold in the rest. Spoon the mixture into the muffin pan and bake for 10-15 minutes or until risen and a skewer inserted in the center of one mini cake comes out a little moist. Cool for a few minutes in the pan, then carefully unmold onto a cooling rack. Cool completely.
For the ganache, melt the chocolate and butter over a saucepan of simmering water. Remove from the heat and cool for 5 minutes or until slightly thickened. Pour a little ganache over each cake and decorate with a roasted hazelnut.
The cakes can be stored in an airtight container for up to 2 days at room temperature.
Makes 24