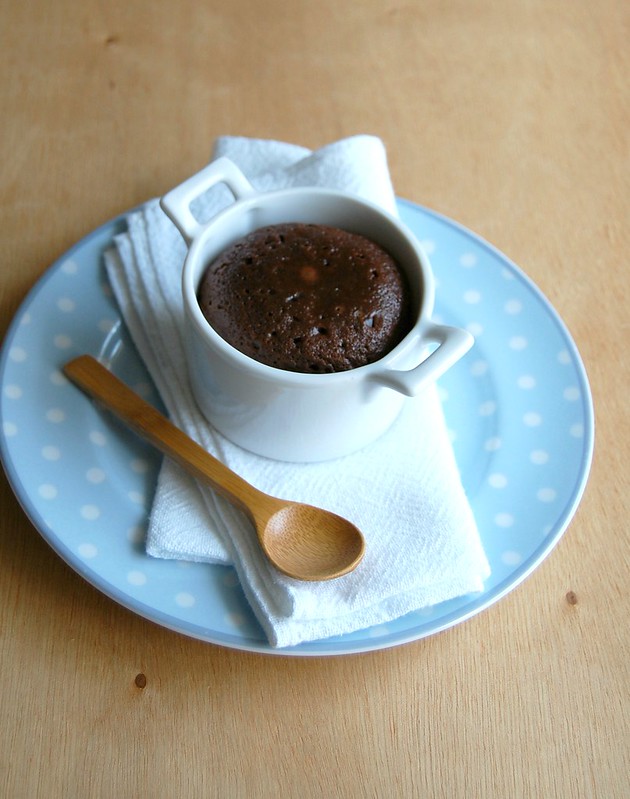
Sometimes it takes me forever to share certain recipes with you here because they’re gone before I can take any pictures – these chocolate pots, from the lovely Nigella Lawson, are one of those recipes: they are so easy to put together (you probably have all the ingredients at hand) and are ready in a matter of moments, so it is the perfect dessert for me to share with you here, but they are always gone so quickly that I was able to bring the recipe to you only now only now.
Last time I made them, I stashed one of the pots in the fridge, tightly covered with plastic wrap. Two days later I baked it and managed to take the picture before I gladly ate it. :)
So next time you have people over for a meal, make these for dessert: prep them in advance and stash them in the fridge, then take them out for 30 minutes and pop them in the oven for 15-20 – I am sure your guests will love it (and so will you). ;)
Chocohotopots
slightly adapted from the wonderful and foolproof Feast: Food to Celebrate Life
100g unsalted butter, chopped
100g dark chocolate – 53% cocoa solids – finely chopped
2 eggs
½ cup (100g) granulated sugar
3 tablespoons all-purpose flour
pinch of salt
1 teaspoon vanilla extract
Preheat to 200°C/400°F.Lightly butter four ¾-cup (180ml) ovenproof ramekins.
Place butter and chocolate in a heatproof bowl over a saucepan of simmering water and stir until melted. Cool.
In another bowl, whisk together the eggs, sugar, flour, salt and vanilla. Beat in the cooled butter and chocolate mixture. Divide the mixture between the prepared ramekins. Bake for about 15 minutes, by which time the tops will be cooked and cracked and the chocolate gooey underneath (I don't wait for the top to crack, I underbake it a little for more fluid centers).
Place each ramekin on a small plate with a teaspoon and serve. Make sure to warn people that these desserts will be HOT!
Serves 4
Tuesday, March 31, 2015
Chocohotopots - quick, easy and delicious
Sunday, March 29, 2015
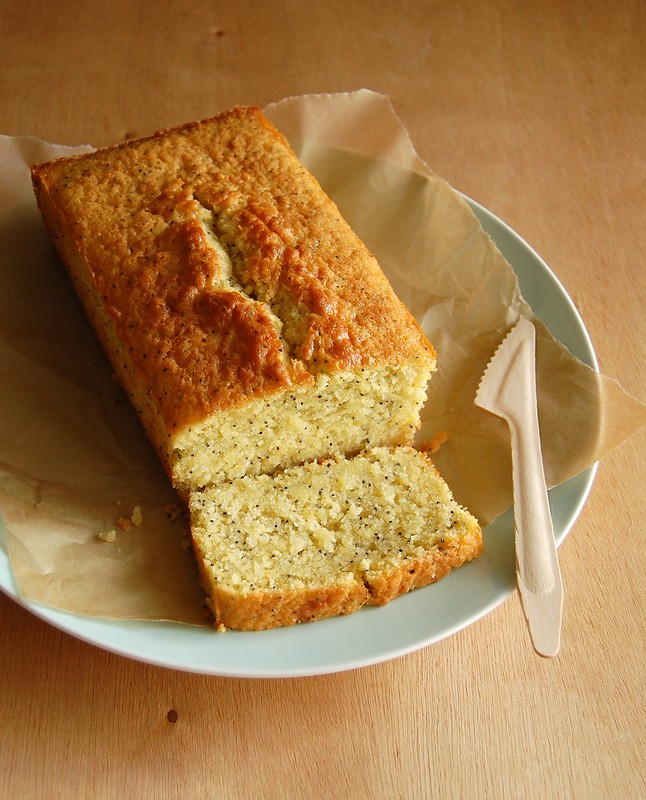
Orange coconut poppy seed cake and how important photos are to me
When I read cookbook reviews at Amazon I notice that one of the things people most complain about is the lack of photographs, and I tend to agree with them: I own books that I know are really great
, but I tend to ignore them because they have no or close to none photos – I guess that when I need inspiration I need to look at great images that will make my mouth water.
It is also really good to know how the food is going to look like once you’re finished cooking it.
I saw a recipe for a citrus coconut cake on Taste magazine days ago and it immediately caught my attention: the cake slices looked so tender I couldn’t resist it! And I wasn’t even thinking of baking a cake – I was searching for something savory – but that photo made me wish for a slice of that super tender cake, so I had to make it (if you ask me what I was looking for in the first place I don't really remember). :D
The result was a very tender cake indeed, even difficult to slice, and it tasted delicious – inspiration came in the form of a tempting photo and I’m glad I gave it a go.
Orange coconut poppy seed cake
slightly adapted from Taste magazine
1 cup (140g) all purpose flour
1 teaspoon baking powder
pinch of salt
2 tablespoons poppy seeds
¾ cup (75g) unsweetened desiccated coconut
1 cup (200g) granulated sugar
finely grated zest of 1 large orange
125g unsalted butter, softened
2 large eggs
½ teaspoon vanilla extract
1 cup (240ml) coconut milk*
Preheat oven to 180°C. Lightly butter a 20x10cm (8x4in) loaf pan, line it with baking paper and butter it as well.
In a medium bowl, whisk together flour, baking powder, salt and poppy seeds. Whisk in the coconut.
Place sugar and orange zest in the bowl of an electric mixer and rub them together with your fingertips until sugar is fragrant. Add butter and beat with the electric mixer until light and creamy. Add eggs, one at a time, beating between each addition until the mixture is well combined. Scrape the sides of the bowl occasionally. Beat in the vanilla. On low speed, add flour mixture in three additions alternating with coconut milk and mix just until combined. Transfer batter to prepared pan and smooth the surface. Bake for 45-50 minutes or until golden and a skewer inserted into the centre comes out clean. Cool in the pan over a wire rack for 25 minutes, then carefully lift cake from the pan using the paper and transfer to the rack. Cool completely, then carefully peel off the paper.
* to avoid opening a second bottle of coconut milk, I used a whole bottle (200ml) + 40ml of whole milk
Serves 6-8
Wednesday, March 25, 2015
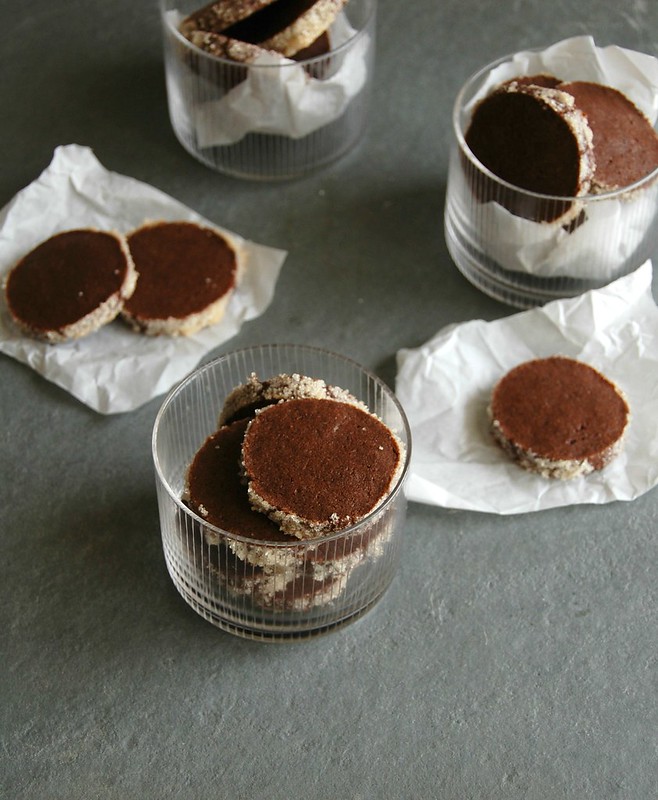
Sugar-crusted chocolate cookies for a budget-friendly Easter
Easter is around the corner and I haven’t figured out yet what I’ll make for lunch, but one thing I’m pretty sure of: I won’t be buying chocolate Easter eggs – they’re too expensive! :(
I think that creativity is an important tool in moments like this, when money is short and we want to give gifts to the people we love, that is why I loved these cookies: they taste amazing, are dead easy to make and wrapped in a plastic bag tied with a pretty ribbon they become a really good gift – and one can make tons of cookies with the same amount of money one would buy only one Easter egg.
I hope you like my delicious yet budget friendly Easter suggestion! :)
Sugar-crusted chocolate cookies
from Food & Wine magazine
1 ¾ cups (245g) all-purpose flour
½ cup (45g) unsweetened cocoa
pinch of salt
1 stick + 2 tablespoons (140g) unsalted butter, cut into tablespoons
¾ cup + 2 tablespoons (125g) confectioners' sugar
2 tablespoons cold milk
1 teaspoon pure vanilla extract
1 large egg white, lightly beaten with a fork
¼ cup (50g) granulated sugar
In a food processor, pulse the flour, cocoa and salt. Add the butter and process until sandy, about 3 minutes. Add the confectioners' sugar, milk and vanilla extract and process until a firm dough forms. Divide the dough in half, place each on a piece of parchment paper; shape dough into logs. Fold parchment over dough; using a ruler, roll and press into a 3.5 cm (1.4in) log – like Martha does here. Wrap in parchment. Refrigerate for 4 hours.
Preheat oven to 180°C/350°F; line two large baking sheets with baking paper - I like Beyond Gourmet a lot.
Unwrap one log at a time (keep the other in the fridge). Unwrap the log, brush it with the egg white and roll in half the sugar, pressing it to help it adhere. Cut log into 6mm (¼in) thick rounds; space 2.5cm (1in) apart onto prepared sheets. Bake the cookies for about 20 minutes, until just firm to the touch. Cool completely on the sheets. Repeat with the remaining log.
Makes about 45
Sunday, March 22, 2015
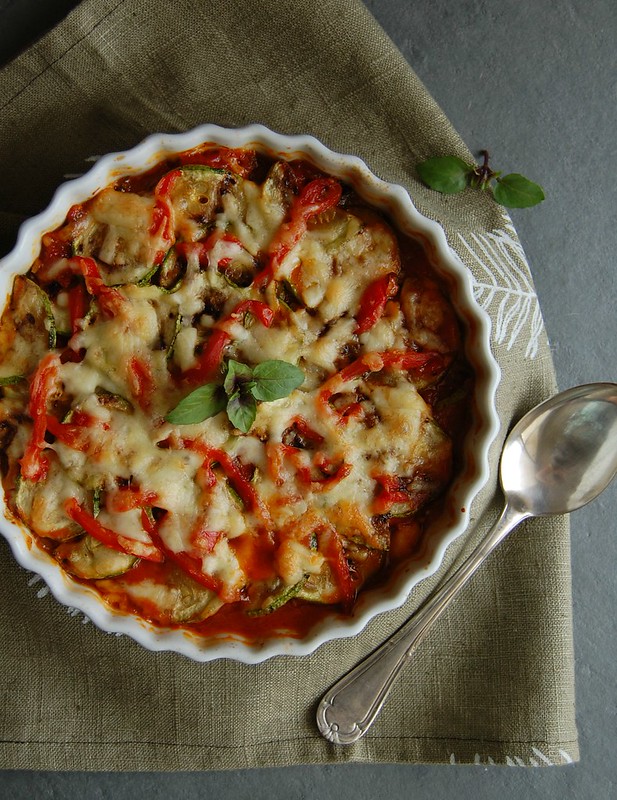
Courgette, tomato and roasted red pepper gratin and baby talk
My sister-in-law and I talk about my baby nephew a lot, and we always talk about the food he’ll eat when he grows up – my brother is the pickiest eater I know and we know that he’ll have to change in order to become a good example for the boy.
I tell her to calm down because my husband used to be just like that and now he tries lots of different types of food (I guess we’ll have to organize a trip to China for my brother as well). :D
For instance, my husband always tells me how much he hated gratins as a kid, especially the potato gratin his mother made constantly back in the day. He also hated courgettes. Just so you know, he ate the gratin in the picture like crazy and told me that I can make that dish whenever I want because “it is so delicious”.
People change, thank heavens. There’s still hope for my brother. :D
Courgette, tomato and roasted red pepper gratin
slightly adapted from the always delicious Olive magazine
1 small red pepper
2 tablespoons olive oil, divided use
½ large onion, finely diced
2 large garlic cloves, minced
1 x 400g (14oz) can peeled tomatoes
1 teaspoon sugar
salt and freshly ground black pepper
handful of fresh basil leaves
350g large courgettes, halved in the widest part, cut into 5mm slices
75g coarsely grated cheddar salt and freshly ground black pepper
Preheat the oven to 220°C/420°F. Put the red pepper on a baking tray and roast in the oven for about 30 minutes, turning it once or twice, until the skins are blackened in places and the flesh is soft. Transfer to a heatproof bowl, seal with plastic wrap and leave to cool. Break the pepper open, discard the stalk and seeds, peel off the skin and slice the flesh into thin strips.
While that goes on, make the tomato sauce: in a medium saucepan, heat 1 tablespoon of the olive oil over medium-high heat. Add the onions and cook until translucent. Add the garlic, cook for 1-2 minutes, then add the tomatoes and the sugar. Fill 1/3 of the can with water, swirl it around and add to the saucepan. Season with salt and pepper, break the tomatoes with a wooden spoon then cook over medium heat, stirring occasionally, for about 20 minutes or until slightly thickened. Add the basil, stir to combine, cover and remove from the heat.
Heat a large, ridged griddle until smoking hot, then lower the heat slightly. Toss the courgette slices in the other tablespoon of oil, season with salt and pepper, then griddle in batches for 2 minutes on each side until marked with dark lines. Set aside on kitchen paper to drain.
Spread half the sauce over a medium, shallow baking dish. Scatter half the griddled courgettes over the tomato sauce, followed by half the red pepper strips and half the grated cheese. Spoon over the remaining tomato then repeat the layers once more, ending with the grated cheese. Bake for 25-30 minutes until lightly golden and bubbling.
Serves 2 generously
Wednesday, March 18, 2015
Lime syrup marble cake, a movie and a great soundtrack
Days ago I felt like going to the movies but wasn’t in the mood for drama or tears – that made me immediately discard the idea of watching Still Alice despite my love for Julianne Moore and since I’ll only watch horror movies when my sister comes along I completely ignored The Lazarus Effect.
There was Love, Rosie left and I guess it was exactly what I needed that day: nothing serious, a bit of romance, a bit of comedy – the perfect combo. :) But what I really loved about the movie – besides Sam Claflin ;) – was the soundtrack: I looked it up on Spotify and haven’t been able to stop listening to it.
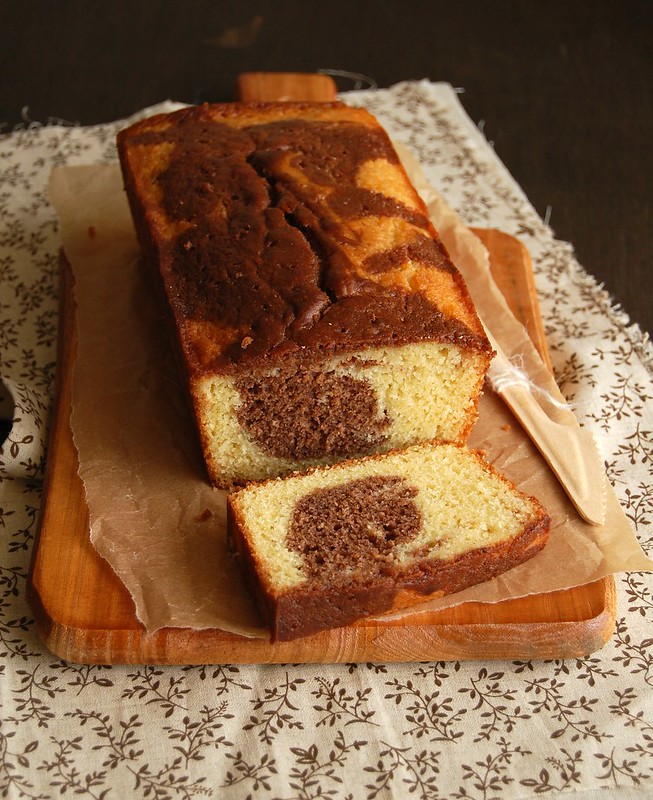
With a good soundtrack sorted out all I needed was a good cake recipe to bake, and the limes in my fridge sent me directly to a couple of recipes with lime published by Dan Lepard on The Guardian ages ago – the cake turned out moist and delicious, and I thought it was a nice change from the usual marble cakes.
Lime syrup marble cake
slightly adapted from Dan Lepard
Cake:
finely grated zest of 3 limes
¾ cup + 2 tablespoons (175g) granulated sugar
2 tablespoons canola oil
3 medium eggs*
150g plain yogurt
1/3 cup (75g) unsalted butter, melted
½ teaspoon vanilla extract
1 ½ cups (210g) all purpose flour
2 teaspoons baking powder
1 tablespoon unsweetened cocoa powder
pinch of salt
Syrup:
1/3 cup (80ml) fresh lime juice
2 tablespoons granulated sugar
Preheat the oven to 180°C/350°F. Lightly butter a 20x10cm (8x4in) loaf pan, line it with baking paper and butter it as well.
Place zest and sugar in a large bowl and rub them together until sugar is fragrant. Add oil and eggs, whisk until creamy, then whisk in the yogurt, melted butter and vanilla. Whisk in the flour, baking powder and salt, then tip two-thirds of the mix into the pan. Beat the cocoa into the remaining batter, spoon this into the pan over the yellow batter and gently swirl the two together. Bake for 50 minutes, or until a skewer comes out clean. Remove from the oven and leave to cool for five minutes. Meanwhile, mix the lime juice and sugar until you have a clear syrup. Prick the cake with a toothpick, then gradually spoon the syrup over the cake, waiting for the syrup to be absorbed before pouring more.
Cool completely in the pan.
* I had only large eggs at home, so I chose the smallest three I could find and used them in the recipe
Serves 6-8
Wednesday, March 11, 2015
Citrus caramel blondies
I am not a very techie person but I love it when people teach me something new about computers or tell me about interesting apps – the same lovely friend who introduced me to Shazam told me about Spotify as well and now I cannot live without it any longer (thanks, C.!).
That happened ages ago, but you know how things are around here. :D
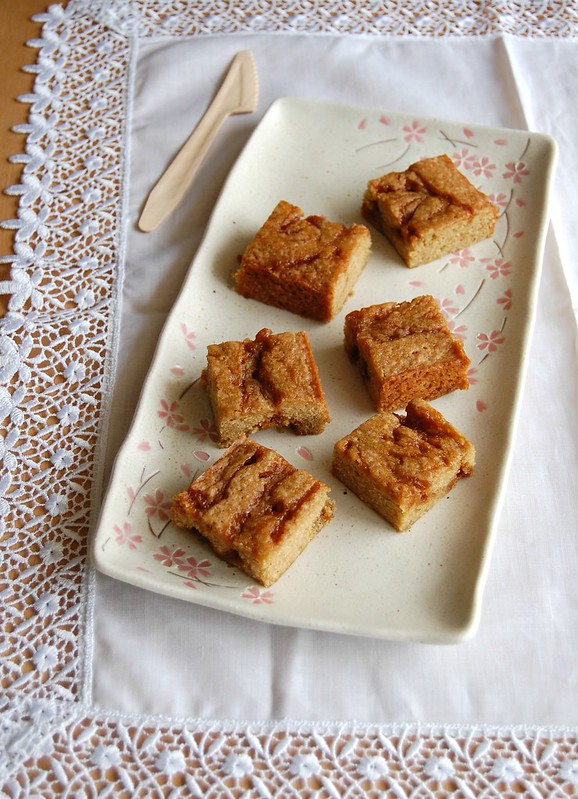
Something else I adore about technology: having loads of recipes to choose from and to get inspired by, even when I’m far from home and from my cookbooks. I was going through Food & Wine’s website while waiting on a very long line and found these unusual blondies – I made them as soon as I got home (melted butter, yay) and they turned out fantastic. The caramel is so delicious I had to keep it away from me while making the blondie batter – I advise you to do the same (or make a double batch). :D
Citrus caramel blondies
from Food & Wine magazine
Caramel:
¼ cup (50g) granulated sugar
3 tablespoons heavy cream
1 tablespoon (14g) cold unsalted butter
½ teaspoon Maldon sea salt or fleur de sel
Blondies:
1 cup (140g) all-purpose flour
¼ teaspoon table salt
½ teaspoon baking powder
½ cup (113g/1 stick) unsalted butter, melted
1 cup (175g) packed light brown sugar
2 large eggs
½ teaspoon vanilla extract
finely grated zest of 1 orange
Caramel: in a small saucepan, combine the granulated sugar with 1 tablespoon of water and bring to a boil. Using a wet pastry brush, wash down any crystals on the side of the pan. Boil the syrup over moderately high heat until a deep amber caramel forms, about 5 minutes. Remove from the heat and immediately whisk in the cream, butter and Maldon sea salt. Let the caramel cool to room temperature.
Blondies: preheat the oven to 180°C/350°F. Lightly butter a 20cm (8in) square metal baking pan, line it with foil leaving an overhang on 2 opposite sides; butter the foil as well.
In a small bowl, whisk the flour with the salt and baking powder. In a medium bowl, whisk the butter with the brown sugar until combined, then whisk in the eggs, vanilla and orange zest. Add the flour mixture and stir until just incorporated.
Spread the batter in the prepared pan in an even layer. Drizzle the caramel over the top in small portions, then swirl it decoratively using a toothpick. Bake the blondies for 25-30 minutes, until it is golden on top and a toothpick inserted in the center comes out with a few moist crumbs attached. Let cool completely. Cut into bars and serve.
The blondies can be stored in an airtight container at room temperature for up to 3 days.
Makes 16
Sunday, March 8, 2015
Double chocolate cookies and favorite cookbooks
I have lots of cookbooks and food magazines, yet I have the feeling that I cook from the same ones over and over again – I’ve tried using all of them more often, but there is always one or more ingredients lacking, or I don’t have enough time to make certain recipes, and when that happens I turn to my favorites in search of inspiration.
Martha’s cookie book, for instance, comes to my rescue every time I want to bake cookies but don’t know which recipe to choose – there are so many options there that if there’s no peanut butter, jam, coconut or nuts in my pantry I’ll always find something else to bake.
[that said, I’m always searching for cookbooks with good cookie recipes – I’ve had my eye on this one for a while and I hope the “search inside” tool is available soon]
Days ago I had nothing but chocolate in my pantry to bake with and ended up searching for a recipe on that cookbook: these cookies were easy to make and turned out delicious – a treat for chocolate lovers. If you don’t have white chocolate around, use dark chocolate chips in the batter or even milk chocolate, for a different twist.
Double chocolate cookies
slightly adapted from one of my favorite cookbooks
170g (6oz) dark chocolate, coarsely chopped – I used one with 53% cocoa solids
½ cup (113g/1 stick) unsalted butter
1 cup (140g) all-purpose flour
½ cup (45g) unsweetened Dutch-process cocoa powder
½ teaspoon baking soda
¼ teaspoon salt
1 ½ cups (300g) granulated sugar
2 large eggs
1 teaspoon pure vanilla extract
150g white chocolate chips or chunks
Melt the dark chocolate with the butter in a small heatproof bowl set over a pan of simmering water; let cool slightly.
Whisk together flour, cocoa powder, baking soda, and salt; set aside. Put chocolate mixture, sugar, eggs, and vanilla in the bowl of an electric mixer fitted with the paddle attachment. Mix on medium speed until combined. Reduce speed to low; gradually mix in flour mixture. Fold in chocolate chunks. Refrigerate dough for 30 minutes.
Preheat oven to 180°C/350°F; line two large baking sheets with baking paper.
Using a 2-tablespoon cookie scoop drop portions of dough per cookie onto prepared sheets, spacing 5cm (2 in) apart. Bake until cookies are flat and surfaces crack, about 15 minutes (cookies should be soft). Cool on sheet over a wire rack for 5 minutes, then slide the paper onto the rack and cool completely.
Cookies can be stored between layers of parchment in airtight containers at room temperature up to 3 days.
Makes about 30
Wednesday, March 4, 2015
Quick apple cake
It’s no secret I like spending time in the kitchen, but there are days I’m pressed for time and the word “quick” on a recipe draws my immediate attention – and if it comes from a reliable source like Stephanie Alexander, the better.
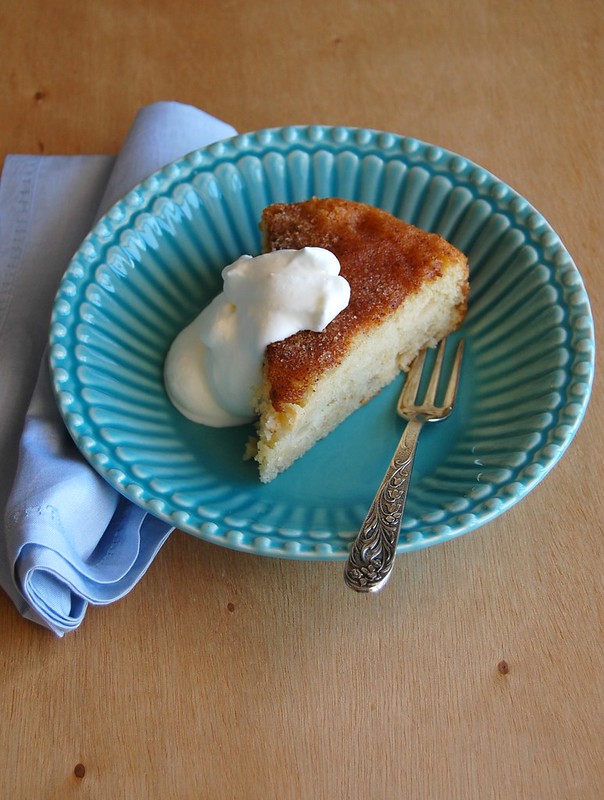
I needed a good cake recipe that didn’t take much time between prepping and baking, but my butter was rock solid and I was out of vegetable oil – tough call. Eat Your Books came to my rescue and in no time at all the cake was in the oven, perfuming the entire apartment. The cake turned out tender and tasted delicious, and if you don’t have apples around I am sure pears or berries would suit this cake equally well.
The cake is great both warm and at room temperature, so it can be served as dessert with a dollop of whipped cream or as an afternoon snack with a cup of tea or coffee – take your pick.
Quick apple cake
slightly adapted from the wonderful The Cook's Companion, one of my favorite cookbooks
Cake:
2 medium Granny Smith apples, peeled, cored and chopped in small cubes
3 tablespoons sherry (feel free to use apple brandy, brandy or rum)
160g all purpose flour
1 teaspoon baking powder
pinch of salt
3 eggs
120g granulated sugar
½ teaspoon vanilla extract
140g unsalted butter, melted and cooled
To dust the cake:
2 tablespoons granulated sugar
½ teaspoon ground cinnamon
Preheat the oven to 190°C/375°F – while that happens, soak the apples in the brandy in a small bowl.
Butter a 20x6cm (8x2 ½in) round cake pan, line the bottom with a circle of baking paper and butter it as well.
Sift flour, baking powder and salt in a small bowl and set aside. Using an electric mixer, using the whisk attachment, beat eggs and sugar until thick and fluffy. Beat in the vanilla. Fold in flour mixture gently. Drizzle in melted butter, then fold it in. Fold in apple and any juice/sherry left. Spoon into prepared tin and smooth the top. In a small bowl, stir together the granulated sugar and cinnamon and sprinkle over the batter. Bake for about 40 minutes until the cake is golden brown and a skewer inserted in the center comes out clean. Cool in the pan over a wire rack for 25 minutes, then carefully unmold.
Serve warm or at room temperature (turn it into dessert by serving it with whipped cream).
Serves 8-10
Sunday, March 1, 2015
Pasta with vodka tomato sauce - when simple food tastes great
Years ago I saw this pasta sauce on many blogs, some of them my favorites and I had all the intention of making it, but for some reason I never did and it ended up slipping my mind.
I thought of it days ago when I bought a bottle of vodka to make a new batch of vanilla extract and wrote the idea down to avoid forgetting it all over again. The original recipe calls for shallots, but there was a leek in my fridge begging to be used and I added it instead.
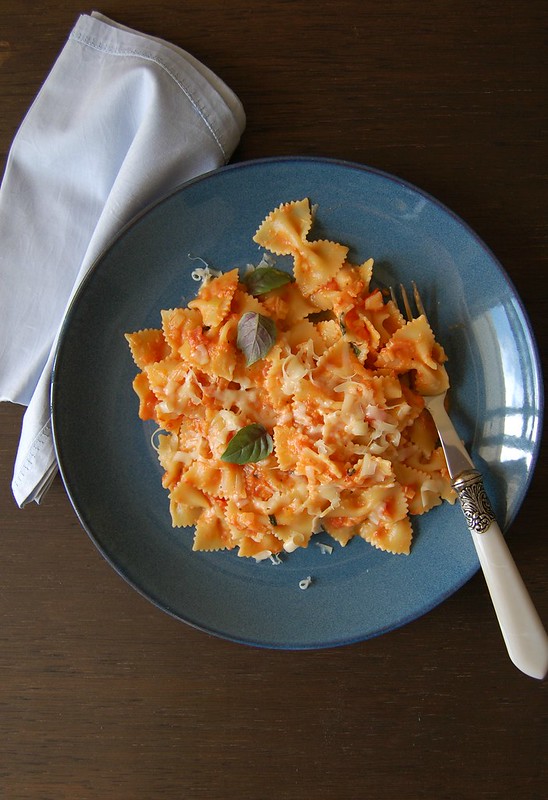
I’m not sure if it was the leek, the vodka, the cream or the three of them together, but this turned out to be one of the tastiest tomato sauces I’ve ever made – seriously good. It is flavorsome, creamy without being heavy and slightly peppery, not to mention simple to make.
I had no idea this sauce would turn out so delicious when I set out to make it and now I strongly recommend you try it, too.
Pasta with vodka tomato sauce
slightly adapted from this book and from Rachel Ray
1 tablespoon unsalted butter
½ tablespoon olive oil
1 small leek, white part only
1 fat garlic clove, minced
pinch of red pepper flakes
½ cup (120ml) vodka
1 can (400g/16oz) chopped canned tomatoes
2 teaspoons sugar
salt and freshly ground black pepper
225g (8oz) dried short pasta, such as farfalle or penne
¼ cup (60ml) heavy cream
handful fresh basil leaves, shredded or torn
grated parmesan cheese, to serve
Heat a medium saucepan over moderate-high heat. Add butter and oil and while the butter melts, slice the leek in half lengthwise, then cut both halves in thin slices. Add to the saucepan and cook, stirring occasionally, until translucent. Add the garlic and pepper flakes and cook until fragrant. Gradually pour in the vodka, stir then cook until reduced by half, 3-4 minutes. Add tomatoes, sugar, season with salt and pepper and bring to a boil. Reduce heat to simmer and cook partially covered until thickened, about 10 minutes, stirring occasionally.
While sauce simmers, cook pasta in salted boiling water until cooked to al dente.
Stir cream into sauce, cook for 5 minutes, stir in the basil and remove from the heat. Drain pasta and toss it with the sauce. Serve immediately sprinkled with the cheese.
Serves 2
