Thursday, November 26, 2020

Marinated zucchini for exhausted people

Abobrinha marinada

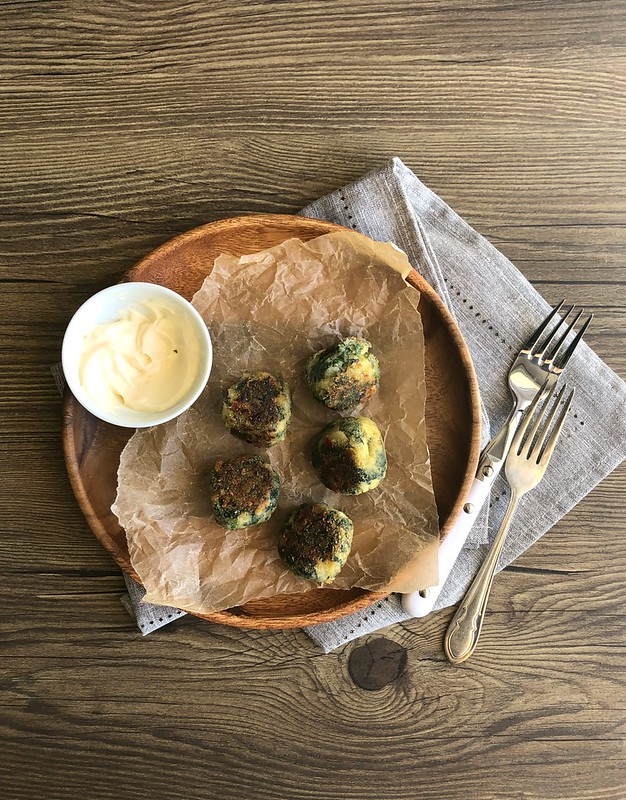
I have been super busy lately, it seems that whenever the end of the year is near everything starts to accumulate – I must confess that I cannot wait for the holidays, 2020 was so exhausting (mentally exhausting, especially) and I know you feel the same way. I cannot wait to turn off the computer, to stop cooking in a rush, to take naps after lunch. I just want to be lazy for a few days.

Speaking of lazy, the recipe I bring you today is very much so: quick to put together, lasts a long time in the fridge (and it tastes even better after a few days there), makes any cheese & wine dinner even better. 

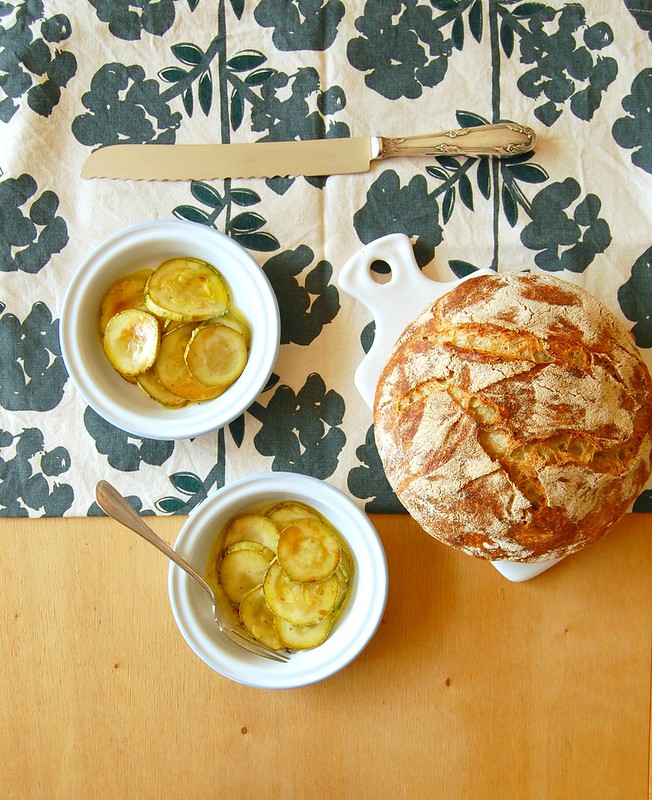
The bread you see on the photo is Jim Lahey’s no-knead bread, something I have been making once a week since quarantine started.


Marinated zucchini

slightly adapted from a Brazilian cookbook


4 medium zucchini

olive oil, for brushing

½ cup (120ml) extra virgin olive oil

4 garlic cloves, peeled and cut in half lengthwise

1/3 cup (80ml) white wine vinegar – I used sherry vinegar for it was all I had at home

salt and freshly ground black pepper

Cut the zucchini into 3mm coins.

Heat a large nonstick frying pan over medium heat. Brush the zucchini slices with the olive oil and cook for about 1 minute each side, or until they become slightly tender. Set aside.

In a small saucepan, heat the extra virgin olive oil in medium heat. Add the garlic and cook for 1 minute. Stir in the vinegar and remove from the heat. Cool completely. Season with salt and pepper.

In a shallow dish, make layers with the zucchini slices and the oil mixture, alternating them. Cover and refrigerate for 3 days – we finished the zucchini in 1 week after the first three days of preparation.

Serves 8

Monday, October 5, 2020

Banana hazelnut yogurt cake

Bolo de iogurte, banana e avelã

I hope you are not tired of the Epicurious yogurt cake, for I have made it again with different flavors, and the result was simply amazing! I love how versatile this cake recipe is, and how simple to put together it is – a bowl and whisk and you are good to go.

I wanted to make a banana cake, but different from the usual recipes, in which the banana is called for mashed. I thought of the delicious apple yogurt cake and decided to add the banana in diced form. To make the cake moister and more interesting, I replaced part of the all purpose flour for hazelnut flour and it was such a perfect combination of flavors! Please feel free to use other nut flours if you wish.

The cake turned out flavorsome, moist and tender - the baked banana pieces were lovely in the cake. The recipe immediately became a favorite and now it is tied with the apple cake as the most delicious version of the Epicurious yogurt cake I have made so far. :)


Banana hazelnut yogurt cake

adapted from the Epicurious recipe, once again


180g all-purpose flour

45g hazelnut flour (finely ground hazelnuts)

2 teaspoons baking powder

½ teaspoon ground cinnamon

¼ teaspoon table salt

180g granulated sugar

¾ cup (180g) plain yogurt – I used sheep’s milk yogurt

½ cup (120ml) vegetable oil – I used canola

2 large eggs, room temperature

1 tablespoon Frangelico

½ teaspoon vanilla extract

2 medium ripe bananas (120g each, weighed before peeling), peeled and diced in about ½-in pieces


Preheat oven to 180C/350°F. Lightly brush a 6-cup capacity loaf pan with oil, line it with baking paper and then brush the paper as well.

In a medium bowl, whisk together the all purpose flour, hazelnut flour, baking powder, cinnamon and salt. Set aside.

In a large bowl, whisk together sugar, yogurt, oil, eggs, vanilla and Frangelico until smooth. Fold in reserved dry ingredients – if batter is too lumpy, whisk for a few seconds – do not overmix or the cake will become tough. Stir in the bananas.

Pour the batter into prepared pan and smooth the top. Bake for 50-55 minutes, or until a skewer or toothpick inserted into center of the cake comes out clean.

Let cake cool in pan on a wire rack for 15 minutes. Carefully and using the paper as a guide, remove cake from pan and transfer to the rack to cool completely.

The cake can be stored in an airtight container at room temperature for up to 3 days.


Serves 8

Thursday, September 17, 2020

Pizza flavored whole wheat waffles and very different vacations

Waffles integrais sabor pizza

I was on vacation for most of July and it was very different from all the other previous vacations I ever took: in quarantine, I stayed home all the time. I had plans to go back to NYC this year, but unfortunately had to postpone the trip to god knows when due to the pandemic. On my vacation there was no travelling, no walking around the city, no nothing. I saw one movie a day, some TV shows, cooked a lot. I organized my books and my closet, took naps after lunch and rested.

In one of the afternoons watching movies I felt like nibbling on something, and there was freshly baked cake, but I really wanted something savory. I adapted my recipe for orange olive oil waffles to make it flavored like pizza, with cheese and dried oregano, and also added a bit of whole wheat flour to make the waffles more interesting and nuttier in flavor. The waffles turned out delicious, therefore I share the recipe with you today.


Pizza flavored whole wheat waffles

own recipe


100g all purpose flour

75g whole wheat flour

2 teaspoons baking powder

pinch of salt

2 teaspoons dried oregano

1 large egg, room temperature

¼ cup (60ml) extra virgin olive oil

¾ cup (180ml) whole milk, room temperature

1 cup (70g) coarsely grated yellow mozzarella*

2 tablespoons finely grated parmesan


In a medium bowl, whisk together the flours, baking powder, oregano and salt. Set aside.

In a small bowl, whisk together the egg, olive oil and milk. Pour over the dry ingredients and stir just until incorporated – do not overmix. Stir in the cheeses.

Heat a waffle iron until very hot; lightly coat with nonstick spray – my waffle maker is nonstick, so I do not coat it.

Working in batches, cook waffles until golden and cooked through. Transfer to a wire rack set inside a baking sheet and keep warm in oven until ready to serve.

* the yellow mozzarella I used is not like fresh mozzarella balls, therefore it does not release too much liquid. Replace by cheddar or something similar texture wise.

Makes 5-6 waffles


Monday, September 14, 2020

Chocolate yogurt cake for busy days

Bolo de iogurte e chocolate

The past few weeks have been quite busy and I haven’t had much time to bake or write on the blog – lots going on at work, and this never ending quarantine makes most of my days emotionally exhausting. 

I want, however, to share this recipe with you, for I am sure that sometimes a slice of cake and a cup of tea can make the day a little bit better: again, I have used the Epicurious yogurt cake recipe, but this time I turned it into a chocolate cake. Easy to make, moist, tender and delicious, this might become your go-to chocolate cake for busy days, just like it has become mine.

The apple yogurt cake continues to be my favorite version of the Epicurious recipe, but there are times when only chocolate will do, right? :)

Bolo de iogurte e chocolate

Chocolate yogurt cake

once again, adapted from the Epicurious yogurt cake


1 ¼ cups (175g) all-purpose flour

1/3 cup (30g) Dutch processed cocoa powder

2 teaspoons baking powder

½ teaspoon ground cinnamon

¼ teaspoon table salt

1 cup (200g) granulated sugar

¾ cup (180g) plain yogurt – I used sheep’s milk yogurt

½ cup (120ml) vegetable oil – I used canola

2 large eggs, room temperature

1 teaspoon vanilla extract


Preheat oven to 180C/350°F. Lightly brush a 6-cup capacity loaf pan with oil, line it with baking paper and then brush the paper as well.

In a medium bowl, whisk together the flour, cocoa, baking powder, cinnamon and salt. Set aside.

In a large bowl, whisk together sugar, yogurt, oil, eggs and vanilla until smooth. Fold in reserved dry ingredients – if batter is too lumpy, whisk for a few seconds – do not overmix or the cake will become tough.

Pour the batter into prepared pan and smooth the top. Bake for 50-55 minutes, or until a skewer or toothpick inserted into center of the cake comes out clean.

Let cake cool in pan on a wire rack for 15 minutes. Carefully and using the paper as a guide, remove cake from pan and transfer to the rack to cool completely.

The cake can be stored in an airtight container at room temperature for up to 3 days.


Serves 8


Thursday, September 3, 2020

Tangerine sour cream cake

Bolo de tangerina e creme azedo / Tangerine sour cream cake

After I started tweaking Epicuriou’s yogurt cake recipe for different cake flavors it took me a good while to make cake using butter again – every time I thought of it, I had to drop the idea for not having enough time for the butter to soften (I don’t have a microwave oven). 

The day came when I had to use up some heavy cream sitting on the fridge before it went bad, and ended up making a sour cream cake that called for butter. It turned out very tender, perfumed with tangerines – both zest and juice – and delicious. My husband loved the cake with the glaze on top. 

The cake is drenched in tangerine juice after being unmolded, which makes it wonderfully moist. Do try the recipe with oranges in case you don’t have tangerines around (the original recipe calls for lemon).

Bolo de tangerina e creme azedo / Tangerine sour cream cake

Tangerine sour cream cake

adapted from this recipe


Cake:

2 cups (280g) all-purpose flour

1 ½ teaspoons baking powder

¼ teaspoon table salt

1 ¼ cups (250g) granulated sugar

finely grated zest of 2 medium tangerines

180g unsalted butter, softened

3 large eggs, room temperature

½ teaspoon vanilla extract

2 teaspoons Cointreau - optional

1 cup sour cream*


To brush the cake:

3 tablespoons tangerine juice


Glaze:

½ cup (70g) icing sugar

2 tablespoons tangerine juice


Start with the cake: preheat the oven to 180°C/350°F. Butter and flour an 8-cup capacity Bundt pan.

In a medium bowl, whisk together flour, baking powder and salt. Set aside.

Place sugar and tangerine zest in the bowl of an electric mixer and rub them together with your fingertips until sugar is fragrant. Add the butter then beat until mixture is very light and fluffy – scrape the sides of the bowl with a rubber spatula several times throughout the making of the cake. Add the eggs, one at a time, beating well between each addition. Beat in the vanilla and Cointreau (if using).

On low speed, beat in the flour mixture in three additions, alternating with the sour cream in two additions. Beat until combined only – do not overmix.

Spoon into the prepared pan and smooth the top. Bake in the oven for 45-55 minutes or until golden and risen and a skewer inserted in the center of the cake comes out clean. Cool in the pan over a wire rack for 20 minutes, then carefully unmold onto the rack. Once cake is unmolded, brush it all over with the tangerine juice, until it is absorbed completely.

Make the glaze: gradually add the tangerine juice to the icing sugar, mixing until you get the desired consistency. Pour over the cooled cake.

*homemade sour cream: to make 1 cup of sour cream, mix 1 cup (240ml) heavy cream with 2-3 teaspoons lemon juice in a bowl. Whisk until it starts to thicken. Cover with plastic wrap and leave at room temperature for 1 hour or until thicker (I usually leave mine on the counter overnight – except on very warm nights – and it turns out thick and silky in the following morning; refrigerate for a creamier texture)

Serves 10-12

Monday, August 31, 2020

Roasted eggplant bacon pasta

Macarrão com berinjela assada e bacon / Roasted eggplant bacon pasta

Even though Joao and I are not vegans or vegetarians, most of our meals revolve around vegetables, and there are several occasions when we eat vegan or vegetarian lunches and dinners – it has been like this for many years now and it happened very naturally. We both love vegetables and I am always searching for new ways to prepare them.

I like pretty much all veggies except for sweet potatoes, and Joao does not like cauliflower, but he loved the cauliflower balls I made the other day. I guess it is just a matter of making vegetables interesting, instead of simply boiling them in water. Roasting is one of the cooking methods I use the most and it seems to make all vegetables delicious.

I still cook beef and chicken sometimes – once a week, tops – and I like to use a little bacon here and there, occasionally, for flavor, or to enhance a dish that is based on vegetables. This pasta has a very meaty texture because of the eggplant, and the bacon just makes it more interesting – the saltiness matches the roasted eggplant perfectly, and the tomato makes everything moist.

I made this recipe on a Saturday for lunch and we devoured it with some crusty bread – it is rather simple and does not call for many ingredients, but the result is very tasty.


Roasted eggplant bacon pasta

own recipe


1 medium eggplant (380g), diced in 2.5cm (1in) cubes

2 tablespoons extra virgin olive oil

salt and freshly ground black pepper

180g fusilli or other short pasta of your preference

4 slices of bacon

1 large garlic clove, minced

1 large ripe tomato, deseeded and finely diced

2 tablespoons dry white wine


Preheat the oven to 200°C/400°F. Line a large baking sheet with foil.

Place the eggplant on the foil, drizzle with the olive oil, season with salt and pepper and roast for 15 minutes. Toss the pieces around, carefully not to pierce the foil, then roast for another 15 minutes.

In the meantime, cook the pasta in a large saucepan of boiling salted water until al dente.

Heat a large nonstick frying pan over high heat and add the bacon, cooking until crispy and the fat is rendered. Add the garlic and cook for 1 minute – do not let it burn or it will turn bitter. Add the tomato, season with salt and pepper (go easy on the salt because of the bacon) and cook, stirring occasionally, until tomatoes release their juices, 2-3 minutes. Add the wine and cook for 1 minute. Add the roasted eggplants and stir well.

Drain the pasta, reserving ½ cup of the cooking liquid. Add the pasta to the sauce and cook for 1 minute – if sauce is too thick or dry, add some of the reserved pasta water and stir – I did not have any fresh herbs at home, but do add fresh basil if you have some at hand.

Serve immediately.

Serves 2

Friday, August 28, 2020

Apple yogurt cake

Bolo de iogurte e maçã

I have been in love with Epicurious’ yogurt cake ever since quarantine started: versatile and delicious, easy to make – no need to wait for the butter to soften when you feel like baking! I have made this recipe in several different ways and all turned out wonderful: marble cake, orange with chocolate sprinkles, lime with poppy seeds, Rangpur lime with coconut…

When I found two small apples in my fridge that had been forgotten there for weeks I immediately knew I wanted to make cake with them, and I did not think twice to decide on which recipe I would use. A little bit of cinnamon, the classic pairing with apples, and the cake perfumed the entire apartment. The cake turned out moist, very tender and absolutely delicious.

My heart belongs to citrus flavors, as you know, but this apple cake won me over – of all the versions I have made, it was the tastier. My husband, who definitely does not have a sweet tooth, saw the cake cooling on the counter and asked me for a slice, while it was still hot from the oven – he told me he could not resist the smell. At that moment I knew this recipe was a winner and a keeper.


Apple yogurt cake

slightly adapted from Epicurious, again


1 ½ cups (210g) all-purpose flour

2 teaspoons baking powder

¾ teaspoon ground cinnamon

¼ teaspoon table salt

1 cup (200g) granulated sugar

¾ cup (180g) plain yogurt – I used sheep’s milk yogurt

½ cup (120ml) vegetable oil – I used canola

2 large eggs, room temperature

1 teaspoon vanilla extract

2 small Gala apples (100g each, weighed before peeling and coring), peeled, cored and diced in 1cm pieces – I used two apples that had been completely forgotten in my fridge for weeks


Preheat oven to 180C/350°F. Lightly brush a 6-cup capacity loaf pan with oil, line it with baking paper and then brush the paper as well.

In a medium bowl, whisk together the flour, baking powder, cinnamon and salt. Set aside.

In a large bowl, whisk together sugar, yogurt, oil, eggs and vanilla until smooth. Fold in reserved dry ingredient – if batter is too lumpy, whisk for a few seconds – do not overmix or the cake will become tough. Stir in the apples.

Pour the batter into prepared pan and smooth the top. Bake for 50-55 minutes, or until a skewer or toothpick inserted into center of the cake comes out clean.

Let cake cool in pan on a wire rack for 15 minutes. Carefully and using the paper as a guide, remove cake from pan and transfer to the rack to cool completely.

The cake can be stored in an airtight container at room temperature for up to 3 days.


Serves 8

Wednesday, August 26, 2020

Anthill shortbread

Amanteigados formigueiros / Anthill shortbread

My nephew loves anthill cake and because of that last December I bought a large bag of chocolate sprinkles – he was visiting me every week and we would bake the cake together. It was a lot of fun.

The pandemic came, so did the need of social distancing and the anthill cakes became a thing of the past. Sometimes I see the huge jar of sprinkles in my cupboard and I miss those Saturdays with my nephew so, so much. I wanted to find a way to use up the sprinkles in other recipes, and decided to add them to cookie dough.

These shortbread cookies are simple, yet delicious: crunchy when you bite them, then they melt in your mouth. I baked the first log of dough at the same day I made the recipe, then froze the other log for some other time. Last Sunday my husband wanted something tasty to go with his espresso and we were out of cake; I turned the oven on and baked the other dough log – freshly baked cookies for the super cold day we were having. 

Amanteigados formigueiros / Anthill shortbread

Anthill shortbread

slightly adapted from Annie Bell’s brown sugar shortbread


200g unsalted butter, chilled and diced

50g light brown sugar

50g granulated sugar

300g all purpose flour

1/8 teaspoon table salt

6 tablespoons chocolate sprinkles

3 ½ tablespoons whole milk, cold


For sprinkling over the dough logs:

1 ½ tablespoons granulated or demerara sugar


Place butter and sugars in the bowl of an electric mixer and mix until mixture resembles coarse breadcrumbs – at this stage there will still have large pieces of butter. Add flour, salt and chocolate sprinkles and mix again until mixture is sandy. With the mixer on low, add the milk, gradually, just until a dough starts to form – you might not need to use all the milk.

Divide dough in half and place each onto a large piece of baking paper. Shape dough like a cylinder, using a ruler to help, as Martha does here. Refrigerate for 4 hours, or overnight.

Preheat the oven to 180°C/350°F. Line two large baking sheets with baking paper.

Unwrap one of the dough logs (keep the other in the fridge) and brush it lightly with water. Sprinkle with half the sugar, spreading it evenly. Slice the cylinder into 1cm-thick rounds. Place onto the prepared baking sheets 5cm (2in) apart and bake for 15-18 minutes or until golden around the edges. Remove from the oven and cool in the sheets over a wire rack for 5 minutes, then carefully slide the paper with the cookies onto the rack and cool completely. Repeat the process with the other log of dough and sugar.

Cookies can be kept in an airtight container at room temperature for up to 5 days. Dough can be frozen for up to 2 months.

Makes 40

Monday, August 24, 2020

Cauliflower balls and feeling nostalgic

Bolinhos de couve-flor / Cauliflower balls

I have been feeling nostalgic lately, thinking of my mom a lot. Some ingredients and foods remind me of her so much, it is impossible not to think of her and of some moments of my childhood. Cauliflower, for instance, is something that immediately takes me back to the past, it is as if I could almost hear my mom telling me “eat the little trees, my dear, for they are very good for you”. Cauliflower, to me, will always be “little trees”.

As much as I love these little trees, I’ll admit that sometimes they need a little push when it comes to flavor: cauliflower can be pretty bland depending on how it is prepared. It is not the case with these balls: they are delicious! Very flavorful, crunchy on the outside and tender on the inside.

I served these balls as part of a meal with rice, beans and cooked kale, but they would be wonderful to nibble on with a cold beer. By the way, I recommend adding a few drops of Tabasco to the balls when eating them – they taste even better.


Cauliflower balls

own recipe, inspired by these lentil patties


400g cauliflower, cut into florets – a little more than ½ small cauliflower

salt

½ small onion, finely diced

1 egg, room temperature

2 tablespoons finely chopped parsley leaves

½ tablespoon olive oil

¼ cup finely grated parmesan

¾ cup breadcrumbs – I used homemade

freshly ground black pepper


Place the cauliflower in a large saucepan and cover with water. Heat over high heat and when the water starts to boil, add a pinch of salt and cook until cauliflower is tender, about 10 minutes. Drain well, then refresh under cold water until cauliflower is cool. Drain again and chop finely. Transfer to a large bowl.

Preheat the oven to 200°C/400°F. Line a large baking sheet with foil, then brush with olive oil

Add all the remaining ingredients to the chopped cauliflower and mix well. Season with salt and pepper. With a handheld mixer, process half the mixture (use a food processor if you don’t have a mixer). Stir well, then shape small balls with your hands using 1 ½ leveled tablespoons per ball. Place the balls into the prepared pan leaving 2.5cm (1in) between them. Bake for 15 minutes, then carefully turn the balls. Bake for another 15 minutes and serve.

Makes about 22 – we ate half of the balls on the day I made them, and I froze the rest for some other time

Wednesday, August 19, 2020

Buttermilk pound cake - perfect with a cup of coffee (or tea)

Bolo de buttermilk, ou bolo de nada

Because of the recently acquired habit ofcoffee breaks at home, I have been searching for good cake recipes on my books and on the Internet – I no longer remember the last time I had stayed in my couch for hours bookmarking cake recipes: for a good while, my main focus was savory recipes only, with a cookie or a brownie recipe here and there for the people at the office.

I felt like having a slice of plain cake, simple, but with a tender texture. When I saw Sydney’s photos I knew I had to bake that buttermilk cake! It was exactly what I wanted, and the photos were mouthwatering. I immediately marched to the kitchen to remove the butter from the fridge.

Her recipe does not specify the size of the loaf pan, but I knew that mine would not fit a batter made with 3 cups of flour. I downsized the recipe slightly to make a smaller cake and loved the result. My husband told me that the sugary crust was the best part of the cake, while to me it was the very tender middle part.

I used Frangelico to perfume the cake – I love using booze in recipes – but go for vanilla extract if you don’t want to use alcohol (Sydney does not use anything in her cake). I have been thinking of making this cake again, adding orange zest and Cointreau in the batter – yum!

Bolo de buttermilk, ou bolo de nada

Buttermilk pound cake

slightly adapted from this lovely blog


2 cups (280g) all-purpose flour

1 ½ teaspoons baking powder

¼ teaspoon table salt

2/3 cup (150g) unsalted butter, room temperature

1 cup (200g) granulated sugar

2 large eggs, room temperature

1 ½ tablespoons Frangelico – optional; Amaretto would be delicious as well. If not using liquor, replace with 1 ½ teaspoons vanilla extract

½ cup (120ml) buttermilk*


For sprinkling over the cake:

1 tablespoon granulated or demerara sugar


Preheat your oven to 180°C/350°F. Butter a 6-cup capacity loaf pan, line it with baking paper leaving an overhang on the two larger sides, and then butter the paper as well.

In a medium bowl, whisk together the flour, baking powder and salt. Set aside.

Beat together butter and sugar until light and fluffy, at least 4-5 minutes – the more you beat these ingredients together the better the texture of your cake will be.

Beat in the eggs, one at a time, beating each in until adding the next, scraping down the sides of the bowl several times during the making of the entire recipe. Beat in the Frangelico (if using).

In low speed, add the flour mixture in three additions, alternating with the buttermilk in two additions (start and finish with the dry ingredients). Mix until incorporated, but do not overmix.

Transfer batter to the prepared pan and smooth the top. Sprinkle with the sugar and bake for 50-60 minutes, or until golden and risen and until a toothpick comes out clean.

Cool in the pan over a wire rack for 30 minutes, then carefully lift the cake using the paper and transfer to the rack to cool completely.

Cake can be kept in an airtight container for up to 5 days, but I thought that it started to dry out slightly after day 3 (we ate it anyway). :D 

* buttermilk is not sold in Brazil, so I made a homemade version using whole milk and lime juice


Serves 8-10 slices

Monday, August 17, 2020

Spinach and mozzarella risotto - lunch on the table despite a bare fridge

Risoto de espinafre e mozarela / Spinach and mozzarella risotto

A while ago I made a risotto with severaldifferent veggies, using pretty much all there was in my crisper drawer – it turned out delicious and full of good-for-you stuff. This time, it was the complete opposite: the fridge was almost bare, so I reached out to the freezer and made a risotto using frozen spinach, throwing in some cheese to make it better. I never use garlic in risottos, but this time I added a small clove since garlic and spinach are so great together.

I was actually surprised with how good the risotto tasted! Joao is not fond of risotto and this time he had seconds – I was impressed, because that never happens. I always have frozen spinach in my freezer because I use it a lot in soups – like this one – but in a risotto was the first time. I was happy with the results and even happier to have lunch on the table in about half an hour – that is great on the days we clean the apartment. :D

Spinach and mozzarella risotto

own recipe


3 tablespoons unsalted butter

½ tablespoon olive oil

1/3 cup finely diced celery

½ small onion, finely diced

1 small garlic clove, minced

¾ cup (165g) Arborio or Carnaroli rice

¼ cup (60ml) dry white wine

salt and freshly ground black pepper

100g frozen spinach, thawed

3 cups (720ml) vegetable stock

1 cup (70g) coarsely grated yellow mozzarella*

2 tablespoons coarsely grated parmesan

In a medium saucepan, melt half the butter and olive oil. Add the celery and onion and cook, stirring occasionally, until tender, 3-4 minutes. Add the garlic and cook for 1 minute – do not let it burn or it will turn bitter. Add the rice and cook for about 2 minutes, to coat all the rice grains with fat. Add the wine and cook until it evaporates. Season with salt and pepper. Stir in the spinach. Start adding the stock, 1 ladle at a time, then stirring constantly so the rice releases its starch.

Repeat this until all the stock has been used, the rice is al dente and the risotto is thick and glossy – about 20 minutes. Stir in the remaining butter and the cheese. Check the seasoning, adjust if necessary, cover the pan and wait 5 minutes. Serve immediately.

* the yellow mozzarella I used is not like fresh mozzarella balls, therefore it does not release too much liquid. Replace by cheddar or something similar texture wise.

Serves 2 


Thursday, August 13, 2020

Potato, pea and cheese croquettes for Nana

Croquetes de batata, ervilha e queijo

Food is a synonym of love and comfort in many moments of our lives. Days ago I was thinking about my grandmother, who is now 95 years old and no longer remembers people or things. I kept the thought to myself and continued my day. 

On the following day I received a message from one of my cousins saying that she had played my Instagram stories for grandma, and that she recognized me from the videos, saying that I looked just like my mom, but only on the outside, because on the inside I was just like her, grandma, and that we were too intense and that made us go through life with a lot of suffering. I cried so much on that day, because she remembered both me and my mom, and also because yes, we pretend to be strong, Nana, but we suffer, and we feel lonely, and we cry.

After that I went to the kitchen and cooked food that reminded me of Nana: croquettes – every time she made these for lunch I was a happy kid. She used to make croquettes using leftover minced beef (already cooked) or leftover pot roast, but I decided to make a vegetarian version, and baked the croquettes instead of frying. The dough is very soft, so be careful when turning the croquettes on the baking sheet – and feel free to fry them if you wish.


Potato, pea and cheese croquettes

own recipe


2 medium potatoes (300g/10oz weighed before peeling), peeled and cu tinto quarters

salt

1 tablespoon unsalted butter

¼ cup frozen peas, thawed

¾ cup (50g) yellow mozzarella, coarsely grated*

freshly ground black pepper


For coating the croquettes:

1 egg + 2 teaspoons cold water, beaten with a fork and seasoned with a pinch of salt and a pinch of pepper

2/3 cup dried breadcrumbs, seasoned with a pinch of salt and a pinch of pepper


Place the potatoes on a small saucepan, cover with cold water, add a pinch of salt and then cook over high heat until potatoes are tender – just like you would do for mashed potatoes. Drain and mash them, using a ricer if possible. Add the butter, peas and the cheese, season with salt and pepper and mix well. Using 2 leveled tablespoons of dough at a time, shape the dough into croquettes and transfer to a plate. Refrigerate for 40 minutes so they are firmer.

In the meantime, preheat the oven to 200°C/400°F. Line a medium baking sheet with foil and brush it well with olive oil – very important step, since the melted cheese might stick to the foil.

Roll the croquettes in the egg mixture, them in the breadcrumbs, and place them 2.5cm (1in) apart in the prepared sheet. Bake for 20 minutes, carefully turn the croquettes and then bake for another 20 minutes. Serve immediately.

* the yellow mozzarella I used is not like fresh mozzarella balls, therefore it does not release too much liquid. Replace by cheddar or something similar texture wise.

Makes about 12 croquettes


Monday, August 10, 2020

Anthill banana cake and something new in our house

Bolo formigueiro de banana

These are insane times we are living in – and in Brazil, for more reasons than the pandemic only – and many things are changed. However, I’ll tell you about something small, but important to me: my husband has discovered the joy of having a slice of cake in the middle of the afternoon. He was never fond of sweets and never tried my baked goods or desserts, but nowadays he asks me to bake a cake, or cookies, so he can take a break between lunch and dinner and enjoy something sweet with his espresso.

It might seem silly, but for me it was a very nice surprise, in these crazy days. 

Therefore, I have been baking once a week, a cake or sometimes cookies, and he looks at me with those Puss in Boots’ eyes asking if he can have something delicious with his coffee. :) My heart is filled with joy.

One of the cakes I baked recently was the one I bring you today, a banana cake with chocolate sprinkles as the Brazilian anthill cake. I had to adapt the recipe to yield a small cake since I had only 1 ripe banana at home. The cake turned out moist, tender and perfumed the entire apartment while it was in the oven. 

Bolo formigueiro de banana

Anthill banana cake

adapted from this recipe


1 large very ripe banana (150g/5oz weighed before peeling)

2 eggs, room temperature

65g light brown sugar

100ml vegetable oil – I used canola

1 teaspoon vanilla extract

185g all purpose flour

1 ¾ teaspoons baking poder

½ teaspoon ground cinnamon

pinch of salt

3 tablespoons chocolate sprinkles


Preheat the oven to 180°C/350°F. Lightly brush with vegetable oil a small loaf pan - 22x10cm, 4 ½ cups capacity – line it with baking paper and brush the paper as well.

In a medium bowl, mash the banana with a fork. Add the eggs, sugar, oil and vanilla and whisk well. Add the flour, baking powder, cinnamon and salt and fold with a spatula – do not overmix or the cake will turn out tough. Stir in the chocolate sprinkles. Pour into the prepared pan and smooth the top. Bake for about 40 minutes or until golden and risen and a skewer inserted in the center of the cake comes out clean.

Cool in the pan over a wire rack for 20 minutes, then carefully unmold using the paper as guide. Transfer to the rack and cool completely.

Serves 6-7 slices

Wednesday, August 5, 2020

Stuffed eggplants with tomato and cheese

Barquinhas de berinjela com tomate e queijo

Days ago I asked my Instagram followers what they like to see on the blog the most, the recipes they immediately feel like making in their homes when I post: cakes and cookies were the champions, followed by brownies and bread. Some followers told me they love my savory recipes, to vary the daily meals, and soups were also mentioned. 

I must confess that I love baking and photographing (and eating!) cakes and cookies, but one cannot live on these alone, especially now that I am no longer exercising daily as I used to. Therefore, I will continue posting the sweet recipes my Brazilian followers love so much, but will focus on the savory ones, like these stuffed eggplants I bring you today: they are delicious! A vegetarian meal full of flavor and that looks beautiful on the plate. 

I would also love to hear what you, my foreign readers, like to see around here the most – please share with me your thoughts. Thanks. xx

Barquinhas de berinjela com tomate e queijo

Stuffed eggplants with tomato and cheese

own recipe


Eggplant “boats”:

2 large eggplants (about 350g/12oz each)

2 teaspoons olive oil 


Filling:

2 tablespoons olive oil

1 small onion, finely chopped

2 garlic cloves, minced

2 ripe tomatoes, seeded, in small dice

sal and freshly ground black pepper

2 teaspoons dried oregano

a few fresh basil leaves

2 cups (140g) coarsely grated yellow mozzarella* - set aside 3 tablespoons to sprinkle over the dish

8 large black olives, pitted and finely chopped

Preheat the oven to 200°C/400°C. Line a large baking sheet with foil.

Cut the eggplants lengthwise, making little “boats” with them, and then make crisscross cuts on the flesh, but be careful not to pierce the skins. Brush the cut side with the olive oil and place it upside down, facing the foil. Bake for 30 minutes.

In the meantime, start the filling: heat the olive oil in a large frying pan (nonstick is better) over medium-high heat. Add the onion and cook, stirring occasionally, until translucent. Add the garlic and cook for 1 minute – do not let it burn or it will become bitter. Add the tomatoes, season with salt and pepper and cook, stirring occasionally, until the tomatoes start to break down. Add the oregano and cook for 2 more minutes. Stir in the basil and turn off the heat.

Remove the eggplants from the oven (keep it on), and very carefully not to get burned, using a spoon remove the flesh from the eggplants, but not too deep so the “boats” stay intact. Add the flesh to the cooked filling, stir in the cheese (do not forget to set aside 3 tablespoons for topping the dish) and the olives. Stuff the eggplant shells with the filling, sprinkle with the remaining cheese and place them back on the baking sheet. Bake for another 25 minutes. Serve immediately.

* the yellow mozzarella I used is not like fresh mozzarella balls, therefore it does not release too much liquid. Replace by cheddar or something similar texture wise.

Serves 4 – I served my stuffed eggplants with rice and a green salad on the side, so 1 “boat” (1/2 eggplant) was enough per person; if you intend to serve this as a single dish, I believe 2 “boats” (1 eggplant) per person should be enough

Friday, July 10, 2020

Butter chicken

Frango ensopado à moda indiana / Butter chicken

For years now I have been reducing the amount of beef and chicken we eat and we are very fine with it: I use vegetables in many different ways, and they always taste amazing. However, sometimes both Joao and I feel like eating chicken – maybe every 10 days or so? – but my precious little husband does not like chicken cooked in sauces, or “wet chicken” as he says. :S

I, on the other hand, love me some “wet chicken”, so I decided to make butter chicken – first time ever – and just told him I would bake some meatballs for him. When I was making lunch and he smelled the food he changed his mind and told me he would eat the chicken. Not only that happened, but he asked me to make this chicken again twice more. He was surprised of how tender and flavorful the chicken was, and the sauce was thick and delicious, not watery at all – the power of yogurt and spices… :)

Butter chicken
slightly adapted from Good Food magazine

For marinating the chicken:
½ cup (130g) natural yogurt – I was once short on yogurt and used part yogurt, part homemade buttermilk (whole milk + lime juice)
juice of ½ lime
1 teaspoon ground cumin
1 teaspoon sweet paprika
¼ teaspoon cayenne pepper
salt and freshly ground black pepper
350g skinless boneless chicken breast, in bite-sized pieces

For the curry:
1 tablespoons vegetable oil – I use canola
½ large onion, finely diced
2 garlic cloves, minced
1 tablespoon grated fresh ginger
2 teaspoons garam masala*
2 tablespoons tomato paste
1 cup (240ml) boiling water
1 bay leaf
2 tablespoons fresh cilantro leaves, chopped
2 tablespoons flaked almonds, toasted

In a medium bowl, mix the yogurt, lime juice, spices, salt and pepper and mix well. Add the chicken, mix to combine, cover and chill in the fridge for 1 hour or overnight – I have made this recipe three times and marinated the chicken for 3 hours.

Heat the oil in a medium saucepan over medium-high heat. Add the onion, garlic and ginger and cook for 5-6 minutes or until soft.
Add the spices with the tomato purée, cook for a further 2 minutes, then add the water, the bay leaf and the chicken, with the marinade. Cook over low heat for 15-20 minutes, stirring occasionally, until chicken is cooked through and sauce is thickened. Stir through the cilantro.
Serve immediately sprinkled with the almonds.

* instead of garam masala, I used a mix of spices called “vindaloo” that has cinnamon, cardamom, cilantro, cumin, cloves, turmeric, fenugreek, ginger, mustard seeds, black pepper and red pepper flakes. If you want to follow the original recipe, use 1 teaspoon garam masala + 1 teaspoon fenugreek

Serves 2

Thursday, July 2, 2020

Chocolate chip cookies with oats

Cookies com pedaços de chocolate e aveia / Chocolate chip cookies with oats

I made these cookies last week and the inspiration was something very simple: while I was grabbing a can of chickpeas in the cupboard to make a soup, I saw the jar of oats right next to it, and thought that I hadn’t baked cookies in a very long time. Some more searching through the bags, jars and cans and I found some very good dark chocolate begging to be used.

It is a simple cookie but the bitterness of the chocolate really makes it. There is not a lot of oats in the recipe, but I do feel virtuous eating my cookies and thinking that they have a little bit of goodness in them, from the oats and from the chocolate. These days, isolated and feeling blue, thinking positive is one of the things I try to do the most.

Chocolate chip cookies with oats
slightly adapted from Donna Hay

1 ½ cups (210g) all purpose flour
½ cup (44g) rolled oats
½ teaspoon baking powder
¼ teaspoon table salt
¼ teaspoon ground cinnamon
2/3 cup (150g) unsalted butter, softened
½ cup (100g) granulated sugar
2/3 cup (116g) light brown sugar, packed
1 large egg, room temperature
2 teaspoons vanilla extract
200g dark chocolate, chopped – I used one with 70% cocoa solids

Preheat oven to 180°C (350°F). Line two large baking sheets with baking paper.
In a medium bowl, whisk together the flour, oats, baking powder, salt and cinnamon. Set aside.
Place the butter, sugars and vanilla in the bowl of an electric mixer and beat until light and creamy – scrape the sides of the bowl occasionally throughout the making of the recipe. Add the egg and beat until well combined. Add the dry ingredients and mix on low speed just until incorporated and a dough forms. Fold through the chocolate pieces.

Roll 2 leveled tablespoons of dough per cookie into balls and place onto prepared sheets, 5cm (2in) apart. Bake for about 14 minutes or until cookies are golden around the edges. Cool on the sheets for 5 minutes, then slide the paper with the cookies onto a wire rack to cool completely.

Makes about 28 cookies

Monday, June 22, 2020

Anthill orange yogurt cake

Bolo formigueiro de laranja e iogurte

Those of you who follow the news about Brazil probably know that the situation here is completely chaotic: not only we have to deal with a virus, we also have to deal with a psychopath in the presidency of the country. It has not been easy to keep sane.

I have found solace in the kitchen, cooking and baking, trying to make my days a little bit lighter and happier. I made this cake last week, using again the Epicurious’ yogurt cake as base and it turned out amazing: super tender, perfumed with orange, delicious. I added chocolate sprinkles in order to turn the cake into an anthill cake, a popular cake in Brazil.

I hope you like the recipe much as I did.

Anthill orange yogurt cake
slightly adapted from Epicurious

1 ½ cups (210g) all-purpose flour
2 teaspoons baking powder
¼ teaspoon table salt
1 cup (200g) granulated sugar
finely grated zest of 1 large orange
¾ cup (180g) plain yogurt – I used sheep’s milk yogurt
½ cup (120ml) vegetable oil – I used canola
2 large eggs, room temperature
1 teaspoon vanilla extract
3 tablespoons chocolate sprinkles

Preheat oven to 180C/350°F. Lightly brush a 6-cup capacity loaf pan with oil, line it with baking paper and then brush the paper as well.
In a medium bowl, whisk together the flour, baking powder and salt. Set aside.
In a large bowl, whisk together the sugar and orange zest and rub together with your fingertips until sugar is fragrant. Add yogurt, oil, eggs and vanilla and whisk until smooth. Fold in reserved dry ingredients, keeping 1 tablespoon reserved, just to blend – if batter is too lumpy, whisk for a few seconds. Stir the chocolate sprinkles into the reserved flour mixture, then fold everything into the batter.
Pour the batter into prepared pan and smooth the top. Bake for 50-55 minutes, or until a skewer or toothpick inserted into center of the cake comes out clean.
Let cake cool in pan on a wire rack for 15 minutes. Carefully and using the paper as a guide, remove cake from pan and transfer to the rack to cool completely.

The cake can be stored in an airtight container at room temperature for up to 3 days.

Serves 8

Thursday, June 11, 2020

Ratatouille calzones

Calzones de ratatouille / Ratatouille calzones

Last week I told Joao that for the weekend I wanted to make something different for lunch: I was not in the mood for pasta or for the good old rice and beans combo, and I definitely wanted to try my hands at a new recipe.

Going through the vegetables in my fridge I found one eggplant, one zucchini, a couple of carrots and that was it: not much to choose from. So I kept the carrots for some other time and used the eggplant and the zucchini to make a sort of ratatouille, adding tomato paste and olive to make the mixture more interesting. Mixed with cheese it became the filling for these calzones and I bring you this recipe with a very proud smile: the calzones turned out so good!

Apparently going through the crisper drawer might be a good creative exercise. :D

The recipe yields 8 large calzones, which is too much for the both of us for one meal, so I froze the remaining calzones and we ate them for dinner yesterday. If you want to do the same, just wait for the calzones to cool completely, wrap in foil and place them in a plastic bag, sealing well. Once the calzones are thawed, 10 minutes in a hot oven are enough to make them delicious again.

Calzones de ratatouille / Ratatouille calzones

Ratatouille calzones
own recipe

Dough:
2 teaspoons dried yeast
½ teaspoon granulated sugar
1 ¼ cups (300ml) lukewarm water
2 tablespoons extra-virgin olive oil
3 cups (420g) all purpose flour
1 ¼ teaspoons table salt

Filling:
1 ½ tablespoons olive oil
½ small onion, finely diced
1 large garlic clove, minced
1 medium zucchini (240g), in 1cm-cubes
1 medium eggplant (300g), in 1cm-cubes
1 bay leaf
salt and freshly ground black pepper
½ tablespoon tomato paste
1 tablespoon dry white wine
10 large black olives, pitted and finely chopped
1 ½ cups (150g) coarsely grated yellow mozzarella*
3 tablespoons coarsely grated parmesan
2 teaspoons dried oregano

After assembling the calzones:
olive oil, for brushing
finely grated parmesan, for sprinkling over the calzones

Start with the dough: in the bowl of an electric mixer fitted with the dough hook, mix the yeast, sugar and water with a fork. Set aside until foamy, about 5 minutes. Add the olive oil, flour and salt and mix for 6-8 minutes or until a soft and elastic dough forms. Shape dough into a ball and transfer to a lightly oiled bowl. Cover with plastic wrap and set aside to proof in a warm place for about 1 hour or until doubled in size – mine proved for 90 minutes.

In the meantime, make the filling: heat a large nonstick frying pan over medium heat. Add the onion and cook stirring occasionally until tender and translucent. Add the garlic and cook for 1 minute or until fragrant – do not let it burn or it will get bitter. Stir in zucchini, eggplant and bay leaf, season with salt and pepper. Cook for 5-7 minutes or until vegetables are softer. Stir in the tomato paste and cook for 2 minutes – it is important to cook it thoroughly to avoid the raw tomato aftertaste. Add the wine and cook for 1 minute, then stir in the olives. Remove from the heat, cool completely, discard the bay leaf and then stir in the cheeses and the oregano.

Preheat the oven to 420°F/220°C. Have ready two large baking sheets.
Divide the dough into 8 equal parts – each will be around 100g (3 ½ oz.). Roll out each portion of dough on a lightly floured surface until you get a rough 25cm (10in) circle. Place about ½ cup of the filling on one side of the dough and fold the other half over, pinching the seams well to keep the filling inside – since vegetables can vary in size, if you have a scale weigh the filling and divide it equally in 8 portions. Repeat the process with the remaining dough and filling. Place the calzones onto the sheets and brush them with the olive oil and sprinkle with the parmesan. Bake for about 20 minutes or until golden. Serve immediately.

* the yellow mozzarella I used is not like fresh mozzarella balls, therefore it does not release too much liquid. Replace by cheddar or something similar texture wise.

Makes 8

Monday, June 8, 2020

Lime olive oil pound cake

Bolo de azeite e limão / Lime olive oil pound cake

During this isolation period, I have not made too many sweets: my husband is not into them very much and I don’t want to end up eating it all myself. I do search for some chocolate when anxiety comes hard on me, I must confess, but having to deal with an entire cake before it goes stale might be tricky.

So in almost 3 months at home I have baked 3 cakes so far, one being the yogurt marble cake I shared with you weeks ago. I felt like baking another cake last week, but didn’t have time to wait for the butter to soften (and I don’t have a microwave oven to speed up the process). So I made Alice Medrich’s pound cake with olive oil and it was not only easy to put together but it turned out tender and delicious. I could have used sherry, as the original recipe calls for, but I wanted a recipe that more people could make during these times, so I adapted it a little bit and replaced the booze with milk. A little lime zest and a pinch of nutmeg made it all even better.

Lime olive oil pound cake
adapted from the sherry and olive oil pound cake on this book

2 cups (280g) all purpose flour
1 ¼ teaspoons baking powder
1/8 teaspoon freshly ground nutmeg
1/8 teaspoon salt
½ cup + 2 tablespoons (125g) sugar
finely grated zest of 2 limes
150ml flavorful extra virgin olive oil
3 cold eggs
½ teaspoon vanilla extract
150ml whole milk, room temperature

Preheat the oven to 180°C/350°F. Butter and flour an 8-cup capacity Bundt pan.
In a medium bowl, whisk the flour, baking powder, nutmeg and salt. Set aside.

In the bowl of an electric mixer fitted with the whisk attachment, combine sugar and lime zest and rub with your fingertips until sugar is fragrant. Add the oil and beat until well blended. Add the eggs one at a time, beating well after each addition. Continue to beat until the mixture is thick and pale, 3-5 minutes. Beat in the vanilla. Stop the mixer and add 1/3 of the flour mixture. Beat on low speed just until blended. Stop the mixer and add ½ of the milk, then beat just until it is blended. Repeat with another third of the flour, followed by the remaining milk, and then the remaining flour.

Scrape the batter into the pan and smooth the top. Bake until a cake tester comes out clean, about 50 minutes. Cool the cake in the pan on a rack for about 20 minutes. Invert the cake onto the rack and cool completely.

Serves 8-10

Thursday, May 28, 2020

Pea and Japanese pumpkin soup

Sopa de abóbora e ervilha / Pea and Japanese pumpkin soup

Do you ever get tired of your own food?

That has not happened to me yet – not only during the pandemic, because before that I already took my own food for lunch at the office – but I must confess that there are days that I eat and think “it could have been better”, or “this does not go with that”.

Cooking with whatever we have at hand can yield good surprises, like the risotto I posted the other day, but it can go terribly wrong, too, like when I made rice and beans - the staple of Brazilian food - with pumpkin and carrots cooked together (because I didn’t have much of each) and a radish salad on the side: I felt that the salad did not agree with the other components, maybe because it was a cold day, maybe because the radishes were too peppery… I usually roast pumpkin because it tastes so much better that way, but I was baking bread and could not use the oven. The whole meal was not bad, but it lacked something… There was no “yum” factor. I filed that lunch under “I tried, but it didn’t work”. :)

But now I will talk about something good: there was also the day I made a soup using some of that same Japanese pumpkin, 1 lonely potato and frozen peas. It turned out delicious and with a beautiful, vibrant, almost fluorescent color.
Since both the pumpkin and the peas are sweet, the acidity of the lime (or lemon) juice and the saltiness of the bacon balance the sweetness perfectly.

Pea and Japanese pumpkin soup
own recipe

2 slices of bacon, chopped
½ tablespoon olive oil
½ large onion, finely diced
2 large garlic cloves, minced
2 tablespoons dry white wine
1 medium potato (150g), peeled and diced
200g peeled and diced Japanese pumpkin (about 1 2/3 cups already diced in 2cm cubes)
salt and freshly ground black pepper
3 ½ cups (840ml) boiling water
1 bay leaf
2 ½ cups (325g) frozen peas, straight from the freezer
juice of ½ lime (or lemon)

Heat a large saucepan over medium-high heat. Add the bacon and cook, stirring occasionally, until crisp – remove from the pan with a slotted spoon and set aside. Add the olive oil to the pan and mix with the rendered fat. Add the onion and cook, stirring occasionally, until tender and starting to brown. Add the garlic and cook for 1 minute – do not let it burn or it will turn bitter.
Add wine and scrape the bottom of the pan, cooking until wine has evaporated. Add potato and pumpkin, stir to combine and season with salt and pepper. Add the water and the bay leaf, stir, and let it come to a boil. Turn down the heat and simmer for 15-17 minutes or until vegetables are tender. Add the peas and cook for 5 minutes. Remove from the heat, discard the bay leaf and blitz with a handheld mixer.
Stir in the lime juice and serve topped with the crunchy bits of bacon.

Serves 4 as a starter or 2 as an entrée


Tuesday, May 26, 2020

Spinach and cheese “meatballs”

Bolinhos de espinafre e queijo

Who follows me on Instagram has seen some of my lunch dishes: it is usually simple food, quick to put together, so I can make it and eat in on my lunch break. Rice and beans I keep ready at the fridge, so it is just a matter of roasting some vegetables, making a salad or an omelet, or getting meatballs from the fridge straight to the oven. All very quick.

But when I have a little more time, or when I get organized enough on the previous night, I like to make new recipes, food that takes a little bit longer in the kitchen, like these delicious spinach “meatballs”: I had some spinach in the fridge and wanted to use it in something different – on a busy day I would simple stir-fry it with olive oil, garlic and a pinch of nutmeg for a tasty side dish, but since I had a bit of extra time I went to my good old sources for recipes online (Donna Hay, Jamie Oliver, Gourmet Traveller, both Australian and UK Delicious magazines) and it was on the Guardian that I found something interesting. I adapted the recipe slightly and got truly delicious spinach cakes – I am calling them meatballs because I decided to roll them into balls.

I am sure these meatballs would be delicious baked, but since my oven was already full with something else I just grilled them quickly in a nonstick frying pan with a little bit of olive oil. If you decide to bake them, line the baking sheet with foil and brush it with olive oil, because the amount of cheese in these cakes will make them stick on the sheet.

Too bad the recipe does not yield much – the meatballs were gone in no time at all. :D

Spinach and cheese “meatballs”
adapted from Hugh Fearnley-Whittingstall's savory spinach cakes recipe

"Meatballs":
4 cups (260g) fresh spinach, tough stalks removed, leaves washed, packed
1 ½ tablespoons olive oil
½ medium onion, finely chopped
1 large garlic clove, minced
½ cup coarsely grated yellow mozzarella – cheddar should make a fine substitute, or even Monterey Jack
2 tablespoons finely grated parmesan
1 tablespoon cream cheese
2 tablespoons breadcrumbs
¼ teaspoon freshly grated nutmeg
1 egg, lightly beaten – the egg I used was a small one, 50g; I buy organic eggs and sizes vary
salt and freshly ground black pepper

For frying the balls:
2 tablespoons breadcrumbs
1 tablespoon olive oil

In a large nonstick frying pan over high heat, cook the spinach in two batches, stirring until wilted. Transfer to a colander. Once cool enough to handle, squeeze very well with your hands, then chop. Set aside to cool completely.
Using the same frying pan, heat the olive oil over medium-high heat. Add the onion and cook for 3-4 minutes, stirring occasionally, until translucent. Add the garlic and cook for 1 minute – don’t overcook or the garlic will turn bitter. Remove from the heat and let it cool completely.

Transfer spinach, onion and garlic mixture, cheeses, cream cheese, breadcrumbs and nutmeg to a medium bowl. Stir in the egg and season with salt and pepper. With damp hands, roll 1 ½ tablespoons of the mixture into balls, pressing slightly to compact the mixture. Transfer to a place and refrigerate for 30 minutes.

Before frying the meatballs, roll them into the breadcrumbs. Heat the olive oil in the same frying pan used before over medium-high heat and fry the balls, turning two or three times to evenly brown them – be careful because they are very soft. Serve immediately.

Makes 10-11 cakes

Tuesday, May 19, 2020

Carrot and kale risotto with roasted radishes, or “everything-but-the-kitchen-sink-risotto”

Risoto de cenoura e couve com rabanetes assados

Saturday morning, feeling super lazy after cleaning the apartment, all I really wanted was to take a shower, open a bottle of wine and lay on my couch. But we gotta eat, right? After cleaning the apartment and doing the laundry Joao and I get pretty hungry – never fails. :D I was not feeling very creative or inspired to cook, to be honest with you: I could have made burgers, but had forgotten to defrost the beef. I did not feel like eating pasta. So I opened the fridge and grabbed everything in front of me: carrots, leeks, radishes. Oh, there were also some kale leaves already washed, so I just gathered everything and decided to use them up in a risotto.

It is a carrot and kale risotto with roasted radishes, a.k.a. “everything-but-the-kitchen-sink-risotto”. :)

As I did not have any vegetable stock at hand, I used leeks and onion to enhance the risotto flavor and boiled 1 bay leaf in the water I used to replace the stock. It worked like a charm! The risotto turned out really good, guys – sorry for not being modest at all. :D
In the end, the roasted radishes did not go so well with the rest of the dish: I wanted to add a different texture to the meal, but the risotto worked very well without the radishes. I bring you the recipe anyway, in case you want to serve the radishes in a different meal, with a different dish.

Carrot and kale risotto with roasted radishes
own recipe

Radishes:
5 small radishes (100g in total), sliced in half lengthwise; if radishes are large, cut them in 3 or 4 pieces
2 teaspoons olive oil
salt and freshly ground black pepper

Risotto:
3 cups (720ml) water
1 bay leaf
3 tablespoons unsalted butter
½ tablespoon olive oil
1 small and thin leek, only the light green part, thinly sliced
½ small onion, finely diced
¾ cup (165g) Arborio or Carnaroli rice
¼ cup (60ml) dry white wine
salt and freshly ground black pepper
2 small carrots (160g in total, weighed before peeling), coarsely grated
2 kale leaves, without the central stalk, torn into small pieces
¼ xícara (35g) coarsely grated parmesan

Preheat the oven to 200°C. Line a small baking sheet with foil. Transfer the radishes to the foil, drizzle with the olive oil and season with salt and pepper. Stir to coat, spread on the sheet leaving some space between the radishes and roast for 30 minutes, turning at half the oven time. Remove from the oven and set aside.

In the meantime, make the risotto: place the water and the bay leaf in a small saucepan over high heat until it boils. Keep it simmering. In a medium saucepan, melt half the butter and olive oil. Add leek and onion and cook, stirring occasionally, until tender, 3-4 minutes. Add the rice and cook for 2-3 minutes, to coat all the rice grains with fat. Add the wine and cook until it evaporates. Season with salt and pepper. Stir in the carrots. Start adding the water, 1 ladle at a time, then stirring constantly so the rice releases its starch.
Repeat this until all the water has been used, the rice is al dente and the risotto is thick and glossy – about 20 minutes. Stir in the kale, the remaining butter and the parmesan. Check the seasoning, adjust if necessary, cover the pan and wait 5 minutes. Transfer risotto to serving plates, arrange the radishes on top and serve immediately.

Serves 2 generously, or 3 lighter servings

Related Posts with Thumbnails