Friday, May 29, 2009

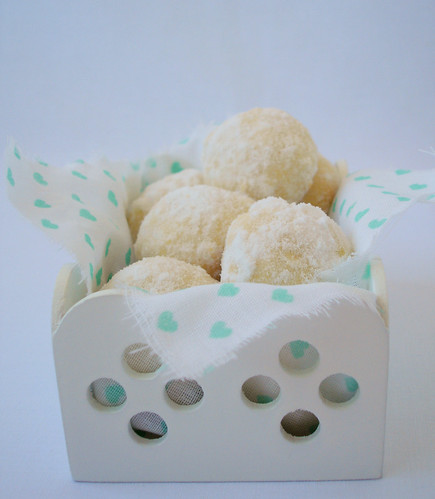
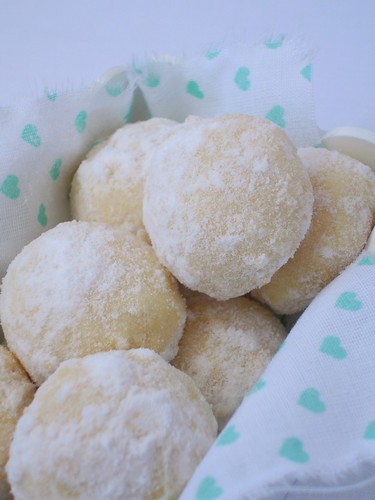
Coconut balls

Coconut balls / Bolinhas de coco

I grew up hearing comments about my bad temper – I used to get in trouble with my father and my teachers for protesting over just about anything. As I get older I try hard to believe I’m also getting calmer. :)
Some things still make me furious, though, and I was mad as hell at the guys from a certain website for not keeping their word (and they did the same to other bloggers I love). You’ll no longer see recipes from Better Homes and Gardens on my blog.

You will, however, see me using recipes from other websites, because there are great ones out there – these coconut balls are one of Martha’s cookies.

Coconut balls / Bolinhas de coco

Coconut balls

1 cup (2 sticks/226g) unsalted butter, softened
¼ cup (35g) confectioner's sugar, sifted, plus more for dusting
2 cups (280g) all-purpose flour
¼ teaspoon salt
2 cups (200g) sweetened flaked coconut

Preheat oven to 180ºC/350ºF; line two large baking sheets with baking paper.

In the bowl of an electric mixer, cream butter with ¼ cup confectioners' sugar until fluffy. Mix in flour and salt until they're just combined. Stir in coconut.
Roll dough into 2.5cm (1 in) balls; place 5cm (2 in) apart on prepared sheets. Bake until just starting to brown, 15 to 20 minutes.
Roll the warm cookies in confectioners' sugar; let cool completely.

Store cookies in an airtight container for up to 1 week.

Makes 36 – I halved the recipe and still got 24

Coconut balls / Bolinhas de coco

Wednesday, May 27, 2009

Honey and golden syrup meringue cupcakes

Honey and golden syrup meringue cupcakes / Cupcakes de mel com cobertura de merengue

I’ve realized something really important: there’s a huge lack of cupcakes on this blog! Shame on me! :D

I’m determined to change that and my mission has already begun: these tender cupcakes I found on DH mag #41. The meringue topping was a wonderful way of using the egg whites I had left after making stracciatella ice cream for Joao - for the 10th time. :)

Honey and golden syrup meringue cupcakes / Cupcakes de mel com cobertura de merengue

Honey and golden syrup meringue cupcakes
from Donna Hay magazine

250g unsalted butter, softened
1 cup (200g) caster sugar
½ cup honey
2 teaspoons vanilla extract
4 eggs
2 ½ cups + 2 tablespoons (370g) all purpose flour, sifted
2 teaspoons baking powder, sifted
1 cup (240ml) milk, room temperature

Golden syrup meringue icing:
1 ¼ cups golden syrup - I used corn syrup
¼ teaspoons cream of tartar
3 very fresh egg whites

Preheat the oven to 160ºC/320ºF; line 24 ½ cup-capacity muffins pans with cupcake papers. Place the butter, sugar, honey and vanilla in the bowl of an electric mixer and beat for 10-12 minutes or until light and creamy. Gradually add the eggs and beat well. Add the flour, baking powder and milk and beat until well combined. Spoon into prepared pans and bake for 18-20 minutes or until cooked when tested with a skewer. Cool on wire racks.

To make the golden syrup meringue icing, place the golden syrup and cream of tartar in a small saucepan over high heat and bring to the boil. Place the egg whites in the bowl of an electric mixer and whisk until soft peaks form. While with motor is still running, gradually add the golden syrup mixture and beat for 4-5 minutes or until thick and glossy.
Spread over the cupcakes with a palette knife.

Makes 24 – I halved the recipe, used 1/3 cup-capacity muffin pans and got 12 cupcakes with high tops; I also got about ½ cup of icing left, even though I halved it too.

Honey and golden syrup meringue cupcakes / Cupcakes de mel com cobertura de merengue

Monday, May 25, 2009

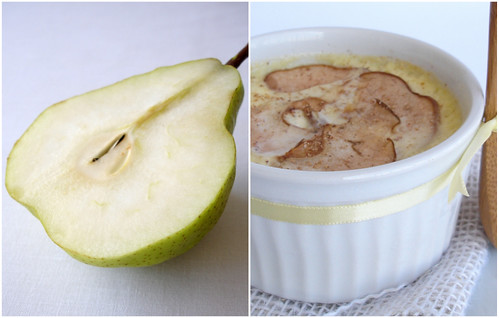
Baked pear custards

Baked pear custards / Pudinzinhos de pêra

Let me tell you a secret: I’m a lazy person. Depending on the subject, not one beats me in the lazy department.

Joao and I had plans to go to the movies last Saturday. I’d already chosen the movie, the session... But the thought of going to a crowded mall – they are really full here in Sao Paulo on weekends – made me drop the idea. I looked at the hubby and he read my mind: “Ok, Ok, let’s stay in”. :D

But I’m no lazy when it comes to cooking and baking: I made lunch for us, baked a batch of cookies and finished up with these custards – they turned out to be my favorite recipe of the day.

Baked pear custards / Pudinzinhos de pêra

Baked pear custards
from Donna Hay magazine

2 cups (480ml) pouring cream
2 eggs
1 egg yolk
1/3 cup (67g) caster sugar – I used vanilla infused sugar
1 teaspoon vanilla extract
1 corella pear, thinly sliced – I used Williams
freshly grated nutmeg, for sprinkling

Preheat the oven to 150ºC/300ºF.
Place the cream in a saucepan over medium heat until it just comes to the boil. Place the eggs, egg yolk, sugar and vanilla in a bowl and whisk until combined. Gradually add the hot cream, whisking constantly to combine and to avoid cooking the eggs.
Pour into four 1 ½ cup (360ml) capacity ovenproof bowls/dishes and top with the pear slices. Place on a baking tray and cook for 20-25 minutes or until just set – this is a very silky dessert.
Sprinkle with nutmeg to serve – the magazine doesn’t mention if you these custards are supposed to be served hot or cold; I tried them warm and cold (after a night in the fridge) and think both ways work great.

Serves 4

Baked pear custards / Pudinzinhos de pêra

Friday, May 22, 2009

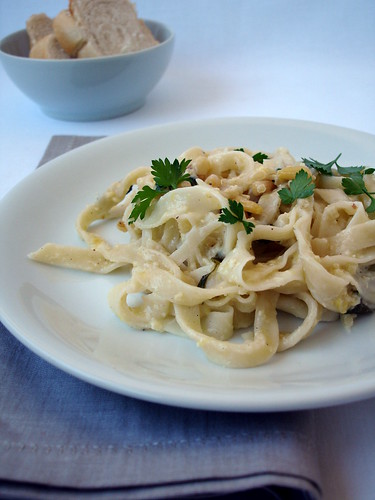
Summertime tagliatelle, in the middle of fall

Summertime tagliatelle / Tagliatelle de verão

My dad sometimes tells me funny/cute stories about my mom and I especially like the ones about her weird pregnancy cravings, like the day she felt like cooking and eating a rooster – no, I’m not kidding. :D

She’d crave ice cream desperately in the middle of the winter and would get under 2-3 blankets to eat it.

Everyone that knows me and knew my mom says that we look exactly the same and they say that we have a lot in common, too, when it comes to personality. Maybe they are right, because I felt like eating summertime pasta in a very cold day. :D

Summertime tagliatelle / Tagliatelle de verão

Summertime tagliatelle
slightly adapted from Cook with Jamie

115g (4oz) pine nuts
juice and zest of 2 lemons
a bunch of fresh flat-leaf parsley, leaves picked
¾ cup (180ml) extra virgin olive oil
1 ½ cups (150g) Parmesan cheese, freshly grated, plus extra for shaving
½ cup (50g) pecorino cheese, freshly grated
salt and freshly ground black pepper
500g good-quality tagliarini or tagliatelle

Smash up half of the pine nuts to a paste, then put it into a big heatproof bowl with the rest of the whole pine nuts, the lemon juice and zest, and the extra virgin olive oil. Stir and add the Parmesan and pecorino. Season with some freshly ground black pepper.

Put a large pot of salted water on to boil for your pasta. Sit the sauce bowl on top of the pan while the water’s heating up – this will take the chill out of the sauce and warm it through slightly. When the water starts to boil, remove the bowl and add your pasta to the water. Cook it according to the packet instructions then drain in a colander, reserving a little of the cooking water. Toss the pasta with the sauce and a little of the reserved cooking water to help loosen it up a bit. The heat from the pasta will melt the cheese, allowing all the lovely sauce to coat it. If you find the sauce is too thick then add a little more water. It’s not supposed to thick – it should be more a dressing than a sauce.

Serve with a little extra Parmesan shaved over the top and a sprinkle of parsley leaves. Eat immediately.

Serves 4

Summertime tagliatelle / Tagliatelle de verão

Wednesday, May 20, 2009

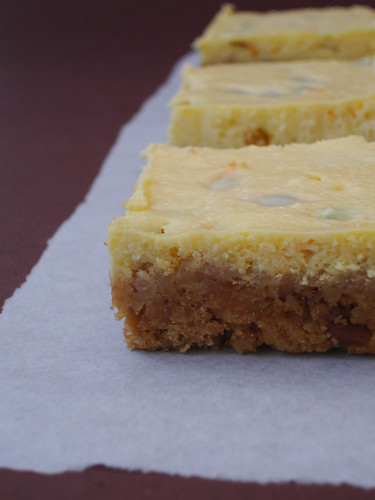
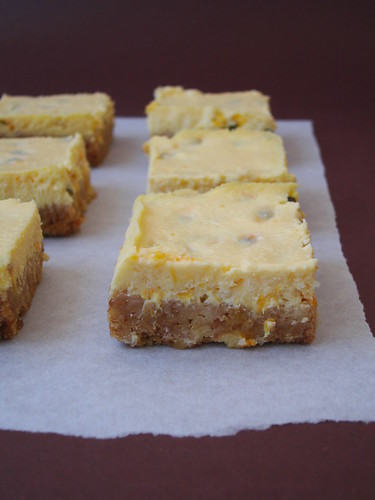
Passion fruit cheesecake squares

Passion fruit cheesecake squares / Quadradinhos de cheesecake de maracujá

To me, passion fruit is such a magical ingredient – I love its color, taste, smell... Slice one passion fruit in half and in a couple of seconds your kitchen will be completely taken by that delicious aroma. So revigorating.

In a gray day like today – and by gray I don’t mean only the color of the sky – I wish I still had some of those cheesecake squares around.

Passion fruit cheesecake squares / Quadradinhos de cheesecake de maracujá

Passion fruit cheesecake squares
from Donna Hay magazine

250g plain sweet cookies
180g unsalted butter, melted
250g ricotta cheese – I used homemade
250g cream cheese, softened
½ cup (100g) caster sugar
1 tablespoon finely grated lemon zest
3 eggs
¾ cup (180ml) passion fruit pulp

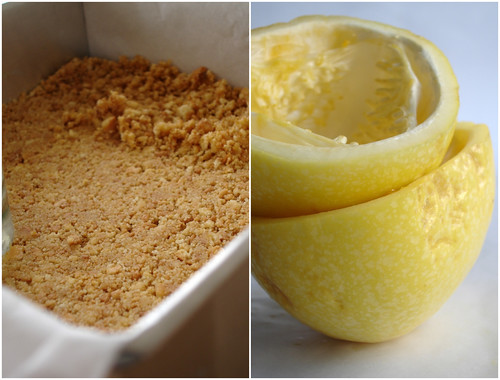
Place the cookies in the bowl of a food processor and process until they resemble fine breadcrumbs – I placed them in a sturdy plastic bag and crushed with a rolling pin. Add the butter and mix to combine. Press the mixture into the base of a 20x30cm lightly greased rectangular pan lined with baking paper. Refrigerate for 30 minutes or until firm and cold.

Preheat the oven to 160ºC/320ºF. Place the ricotta, cream cheese, caster sugar and lemon zest in the bowl of a food processor and process until smooth – I used an electric mixer.
Gradually add the eggs, processing well after each addition. Fold through the passion fruit pulp and pour mixture over the base. Bake for 25-30 minutes or until set.
Allow to cool completely; carefully slice to serve.

Serves 8 – I made 2/3 of the recipe and used a 20cm square pan

Passion fruit cheesecake squares / Quadradinhos de cheesecake de maracujá

Monday, May 18, 2009

Triple choc brownies

Triple choc brownies

Several months ago I told you how much I wanted to see “The Reader” – back then, there wasn’t even a release date for the movie in Brazil. Time went by, the movie premiered here, Kate got all the awards and I had not watched it. It’s now been released in DVD, I’ve finally seen it and knew that the beautiful poster was just the tip of the iceberg – the movie is sublime and so is Kate. I should not have waited so long to see it.

I bought Donna Hay’s Flavours almost three years ago and have had an eye on her triple choc brownies ever since. Now I’ve finally made them and it was pretty much what I felt about the movie: I should not have waited so long.

Triple choc brownies

Triple choc brownies
from Flavours

¾ cup + 1 tablespoon (185g) unsalted butter
185g dark chocolate, chopped
3 eggs
1 ¼ cups (250g) sugar
1 teaspoon vanilla extract
2/3 cup (94g) all purpose flour
½ cup (45g) cocoa powder
pinch of salt
¾ cup (116g) roughly chopped white chocolate
¾ cup (116g) roughly chopped milk chocolate

Preheat the oven to 180ºC/350ºF; line a square 20cm (8in) baking pan with foil, extending foil over the edges of pan. Butter foil; set aside.

Place the butter and dark chocolate in a saucepan over low heat and stir until just smooth. Remove from heat and allow to cool.
Place the eggs, sugar and vanilla in the bowl of an electric mixer and beat until light and creamy. Fold through the chocolate and butter mixture.
Sift the flour, cocoa and salt over the mixture and mix to combine. Add the white and milk chocolate chunks, mix well then pour into the prepared pan. Bake for 35-40 minutes or until just set.
Allow to cool, unmold using the foil “handles” and cut into squares.

Makes 16

Triple choc brownies

Friday, May 15, 2009

Potato soufflés

Potato soufflés / Suflê de batata

I have a confession to make... I’ve watched “Twilight” and thought it was cute. :D

My friend told me she was going to see the movie and I acted like a fool – even joked about teen movies and such. After she told me how much she’d liked it, I decided to give it a try... and here I am now, feeling stupid for my prejudices. But I must say, in my defense, that Paramore is one of the things that put me off the movie. :D

If that hadn’t been a good lesson for me, here’s another one: I saw this recipe months ago and wondered how a simple potato soufflé could be good... Even though I love potatoes, a soufflé without other flavors added sounded too bland.

Guess what? I was wrong, again. :)

Potato soufflés / Suflê de batata

Potato soufflés
from Donna Hay magazine

melted butter, for brushing
1kg sebago (starchy) potatoes, peeled and chopped
100g butter
salt and black pepper
60g butter, extra
¼ cup (35g) all purpose flour
1 cup (240ml) milk
3 egg yolks
1 cup (100g) finely grated parmesan
5 egg whites

Preheat the oven to 200ºC/400ºC. Brush 4 x 1 ¼ capacity (310ml) ovenproof dishes with melted butter, using upward brush strokes to help the soufflé raise; set aside.
Place the potato in a saucepan of cold salted water over high heat. Bring to the boil and cook for 20 minutes or until tender. Drain and return to the pan. Roughly mash the potato, add the butter, salt and pepper and mash until smooth. Set aside.
Melt the extra butter in a saucepan over low heat. Add the flour and cook, stirring, for 1-2 minutes or until mixture is sandy texture. Gradually whisk in the milk and cook, stirring, for 3-5 minutes or until thick. Place in a bowl with the mashed potato, egg yolks and cheese and mix to combine. Place the egg whites in a bowl and whisk until soft peaks form. Fold through potato mixture. Spoon into the buttered dishes, place on a baking tray and bake for 25-30 minutes or until puffed and golden.
Serve immediately.

Serves 4

Wednesday, May 13, 2009

Banana caramel cake

Banana caramel cake / Bolo de banana e caramelo

Even though there are new movies coming out on a daily basis, some are so good that if they are on TV it’s almost an obligation to watch them again - I saw “Misery” for the 4th time last week. :D

Can’t say the same happens in my kitchen: with hundreds of new things to try – a list that grows longer everyday – I don’t like repeating recipes... I’m pretty sure some of you agree with me. But I don’t mind trying variations on something I’ve already made and that was a hit among my family and friends.

Remember my apple caramel cake? It was delicious and I have received very positive feedback from people who have baked it, too. So why not try something similar, with bananas instead?

This great recipe comes from our favorite Cream Puff, the lovely Ivonne. Everything she makes is amazing and this cake is no different.

Banana caramel cake / Bolo de banana e caramelo

Banana caramel cake

Cake:
2 cups (280g) all-purpose flour
1 teaspoon cinnamon
½ teaspoon nutmeg
¼ teaspoon cloves
1 teaspoon salt
1 teaspoon baking soda
3 large eggs
1 ¼ cups (300ml) vegetable oil (or canola oil as in the original recipe)
1 ¾ cups (350g) sugar
1 tablespoon vanilla extract
¾ cup (75g) coarsely chopped walnuts
85g (3oz) dark chocolate, broken into small pieces (size of chips)
3 ripe bananas, diced

Caramel:
½ cup (88g) firmly packed brown sugar
2 tablespoons whole milk
4 tablespoons (56g) unsalted butter, cut into pieces

Butter and flour a tube pan or a bundt pan that can hold 12 cups*; preheat the oven to 180ºC/350ºF.

Sift together flour, cinnamon, nutmeg, cloves, salt and baking soda.
In the bowl of a stand mixer, combine the eggs, oil and sugar. With the paddle attachment, mix on medium speed for 2 to 3 minutes.
Scrape down the sides of the bowl to ensure that the sugar has been incorporated. Add the vanilla extract and mix for another 30 seconds.
With the mixer on low speed, add the dry ingredients a bit at a time. Scrape down the sides of the bowl every now and then to ensure everything is incorporated.
Once the dry ingredients have been added, remove the bowl from the stand mixer and add the walnuts, chocolate and bananas. Gently fold them in with a spatula or a wooden spoon. Don’t over mix.
Spoon the batter into the prepared pan. Bake for 50 minutes and then test the cake to see if it’s done by poking a toothpick or cake tester into the centre of the cake. If it comes out clean, it’s done. If not, bake the cake for another 5 to 10 minutes. In Ivonne’s oven, this cake took 55 minutes; in mine, 1 hour.

About 5 to 10 minutes before the cake is done, make the caramel by combining all the ingredients in a small pan. Bring to the boil and stir occasionally to ensure that it doesn’t burn. Let it boil for about 5 minutes and then turn off the heat.
Once the cake is out of the oven, poke holes all over the cake with a skewer. Immediately pour the caramel over the cake, stopping every now and then to let the caramel sink in. If the caramel pools in spots, poke more holes to allow it to sink in.
Let the cake cool in the pan on a wire rack. Once it’s cool, loosen the cake from the sides of the pan and then unmold it onto a plate.

* I halved the recipe and used a 19cm (6-cup capacity) ring pan

Serves 10-12

Banana caramel cake / Bolo de banana e caramelo

Monday, May 11, 2009

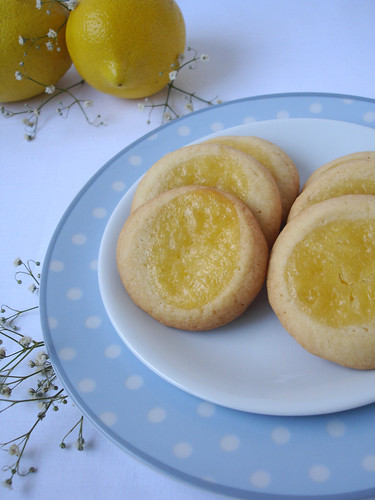
Spoon-dent cookies with lemon curd

Spoon-dent cookies with lemon curd / Cookies recheados com curd de limão siciliano

Have you read about Benicio Del Toro’s new movie? It’s not even ready yet and I’m eager to see it – the cast is amazing and I love stories that take place in the Victorian age. One could say that I am in a wolf state of mind after watching my favorite mutant on screen. :D

I am indeed in a lemony state of mind and present you these cookies: one of the most delicious I have ever baked. Top 3 delicious – really.
The curd is wonderful – much better than the one I made a while ago - and goes perfectly well with the buttery dough. Try them and tell me later.

Spoon-dent cookies with lemon curd / Cookies recheados com curd de limão siciliano

Spoon-dent cookies with lemon curd
from Donna Hay magazine

Lemon curd*:
½ cup (120ml) lemon juice
zest of the juiced lemons
125g unsalted butter, chopped
1 cup (200g) sugar
3 eggs, beaten

Cookie dough:
180g unsalted butter, softened
1 cup (200g) sugar
1 ½ teaspoons vanilla extract
1 egg
2 cups (280g) all purpose flour, sifted
½ teaspoon baking powder

Start with the curd: place the lemon juice, zest, butter, sugar and eggs in a heatproof bowl over a saucepan if rapidly simmering water. Cook, stirring continuously, for 20 minutes or until mixture has thickened slightly. Pass through a sieve into a glass/ceramic bowl and cover with plastic wrap touching the surface of the curd to prevent a skin from forming. Refrigerate until cool and thick.

Make the cookie dough: preheat the oven to 180ºC/350ºF; line two large baking sheets with baking paper.

Place the butter, sugar and vanilla in the bowl of an electric mixer and beat until light and creamy. Add the egg and beat well. Using a spatula, stir through the flour and baking powder to form a dough. Roll 2 teaspoons of the mixture into balls and place onto prepared sheets 5cm (2in) apart.
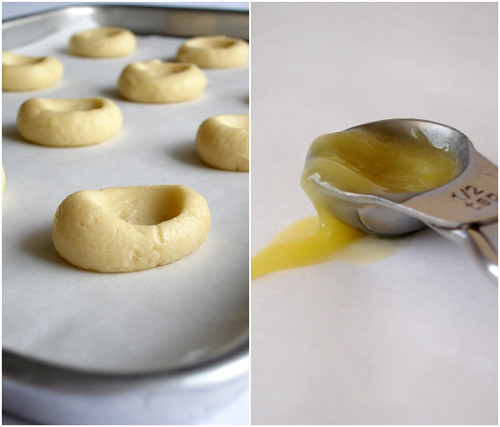
Press deep dents into the middle of the balls with the back of a small teaspoon, wetting the spoon if the dough starts to stick – I though it was easier to do that with my index fingertip.
Fill each of the indents with ½ teaspoon of the cooled lemon curd and bake for 10-15 minutes or until golden.

* there was some curd left – I think that ¾ of the recipe should be enough to fill all the cookies

Makes 35 – I halved the recipe and still got 24

Spoon-dent cookies with lemon curd / Cookies recheados com curd de limão siciliano

Friday, May 8, 2009

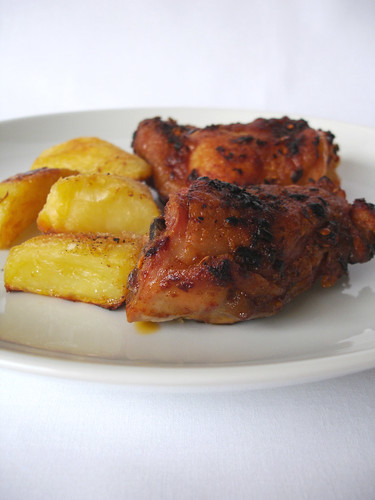
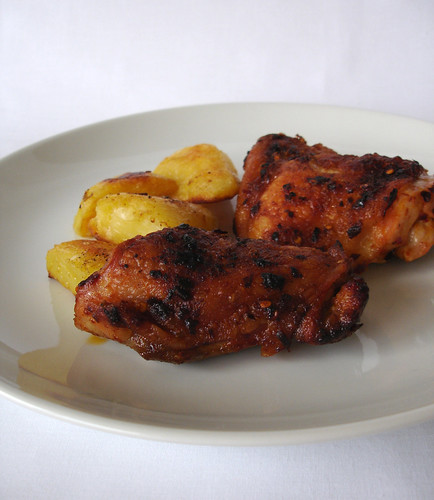
Lemon and chilli marinated chicken

Lemon and chilli marinated chicken / Frango marinado com limão siciliano e pimenta calabresa

Some dishes take me way back to my childhood days - roasted chicken is one of them. My mom loved it and used to make it deliciously well: nicely golden and crisp on the outside and tender on the inside, the meat almost falling off the bones. So good! I can almost taste it as I write this. :D

I immediately thought of mom when I saw the “simple chicken classics” spread on the latest DH magazine. Since I had some marvelous lemons around, this is the recipe I chose.

Oh, and before I forget, I have added an ingredient measure list to the blog that might be useful to some of you.

Lemon and chilli marinated chicken / Frango marinado com limão siciliano e pimenta calabresa

Lemon and chilli marinated chicken
slightly adapted from Donna Hay magazine

1 x 1.5g whole chicken, butterflied – or use your favorite chicken parts
4 cloves garlic, crushed
1 teaspoon salt
1 teaspoon smoked paprika
1 tablespoon finely grated lemon zest
juice of 2 lemons
1 tablespoon chilli flakes*
1/3 cup (80ml) olive oil – I used garlic infused olive oil

Place the chicken on a baking tray lined with baking paper. Place the garlic, salt, paprika, lemon zest and juice, chilli flakes and oil in a bowl and whisk to combine. Pour over the chicken and marinate in the fridge for 1 hour.
Preheat the oven to 200ºC/390ºF. Roast the chicken for 35-40 minutes or until cooked through – I roasted mine for 1 ½ hours to get it really golden.

* the chicken turned out spicy and I loved it but my husband thought it was a bit too hot; therefore, adjust the chilli flakes amount according to your taste.

Serves 4-6

Lemon and chilli marinated chicken / Frango marinado com limão siciliano e pimenta calabresa

Wednesday, May 6, 2009

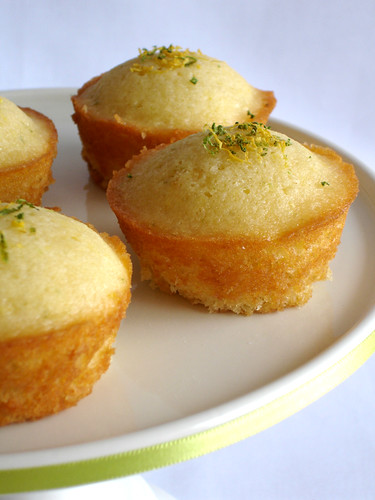
Mini citrus syrup sponges

Mini citrus syrup sponges

These little darlings gave me such a hard time while unmolding them that I kept thinking of a song I love, Erasure’s “Here I go impossible again”. :D

The workout made me wonder why Ms. Lawson’s photo for these mini cakes shows them still in the pan they were baked, but it was worth it: the mini sponges were delicious and had an amazing texture – the syrup really gets into them, enhancing the citrus flavor. Yum!

I used both lemons and limes here but if you want to make the original recipe use just limes.

Mini citrus syrup sponges

Mini citrus syrup sponges
from How to Be a Domestic Goddess

½ cup (113g) unsalted butter, softened
½ cup + 1 tablespoon (112g) sugar
2 large eggs
zest of 1 lime
zest of 1 lemon
1 cup + 2 tablespoons (160g) self-rising cake flour
pinch of salt
4 tablespoons milk

Syrup:
2 tablespoons lime juice, plus zest for decoration
2 tablespoons lemon juice, plus zest for decoration
½ cup (70g) confectioners’ sugar

Preheat the over to 180ºC/350ºF; generously butter an 8-cup mini-loaf pan.

Cream together the butter and sugar, and add the eggs and zest, beating them in well. Add the flour and salt, folding in gently, and then the milk. Spoon into the mini-loaf pan, and cook for 25 minutes.

While the cakes are cooking, prepare the syrup by putting the lime and lemon juices and sugar into a small saucepan and heating gently so that the sugar dissolves.

As soon as the mini-sponges are ready, take them out of the oven and prick them with a cake-tester all over. Pour over the syrup evenly. Try to let the middle absorb the liquid as well as the sides, then leave it to soak up the rest. Don’t try to take the cakes out of the pan until they have cooled slightly and the syrup looks like it has been absorbed, but be aware that if you leave these to cool completely they might be very difficult to get out of the pan.

So, after an hour or two, turn them out onto a rack and grate some lime zest over them before serving.

Makes 8 – I halved the recipe, used a muffin pan (each well holds 1/3 cup batter) and got 5 mini cakes

Monday, May 4, 2009

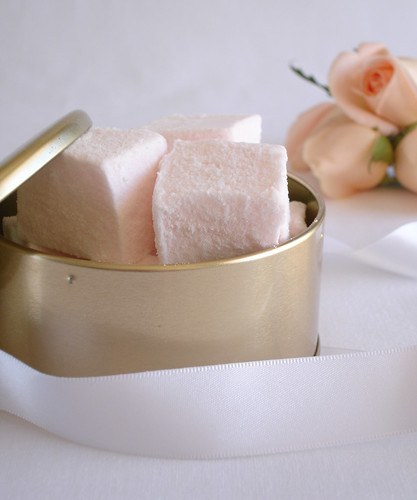
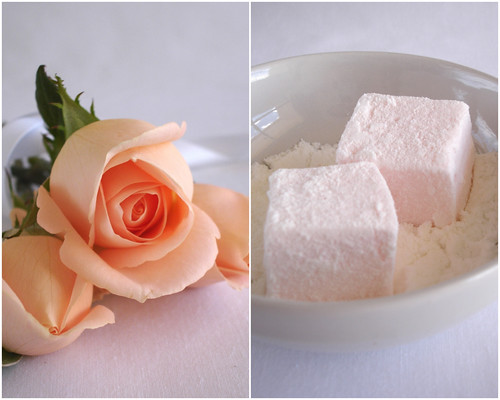
Rosewater marshmallows

Rosewater marshmallows / Marshmallows de água de rosas

Searching for something good on TV last night I stopped zapping when I saw Giovanni Ribisi. It was a drama movie and I was pretty surprised – in a very good way – by his performance... Let’s be honest: it’s not easy to stand out working next to the marvelous Ms. Blanchett. :D

Whether it’s a heavy drama or a light comedy – who can forget Frank Buffay Jr.? – Giovanni Ribisi is always a joy to watch, like marshmallows are a joy to make (and eat).

My inspiration was this recipe but I did not want to use egg whites and adapted a Donna Hay recipe instead.

Rosewater marshmallows / Marshmallows de água de rosas

Rosewater marshmallows
adapted from Donna Hay magazine

2 tablespoons powdered gelatin
½ cup (120ml) warm water
330g caster sugar
½ cup + 1 ½ tablespoons glucose syrup
1/3 cup (80ml) water, extra
1 tablespoon rosewater
1-2 drops pink food coloring

For rolling the marshmallows:
¾ cup (105g) confectioners’ sugar, sifted
1 tablespoon corn starch, sifted

Lightly oil a 20cm (8in) square cake pan and line with non-stick baking paper.

Place the gelatin and warm water in the bowl of an electric mixer, stir well to combine and set aside. Place the sugar, glucose and extra water in a saucepan over medium heat. Bring to the boil and cook without stirring for 5-6 minutes or until soft ball stage (115ºC/240ºF) on a sugar thermometer.

With the mixer running at high speed, gradually add the hot syrup to the gelatin mixture. Add the rosewater, the food coloring and beat for 10 minutes or until thick and fluffy. Pour into prepared pan, cover with lightly greased non-stick baking paper and refrigerate overnight (I used regular baking paper and oiled it very well).

Place the icing sugar and corn starch in a bowl and stir to combine. Turn the marshmallow onto a surface lightly dusted with a little of the icing sugar mixture and carefully remove the paper. Cut into squares with a lightly oiled knife.

Dust with remaining icing sugar mixture and store in an airtight container.

Makes 36

Related Posts with Thumbnails