Monday, April 30, 2012

Nutmeg butter cake - perfect with a cup of tea

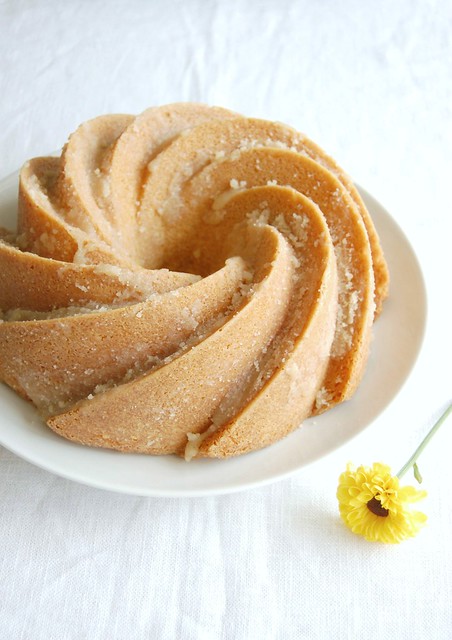
Nutmeg butter cake / Bolo amanteigado de noz-moscada

As much as I love gooey, chocolatey baked goods like last week’s rocky road brownies my Achilles' heel is, really, the simple cakes (as you already know). This butter cake, perfumed with freshly ground nutmeg is the kind of cake I crave most of my days, and even more in cold ones like today because it goes perfectly well with a cup of tea. I’d thought of skipping the glaze all together but at the end I was glad I did not: its crunchy texture and (also) buttery flavor compliment the cake really well.

Nutmeg butter cake
from the Butter Cake Queen

Cake:
3 cups (420g) all purpose flour
1 teaspoon baking powder
½ teaspoon baking soda
½ teaspoon salt
2 teaspoons freshly grated nutmeg
1 cup (226g/2 sticks) unsalted butter, softened
2 cups (400g) granulated sugar
4 large eggs
2 teaspoons vanilla extract
1 cup sour cream*

Glaze:
6 tablespoons (84g) unsalted butter, chopped
2/3 cup + 2 tablespoons (157g) granulated sugar
½ teaspoon freshly grated nutmeg

Preheat the oven to 180°C/350°F. Butter and flour a 14-cup capacity Bundt cake.
Make the cake: sift the flour, baking powder, baking soda, salt and nutmeg in a medium bowl. Set aside.
In the large bowl of an electric mixer, beat butter until creamy. Gradually add the sugar, then beat well until light and fluffy. Beat in the eggs, one at a time, scraping the sides of the bowl. Blend in the vanilla.
On low speed, alternately add the sifted ingredients in three additions with the sour cream in two additions, beginning and ending with the dry ingredients. Scrape down the sides of the bowl after each addition.
Spoon the batter into the prepared pan and smooth the top. Bake for about 55 minutes or until risen, golden and a skewer inserted in the center comes out clean.
Cool the cake in the pan over a wire rack for 10 minute – in the meantime, make the glaze: place the butter, sugar and nutmeg in a small, heavy saucepan. Place over low heat and cook, stirring occasionally, until butter is melted and sugar is slightly dissolved. Remove from the heat. Unmold the cake onto the rack and brush it generously with the glaze. Cool completely before slicing and serving.

* homemade sour cream: to make 1 cup of sour cream, mix 1 cup (240ml) heavy cream with 2-3 teaspoons lemon juice in a bowl. Whisk until it starts to thicken. Cover with plastic wrap and leave at room temperature for 1 hour or until thicker (I usually leave mine on the counter overnight – except on very warm nights – and it turns out thick and silky in the following morning; refrigerate for a creamier texture)

Serves 16 – I made ¾ of the recipe above and baked it in a 10-cup capacity Bundt pan

Friday, April 27, 2012

Rocky road brownies

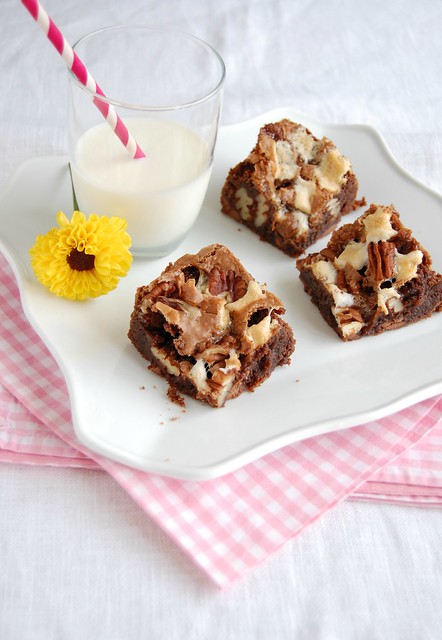
Rocky road brownies / Brownies rocky road

I bought a bag of mini marshmallows last week with these cookies in mind – I found the recipe going through my folder of torn magazine pages and thought it would be great to use whole wheat flour in my baking (haven’t done that in a while now). But the reviews discouraged me to make the cookies. :(

Luckily, Alice Medrich – a.k.a. the Chocolate Queen – came to my rescue and I ended up with these brownies: they are so good, so sinfully delicious that I wished the recipe had yielded more than 16 pieces. :D
While tasting one of the brownies I knew I had done the right thing by buying Medrich’s new cookbook – cannot wait for it to arrive.

Rocky road brownies
from the wonderful Chewy Gooey Crispy Crunchy Melt-in-Your-Mouth Cookies

120g (4oz) dark chocolate – I used one with 50% cocoa solids
½ cup (113g/1 stick) unsalted butter
½ cup + 2 tablespoons (90g) all purpose four
¼ teaspoon baking powder
3 large eggs
1 ½ cups + 1 tablespoon (262g) granulated sugar
¼ teaspoon salt
1 cup mini marshmallows
90g (3oz) milk chocolate chips or chunks
1 cup (110g) pecans

Preheat the oven to 180°C/350°F. Lightly butter an 8in square cake pan, line with foil leaving an overhang on two opposite sides. Butter the foil as well.
Melt the dark chocolate and butter in a heatproof bowl over a saucepan of simmering water until smooth. Remove from the heat and cool to lukewarm.
In a medium bowl, combine the flour and baking powder. Set aside.
In the large bowl of an electric mixer, with the whisk attachment, beat eggs, sugar and salt on high speed until the mixture is thick, pale and about double in volume. Fold the chocolate mixture into the eggs until partially incorporated. Sift the flour mixture over the batter and fold just until blended. Transfer to the prepared pan and smooth the surface. Distribute the marshmallows over the batter, followed by the pecans and the milk chocolate. Bake for 20-25 minutes or until a toothpick inserted in a cakey part of the brownies comes out with a few moist crumbs.
Cool completely in the pan over a wire rack. Cut into squares.

Makes 16

Wednesday, April 25, 2012

Almond and raisin cake

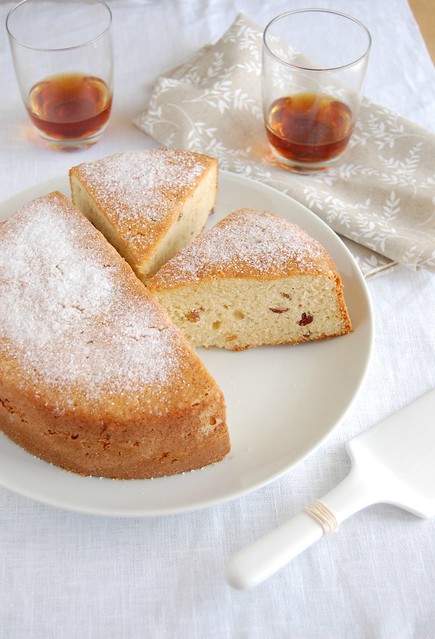
Almond and raisin cake / Bolo de amêndoa e passas

I love movies with strong female characters – you know I like them complex – and last week, besides Saoirse Ronan’s amazing Hanna, I got to know Jennifer Lawrence’s brave Ree. The fantastic “Winter’s Bone” is another example of the theory I wrote about a couple of posts ago: the story is perfectly told and directed, and the performances are excellent. Jennifer Lawrence, talented as hell, is the back bone of the movie but all the other actors (most of which, I’ve read, are from the area where the movie was shot and had never acted before) are great, too – John Hawkes, brilliant as Teardrop, makes me want to watch “Martha Marcy May Marlene” even more (as soon as it gets here).

Lately I have thought twice before recommending movies to people I know – because most of them turn to me later on to tell me how much they hated them – but I do not feel this way writing on the blog, maybe because those of you reading me for a while now already know the kind of movie I’m interested in. I’m not the romantic-comedy-happy-ending kind of girl. So if you are anything like me I am sure you’ll love “Winter’s Bone”.

***

I baked Flo Braker’s tea almond cake a couple of weeks ago and after that I started obsessing with almond cakes in general (the one on “Tartine” is next on my list); therefore, when I saw this almond and raisins cake on Gina DePalma’s wonderful “Dolce Italiano” I immediately marched to the kitchen to prepare it. The cake is very tasty, with great texture, but I think that an extra handful of raisins would make it even better.
Almond and raisin cake
slightly adapted from the delicious Dolce Italiano: Desserts from the Babbo Kitchen

½ cup (120ml) Marsala wine
½ cup (77g) golden raisins
2 cups (280g) all purpose flour
¼ cup (25g) almond meal
2 teaspoons baking powder
¼ teaspoon table salt
½ cup (113g/1 stick) unsalted butter, softened
¾ cup (150g) granulated sugar
100g (3 ½oz) almond paste – I used homemade
2 large eggs
1 teaspoon vanilla extract
¼ cup (60ml) whole milk, room temperature
confectioners’ sugar, for dusting

Preheat the oven to 180°C/350°F. Lightly butter a 22cm (9in) round cake pan*, line the bottom with baking paper, butter the paper as well and dust it all with flour, tapping out the excess.
Combine the Marsala with the raisins in a small saucepan and place over medium heat until the wine just begins to simmer. Remove from the heat and cool completely.
In a medium bowl, whisk together the all purpose flour, almond meal, baking powder and salt. Set aside.
In the large bowl of an electric mixer cream butter and sugar until light and fluffy. Beat in the almond past until smooth.
Beat in the eggs, one at a time, followed by the vanilla, scraping the sides of the bowl after each addition. On low speed, add half of the dry ingredients, beating well. Scrape the bowl again. Add the milk, beat well, then beat in the remaining dry ingredients. Switch to medium speed and beat for 30 seconds. Switch to low speed again and add the raisin and the wine.
Pour the batter into the prepared pan and smooth the top. Bake for 35-40 minutes or until golden and risen and a skewer inserted in the center of the cake comes out clean. Cool in the pan over a wire rack for 10 minutes, then invert onto the rack. Cool completely.
Dust with confectioners’ sugar before serving.

* I made the exact recipe above using a 20cm (8in) cake pan (7cm high)

Serves 8-10

Monday, April 23, 2012

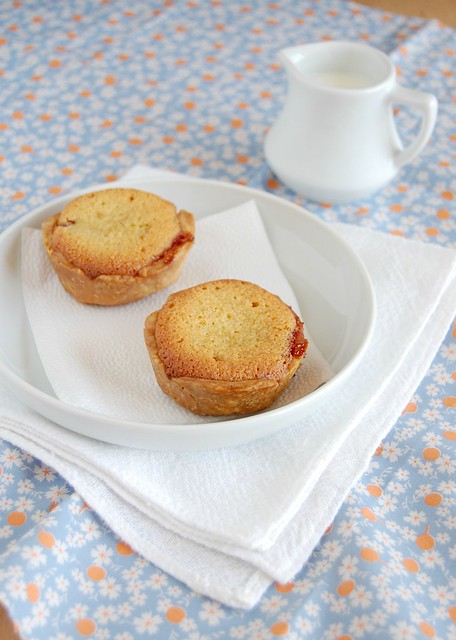
Cherry jam frangipane tartlets + "Hanna"

Cherry jam frangipane tartlets / Tortinhas de frangipane e geléia de cereja

Sometimes I get mad at things that usually do not bother other people; for instance, I hate it that some incredible movies go straight to DVD here in Brazil, after I’d waited forever to see them on the big screen: that has happened quite frequently lately – “Take Shelter”, “Jane Eyre”, among others – and it was the case with “Hanna”. It is such a shame that not many people have heard of such an amazing film: brilliant script, great music, and the cast...

* spoilers *

Cate Blanchett is one of my favorite actresses – I love how versatile she is, and here, as one of the villains, she’s fabulous: the tone of her voice, the color of her hair, the way her eyes move... Fantastic. Eric Bana proves that good looks and talent can go hand in hand: he won my heart a long time ago playing the Hulk – I know that not everyone liked Ang Lee’s version of the hero, but I did; Bana played Banner as a very contained man, which is the perfect counterpoint to his explosive alter ego. He’s played a perfect Henry VIII and will play another King – I’m looking forward to it. Tom Hollander, so brilliantly playing a villain that looks he has come out of a cheap 1970s movie. And Saoirse Ronan... she’s the soul of the movie and having watched “Atonement” and “The Lovely Bones” I expected a lot from her, but she transcends as Hanna – the physicality of the role seems to be something quite difficult to accomplish, but what really stunned me was how perfectly she portrays Hanna’s emotions, her discovery moments: the first time seeing a plane or listening to music – the way her eyes shine... Her performance is poetic.
I’ve been telling everyone I know to watch “Hanna” as soon as possible and now I am telling you, too. :)

***

I really don’t mind doing the dishes but I hate washing the food processor parts: I usually cut my fingers while washing the blade and that sucks. Therefore, when I grab the food processor to make pastry, sweet or savory, I double the amount and freeze some – that is what I did when I made the chocolate crème brûlée tartlets, and a couple of weekends after that I used the frozen amount to make these delicious frangipane tartlets, courtesy of the always wonderful Jamie Oliver.

Cherry jam frangipane tartlets
slightly adapted from the amazing Jamie Oliver's Meals in Minutes: A Revolutionary Approach to Cooking Good Food Fast (mine was bought aqui)

6 small deep shortcrust pastry cases*
1 egg
1 cup (100g) almond meal
100g unsalted butter, softened
½ cup (100g) granulated sugar
finely grated zest of ½ orange
2 teaspoons vanilla extract
½ cup cherry jam, or your favorite flavor

Preheat the oven to 190°C.
Put the 6 pastry cases on a baking tray. In a medium bowl, make the frangipane: combine the egg, almond meal, butter, sugar, zest and vanilla and mix everything together. Spoon a small teaspoon of jam into each pastry base. Top with a heaped teaspoon of frangipane, add another small teaspoon of jam, then finally another heaped teaspoon of frangipane. Put the tray in the oven on the middle shelf and bake until the filling is puffed and golden, about 20 minutes
Serve them warm or at room temperature, with whipped cream or crème fraîche.

* I used this recipe to make the tartlet cases; baked them in 1/3-cup (80ml) capacity muffin pans (as described here) and got 8 tartlet cases; I halved the recipe above and it was enough for the 8 tartlet cases

Makes 6

Friday, April 20, 2012

Buffalo mozzarella, artichoke and lemon pizza - a great idea for the weekend

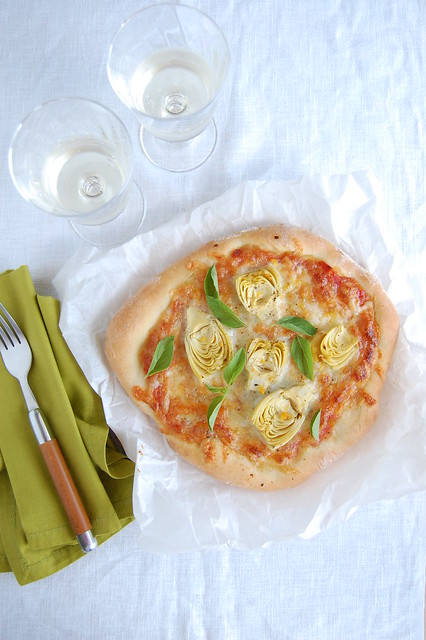
Buffalo mozzarella, artichoke and lemon pizza / Pizza de mozarela de búfala, alcachofra e limão siciliano

Mark Bittman is trying to convince people to make pizza at home and his argument is that not only is it budget-friendly but the pizza also tastes better – I have got to agree with the guy. :)
The last time I ordered pizza at my house was nearly 7 years ago and so far we haven’t missed it – actually, to be honest, the pizzas we ate at other people’s homes (because I am the only “crazy person” who makes them at home) cost a lot and/or weren’t all that in terms of flavor.

Here’s my pizza, if you’re interested in becoming a “crazy person” like me; I used to make Richard Bertinet's pizza dough (which is amazing) but since I am always pressed for time I’ve switched to Donna Hay's recipe: it is much faster and equally delicious.

Buffalo mozzarella, artichoke and lemon pizza
adapted from the wonderful Modern Classics (Book 1) and from the always delicious Donna Hay Magazine

Pizza dough:
1 teaspoon dried yeast
pinch of sugar
2/3 cup (160ml) lukewarm water
1 tablespoon extra virgin olive oil
1 ¾ cups + ½ tablespoon (250g) all purpose flour
1 teaspoon table salt

Topping:
1/3 cup tomato sauce (more if you like it)
200g buffalo mozzarella, coarsely grated
6-8 store-bought marinated artichoke hearts, drained and halved lengthwise
finely grated zest of 1 lemon
fresh basil leaves

Place the yeast and sugar in a medium bowl. Add the water and mix with a fork. Let stand for 2-3 minutes or until foamy. Add the olive oil, flour and salt and mix to combine. Transfer to a clean surface (no need to flour it) and knead until smooth and elastic – sprinkle with a little flour if necessary. Form dough into a ball. Lightly oil the same bowl and place the dough in it. Cover with plastic wrap and let it rise in a warm place for 45-60 minutes.
Preheat the oven to 250°C/480°F. With your hands, shape the dough into a rough circle and transfer to a large baking sheet*. Spread with the tomato sauce and cover with the mozzarella. Arrange the artichoke halves on top of the cheese, sprinkle with the lemon zest and bake until golden, 20-25 minutes. Sprinkle with the basil leaves and serve.

* I place the baking sheet in the oven for a good while before baking the pizza; then, I place the dough onto it when it’s really hot, spread the sauce and topping over it very quickly and put it back in the oven – it works really well (since I do not have a pizza stone) and the crust doesn’t get soggy

Serves 4 (at my house it serves 2). :)

Related Posts with Thumbnails