Now that I have brought my husband to the dark side – the side of the addicted to TV series – he keeps asking me what we’ll watch next: I find it both funny and lovely and I hope he stays this way for good. :)
We finished watching the first season of The Americans and while Netflix doesn’t bring us more episodes – I cannot wait! – I suggested we watched Bloodline, for its great cast and because Ben Mendelsohn had impressed me very much in the great Animal Kingdom. One of my readers had told me it was a wonderful show and she was right: it is well written, well directed and definitely spot on in acting – my husband loved it, too, and as we moved on through the episodes things got more and more interesting, to the point my husband said that he hoped there would be a second season (good news: there will be).
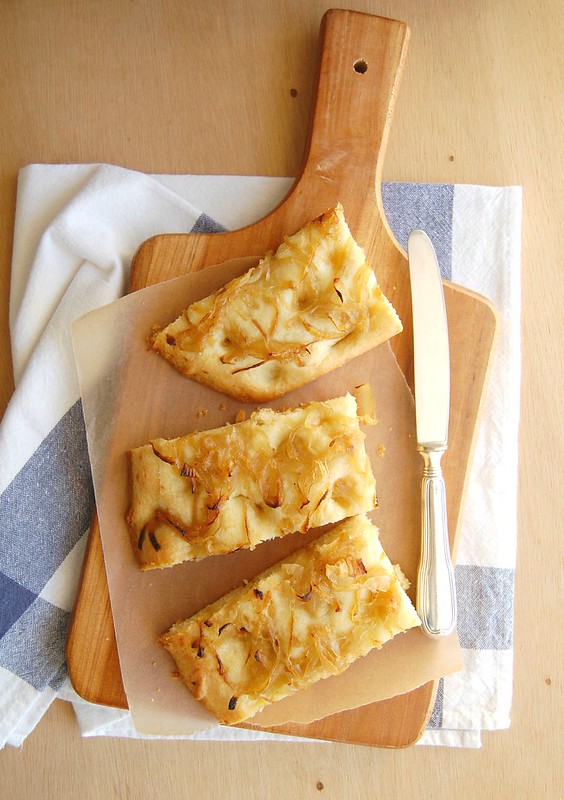
If you like dramas like the ones I usually write about here on the blog I can’t recommend Bloodline enough, and if you like baking bread and having something tasty to nibble on with a glass of sparkling wine or beer go to the kitchen and make this focaccia: it is not complicated to make and it tastes absolutely fantastic.
Caramelized onion and gruyere focaccia
slightly adapted from the delicious Home Baked Comfort (Williams-Sonoma) (revised): Featuring Mouthwatering Recipes and Tales of the Sweet Life with Favorites from Bakers Across the Country
Dough:
2 ¼ teaspoons (7g/1 sachet) active dry yeast
1 teaspoon granulated sugar
1 cup (240ml) warm water
3 1/3 cups (465g) all-purpose flour
¼ cup (60ml) olive oil
1 scant teaspoon table salt
150g (5oz) Gruyere cheese, shredded
Topping:
3 tablespoons olive oil
2 yellow onions, halved and thinly sliced
1 teaspoon granulated sugar
salt
In the bowl of a stand mixer, dissolve the yeast and sugar in the warm water. Let stand until foamy, about 5 minutes. Add the flour, oil, salt and cheese. Attach the dough hook and knead on medium-low speed until the dough is smooth and elastic, about 10 minutes. Form the dough into a ball, put it back in a lightly oiled large bowl, cover with plastic wrap and let the dough rise in a warm, draft-free spot until it doubles, about 1 hour.
Meanwhile, in a large frying pan, heat 1 tablespoon of the olive oil medium-low heat. Add the onions and sauté over medium-low heat until they start to wilt, about 3 minutes. Stir in the sugar and a good pinch of salt and continue to cook until the onions are golden brown and caramelized, about 20 minutes. Remove from the heat and let cool.
Oil a rimmed baking sheet with 1 ½ tablespoons of the olive oil. Dump the dough onto the prepared pan and press it into a rough rectangle. Using your fingers, stretch the dough into a rectangle about 20x30cm (8x12in). Cover the dough loosely with a kitchen towel and let rise in a warm, draft-free place until puffy, about 1 hour.
Position a rack in the middle of the oven and preheat to 220°C (425°F). Dimple the surface of the dough with your fingertips. Gently brush the remaining oil, then sprinkle evenly with the onion. Bake until gorgeously golden, about 20 minutes. Cut into squares and serve while warm.
Makes 1 flatbread (serves 6-8)
Tuesday, June 30, 2015
Caramelized onion and gruyere focaccia and the excellent "Bloodline"
Friday, June 26, 2015
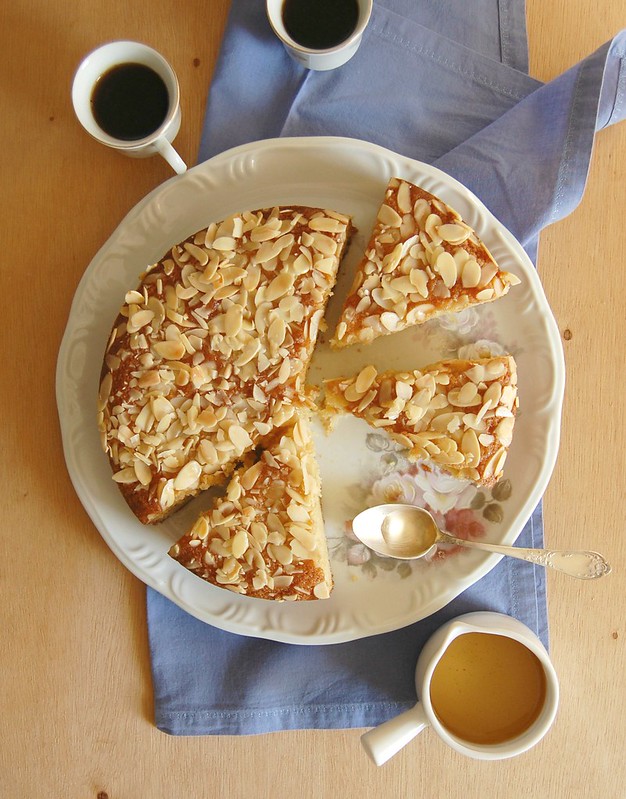
Almond syrup cake and more bad TV news
I apparently spoke too soon, guys – days ago I found out that another one of my favorite TV series has been cancelled. :(
The good thing is I’m not the only one disappointed by the news about Hannibal and like me many others are hoping that the show gets saved by Netflix or some other network – let's hope it works, right, boys? ;)
I’ve loved Hannibal ever since its beginning – how could I not? – and might be a little behind on the episodes because so many other shows have grabbed my attention lately, but it is still one of the best series I’ve seen even though I know it might be a little too graphic for many people – I don’t mind the gore at all because in that case it is absolutely necessary to the story being told, and not only splashed there to shock.
I haven’t baked much lately (which is a shame), but I did make this delicious cake weeks ago and here it is: I know I can be a little too repetitive when it comes to almond cakes – or TV shows ;) – but this one is really special: it tastes delicious and if there’s any syrup left after the cake is gone it is wonderful poured over pancakes or waffles.
Almond syrup cake
slightly adapted from the always gorgeous Donna Hay Magazine
Cake:
3 eggs
¾ cup (150g) granulated sugar
1 teaspoon vanilla extract
1 cup + 1 tablespoon (150g) all purpose flour
1 teaspoon baking powder
pinch of salt
1 ¼ cups (125g) almond meal
1/3 cup (75g) unsalted butter, melted and cooled
finely grated zest of 1 lime
2 tablespoons Amaretto
½ cup (60g) flaked almonds
Syrup:
1 cup (240ml) water
¾ cup (150g) granulated sugar
1 teaspoon vanilla extract
¼ cup (60ml) Amaretto
Preheat the oven to 180°C/350°F. Lightly butter a 20cm (8in) round cake pan, line the bottom with a circle of baking paper and butter it as well.
Place the eggs, sugar and vanilla in the bowl of an electric mixer and beat for about 8 minutes or until thick, pale and tripled in volume. With a rubber spatula, gently fold in the flour, baking powder, salt, almond meal, butter, lemon zest and Amaretto. Pour batter into prepared pan and smooth the top. Sprinkle with the flaked almonds and bake for 35-40 minutes or until golden and risen and a skewer inserted in the center comes out clean.
Cool in the pan over a wire rack while you make the syrup: place water, sugar, vanilla and Amaretto in a small saucepan and cook over medium heat, stirring to dissolve the sugar. Boil over medium heat for about 10 minutes or until reduced and thickened. Pour ¾ of the hot syrup over the cake gradually, making sure it gets absorbed by the cake before pouring more syrup. Cool completely in the pan, then carefully unmold.
Serve the cake with the remaining syrup.
Serves 8-10
Thursday, June 18, 2015
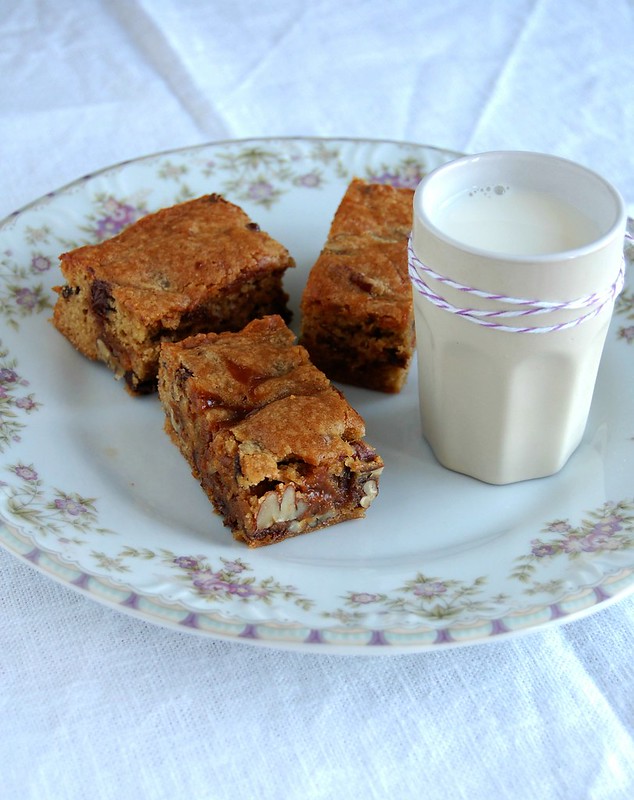
Dulce de leche swirl congo bars
Sometimes I buy cookbooks and wait anxiously for them to arrive by mail only to go through them back and forth countless times without any idea of which recipe to start using them from – I know it sounds stupid, but that is exactly what happens around here.
Then it takes me forever to go back to that cookbook, not because I did not like it but because there were lots of other recipes grabbing my attention in between. I suddenly see the book while looking for something else and take it to the couch with me to go through it back and forth all over again, until I find that makes me run to the kitchen.
I made these bars a long time ago, after making the delicious coconut and pecan bars from the same book, but never posted them – they were scrumptious and were a hit with my former coworkers. I ended up taking a “healthy” route in my baking a while ago and thought that bars made with pecans, chocolate and dulce de leche were a bit too much. While searching for a certain photo I found this picture and thought that it was such a waste not to share this recipe with you – after all, eating a couple of these bars once in a blue moon won’t kill anyone.
While you read the recipe I’ll grab Nancy Baggett’s book and choose something tasty for the weekend. ;)
Dulce de leche swirl congo bars
slightly adapted from the delicious Simply Sensational Cookies
¾ cup (1½ sticks/170g) unsalted butter, cut into chunks
1 ¼ cups (215g) packed light brown sugar
1 ½ teaspoons baking powder
¼ teaspoon table salt
2 teaspoons vanilla extract
3 large eggs, room temperature
2 cups (280g) all purpose flour
1 cup (110g) pecans, chopped
1 cup (165g) dark chocolate chips – I used 53% cocoa solids
1 cup dulce de leche
Position a rack in the middle of the oven; preheat to 180°C/350°F. Lightly butter a 22x32cm (9x13in) baking pan, line it with foil and butter it as well – I used a 20x30cm (8x12in) pan
.
In a large saucepan, melt the butter over medium heat, stirring, until melted. Remove from the heat and cool to warm. Stir in the sugar, baking powder, salt, and vanilla until well blended. One at a time, vigorously stir in the eggs. Stir in the flour just until evenly incorporated. Fold in the nuts and chocolate until evenly distributed.
Spread a generous half of the mixture evenly in the pan. Put evenly spaced heaping tablespoonfuls of the dulce de leche over the batter. Then drop spoonfuls of the remaining batter over the top. Using a table knife held vertically, swirl the two together to produce a slightly rippled effect; don’t blend them too much.
Bake for 25-30 minutes, until nicely browned on top and a toothpick inserted in the center comes out clean. Cool completely in the pan over a wire rack. Cut into bars.
Makes 18
Monday, June 15, 2015
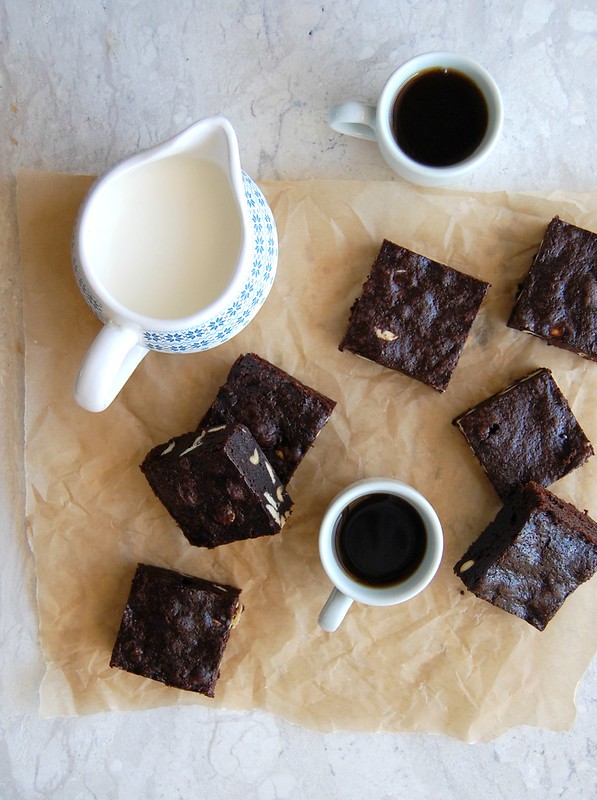
Peanut and white chocolate brownies and the amazing Viola
Back in January I watched the Golden Globes and many of my favorites took awards home – among them was Ruth Wilson, who is absolutely amazing in The Affair, but she was competing head to head with another actress I deeply admire, the über talented Viola Davis. Back then I hadn’t watched How to Get Away with Murder yet but got immediately interested in it.
The show is really that good and each episode ends with a bang that would make my husband and I crazy to know what would happen next – we saw the season finale last night and were like “OMG!!”. Viola is, indeed, superb: the woman can pull anything off, she can play any part. I am still Team Ruth because I think that her character in The Affair is more difficult to play – it is like she portrayed two different characters – but if Viola had taken the GG home I wouldn’t have minded at all.
Gladly a second season has been confirmed for How to Get Away with Murder – enough with the cancellation of my favorite TV shows, really. :)
From a woman that can do no wrong in acting to another who does wonders in the kitchen: Alice Medrich – these peanut and white chocolate brownies are a riff on one of her great recipes and are super delicious!
Peanut and white chocolate brownies
slightly adapted from the amazing Chewy Gooey Crispy Crunchy Melt-in-Your-Mouth Cookies by Alice Medrich
10 tablespoons (140g/1 ¼ sticks) unsalted butter, room temperature and chopped
1 ¼ cups (250g) granulated sugar
¾ cup + 2 tablespoons (80g) unsweetened cocoa powder (natural or Dutch-process)
¼ teaspoon salt
½ teaspoon pure vanilla extract
2 large eggs
½ cup (70g) all-purpose flour
½ cup (75g) unsalted roasted peanuts
½ cup (80g) white chocolate chips
Preheat the oven to 180°C/350°F. Lightly butter a 20cm (8in) square baking pan, line it with foil leaving an overhang on two opposite sides and butter the foil as well.
In a medium heatproof bowl, add the butter and set on top of a large sauce pan with barely simmering water. Melt the butter, then add sugar and salt, and stir until well combined. Next add the cocoa powder and stir until mixture is smooth and hot enough that you want to remove your finger fairly quickly after dipping it in to test. Remove the bowl from the water and set aside briefly until the mixture is only warm, not hot.
Using a rubber spatula, stir in the vanilla. Add the eggs one at a time, stirring vigorously after each one. When the batter looks thick, shiny, and well blended, add the flour and stir until you cannot see it any longer, then beat vigorously for 40 strokes with the wooden spoon or a rubber spatula. Stir in the peanuts and white chocolate. Transfer the batter to the prepared pan and smooth the surface.
Bake until a toothpick plunged into the center emerges slightly moist with batter, 20 minutes. Let cool completely in the pan over a wire rack. Cut into squares.
Makes 16
Friday, June 12, 2015
Poppy seed cake and a certain horror movie
I am a coward when it comes to watching horror movies – I usually spend 2/3 of them with my eyes closed – but I am a kid from the 70s and therefore was more than curious to watch the remake of one of the movies that scared the bejeesus out of me back in the day.
I would never do such thing alone, so my husband was in charge of holding my hands whenever necessary – he also had memories of Carol Anne and the scary TV from 1982.
All I can say is that aside from a couple of jumps I wasn’t too frightened or impressed: the movie isn’t all that – maybe remakes aren’t as good as the originals or maybe I have seen too many of James Wan’s movies. :)
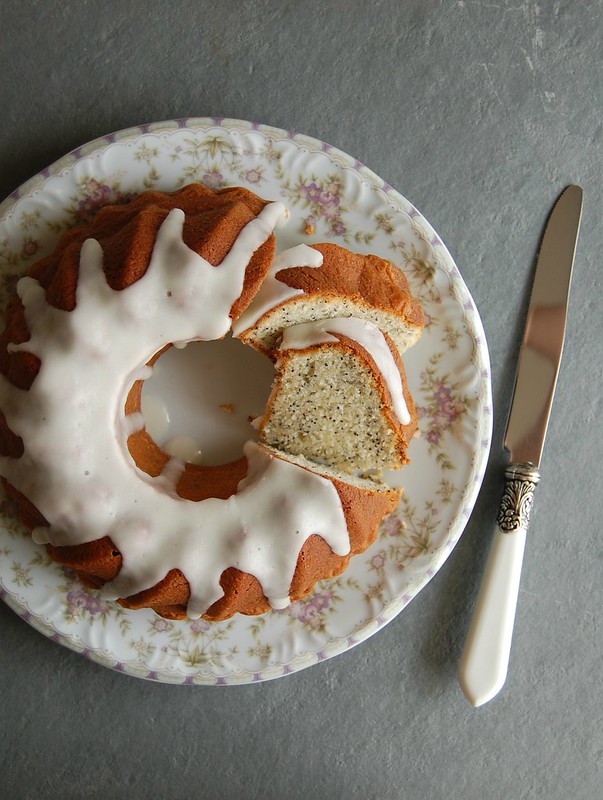
Choosing movies to watch might be tricky: one can find something really good or something not so great, and I believe it is the same with recipes: we can’t really tell they’re good until we’ve tried them. I made this cake because I had a couple of egg whites to spare – because of these wonderful cookies – and it turned out to be a great recipe: the cake is very light in texture and tender, perfect with a cup of tea or coffee.
Poppy seed cake
slightly adapted from 100 Best Cakes and Desserts
Cake:
125g unsalted butter, softened
finely grated zest of 1 lime
1 tablespoon honey
1 tablespoon lime juice
1 ¼ cups (250g) granulated sugar, divided use
1 egg yolk
250ml whole milk
1 teaspoon vanilla extract
250g all purpose flour
2 teaspoons baking powder
pinch of salt
3 tablespoons poppy seeds
4 egg whites
Icing:
½ cup (70g) icing sugar
1 tablespoon lime juice
Preheat the oven to 180°C/350°F. Butter and flour a 2-liter Bundt pan.
In a medium bowl, whisk together the flour, baking powder, salt and poppy seeds. Set aside.
Using an electric mixer, beat the butter, lime zest, honey, lime juice and 1 cup (200g) of the sugar until creamy. Beat in the egg yolk, milk and vanilla – don’t worry if the mixture looks a little curdled at this stage. Add the dry ingredients and mix well.
In a separate bowl, beat the egg whites until stiff peaks form. Add the remaining ¼ cup (50g) sugar and beat until satiny. Gently fold the egg white mixture into the cake mixture, then pour into the prepared pan.
Bake for about 45 minutes or until a skewer inserted into the middle comes out clean. Cool in the pan over a wire rack for 15 minutes, then carefully unmold onto rack and cool completely.
Glaze: sift the icing sugar in a bowl and gradually stir in the lime juice, mixing until you get a drizzable consistency. Set aside for 15 minutes.
Serves 8-10
Sunday, June 7, 2015
Peanut butter cookies and great music
I have been baking cookies like crazy lately, I could say it has become an addiction: every time I see a cookie recipe online or in a cookbook I want to make it, and I pretty much do it most of times – luckily for me my family likes cookies as much as I do and I don’t have to eat them all myself. :D
There is something else I’ve been obsessing about these days and it’s not food: Ra Ra Riot – I’ve been listening to one of their songs for ages, so last week I decided to search for their songs on Spotify and I became a fan for the songs are really good and they have a cover of one of my all time favorite songs.
I’ll admit it that when it comes to music I am a bit of a coward: if I like a song too much, I avoid listening to other songs by the same singer/band out of fear of getting disappointed (you can go ahead and laugh now). :)
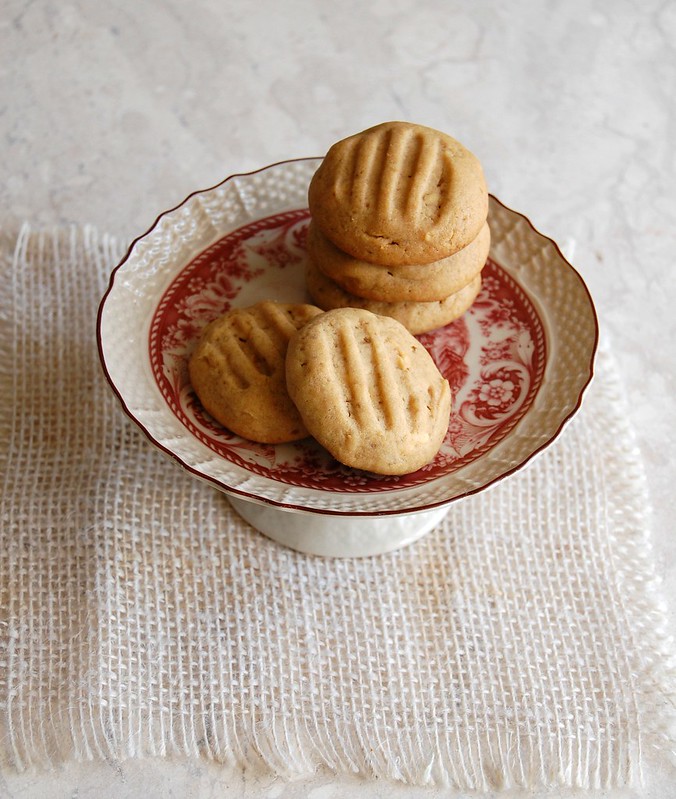
I was brave enough this time – it’s taken me what, two and a half years? – and it paid off: the other songs by Ra Ra Riot are amazing, and my favorites are “Beta Love”, “Angel, Please” and “For Once” – I’ve been listening to them nonstop while cooking and baking, and one of the results were these delicious and super easy to make peanut butter cookies, a recipe from one of the most beautiful cookbooks I own.
Peanut butter cookies
slightly adapted from the über beautiful The Baking Collection (The Australian Women's Weekly)
1 ½ cups (210g) all purpose flour
½ teaspoon baking soda
pinch of salt
125g unsalted butter, softened
¼ cup (70g) crunchy peanut butter
¾ cup (130g) light brown sugar, packed
1 egg
1 teaspoon vanilla extract
½ cup (75g) roasted unsalted peanuts, coarsely chopped
Preheat the oven to 180°C/350°F; line two large baking sheets with baking paper.
In a medium bowl, whisk together the flour, baking soda and salt. Set aside.
Using an electric mixer, beat butter, peanut butter and sugar until light and creamy. Beat in the egg. Scrape the sides of the bowl occasionally. Beat in the vanilla. On low speed, beat in the dry ingredients, then stir in the peanuts.
Roll 1 leveled tablespoon of dough per cookie into balls, place them 5cm (2in) apart onto prepared sheets and flatten each ball lightly with a floured fork.
Bake for 12-14 minutes or until golden around the edges. Cool in the sheets over a wire rack for 5 minutes, then carefully slide the paper with the cookies onto the rack and cool completely.
Makes about 40
Wednesday, June 3, 2015
Milk rolls
It is always a joy to receive the latest issues of the food magazines I subscribe to: I usually bookmark a lot of recipes but it takes me some time to actually make them, especially if the magazines arrive on those days when a trip to the grocery store is more than necessary.
When I received my Donna Hay magazine a couple of weeks ago, for instance, both my fridge and my cupboard were a bit on the empty side, but when I saw the recipe for these rolls I knew I would make them the following morning: the small list of ingredients consisted of basics I still had a bit of around, it wouldn’t be a problem. I did bake them and they looked beautiful when I took them out of the oven – they smelled fantastic, too.
I posted the photo on Instagram and it was welcomed by many people, therefore I felt like sharing the recipe here on the blog – the thing is: I gathered my family around the table, made some coffee and the rolls disappeared on that very same day. :)
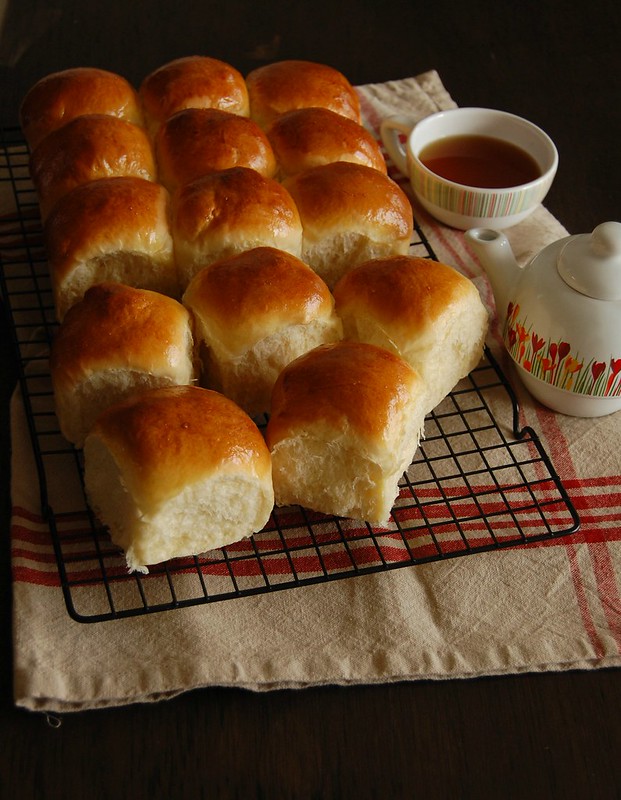
Everyone loved the rolls, so I made them once again and thought they looked even better, more golden – now that I’ve managed to take a decent photo of them I bring you the recipe and I am sure many of you will like it for it is really easy to make and the rolls are divine.
Milk rolls
slightly adapted from the always wonderful Donna Hay magazine
330ml whole milk
65g unsalted butter, room temperature and chopped
3 tablespoons granulated sugar
2 teaspoons dried yeast
2 eggs
650g all purpose flour
1 teaspoon table salt
For brushing the rolls:
1 egg yolk
1 teaspoon whole milk
Place half the milk in a small saucepan over high heat and bring to a simmer. Remove from the heat, add the butter and sugar and stir until butter is melted. Add the remaining milk. Set aside until lukewarm, then pour into the bowl of an electric mixer. Stir in the yeast and set aside until foamy, 5 minutes or so.
Add the egg, flour and salt and mix with the dough hook until you get a smooth dough, about 8 minutes. Transfer to a large lightly buttered bowl, cover with plastic wrap and set aside in a warm place until doubled in size, about 40 minutes. Butter a 20x30cm (8x12in) metal baking pan and set aside.
Punch the air from the dough, divide into 15 equal pieces (mine were 75g each) and roll each into a smooth ball, using your hand as a cage to roll the dough around. Place the dough balls side by side onto the prepared pan, about 1cm apart. Cover with a clean kitchen towel and set aside for 40 minutes or until risen – in the meantime, preheat the oven to 200°C/400°F.
Beat the egg yolk and milk together with a fork. Brush the rolls with the mixture and bake for 20-25 minutes or until golden brown and the rolls sound hollow when tapped with your fingers. Cool in the pan over a wire rack for 5 minutes, then carefully unmold onto the rack to cool. Serve warm or at room temperature – the rolls can be kept in the freezer for up to 1 month, just let cool completely and wrap in Ziploc bags.
Makes 15
Monday, June 1, 2015
Chocolate Ovaltine snacking cake - easy to make and delicious
When it comes to baking – and you know how addicted to it I am – there are certain ingredients one should always have on hand, and I certainly do: flour, sugar, eggs, butter, milk, vanilla extract, for instance – with these you can whip up a simple cake, make shortbread, a topping for a fruit crumble or even prepare a batch of pancakes.
Other ingredients, however, aren’t called for in recipes that much, but sometimes I’ll get them in an impulse purchase, only to stare at them in my cupboard/refrigerator/freezer for weeks on end. That happened with a small bag of Ovaltine weeks ago – my brother likes it with his milk in the morning, but since he doesn’t have breakfast here that often I had to find another use for the poor ingredient.
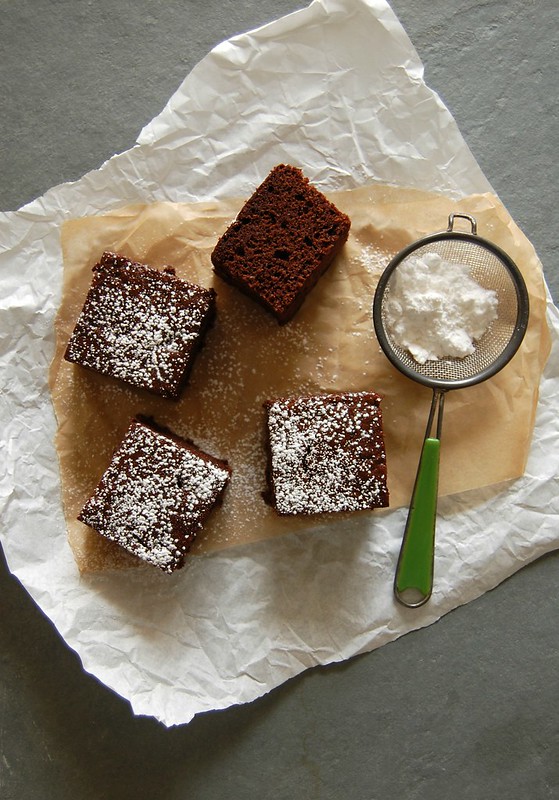
I found this cake on a cookbook I deeply love, and it turned out delicious: very chocolatey, very moist and dead easy to put together – Lauren Chattman suggests it to be served spread with a chocolate glaze, but I thought it would be too much: it is a snacking cake, so to me the simpler, the better.
Chocolate Ovaltine snacking cake
slightly adapted from the wonderful and foolproof Cake Keeper Cakes: 100 Simple Recipes for Extraordinary Bundt Cakes, Pound Cakes, Snacking Cakes, and Other Good-to-the-Last-Crumb Treats
½ cup (100g) granulated sugar
½ cup (70g) Ovaltine
1 cup (140g) all purpose flour
6 tablespoons unsweetened cocoa powder + a bit extra for prepping the pan
¼ teaspoons table salt
1 ½ teaspoons baking powder
2 large eggs
¾ cup (180ml) whole milk, room temperature
6 tablespoons (85g/¾ stick) unsalted butter, melted and cooled
1 teaspoon vanilla
icing sugar, for dusting
Preheat oven to 180°C/350°F. Lightly butter a 20cm (8in) square cake pan, line the bottom with baking paper and butter it as well. Dust everything with cocoa and knock out the excess.
Combine sugar, Ovaltine, flour, cocoa powder, salt and baking powder in a large mixing bowl. Using a wooden spoon or an electric mixer, stir in the eggs, milk, butter and vanilla until just combined.
Transfer batter into prepared pan and smooth the top. Bake for 35-40 minutes or until risen and a toothpick inserted in the center of the cake comes out clean. Cool in the pan over a wire rack for 20 minutes, then carefully unmold, peel off the paper and turn onto the rack. Cool completely. Dust with icing sugar to serve.
Serves 16
