I believe that the first time I saw/heard of Turkish pizza was watching one of the episodes of the fantastic Ottolenghi's Mediterranean Island Feast, a long time ago – what he actually made was called lahmacun and it looked absolutely delicious, topped with a fresh salad.
Fast forward many months and I was reading about pide recipes on a magazine (the Australian Delicious, if I am not mistaken) and it looked similar to Ottolenghi’s lahmacun, however shaped slightly differently. I decided to then search about it some more, and ended up making my own version of it.
I first made pides for lunch on a lazy Saturday, already expecting compliments from my husband for he loves sfihas; However, he went so crazy about them that from the second time onwards I started making 1 ½ recipes each time – 4 pides were not enough for the both of us. :D
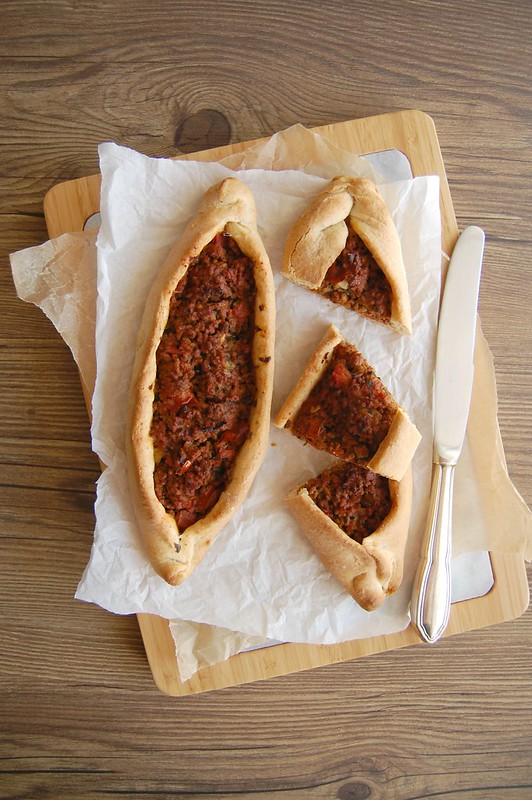
Beef and leek pide
own recipe, inspired by several others
Dough:
1 teaspoon dried yeast
½ teaspoon granulated sugar
1/3 cup (80ml) lukewarm water
¼ cup (60ml) lukewarm whole milk
1 ¼ cups (175g) all purpose flour
¼ cup (35g) whole wheat flour
½ teaspoon table salt
2 tablespoons extra virgin olive oil
Filling:
2 tablespoons unsalted butter
1 large leek (120g/4oz), white/light green parts only, sliced
2 large garlic cloves, minced
250g (9oz) beef mince
1 teaspoon smoked paprika
2 ripe tomatoes, deseeded and diced
salt and freshly ground black pepper
handful of fresh parsley leaves, chopped
For brushing the dough:
1 tablespoon extra-virgin olive oil
Start with the dough: in the bowl of an electric mixer, combine yeast, sugar, water and milk and mix with a fork. Set aside until foamy, about 5 minutes. Add flours, salt and olive oil and mix using the hook attachment for about 8 minutes or until dough is elastic and smooth – if mixing by hand, 12-14 minutes should be enough. Form dough into a ball, transfer to a large lightly oiled bowl and cover with plastic wrap. Set aside in a draft-free area for about 1 hour or until doubled in volume.
While dough is proofing, make the filling: heat butter on a large saucepan over medium heat until melted. Add the leek and cook, stirring occasionally, until tender, about 5 minutes. Stir in the garlic and cook for 1 minute or until fragrant. Add the beef and cook, stirring occasionally, until golden, 5-7 minutes. Stir in the paprika, the tomatoes, season with salt and pepper and cook for another 3-5 minutes or until tomatoes are soft. Stir in the parsley, remove from the heat and cool completely.
Preheat the oven to 200°C/400°F. Line a large baking sheet with foil.
Divide the dough into 4 equal portions. Roll each portion into a rough 25cm (10in) long oval shape. Spread the cooled filling along the center. Pinch the edges together so your pide looks like a boat. Transfer to the prepared sheet and brush the dough with olive oil and bake for 25-30 minutes or until golden brown. Serve at once.
Makes 4
Wednesday, June 28, 2017
Beef and leek pide
Friday, June 23, 2017
Baked figs with streusel topping and Marsala whipped cream and the reason why we like certain things
Do you ever wonder why you like certain things?
I was making lunch the other day and listening to some music – Toto’s Rosanna was playing. My husband said “I did not know you liked Toto”. I replied “I like this song, because I had an English teacher that loved it, for her name was Rosana”. She was one of the best teachers I had, and on top of that I found her so, so beautiful: she was a redhead and covered with freckles – it was then, at the age of 15, that I started liking my own freckles for until that moment I felt completely awkward with them (no one else in my family, at school or at my street had freckles).
Because of my teacher Rosana I stopped covering my arms in long sleeves even when it was insanely hot. Because of her I stopped hating the way my face looked with freckles everywhere – she never knew that, but she had a big part in my acceptance of my own features. That is why I think of her when I listen to “Rosanna” and my heart is filled with joy.
Now, the figs… I like figs because I first tried them in my godmother’s house, maybe at around 7 or so. The smell of the fruit takes me back to the days I spent with her – figs and peppermint tea, it is impossible for me to try these things without thinking of my godmother. She died a long time ago, however I have lots of fond memories of her.
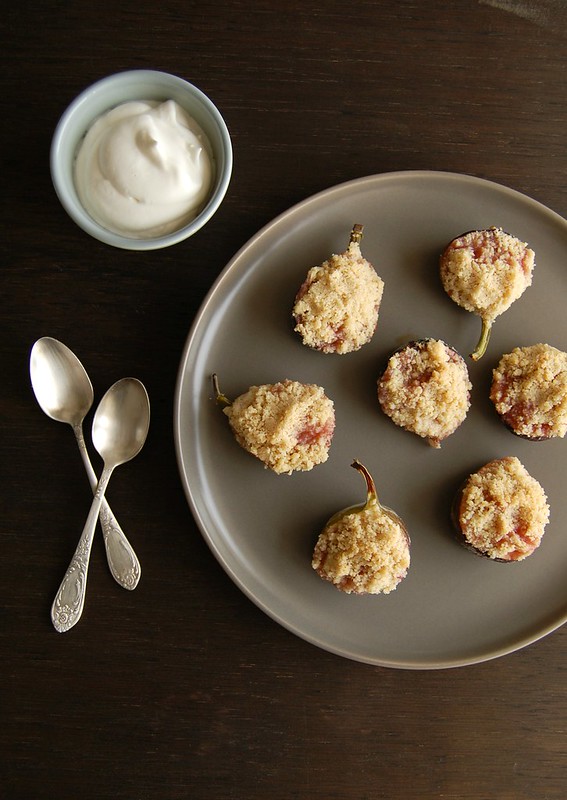
My godmother was a very sophisticated woman who had travelled the world, so I believe she would like this dessert very much – the figs sort of turn into a creamy jam while in the oven and the Marsala whipped cream pairs beautifully with them. I don’t think the fruit skin benefits from the heat, though, therefore I recommend you eat the pulp and the crumble topping using a spoon and consider the skin a vessel for the deliciousness only. :)
Baked figs with streusel topping and Marsala whipped cream
own creation
For the figs:
6 small figs
½ cup (70g) all purpose flour
3 tablespoons demerara sugar
3 tablespoons (42g) unsalted butter, cold and diced
¼ teaspoon ground cinnamon
pinch of salt
Marsala whipped cream:
½ heavy cream, very cold
1 tablespoon granulated sugar
1 teaspoon Marsala
Preheat the oven to 200°C. Line a small baking sheet with foil.
In a small bowl, combine flour, sugar, salt and cinnamon. Add the butter and rub ingredients with your fingertips until mixture resembles coarse breadcrumbs.
Cut figs in half lengthwise and place them cut side up on top of the foil. Sprinkle the crumble topping over each fig half, packing it slightly with your fingers to make it adhere to the fruit. Bake for 20-25 minutes or until crumble is golden.
In the meantime, place the cream, sugar and Marsala in a small bowl and whisk until soft peaks form. Serve the figs warm with the whipped cream.
Serves 4
Wednesday, June 21, 2017
Blackberry rye financiers and going crazy with ingredients
I know many people hate to go to the grocery store, but I must confess that to me that is a lot of fun (you can go ahead and call me crazy, no hard feelings). :)
My husband finds it funny that I can get really, really excited about a beautiful fruit or certain new products – a couple of weeks ago I saw a jar of lemon marmalade on the shelf and screamed at him “LOOK AT THIS!!” from the other side of the aisle – it is a good thing he knows me well and does not mind being stared at by strangers. :)
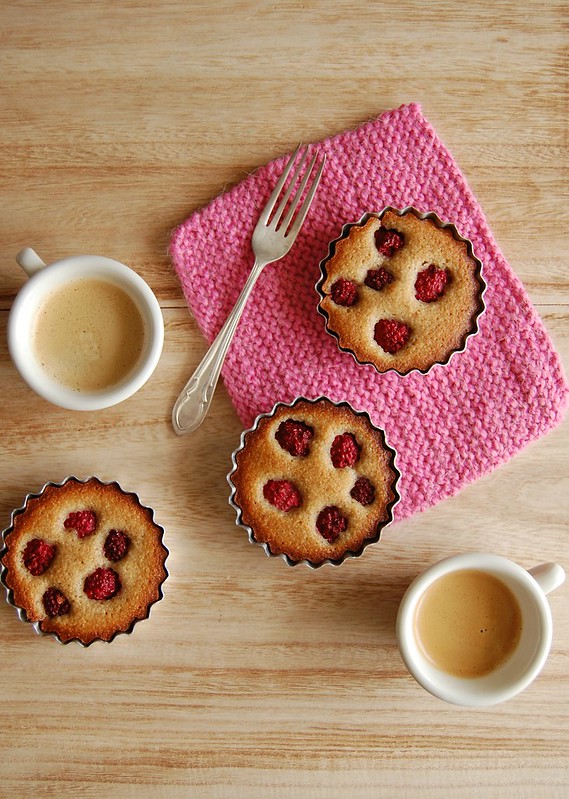
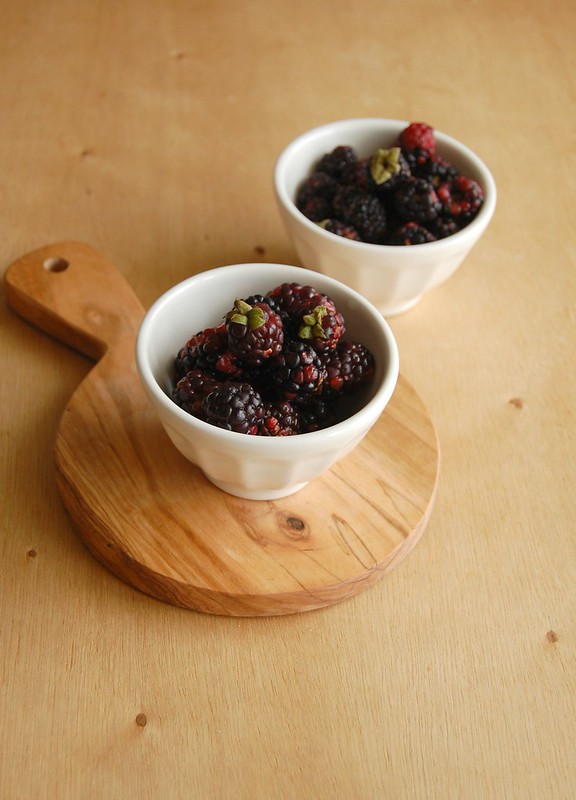
Another discreet moment *ahem* happened months ago, when I saw these teeny tiny blackberries in the supermarket – they looked so adorable I had to bring them home. My idea was to eat them with yogurt for breakfast, however they were really sour, even for me. So half of them became a crumble and the other half were added to these financiers, in which I replaced the all purpose flour for fine rye flour (the flour I mentioned here). It was such a beautiful combo of flavors I was very happy with the result – not to mention how cute the financiers look. <3
Blackberry rye financiers
own recipe
¾ cup (75g) almond meal
2 ½ tablespoons (25g) fine rye flour (the same kind I describe here)
½ cup (70g) icing sugar, sifted
1/8 teaspoon ground cinnamon
pinch of salt
3 egg whites (84g)
1/3 cup (75g) unsalted butter, melted and cooled
2 teaspoons Amaretto
½ teaspoon vanilla extract
¾ cup (90g) small blackberries
In a medium bowl, whisk together the almond meal, rye flour, icing sugar, cinnamon and salt. Whisk in the egg whites. Whisk in the butter, Amaretto and vanilla until smooth. Cover with plastic wrap and refrigerate for 1 hour.
Preheat the oven to 200°C. Butter eight 100ml-capacity molds or mini muffin pans.
Divide the batter among the prepared pans and smooth the top. Divide the berries among the pans, placing them on top of the batter and pushing them slightly into the batter. Bake for about 15 minutes or until golden and risen – a skewer in the center should come out clean.
Cool in the pans over a wire rack for 5 minutes, then carefully unmold and transfer to the rack, cooling completely.
Makes 8
Wednesday, June 14, 2017
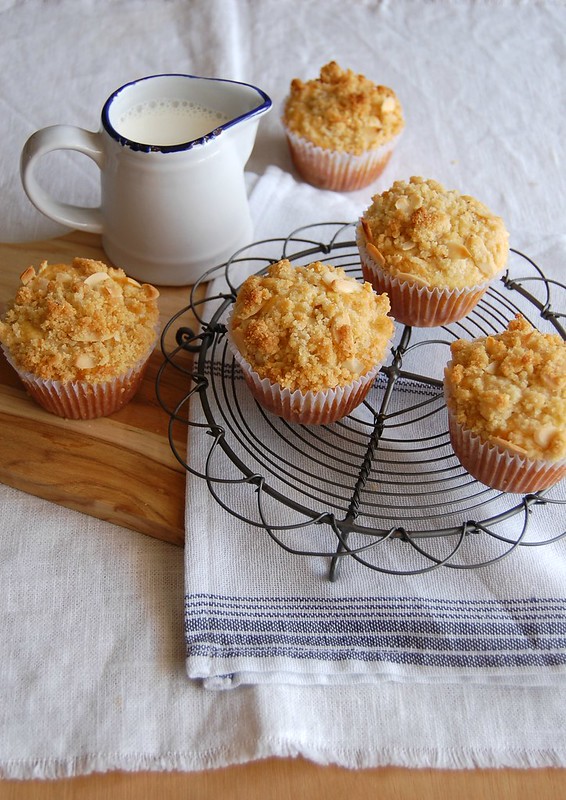
Pear lemon muffins with almond streusel
When I cook or bake at home I many times start with a specific idea, something I saw somewhere or that I really want to eat at that moment. However, there are times that I open the fridge or the cupboard and decide what to make at the sight of whatever there is at home.
The muffins I bring you today came to existence when I was grabbing vegetables to cook lunch: I opened the fridge and saw the pears there. My husband had brought home some beautiful lemons so I decided to pair them with the pears, and the idea to add the almond streusel topping crossed my mind because I had baked a fruit crumble with almonds a couple of days before that.
While the whole process of how this recipe was created might be very mundane, I can assure you the muffins are everything but: they are tender, smell and taste amazing.
Pear lemon muffins with almond streusel
own creation
Streusel:
2 ½ tablespoons (25g) all purpose flour
¼ cup (25g) almond meal
1/3 cup (65g) demerara sugar
pinch of salt
2 tablespoons (28g) unsalted butter, melted and cooled
¼ cup (25g) flaked almonds
Muffins:
½ cup (100g) granulated sugar
finely grated zest of 2 lemons
2 cups (280g) all purpose flour
2 teaspoons baking powder
pinch of freshly ground nutmeg
pinch of salt
½ cup (113g/1 stick) unsalted butter, melted and cooled
2 large eggs
¾ cup (180ml) whole milk, room temperature
1 teaspoon vanilla extract
3 small pears (about 400g/14oz in total), peeled, cored and chopped
Preheat the oven to 200°C/400°F. Line a 12-hole muffin pan with paper cups.
Make the streusel: mix flour, almond meal, sugar and salt in a small bowl. Add the butter and stir with a fork until mixture resembles coarse breadcrumbs. Still using the fork, stir in the almond flakes, but do not overmix. Refrigerate while you make the muffin batter.
Now, the muffins: in a large bowl, combine sugar and lemon zest and rub them together with your fingertips until sugar is fragrant. Whisk in the flour, baking powder, nutmeg and salt.
In a medium bowl, whisk together the butter, eggs, milk and vanilla. Pour them over the dry ingredients and, with a fork, gently but quickly stir to blend – do not overmix, or your muffins will be tough. Incorporate the pear pieces.
Divide the batter evenly among the muffin cups. Sprinkle with the streusel and lightly press it over the batter to make it stick.
Bake for about 20 minutes, or until the tops are golden and a toothpick inserted into the center of the muffins comes out clean. Transfer the pan to a rack and cool for 5 minutes before carefully removing each muffin from its mold.
Makes 12
Friday, June 9, 2017
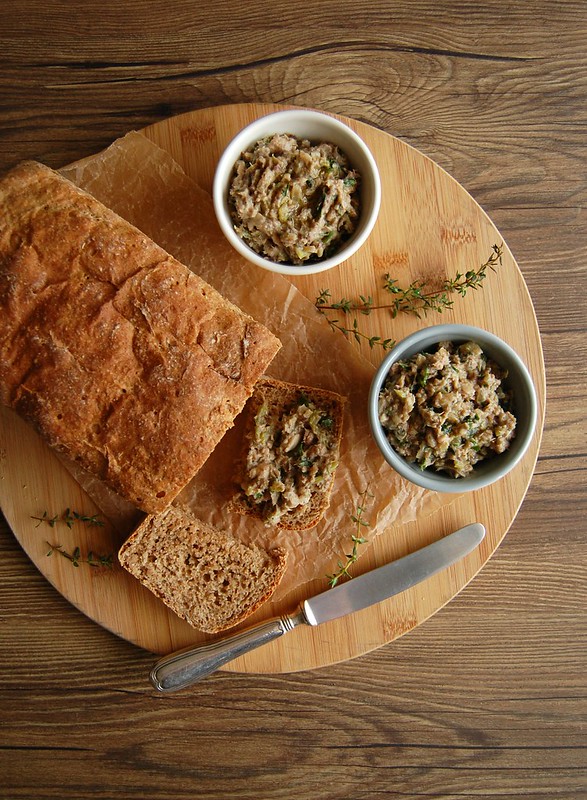
Soft rye bread with sardine rillette and more childhood memories
Many, many months ago, while I still had plans to write a book, I was reading about rillettes and found them very interesting – as I read recipes for pork rillettes, I instantly thought of my mother and her love for this kind of meat, which I link to her German heritage.
As I thought of how much she would love that kind of rustic pâté, I also remembered the sardine salad (which we call “patê” in Portuguese) she used to make for sandwiches when I was a kid – canned sardines were cheap (still are) and those sandwiches are part of my childhood memories (mom would always cut the crusts off mine). :)
Mixing everything in my head I thought of making the rillettes with sardines instead of the pork and a quick search online showed me some variations made with salmon, so I was on the right track. I ended up making this sardine rillette several times for both my husband and I went crazy for it.
After the third time, if I am not mistaken, I felt that the delicious mixture deserved a good homemade bread to go with it, and the strong flavor of rye seemed really right for it – Joao agreed, but asked me for a soft bread that we could have for breakfast on the following day as well. I made this rye bread, tender from the addition of milk but still flavorsome. The problem is that we ended up eating the whole thing with the rillette and there was nothing left for breakfast. :)
Soft rye bread
own creation
Bread:
150ml whole milk, lukewarm
200ml water, lukewarm
2 teaspoons dried yeast
1 teaspoon granulated sugar
½ tablespoon honey
2 cups (280g) all purpose flour
1 ¼ cups (175g) rye flour
1 ½ teaspoons table salt
For brushing the bread:
1 tablespoon whole milk, room temperature
Start with the bread: in the bowl of an electric mixer, place milk, water, sugar and yeast and mix with a fork. Set aside until foamy, about 5 minutes. Add the honey, flours and salt and mix using the hook attachment for about 8 minutes or until dough is elastic and smooth – if mixing by hand, 12-14 minutes should be enough. Form dough into a ball, transfer to a large lightly oiled bowl and cover with plastic wrap. Set aside in a draft-free area for 1 ½ hours or until doubled in volume.
Lightly brush a 6-cup loaf pan with oil or butter.
Punch the dough to remove the excess air. On a lightly floured surface, using a rolling pin, roll the dough nto a large rectangle, about 20x30cm (8x12in). Starting with one of the long sides, carefully pick up the dough and roll, forming a cylinder. Pinch the seams and place the dough into the prepared pan, seam side down. Cover with a clean kitchen towel and set aside in a draft-free area again for 40-45 minutes – in the meantime, preheat the oven to 200°C.
Brush the top of the bread with milk and bake for about 30 minutes or until golden and baked through – bread should sound hollow when tapped with your fingers. Cool in the pan over a wire rack for 5 minutes, then carefully unmold onto the rack to cool. Cool completely.
Serves 6-8
Sardine rillette
own creation
1 ½ tablespoons extra virgin olive oil, divided use
½ tablespoon unsalted butter
½ onion, finely diced
1 celery stalk, finely sliced – use a mandolin
1 garlic clove, minced
3 sprigs of fresh thyme, leaves only
pinch of smoked paprika
salt and freshly ground black pepper
350g canned sardines, drained and flaked – I used sardines packed in olive oil for better flavor
2 tablespoons dry white wine
2 tablespoons sour cream*
2 tablespoons finely chopped fresh parsley leaves
Place ½ tablespoon of the olive oil and the butter in a medium saucepan and cook over medium heat until butter is melted. Add the onion and celery and cook, stirring occasionally, until tender, 3-4 minutes. Stir in the garlic and cook until fragrant, about 1 minute. Stir in the thyme leaves and paprika, season with salt and pepper and cook, covered, on low heat for 2 minutes. Add the wine, turn the heat up and cook until wine evaporates. Remove from the heat, stir in the sardine and cool completely.
When mixture is cool, stir in the sour cream, the remaining 1 tablespoon of olive oil and the parsley. Check seasoning.
The rillette can be kept tightly covered in the fridge overnight, however it is best served at room temperature.
*homemade sour cream: to make 1 cup of sour cream, mix 1 cup (240ml) heavy cream with 2-3 teaspoons lemon juice in a bowl. Whisk until it starts to thicken. Cover with plastic wrap and leave at room temperature for 1 hour or until thicker (I usually leave mine on the counter overnight – except on very warm nights – and it turns out thick and silky in the following morning; refrigerate for a creamier texture)
Serves 2-3
Wednesday, June 7, 2017
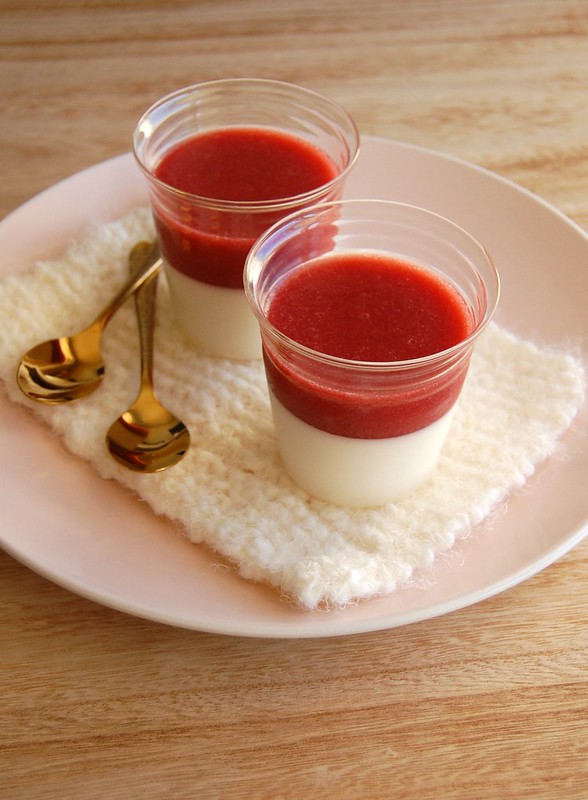
Yogurt panna cotta with strawberry gelatin and killing classics (or not)
Every time I hear about movie remakes I feel a pang in my heart – why mess with the classics and ruin what is great already?
When I first read that Hollywood was working on a remake of Blade Runner I thought: “they are going to destroy such an amazing movie”. Weeks ago I saw the first trailer and it was actually a thing of beauty – it is not actually a remake, it is a sequel. We know sequels and prequels don’t always work – right, Mr. Scott? – but this time Denis Villeneuve is directing it, which makes me hopeful already – Arrival should have won Best Picture last February, even though I did love Moonlight. As of now, it seems they are not killing a classic – let’s wait until October to be sure.
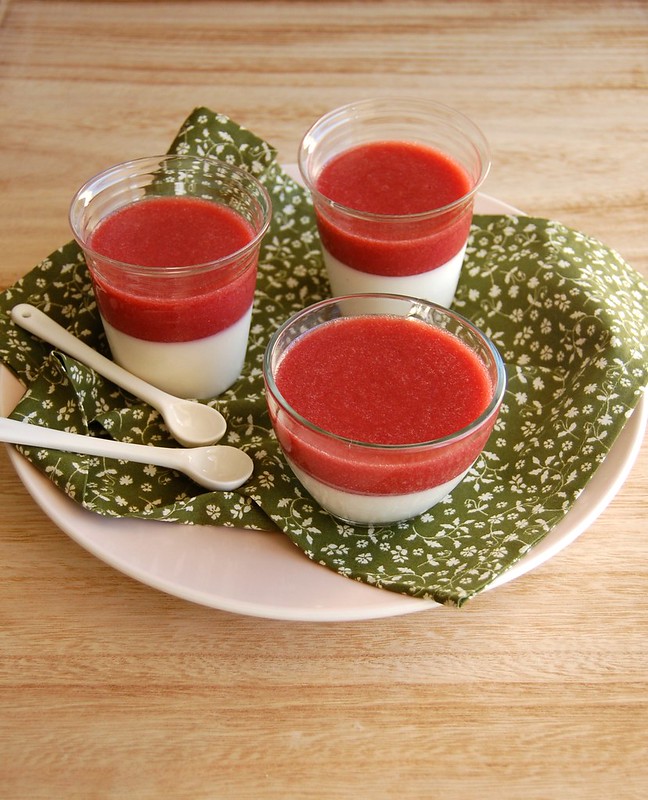
And speaking of classics, I know that some people turn their noses up at panna cottas made with yogurt for they are not “the real deal”, however I love them: you still get richness from the cream, with a nice tang from the yogurt, which for me is a perfect combination – and the texture is amazing. To make the panna cotta even more interesting, I added a layer of strawberry gelatin – homemade, of course – and it is so delicious you can even skip the panna cotta, make only the gelatin and serve it on its own: truly delicious.
Yogurt panna cotta with strawberry gelatin
own creation
Panna cotta:
2 tablespoons cold water
1 ½ teaspoons powdered unflavored gelatin
1 cup (240ml) heavy cream
¼ cup (50g) granulated sugar
¾ cup (195g plain yogurt, room temperature
¼ cup (60ml) whole milk, room temperature
2 teaspoons vanilla extract
pinch of salt
Strawberry gelatin:
600g fresh strawberries, hulled and sliced in half
¼ cup + 2 tablespoons (75g) granulated sugar
2/3 cup (160ml) cold water, divided use
2 teaspoons freshly squeezed lemon or lime juice
2 teaspoons powdered unflavored gelatin
Start by making the panna cotta: set aside six 200-ml glasses.
Put the water in a small bowl and sprinkle over the gelatin. Set aside for 5 minutes for the gelatin to absorb the water – in the meantime, in a small saucepan, heat together the cream and sugar over medium heat, whisking to dissolve the sugar. When the mixture starts to boil, remove from the heat and stir in the yogurt, milk, vanilla and salt. Whisk in the gelatin until dissolved. Pass mixture through a fine sieve and divide between the glasses. Refrigerate for about 4 hours or until firm.
Now the gelatin: in a medium saucepan, combine the strawberries, sugar and 1 tablespoon of the cold water. Cook over medium heat, stirring occasionally, until berries are soft and release their juices, about 10 minutes. Remove from the heat and transfer to a blender. Add ½ cup (120ml) of the cold water and the lemon juice. Blitz until smooth, then pass through a fine sieve back into the saucepan.
Place the remaining cold water in a small bowl and sprinkle over the gelatin. Set aside for 5 minutes for the gelatin to absorb the water.
Heat the strawberry juice in the saucepan over medium heat until it starts to boil - remove from the heat and whisk in the gelatin until dissolved. Stir through a sieve again, let cool to room temperature, then carefully pour over the set panna cotta, dividing the strawberry mixture among the 6 cups. Refrigerate again for about 4 hours or until jelly is set.
The dessert can be kept in the fridge for up to 2 days, covered with plastic wrap.
Serves 6
