Showing posts with label citrus. Show all posts

Friday, September 3, 2021

Lime poppy seed waffles and memories of traveling

Waffles de limão e sementes de papoula


Living in pandemic times is tiresome, and one of the things I miss the most is traveling: from time to time I browse the photos I took in past trips. First I thought that it would be painful to see those photos, but actually it felt really good to realize the privilege I had to know so many wonderful places. Even with the vaccination process going forward, traveling abroad will no longer be like it used to, given the Brazilian currency is completely devaluated. Traveling abroad is now only for a selected group of people, like it used to be in the past, when I was a kid and a teenager.

I look at the photos and think of the wonderful places I visited, the beautiful museums and parks, the restaurants and delicious meals I had. It makes me nostalgic, but happy at the same time.

While browsing my travel photos on a flash drive, I found a folder with recipes I made a good while ago but, for some reason, I did not post here because I did not like the photo, did not like the recipe result, or because of a certain ingredient, like these waffles: poppy seeds have been hard to find in Brazil, therefore I ended up forgetting about the recipe.

Weeks ago I was finally able to buy some poppy seeds and immediately baked an orange cake with them – after that, I posted these waffles on my blog in Portuguese, and now I post them here too. The waffles are delicious, perfumed with lime and with an extra crunch from the poppy seeds – I hope you like them.


Lime poppy seed waffles

own recipe, adapted from these waffles


2 tablespoons granulated sugar

finely grated zest of 2 large limes

1 ¼ cups (175g) all purpose flour

2 teaspoons baking powder

pinch of salt

1 tablespoon poppy seeds

1 large egg, room temperature

¼ cup (60ml) extra virgin olive oil

¾ cup (180ml) whole milk, room temperature

2 teaspoons lime juice

½ teaspoon vanilla extract


In a medium bowl, place the sugar and lime zest and rub them together with your fingertips until sugar is fragrant. Add the flour, baking powder, poppy seeds and salt and whisk well.

In a small bowl, whisk together the egg, olive oil, milk, lime juice and vanilla. Pour over the dry ingredients and stir just until incorporated – do not overmix.

Heat a waffle iron until very hot; lightly coat with nonstick spray – my waffle maker is nonstick, so I do not coat it.

Working in batches, cook waffles until golden and cooked through. Transfer to a wire rack set inside a baking sheet and keep warm in oven until ready to serve.


Makes 5-6 waffles

Tuesday, July 13, 2021

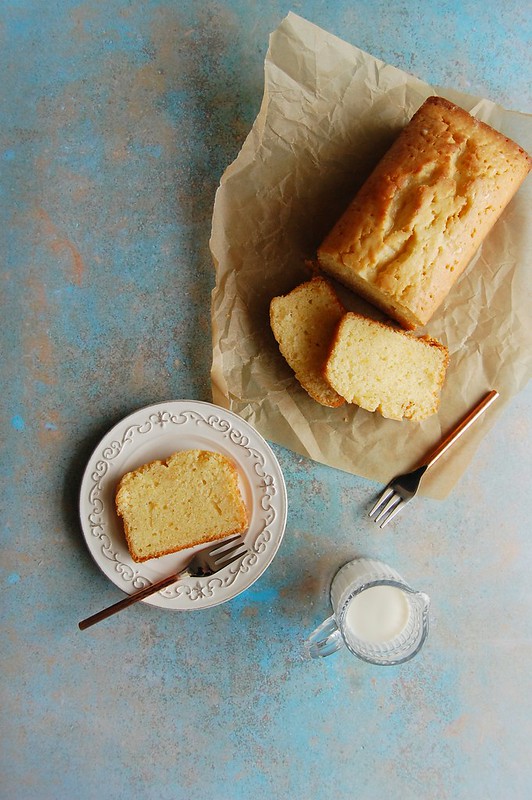
Lemon pistachio yogurt cake - yes, cake again :)

Bolo de iogurte, pistache e limão siciliano

Here I am once again with cake. :) 

Days have been pretty busy around here, lots of work, back at the office twice a week, but all in all everything is fine. I took my first vaccine shot two weeks ago and I felt something I hadn’t felt in quite a long time: hope.

It was quite an emotional moment for me, when a mix of feelings emerged: happiness and relief, and at the same time anger because of all the people who have died because the psychopath who is the president of my country refused to buy vaccines, because he wanted to make money out of it – corruption in its most disgusting shape.

One thing I have not changed on my weeks is baking a cake to snack on in the afternoons: my husband and I got completely hooked on that. The Epicurious yogurt cake recipe continues to be a hit in my house, and I have made it so many times since quarantine started that I have lost track of it. So easy to put together, so adaptable. 

This version I made with lemon and pistachio and it turned out amazing – very tender and sort of marzipany in taste, even though I used pistachios instead of almonds. My favorite take on this recipe, tied with the apple version.


Bolo de iogurte, pistache e limão siciliano


Lemon pistachio yogurt cake

adapted from the Epicurious recipe, once again


Cake:

1 ¼ cups (175g) all-purpose flour

½ cup (50g) pistachio flour (finely ground hazelnuts)

2 teaspoons baking powder

¼ teaspoon table salt

1 cup (200g) granulated sugar

finely grated zest of 2 lemons

¾ cup (180g) plain yogurt

½ cup (120ml) vegetable oil – I used canola

2 large eggs, room temperature

½ teaspoon vanilla extract

1 tablespoon lemon juice

2 teaspoons Cointreau (optional)


To sprinkle to cake:

1 tablespoon granulated sugar


Preheat oven to 180C/350°F. Brush with oil a 6-cup capacity loaf pan (22x11cm/8.5x4.5in), line with baking paper leaving an overhang in the two longer sides and brush the paper as well.

In a medium bowl, whisk together the all purpose flour, pistachio flour, baking powder and salt. Set aside.

In a large bowl, rub sugar and lemon zest with your fingertips until sugar is fragrant. Whisk in yogurt, oil, eggs, vanilla, lemon juice and Cointreau (if using) until smooth. Fold in reserved dry ingredients – if batter is too lumpy, whisk for a few seconds – do not overmix or the cake will become tough.

Pour the batter into prepared pan and smooth the top. Sprinkle with the sugar. Bake for 50-55 minutes, or until a skewer or toothpick inserted into center of the cake comes out clean.

Let cake cool in pan on a wire rack for 15 minutes. Carefully and using the paper as a guide, remove cake from pan and transfer to the rack to cool completely.

The cake can be stored in an airtight container at room temperature for up to 4 days.

Serves 8

Tuesday, June 29, 2021

Rangpur lime cake

Bolo de limão cravo / Rangpur lime cake


When I first started cooking from foreign books, magazines and food blogs, I was amazed to find out so many new ingredients – and until some point in time, I was not able to find some of them in Brazil.

Almond extract was one of them – I could only find the synthetic stuff here, so when I first went to New York, in 2012, I brought home a small bottle of Nielsen-Massey’s almond extract. To my surprise, when I tried it and baked it for the first time, I found it… weird. It was not what I expected – to me, it still felt artificial. So after that I went back to using Amaretto to replace almond extract in recipes, as I had been doing before my trip with great success.

When I saw Claire Saffitz making her almond poppy seed cake on YouTube I was immediately interested in the recipe – since I wanted to bake something but did not have much butter in the fridge – plus my good friend Ellen had told me the cake was truly wonderful.

First I thought of making the cake using Amaretto instead, but then I decided to tweak Claire’s recipe just a little to flavor the cake with the lovely Rangpur limes I had brought from the farmers’ market – the cake turned out tender and absolutely delicious, perfumed with the limes and the smell took over the apartment while the cake was in the oven - it smelled so good it was very hard to wait for the cake to cool to slice it. 😊

If Rangpur limes are not easy to find where you live, go ahead and use lemons or limes instead.  


Rangpur lime cake

slightly adapted from Claire Saffitz’s almond poppy seed cake


Cake:

1 cup (200g) granulated sugar

finely grated zest of 2 large Rangpur limes (about 60g each lime)

1 ½ cups (210g) all purpose flour

¾ teaspoon baking powder

¼ teaspoon salt

¾ cup (180ml) whole milk, room temperature

2/3 cup (160ml) canola oil

1 large egg, room temperature

1 large egg yolk, room temperature

½ teaspoon vanilla extract

1 ½ teaspoons Rangpur lime juice

1 tablespoon Cointreau (optional)


Glaze:

1/3 cup (46g) icing sugar

½ tablespoon (7g) unsalted butter, melted and cooled

3 teaspoons Rangpur lime juice


Preheat the oven to 180°C/350°F. Brush with oil a 6-cup capacity loaf pan (22x11cm/8.5x4.5in), line with baking paper leaving an overhang in the two longer sides and brush the paper as well.

In the bowl of an electric mixer, rub together sugar and zest with your fingertips until sugar is fragrant. Add flour, baking powder, salt, and whisk. Set aside.

In a medium bowl whisk well the milk, oil, egg, egg yolk, vanilla extract, lime juice and Cointreau (if using). Pour over dry ingredients and then mix in high speed for 1 minute or until batter is smooth.

Transfer to prepared pan and bake for about 80 minutes, or until risen and golden and a skewer inserted in the center of the cake comes out clean.

Cool in the pan over a wire rack for 15 minutes, then carefully unmold using paper as guide.

In the meantime, make the glaze: sift the icing sugar into a small bowl, add the remaining ingredients and whisk well until you get a pourable consistency (add more juice if necessary).

After unmolding the cake, peel off the paper from the sides of the cake (only the sides at this point, since the cake will still be very fragile to be turned around) and pierce the cake all around with a toothpick. Brush with the glaze on top and sides, until all the glaze is absorbed. Cool completely before serving.

Cake can be kept in an airtight container at room temperature for up to 3 days.

Serves 8-10 slices

Tuesday, April 27, 2021

Orange and thyme sablés and my love for herbs

Sablés de laranja e tomilho


One of the things I liked the most when I started cooking recipes from different new sources – books, magazines, foodblogs – was learning how to use fresh herbs: until then, I was used to parsley and chives, which are highly popular in Brazilian houses, but not much more than that. 

The first time I added basil to a tomato sauce it was a revelation: it was amazing how much more delicious it tasted! After basil, I became friends with rosemary, sage, mint, marjoram (which I love, even though is not super easy to find), oregano, cilantro, and my absolute favorite: thyme.

I sometimes hear people saying that it goes well with beef, or lamb, but I have used thyme in so many recipes, combined with so many different types of produce and ingredients, and it has worked wonderfully every time. I love it with roasted vegetables, tomato sauce, dishes with cheese and cream, chicken, fish, chickpeas… Really, the sky is the limit for me.

One of my favorite recipes with thyme is actually sweet: these melt-in-your-mouth sables are delicious and might turn you into a thyme-fan, if you are not one yet.


Orange and thyme sablés

own recipe


Dough: 

½ teaspoons fresh thyme leaves

finely grated zest of 2 large oranges

¾ cup (150g) granulated sugar

1 cup (226g) unsalted butter, room temp.

1 large egg, room temp.

½ teaspoon vanilla extract

2 teaspoons Cointreau (optional)

2 ¾ cups (385g) all purpose flour

½ teaspoon table salt


To roll the dough log:

2 tablespoons granulated sugar – demerara works wonders here too


Place the thyme, orange zest and sugar in a mortar and pestle or a mini food processor and crush/grind until sugar is fragrant. Transfer mixture to the bowl of an electric mixer, add butter and cream until light and fluffy – scrape the sides of the bowl occasionally throughout the making of the recipe. Beat in the egg, beating well after the addition. Beat in the vanilla and the Cointreau (if using). In low speed, beat in the flour and salt and mix just until a dough forms – do not overmix.

Divide the dough into two equal parts. Place each on a large piece of parchment paper; shape dough into logs. Fold parchment over dough; using a ruler, roll and press into a 3.5 cm (1.4in) log – like Martha does here. Wrap in parchment. Chill in the fridge until very firm, about 3 hours (the dough logs can be kept in the fridge for up to 3 days or stored in the freezer for up to 1 month.)

Preheat oven to 180°C/350°F; line two large baking sheets with baking paper.

Unwrap one log at a time (keep the other in the fridge) and roll it through the sugar, pressing ever so slightly to help adhere. Cut log into 5mm (about ¼in) thick rounds; space 5cm (2in) apart onto prepared sheets. Bake until golden brown around the edges, 12-15 minutes. Cool on the sheets for 5 minutes, then slide the paper with the cookies onto a wire rack and cool completely. Repeat the process with the remaining dough log.

Packed airtight, the cookies will keep for about 5 days at room temperature or in the freezer for a month.

Makes about 48 cookies

Wednesday, March 10, 2021

Anthill yogurt, lime and almond cake on an atypical day

Bolo formigueiro de iogurte, amêndoa e limão / Anthill yogurt, lime and almond cake

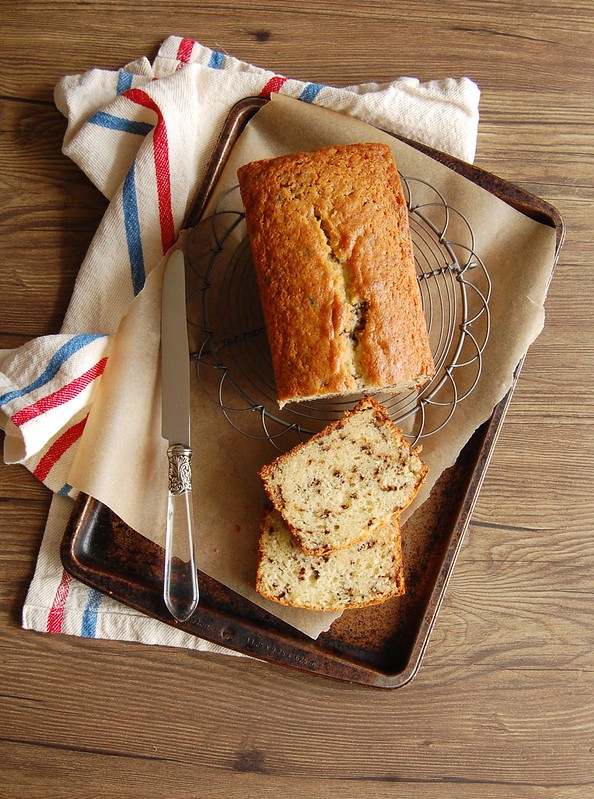
After months without baking cakes, I felt the urge to make a new recipe, a tasty one, to brighten up the rainy Friday. 

In a very atypical day, I woke up with such a disposition as I hadn’t in quite a long time: got up very early, turned on the oven, prepared the cake batter and while it baked and perfumed my home I sat down and wrote down a newsletter for my Portuguese speaking readers. It was a few minutes after 06:00 and the light coming through the balcony gave me energy.

While I picked the recipes for the newsletter and wrote the text, I started feeling so good, it was like a ray of sunshine coming from within: I did not even remember when I had last felt that way, especially about food, recipes. It was such a good feeling I would have kept it in a jar if I could.

When I removed the cake from the oven, it was so beautiful and golden, I wished really hard for it to turn out delicious, not only for our coffee break in that afternoon, but also so I could share the recipes with you here on the blog. I unmolded the cake and left it cooling on the kitchen counter – hours later, I cut myself a slice and tasted it: it was really good! My mind, so tired lately, immediately started thinking about the photo, how I would photograph the cake, which colors would work well with it. I opened my cupboard and, looking at the china and silverware, pictured in my head what would please my eyes the most. I prepped everything, grabbed the camera, took the photos, and again started feeling really good. If I could, I would turn that feeling into a scented candle.

With my hear at peace, with a nice cake to go with my cup of tea and a very productive day, for a moment I felt like my old self again. I hope the Patricia from the past shows up again sometimes, I missed her so much.


Anthill yogurt, lime and almond cake

adapted from the Epicurious recipe, once again


180g all-purpose flour

45g almond meal/finely ground almonds

2 teaspoons baking powder

¼ teaspoon table salt

3 tablespoons chocolate sprinkles

finely grated zest of 2 large limes

1 cup (200g) granulated sugar

¾ cup (180g) plain yogurt – I used sheep’s milk yogurt

½ cup (120ml) vegetable oil – I used canola

2 large eggs, room temperature

1 tablespoon Amaretto (optional)

1 tablespoon lime juice

½ teaspoon vanilla extract

Preheat oven to 180C/350°F. Lightly brush a 6-cup capacity loaf pan with oil, line it with baking paper and then brush the paper as well.

In a medium bowl, whisk together the all purpose flour, almond meal, baking powder and salt. Whisk in the chocolate sprinkles. Set aside.

In a large bowl, rub lime zest and sugar together with your fingertips until sugar is fragrant. Whisk in yogurt, oil, eggs, Amaretto (if using), lime juice and vanilla until smooth. Fold in reserved dry ingredients – if batter is too lumpy, whisk for a few seconds – do not overmix or the cake will become tough.

Pour the batter into prepared pan and smooth the top. Bake for 50-55 minutes, or until a skewer or toothpick inserted into center of the cake comes out clean.

Let cake cool in pan on a wire rack for 15 minutes. Carefully and using the paper as a guide, remove cake from pan and transfer to the rack to cool completely.

The cake can be stored in an airtight container at room temperature for up to 3 days.

Serves 8

Thursday, September 3, 2020

Tangerine sour cream cake

Bolo de tangerina e creme azedo / Tangerine sour cream cake

After I started tweaking Epicuriou’s yogurt cake recipe for different cake flavors it took me a good while to make cake using butter again – every time I thought of it, I had to drop the idea for not having enough time for the butter to soften (I don’t have a microwave oven). 

The day came when I had to use up some heavy cream sitting on the fridge before it went bad, and ended up making a sour cream cake that called for butter. It turned out very tender, perfumed with tangerines – both zest and juice – and delicious. My husband loved the cake with the glaze on top. 

The cake is drenched in tangerine juice after being unmolded, which makes it wonderfully moist. Do try the recipe with oranges in case you don’t have tangerines around (the original recipe calls for lemon).

Bolo de tangerina e creme azedo / Tangerine sour cream cake

Tangerine sour cream cake

adapted from this recipe


Cake:

2 cups (280g) all-purpose flour

1 ½ teaspoons baking powder

¼ teaspoon table salt

1 ¼ cups (250g) granulated sugar

finely grated zest of 2 medium tangerines

180g unsalted butter, softened

3 large eggs, room temperature

½ teaspoon vanilla extract

2 teaspoons Cointreau - optional

1 cup sour cream*


To brush the cake:

3 tablespoons tangerine juice


Glaze:

½ cup (70g) icing sugar

2 tablespoons tangerine juice


Start with the cake: preheat the oven to 180°C/350°F. Butter and flour an 8-cup capacity Bundt pan.

In a medium bowl, whisk together flour, baking powder and salt. Set aside.

Place sugar and tangerine zest in the bowl of an electric mixer and rub them together with your fingertips until sugar is fragrant. Add the butter then beat until mixture is very light and fluffy – scrape the sides of the bowl with a rubber spatula several times throughout the making of the cake. Add the eggs, one at a time, beating well between each addition. Beat in the vanilla and Cointreau (if using).

On low speed, beat in the flour mixture in three additions, alternating with the sour cream in two additions. Beat until combined only – do not overmix.

Spoon into the prepared pan and smooth the top. Bake in the oven for 45-55 minutes or until golden and risen and a skewer inserted in the center of the cake comes out clean. Cool in the pan over a wire rack for 20 minutes, then carefully unmold onto the rack. Once cake is unmolded, brush it all over with the tangerine juice, until it is absorbed completely.

Make the glaze: gradually add the tangerine juice to the icing sugar, mixing until you get the desired consistency. Pour over the cooled cake.

*homemade sour cream: to make 1 cup of sour cream, mix 1 cup (240ml) heavy cream with 2-3 teaspoons lemon juice in a bowl. Whisk until it starts to thicken. Cover with plastic wrap and leave at room temperature for 1 hour or until thicker (I usually leave mine on the counter overnight – except on very warm nights – and it turns out thick and silky in the following morning; refrigerate for a creamier texture)

Serves 10-12

Monday, June 22, 2020

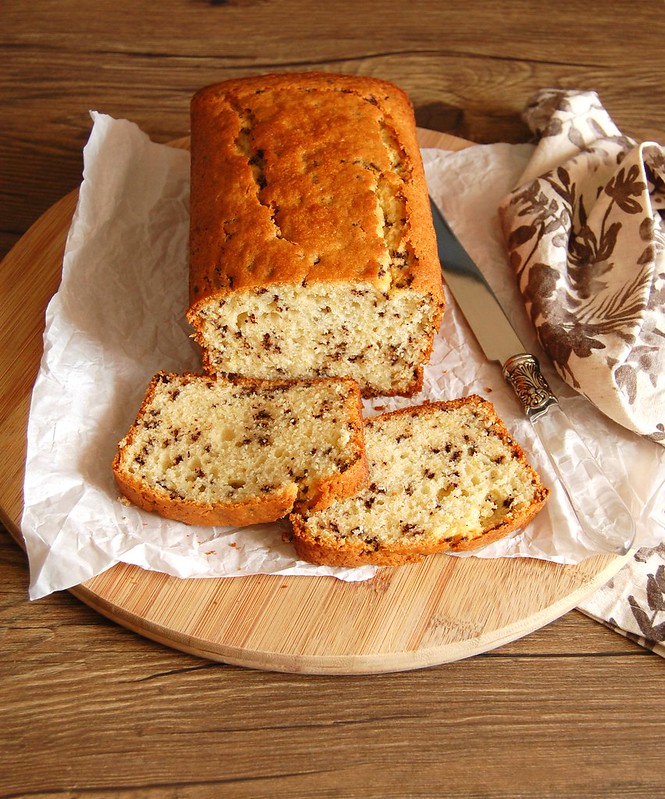
Anthill orange yogurt cake

Bolo formigueiro de laranja e iogurte

Those of you who follow the news about Brazil probably know that the situation here is completely chaotic: not only we have to deal with a virus, we also have to deal with a psychopath in the presidency of the country. It has not been easy to keep sane.

I have found solace in the kitchen, cooking and baking, trying to make my days a little bit lighter and happier. I made this cake last week, using again the Epicurious’ yogurt cake as base and it turned out amazing: super tender, perfumed with orange, delicious. I added chocolate sprinkles in order to turn the cake into an anthill cake, a popular cake in Brazil.

I hope you like the recipe much as I did.

Anthill orange yogurt cake
slightly adapted from Epicurious

1 ½ cups (210g) all-purpose flour
2 teaspoons baking powder
¼ teaspoon table salt
1 cup (200g) granulated sugar
finely grated zest of 1 large orange
¾ cup (180g) plain yogurt – I used sheep’s milk yogurt
½ cup (120ml) vegetable oil – I used canola
2 large eggs, room temperature
1 teaspoon vanilla extract
3 tablespoons chocolate sprinkles

Preheat oven to 180C/350°F. Lightly brush a 6-cup capacity loaf pan with oil, line it with baking paper and then brush the paper as well.
In a medium bowl, whisk together the flour, baking powder and salt. Set aside.
In a large bowl, whisk together the sugar and orange zest and rub together with your fingertips until sugar is fragrant. Add yogurt, oil, eggs and vanilla and whisk until smooth. Fold in reserved dry ingredients, keeping 1 tablespoon reserved, just to blend – if batter is too lumpy, whisk for a few seconds. Stir the chocolate sprinkles into the reserved flour mixture, then fold everything into the batter.
Pour the batter into prepared pan and smooth the top. Bake for 50-55 minutes, or until a skewer or toothpick inserted into center of the cake comes out clean.
Let cake cool in pan on a wire rack for 15 minutes. Carefully and using the paper as a guide, remove cake from pan and transfer to the rack to cool completely.

The cake can be stored in an airtight container at room temperature for up to 3 days.

Serves 8

Monday, June 8, 2020

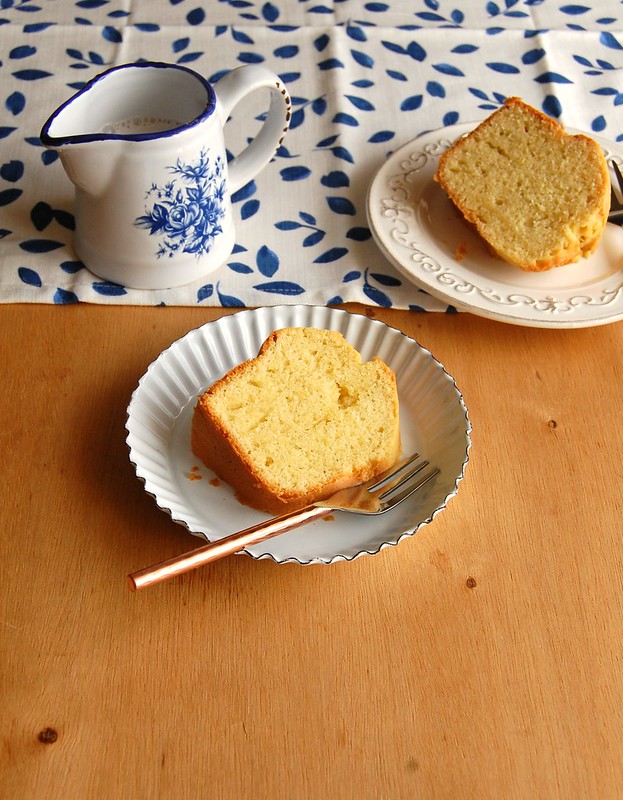
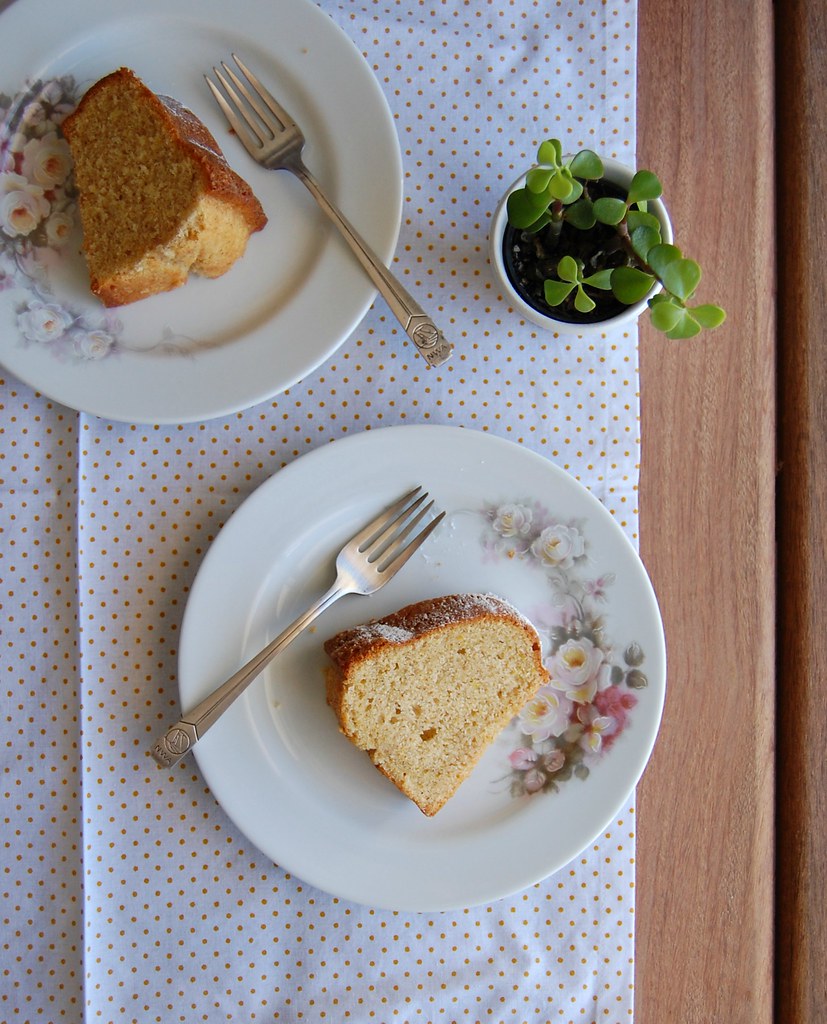
Lime olive oil pound cake

Bolo de azeite e limão / Lime olive oil pound cake

During this isolation period, I have not made too many sweets: my husband is not into them very much and I don’t want to end up eating it all myself. I do search for some chocolate when anxiety comes hard on me, I must confess, but having to deal with an entire cake before it goes stale might be tricky.

So in almost 3 months at home I have baked 3 cakes so far, one being the yogurt marble cake I shared with you weeks ago. I felt like baking another cake last week, but didn’t have time to wait for the butter to soften (and I don’t have a microwave oven to speed up the process). So I made Alice Medrich’s pound cake with olive oil and it was not only easy to put together but it turned out tender and delicious. I could have used sherry, as the original recipe calls for, but I wanted a recipe that more people could make during these times, so I adapted it a little bit and replaced the booze with milk. A little lime zest and a pinch of nutmeg made it all even better.

Lime olive oil pound cake
adapted from the sherry and olive oil pound cake on this book

2 cups (280g) all purpose flour
1 ¼ teaspoons baking powder
1/8 teaspoon freshly ground nutmeg
1/8 teaspoon salt
½ cup + 2 tablespoons (125g) sugar
finely grated zest of 2 limes
150ml flavorful extra virgin olive oil
3 cold eggs
½ teaspoon vanilla extract
150ml whole milk, room temperature

Preheat the oven to 180°C/350°F. Butter and flour an 8-cup capacity Bundt pan.
In a medium bowl, whisk the flour, baking powder, nutmeg and salt. Set aside.

In the bowl of an electric mixer fitted with the whisk attachment, combine sugar and lime zest and rub with your fingertips until sugar is fragrant. Add the oil and beat until well blended. Add the eggs one at a time, beating well after each addition. Continue to beat until the mixture is thick and pale, 3-5 minutes. Beat in the vanilla. Stop the mixer and add 1/3 of the flour mixture. Beat on low speed just until blended. Stop the mixer and add ½ of the milk, then beat just until it is blended. Repeat with another third of the flour, followed by the remaining milk, and then the remaining flour.

Scrape the batter into the pan and smooth the top. Bake until a cake tester comes out clean, about 50 minutes. Cool the cake in the pan on a rack for about 20 minutes. Invert the cake onto the rack and cool completely.

Serves 8-10

Thursday, May 14, 2020

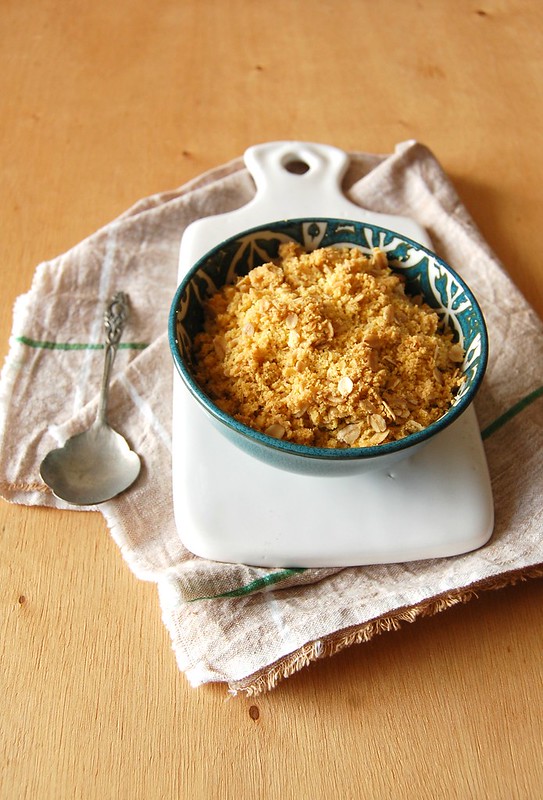
Apple crumble with corn flour and orange and my eating habits during quarantine

Crumble de maçã com fubá e laranja / Apple crumble with corn flour and orange

I don’t know about you guys, but during this quarantine my eating habits have varied a lot: breakfast with homemade bread and fruit, followed by lunch, also homemade, the very Brazilian combo of rice & beans with vegetables on the side, and sometimes beef or chicken (usually once or twice a week, tops). When it comes to dinner… my will power is usually gone.

Some days I make soup, some days I make a hearty salad with beans and eggs, but there are days I crave food that makes me feel hugged – that is when my dinner becomes pizza (homemade, because I am too afraid to order), or a nice loaf of bread with cheeses and some wine. If there are avocados dinner is guacamole. And on top of all that my cravings for sweets are now daily, and no longer only during my PMS days.

In the very few times I went out for groceries I brought home some chocolate, but my stash sometimes vanishes in no time at all. In one of those days I was desperate for something sweet I used one apple that had been in the fridge forever to make a crumble, my favorite dessert. To make the recipe a little bit more interesting, I replaced the all purpose flour with corn flour (finer than cornmeal, but this would also work) and added orange zest – it turned out delicious!

I share the recipe with you today and I hope you like it as much as I did – I am sure this crumble topping would also be delicious with other fruit, like bananas or pears: use whatever you have at hand.

Apple crumble with corn flour and orange
own recipe

Crumble topping:
2 tablespoons demerara sugar – I use it for the crunch, but it can be replaced by granulated sugar
finely grated zest of 1 orange
½ cup (70g) corn flour – it is finer than cornmeal, but the latter works just as fine
1/8 teaspoon baking powder
pinch of salt
2 ½ tablespoons (35g) unsalted butter, cold and diced
¼ cup (22g) rolled oats

Filling:
2 medium Granny Smith apples
2 tablespoons granulated sugar
¼ teaspoon ground cinnamon

Preheat the oven to 350°F/180°C. Have ready two 1-cup capacity each heatproof bowls.

Topping: in a medium bowl, rub together the sugar and orange zest until sugar is fragrant. Add the corn flour, baking powder and salt. Add the butter and rub the ingredients with your fingertips until mixture resembles coarse meal. With a fork, stir in the oats. Freeze the mixture while you prepared the apples: peel and core the apples. Cut them into small dice and transfer to a medium bowl. Add the sugar and cinnamon and stir to coat. Divide the apples between the two dishes and sprinkle with the crumble topping. Bake for about 30 minutes or until topping is golden brown. Serve warm.

The crumble topping might be frozen for up to 1 month in a tightly sealed plastic bag.

Serves 2

Tuesday, May 12, 2020

Red lentil soup with kale chips

Sopa de lentilha vermelha com chips de couve / Red lentil soup with kale chips

As many of you, I have been cooking a lot more since the quarantine started, and it is not an easy task to cook lunch and dinner every day while also trying to vary the menu with what I have at hand – we already feel like Bill Murray in Groundhog Day, so if the food is also the same in every meal… I don’t want to think about that. :D

I was going through some recipes I bookmarked in the past and found this soup on Gourmet Traveller, one of my favorite recipe sources. I decided to freestyle a little with the recipe while also aiming to make it a vegan meal. I did not have vegetable stock in the freezer and was also out of carrots to make some from scratch, so on top of the spices I also added a bay leaf and tomato paste to enhance flavors. And speaking of spices, I used the ones I have at hand and you can adapt and do the same.

To make it vegan I served my soup with kale chips and it worked beautifully – feel free to do what GT suggests and serve the soup with yogurt. Next time I have the soup for dinner (I froze half of it for some other day) I will top mine with a poached egg – my mouth is watering already. :D

Red lentil soup with kale chips
soup recipe adapted from here, chips adapted from several recipes around the web

Soup:
1 tablespoon olive oil
1 small onion, finely diced
1/3 cup celery stalks, finely chopped – I used frozen and added unthawed to the pan
2 large garlic cloves, finely chopped
1 teaspoon yellow mustard seeds
½ teaspoon ground cumin
¼ teaspoon smoked paprika
pinch of red pepper flakes
1 teaspoon tomato paste
5 ½ cups (1,320ml) boiling water
1 1/3 cups (285g) dried red lentils
1 bay leaf
salt and freshly ground black pepper
1 large lime, finely grated zest and juice

Kale chips:
5 large kale leaves
1 ½ teaspoons olive oil
salt and freshly ground black pepper

Preheat the oven to 180°C.
In the meantime, start with the soup: heat the olive oil in a large saucepan over medium-high heat. Add the onion and cook, stirring occasionally, until translucent. Add celery and cook for another 2 minutes. Add garlic and cook for 1 minute – do not overcook it or the soup will taste bitter. Add spices and tomato paste and cook for 1-2 minutes – it is important to cook the tomato paste well to remove the flavor of raw tomatoes from the recipe. Add water and stir. When it comes to a boil, add lentils and bay leaf, season with salt and pepper and then simmer for 15-17 minutes or until lentils are soft and starting to break down – stir occasionally so it does not catch in the bottom of the pan.

While the soup boils, make the chips: tear the kale leaves into medium pieces and transfer to a nonstick large baking pan. Drizzle with the olive oil and season with salt and pepper and dress the leaves using your hands. Spread the kale onto the sheet and bake for 15 minutes. Leave to cool completely so they become crunchy.

If you will eat the soup right away, remove the bay leaf, add lemon rind and juice, then blend with a hand-held blender until a coarse purée. If you are making the soup to freeze, do not add lime zest and juice – do this upon serving.

Divide among bowls and serve with the kale chips.

Serves 4-5

Tuesday, March 27, 2018

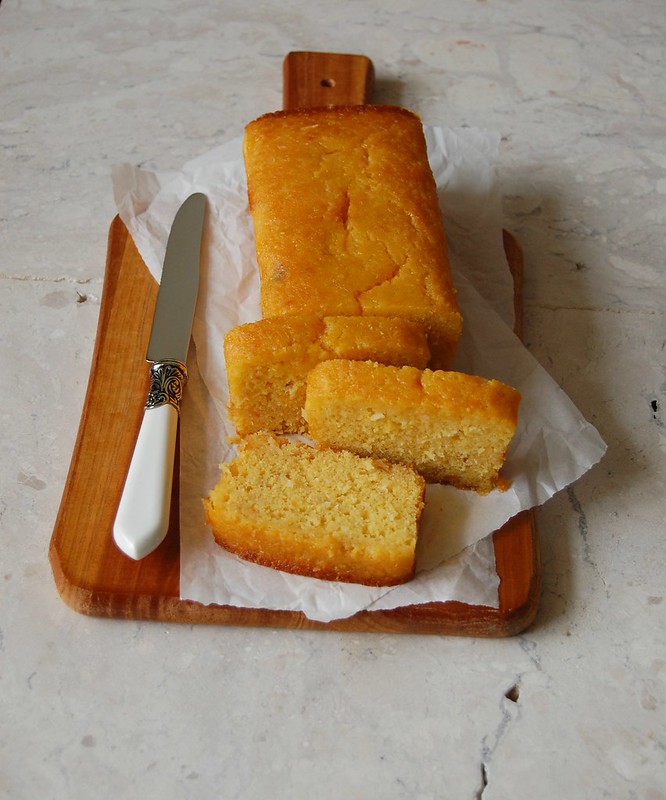
Cornmeal, coconut and marmalade cake

Cornmeal, coconut and marmalade cake / Bolo de fubá, coco e geleia de laranja

I bought Ottolenghi’s beautiful book ages ago and if I am not mistaken the first recipe I made from it was the semolina, coconut and marmalade cake – it is delicious and the recipe yields two cakes: you can enjoy one while making other people’s day better sharing the second loaf.

One day I wanted to make this cake again, however I did not have any semolina at home. I decided then to use corn flour instead and it worked beautifully. Feel free to use one or the other.

Cornmeal, coconut and marmalade cake
slightly adapted from the wonderful Jerusalem

Cake:
¾ cup (180ml) sunflower oil
finely grated zest of 1 orange
1 cup (240ml) freshly squeezed orange juice
160g orange marmalade
3 large eggs
70g granulated sugar
70g unsweetened desiccated coconut
90g all purpose flour
180g fine corn flour
2 tablespoons almond meal
2 teaspoons baking powder
pinch of salt

Soaking syrup:
¾ cup (150g) granulated sugar
140ml water
1 tablespoon orange blossom water

Preheat the oven to 180°C/350°F. Whisk together the oil, orange zest and juice, marmalade, and eggs until the marmalade dissolves. In a separate bowl, mix together all the dry ingredients and add to the wet ingredients. Mix until well combined. The mixture should be runny.
Butter or brush with oil, line two 1-lb loaf pans (8½x4½ in/22x11cm) with baking paper and butter the paper as well. Divide the filling evenly between them. Bake for 45-60 minutes, until a skewer inserted in a cake comes out clean and the tops turn an orangey brown.

Near the end of the baking time, place the syrup ingredients in a small saucepan and bring to a boil, then remove from the heat. As soon as the cakes come out of the oven, start brushing them with the hot syrup using a pastry brush; you’ll need to do this in a few goes, allowing the syrup to soak in for a minute or two before you carry on brushing with more syrup. Make sure you use up all the syrup and it is all absorbed into the cakes.
Cool completely on the pans over a wire rack.

Makes 2 cakes

Tuesday, January 30, 2018

Lemon and raisin oatmeal cookies

Lemon and raisin oatmeal cookies / Cookies de aveia, limão siciliano e passas

Days ago I was thinking (again) of certain ingredients and why they are so hated: aside from coconut and cilantro, I can’t think of anything that divides people as much as raisins do – at least here in Brazil. Every December there are hundreds of memes on Facebook and Twitter of either people saying how much they hate raisins and begging others not to add them to the Christmas dishes or people saying how much they love them, “please add raisins to everything”. It is crazy. :)

I like raisins and have nothing against them, but have to say I prefer them on sweet dishes rather than savory ones. In cookies they work beautifully and here, combined with lemon and oats, make them even more delicious.

Lemon and raisin oatmeal cookies
own recipe

¾ cup (105g) all purpose flour
½ teaspoon baking soda
pinch of salt
1/3 cup (67g) granulated sugar
1/3 cup (58g) light brown sugar, packed
finely grated zest of 2 lemons
½ cup (113g/1 stick) unsalted butter, room temperature
1 large egg, room temperature
½ teaspoon vanilla extract
1 1/3 cups (120g) rolled oats
1 cup (150g) raisins – use golden raisins if you prefer

Preheat the oven to 180°C/350°F. Line two large baking sheets with baking paper.

In a medium bowl, whisk together the flour, baking soda and salt. Set aside.
In the bowl of an electric mixer, rub sugars and lemon zest together with your fingertips until sugar is fragrant. Add the butter and beat until creamy and light – scrape the sides of the bowl occasionally throughout the making of the recipe. Beat in the egg and the vanilla. Add the flour mixture and the oats at once and mix on slow only until a dough forms. Stir in the raisins.

Roll 2 leveled tablespoons of dough per cookie into balls and place onto prepared sheets, 5cm (2in) apart. Bake for 12-14 minutes or until cookies are golden around the edges. Cool on the sheets for 5 minutes, then slide the paper with the cookies onto a wire rack to cool completely.

Makes 20

Tuesday, November 28, 2017

Lime nutmeg snickerdoodles and Christmas gifts

Lime nutmeg snickerdoodles / Snickerdoodles de limão e noz-moscada

This is the time of the year when my colleagues and friends with kids tell me that they have to buy Christmas gifts for their children’s teachers, and since the kids have so many teachers these days they have to buy tons of presents. This is when I suggest them to make cookies or brownies, to wrap them up beautifully and there, gifts are ready. :)

These snickerdoodles may be a good idea for a holiday gift: starting with a traditional snickerdoodle recipe, I swapped the baking soda and cream of tartar for baking powder – since not everyone has cream of tartar around or wants to buy it – and added a touch of lime and nutmeg (instead of the most common cinnamon). The cookies turned out delicious and they smelled amazing while in the oven – you might have to bake an extra batch for your neighbors. :)

Lime nutmeg snickerdoodles
own recipe

Dough:
1 ½ cups (210g) all purpose flour
1 teaspoon baking powder
1/8 teaspoon table salt
¾ cup (150g) granulated sugar
finely grated zest of 2 limes
½ cup (1 stick/113g) unsalted butter, room temperature
1 large egg, room temperature
½ teaspoon vanilla extract

To roll the cookies:
¼ cup (50g) granulated sugar
finely grated zest of 1 lime
¼ teaspoon freshly ground nutmeg

In a medium bowl, whisk together the flour, baking powder and salt. Set aside.

In the bowl of an electric mixer, rub sugar and lime zest together with your fingertips until sugar is fragrant. Add the butter and beat until creamy and light – scrape the sides of the bowl occasionally throughout the making of the recipe. Beat in the egg and the vanilla. Add the dry ingredients at once and mix on slow only until a dough forms. Cover with plastic wrap and refrigerate for 30 minutes – in the meantime, preheat the oven to 180°C/350°F and line two large baking sheets with baking paper.

To roll the cookies: in a small bowl, rub sugar and lime zest together with your fingertips until sugar is fragrant. Stir in the nutmeg. Roll 2 leveled teaspoons of dough per cookie into balls and then roll the balls through the sugar. Place onto prepared sheets, 5cm (2in) apart. Bake for 10-12 minutes or until cookies are golden around the edges. Cool on the sheets for 5 minutes, then slide the paper with the cookies onto a wire rack to cool completely.

Makes about 35

Friday, September 15, 2017

Orange, cinnamon and clove cake and the second recipe I ever learned

Orange, cinnamon and clove cake / Bolo de laranja, canela e cravo

Most people who know me or read the blog know that the first recipe I ever learned how to make was a Brazilian cornmeal cake, the one I published a while ago. I was 11 years old and right then and there a whole new world opened up in front of me: from that day on I engaged in a relationship with food and cooking that changed my life for good.

What not everyone knows is that the second recipe I learned how to make was an orange cake – very simple, yet so delicious, I can almost smell it if I close my eyes for a moment. For that reason (aside from the fact that I am a citrus nut) orange cakes have a special place in my heart and I am always looking for new ways to make them.

The one I bring you today is perfumed with both cinnamon and cloves and the inspiration for this combo of flavors came from the sablés I posted a couple of years ago, when I was saying goodbye to my dear Peggy Olson.

Orange, cinnamon and clove cake
own recipe

2 cups (280g) all purpose flour
2 teaspoons baking powder
1/8 teaspoon table salt
1 teaspoon ground cinnamon
¼ teaspoon ground cloves
1 cup (200g) granulated sugar
finely grated zest of 2 oranges
¾ cup (170g) unsalted butter, softened
2 large eggs, room temperature
½ teaspoon vanilla extract
1 cup (240ml) sour cream*
Icing sugar, for dusting the cake

Preheat the oven to 180°C/350°F. Butter and flour a 2-liter capacity Bundt pan.
In a medium bowl, whisk together the flour, baking powder, salt and spices. Set aside.
In the bowl of an electric mixer, combine granulated sugar and orange zest and rub them together until sugar is fragrant. Add the butter and using the mixer beat until creamy and light in color – scrape the sides of the bowl occasionally throughout the making of the recipe. Beat in the eggs, one at a time, beating well after each addition. Beat in the vanilla.

On slow speed, beat in the dry ingredients in three additions, alternating with the sour cream in two additions (start and end with the dry ingredients). Beat just until incorporated. Pour into prepared pan and smooth the top. Bake for 40-45 minutes or until cake is golden and risen and a skewer inserted in the center comes out clean. Cool in the pan over a wire rack for 20 minutes, then carefully unmold onto the rack and cool completely.
Dust with icing sugar before serving.

* homemade sour cream: to make 1 cup of sour cream, mix 1 cup (240ml) heavy cream with 2-3 teaspoons lemon juice in a bowl. Whisk until it starts to thicken. Cover with plastic wrap and leave at room temperature for 1 hour or until thicker (I usually leave mine on the counter overnight – except on very warm nights – and it turns out thick and silky in the following morning; refrigerate for a creamier texture)

Serves 8

Tuesday, September 12, 2017

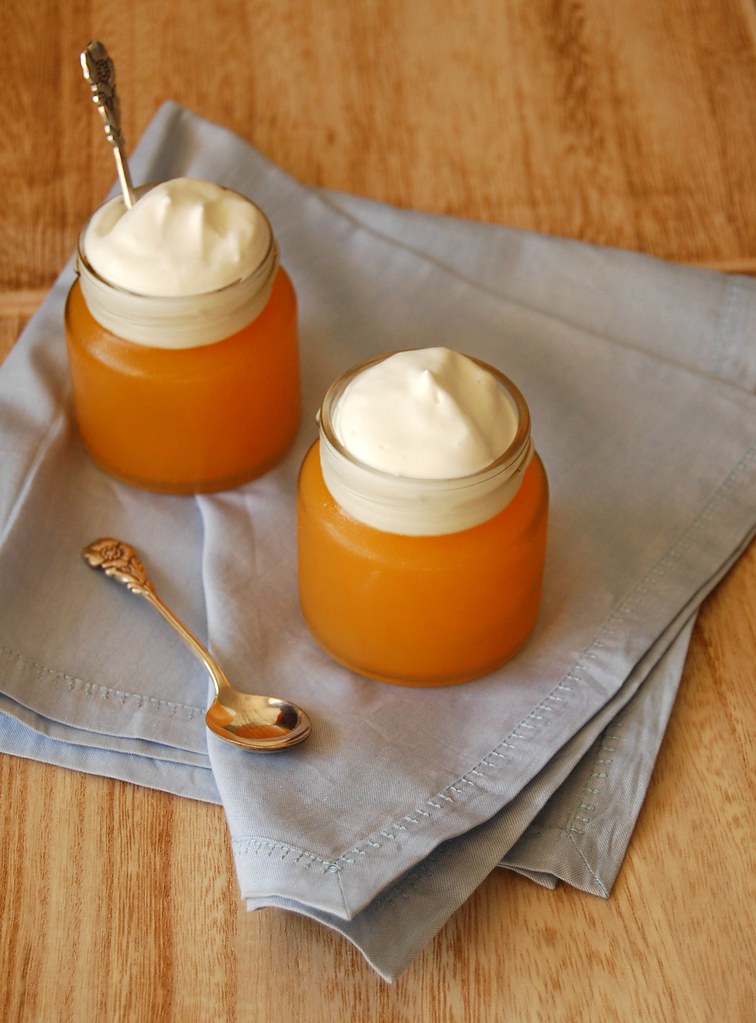
Tangerine Prosecco gelatin and a scary movie

Tangerine prosecco gelatin / Gelatina de tangerina e prosecco

I am not very brave when it comes to horror films, but after watching the teaser for It I really wanted to watch the movie. My husband asked if I was sure this was a good idea, and I told him that I would be OK since I am not afraid of clowns.
A few minutes into the movie and I was scared as hell and with my eyes closed. :D To be honest I did not recall the 1990 movie being so scary. :S

As promised, I bring you today a recipe that calls for the tangerine juice left from making the financiers I posted yesterday – and the color of the gelatin reminds me of Beverly’s beautiful hair (I was impressed at how much the young Sophia Lillis looks like Amy Adams). I added Prosecco to the gelatin to make this an adult dessert, but if you don’t drink alcohol or want to make this for kids just replace the Prosecco with more tangerine juice.

Tangerine Prosecco gelatin
own recipe

1 ¼ teaspoons gelatin powder
1 ½ tablespoons water
200ml fresh tangerine juice, strained
1 tablespoon granulated sugar
100ml Prosecco
whipped cream, for serving (optional)

In a small bowl, combine the gelatin with the water. Set aside.
In a medium saucepan combine the tangerine juice and sugar and stir over low heat until sugar is dissolved and mixture is lukewarm. Remove from the heat and whisk in the Prosecco, followed by the gelatin. Set aside to cool for 10 minutes. Strain mixture through a fine sieve into four ½-cup capacity glasses. Refrigerate for 3-4 hours or until set.
Serve with a dollop of the whipped cream.

Serves 4


Monday, September 11, 2017

Tangerine coconut financiers, videos and texts

Coconut tangerine financiers / Financiers de coco e tangerina

I was talking to my husband the other day about why I still blog, after eleven years. I was telling him how people are drawn to videos nowadays and that everyone says that blogs are a thing of the past.

The conversation started because I wanted to read reviews about a hair product and all I could find was videos about it. I did not want videos, I wanted text, and there were hardly any. Until that day I used to tell my husband that I did not make recipe videos because I do not have time for them (which is true), but I suddenly realized that I actually don’t like recipe videos (with very few exceptions) – I prefer text whenever possible. I like to read people’s ideas, and it makes me happy when they read me too.

These financiers are a result of replacing almond meal with desiccated coconut, and such a tropical flavor paired beautifully with the citrus touch from the tangerines. This recipe goes to those of you who still feel that blogs are worth reading, and I hope you come back later this week: I will post another recipe using the juice of these very tangerines, since in the financiers you will only use the zest.

Tangerine coconut financiers
own recipe

3 tablespoons (30g) all purpose flour
2/3 cup (67g) desiccated unsweetened coconut
½ cup (70g) icing sugar, sifted
pinch of salt
finely grated zest of 2 tangerines
3 egg whites (84g)
1/3 cup (75g) unsalted butter, melted and cooled
½ teaspoon vanilla extract

In a medium bowl, whisk together the flour, coconut, icing sugar, salt and tangerine zest. Whisk in the egg whites. Whisk in the butter and vanilla until smooth. Cover with plastic wrap and refrigerate for 1 hour.

Preheat the oven to 200°C. Butter twelve 2-tablespoon capacity molds or mini muffin pans.
Divide the batter among the prepared pans and smooth the top. Bake for about 10 minutes or until golden and risen – a skewer in the center should come out clean.
Cool in the pans over a wire rack for 5 minutes, then carefully unmold and transfer to the rack, cooling completely.

Makes 12

Tuesday, August 29, 2017

Orange olive oil waffles

Orange olive oil waffles / Waffles de laranja e azeite de oliva

I do not make waffles very often because my husband does not like them, leaving me to eat the whole batch alone (not pretty), but since I like them a lot I am always interested in trying new flavors and toppings. A bit of research led me to the fact that the key to get crispier, crunchier on the outside waffles was to use oil instead of butter, and it actually worked.

Now that I no longer can eat regular dairy I have been making my waffles like the ones I bring you today, with olive oil and lactose-free milk, but if you prefer the butter flavor over the crispy texture it is just a matter of replacing the olive oil with melted unsalted butter.

I absolutely love the combination of orange and blueberries – one of my favorite flavor combos – so it is my duty to tell you that the waffles taste amazing served with the baked blueberry jam I posted a couple of years ago (it works well with frozen, thawed blueberries when fresh ones are not available).

Orange olive oil waffles
own recipe

2 tablespoons granulated sugar
finely grated zest of 1 large orange
1 ¼ cups all purpose flour
2 teaspoons baking powder
pinch of salt
1 large egg
¼ cup (60ml) extra virgin olive oil
¾ cup (180ml) whole milk, room temperature
½ teaspoon vanilla extract

In a medium bowl, place the sugar and orange zest and rub them together with your fingertips until sugar is fragrant. Add the flour, baking powder and salt and whisk well.
In a small bowl, whisk together the egg, olive oil, milk and vanilla. Pour over the dry ingredients and stir just until incorporated – do not overmix.

Heat a waffle iron until very hot; lightly coat with nonstick spray – my waffle maker is nonstick, so I do not coat it.
Working in batches, cook waffles until golden and cooked through. Transfer to a wire rack set inside a baking sheet and keep warm in oven until ready to serve.

Makes 5-6 waffles

Friday, August 11, 2017

Orange, blueberry and olive oil muffins and a lactose problem

Orange, blueberry and olive oil muffins / Muffins de laranja, mirtilo e azeite de oliva

I know how rare it is nowadays to post recipes on the blog on two consecutive days, and I am still running around like a headless chicken trying to do everything I have to do lately, but since next week will be even busier than the week ending today I decided to go crazy and bring you these muffins: again a speedy recipe, but a very delicious one. These muffins are golden and really moist, very tender and perfumed with orange zest.

I am a complete sucker for citrus as you all know and in these muffins the orange flavor compliments the blueberries in the most wonderful way. The addition of olive oil is a nice surprise, not to mention that this became my go-to muffin recipe after I was diagnosed as lactose intolerant, a month ago or so: I have made it using lactose-free milk with good results (next time I will try making them using almond milk).

Orange, blueberry and olive oil muffins
own recipe

¾ cup (150g) granulated sugar
finely grated zest of 2 oranges
1 ½ cups (210g) all purpose flour
2 teaspoons baking powder
1/8 teaspoon table salt
1 large egg, room temperature
½ cup (120ml) whole milk, room temperature
1/3 cup (80ml) extra virgin olive oil
½ teaspoon vanilla extract
1 cup (140g) blueberries, fresh or frozen (unthawed)

Preheat the oven to 200°C/400°F. Line a 12-hole muffin pan with 8 paper cases. Fill the empty cavities halfway through with water (this will prevent the pan from warping).

In a large bowl, place sugar and orange zest and rub them together with your fingertips until sugar is fragrant. Whisk in the flour, baking powder and salt.
In a medium bowl, whisk together the egg, milk, olive oil and vanilla until smooth. Pour over dry ingredients and stir lightly with a fork just until combined – do not overmix or your muffins will be tough; muffin batter is not smooth as cake batter.
Stir in the berries. Divide the batter among the paper cases, then bake for about 20 minutes or until risen and golden and a skewer inserted in the center comes out clean. Cool in the pan over a wire rack for 5 minutes, then carefully remove the muffins from the pan and transfer to the rack. Cool completely or serve warm.

Makes 8

Tuesday, July 4, 2017

White chocolate and lemon blondies

White chocolate and lemon blondies / Blondies de chocolate branco e limão siciliano

Back in the days when I was still dreaming of writing a book I remember telling my husband that I intended to add as many citrus recipes to it as possible, and had all types of ideas for lemon baked goods and desserts – the thought of the fruit makes my mouth water already.

However, every time I went to the grocery store the price of the lemons made me cringe, and I would go back home empty handed. I was unemployed then, so I went from wanting a book filled with lemon recipes to choosing very wisely which recipes to use the fruit in. :(

That is one of the reasons why I am so proud of these blondies: they are delicious, perfumed with lemon and the tart flavor of the fruit goes really well with the sweetness of the white chocolate. The lemons were expensive, but it was worth spending that money to make something so tasty (not to mention easy): the blondies were gone very fast in each of the three times I made them.

White chocolate and lemon blondies
own recipe

¼ cup (50g) granulated sugar
finely grated zest of 2 lemons
2 ½ tablespoons (35g) unsalted butter, room temperature
200g white chocolate, chopped – divided use
1 large egg
½ teaspoon vanilla extract
¾ cup (105g) all purpose flour
½ teaspoon baking powder
pinch of salt

Preheat the oven to 180°C/350°F. Lightly butter a square 20cm (8in) baking pan, line it with foil leaving an overhang on two opposite sides and butter the foil as well.

In a small bowl, rub together with your fingertips the sugar and the lemon zest until sugar is fragrant. Set aside.
In a large bowl set over a saucepan of simmering water (do not let the bottom of the bowl touch the water) combine 150g of the chocolate and the butter, stirring until they are both melted. Remove from the heat and cool slightly.
Whisk in the sugar, followed by the egg and vanilla. With a rubber spatula, fold in the flour, baking powder and salt. Fold in the remaining 50g white chocolate.

Spread the batter evenly into the prepared pan and smooth the top. Bake for 15-20 minutes or until a skewer inserted in the center comes out with moist crumbs. Cool completely in the pan over a wire rack before cutting into squares to serve.

Makes 16


Wednesday, June 14, 2017

Pear lemon muffins with almond streusel

Pear lemon muffins with almond streusel / Muffins de limão siciliano e pera com farofinha de amêndoa

When I cook or bake at home I many times start with a specific idea, something I saw somewhere or that I really want to eat at that moment. However, there are times that I open the fridge or the cupboard and decide what to make at the sight of whatever there is at home.

The muffins I bring you today came to existence when I was grabbing vegetables to cook lunch: I opened the fridge and saw the pears there. My husband had brought home some beautiful lemons so I decided to pair them with the pears, and the idea to add the almond streusel topping crossed my mind because I had baked a fruit crumble with almonds a couple of days before that.

While the whole process of how this recipe was created might be very mundane, I can assure you the muffins are everything but: they are tender, smell and taste amazing.

Pear lemon muffins with almond streusel
own creation

Streusel:
2 ½ tablespoons (25g) all purpose flour
¼ cup (25g) almond meal
1/3 cup (65g) demerara sugar
pinch of salt
2 tablespoons (28g) unsalted butter, melted and cooled
¼ cup (25g) flaked almonds

Muffins:
½ cup (100g) granulated sugar
finely grated zest of 2 lemons
2 cups (280g) all purpose flour
2 teaspoons baking powder
pinch of freshly ground nutmeg
pinch of salt
½ cup (113g/1 stick) unsalted butter, melted and cooled
2 large eggs
¾ cup (180ml) whole milk, room temperature
1 teaspoon vanilla extract
3 small pears (about 400g/14oz in total), peeled, cored and chopped

Preheat the oven to 200°C/400°F. Line a 12-hole muffin pan with paper cups.

Make the streusel: mix flour, almond meal, sugar and salt in a small bowl. Add the butter and stir with a fork until mixture resembles coarse breadcrumbs. Still using the fork, stir in the almond flakes, but do not overmix. Refrigerate while you make the muffin batter.

Now, the muffins: in a large bowl, combine sugar and lemon zest and rub them together with your fingertips until sugar is fragrant. Whisk in the flour, baking powder, nutmeg and salt.
In a medium bowl, whisk together the butter, eggs, milk and vanilla. Pour them over the dry ingredients and, with a fork, gently but quickly stir to blend – do not overmix, or your muffins will be tough. Incorporate the pear pieces.
Divide the batter evenly among the muffin cups. Sprinkle with the streusel and lightly press it over the batter to make it stick.

Bake for about 20 minutes, or until the tops are golden and a toothpick inserted into the center of the muffins comes out clean. Transfer the pan to a rack and cool for 5 minutes before carefully removing each muffin from its mold.

Makes 12

Related Posts with Thumbnails