Showing posts with label yeast. Show all posts

Monday, March 22, 2021

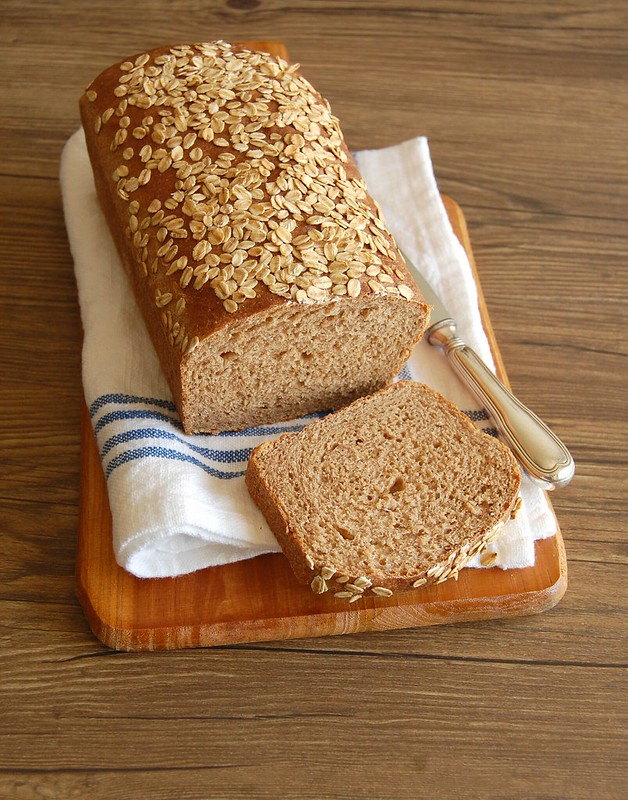
100% whole wheat bread for delicious breakfasts - or sandwiches

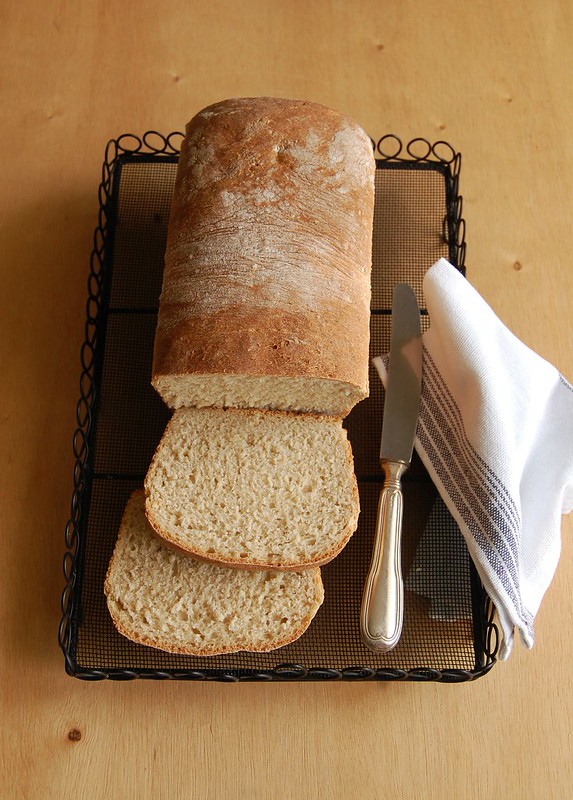
Pão 100% integral

For quite a long time now I have been baking this wonderful bread every week and it makes my breakfasts tastier and healthier: I found this recipe almost two years ago and it instantly became one of my all-time favorites – and many of my Brazilian readers love it too.

I usually bake this bread on the weekends, cut into slices and freeze them – I take the slices from the freezer as I need them, and even when I forget to do that in advance I can pop the slices straight onto a frying pan over medium heat and in no time I have fresh bread to go with my latte – so good.

Even though this bread is made entirely with whole wheat flour it turns out so tender it is even hard to slice it sometimes. It is delicious and I feel fueled until lunch time every day. My six-year-old nephew is a fan of this bread, too – he was very surprised when I told him a long time ago that I’d made the bread myself. :)

I have also already made this bread replacing 50g of the flour with quinoa flakes and with teff flour and it worked like a charm – when using teff the flavor gets a bit nuttier.

This is a recipe I adapted from the wonderful King Arthur Flour website – if you like baking like I do, their website is perfect for you.

Pão 100% integral


100% whole wheat bread

slightly adapted from King Arthur Flour's wonderful website


1 cup (240ml) lukewarm water

2 ½ teaspoons dried yeast

2 tablespoons honey – you can also use agave or maple syrup

¼ cup (60ml) vegetable oil – I use canola

400g whole wheat flour

1 ¼ teaspoons table salt

1 tablespoon rolled or jumbo oats

Place water, yeast and 1 teaspoon of the honey in the bowl of an electric mixer fitted with the dough hook. When mixture foams (about 5 minutes) add the remaining honey, the oil, flour and salt and mix with a spatula or wooden spoon. Mix in medium speed for about 10 minutes or until dough is smooth and elastic and pulls away from the sides of the bowl – you can knead by hand for about 15 minutes too.

Cover with plastic wrap and let it proof for 70-90 minutes or until doubled in size.

Lightly brush with oil a 6-cup capacity loaf pan.

Gently deflate the dough to remove the excess air, then roll it onto a lightly floured surface until you get a rectangle of roughly 30x20cm (12x8in), then shape it into a log. Transfer to prepared pan and cover loosely with a clean kitchen towel. Let the bread rise for about 40-60 minutes, or longer if the day is too cold. In the meantime, preheat the oven to 200°C/400°F.

Brush the top of the bread lightly with water and sprinkle with the oats, pressing ever so slightly for them to stick. Bake for 30-35 minutes or until golden brown - bread should sound hollow when tapped with your fingers. Cool in the pan over a wire rack for 5 minutes, then carefully unmold onto the rack to cool. Cool completely.

Makes 12-14 slices

Monday, March 12, 2018

Simple breakfast bread (dairy free)

Simple breakfast bread / Pão de forma do meu jeito

I wanted a bread recipe I could make sandwiches with, turn into toast for breakfast, and do everything we do with packaged white bread. I no longer buy that and most of the homemade versions I found called for milk or butter (or both). I thought of making Kim Boyce’s oatmeal bread, which is delicious, replacing the butter with olive oil, but the making of that recipe is not as straightforward as I needed it to be.

I reached out to King Arthur Flour’s website and I bring you my take on their white breakfast bread: a bit of whole meal flour, a bit of oats, no dairy. It is not a light bread and I like it that way, but the big surprise came when my 3-yeard old nephew saw the bread cooling on the counter and asked for some. I gave him a tiny piece, so sure that he would not enjoy such a dense kind of bread, but he devoured it in seconds and asked for seconds (and thirds). :)

Simple breakfast bread
slightly adapted from here

1 1/3 cups (320ml) lukewarm water
1 ½ teaspoons dried yeast
1 tablespoon demerara sugar – for the caramel flavor; use granulated if you prefer
½ tablespoon honey
1 ½ tablespoons extra virgin olive oil
3 cups (420g) all purpose flour
½ cup (70g) whole wheat flour
1/3 cup (30g) rolled oats
1 ½ teaspoons table salt

Place the water, yeast, sugar and honey in the bowl of an electric mixer fitted with the dough hook. Whisk with a fork and set aside until foamy. Add the olive oil, flours, oats and salt and knead for 8-10 minutes until a smooth and elastic dough forms. Transfer to a large bowl brushed with olive oil, cover with plastic wrap and set aside to prove for 1 ½ hours, or until doubled in size.

Brush with olive oil a 5-cup capacity loaf pan. Punch the dough to remove the excess of air and transfer to a slightly floured surface. Roll into a large rectangle, then fold it like a letter and fit into the prepared pan. Cover and set aside to prove again for 1 hour – in the meantime, preheat the oven to 200°C/400°F.
Bake for about 30 minutes or until golden brown – bread should sound hollow when tapped with your fingers. Cool in the pan over a wire rack for 5 minutes, then carefully unmold onto the rack to cool. Cool completely.

Makes about 10 slices

Wednesday, January 10, 2018

Roasted garlic pecorino focaccia

Roasted garlic pecorino focaccia / Focaccia de alho assado e pecorino

I can say that after the lovely Ina my favorite Food Network presenter is Rachael Ray – she is fun and her food always looks good – even though most of the times her portions look too generous to me. :)

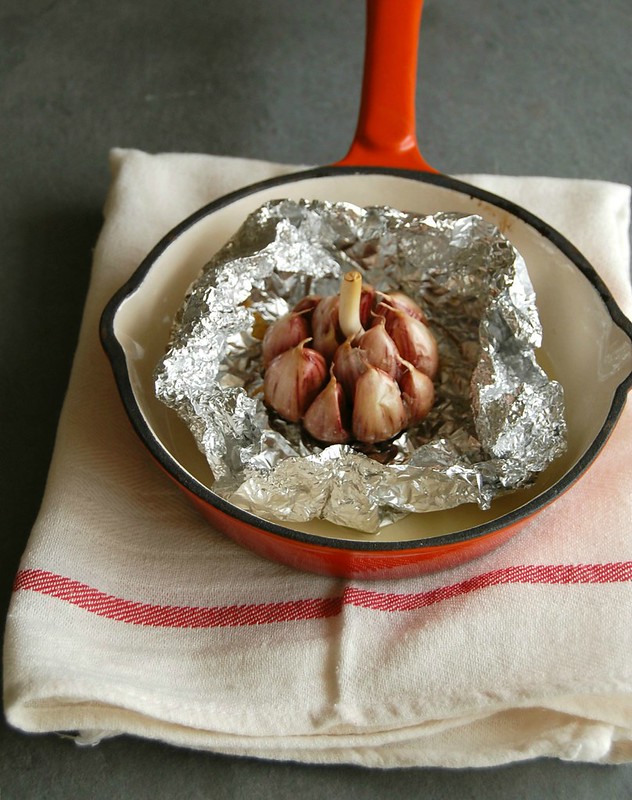
She constantly says how much she loves garlic and I always relate to that: I have a heavy hand with it comes to adding garlic to my food and usually double the amount requested in recipes (maybe that is why both my husband and I rarely have colds). And don’t even get me started on roasted garlic: I just love the stuff so much I had to mix it into a focaccia dough. It turned out delicious, but if you are not a fan of bold flavors you can tone this down by adding half the amount of garlic and replacing the pecorino with parmesan.

Roasted garlic pecorino focaccia / Focaccia de alho assado e pecorino


Roasted garlic pecorino focaccia
own recipe

For the roasted garlic:
1 large head of garlic, whole
1 tablespoon extra virgin olive oil

Dough:
2 teaspoons dried yeast
¼ teaspoon granulated sugar
300ml lukewarm water
3 tablespoons extra virgin olive oil, plus a little extra to drizzle over the focaccia
3 cups (455g) all purpose flour
1 teaspoon table salt
1/3 cup finely ground pecorino
2 tablespoons fresh thyme leaves

Preheat the oven to 180°C/350°F. Place the whole head of garlic in the center of a medium piece of foil. Drizzle with the olive oil and close the ends of the paper, pressing them together so the oil does not leak. Place the foil package in a small baking sheet and roast for about 45 minutes or until garlic is tender. Remove from the oven and leave to cool completely. When garlic is cold, remove the pulp from the skins and mash it with a fork to form a purée – save the olive oil left in the foil for later. Set the garlic aside.

In the large bowl of a stand mixer, combine the yeast, sugar and water and mix with a fork. Set aside for 5 minutes or until foamy. Add the olive oil, flour, salt and half of the pecorino and mix with the dough hook for 6-8 minutes or until an elastic and smooth dough forms – it kneading by hand, 10-12 minutes should do. Add the mashed garlic, half the thyme leaves and mix well. Transfer to a lightly oiled large bowl, cover with plastic wrap and set aside in a warm spot for 1 ½ hours or until doubled in volume.

Lightly brush a large baking sheet with olive oil. Carefully transfer the dough to the prepared sheet, gently so you don’t lose the air trapped in the dough. Shape it onto a 30x20cm (12x8in) oval. With lightly floured fingertips, pierce the dough in a few spots without pressing it too deep. Measure the olive oil left from roasting the garlic and add more olive oil until you have 1 tablespoon. Drizzle over the dough, then sprinkle it with the remaining thyme leaves and pecorino. Set aside in a warm place for about 20 minutes – in the meantime, preheat the oven to 200°C/400°F. Bake the focaccia for 25-30 or until golden brown. Remove from the oven and very carefully slide it onto a wire rack. Serve warm or at room temperature. The focaccia can be kept in an airtight container at room temperature for up to 2 days and tastes fresh again if reheated briefly in the oven.

Serves 8-10

Thursday, November 23, 2017

Gorgonzola and fresh oregano grissini

Gorgonzola and fresh oregano grissini / Grissini de orégano fresco e gorgonzola

At home we like nibbling very much, especially on weekends, and that came to my mind as I set up a plate of bread, cheese and fruit last Saturday for dinner: a glass of wine and the meal was perfect.
Sometimes we have guacamole with homemade tortillas, and of course there are days I don’t even want to enter the kitchen: those are the days for pizza. :)

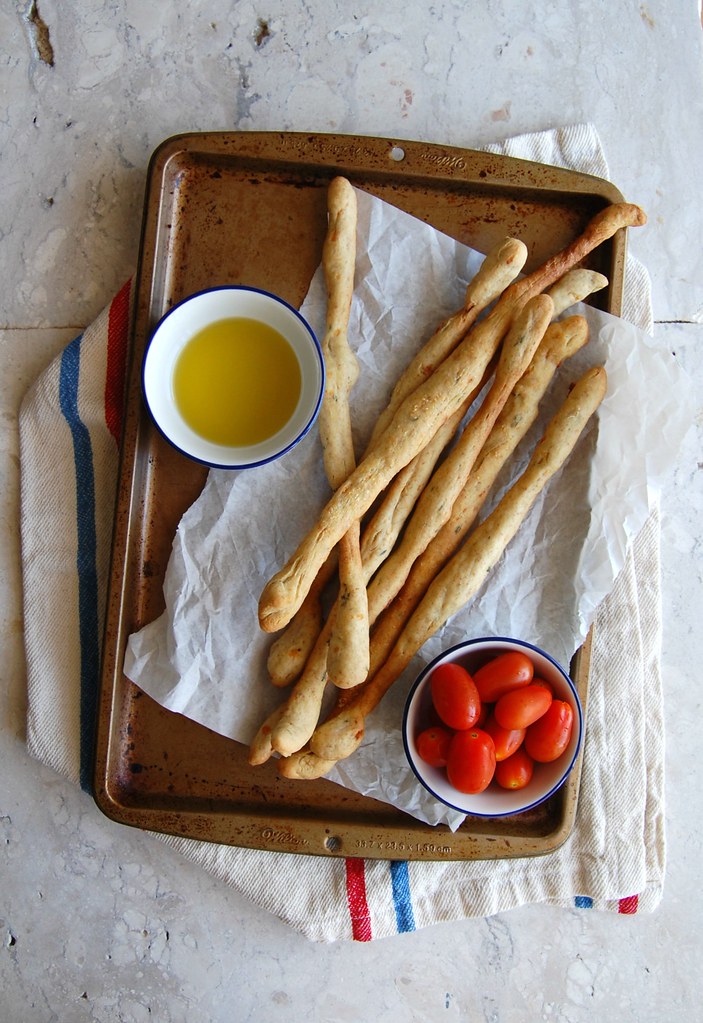
If you are feeling a bit more enthusiastic than me lately please have a go at these grissini: they are absolutely delicious and great for the cheese/fruit platter (and with wine, too). :)

Gorgonzola and fresh oregano grissini
own recipe

1 teaspoon dried yeast
1 teaspoon granulated sugar
200ml lukewarm water
2 cups (280g) all purpose flour
1/3 cup (46g) whole wheat flour
3 tablespoons olive oil + a bit extra for brushing
1 teaspoon table salt
2 tablespoons fresh oregano leaves, packed
50g gorgonzola, coarsely grated or crumbled if too soft
3 tablespoons finely grated parmesan

In the bowl of an electric mixer fitted with the dough hook, mix the yeast, sugar and water with a fork. Set aside for about 5 minutes or until foamy. Add the flours, olive oil and salt. Mix on medium for about 8 minutes or until mixture turns into an elastic and smooth dough – if mixing by hand, 10-12 minutes should do it. Mix in the oregano and the gorgonzola, shape the dough into a ball and transfer to a large bowl lightly brushed with olive oil. Cover with plastic wrap and set aside to prove for 1 ½ hours, or until doubled in size.

Preheat the oven to 200°C/400°F. Line two large baking sheets with foil and brush it with olive oil.
Punch the dough to remove the excess air. Divide dough in 24 equal portions e roll each of them into a 30cm (12in) sausage shape – if dough is too stick, lightly flour your counter, but avoid too much flour or the dough will be tough and dry. Place the grissini onto the foil leaving 2cm (little less then 1in) between them. Brush them with olive oil, sprinkle with parmesan and bake for 20-25 minutes or until golden brown.
Transfer the sheets to a wire rack and cool completely.

Makes 24

Wednesday, October 4, 2017

Spinach, cheese and chorizo calzones

Spinach, cheese and chorizo calzones / Calzones de espinafre, queijo e chorizo

When I have difficult and/or very busy days I usually take a breather and go to People magazine’s website: I get to read about celebrities and for that I don’t need to use any of my brain cells. :D

Today I read about how Kim Cattrall “killed” the plans of a third SATC movie, and for that we all have to send Kim a big thank you card – the first movie was nice, but the second was absolutely ridiculous and just the thought of certain scenes makes me agonize all over again. Some of the comments suggest that the writers kill Samantha Jones and do the movie with the other three women instead, however I don’t find it a smart decision for the fun of the TV show was the four of them together, and Samantha was always my favorite character (followed very closely by Miranda).

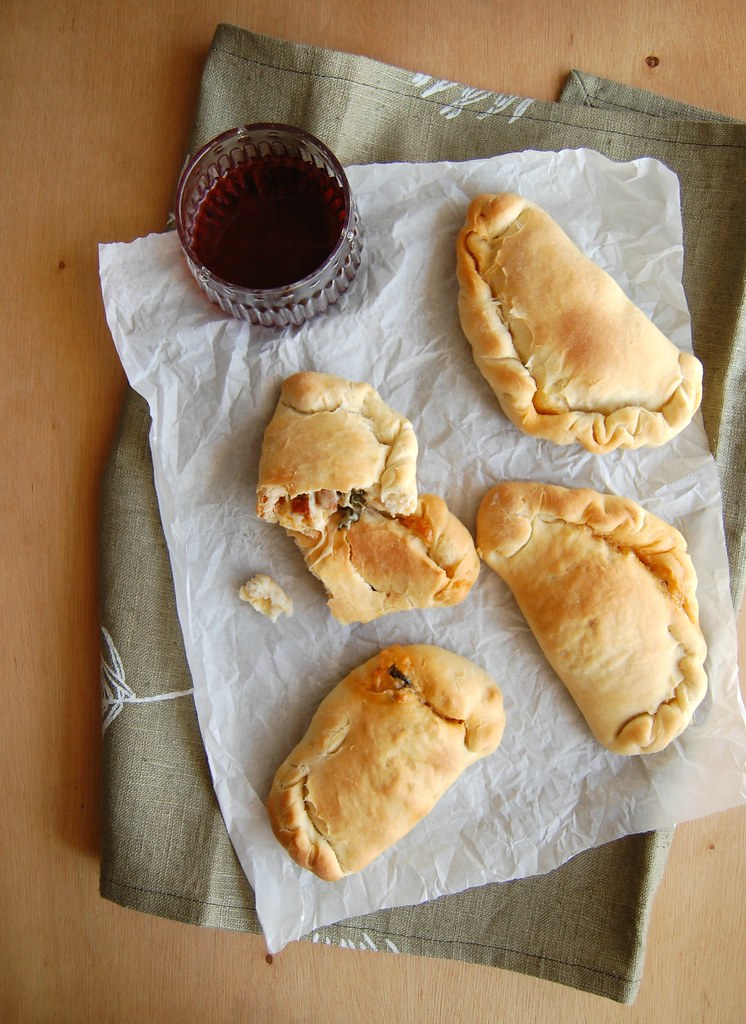
I will borrow inspiration from SATC and present you these delicious calzones: the filling is a combination of spinach, cheese and chorizo and I beg of you not to remove any of the ingredients from it: the calzones would not be the same. The spinach and the cheese benefit intensely from the saltiness of the chorizo, however if you can’t find it bacon goes well here too.

Spinach, cheese and chorizo calzones
own recipe

Dough:
2 teaspoons dried yeast
½ teaspoon granulated sugar
1 ¼ cups (300ml) lukewarm water
2 tablespoons extra-virgin olive oil
3 ¼ cups (455g) all purpose flour
1 teaspoon salt

Filling:
¾ cup (105g) finely diced chorizo
2 large garlic cloves
2 cups (120g) fresh spinach leaves, packed
salt and freshly ground black pepper
2 cups (200g) coarsely ground yellow mozzarella*
extra virgin olive oil, for brushing the calzones

Start with the dough: in the bowl of an electric mixer fitted with the dough hook, mix the yeast, sugar and water with a fork. Set aside until foamy, about 5 minutes. Add the olive oil, flour and salt and mix for 6-8 minutes or until a soft and elastic dough forms. Shape dough into a ball and transfer to a lightly oiled bowl. Cover with plastic wrap and set aside to proof in a warm place for about 1 hour or until doubled in size.

In the meantime, make the filling: heat a large nonstick frying pan over high heat. Add the chorizo and cook stirring occasionally until the pieces are golden and crispy. Add the garlic and cook for 1 minute or until fragrant – do not let it burn or it will get bitter. Stir in the spinach leaves and cook until wilted. Season with salt and pepper – go easy on the salt for the chorizo is usually salty. Cool, then stir in the cheese.

Preheat the oven to 400°F/200°F. Line a large baking sheet with foil and brush it lightly with olive oil.
Divide the dough into 8 equal parts – each will be around 100g (3 ½ oz.). Roll out each portion of dough on a lightly floured surface until you get a rough 25cm (10in) circle. Place some of the filling on one side of the dough and fold the other half over, pinching the seams well to keep the filling inside. Repeat the process with the remaining dough and filling. Place the calzones onto the prepared sheet and brush them lightly with olive oil. Bake for 25-30 minutes or until golden. Serve immediately.

* the yellow mozzarella I used is not like fresh mozzarella balls, therefore it does not release too much liquid. Replace by cheddar or something similar texture wise.

Makes 8

Wednesday, September 27, 2017

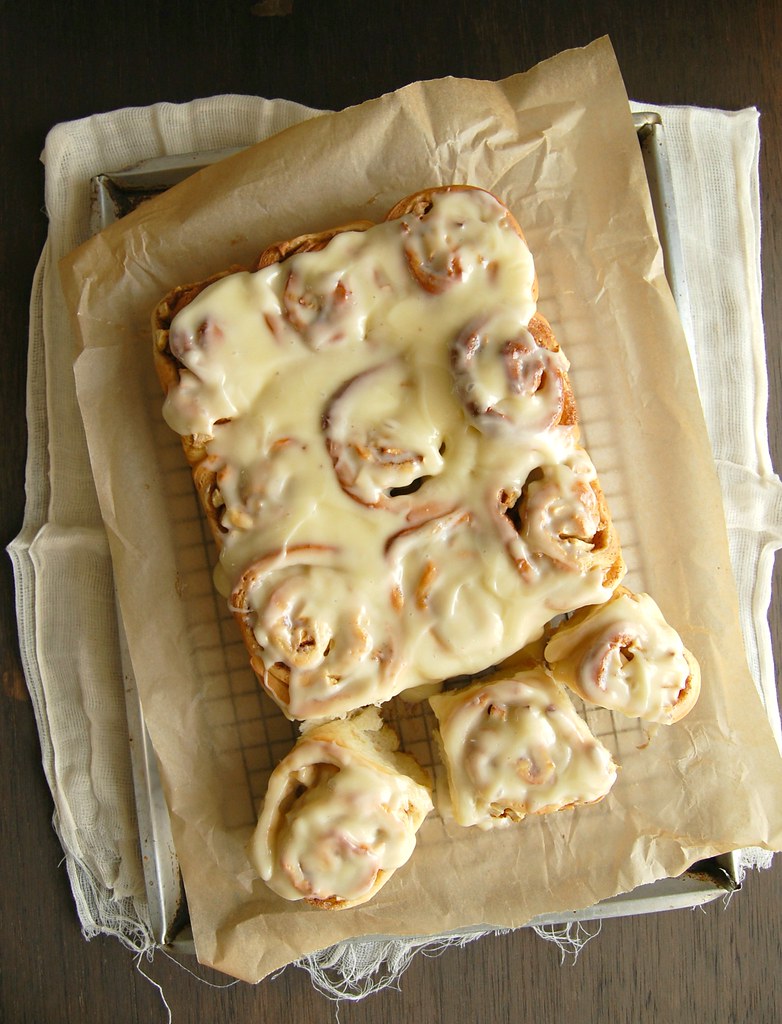
Apple cinnamon rolls with cream cheese icing

Apple cinnamon rolls with cream cheese icing / Pãezinhos de maçã e canela com cobertura de cream cheese

Baking bread is something I deeply enjoy, even though I have not done that much lately. Unless you have access to good artisanal bakeries (which are very few here in Sao Paulo), it is the only guaranteed way of having good bread on the table.

These apple rolls were my idea to turn the humble cinnamon roll into something even more special, to get people interested in them again – like Nic Pizzolatto casting Mahershala Ali for the third season of True Detective, after that not-so-great season 2. :D

I was very happy with the recipe: the rolls are tender and perfumed with cinnamon and the tangy icing compliments the apples beautifully. They disappeared quite quickly every time I made them, and next time I prepare this recipe I intend to use pears + nutmeg instead of apples + cinnamon – I believe it will be just as delicious.

Apple cinnamon rolls with cream cheese icing
own recipe

Dough:
200ml whole milk
¼ cup (56g) unsalted butter, room temperature and chopped
2 ¼ teaspoons (7g) dried yeast
¼ cup + 2 tablespoons (75g) granulated sugar
1 large egg, room temperature
pinch of salt
½ teaspoon vanilla extract
3 ¼ cups (455g) all purpose flour

Filling:
¼ cup (56g) unsalted butter, softened
4 Granny Smith apples (about 650g/1 ½ pounds), peeled, cored and cut into small dice*
¼ cup (50g) granulated sugar
¼ cup (44g) light brown sugar, packed
1 ½ teaspoons ground cinnamon

Icing:
½ cup (113g) cream cheese, very soft
¼ cup (56g) unsalted butter, very soft
1 teaspoon vanilla extract
1 cup (140g) icing sugar, sifted

Start by making the dough: in a small saucepan, heat milk until it starts to boil. Remove from the heat, stir in the butter and let it melt. Once the mixture is lukewarm, pour it into the bowl of an electric mixer and stir in the yeast and sugar. Set aside until foamy, about 5 minutes. Add the egg, salt, vanilla and flour and mix with the dough hook for 8-10 minutes or until smooth and elastic. Transfer to a lightly buttered large bowl and cover with plastic wrap. Set aside in a draft-free area until doubled in volume, about 1 ½ hours.

Generously butter a 20x30cm (8x12in, and 13x9in also works) baking pan. Set aside.
Transfer the dough to a lightly floured surface and roll it into a 30x40cm (12x16in) rectangle. Spread the butter over the dough leaving a 1cm (½in) border. In a medium bowl, stir the apples with the sugar and cinnamon until well coated, then spread evenly on top of the butter layer. Starting from the longest side, roll the dough into a tight cylinder, then slice into 12 equal pieces. Place the slices side-by-side in the prepared pan, cover loosely with a clean kitchen towel and set aside to prove again, 40-45 minutes – in the meantime, preheat the oven to 200°/400°F.

Bake the buns for 25-30 minutes or until risen and golden. Cool in the pan over a wire rack for 5 minutes, then carefully unmold the buns onto the rack. Now, make the icing: in a small bowl, whisk the ingredients together until smooth. Spread over the buns and set aside to cool completely, or serve them warm.

* it is important to keep the apple pieces small otherwise they will not bake properly inside the dough

Makes 12

Wednesday, August 16, 2017

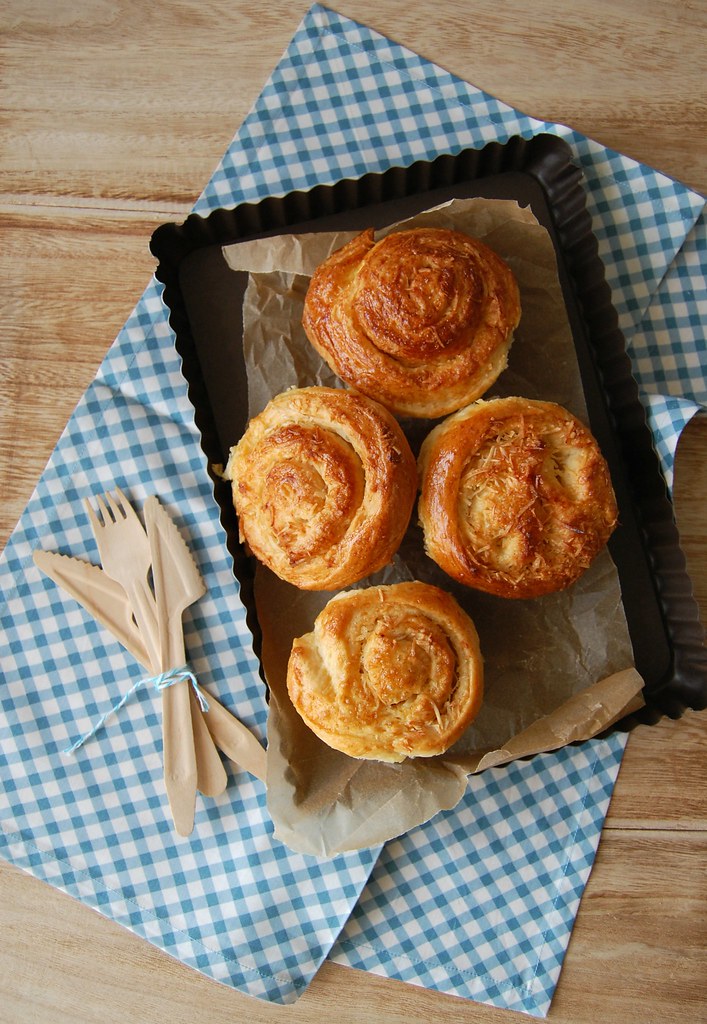
Coconut sour cream buns and polarizing flavors

Coconut sour cream buns / Pãezinhos de coco e creme azedo (sour cream)

I thought I was crazy for sweets until I started working at my current job, two years ago: my coworkers are addicted to all kinds of sweets, and being a Swiss company you can imagine the ridiculous amounts of chocolate coming every time someone travels from headquarters to Sao Paulo. :)

One of the executives at the office keeps a jar of candy on top of his desk, and the group is welcome to get some whenever a sugar high is needed. Everyone that travels brings candy for the jar, which I find very nice and generous. Last week we started a debate about flavors because of the jar: my boss reached out for some candy, and since she does not speak Portuguese I warned her that those were coconut-filled candy bars. She told me she loved coconut, and then someone else replied that they hated it, while another person said they loved it too, and my boss said she believed that coconut is one of those flavors that polarize people: you either love it or hate it – like cilantro. :)

I am part of the coconut fan club for I love it in absolutely anything, including savory dishes. For that reason I wanted to come up with a recipe for buns made with coconut, but no only in the filling, as most recipes I have seen – I wanted a double splash of coconut, both in the dough and in the filling. I came up with these delicious buns that look super cute by being baked in a muffin pan, and they taste oh, so good. The addition of both sour cream and butter to the dough makes them insanely tender.

Coconut sour cream buns
own recipe

Dough:
2 ¼ teaspoons dried yeast
¼ cup (50g) granulated sugar
½ cup (120ml) lukewarm water
½ cup (120ml) sour cream*
1 large egg yolk
2 ½ cups (350g) all purpose flour
pinch of salt
1/3 cup (33g) unsweetened desiccated coconut
½ teaspoon vanilla extract
¼ cup (56g) unsalted butter, very soft

Filling:
¼ cup (56g) unsalted butter, very soft
2/3 cup (66g) unsweetened flaked coconut
4 tablespoons demerara sugar

For the egg wash and sprinkling the buns:
1 egg, + 1 teaspoon water, lightly beaten with a fork
3 tablespoons unsweetened flaked coconut

Start by making the dough: in the large bowl of an electric mixer fitted with the dough attachment, mix yeast, pinch of the sugar and water with a fork. Set aside until foamy, about 5 minutes. Add the sour cream, yolk, remaining sugar, flour, salt, coconut and vanilla and mix for 8-10 minutes or until smooth and elastic. Gradually beat in the butter, 1 tablespoon at a time, mixing well after each addition – dough will be soft. Transfer to a lightly buttered large bowl and cover with plastic wrap. Set aside in a draft-free area until doubled in volume, about 1 ½ hours.

Generously butter a 12-hole nonstick muffin pan. Set aside.
Transfer the dough to a lightly floured surface and roll it into a 30x40cm (12x16in) rectangle. Spread the butter over the dough leaving a 1cm (½in) border. Sprinkle the butter with the sugar, then with the coconut. Starting from the longest side, roll the dough into a tight cylinder, then slice into 12 equal pieces. Place each piece into a cavity of the muffin pan. Cover loosely with a clean kitchen towel and set aside to prove again, 40-45 minutes – in the meantime, preheat the oven to 200°C/400°F.

Brush the rolls with the egg wash and sprinkle with the coconut. Bake for about 25 minutes or until risen and golden. Cool in the pan over a wire rack for 5 minutes, then carefully unmold the buns and transfer them to the rack to cool completely (they are delicious served warm, too).

* homemade sour cream: to make 1 cup of sour cream, mix 1 cup (240ml) heavy cream with 2-3 teaspoons lemon juice in a bowl. Whisk until it starts to thicken. Cover with plastic wrap and leave at room temperature for 1 hour or until thicker (I usually leave mine on the counter overnight – except on very warm nights – and it turns out thick and silky in the following morning; refrigerate for a creamier texture)

Makes 12

Wednesday, June 28, 2017

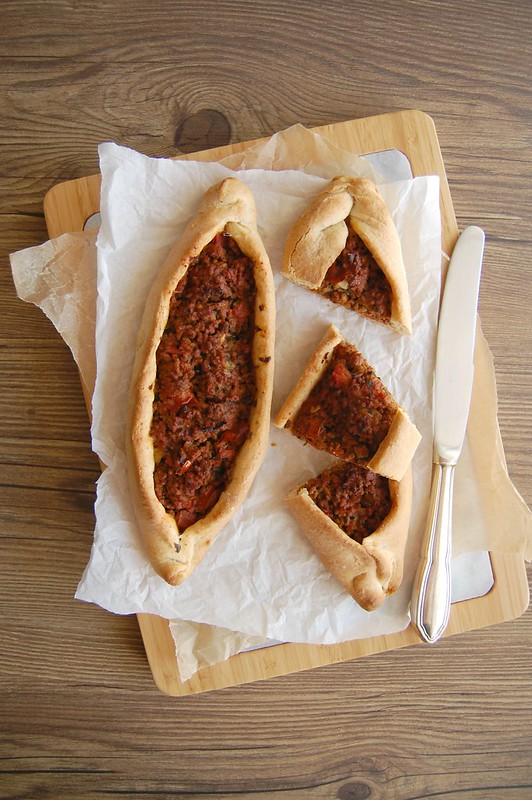
Beef and leek pide

Beef and leek pide / Pide de carne e alho-poró

I believe that the first time I saw/heard of Turkish pizza was watching one of the episodes of the fantastic Ottolenghi's Mediterranean Island Feast, a long time ago – what he actually made was called lahmacun and it looked absolutely delicious, topped with a fresh salad.

Fast forward many months and I was reading about pide recipes on a magazine (the Australian Delicious, if I am not mistaken) and it looked similar to Ottolenghi’s lahmacun, however shaped slightly differently. I decided to then search about it some more, and ended up making my own version of it.

I first made pides for lunch on a lazy Saturday, already expecting compliments from my husband for he loves sfihas; However, he went so crazy about them that from the second time onwards I started making 1 ½ recipes each time – 4 pides were not enough for the both of us. :D

Beef and leek pide
own recipe, inspired by several others

Dough:
1 teaspoon dried yeast
½ teaspoon granulated sugar
1/3 cup (80ml) lukewarm water
¼ cup (60ml) lukewarm whole milk
1 ¼ cups (175g) all purpose flour
¼ cup (35g) whole wheat flour
½ teaspoon table salt
2 tablespoons extra virgin olive oil

Filling:
2 tablespoons unsalted butter
1 large leek (120g/4oz), white/light green parts only, sliced
2 large garlic cloves, minced
250g (9oz) beef mince
1 teaspoon smoked paprika
2 ripe tomatoes, deseeded and diced
salt and freshly ground black pepper
handful of fresh parsley leaves, chopped

For brushing the dough:
1 tablespoon extra-virgin olive oil

Start with the dough: in the bowl of an electric mixer, combine yeast, sugar, water and milk and mix with a fork. Set aside until foamy, about 5 minutes. Add flours, salt and olive oil and mix using the hook attachment for about 8 minutes or until dough is elastic and smooth – if mixing by hand, 12-14 minutes should be enough. Form dough into a ball, transfer to a large lightly oiled bowl and cover with plastic wrap. Set aside in a draft-free area for about 1 hour or until doubled in volume.

While dough is proofing, make the filling: heat butter on a large saucepan over medium heat until melted. Add the leek and cook, stirring occasionally, until tender, about 5 minutes. Stir in the garlic and cook for 1 minute or until fragrant. Add the beef and cook, stirring occasionally, until golden, 5-7 minutes. Stir in the paprika, the tomatoes, season with salt and pepper and cook for another 3-5 minutes or until tomatoes are soft. Stir in the parsley, remove from the heat and cool completely.

Preheat the oven to 200°C/400°F. Line a large baking sheet with foil.
Divide the dough into 4 equal portions. Roll each portion into a rough 25cm (10in) long oval shape. Spread the cooled filling along the center. Pinch the edges together so your pide looks like a boat. Transfer to the prepared sheet and brush the dough with olive oil and bake for 25-30 minutes or until golden brown. Serve at once.

Makes 4

Friday, June 9, 2017

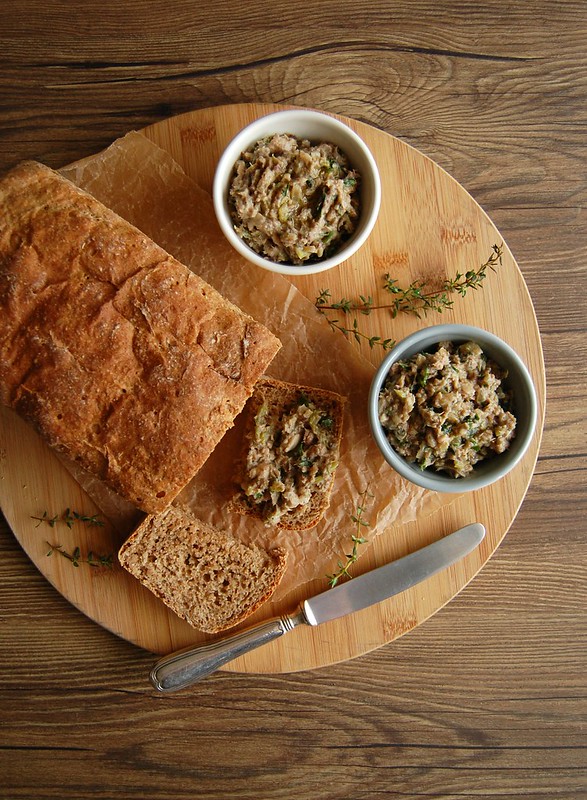
Soft rye bread with sardine rillette and more childhood memories

Soft rye bread with sardine rillette / Pão de centeio macio com rillette de sardinha

Many, many months ago, while I still had plans to write a book, I was reading about rillettes and found them very interesting – as I read recipes for pork rillettes, I instantly thought of my mother and her love for this kind of meat, which I link to her German heritage.

As I thought of how much she would love that kind of rustic pâté, I also remembered the sardine salad (which we call “patê” in Portuguese) she used to make for sandwiches when I was a kid – canned sardines were cheap (still are) and those sandwiches are part of my childhood memories (mom would always cut the crusts off mine). :)

Mixing everything in my head I thought of making the rillettes with sardines instead of the pork and a quick search online showed me some variations made with salmon, so I was on the right track. I ended up making this sardine rillette several times for both my husband and I went crazy for it.

After the third time, if I am not mistaken, I felt that the delicious mixture deserved a good homemade bread to go with it, and the strong flavor of rye seemed really right for it – Joao agreed, but asked me for a soft bread that we could have for breakfast on the following day as well. I made this rye bread, tender from the addition of milk but still flavorsome. The problem is that we ended up eating the whole thing with the rillette and there was nothing left for breakfast. :)

Soft rye bread
own creation

Bread:
150ml whole milk, lukewarm
200ml water, lukewarm
2 teaspoons dried yeast
1 teaspoon granulated sugar
½ tablespoon honey
2 cups (280g) all purpose flour
1 ¼ cups (175g) rye flour
1 ½ teaspoons table salt

For brushing the bread:
1 tablespoon whole milk, room temperature

Start with the bread: in the bowl of an electric mixer, place milk, water, sugar and yeast and mix with a fork. Set aside until foamy, about 5 minutes. Add the honey, flours and salt and mix using the hook attachment for about 8 minutes or until dough is elastic and smooth – if mixing by hand, 12-14 minutes should be enough. Form dough into a ball, transfer to a large lightly oiled bowl and cover with plastic wrap. Set aside in a draft-free area for 1 ½ hours or until doubled in volume.

Lightly brush a 6-cup loaf pan with oil or butter.
Punch the dough to remove the excess air. On a lightly floured surface, using a rolling pin, roll the dough nto a large rectangle, about 20x30cm (8x12in). Starting with one of the long sides, carefully pick up the dough and roll, forming a cylinder. Pinch the seams and place the dough into the prepared pan, seam side down. Cover with a clean kitchen towel and set aside in a draft-free area again for 40-45 minutes – in the meantime, preheat the oven to 200°C.

Brush the top of the bread with milk and bake for about 30 minutes or until golden and baked through – bread should sound hollow when tapped with your fingers. Cool in the pan over a wire rack for 5 minutes, then carefully unmold onto the rack to cool. Cool completely.

Serves 6-8

Sardine rillette
own creation

1 ½ tablespoons extra virgin olive oil, divided use
½ tablespoon unsalted butter
½ onion, finely diced
1 celery stalk, finely sliced – use a mandolin
1 garlic clove, minced
3 sprigs of fresh thyme, leaves only
pinch of smoked paprika
salt and freshly ground black pepper
350g canned sardines, drained and flaked – I used sardines packed in olive oil for better flavor
2 tablespoons dry white wine
2 tablespoons sour cream*
2 tablespoons finely chopped fresh parsley leaves

Place ½ tablespoon of the olive oil and the butter in a medium saucepan and cook over medium heat until butter is melted. Add the onion and celery and cook, stirring occasionally, until tender, 3-4 minutes. Stir in the garlic and cook until fragrant, about 1 minute. Stir in the thyme leaves and paprika, season with salt and pepper and cook, covered, on low heat for 2 minutes. Add the wine, turn the heat up and cook until wine evaporates. Remove from the heat, stir in the sardine and cool completely.
When mixture is cool, stir in the sour cream, the remaining 1 tablespoon of olive oil and the parsley. Check seasoning.

The rillette can be kept tightly covered in the fridge overnight, however it is best served at room temperature.

*homemade sour cream: to make 1 cup of sour cream, mix 1 cup (240ml) heavy cream with 2-3 teaspoons lemon juice in a bowl. Whisk until it starts to thicken. Cover with plastic wrap and leave at room temperature for 1 hour or until thicker (I usually leave mine on the counter overnight – except on very warm nights – and it turns out thick and silky in the following morning; refrigerate for a creamier texture)

Serves 2-3


Tuesday, March 21, 2017

Pesto and cheese rolls and family traditions

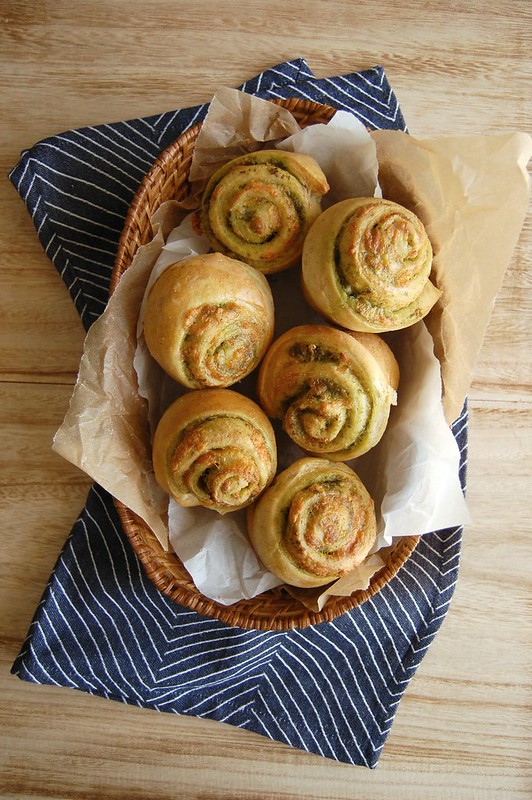
Pesto and cheese rolls / Pãezinhos recheados de pesto e queijo

Yesterday I started thinking about family traditions and how some of them go from one generation to the other, sometimes without us even noticing.

My brother and I have become much closer since my nephew was born, and that brings me a lot of joy. So on weekends we are inevitably all together, either they come to visit Joao and I or we visit them – I love that. It reminds me of when I was little and we would go for Sunday lunches at my grandmother’s or my aunt and uncle from the country side would come to spend the day with us – we are doing exactly what our parents did almost forty years ago and that happened so naturally I only thought of it now.

One of the times they came to visit us I had just finished baking these pesto rolls – they smelled wonderful and I thought the adults would love them, but to my surprise my nephew was the one that enjoyed them the most. I had no idea he would like bread filled with pesto – I thought he would find the flavor too strong or something like that – but I was wrong. Therefore I bring you these today and hope you the adults reading me like them as much as the little one at home did. :)

Pesto and cheese rolls
own creation

Dough:
¼ cup (60ml) lukewarm water
¾ cup (180ml) lukewarm whole milk
½ teaspoon granulated sugar
2 ¼ teaspoons dried yeast
1 large egg
2 tablespoons (28g) unsalted butter, melted and cooled
2 tablespoons extra virgin olive oil
¾ teaspoon table salt
2 ¼ cups (315g) all purpose flour
½ cup (70g) whole wheat flour

Filling:
½ cup (40g) fresh basil leaves, packed
2 tablespoons finely ground pecorino
1 small garlic clove
2 tablespoons pine nuts
¼ cup (60ml) extra virgin olive oil
freshly ground black pepper
200g shredded cheese – I used one kind of mozzarela we find here in Brazil that is yellow and drier than fresh mozzarela; replace with cheddar

Egg wash:
1 egg + ½ teaspoon water, beaten with a fork

Start by making the dough: in the bowl of an electric mixer fitted with the dough hook, mix together with a fork the water, milk, sugar and yeast. Set aside until foamy, about 5 minutes. Add the egg, butter, olive oil, salt and flours and mix on medium speed until a smooth and elastic dough forms, about 8 minutes. Transfer to a buttered bowl, cover with plastic wrap and set aside on a warm spot until doubled in size, about 1 ½ hours.

Filling: place the basil, pecorino, garlic, pine nuts, olive oil and black pepper in a blender or food processor and blitz until a paste forms – I don’t add any salt for the cheeses are already salty. Set aside. Brush a 12-hole muffin pan with butter.

Knock down the dough to remove any excess air. Roll it on a lightly floured surface until you get a 30x50cm (12x20in) rectangle. Spread the pesto over the dough, leaving a 1cm (½in) border. Sprinkle evenly with the shredded cheese. Beginning with the longer side, roll the dough tightly like a cylinder. Cut into 12 slices and place each slice, cut side up, inside a hole in the muffin pan. Cover with a clean kitchen towel and let rise again for 40-60 minutes – in the meantime, preheat the oven to 200°C.

Brush the rolls with the egg wash and bake for 20-25 minutes or until deeply golden and cooked through. Cool in the pan over a wire rack for 5 minutes, then carefully unmold each roll and transfer to the wire rack. Serve warm or at room temperature.

Rolls can be kept in an airtight container at room temperature for up to 3 days. Reheat them in a 180°C oven for 8-10 minutes before serving if desired.

Makes 12

Monday, December 12, 2016

Panettone

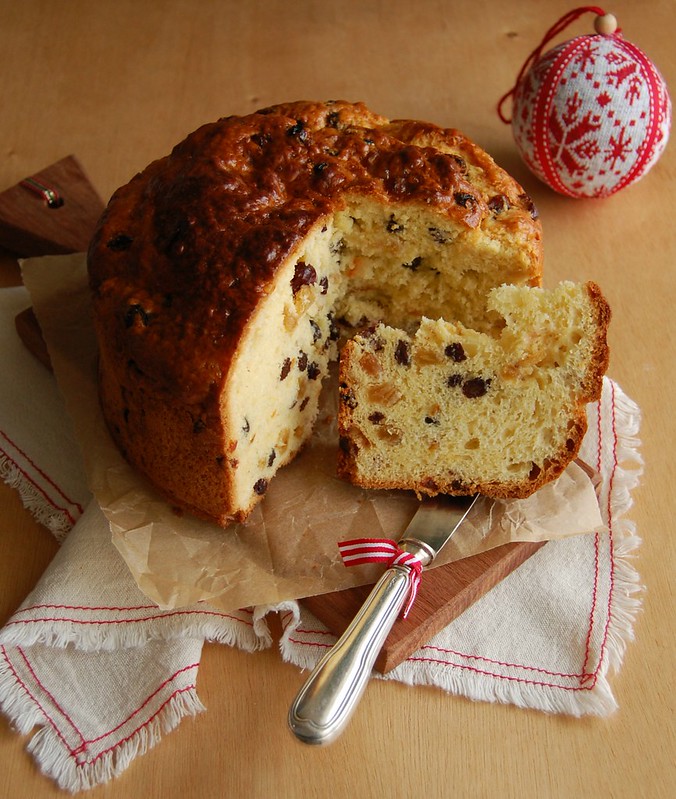
Panetone / Panettone

Even though I have been posting Christmas recipes at this time of the year for a long long time, I have not baked panettone – or chocottone, for that matter – in ages. We sometimes get panettones as gifts, and my husband sometimes buys some at this time of the year.

This year, however, Joao told me he wanted homemade panettone and since I was on a Christmas state of mind I decided to make it. It was a rainy Saturday, I did not want to go anywhere, so I made the panettone and watched Carol in between (by the way, I am still trying to understand all the fuss over the awards season).

This is an adaptation of Paul Hollywood’s panettone and it turned out really delicious – the tender brioche dough perfumed with citrus and dotted with chewy and sweet raisins and dried cranberries. But unlike Paul’s brioche, that still tastes great a day after it is made, the panettone got a little tough on the following morning – it was still delicious, but texture-wise it was better freshly baked. If your family is big, I am sure the panettone will be gone in no time, but if there are not many of you around to eat it within a day no worries: it makes a killer French toast. ;)

Panettone
slightly adapted from Paul Hollywood

14g dried yeast
140ml whole milk, lukewarm
75g granulated sugar
500g all purpose flour
¼ teaspoon table salt
5 large eggs, room temperature
finely grated zest of 1 orange
finely grated zest of 1 lemon
1 teaspoon vanilla extract
1 teaspoon Cointreau
1 teaspoon Amaretto
200g unsalted butter, softened
120g dried cranberries
120g golden raisins
120g dark raisins
50g crystallized orange peel, finely chopped

Egg wash:
1 egg, lightly beaten with a fork

In the bowl of an eletric mixer, place yeast, milk and a pinch of the sugar and mix with a fork. Set aside for 5 minutes or until foamy. Add the flour, salt, remaining sugar, eggs, orange and lemon zest, vanilla, Cointreau and Amaretto, then mix on slow using the dough hook for two minutes. Increase the speed to medium and mix for a further 6-8 minutes until you have a soft dough.

Add the softened butter and mix for another 5-8 minutes, scraping the sides of the bowl occasionally. Dough will be very soft. Mix in the dried fruit and crystallized orange peel. Transfer the dough to a large buttered bowl, cover with plastic wrap and chill overnight until the dough has firmed up enough for you to able to shape it.

Prepare a 18cm/7in panettone pan by brushing the inside generously with melted butter*.
Remove the panettone dough from the fridge, knock back the dough, shape into a ball and place into the pan. Leave to prove at room temperature for a further 2-3 hours, until the dough just starts to dome over the top of the pan.

Preheat the oven to 180°C/350°F.
Brush the top of the panettone with egg wash and bake for about 25 minutes. Reduce the temperature to 150°C/300°F and bake for a further 35 minutes, or until a skewer comes out clean. Check the panettone periodically in case of oven hot spots. Bear in mind that the sugar and butter in the dough could brown too much before it is actually fully baked – if panettone starts to brown too quickly, cover it loosely with foil.
Remove the panettone from the pan immediately and allow to cool over a wire rack.

* I used a 20cm (8in) round cake pan to bake my panettone – I made a collar with a double sheet of baking paper folded in half (that way getting 4 layers of paper) and buttered it all with melted butter (there is a photo of the prepared pan on my Instagram).

Serves 8-10

Saturday, December 26, 2015

Cheese and poppy seed bread sticks

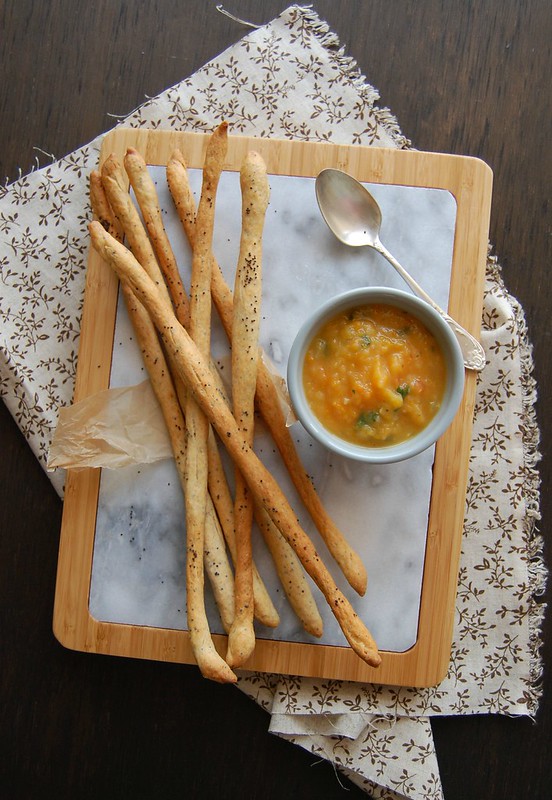
Cheese and poppy seed bread sticks / Grissini de queijo e sementes de papoula

It has been incredibly hot here in Sao Paulo lately, so turning on the oven is a matter of courage – as much as I love baking, and I do, you know, if possible I stay away from the kitchen while the oven does all the work. And sometimes I also try to make things to nibble with a cold beer or a glass of Prosecco instead of actually cooking – I feel like a complete loser in the summer, for the heat takes away my energy and my will of doing anything whatsoever.

These bread sticks are easy to make, last a good while if kept in an airtight container and go really well with drinks, especially with dips or rolled up with slices of prosciutto – I will make them again for New Year’s Eve, but with a different type of cheese to try new flavors (I’m thinking something sharp like feta or pecorino).

Cheese and poppy seed bread sticks
slightly adapted from Delicious Australia

250g all purpose plain flour
1 teaspoon dried instant yeast
60g strong cheddar, finely grated
2/3 cup (160ml) lukewarm water
½ teaspoon salt
3 teaspoons poppy seeds
25g unsalted butter, melted

Combine flour, yeast and cheese in an electric mixer fitted with a paddle attachment, then, with the motor running at low speed, gradually add the water until the dough comes together. Add the salt and 2 teaspoons of the poppy seeds, then mix for a further 2-3 minutes until well combined. Knead for 2-3 minutes – either with the machine using a dough hook or by hand – until dough is smooth and elastic. Transfer to a lightly oiled bowl, cover with plastic wrap, then set aside in a warm spot for 45 minutes or until doubled in size.

Preheat the oven to 350°F/180°C. Line 2 large baking trays with baking paper.
Knock back dough on a lightly floured surface, then divide the dough into roughly equal 24 portions. Using your hands, roll each portion into a 1cm-thin straw approximately 30cm long. Transfer to a prepared baking tray, then repeat with remaining dough. Brush the straws with the melted butter and scatter with the remaining 1 teaspoon poppy seeds. Bake the straws, switching the position of the trays halfway through cooking so they’re evenly golden, for 30 minutes or until golden and crisp. Transfer to a wire rack to cool completely, then serve.

The bread sticks can be kept in an airtight container at room temperature for up to 1 week.

Makes 24

Sunday, August 2, 2015

Olive oil buns and great news

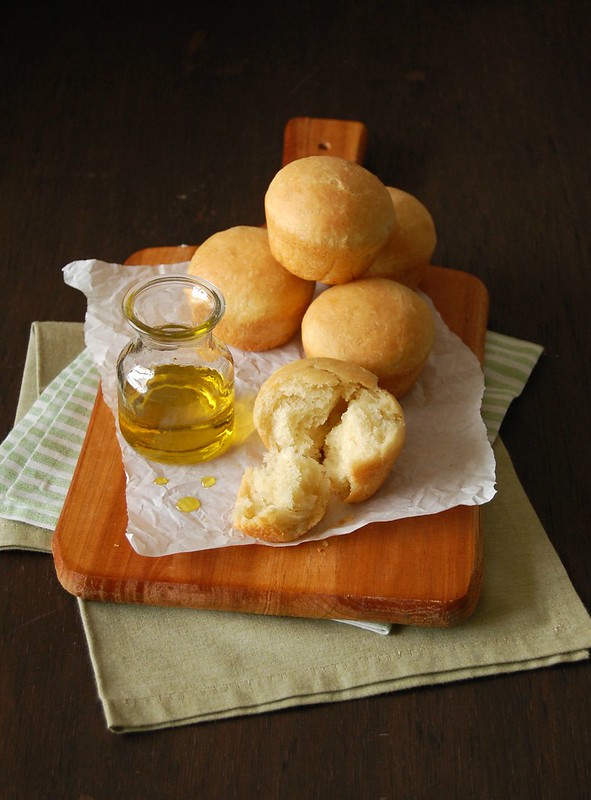
Olive oil buns / Pãezinhos de azeite de oliva

There hasn’t been a new post around here in a good while but there is a good reason for that: my job hunt has come to an end! Days ago I started working in a new company (for those of you who don’t know, I work as an executive assistant) and it was a very busy week – it was all about meeting lots of new people, getting to know how the company works and the details of my job description. I feel really, really happy for having a job again after so many months, so this is a celebration post! \0/

I know that some of you might look away from this recipe because of the many steps, but let me tell you something: these buns are easy peasy and what you really need is a bit of time to spare and a bit of prepping in advance – you don’t have to do much with the dough besides leaving it at room temperature, covered with plastic wrap.

I chose this recipe for today’s post exactly because in life sometimes we need to be patient and wait for the Universe to do its thing – some things can’t be rushed, no matter how anxious or even sad we feel (like I did weeks ago). In this case, I can guarantee that the buns are worth all the hours called for in the recipe: they are delicious and have an amazing texture.

Olive oil buns
slightly adapted from Bread Cake Doughnut Pudding: Sweet And Savoury Recipes From Britain's Best Baker

Ferment:
65g all purpose flour
65g water, room temperature
1g dried yeast

Dough:
200g lukewarm water
pinch of sugar
2g dried yeast
350g all purpose flour
4g table salt
90ml olive oil – I used extra-virgin

Make the ferment: combine the ingredients in a small bowl, cover with plastic wrap and leave at room temperature for 24 hours.

Bread: put the water in the bowl of an electric mixer and whisk in the yeast and sugar until dissolved, then set aside until it foams, about 5 minutes. Add the ferment, flour and salt, mix on medium speed for 5 minutes or until the dough starts to come away from the sides of the bowl. continue mixing on medium speed and gradually pour in ¼ cup (60ml) of the olive oil, then keep mixing until dough is smooth, glossy and elastic (it will be a very wet dough). Form roughly into a ball, cover with plastic wrap and leave at room temperature for 1 hour (if the day is too cold, leave the oven on so the kitchen is a bit warm).

After 1 hour, using a rubber spatula, mix in the remaining 2 tablespoons olive oil, 1 tablespoon at a time. Cover again with plastic wrap and leave at room temperature for 1 hour.

Lightly brush a 12-cup muffin pan with olive oil. Divide the dough into 12 equal portions and roll each into a ball, making sure the top is smooth. Place the balls into the prepared muffin pan and let them prove for 1 hour – in the meantime, preheat the oven to 220°C/425°F. Bake the buns for 15-20 minutes or until golden. Cool in the pan over a wire rack for 5 minutes, then carefully unmold and place onto the rack. Serve warm or at room temperature.
Makes 12

Tuesday, June 30, 2015

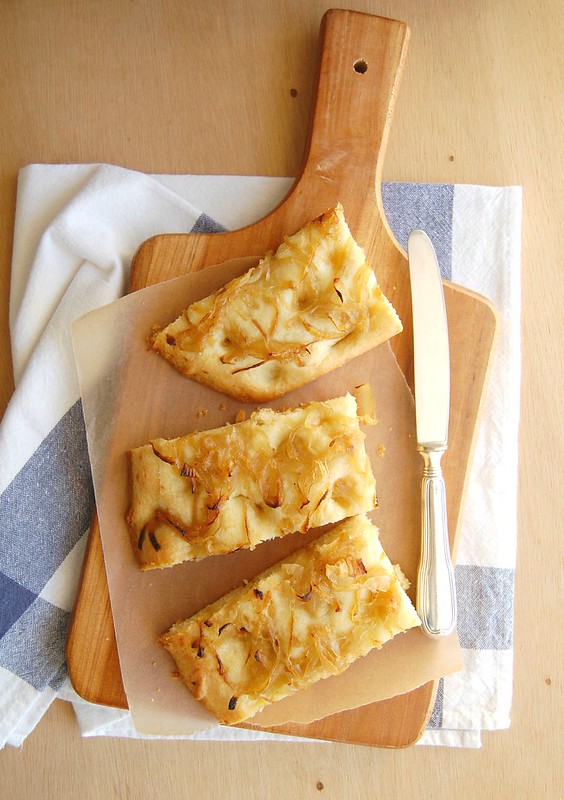
Caramelized onion and gruyere focaccia and the excellent "Bloodline"

Caramelized onion and cheese focaccia / Focaccia de queijo e cebola caramelizada

Now that I have brought my husband to the dark side – the side of the addicted to TV series – he keeps asking me what we’ll watch next: I find it both funny and lovely and I hope he stays this way for good. :)

We finished watching the first season of The Americans and while Netflix doesn’t bring us more episodes – I cannot wait! – I suggested we watched Bloodline, for its great cast and because Ben Mendelsohn had impressed me very much in the great Animal Kingdom. One of my readers had told me it was a wonderful show and she was right: it is well written, well directed and definitely spot on in acting – my husband loved it, too, and as we moved on through the episodes things got more and more interesting, to the point my husband said that he hoped there would be a second season (good news: there will be).

If you like dramas like the ones I usually write about here on the blog I can’t recommend Bloodline enough, and if you like baking bread and having something tasty to nibble on with a glass of sparkling wine or beer go to the kitchen and make this focaccia: it is not complicated to make and it tastes absolutely fantastic.

Caramelized onion and gruyere focaccia
slightly adapted from the delicious Home Baked Comfort (Williams-Sonoma) (revised): Featuring Mouthwatering Recipes and Tales of the Sweet Life with Favorites from Bakers Across the Country

Dough:
2 ¼ teaspoons (7g/1 sachet) active dry yeast
1 teaspoon granulated sugar
1 cup (240ml) warm water
3 1/3 cups (465g) all-purpose flour
¼ cup (60ml) olive oil
1 scant teaspoon table salt
150g (5oz) Gruyere cheese, shredded

Topping:
3 tablespoons olive oil
2 yellow onions, halved and thinly sliced
1 teaspoon granulated sugar
salt

In the bowl of a stand mixer, dissolve the yeast and sugar in the warm water. Let stand until foamy, about 5 minutes. Add the flour, oil, salt and cheese. Attach the dough hook and knead on medium-low speed until the dough is smooth and elastic, about 10 minutes. Form the dough into a ball, put it back in a lightly oiled large bowl, cover with plastic wrap and let the dough rise in a warm, draft-free spot until it doubles, about 1 hour.

Meanwhile, in a large frying pan, heat 1 tablespoon of the olive oil medium-low heat. Add the onions and sauté over medium-low heat until they start to wilt, about 3 minutes. Stir in the sugar and a good pinch of salt and continue to cook until the onions are golden brown and caramelized, about 20 minutes. Remove from the heat and let cool.

Oil a rimmed baking sheet with 1 ½ tablespoons of the olive oil. Dump the dough onto the prepared pan and press it into a rough rectangle. Using your fingers, stretch the dough into a rectangle about 20x30cm (8x12in). Cover the dough loosely with a kitchen towel and let rise in a warm, draft-free place until puffy, about 1 hour.

Position a rack in the middle of the oven and preheat to 220°C (425°F). Dimple the surface of the dough with your fingertips. Gently brush the remaining oil, then sprinkle evenly with the onion. Bake until gorgeously golden, about 20 minutes. Cut into squares and serve while warm.

Makes 1 flatbread (serves 6-8)

Wednesday, June 3, 2015

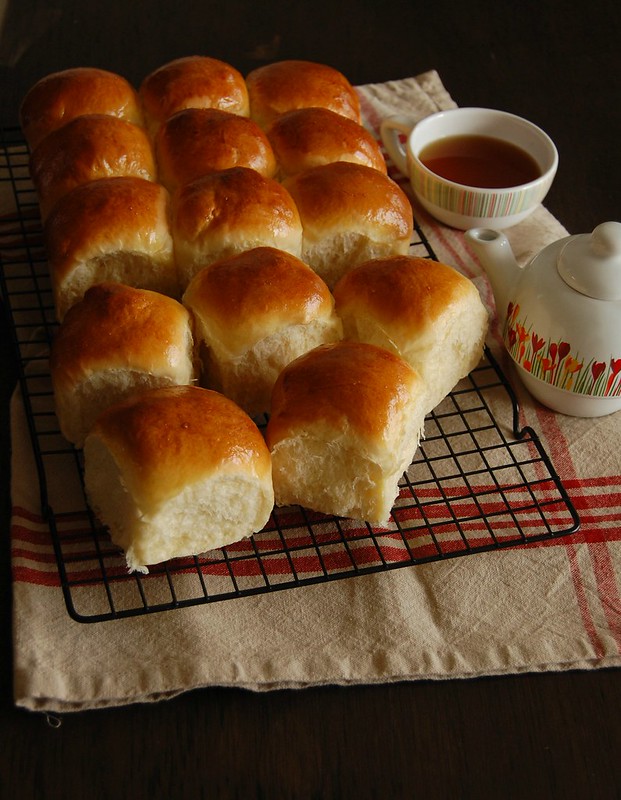
Milk rolls

Milk rolls / Pãezinhos de leite

It is always a joy to receive the latest issues of the food magazines I subscribe to: I usually bookmark a lot of recipes but it takes me some time to actually make them, especially if the magazines arrive on those days when a trip to the grocery store is more than necessary.

When I received my Donna Hay magazine a couple of weeks ago, for instance, both my fridge and my cupboard were a bit on the empty side, but when I saw the recipe for these rolls I knew I would make them the following morning: the small list of ingredients consisted of basics I still had a bit of around, it wouldn’t be a problem. I did bake them and they looked beautiful when I took them out of the oven – they smelled fantastic, too.

I posted the photo on Instagram and it was welcomed by many people, therefore I felt like sharing the recipe here on the blog – the thing is: I gathered my family around the table, made some coffee and the rolls disappeared on that very same day. :)

Everyone loved the rolls, so I made them once again and thought they looked even better, more golden – now that I’ve managed to take a decent photo of them I bring you the recipe and I am sure many of you will like it for it is really easy to make and the rolls are divine.

Milk rolls
slightly adapted from the always wonderful Donna Hay magazine

330ml whole milk
65g unsalted butter, room temperature and chopped
3 tablespoons granulated sugar
2 teaspoons dried yeast
2 eggs
650g all purpose flour
1 teaspoon table salt

For brushing the rolls:
1 egg yolk
1 teaspoon whole milk

Place half the milk in a small saucepan over high heat and bring to a simmer. Remove from the heat, add the butter and sugar and stir until butter is melted. Add the remaining milk. Set aside until lukewarm, then pour into the bowl of an electric mixer. Stir in the yeast and set aside until foamy, 5 minutes or so.

Add the egg, flour and salt and mix with the dough hook until you get a smooth dough, about 8 minutes. Transfer to a large lightly buttered bowl, cover with plastic wrap and set aside in a warm place until doubled in size, about 40 minutes. Butter a 20x30cm (8x12in) metal baking pan and set aside.

Punch the air from the dough, divide into 15 equal pieces (mine were 75g each) and roll each into a smooth ball, using your hand as a cage to roll the dough around. Place the dough balls side by side onto the prepared pan, about 1cm apart. Cover with a clean kitchen towel and set aside for 40 minutes or until risen – in the meantime, preheat the oven to 200°C/400°F.

Beat the egg yolk and milk together with a fork. Brush the rolls with the mixture and bake for 20-25 minutes or until golden brown and the rolls sound hollow when tapped with your fingers. Cool in the pan over a wire rack for 5 minutes, then carefully unmold onto the rack to cool. Serve warm or at room temperature – the rolls can be kept in the freezer for up to 1 month, just let cool completely and wrap in Ziploc bags.

Makes 15

Sunday, February 8, 2015

Ginger twist

Ginger twist / Pão trançado de gengibre

I’ve asked my readers over at the blog’s Facebook page if they like to cook and bake on weekends and what they like to make – I love being in the kitchen on weekends because it is when I have more time and get to make more complex things, recipes that take a while to be ready or/and have many steps, such as this ginger twist.

Spending a lot of time in the kitchen can be frustrating if the results aren’t what we expect – and trust me, I’ve been there many times – but in this recipe’s case every bit of work and every second were worth it: the bread looked beautiful and tasted amazing, too.

It is a bit time consuming, I won’t lie, but I recommend you bookmark it for a cold, rainy day when you’re not at all interested in going out – just imagine that after all the work you’ll have something this delicious to go with a cup of tea or coffee. :D

Ginger twist
slightly adapted from the always amazing Gourmet Traveller

Dough:
140ml lukewarm whole milk
2 ½ teaspoons dry yeast
120g granulated sugar
400g all purpose flour
50g whole wheat flour
2 teaspoons ground ginger
1 teaspoon ground cinnamon
finely grated zest + juice of 1 orange
2 eggs, room temperature
100g unsalted butter, softened
1 egg, extra, for brushing the loaf

Filling:
70g unsalted butter, softened
50g brown sugar
50g granulated sugar
1 teaspoon ground ginger
130g pecans, chopped
100g almonds, chopped

Topping:
1 tablespoon all purpose flour
1 tablespoon granulated sugar
1 tablespoon (14g) unsalted butter, cold

Dough: stir milk, yeast and a pinch of the sugar in a small bowl to dissolve and stand until foamy (5 minutes). Meanwhile, combine dry ingredients and zest with a pinch of salt in an electric mixer fitted with a dough hook. Add yeast mixture, 2 eggs and orange juice, then mix on medium speed to form a soft dough. Gradually add butter, beating on medium speed to form a soft dough, then transfer to a buttered bowl, cover with plastic wrap and stand in a warm place until doubled in size (1 hour).

Filling: mix all the ingredients together and refrigerate until needed. Set aside 30g of the filling for the topping.

Knock back dough on a well-floured surface, roll out to a 30x60cm (12x24in) rectangle and spread evenly with filling. Roll from the longest side to form a cylinder, then cut in half. Twist each half around one another to form a rope and place in a buttered 12x25cm (5x10in) loaf tin. Stand until slightly risen (30 minutes) – in the meantime, preheat oven to 180°C.
Using your fingertips, mix the 30g reserved filling with the topping ingredients until a crumble forms. Refrigerate until needed.

Beat the extra egg with a pinch of salt and brush loaf with the mixture. Scatter with the topping and bake until golden and risen (45 minutes to 1 hour). Cover with foil if loaf gets too dark. Cool in the pan for 10 minutes, then carefully unmold onto a rack to cool.

Serves 8-10

Sunday, November 2, 2014

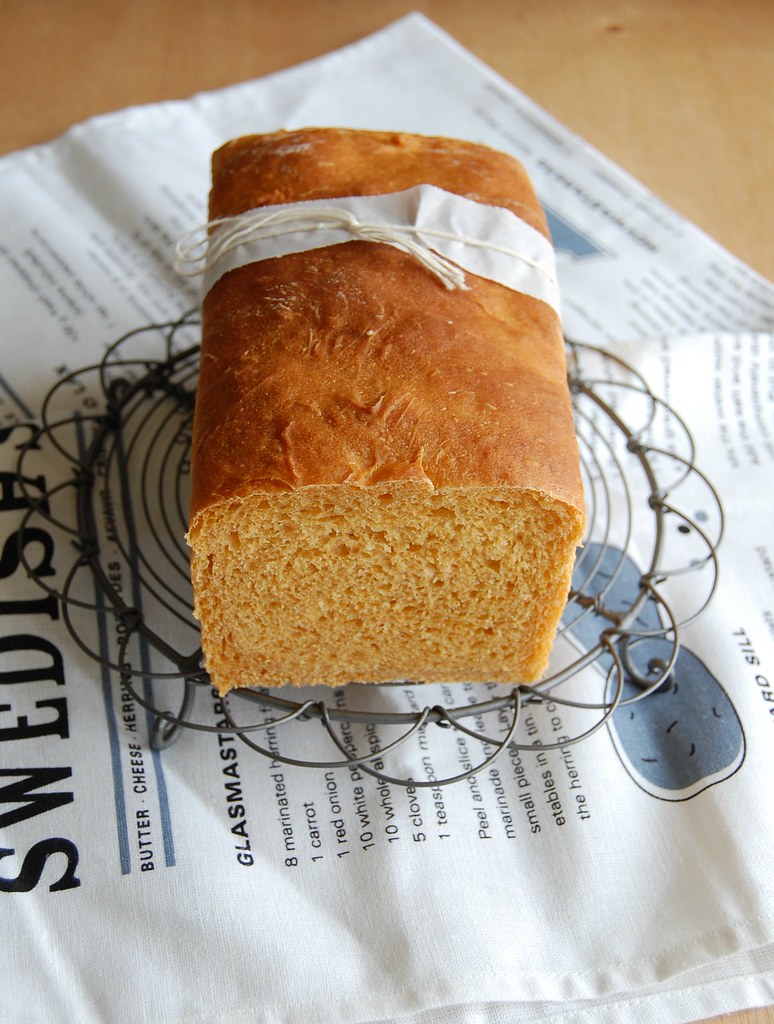
Red curry and coconut bread - the most unusual bread I have ever made

Red curry and coconut bread / Pão de pasta de curry vermelha e coco

Months ago I purchased a very interesting cookbook filled with recipes of bread and soups, two things I deeply love. I patiently and eagerly waited for the cold days of winter to show up around here, but unfortunately this year they were a handful only – it’s been hot for so long it feels like summer never ended.

For that reason, I postponed the plan of making the delicious soups I saw on the book and decided to focus on the bread instead: the recipes looked equally flavorsome.

I started with the one I found the most unusual bread, a loaf made with red curry paste and coconut – I had some paste in the fridge and could not wait to discover how it would flavor the bread. The loaf turned out very unusual, indeed, and I’ll admit it: it’s not everyone’s cup of tea – one has to like spicy food to enjoy the bread.

I thought it tasted great with a simple vegetable soup (the temperature dropped a day after I baked the bread, go figure), but I found that the killer way of having this bread was turning it into grilled cheese – it was delicious beyond words.

Red curry and coconut bread
slightly adapted from the delicious The Soup & Bread Cookbook: More Than 100 Seasonal Pairings for Simple, Satisfying Meals

scant ½ tablespoon dried yeast
½ tablespoon granulated sugar
100ml warm water
1/3 cup (80ml) unsweetened coconut milk
1 ½ tablespoons red curry paste
½ teaspoon table salt
2 cups (280g) all purpose flour

Place yeast, sugar and water in a large bowl and stir to combine. Set aside until foamy, about 5 minutes. Add the coconut milk, curry paste, salt and flour and mix until a dough starts to form. Cover and set aside for 15 minutes.

Knead for about 10 minutes (or 5 using an electric mixer) or until smooth and elastic. Place onto a large lightly oiled bowl, turn to coat, then cover with plastic wrap and set aside in a warm place for 1 hour or until doubled in volume.

Butter a 21.5x11.5cm (8.5x4.5in) loaf pan (6-cup capacity). Transfer the dough to a lightly floured surface and roll it into a 20x30cm (8x12in) rectangle. Roll it tight to form a cylinder, then place onto prepared pan. Cover and set aside again for 45 minutes – in the meantime, preheat the oven to 200°C/400°F.
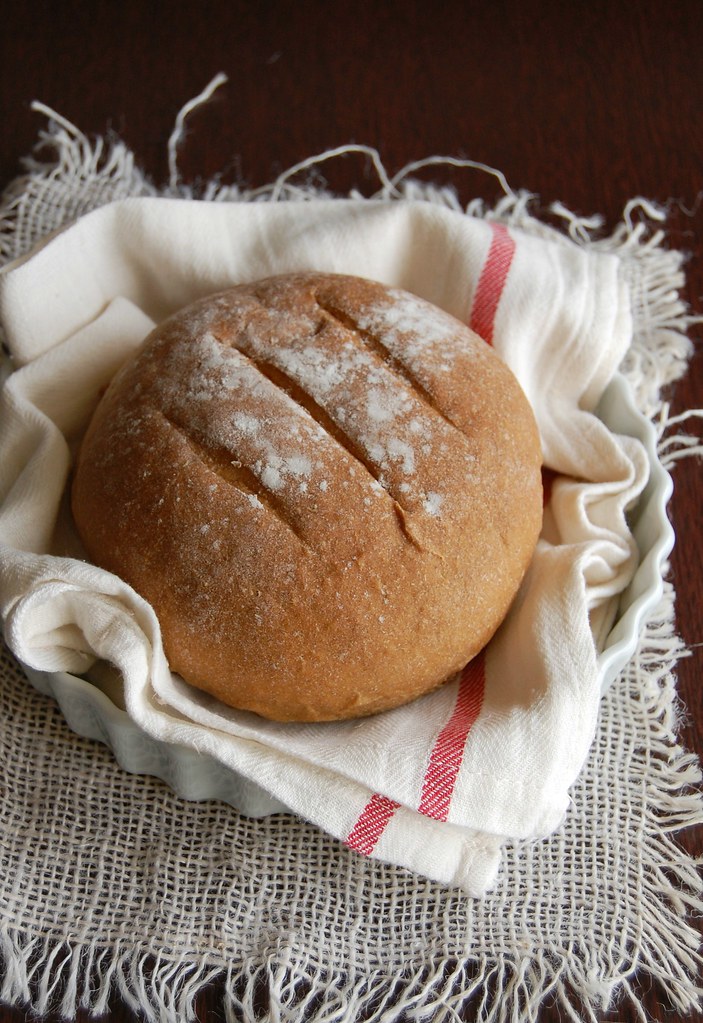
Bake the bread until golden and loaf sounds hollow when tapped, about 30 minutes. Cool in the pan over a wire rack for 5 minutes, carefully unmold and transfer to rack to cool completely.

Makes 1 loaf

Friday, September 19, 2014

Rye and stout bread and food waste

Rye and stout bread / Pão de centeio e cerveja stout

I was watching Save with Jamie the other day and besides the delicious recipes (I drooled over his beautiful panzanella and have been dreaming about the beef rendang with homemade chapatis, yum! ) I find it really great that he shows (with numbers) the insane amount of food that goes to waste for absolutely no reason – the show takes place in England, but I know that here in Brazil things are not any different.

I had to take responsibility for my home at a very early age and since I did all the shopping and cooking I had to be smart: there were four of us and nothing could go to waste. Luckily for me my brother was the only picky eater among us: my father and sister ate pretty much anything I cooked, and because they were fearless eaters I could experiment and try new things whenever I wanted to.

Leftover rice and pasta were quickly transformed into fritters, leftover tomato salad was placed in the fridge to be added to tomato sauce some other time, leftover greens were folded into beaten eggs for a delicious omelet – that’s how I managed the kitchen back then, and that made me learn a lot about food, long before blogs, cookbooks and TV shows. That is why I love how Jamie shows people how to transform ingredients into something else entirely – his tips are great.

When I made Nigella’s stout cake a while ago there was some leftover beer and since I wasn’t going to drink it I had to do something useful with it, and this bread was the result: I avoided wasting expensive beer and we had delicious open sandwiches for lunch, made with freshly baked bread – if that’s not a wonderful thing I don’t know what is. :)

Rye and stout bread
slightly adapted from the always gorgeous Gourmet Traveller

150g rye flour
1 teaspoon dried yeast
100ml stout beer
1 tablespoon molasses
1 teaspoon table salt, divided use
1 cup (240ml) lukewarm water
350g all purpose flour

Combine rye flour, yeast, beer, molasses, ½ teaspoon of the salt and water in an electric mixer fitted with a dough hook. Set aside in a warm place until foaming (5-8 minutes), add all purpose flour and remaining salt and knead until smooth (5 minutes). Transfer to a lightly oiled bowl, turn to coat, cover with plastic wrap and set aside in a warm place until doubled in size (1 ½ - 2 hours).

Line a large baking sheet with foil. Knock back dough and knead on a lightly floured surface until smooth, dusting with flour if necessary. Divide in half, then roll each half into a smooth ball. Dust top with a bit of flour, transfer to the prepared sheet, cover with a tea towel and set aside in a warm place until doubled in size (1 hour).
In the meantime, preheat oven to 180°C/350°F. Bake until loaves are deep golden and sound hollow when tapped (30-40 minutes). Transfer to a wire rack, cool slightly, then serve warm or at room temperature.

Makes 2 small loaves

Wednesday, July 30, 2014

Vanilla and cinnamon bread

Vanilla and cinnamon bread / Pão de baunilha e canela

Many people I know have been complaining a lot about the weather for many days now, but not me – I’m actually celebrating the cold days, especially after the dreadful summer we had months ago. \0/

Nothing worse than to start sweating seconds after taking a shower – I’m glad that is part of the past (at least for now).

Because of the low temperatures, keeping the oven on is always a great idea: you stay warm and there is delicious food as a result – win/win situation. :)

Last weekend was perfect for baking, and making bread is something I enjoy deeply. Without thinking too hard about what to prepare, I chose Signe Johansen’s vanilla loaf to be my afternoon project, and added cinnamon, whole wheat flour, oats and a bit more sugar to make it more my taste. The bread turned out delicious and it was also great toasted and slathered with butter.

Besides being tasty, the bread was the perfect project for another reason: I could watch a couple of Law and Order: SVU episodes while the dough proved twice.

Vanilla and cinnamon bread
slightly adapted from the über beautiful and delicious Scandilicious Baking

½ vanilla bean, split lengthwise, seeds removed with the back of the knife
1 cup (240ml) whole milk
50g unsalted butter
2 teaspoons vanilla extract
400g all purpose flour
100g whole wheat flour
½ teaspoon ground cinnamon
75g granulated sugar
¼ teaspoon table salt
3 teaspoons dried yeast
1 egg, beaten
1 tablespoon whole milk, extra, for brushing the loaves
handful rolled oats, for sprinkling

Place the vanilla seeds, milk, butter and vanilla extract in a small saucepan and heat until almost boiling and then allow to cool till lukewarm.
In the bowl of an electric mixer, fitted with the dough hook, mix the flours, cinnamon, salt and sugar. Make a well in the center and sprinkle in the dried yeast. Pour over the egg and the warm milk mixture and mix on low speed until the ingredients are incorporated. Continue mixing on low-medium speed until dough is elastic and smooth, about 8 minutes.
Place the dough in a lightly buttered large bowl and cover with plastic wrap. Leave to rise in a warm place for 45-60 minutes or so until it has doubled in size. Butter two 4 cup capacity loaf pans.
Knock back the dough and divide it in half. Roll each half into a large rectangle, roughly 20x30cm (8x12in), then roll each forming a tight cylinder. Place each cylinder into the prepared pans. Cover and leave to prove in a warm place for about 40 minutes – in the meantime, preheat the oven to 200°C/400°F.
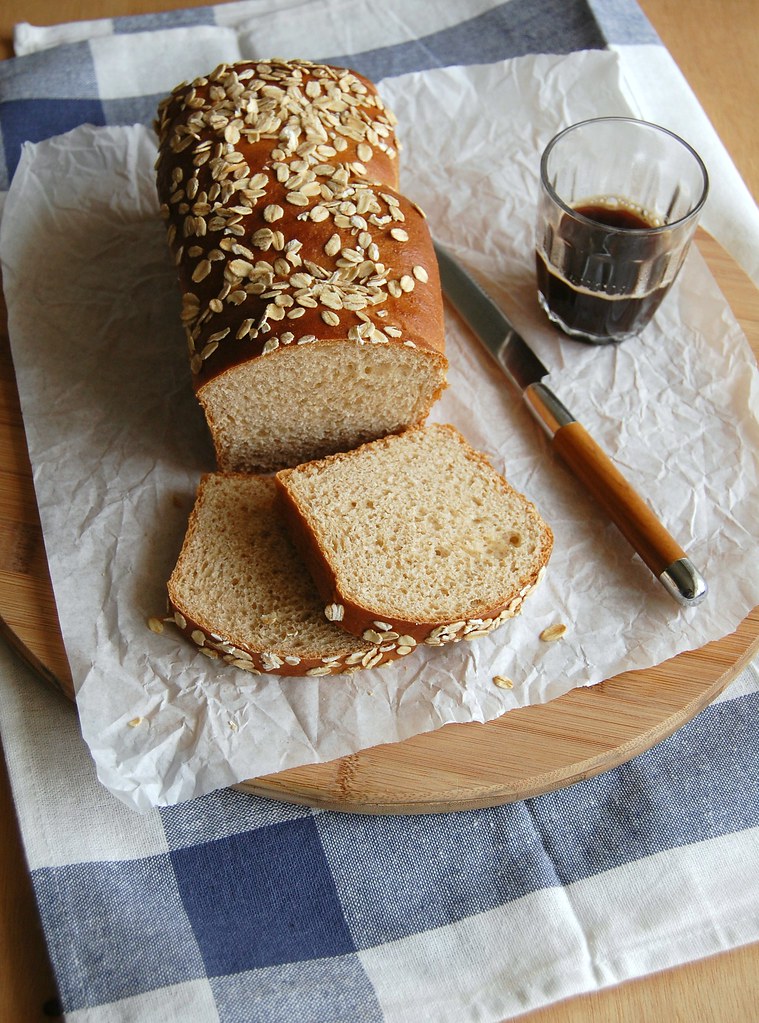
Brush the loaves with the extra milk and sprinkle with the oats. Splash a little water in the bottom of the oven to create steam to help the loaf rise, then bake on the upper middle shelf for about 30 minutes or until the loaves are deep golden and sound hollow when tapped on the base.
Cool in the pans for 10 minutes, then carefully unmold and transfer to a wire rack to cool completely.

Makes 2 loaves

Friday, April 25, 2014

Cinnamon and chocolate rolls for a mind unable to forget

Cinnamon and chocolate rolls / Cinnamon rolls com chocolate

For days in a row I had cinnamon rolls in mind and I wasn’t really sure why – maybe because I’d seen some at Starbucks when I stopped by with a friend? That makes sense. But then again I’d seen blueberry muffins there, too, and they did not cross my mind at all. My mind works in mysterious ways, I guess. :)

Because it was Easter I felt like baking with chocolate, so why not add a handful of the ingredient to some already delicious cinnamon rolls? I did, inspired by Eric Lanlard, and to make the buns more interesting I switched a bit of the all purpose flour for whole wheat flour – not only was the flavor great paired with the chocolate and the cinnamon but it also added a beautiful golden hue to the rolls (and it lightened a bit the guilty factor). :D

I chose not to glaze the rolls for two reasons: I thought it would be overkill and without the glaze they can be reheated in the oven for a couple of minutes before serving – the melted chocolate combined with the cinnamon permeating the soft roll is something I can’t recommend highly enough.

Cinnamon and chocolate rolls
adapted from two wonderful sources: Chocolat and The Beekman 1802 Heirloom Dessert Cookbook: 100 Delicious Heritage Recipes from the Farm and Garden

Dough:
2 ½ teaspoons dry yeast
¼ cup (50g) + 1 teaspoon granulated sugar
¼ cup (60ml) warm water
6 tablespoons (85g/¾ stick) unsalted butter, at room temperature
4 large egg yolks
¾ cup (180ml) buttermilk*
½ teaspoon table salt
80g whole wheat flour
3 to 4 cups (420g to 560g) all-purpose flour

Filling:
100g light brown sugar
2 teaspoons ground cinnamon
pinch of table salt
3 tablespoons unsalted butter, very soft
100g dark chocolate, grated – I used one with 53% cocoa solids and blitzed it in the food processor

icing sugar, for dusting

Dough: in a small bowl, dissolve the yeast and 1 teaspoon granulated sugar in the warm water. Let stand for 5 minutes, or until foamy.
Meanwhile, in a stand mixer fitted with the paddle attachment beat the butter and ¼ cup granulated sugar until smooth. Beat in the egg yolks, buttermilk, and salt until well combined (mixture might look curdled). Beat in the yeast mixture. Add the whole wheat flour and 3 cups of the all purpose flour and mix until combined. Transfer the dough to a lightly floured work surface and knead until smooth, adding more flour if necessary – I switched the paddle attachment for the dough hook and kneaded the dough using mixer; in total, I used 470g all purpose flour.
Transfer the dough to a lightly buttered large bowl, cover with plastic wrap, and let stand at room temperature until doubled in volume, about 1 hour.

Filling: in a small bowl, mix the brown sugar, cinnamon and salt. Set aside.
Transfer the dough to a lightly floured work surface and roll to a 30x45cm (12x18in) rectangle. Spread the butter over the dough, then sprinkle with the cinnamon mixture followed by the chocolate. Starting at the longest end, roll tightly into a cylinder. Cut crosswise into 16 equal pieces.
Line a large baking sheet with foil and brush it lightly with butter. Place the slices side by side, 2.5cm (1in) apart. Cover loosely with plastic wrap and let rise until light and puffed, about 45 minutes – in the meantime, preheat the oven to 180°C/350°F.
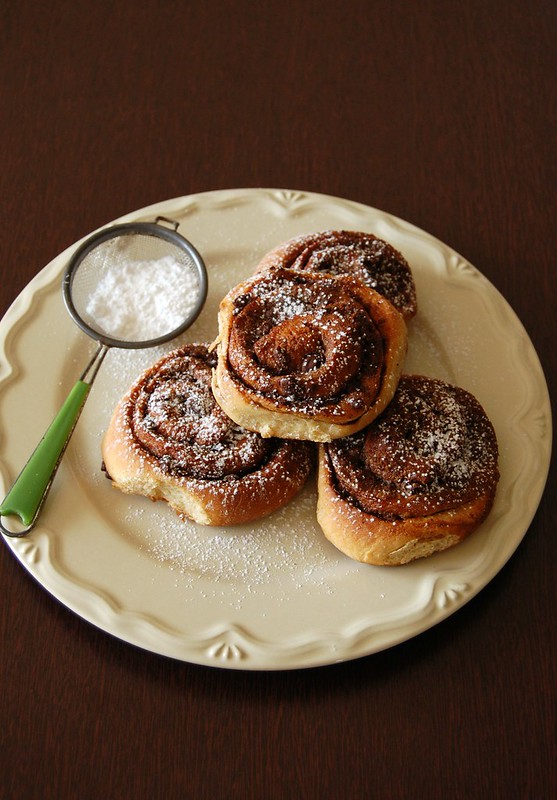
Bake for 20-25 minutes, or until the buns are golden brown and well risen. Remove from the oven and let cool in the pan for 10 minutes, then transfer to a wire rack. Serve warm or at room temperature, dusted with icing sugar.

* homemade buttermilk: to make 1 cup buttermilk place 1 tablespoon lemon juice in a 240ml-capacity measuring cup and complete with whole milk (room temperature). Wait 10 minutes for it to thicken slightly, then use the whole mixture in your recipe

Makes 16

Related Posts with Thumbnails