Close to paying bills and getting up early in the morning to go to work nothing makes me feel more like an adult than realizing that time really flies – saying it out loud every so often basically turns me into my grandmother. :D
Days ago I thought about what I would make to celebrate Easter this year and I remembered these chocolate cookies – when I searched them on the blog I was surprised to find out that the post is from two years ago!
I read the post and well, I continue refusing to buy expensive chocolate Easter eggs – so on top of getting old I am still cheap. :D
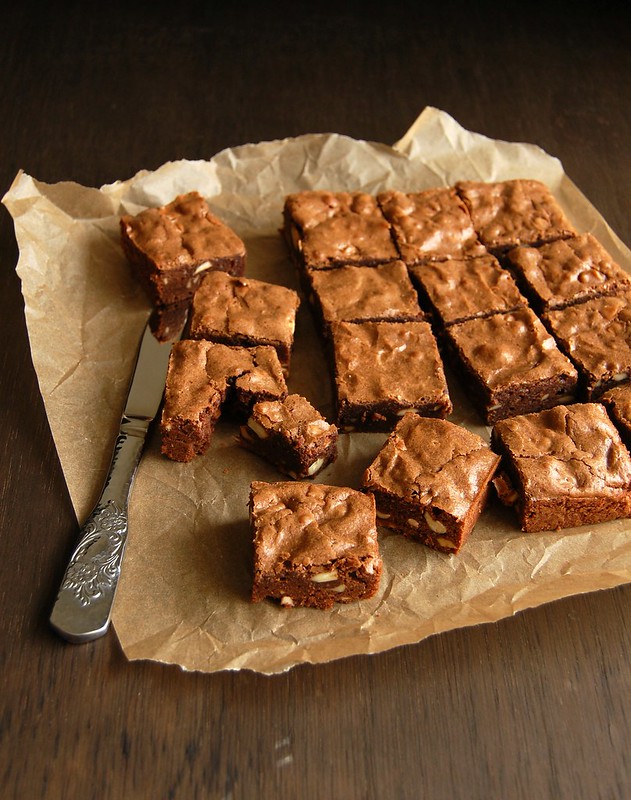
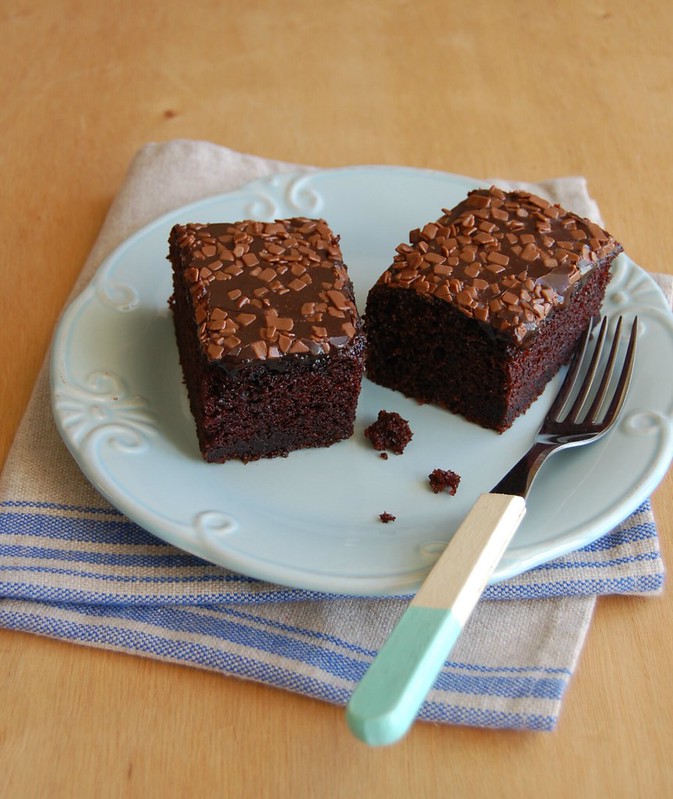
Brownies are a hit with everyone I know, not to mention how easy to make they are: out of a 20cm square pan you get 16 brownies and wrapped nicely you easily have 3-4 gifts covered – I have used cashew nuts for I wanted the brownies to have a Brazilian touch, but feel free to replace them with any other nut you fancy.
Chocolate cashew brownies
own creation
½ cup (113g/1 stick) unsalted butter, softened and chopped
100g dark chocolate, finely chopped – I used one with 53% cocoa solids
¾ cup (130g) light brown sugar, packed
1/3 cup (67g) granulated sugar
2 large eggs, room temperature
1 teaspoon vanilla extract
1 cup (140g) all purpose flour
1/8 teaspoon table salt
¾ cup (105g) unsalted cashew nuts, toasted and cooled
Preheat the oven to 180°C/350°F. Butter a 20cm (8in) square pan, line it with foil leaving an overhang on two opposite sides, and butter the foil as well.
In a large saucepan, combine butter and chocolate and cook over low heat, stirring, until both are melted. Remove from the heat and cool slightly. Whisk in both sugars. Whisk in the eggs, one at a time, until smooth. Stir in the vanilla, flour and salt, mixing just until incorporated. Stir in the nuts.
Spread batter into prepared pan and smooth the top. Bake for about 20 minutes or until a toothpick inserted in the center of the brownies comes out with moist crumbs. Cool completely in the pan over a wire rack. Cut into squares to serve.
Makes 16
Thursday, March 30, 2017
Chocolate cashew brownies for another budget-friendly Easter
Tuesday, March 28, 2017
Mayo marinated roast chicken
I have told you that I am a very visual person and that beautiful food photos get my attention instantly, and a while ago I found out that my husband is just like that too. :)
Now, every time I see something delicious on a magazine or cookbook I immediately show him the picture – that has made my life so much easier! :)
I was reading Bon Appétit the other day and saw this insanely golden chicken – it caught my eye right away. When I read it was marinated in mayonnaise I was even more curious about the recipe, so I lifted the IPad and told him (I might have screamed, I am not so sure): “LOOK at this chicken!” to what he replied: “please make it for lunch next weekend?” :D
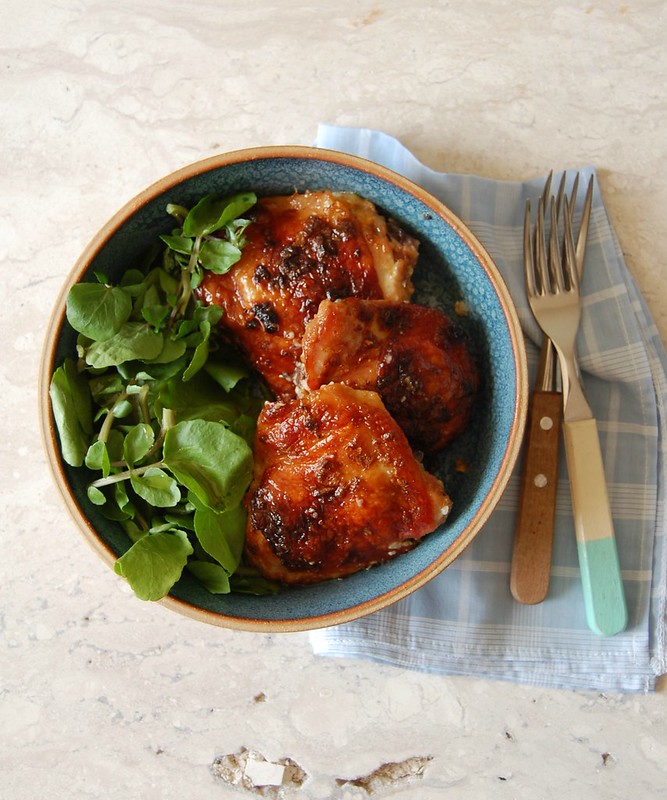
So in a matter of minutes the menu was decided and I got to learn that marinating chicken with mayo makes it really, really tender and beautifully golden – and all those spices combined with the onion and garlic added a wonderful flavor to it.
Mayo marinated roast chicken
adapted from Bon Appétit magazine
1 large onion, peeled and quartered
3 garlic cloves
finely grated zest and juice of 1 lime
1 teaspoon smoked paprika
½ teaspoon ground cumin
pinch of cayenne pepper
salt and freshly ground black pepper
½ cup mayonnaise
4 skin-on, bone-in chicken thighs (about 1½ pounds total)
1 ½ tablespoons olive oil
Make the marinade: in a food processor, process onions, garlic, lime zest and juice, paprika, cumin and cayenne pepper until a rough purée forms. Transfer to a large baking dish and stir in salt, black pepper and mayonnaise. Add the chicken and toss to coat. Cover with plastic wrap and refrigerate for 4 hours (overnight is even better).
Preheat the oven to 200°C/400°F. Line a large and shallow baking dish with a double layer of foil and brush it with olive oil. Remove the chicken pieces from the marinade and scrape off the excess marinade. Place chicken onto the foil, skin side up, drizzle with the olive oil and roast for 60-70 minutes or until golden brown and cooked through.
Serve immediately – I served it with watercress salad, like it was on the magazine, and it was delicious
Serves 2
Friday, March 24, 2017
Bolo de fubá (Brazilian corn flour cake) - the first recipe I made in life
Most of you already know that I started cooking at a very early age – it was purely out of necessity, but it became a true passion over the years. The first recipe I ever learned how to make was this corn flour cake, or “bolo de fubá”, and it was my great-aunt Angelica who taught me how to make it – she would then after that cake teach me how to cook all sorts of food, mostly by phone. <3
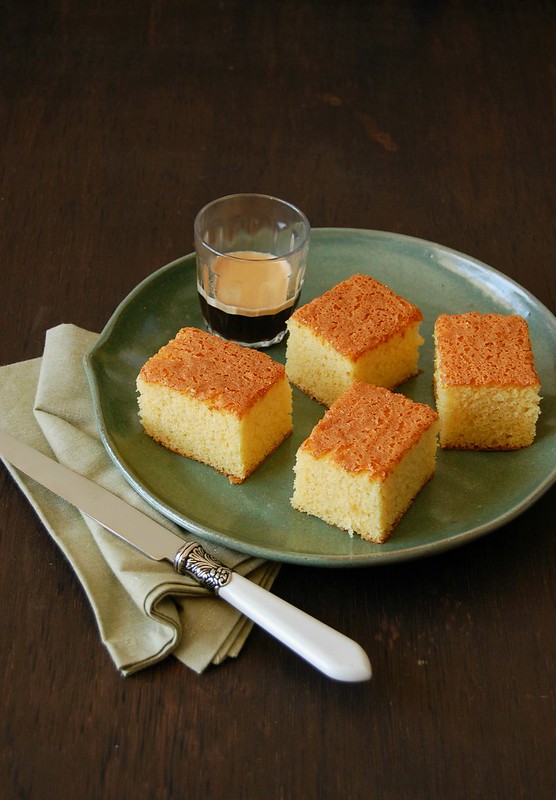
I hadn’t baked her cake for several years for I no longer had her recipe, but after searching all over my place, including very old notebooks I finally found it – it is really, really delicious and exactly how I remembered it: tasty and very light in texture.
I have made other cornmeal cakes over the past years, but this is the one that got me in the kitchen for the first time ever in my life, the recipe that showed me how magical and wonderful cooking and baking can be – if it wasn’t for this cake, this blog would probably not exist, and that makes this recipe even more special for me.
Bolo de fubá (Brazilian corn flour cake)
my great-aunt Angelica’s recipe
1 cup (140g) all purpose flour
1 cup (120g) corn flour (fine cornmeal - fubá) – not corn starch, the same corn flour used in these tartlets
1 tablespoon baking powder
pinch of salt
4 large eggs
1 cup + 2 tablespoons (224g) granulated sugar
¾ cup (180ml) canola oil
1 cup (240ml) very hot whole milk
Preheat the oven to 180°C/350°F. Butter and flour a 20x30cm (8x12in) rectangular baking pan.
In a medium bowl, whisk together the all purpose flour, corn flour, baking powder and salt. Set aside.
In a large bowl, using an electric mixer with the whisk attachment, whisk the eggs on medium speed until foamy. Gradually beat in the sugar, and then beat the mixture on high until thick, glossy and very light in color – scrape the sides of the bowl occasionally during the making of the recipe. Turn down the speed to medium and slowly pour in the oil down the sides of the bowl, then beat to combine. On low speed, gradually add the dry ingredients and mix only until incorporated – do not overmix to avoid losing the air previously incorporated in the batter. Gently stir in the milk with a rubber spatula. Pour batter into prepared pan and bake for35-40 minutes or until risen and golden and a skewer inserted in the center of the cake comes out clean. Cool completely in the pan over a wire rack.
Cake can be kept in an airtight container at room temperature for up to 3 days.
Serves 20
Tuesday, March 21, 2017
Pesto and cheese rolls and family traditions
Yesterday I started thinking about family traditions and how some of them go from one generation to the other, sometimes without us even noticing.
My brother and I have become much closer since my nephew was born, and that brings me a lot of joy. So on weekends we are inevitably all together, either they come to visit Joao and I or we visit them – I love that. It reminds me of when I was little and we would go for Sunday lunches at my grandmother’s or my aunt and uncle from the country side would come to spend the day with us – we are doing exactly what our parents did almost forty years ago and that happened so naturally I only thought of it now.
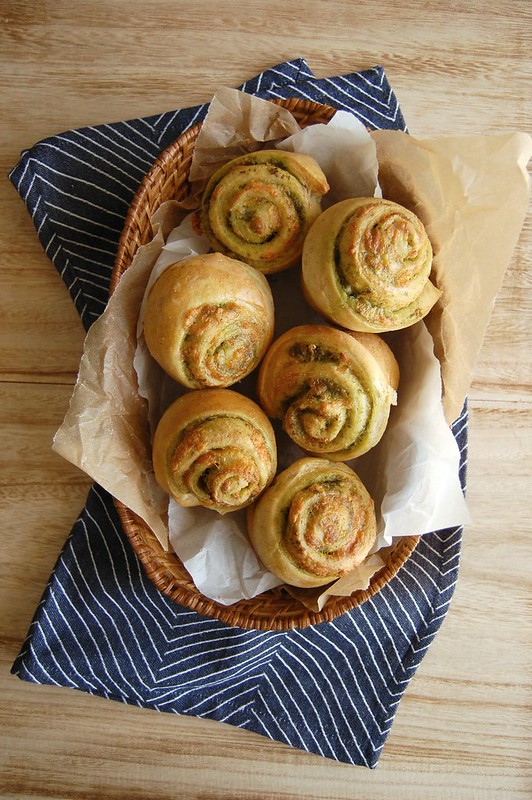
One of the times they came to visit us I had just finished baking these pesto rolls – they smelled wonderful and I thought the adults would love them, but to my surprise my nephew was the one that enjoyed them the most. I had no idea he would like bread filled with pesto – I thought he would find the flavor too strong or something like that – but I was wrong. Therefore I bring you these today and hope you the adults reading me like them as much as the little one at home did. :)
Pesto and cheese rolls
own creation
Dough:
¼ cup (60ml) lukewarm water
¾ cup (180ml) lukewarm whole milk
½ teaspoon granulated sugar
2 ¼ teaspoons dried yeast
1 large egg
2 tablespoons (28g) unsalted butter, melted and cooled
2 tablespoons extra virgin olive oil
¾ teaspoon table salt
2 ¼ cups (315g) all purpose flour
½ cup (70g) whole wheat flour
Filling:
½ cup (40g) fresh basil leaves, packed
2 tablespoons finely ground pecorino
1 small garlic clove
2 tablespoons pine nuts
¼ cup (60ml) extra virgin olive oil
freshly ground black pepper
200g shredded cheese – I used one kind of mozzarela we find here in Brazil that is yellow and drier than fresh mozzarela; replace with cheddar
Egg wash:
1 egg + ½ teaspoon water, beaten with a fork
Start by making the dough: in the bowl of an electric mixer fitted with the dough hook, mix together with a fork the water, milk, sugar and yeast. Set aside until foamy, about 5 minutes. Add the egg, butter, olive oil, salt and flours and mix on medium speed until a smooth and elastic dough forms, about 8 minutes. Transfer to a buttered bowl, cover with plastic wrap and set aside on a warm spot until doubled in size, about 1 ½ hours.
Filling: place the basil, pecorino, garlic, pine nuts, olive oil and black pepper in a blender or food processor and blitz until a paste forms – I don’t add any salt for the cheeses are already salty. Set aside. Brush a 12-hole muffin pan with butter.
Knock down the dough to remove any excess air. Roll it on a lightly floured surface until you get a 30x50cm (12x20in) rectangle. Spread the pesto over the dough, leaving a 1cm (½in) border. Sprinkle evenly with the shredded cheese. Beginning with the longer side, roll the dough tightly like a cylinder. Cut into 12 slices and place each slice, cut side up, inside a hole in the muffin pan. Cover with a clean kitchen towel and let rise again for 40-60 minutes – in the meantime, preheat the oven to 200°C.
Brush the rolls with the egg wash and bake for 20-25 minutes or until deeply golden and cooked through. Cool in the pan over a wire rack for 5 minutes, then carefully unmold each roll and transfer to the wire rack. Serve warm or at room temperature.
Rolls can be kept in an airtight container at room temperature for up to 3 days. Reheat them in a 180°C oven for 8-10 minutes before serving if desired.
Makes 12
Wednesday, March 15, 2017
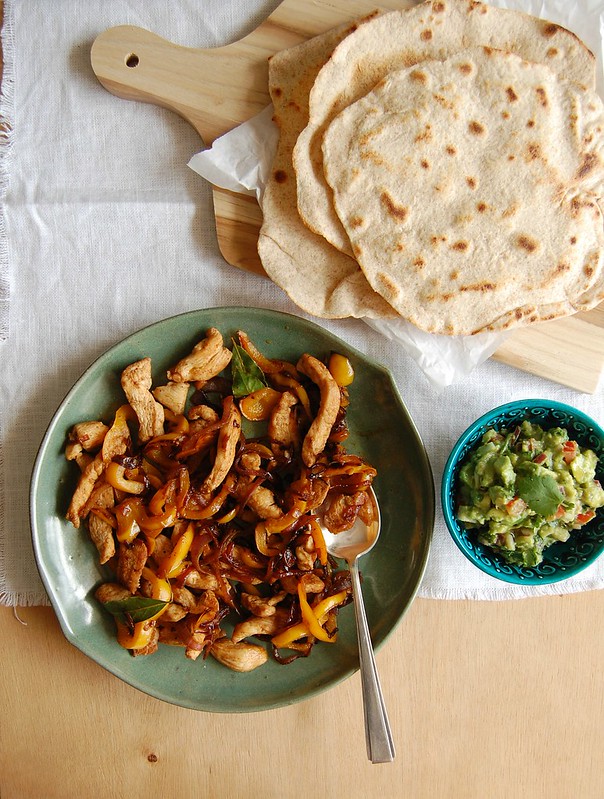
Chicken fajitas with homemade tortillas
I always think about how much my understanding of food has changed over the last decade or so – I feel grateful for how much I have learned after I started writing this blog, back in 2006.
Back then, I had already been cooking for seventeen years, for at the age of 11 I was already cooking dinner for 5 people every night. But after the blog I have come to learn dishes I had never heard of before, new ingredients, amazing flavors, and all of that has improved my cooking immensely.
I first heard of fajitas a long time ago, and I don’t even remember where I first saw it. After that, I ate them a few times in a Tex-Mex restaurant, but I can tell you that nothing, nothing beat homemade fajitas, especially if they are served with homemade tortillas – it is a whole new thing completely.
These tortillas are so delicious that I make them quite often, even to be served with guacamole only – after he tried these for the first time, my husband told me he would never eat store bought tortillas again. :)
Chicken fajitas with homemade tortillas
own creation, inspired by lots of sources
Chicken:
3 tablespoons olive oil
salt and freshly ground black pepper
a few drops of Tabasco
1 teaspoon ground cumin
½ teaspoon smoked paprika
a few drops of Worcestershire sauce
1 large clove of garlic, minced
2 bay leaves
2 chicken fillets (about 250g in total), cut into strips
1 small yellow bell pepper (about 150g), sliced
1 small red onion, sliced in half moons
1 tablespoon water
Tortillas:
2/3 cup (94g) all purpose flour
1/3 cup (46g) whole wheat flour
¼ teaspoon baking powder
½ teaspoon table salt
2 tablespoons canola oil
1/3 cup (80ml) warm water
Start by marinating the chicken: in a shallow medium bowl, mix together 1 tablespoon of the olive oil, salt, pepper, Tabasco, cumin, paprika, Worcestershire sauce and garlic. Add the bay leaves and the chicken and toss to coat. Cover with plastic wrap and refrigerate for at least 30 minutes, 2 hours if possible.
Now, the tortillas: in the bowl of an electric mixer fitted with the dough hook, mix well the flours, baking powder and salt. Add the oil and water and mix on medium speed until a smooth and elastic dough forms, about 5 minutes. Cover with plastic wrap and set aside at room temperature for 30 minutes.
Divide dough into 6 equal portions – each should be about 40g. On a lightly floured surface, roll each piece of dough until you get a thin circle, 20-22cm (8-9in) in diameter. Heat a large nonstick frying pan over high heat. Grill each disc of dough for 1-2 minutes each side, or until a few brown spots appear on the surface – if you want soft tortillas, immediately transfer them to the plate and cover with a clean kitchen towel; if you want crispy tortillas, let them cool on a wire rack, without overlapping them. Repeat the process with all the remaining dough.
Cook the chicken: on a large nonstick frying pan over high heat, heat the remaining olive oil. Add the onion and bell pepper and cook, stirring occasionally, for 5 minutes, or until tender. Add the chicken and cook, stirring a few times, until chicken is golden and cooked through, 8-10 minutes. Stir in the water, scrape the bottom of the pan to remove the delicious burnt bits and then serve immediately with the tortillas and guacamole, if desired.
Serves 2
Monday, March 13, 2017
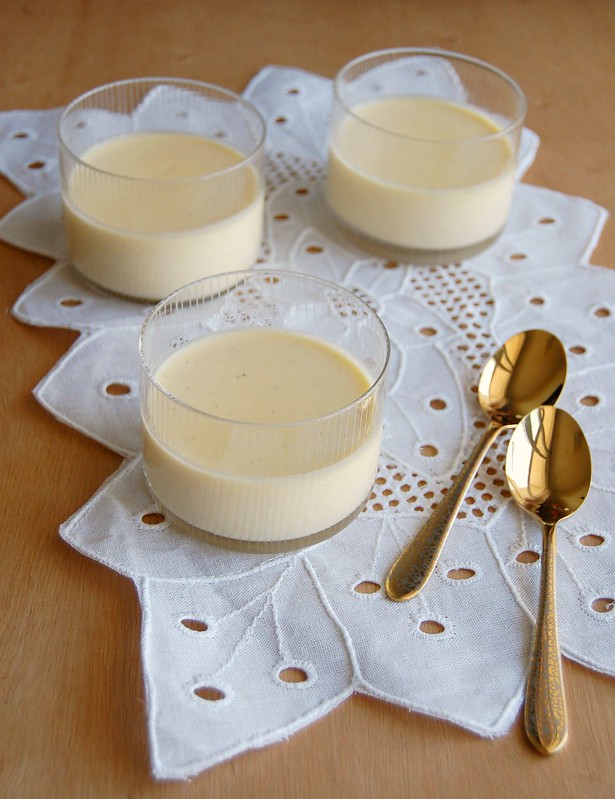
Clementine posset
As much as I try to make new things in the kitchen, I have another priority: not to waste food, not even 1 ounce, if possible at all. It is not always possible, and I fail miserably sometimes, but I keep on trying.
Last week, when I placed the tangerine cookie dough logs in the fridge, I looked at the zested clementines and decided to make something tasty with them. I also had some cream in the fridge, so a posset immediately came to mind – it is such a ridiculously easy to make dessert I feel ashamed of even calling this a recipe, but the result is so delicious, velvety and delicate I had to share it with you.
Clementine posset
slightly adapted from the always great BBC Good Food
300ml heavy cream
¼ cup (50g) granulated sugar
¼ cup (60ml) clementine juice, freshly squeezed
¼ teaspoon vanilla extract
Put the cream and sugar in a small saucepan and bring to a simmer. Turn up the heat and bubble for 2 minutes exactly. Remove from the heat and gradually stir in the juice – mixture will being to thicken slightly. Stir in the vanilla. Sieve the mixture into a jug, wait for it to cool slightly, then divide between 4 glasses. Chill for at least 4 hours or until set.
Serves 4
Thursday, March 9, 2017
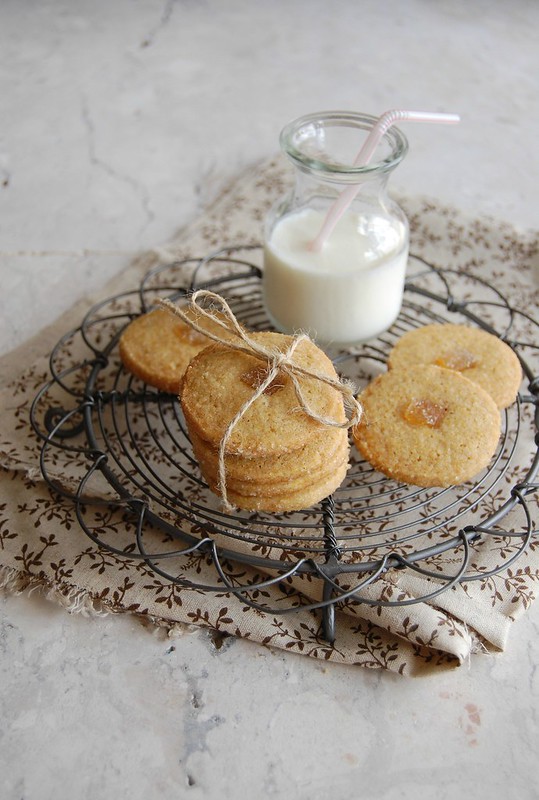
Clementine spiced cookies
I think one can say I am addicted to baking cookies – as you have probably noticed already – and for a good while now slice and bake cookies have been my favorites: they are easy to make and the uncooked dough can spend some time in the fridge or in the freezer waiting for the right moment to be baked.
Even though the dough can be kept for a good while before baking, I hardly ever keep it that long: I prefer to bake lots of cookies at once and eat them and also share them with my family and friends – a “spreading joy” operation, let’s say. :)
These cookies, deliciously fragrant from the tangerine zest and with a kick from the spices, will make your kitchen smell like heaven. The almond meal makes them quite delicate and tricky to be transported, so for a bit firmer – but still wonderful – cookies omit the almond meal and use a total of 175g all purpose flour.
Clementine spiced cookies
slightly adapted from Annie Rigg's breathtakingly beautiful book
1 cup + 1 tablespoon (150g) all purpose flour
¼ cup (25g) almond meal
¼ teaspoon baking powder
¼ teaspoon baking soda
½ teaspoon ground ginger
¼ teaspoon ground cinnamon
pinch of freshly ground nutmeg
pinch of salt
finely grated zest of 2 clementines
¼ cup (50g) granulated sugar
½ cup (113g/1 stick) unsalted butter, room temperature
1 tablespoon honey
½ teaspoon vanilla extract
2-3 pieces of crystallized ginger, cut into small dice
In a medium bowl, whisk together flour, almond meal, baking powder, baking soda, ginger, cinnamon, nutmeg and salt. Set aside.
Put zest and sugar to the bowl of an electric mixer and rub them together with your fingertips until sugar is fragrant. Add the butter and using the mixer beat ingredients together until creamy and light in color. Beat in the honey and vanilla. Turn off the mixer and mix in the dry ingredients using a rubber spatula just until a dough forms – do not overmix.
Place the dough on a large piece of parchment paper; shape into a log. Fold parchment over dough; using a ruler, roll and press into a 3.5cm (1.4in) log – like Martha does here. Wrap in parchment. Chill in the fridge until very firm, about 4 hours or overnight.
Preheat oven to 180°C/350°F; line two large baking sheets with baking paper.
Unwrap the dough log and cut into 5mm (¼in) thick rounds; space 2.5cm (1in) apart onto prepared sheets. Gently press a piece of crystallized ginger in the center of each cookie. Bake until golden brown around the edges, 10-12 minutes. Cool on the sheets for 5 minutes, then carefully slide the paper with the cookies onto a wire rack and cool completely.
Makes about 30
Friday, March 3, 2017
One bowl chocolate cake for my nephew
Up until two years ago my apartment was a home of two adults with no kids: glass objects here and there, pointy drawer handles… Now, there are safety nets on the balcony and on the windows and the glass objects get moved to a very high shelter every time our favorite visitor – my baby nephew – is around.
My husband and I went from not knowing we had any cartoon channels on the cable TV to knowing them by heart. :)
I came to learn that there is a cartoon called Peppa Pig and one day, after my nephew saw a chocolate cake on one of the episodes he immediately asked for one, or “boo cuatche” as he says. :) I had no butter at home, so a quick search brought me this recipe. It is insanely easy to put together and tastes absolutely amazing – and even after two days the texture was still amazing, kept in an airtight container at room temperature.
From that day on I have made this cake several times – I thought it was about time I shared it with you. This recipe is a keeper and has become a family’s favorite. For the one on the photo I used some chocolate sprinkles I had left from making brigadeiros for my nephew's birthday party.
One bowl chocolate cake
cake slightly adapted from here, the icing I don’t remember where I got it from
Cake:
2 cups (280g) all-purpose flour
½ cup (45g) unsweetened Dutch process cocoa powder
2 teaspoons baking soda
1 teaspoon baking powder
½ teaspoon table salt
½ teaspoon ground cinnamon
1 ¾ cups (350g) granulated sugar
2 large eggs, lightly beaten with a fork
1 cup (240ml) canola oil
1 cup (240ml) buttermilk*
2 teaspoons instant coffee granules
1 cup (240ml) hot water
Icing:
3 tablespoons (42g) unsalted butter, softened
3 tablespoons heavy cream
1 ½ tablespoons unsweetened Dutch process cocoa, sifted
1 cup (140g) icing sugar, sifted
Cake: preheat oven to 180°C/350°F. Butter or oil a 20x30cm (8x12in) deep baking pan (if your 8x12in pan is not 5cm deep, use a 13x9in pan).
In a large bowl, sift together the flour, cocoa, baking soda, baking powder, salt and cinnamon. Stir in sugar. Stir in the eggs, oil and buttermilk. Dissolve the coffee into the hot water and stir into the batter, mixing until combined.
Transfer batter to prepared pan. Bake 35-40 minutes or until a toothpick inserted in center comes out clean. When cake has cooled for 20 minutes, make the icing: in a small saucepan, place butter, cream and cocoa and stir over medium heat until melted. When it starts to boil, turn off the heat and whisk in the icing sugar. Spread over warm cake and let cool completely in the pan over a wire rack.
*homemade buttermilk: to make 1 cup buttermilk place 1 tablespoon lemon juice in a 240ml-capacity measuring cup and complete with whole milk (room temperature). Wait 10 minutes for it to thicken, then use the whole mixture in your recipe
Serves 16-20
