Unfortunately I don’t have time to read all the websites and blogs I like (and I’m sure you don’t either so thank you for stopping by, I really appreciate it), but not a day goes by that I don’t visit IMDb for news on the world of cinema.
Yesterday, in one of those visits, I watched the trailer for Horns and it immediately became one of the most interesting/craziest trailers I have even seen. Daniel Radcliffe’s choices in movies and theater have been very diverse and I find it honorable that he’s interested in doing such different things, stretching himself as an actor: he does controversial, he does dark comedy, and romantic comedy as well – who can forget him staring in Equus years ago? So young, yet so versatile – I really admire that.
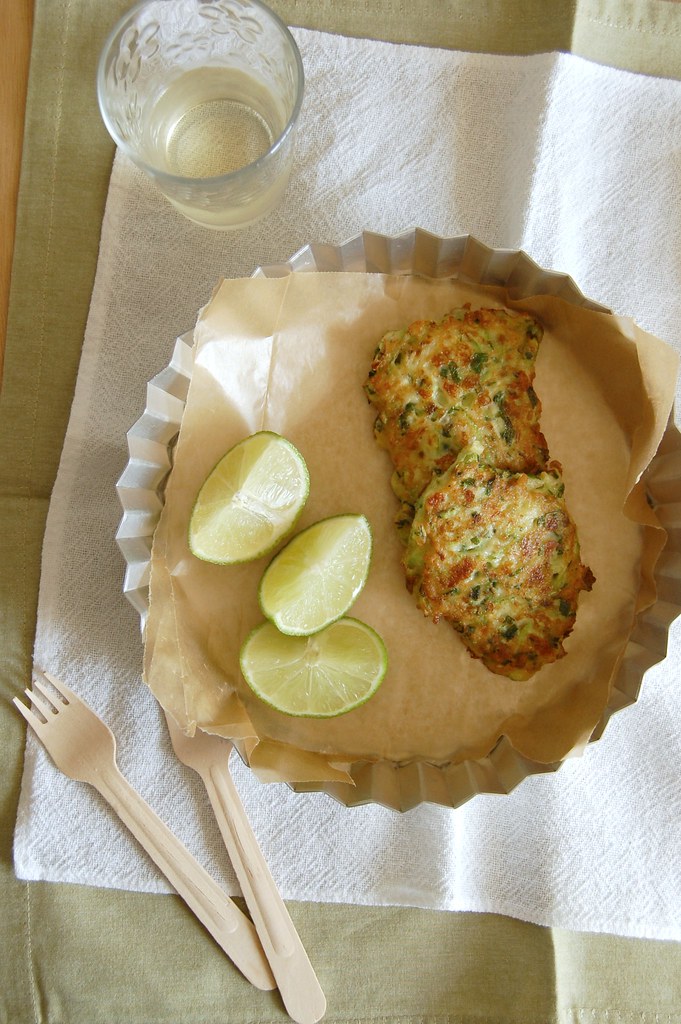
Daniel is versatile, all right, and so are fritters: they can be pretty much made with any vegetable in your fridge and it’s a nice vessel for them if there’s any picky eater around. These courgette fritters turned out delicious and tender – they were fast to prepare and vanished even faster. :D
Courgette and feta fritters
slightly adapted from two great sources: A Girl Called Jack: 100 Delicious Budget Recipes and Nigella Fresh
1 large courgette
1 spring onion, finely chopped
handful parsley leaves, chopped
1 egg, lightly beaten with a fork
50g feta cheese, grated
2 tablespoons all purpose flour
salt and freshly ground black pepper
canola oil, for frying
Coarsely grate the courgette and spread it onto a clean kitchen towel. Set aside for 20 minutes to get rid of any excess moisture.
Transfer the courgette to a large mixing bowl, add the spring onion, parsley, egg, feta and flour, season with salt and pepper and stir to combine. If batter is too thin, add a bit more flour.
Heat a drizzle of oil in a large nonstick frying pan. Dollop two tablespoons of batter per fritter, flatten with the back of a spoon and shape the edges quickly to form a rough circle. Don’t overfill the frying pan. Cook for about 2 minutes, then flip and cook until golden. Transfer to a plate lined with paper towels. Repeat the process with remaining batter.
Serve at once with lime wedges.
Makes 6
Thursday, July 31, 2014
Courgette and feta fritters, a crazy trailer and a versatile young actor
Wednesday, July 30, 2014
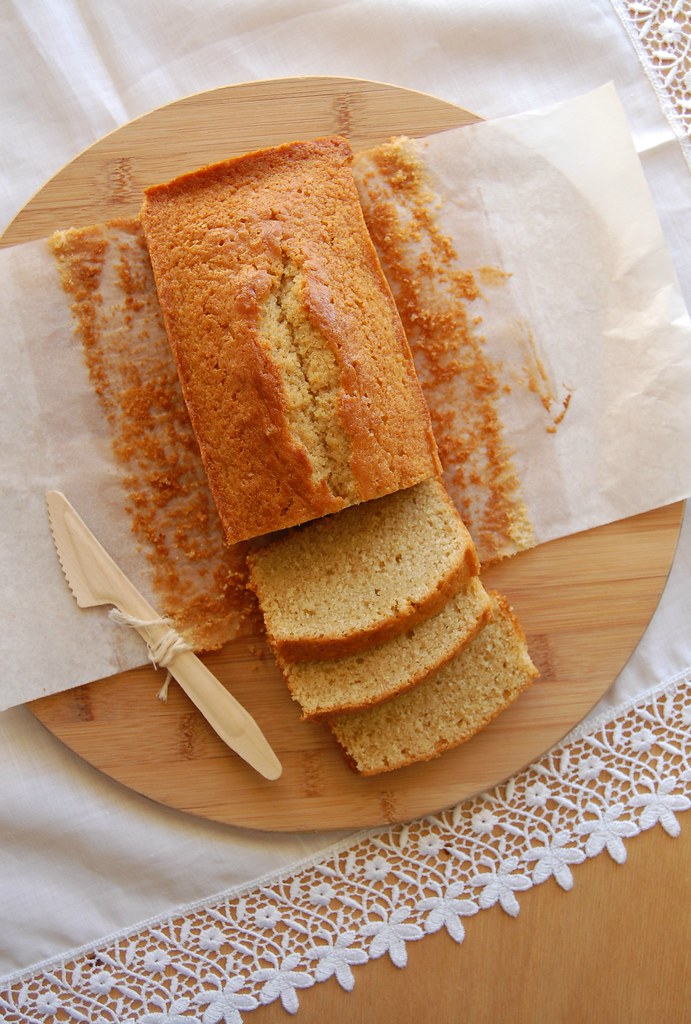
Vanilla and cinnamon bread
Many people I know have been complaining a lot about the weather for many days now, but not me – I’m actually celebrating the cold days, especially after the dreadful summer we had months ago. \0/
Nothing worse than to start sweating seconds after taking a shower – I’m glad that is part of the past (at least for now).
Because of the low temperatures, keeping the oven on is always a great idea: you stay warm and there is delicious food as a result – win/win situation. :)
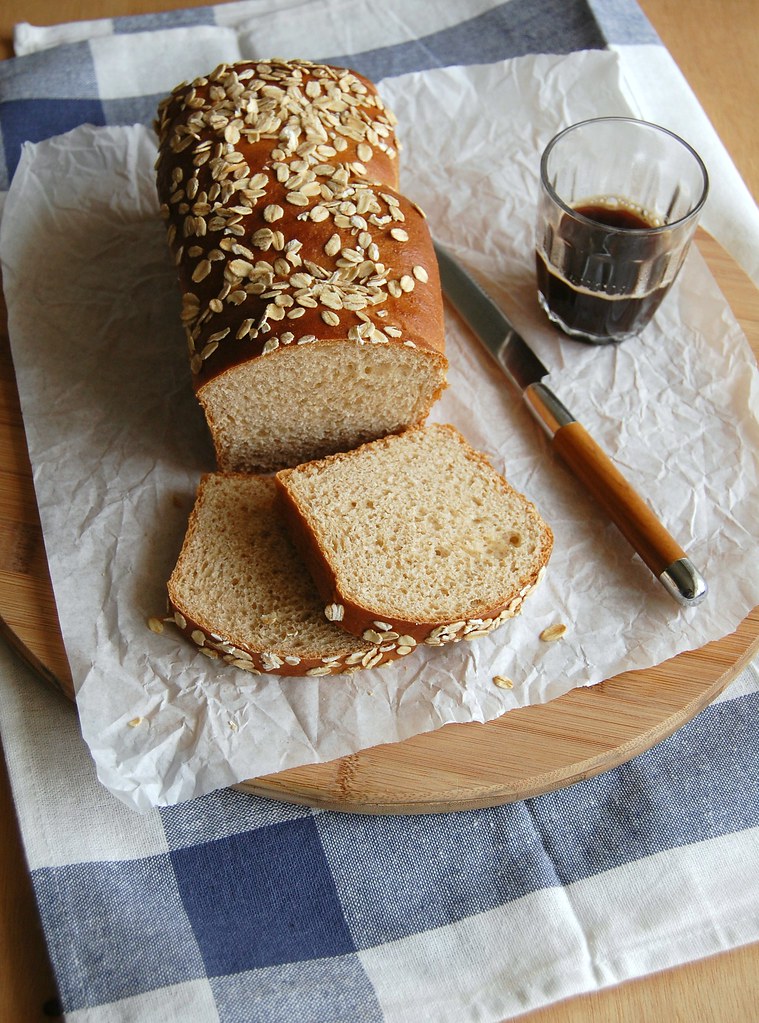
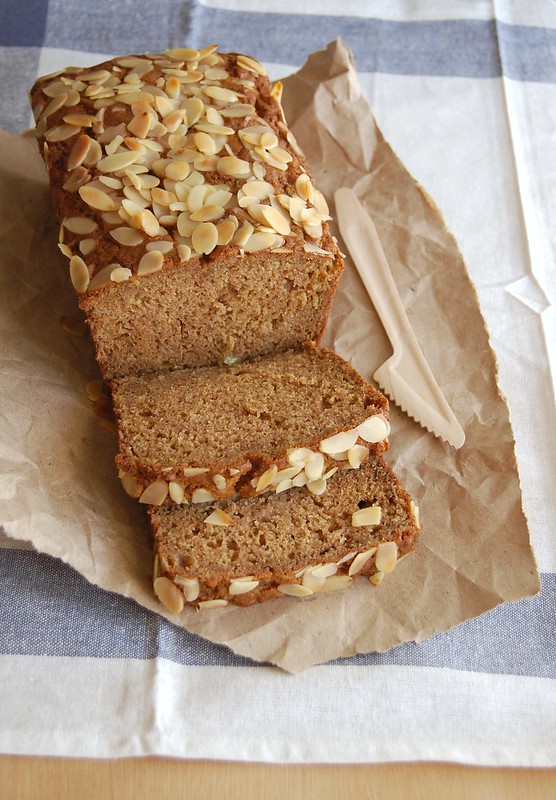
Last weekend was perfect for baking, and making bread is something I enjoy deeply. Without thinking too hard about what to prepare, I chose Signe Johansen’s vanilla loaf to be my afternoon project, and added cinnamon, whole wheat flour, oats and a bit more sugar to make it more my taste. The bread turned out delicious and it was also great toasted and slathered with butter.
Besides being tasty, the bread was the perfect project for another reason: I could watch a couple of Law and Order: SVU episodes while the dough proved twice.
Vanilla and cinnamon bread
slightly adapted from the über beautiful and delicious Scandilicious Baking
½ vanilla bean, split lengthwise, seeds removed with the back of the knife
1 cup (240ml) whole milk
50g unsalted butter
2 teaspoons vanilla extract
400g all purpose flour
100g whole wheat flour
½ teaspoon ground cinnamon
75g granulated sugar
¼ teaspoon table salt
3 teaspoons dried yeast
1 egg, beaten
1 tablespoon whole milk, extra, for brushing the loaves
handful rolled oats, for sprinkling
Place the vanilla seeds, milk, butter and vanilla extract in a small saucepan and heat until almost boiling and then allow to cool till lukewarm.
In the bowl of an electric mixer, fitted with the dough hook, mix the flours, cinnamon, salt and sugar. Make a well in the center and sprinkle in the dried yeast. Pour over the egg and the warm milk mixture and mix on low speed until the ingredients are incorporated. Continue mixing on low-medium speed until dough is elastic and smooth, about 8 minutes.
Place the dough in a lightly buttered large bowl and cover with plastic wrap. Leave to rise in a warm place for 45-60 minutes or so until it has doubled in size. Butter two 4 cup capacity loaf pans.
Knock back the dough and divide it in half. Roll each half into a large rectangle, roughly 20x30cm (8x12in), then roll each forming a tight cylinder. Place each cylinder into the prepared pans. Cover and leave to prove in a warm place for about 40 minutes – in the meantime, preheat the oven to 200°C/400°F.
Brush the loaves with the extra milk and sprinkle with the oats. Splash a little water in the bottom of the oven to create steam to help the loaf rise, then bake on the upper middle shelf for about 30 minutes or until the loaves are deep golden and sound hollow when tapped on the base.
Cool in the pans for 10 minutes, then carefully unmold and transfer to a wire rack to cool completely.
Makes 2 loaves
Tuesday, July 29, 2014
Avocado and lemon zest linguine - becoming good friends with whole wheat pasta
I guess that once we get old and start feeling more comfortable in our own skin what others think doesn’t matter much – what you feel or like or want should come first. I like to believe that.
Back in high school it was all about being trendy and cool or, in other words, doing and saying what others did. I remember going to a concert with my friends a couple of times, it was a cover band that played Elvis Presley’s songs, but I never liked Elvis – I just pretended I liked it so I could fit in, since all the girls kept saying how great Elvis was (lucky for me the concerts were free). I was so bored one of the nights I started doing my Physics homework right there (the concerts were held on Friday evenings, and we would go right after school).
That did not do any good for my “cool reputation”, I’ll tell you that. :)
Up until months ago I would tell everyone how awful whole wheat pasta was, and make faces when people brought the subject up. Then, while reading a recipe that called for that kind of pasta, it suddenly hit me: I was just replicating other people’s opinions. I had, indeed, had my share of bad whole wheat pasta dishes, but as someone who’s been cooking for as long as I have I should know better – I should know that maybe, and just maybe, there was something wrong with what I’d tasted. It could have been a case of bad pasta or bad recipe (or both).
I continue to avoid Elvis like the plague, but I have become good friends with whole wheat pasta. :)
Things we do and say now and then, sometimes without putting much thought to them. I have been there, you probably have, too. We’re humans, we say stupid things sometimes, we follow wrong people. We make mistakes.
Nobody’s perfect.
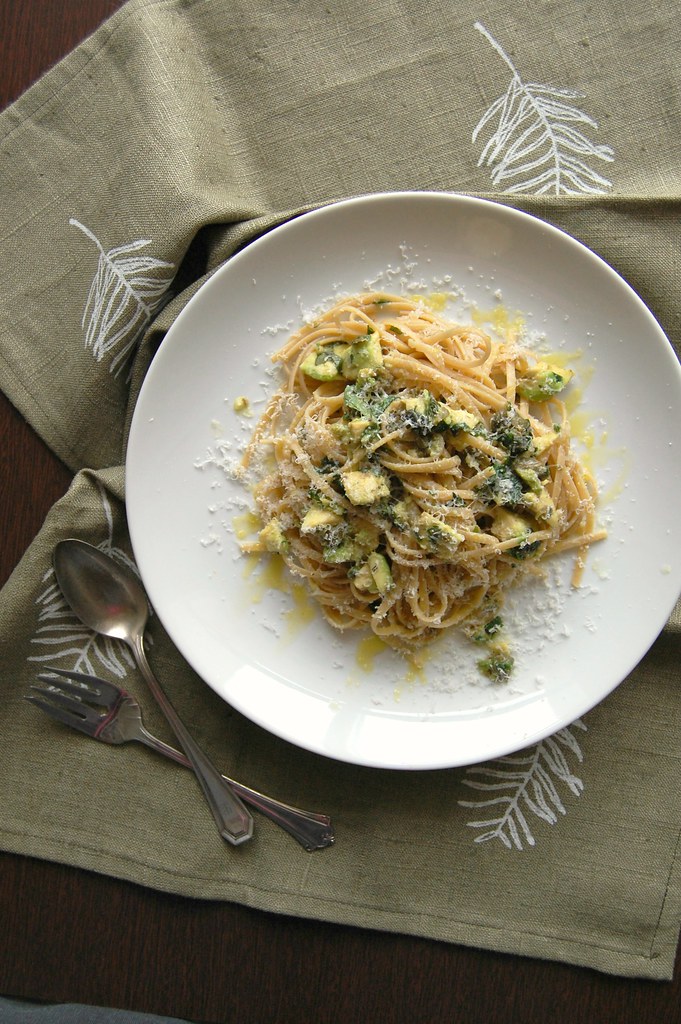
But this pasta dish is (and I would never have thought of pairing avocado and pasta). :)
Avocado and lemon zest linguine
slightly adapted from the wonderful A Modern Way to Eat: Over 200 Satisfying, Everyday Vegetarian Recipes (That Will Make You Feel Amazing)
400g whole wheat linguine
2 tablespoons olive oil
4 tablespoons capers in brine, coarsely chopped
2 cloves of garlic, minced
finely grated zest of 2 lemons + juice of ½ a lemon
a handful basil leaves, coarsely chopped
a handful parsley leaves, coarsely chopped
2 ripe avocados
1-2 tablespoons extra-virgin olive oil
freshly grated pecorino, for serving
Cook the linguine in a saucepan of boiling salted water until al dente (follow the instructions on the package).
In the meantime make the sauce: heat the olive oil in a large nonstick frying pan on a medium heat, then add the capers and garlic and cook until fragrant. Add the lemon zest and the herbs, mix to combine and remove from the heat.
Halve and destone the avocados, then use a knife to make criss-cross cuts through the flesh, chopping it inside the skin. Use a spoon to scoop out each half into the pan, and stir to mix all the flavors together. Before you drain the pasta, scoop out half a mugful of the pasta water. Drain the pasta, add it to the frying pan and return it to medium heat, tossing to combine. Drizzle with the lemon juice and extra-virgin olive oil, season with salt and pepper, and add a splash of the cooking water if necessary.
Serve at once, sprinkled with the cheese.
Serves 4
Monday, July 28, 2014
Almond, lemon and buckwheat tea cake and weekend plans
I think you guys should know that I managed to keep the plans I’d made for the weekend: I watched more than just one movie (one of them probably for the tenth time) and I also baked and cooked a bit – the cold days are a great excuse to keep the oven on. :)
I find it almost impossible to switch channels when some of my favorite movies are on, and yesterday one of the channels had a Godfather marathon: all the three movies were being aired in a row. I don’t care for the third movie, but I love The Godfather and The Godfather II and ended up watching the first movie once again (a couple of glasses of wine kept me from watching the second one). :)
Another thing I find almost impossible to do is to resist the urge to bake lemon cakes: as much as I try to vary – and sometimes I succeed, you know that – I always bookmark the lemon cakes in the cookbooks I buy, and this beauty was no exception: there are tons of wonderful recipes there and the first recipe I tried from it was a recipe for cookies, but after those I could not wait to take the lemony route, and here it is.
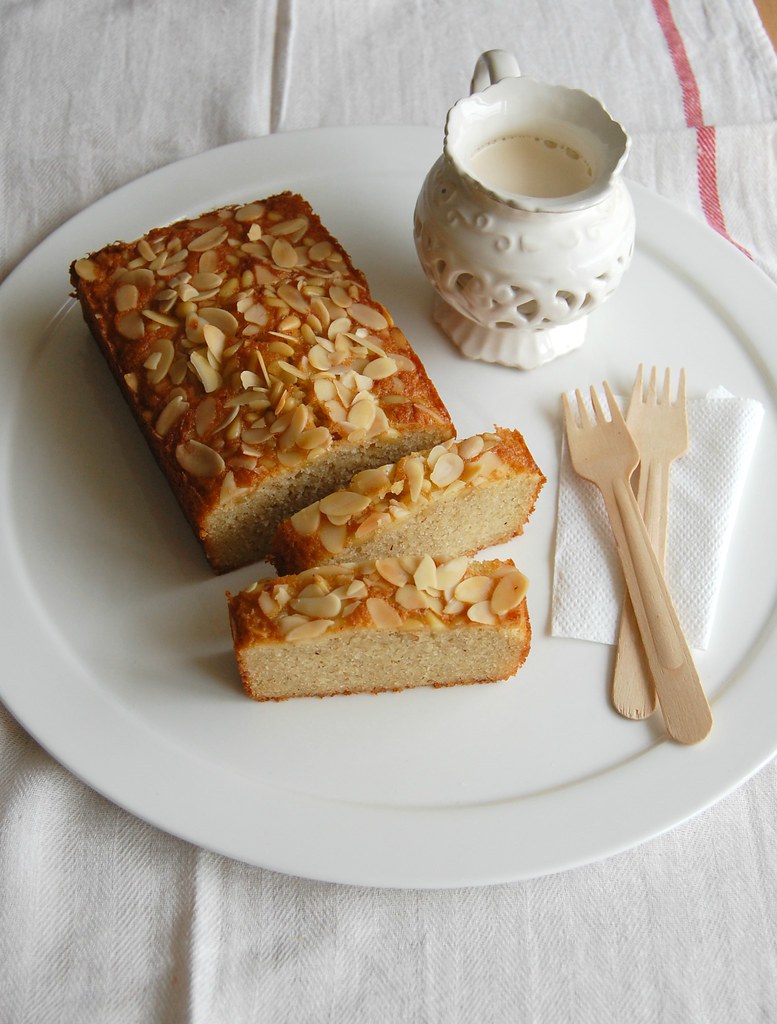
I used buckwheat flour instead of all purpose flour and loved the result – it’s not a very tall cake (mine turned out just as the one on the photo of the book) but it’s packed with flavor (and gluten free).
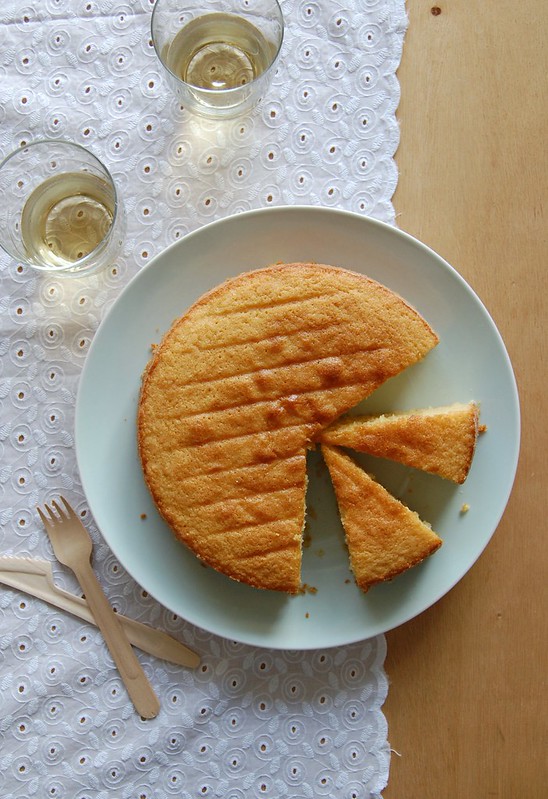
Almond, lemon and buckwheat tea cake
slightly adapted from the oh, so beautiful The Baking Collection (The Australian Women's Weekly)
½ cup (100g) granulated sugar
finely grated zest of 1 large lemon
125g unsalted butter, softened
3 eggs
1 teaspoon vanilla extract
¼ cup (35g) buckwheat flour
pinch of salt
¼ teaspoon baking powder
120g ground almonds
2 tablespoons whole milk, room temperature
2 tablespoons flaked almonds
2 tablespoons pine nuts
Preheat the oven to 180°/350°F. Lightly butter a 5-cup loaf pan, line it with baking paper and butter the paper as well.
In a large bowl, rub sugar and zest together until fragrant. Add butter and using an electric mixer beat the ingredients together light and creamy. Add the three eggs and the vanilla, then beat until incorporated – scrape the sides of the bowl occasionally. Sift the buckwheat flour, salt and baking powder over the mixture, add the almond meal and milk and stir to combine. Transfer the batter to the prepared pan, smooth the top and sprinkle with the almonds and pine nuts.
Bake for 30-35 minutes or until risen and golden and a skewer inserted in the center comes out clean. Cool in the pan over a wire rack for 15 minutes, then carefully unmold onto the rack. Cool completely, then peel off the paper.
Serves 6-8
Friday, July 25, 2014
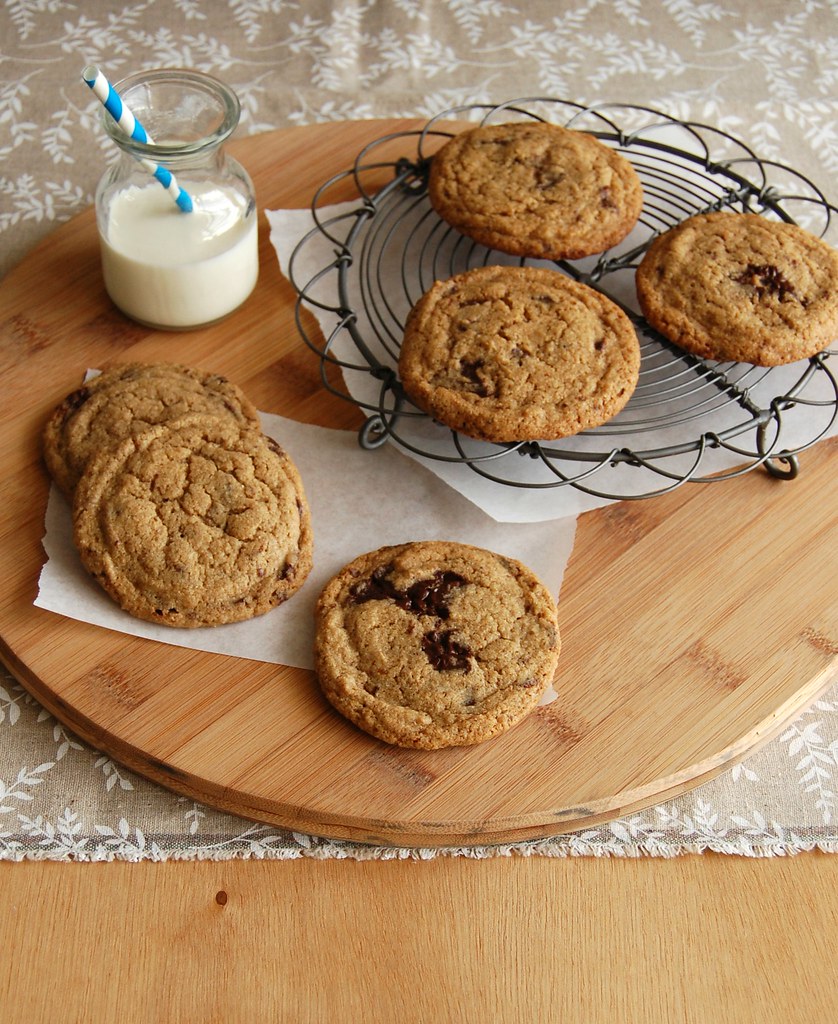
Amaranth choc chip cookies, and one month without movies
I had a confession to make: I haven’t watched a movie in weeks. Several weeks – it might be a record or something.
The last movie I watched was The Fault in Our Stars, then the World Cup began and I breathed soccer for a month – I believe I wasn’t the only one. :) After the German team took home the Cup I got obsessed with season 6 of SoA, so there was no room for movies – I had to know how things would end up (for the record, I did not like it at all).
My plans for the weekend: to watch as least one movie. And to bake, of course. :)
Movies weren’t the only forgotten thing around here: I hadn’t baked chocolate chip cookies in quite some time I did not even remember when I’d done that last. Being in possession of a 70% chocolate bar made me think of choc chips cookies, they would be the perfect way to use up such great chocolate. I’d seen these and they looked so good, and then I saw that they were an adaptation of a recipe I’d made, too, from a cookbook I adore (and the cookies were delicious).
I was out of buckwheat flour so I changed the recipe ever so slightly and used amaranth flour instead – the cookies turned out fantastic, beautifully golden, with a slightly different flavor. I had a couple while they were still warm from the oven and it was hard not to eat several in a row, I must tell you. There was a very, very subtle grainy texture to them while still warm – to me, not a problem at all – and that became less evident once they were completely cool.
If you’re out of amaranth flour, don’t fret: try the whole wheat version, it is equally delish.
Amaranth choc chip cookies
adapted from this wonderful cookbook, one of my favorites
2/3 cup (93g) whole wheat flour
2/3 cup (93g) all purpose flour
¼ cup (35g) amaranth flour
¾ teaspoons baking powder
½ teaspoon baking soda
¼ teaspoon salt
½ cup (1 stick/113g) cold unsalted butter, chopped
½ cup (88g) light brown sugar, packed
½ cup (100g) granulated sugar
1 egg
1 teaspoon vanilla extract
100g dark chocolate (70%), coarsely chopped
Preheat the oven to 180°C/350°F. Line two large baking sheets with baking paper.
In a large bowl, whisk the flours, baking powder, baking soda and salt.
In a large bowl, using an electric mixer, beat the butter and sugars on low speed just until the ingredients are blended, 2 minutes. Scrape down the sides of the bowl. Add the eggs, one at a time, mixing on medium until each is combined. Mix in the vanilla. Add the dry ingredients at once and blend on low just until the flour is barely combined, about 30 seconds. Add the chocolate chunks at once and mix on low speed just until the chocolate is evenly combined – to avoid overmixing the dough, finish incorporating the ingredients with your a spatula.
Place 2 leveled tablespoons of dough per cookie onto the prepared sheets, 5cm (2in) apart. Bake until golden brown around the edges, 12-16 minutes.
Cool in the pan for 2 minutes, then slide the paper with the cookies onto a wire rack and cool completely.
Makes about 20
Thursday, July 24, 2014
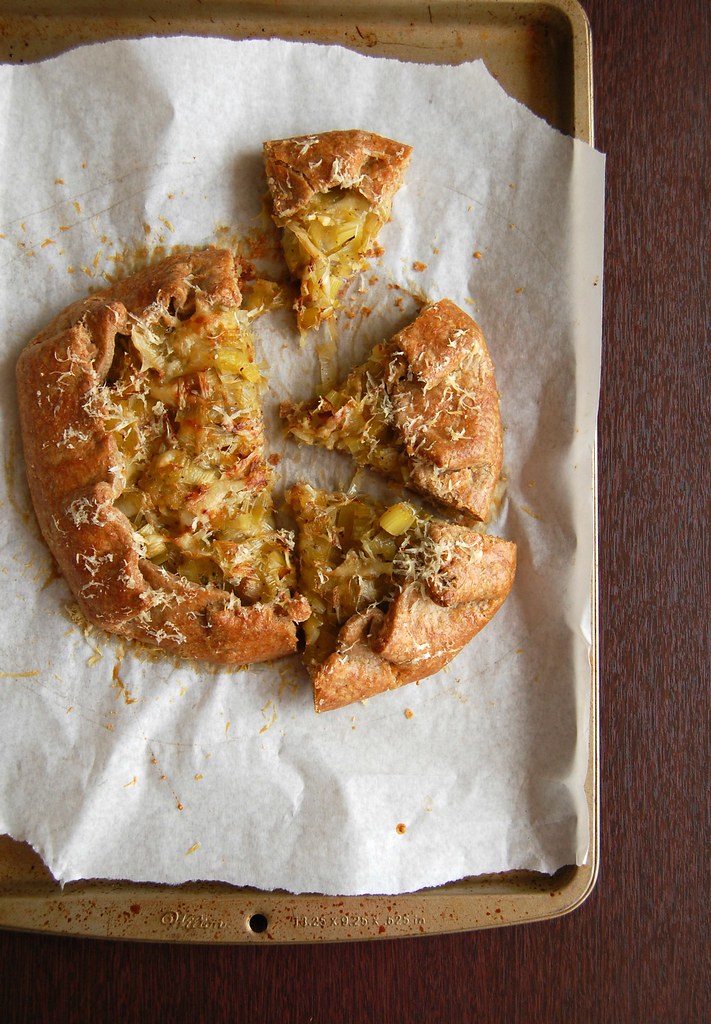
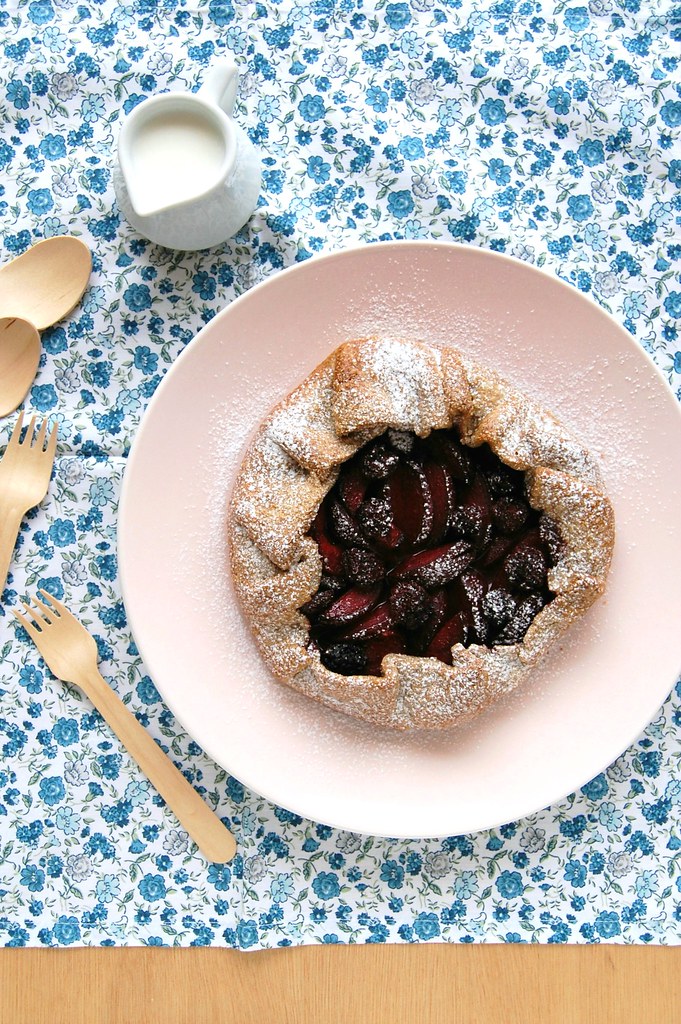
One fantastic rye pastry, two tarts: leek and cheese galette and plum and blackberry galette
One of the things I find most magical and fascinating about cooking is that even if you’ve been doing it for a long time – in my case, nearly 25 years – there always something new to try, or a new way to try something you already love: food is dynamic.
After making those delicious jam bars with rye flour, I began searching for other ways to incorporate the beloved ingredient in my baking and saw these beautiful apricot galettes in one of my favorite books (and one of the most beautiful I own, too). I like Amber Rose’s approach to food and everything I had made from her cookbook had turned out great until then, so I was really looking forward to trying her rye pastry.
It was a revelation.
As I ate pieces of the galettes, first the savory, then the sweet, I was mesmerized: how could that be so delicious?
Making the pastry was easy using a food processor, and as I rolled and folded it I kept thinking that the result would be a very flaky pastry, which is something I love – it indeed turned out flaky, and so tasty. Divine, actually.
When I placed the two little packages of pastry in the fridge for their final rest, I saw the leeks I’d bought for soup and had a sudden urge: instead of making two plum tarts, why not make one sweet and one savory? Dinner and dessert with one pastry recipe = perfection. :)
I cooked the leeks with some white wine (me and my love for booze) and paired it with cheese for the savory galette – it turned out amazing. The plum tart was really good, too. The rye pastry, besides being flavorsome and flaky, was great paired with both savory and sweet fillings. The recipe is a keeper and I hope you give it a go – I cannot wait to make it again with different fillings: tomatoes, goat’s cheese and thyme is a combo I would love to try with this pastry, and I bet that apples and pears would be lovely with it, too.
Rye pastry (enough to make both tarts)
slightly adapted from the beautiful and delicious beyond words Love, Bake, Nourish: Healthier cakes and desserts full of fruit and flavor
120g rye flour
120g all purpose flour
1 teaspoon sugar
½ teaspoon table salt
175g unsalted butter, cold and in small cubes
1 teaspoon white wine vinegar
7-8 tablespoons ice-cold water
1 egg, lightly beaten with a fork, for brushing
Plum and blackberry filling
adapted from the same cookbook
4 plums, each cut in eighths
½ tablespoon honey
pinch ground cinnamon
8 frozen blackberries
demerara sugar, for sprinkling
Leek and cheese filling
own creation
1 large leek, white part only, sliced
1 tablespoon unsalted butter
1 teaspoon olive oil
salt and freshly ground black pepper
1 ½ tablespoons white wine
60g gruyere, grated
1 tablespoon finely grated pecorino or parmesan, for sprinkling
Start by making the pastry: place the flours, salt and sugar in a food processor and blitz to combine. Add the butter and pulse until the mixture resembles coarse meal. Add the vinegar and half the water and pulse until a dough starts to form – add more water if necessary, but do it gradually. Form a ball with the dough, wrap in plastic wrap and refrigerate for 1 hour.
Unwrap the dough, place on a lightly floured surface, and roll into an oblong shape about 20x28cm (8x11in) - don't worry if the dough is still a little crumbly; it will come together with the rolling.
Fold the dough into thirds (as if you were folding a letter), roll out to its original oblong shape, and then fold into thirds again. Repeat the process, then divide the dough in half, wrap each in plastic wrap and return to the fridge for at least 1 hour or overnight.
When ready to make the tarts, place each piece of dough onto large piece of baking paper and roll into a rough 25cm (10in) circle. Transfer each to a baking sheet.
Fruit tart: put the plums in a bowl with the honey and the cinnamon and toss to combine. Arrange the fruit on the center of the dough, top with the blackberries and drizzle with the juices left in the bowl (if there’s too much, use only half to avoid a soggy crust). Carefully fold one edge in towards the center of the fruit and continue folding all the way round, bringing the edge of the pastry towards and over the filling. Place the sheet in the freezer for 30 minutes – in the meantime, preheat the oven to 180°C/350°F.
Savory tart: heat the butter and oil in a large nonstick frying pan. Add the leeks and cook until fragrant and beginning to turn golden, stirring occasionally. Season with salt and pepper, add the wine and cook until it evaporates, 2-3 minutes. Cool.
Arrange the gruyere on the center of the dough, top with the cooled leeks, then fold one edge in towards the center of the filling and continue folding all the way round, bringing the edge of the pastry towards and over the filling. Place the sheet in the freezer for 30 minutes – in the meantime, preheat the oven to 180°C/350°F.
Brush the tarts with the egg wash (only the pastry). For the sweet one, sprinkle with demerara sugar. For the savory one, sprinkle with the pecorino.
Bake for 35-40 minutes or until golden brown. Both tarts are delicious both warm and at room temperature.
Serves 4 (each)
Wednesday, July 23, 2014
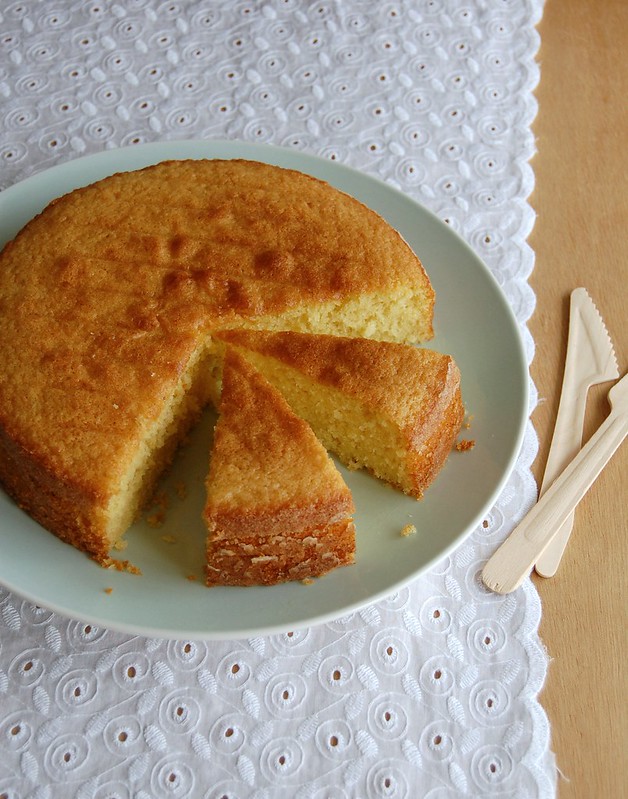
Whisky and nutmeg pound cake
I know, I know, there’s nothing “healthy” about whisky, but I believe that there is nothing wrong with adding a bit of alcohol to your cooking and baking occasionally – I can’t cook risotto without a splash of white wine, and beer can do wonders to a beef recipe (my bolognese sauce turned into something even more delicious after I started adding red wine to it).
All that written by someone who once made a cake drenched in rum. :D
The cake I bring you today has a lot less alcohol, but it is very flavorsome still and I bumped into the recipe because I wanted to bake something with whole wheat flour – my first thought was to bake bread, but when I checked the whole wheat flour container it was almost empty. Alice Medrich’s cake was then a very good choice, since the recipe called less than ½ cup of flour. It turned out tender and delicious – as all cakes should be – and with a beautiful golden hue.
I thought the cake was great with a cup of tea (it was a cold weekend), but I am sure it would be wonderful served with whipped cream and berries or fresh fruit, as the plated trifles Nigella makes, for a summery dessert. Or with vanilla ice cream topped with chocolate sauce, or salted caramel sauce.
Ok, I’ll stop. :)
Whisky and nutmeg pound cake
slightly adapted from the delicious Pure Dessert
2 tablespoons whole milk, room temperature
1 tablespoon whisky
3 large eggs, room temperature
1 teaspoon vanilla
105g cake flour (homemade: 15g corn starch + 90g all purpose flour)
55g whole wheat flour
150g granulated sugar
¾ teaspoon baking powder
1/8 teaspoon table salt
½ teaspoon freshly grated nutmeg
180g unsalted butter, softened and in chunks
Preheat the oven to 180°C/350°F. Lightly butter a 4 to 5 cups loaf pan, line it with baking paper and butter the paper.
In a medium bowl, whisk the milk, whisky, eggs, and vanilla to combine.
In the bowl of an electric mixer, whisk the flours, sugar, baking powder, nutmeg, and salt. Add the butter then pour in half of the egg mixture. Beat on low speed just until the dry ingredients are moistened. Increase the speed to medium and beat for 1 minute. Scrape the sides of the bowl. Add half of the rest of the egg mixture and beat for 20 seconds. Add the rest of the egg mixture and beat for 20 seconds. Scrape the sides and bottom of the bowl.
Transfer the batter to the prepared pan and smooth the surface. Bake until golden and risen and a toothpick comes out clean, 55-60 minutes. Cool the cake in the pan for 20 minutes, unmold carefully and transfer to a wire rack. Cool completely, then peel off the paper.
Serves 8-10
Monday, July 21, 2014
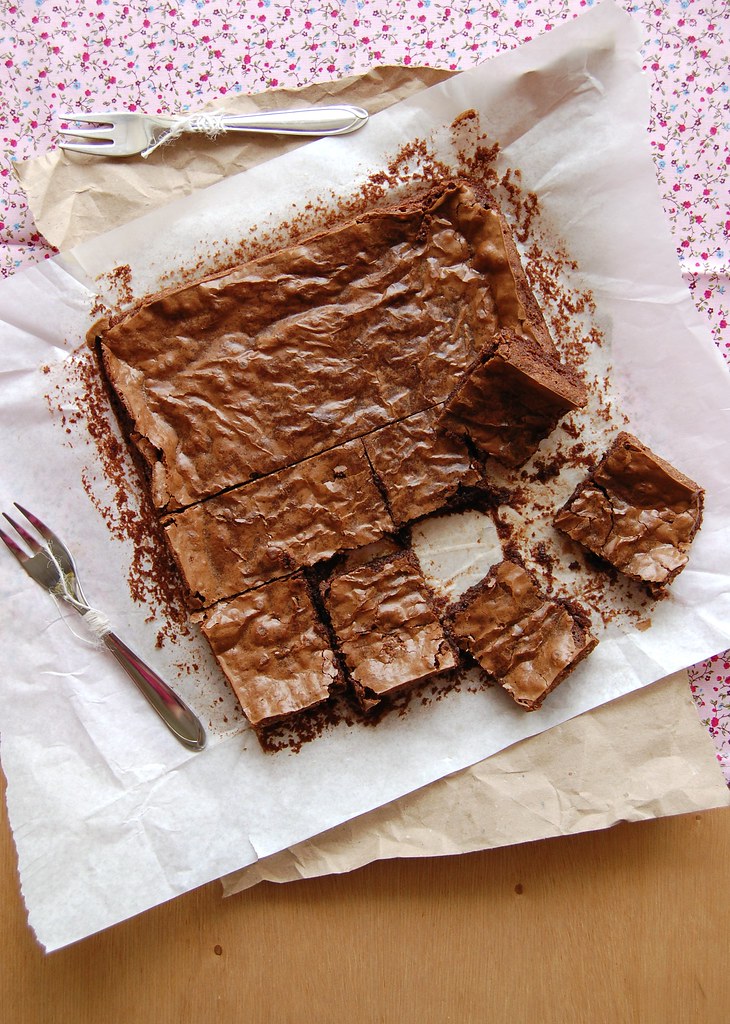
Olive oil brownies and feeling nostalgic
You’ve probably noticed by now that I’ve been using olive oil in my baking quite regularly and with great results – it makes the cakes flavorsome and oh, so moist. That is why I couldn’t wait to try using olive oil in brownies – I was curious to find out if the ingredient paired beautifully with chocolate as it does with apples, coconut and citrus.
I found this simple, yet wonderful recipe online and it comes from one of the first food blogs I ever read, the beautiful The Traveler’s Lunchbox – it made me feel very nostalgic, but in a very good way. It reminded me of my discovery of food blogs, how eager I was to read them and how amazing it was to see so many people passionate about cooking and baking as I was. It was a first for me to see people actually enjoying making dinner or baking a cake, for up until that day I had never met anyone who felt what I did towards food – I knew tons of people who loved eating, but I knew no one who took pleasure at the act of making it as I did.
All of a sudden all those strangers felt a lot closer to my heart than many people I knew in “real life” – I guess that is what happens when you finally find people with something in common, for my friends did not like the kind of movies I watched back then and for sure did not feel that making dinner for a family of five was fun at all (we became six when my sister was born). They were so lazy that if their moms didn’t make any food on a given day they would feed on bread and butter, and some of them wouldn’t even eat on a plate to avoid washing up. I got older, my love for the kitchen became bigger, and my friends continued to believe that cooking was a stupid thing to learn.
Now you can imagine how I felt when I bumped into the first food blog. :)
It’s been a while since Melissa last updated the blog, but I recommend reading the archive – there are plenty of great recipes there, such as the one for these brownies; she calls for dark chocolate with 70% cocoa solids, but since I did not have any I used the one I had and added one tablespoon of cocoa to boost the chocolate flavor.
Olive oil brownies
slightly adapted from the beautiful The Traveller’s Lunchbox
115g dark chocolate, finely chopped – I used one with 53% cocoa solids*
1/3 cup (80ml) fruity extra virgin olive oil
2 large eggs, room temperature
¾ cup (150g) granulated sugar
1 teaspoon vanilla extract
½ cup (70g) all-purpose
1 tablespoon unsweetened cocoa powder
1/8 teaspoon table salt
Preheat the oven to 180°C/350°F. Brush a 20cm (8in) square baking pan lightly with canola oil, line it with a piece of foil leaving an overhang in two opposite sides, and lightly oil the foil as well.
Place the chocolate in a small bowl and melt it over a saucepan of barely simmering water. Whisk in the oil, then cool.
Using an electric mixer, whisk the eggs and sugar until pale and thick. Fold in the vanilla and the cooled chocolate mixture, then fold in the flour, cocoa and salt. Stir to combine. Pour into the prepared pan and distribute evenly.
Bake for 20-25 minutes or until the top is dry and crackly, and a toothpick inserted in the center comes out a little wet. Cool completely, then cut into squares.
*the original recipe called for 70% cocoa solids, I didn’t have any, so I used the one I had (53% cocoa solids) and added cocoa for a deeper chocolate flavor
Makes 16
Friday, July 18, 2014
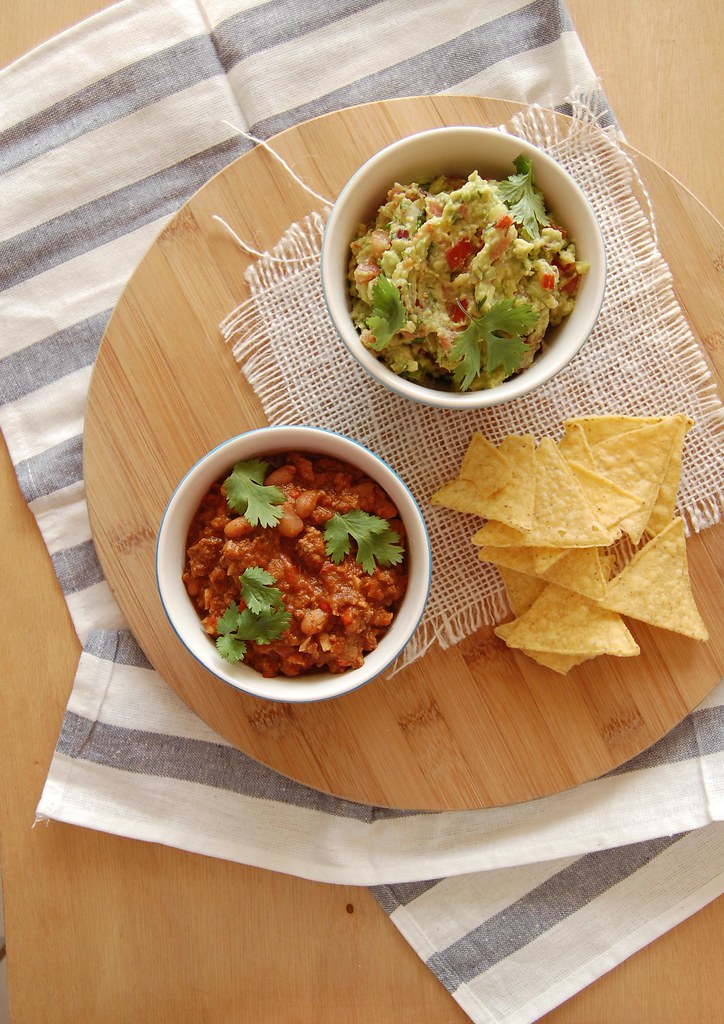
Chilli con carne and guacamole, and being cocky
I guess that once you start cooking and baking and the years go by it’s sort of inevitable to become a little cocky: I try to exercise modesty on a daily basis, but there are times when I’m eating something – savory or sweet – and I think: “I could make this, and a lot tastier” (and I bet some of you reading this right now are nodding your heads in agreement, relating to that feeling). :D
And let’s not forget that we can make the food better and for a lot less money.
I’ve managed to cut down our meat intake quite substantially (which is great), but our occasional fixes include chilli con carne, something my husband loves to eat when we go out for Tex-mex food (I lean towards guacamole, just love the stuff). I told him I would try making the chilli con carne at home and he was more than pleased with the idea.
I immediately reached out for Dean Edwards’ wonderful cookbook and the result was an amazing chilli con carne: very flavorsome, spicy to perfection, and insanely easy to make. I prepared the chilli con carne in advance and urge you to do the same if at all possible: it tasted great the day I made it, but it was even better the day I served it. The recipe below yields a lot and leftovers are delicious over some fluffy rice or as pasta sauce.
For the guacamole, I used one of Martha’s recipes – after mixing the ingredients, I drizzled the mixture with plenty of freshly squeezed lime juice, which not only boosts the flavor but also stops the avocado from getting brown. It tasted really good and paired perfectly with the carnivore part of our meal.
Chilli con carne
slightly adapted from the delicious Mincespiration!
1 ½ tablespoons olive oil
500g beef mince
1 large onion, finely diced
4 garlic cloves, finely chopped
1 small red pepper, deseeded and finely diced
3 bacon rashers, finely sliced
1 teaspoon ground cumin
1 teaspoon ground cinnamon
1 teaspoon cayenne pepper, or to taste
1 teaspoon dried oregano
2 × 400g cans of chopped tomatoes
1 × 400g can of red kidney beans – I used 150g pinto beans I’d cooked the day before
200ml beef stock
sea salt black pepper
1 teaspoon sugar
20g dark chocolate (70% cocoa), grated
2 tablespoons chopped fresh coriander, for serving
Heat half the olive oil in a large saucepan over high heat and brown the mince. Do this in batches if necessary so you don’t overcrowd the pan. Remove the beef from the saucepan and set aside. Add the remaining olive oil to the saucepan and cook the onion, garlic, pepper and bacon for about 5 minutes or until golden and fragrant. Add the cumin, cinnamon, cayenne pepper and oregano and cook for another 1-2 minutes. Tip the mince back into the pan and add the tomatoes and stock. Cover the pan and cook over a low heat for an hour, stirring occasionally so it doesn’t catch in the bottom of the saucepan. Add the beans (and more water if mixture is too dry) and cook for another 30 minutes. Season with salt and pepper, add the sugar and chocolate and stir to incorporate. Sprinkle with chopped coriander before serving. If making it in advance, let cool completely before refrigerating, covered.
Serves 5-6
Guacamole
slightly adapted from Martha
1/3 cup finely chopped red onion
1 large red chilli, finely chopped
3 tablespoons chopped cilantro
½ teaspoon salt, or to taste
freshly ground black pepper
2 ripe Hass avocados
1 small tomato chopped
juice of 1 large lime
In a large bowl, mix together the onion, chilli, 2 tablespoons of the cilantro, salt and black pepper. Crush the avocados into the onion mixture, leaving the mixture chunky. Fold in the tomatoes. Drizzle with the lime juice and mix to combine.
Sprinkle over remaining cilantro and serve.
Serves 2-3
Thursday, July 17, 2014
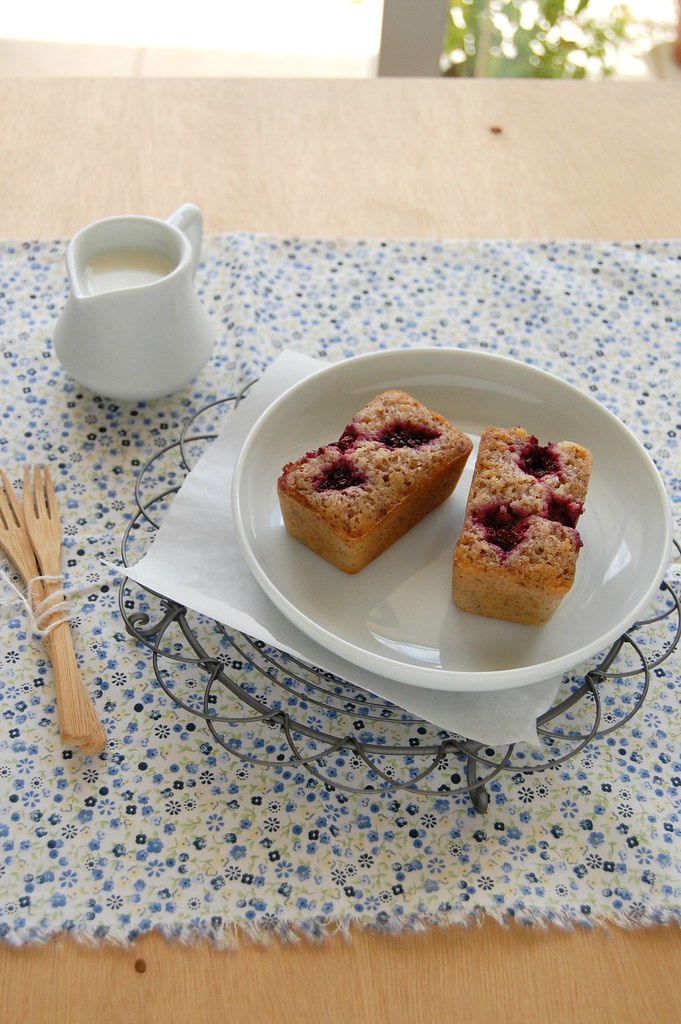
Hazelnut blackberry financiers made with "safely" acquired berries
I was never an athletic child: while my brother and cousins liked being outside playing soccer or riding their bikes, I much preferred being inside, reading my comic books or writing stories. I was never able to do a cartwheel, and up to this day I haven’t learned how to ride a bike (you can go ahead and laugh, now). :)
One of my cousins, who was my age, was quite the opposite: she used to play with the boys, rode her bike with her hands in the air and could even climb trees. Her parents had a mulberry tree in their back yard and I loved eating the berries, but could never reach them; my cousin was kind enough to climb the tree and fill a small bucket with the berries for us to eat together - on the ground, safely, of course. :D
When I went berry picking with my friend Valentina years ago and saw blackberry bushes I thought “hey, this is so much easier!”, only to notice, a couple of steps forward, that the bushes were covered in thorns. :S
I think I should stick with buying berries at the supermarket, right? That is a lot safer. :) Having them in the freezer is great for when the baking urge strikes: here, the blackberries are paired with hazelnuts and the result is really delicious financiers.
Hazelnut blackberry financiers
adapted from the always delicious Simply Bill
85g hazelnut meal (finely ground hazelnuts)
135g icing sugar, sifted
55g all purpose flour, sifted
pinch of salt
5 egg whites
95g unsalted butter, melted and cooled
1 teaspoon vanilla extract
170g frozen blackberries, unthawed
icing sugar, for dusting
In a large bowl, combine the hazelnut meal, icing sugar, flour and salt. Stir in the egg whites until just combined. Stir in the melted butter and the vanilla. Cover and refrigerate the batter for 1 hour.
Preheat the oven to 180°C/350°F. Butter and flour ten 100ml capacity mini cake or muffin pans.
Pour the batter in the pans, then top each with 3-4 berries, pressing some down into the batter. Bake for 15-20 minutes or until golden - the financiers should spring back when touched.
Cool in the pans for 2 minutes, then carefully unmold onto a wire rack to cool. Dust with icing sugar to serve.
Financiers are best served the day they’re made, but can be stored in an airtight container for up to 2 days.
Makes 10
Tuesday, July 15, 2014
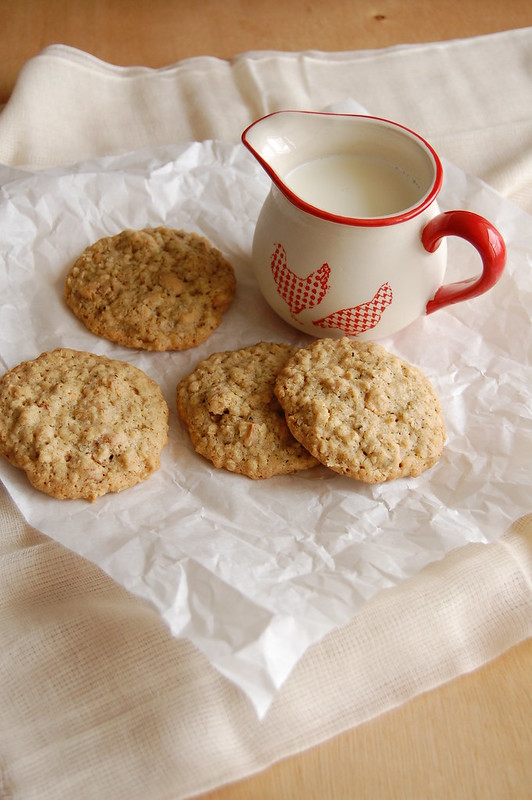
Cashew oatmeal cookies and a story from the past that could be happening to someone right now
As I was baking these cookies the other day, I recalled a time in my life when I was entering my teenage years and used to flip over my older cousins’ magazines – they used to read a mag called Capricho, a Brazilian version of Seventeen. I remember reading something about a Brazilian model called Ana Paula Arósio and the 70+ magazine covers she’d been on till then – she was only fifteen. She was stunning and looked like a grown up, and she was only two years older than me.
One of the questions the reporter asked her was how she managed to stay “in shape”, to what she replied that she ate lots of fruits and vegetables (surprise!), and things like banana with oats and honey, because they were so good for you. My thirteen-year-old brain captured that information instantly, only to feel disappointed seconds later for I, too, ate lots of fruits and vegetables, and I, too, loved bananas with oats and honey, but I did not look like Ana Paula Arósio. At all. I was a thin girl, but not skinny, and I was short and my face and arms were covered in freckles (still are, actually). I did not have any fashionable clothes and my hair was pretty much in a ponytail most of the time. I did not wear lipstick or fake eyelashes – I did not even have boobs, for crying out loud. But I did not know back then everything there is behind a magazine cover, I just thought that there was something very wrong about me because even though I ate (and loved) my greens I did not look like a model. :(
All that crossed my mind while I baked these cookies because oats are, indeed, good for you, even though for a moment in my teen years I doubted that. They are wonderful with bananas and honey (and a pinch of cinnamon, yum), great in granolas and cookies.
Fruits and vegetables are excellent for you, too, and they taste delicious, which is always a plus. So let’s keep eating our greens and our grains to stay healthy and try to stay positive and shield ourselves from all the crap the media throws our way every single day.
Cashew oatmeal cookies
slightly adapted from the always gorgeous Delicious Australia
¾ cup (110g) plain flour
½ teaspoon baking soda
pinch of salt
¼ teaspoon ground cinnamon
125g unsalted butter, room temperature
¾ cup (150g) demerara sugar
1 teaspoon vanilla extract
1 egg
110g rolled oats
150g salted cashew nuts, coarsely chopped
Preheat oven to 180°C/350°F. Line two large baking sheets with baking paper.
In a medium bowl, whisk together the flour, baking soda, salt and cinnamon.
Using an electric mixer, cream butter and sugar until light and creamy. Beat in the vanilla, then the egg, and mix to combine. Scrape the sides of the bowl occasionally. On low speed, beat in the flour mixture and the oats, just until combined, then add the cashew nuts.
Place 2 leveled tablespoons of dough per cookie onto the prepared sheets, 5cm (2in) apart. Flatten slightly. Bake until golden around the edges, 13-15. Cool in the pan for 2 minutes, then slide the paper with the cookies onto a wire rack and cool completely.
Makes about 22
Monday, July 14, 2014
Coconut olive oil cake
These past weeks, in which I have been experimenting with my baking and adding more vegetables to my cooking, have been a lot of fun: once you start trying new things (with both good and bad results because well, that’s life) it’s like a blindfold being lifted from the eyes, I guess – you just want to discover more and more.
It is such a joy to open the fridge and know that you are moments away from a delicious and nutritious meal. It is a great feeling to watch a courgette and some cheese get transformed into fritters (that tasted really good with a few drops of Tabasco), or to make a flavorsome sauce with eggplants, tomatoes, peppers and ricotta while a pot of pasta boils away. I used to cringe at the thought of whole wheat pasta, but after buying Di Cecco’s linguine and cooking it twice with different sauces I’ve come to the conclusion that my past bad experiences with the ingredient were caused either by poor quality pasta or poor recipes.
Being out of the comfort zone is a good thing.
As my butter supply was running low and I needed the 100g left to make cookies (more on that soon), I decided to bake the cake I had in mind with olive and canola oil, and the result was a tender and delicious cake – no icing, no frills, just simple, good cake to be eaten with freshly brewed coffee (I had my slice with a glass of wine because watching Brazil’s ridiculous soccer team embarrass themselves twice in a row requires alcohol).
Coconut olive oil cake
slightly adapted from the delicious Under the Walnut Tree: 400 Recipes Inspired by Seasonal Ingredients
4 medium eggs*
¾ cup (150g) granulated sugar
1 teaspoon vanilla extract
finely grated zest and juice of 1 large lime
1 cup (100g) unsweetened desiccated coconut
100ml extra-virgin olive oil
50ml canola oil
120g all purpose flour
1 teaspoon baking powder
pinch of salt
Preheat the oven to 180°C/350°F. Lightly oil a 20cm (8in) round cake pan, line the bottom with baking paper and oil the paper as well. Dust everything with flour and remove the excess.
Using an electric mixer, whisk the eggs, sugar and vanilla until thick and pale. Stir in the lime zest, juice, desiccated coconut, canola oil and olive oil. Sift in the flour, baking powder and salt and stir to combine. Pour into the prepared pan and bake for about 40 minutes, or until risen, golden and a skewer inserted in the center of the cake comes out clean.
Cool completely in the pan. Unmold, carefully peel off the paper and place onto a serving plate.
* I had only large eggs at home, so I chose the smallest four to use in the cake
Serves 8-10
Saturday, July 12, 2014
Baked fish with salsa verde and potatoes - the oven as an ally
Despite my love for fish I don’t eat it as often as I should or would like to, which is such a shame – if my mom was around she would certainly be mad at me for that. When we were little she made sure we ate fish at least once a week – mom was a health nut, over thirty years before that became fashionable. :D
My favorite way of eating fish as a kid was rolled in corn flour (very fine cornmeal, not corn starch) then deep fried – the thought of it makes me drool already. Crispy on the outside and tender on the inside, it was probably my favorite meal when it was served with a simple tomato salad (with loads of lime juice) and fluffy rice – very simple, yet delicious, especially when cooked by mom. <3
These days, however, I rarely deep fry anything: besides the health issues, I live in a small apartment and I don’t want every piece of fabric in my house (or my hair, for that matter) smelling like fried food. :P Therefore, the oven is always a good ally – I don’t use it for sweet things only, you know. :D
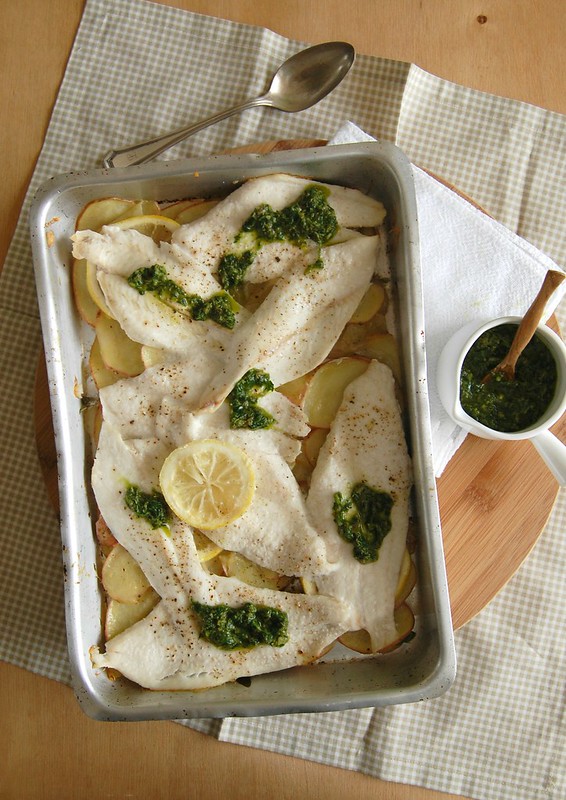
This recipe is really, really simple: fish fillets baked in a bed of potatoes. Nothing much, you might think. I thought so, too, until I tasted the salsa verde: I’d never tried that sauce before and my goodness, it is delicious –it transformed the simple dish into something special and very flavorsome.
I hope you give this recipe a go – if tasty and healthy don’t convince you, this is also quick and easy to put together. :D
Baked fish with salsa verde and potatoes
slightly adapted from the always fabulous Delicious Australia
300g small waxy potatoes, thinly sliced (a mandoline is ideal)
1 lemon, thinly sliced
handful fresh oregano leaves
2 tablespoons extra-virgin olive oil
salt and freshly ground black pepper
4 x 120g firm white fish fillets – I used flounder
Salsa verde:
1 small garlic clove
½ cup flat-leaf parsley leaves
½ cup basil leaves
2 tablespoons capers, rinsed, drained
finely grated zest of 1 lemon¼ cup (60ml) extra-virgin olive oil
salt and freshly ground black pepper
Preheat the oven to 200°C/400°C. Toss potato, lemon slices and oregano with the oil, season with salt and pepper and spread in a lightly oiled 20x30cm (8x12in) baking pan, in a single layer. Bake for 20-25 minutes or until potatoes start to golden.
Meanwhile, to make salsa verde, whiz garlic, parsley, basil, capers and lemon zest in a food processor until finely chopped. With the motor running, slowly add the olive oil and process until mixture is a drizzling consistency. Transfer to a small bowl, season with salt and pepper and set aside.
Remove roasting pan from oven and place the fish on top and season the fillets with salt and pepper. placing a lemon slice from the pan on top of each fillet. Return to the oven for a further 8 minutes or until the fish is cooked through.
Serve drizzled with salsa verde.
Serves 2
Friday, July 11, 2014
Grapefruit bars (gluten free) and the Emmy nominations
During the time I was out of the loop of TV series I did not care much about the Emmys and while watching the Golden Globes I would focus only on the movie part of the ceremony – since I wasn’t watching anything from TV regularly I did not know if the nominations had been fair or who should win. Now, I stay tuned when the nominees are announced and I get happy or sad depending on who takes the awards home (or pleased when each and every one of them deserve the award). :)
As I read this year’s Emmy nominations, I thought part of them were fair, but to me some people were missing from the list: I would replace Jon Hamm and Jeff Daniels for Michael Sheen and Liev Schreiber (heartbroken for having to leave James Spader out), and would cross Christina Hendricks off the list (I really don’t know what she’s doing there). I loved seeing Lizzy Caplan nominated, she really deserves it, and I’m glad Breaking Bad is all over the place, as well as House of Cards (go, Robin!).
(note to self: watch The Normal Heart)
I haven’t watched comedies in ages, but since I like both William H. Macy and Ricky Gervais a lot I’ll be pleased if either wins – I don’t need to watch what they’re doing to know they’re really good at it. :)
As I told you the other day, I am not gluten intolerant therefore I don’t plan on going gluten free, but what is the problem with experimenting every now and then, right? These bars turned out delicious with almond meal replacing the wheat flour, the nut flavor paired beautifully with the citrus tang of the feeling and the texture became pudding-like – if you want to make them as the original recipe, just trade the almond meal for all purpose flour in both the crust and the filling, using the same amounts.
Grapefruit bars
slightly adapted from the delicious Wintersweet: Seasonal Desserts to Warm the Home
Crust:
6 tablespoons (85g) unsalted butter, at room temperature
30g confectioners’ sugar
140g almond meal
2 tablespoons cornstarch
pinch of salt
Filling:
finely grated zest of 2 grapefruits
¾ cup (150g) granulated sugar
3 large eggs, beaten
¾ cup (180ml) freshly squeezed grapefruit juice
1 teaspoon vanilla extract
3 tablespoons almond meal
confectioners’ sugar, for dusting
Preheat the oven to 180°C/350°F. Lightly butter a 20cm (8in) square pan, line it with foil, leaving an overhang on two opposite sides and butter the foil as well.
Crust: in the bowl of an electric mixer fitted with a paddle attachment, cream butter and sugar until creamy. Scrape down the sides of the bowl, add the almond meal, cornstarch, and salt. Mix on low for 2 to 3 minutes or until the mixture starts to clump - stop when the dough holds together when you press on it.
Transfer to the prepared pan and press it evenly onto the base. Bake for 18-22 minutes or until lightly golden around the edges
Filling: rub the grapefruit zest into the sugar in a medium bowl until moist and fragrant. Whisk in the eggs until dissolved, then the grapefruit juice, vanilla and almond meal. Pour the mixture onto the hot crust and bake for 15-20 minutes , or until the center is just set.
Cool completely in the pan over a wire rack. Dust with confectioners’ sugar, then cut into squares to serve – the bars are quite soft, so remove them gently from the pan (I used a pan with a removable bottom, so it was easier to unmold the bars).
The bars can be stored in an airtight container at room temperature for 2-3 days, and they also taste delicious after being refrigerated.
Makes 16
Thursday, July 10, 2014
Leek, carrot and potato soup or "my soup", according to my husband
Soups and winter go perfectly together, right? I make soups quite often during the colder months, and when I do I usually make a large batch so we can have it for dinner two days in a row. I have noticed that most soups, and the one I bring you today especially, taste even better the next day, so there’s another reason for making extra soup. :)
I like to vary when it comes to food and soup is no exception, but this is my husband’s favorite soup: whenever he wants me to cook it he says “why don’t you make your soup tonight?”, and I know that by my soup he means the vegetable soup I’ve been making for as long as I can remember. I have made this soup with and without the leek (just onions and garlic), with squashed added in the mix, with and without the pasta and rice replacing it, you name it. The fresh oregano is a recent addition: I’d always made this soup with parsley only, but on a given day I did not want the oregano bunch to go to waste and ended up adding it to the soup – after that, it became indispensable.
This is a very simple, yet versatile recipe and you can adjust it to make it your own. I used butter because I can’t resist using it with leeks, but you can omit that for a vegan soup.
We love having this soup with some crusty bread on the side, but it would be a crime for me not to suggest Barbara Lynch’s grilled cheese, too. :)
Leek, carrot and potato soup
own creation
1 tablespoon unsalted butter
½ tablespoon olive oil
1 leek, white part only, chopped
½ large onion, finely diced
2 fat garlic cloves, minced
2 ripe tomatoes, seeds removed, finely chopped
3 carrots, in small cubes
3 potatoes, in small cubes
boiling water, enough to cover the vegetables
salt and freshly ground black pepper
handful fresh oregano leaves
handful fresh parsley leaves, chopped
1 cup cooked small shaped pasta, such as ditalini*
Heat butter and olive oil in a large saucepan over medium-high heat. Add the leek and onion and cook until transparent, stirring occasionally. Add the garlic and cook until fragrant. Add the tomatoes and a pinch of salt and cook until they are mushy. Add the carrots and potatoes and stir to combine. Cover with boiling water and season with salt and pepper. When the soup comes to a boil, reduce the heat to medium-low, cover partially and cook until vegetables are tender, 10-15 minutes.
With an immersion blender, blitz the soup for a couple of seconds – you want the mixture to be half chunky, half smooth. Add the oregano and parsley, check the seasoning.
Divide the pasta among the serving bowls, top with the soup and serve.
* Once the pasta is in the soup it won’t stop swelling – that is why I cook it separately and add it only to the bowls when serving and not to the entire batch of soup
Serves 4
Tuesday, July 8, 2014
Apple olive oil cake and things that work
Another trailer for Gone Girl has been released, and it is fantastic – one can count on David Fincher to set that kind of dark mood in a two-minute trailer, for sure, and if I already was looking forward to watching the movie now I just hope time flies. :D
I’m not too keen on Ben Affleck portraying Nick Dunne – let’s just wait to see what happens – but, on the other hand, could there be anyone more perfect to play Desi Collings than Neil Patrick Harris? \0/
The music fits the atmosphere of the story really well and when the trailer ended I could read that Trent Reznor and Atticus Ross are the ones behind it – these two have already have already given us two amazing and innovative soundtracks (and deservedly took home the Oscar for The Social Network). It is great news that they’re once again working with Fincher – what a great combo. And the same way Fincher is sticking with Reznor and Ross for another job because he knows for sure they will perform amazingly, I’m back to baking with olive oil.
After the success of the orange olive oil cake I baked the other day – two colleagues told me they baked the cake, too, and they loved it – I was thrilled to see an apple cake made with olive oil on Anna Jones’ beautiful book. Without much thought, it was the first recipe I tried from the book and the result was a tender, moist and flavorsome cake, with a nice hint of spices. Really, really good. This cake is dairy-free and can be made with spelt flour – I can’t find it in my neck of the woods (such a shame!), so I used all purpose flour instead.
Apple olive oil cake
slightly adapted from the amazing A Modern Way to Eat: Over 200 Satisfying, Everyday Vegetarian Recipes (That Will Make You Feel Amazing)
250g all purpose flour
1 teaspoon ground cinnamon
pinch of ground allspice
1 teaspoon baking powder
1 teaspoon baking soda
pinch of salt
1 tablespoon honey
150g light brown sugar
2 large eggs
150ml extra-virgin olive oil
1 teaspoon vanilla extract
2 Granny Smith apples
handful sliced almonds
Preheat the oven to 180°C/350°F. Lightly oil 20x10cm (4x8in) loaf pan, line it with baking paper and lightly oil the paper as well.
Sift flour, cinnamon, allspice, baking powder, baking soda and salt into a medium bowl.
In a large bowl, mix the honey, sugar, eggs, olive oil and vanilla until you have an even mixture. Stir in the flour mixture and mix again, until evenly combined. The mixture should be quite thick. Grate in the apples and mix well. Pour the batter into the prepared pan and smooth the top. Sprinkle with the almonds.
Bake for 45-50 minutes or until risen and golden and a skewer inserted into the center of the cake comes out clean. Cool in the pan over a wire rack for 10 minutes, then carefully unmold onto the rack. Cool completely, then peel off the paper.
Serves 8-10
Monday, July 7, 2014
Hearts of palm empanadas - great snacks for the World Cup
The World Cup has been a lot of fun, there have been some great matches and I think that soccer aficionados around the world have been biting their nails like there’s no tomorrow. :)
To avoid that from happening, it is a good idea to have something to snack on during the games – I’d always wanted to make empanadas and they seemed perfect for the occasion, but since I’d made sfihas weeks before I wasn’t in the mood for more beef. Therefore, I mixed Argentina and Brazil and filled the empanadas with hearts of palm, making them vegetarian and delicious – those two countries together on the field is a very dangerous thing, but the combo worked out beautifully in my kitchen. :D
Inspired by these beauties I used a 10cm cutter to form the empanadas, and they turned out tiny and cute – you may make them larger if you want, but in the end it doesn’t matter: they were a great treat for the games and went really well with a couple of very cold beers. ;)
Hearts of palm empanadas
inspired by these, dough from Epicurious, filling own creation
Dough:
215g unbleached all-purpose flour
100g whole wheat flour
1 ½ teaspoons salt
½ cup (1 stick/113g) cold unsalted butter, cut into ½-inch cubes
1 large egg
1/3 cup (80ml) ice water
1 tablespoon distilled white vinegar
Filling:
½ tablespoon olive oil
½ onion, finely diced
1 fat garlic clove, minced
300g hearts of palm, chopped
salt and freshly ground black pepper
2 ½ tablespoons boiling water
¼ cup parsley leaves, finely chopped
Egg wash:
1 egg, lightly beaten with a fork, mixed with ½ teaspoon water
Start by making the dough: sift flours with salt into a large bowl and blend in butter with your fingertips or a pastry blender until mixture resembles coarse meal with some (roughly pea-size) butter lumps.
Beat together egg, water, and vinegar in a small bowl with a fork. Add to flour mixture, stirring with fork until just incorporated (mixture will look shaggy) – I used the food processor do make my dough, it was quite fast and effective.
Turn out mixture onto a lightly floured surface and gather together, then knead gently with heel of your hand once or twice, just enough to bring dough together. Form dough into a flat rectangle and chill, wrapped in plastic wrap, at least 1 hour.
Make the filling: heat the olive oil in a medium saucepan over high heat. Add the onion and cook until transparent. Add the garlic and cook until fragrant. Add the hearts of palm, season with salt and pepper, add the water, cover and cook over medium heat for 2-3 minutes or until the water has been absorbed. Add the parsley, mix to combine and remove from the heat. Cool completely.
Preheat your oven to 200°C/400°F. Line two large baking sheets with baking paper.
Remove the dough from the refrigerator and roll it out until it is about 6mm ( ¼in) thick. Cut out roughly 10cm (4in) round circles in the dough. Place about ½ tablespoon of filling in the center and fold the circle into a half moon. Pinch and fold the edges to seal them, then transfer to the prepared sheet.
Once all the empanadas are formed, brush them with the egg wash.
Bake the empanadas for 25-30 minutes or until golden brown.
Makes 22
Friday, July 4, 2014
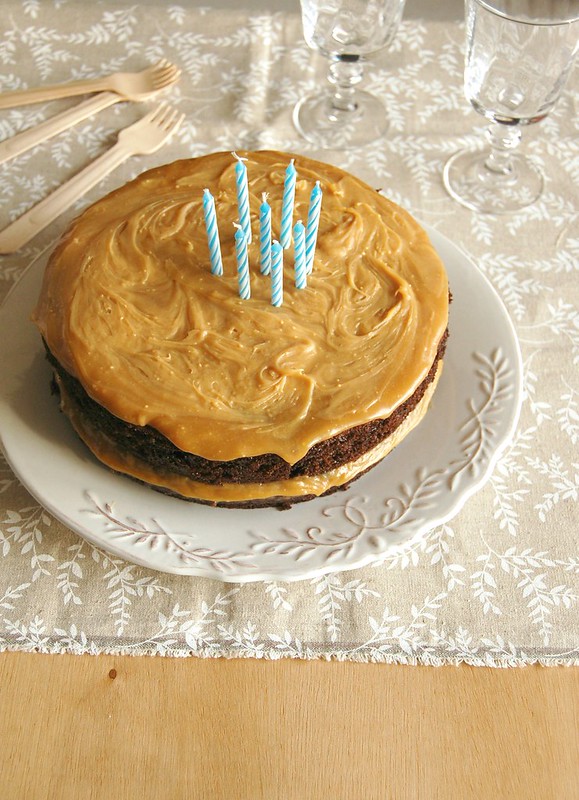
Sour cream-chocolate cake with caramelized white chocolate frosting and being predictable
I am so predictable. I am, really.
As I told you last week, I put the mobsters and gangs aside for a while and started watching Downton Abbey – I thought a break from bad guys would be a nice change. Apparently, I was wrong: after spending some time in 1912 I went back to Tony’s arms and I did it in a hurry. :)
At first I thought the rhythm was the problem for me with Downton Abbey, but then I remembered that Rectify, for instance, has a very singular rhythm, and that never bothered me – much to the opposite, it’s part of what makes that show so sensational. So I’m still trying to figure out the reason why DA is not my cup of tea – and while I do that, I have some serious Hannibal catching up to do. :D
See, I told you I was predictable – I’m back in my criminal TV mood. But at least something has to be sweet, right? So there’s cake, and it’s just not any cake: it is a delicious chocolate cake – tender beyond words – with ganache made of something I’d never tried before: caramelized white chocolate. That scores big points with me not only for being scrumptious but also for being made in a very curious way: the chocolate gets caramelized in the oven – when I read the recipe I wasn’t very sure it would work, but decided to give it a go because I’d read about it in another cookbook. It does work – luckily – and I guarantee that you’ll be more than happy to lick the bowl after you assemble the cake. :D
Sour cream-chocolate cake with caramelized white chocolate frosting
cake adapted from the amazing Sky High, filling/frosting from the most beautiful cookbook I own
Cake:
185g all-purpose flour
300g granulated sugar
45g unsweetened cocoa powder, preferably Dutch process
1 ½ teaspoons baking soda
¼ teaspoon table salt
2/3 cup (160ml) canola oil
2/3 cup sour cream*
1 cup (240ml) water
1 ½ tablespoons white wine vinegar
1 teaspoon vanilla extract
2 small eggs
Filling/frosting:
450g white chocolate, finely chopped
¾ cup (180ml) heavy cream
Preheat the oven to 180°C/350°F. Butter the bottoms and sides of two 8-inch round cake pans. Line the bottom of each pan with a round of baking paper and butter the paper as well.
Cake: sift the flour, sugar, cocoa powder, baking soda, and salt into a large bowl. Whisk to combine. Add the oil and sour cream and whisk to blend. Gradually beat in the water. Blend in the vinegar and vanilla. Whisk in the eggs and beat until well blended. Scrape down the sides of the bowl and be sure the batter is well mixed. Divide among the prepared cake pans.
Bake for 25-35 minutes, or until a cake tester or wooden toothpick inserted in the center comes out almost clean. Let cool completely in the pans over a wire rack.
Frosting: preheat the oven to 160°C/325°F. Line a large baking sheet with foil and spread the chocolate over it. Bake for 8-10 minutes or until light golden. In the meantime, heat the cream in a medium saucepan over medium heat until very hot (but not boiling). Add the caramelized chocolate and stir until melted (reheat the mixture over low heat for a few seconds if necessary). Strain through a fine sieve, pushing down on solids, then discard solids. Let the ganache cool to room temperature, cover and refrigerate for 30 minutes or until spreadable.
Assembling the cake: I followed Deb’s precious tip and froze the cake layers for 30 minutes before assembling it (they are indeed very soft, so this step makes it easier to put the layers together).
Place one layer, flat side up, on a cake stand or large serving plate. Spread about half the ganache, then top with the other cake layer. Spread the remaining ganache over the top of the cake – just the top, not the sides.
* homemade sour cream: to make 1 cup of sour cream, mix 1 cup (240ml) heavy cream with 2-3 teaspoons lemon juice in a bowl. Whisk until it starts to thicken. Cover with plastic wrap and leave at room temperature for 1 hour or until thicker (I usually leave mine on the counter overnight – except on very warm nights – and it turns out thick and silky in the following morning; refrigerate for a creamier texture)
Serves 8-10
Thursday, July 3, 2014
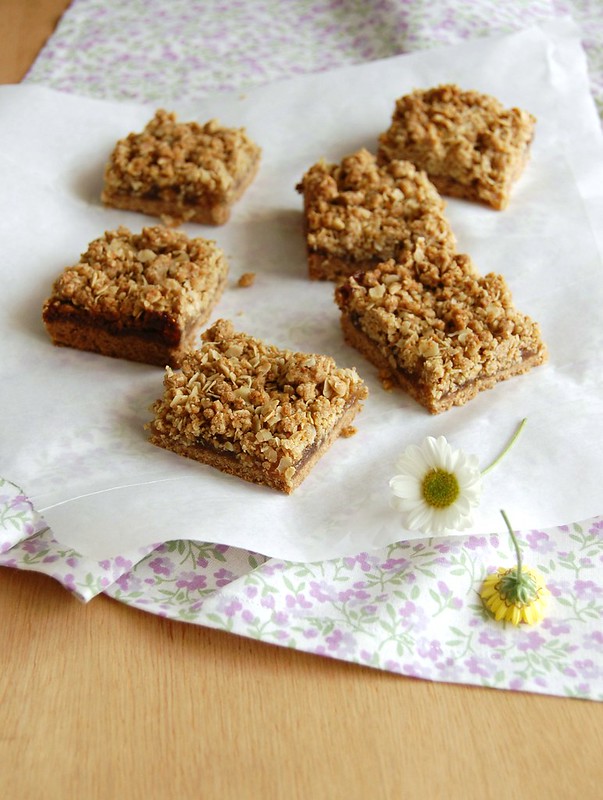
Jam and rye crumble bars - falling in love with rye flour
There was some beer left from Nigella’s spectacular cake, and I started looking for a good recipe to use it in. I froze part of the beer for another day and part of it was transformed into a rye bread. Very flavorful, it was gladly devoured in open sandwich form – I mixed Brazil and Scandinavia and made the open sandwiches with hearts of palm and cheese. They were extremely simple but oh, so delicious.
I liked the bread so much I couldn’t wait to use the rye flour again, and it was such a revelation to me to use it in baked goods other than bread – I’d seen the recipes before, but hadn’t tried them myself. In these bars, for instance, it adds a very interesting depth of flavor, not to mention it paired beautifully with the jam flavors I chose – I mixed apricot jam and marmalade because I did not have 1 cup of either to use in the recipe, and it ended up being a very nice thing. Because I was using marmalade, I added orange zest to the topping, and you can’t imagine how great my kitchen smelled while the bars were in the oven.
I still have some rye flour left and several ideas in my head from the recipes I’ve seen, like using it in cakes and tarts. Such a wonderful addition to my repertoire – and it all started with a simple (yet delicious) loaf of bread.
Jam and rye crumble bars
slightly adapted from the glorious Good to the Grain: Baking with Whole-Grain Flours
Shortbread base:
55g rye flour
105g all-purpose flour
40g light brown sugar
pinch of salt
75g unsalted butter, melted and cooled
¼ teaspoon vanilla extract
Crumble topping:
70g rolled oats
2 tablespoons light brown sugar, packed
40g rye flour
25g all-purpose flour
1 ½ tablespoons granulated sugar
1/8 teaspoon table salt
finely grated zest of 1 orange
55g unsalted butter, melted and cooled
1 cup jam – I used ½ cup apricot and ½ cup marmalade
Position a rack in the middle of the oven and preheat the oven to 160°C/320°F. Lightly butter a 20cm (8in) square pan, line it with foil leaving an overhang in two opposite sides and butter the foil as well.
Crust: in a large bowl, whisk together the flours, sugar and salt. Add the melted butter and vanilla and stir until thoroughly combined. Press the dough evenly into the bottom of the pan. Put the pan in the freezer for 30 minutes.
Crumble topping: add the oats, brown sugar, rye flour, all purpose flour, granulated sugar, salt and orange zest to the bowl of a food processor and process until the oats are partially ground, about 5 seconds. Pour the mixture into a bowl. Add the melted butter and stir with your hands, squeezing the dough as you mix to create small crumbly bits. Set aside.
Bake the frozen shortbread until golden brown and firm when touched, about 30 minutes. Remove from the oven and increase the temperature to 180°C/350°F.
Spread the jam over the shortbread crust and top with the crumble. Bake the bars for about 35 minutes or until golden brown. Cool completely in the pan. Cut into squares to serve.
The bars can be kept in an airtight container for up to 2 days.
Makes 16
Tuesday, July 1, 2014
Churros waffles for my sister
I sometimes look at photos of my sister as a kid and my eyes tear up a little bit – I miss those days, she was a fun, smart kid, it was great being around her. I love telling her the funny things she used to say and do back in the day, the games she liked to play, the clothes she liked to wear – like the T-shirt I gave her when she was around two years old and that she wanted to wear every single day, to her mother’s despair – and the food she liked to eat. She was never picky; she loved salads and ice cream, strawberries and chocolate cake, and would also devour a plate of pasta or rice and beans like nobody’s business.
Her taste has changed over the years, naturally – she still loves strawberries and chocolate cake, but won’t eat bacon anymore. Still, it is always a nice feeling for me to learn that most of the things she loves are the ones I love, too. She could have become pain-in-the neck picky like my brother, but luckily she’s a lot more adventurous, always trying new things like tacos, chilli con carne and guacamole, sushi and sashimi. I can see, sometimes, a bit of me in her, and that makes me really happy. <3
Something we both love and eat together every now and then are churros, so when she came over for another Super Mario Bros. session I told her I would make waffles that tasted just like churros – she was thrilled with the idea (and so was I). :)
These waffles are the perfect way to quench the desire for churros without the frying (and also a great way of winning brownie points with sisters). :D
Churros waffles
slightly adapted from Richie, who got it from Vitor Hugo
For serving the waffles:
unsalted melted butter
½ cup (50g) granulated sugar
½ teaspoon ground cinnamon (or to taste)
dulce de leche
Waffles:
1 cup (140g) all purpose flour
35g corn starch
2 tablespoons granulated sugar
½ tablespoon baking powder
pinch of salt
200ml whole milk, room temperature
2 tablespoons unsalted butter, melted and cool
1 large egg, separated
1 teaspoon vanilla extract
In a shallow plate, mix the sugar and cinnamon together. Set aside.
Make the waffles: in a large bowl, whisk together the flour, corn starch, sugar, baking powder and salt.
In a small bowl, whisk together the milk, melted butter, egg yolk and vanilla. In another bowl, whisk the egg white until firm peaks form.
Pour the milk mixture over the flour mixture and stir until smooth. Fold in the egg white.
Heat a waffle iron until very hot; lightly coat with nonstick spray. Working in batches, cook waffles until cooked through.
When the waffles are cooked, brush them with the melted butter and roll them in the cinnamon sugar. Serve at once with the dulce de leche.
Makes 4 waffles
