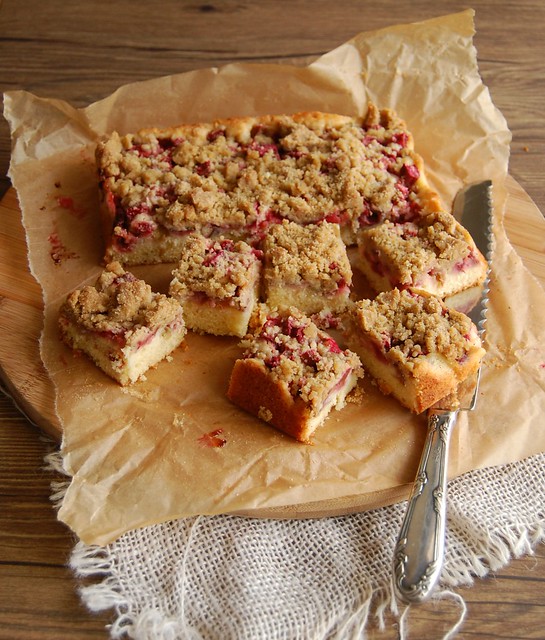
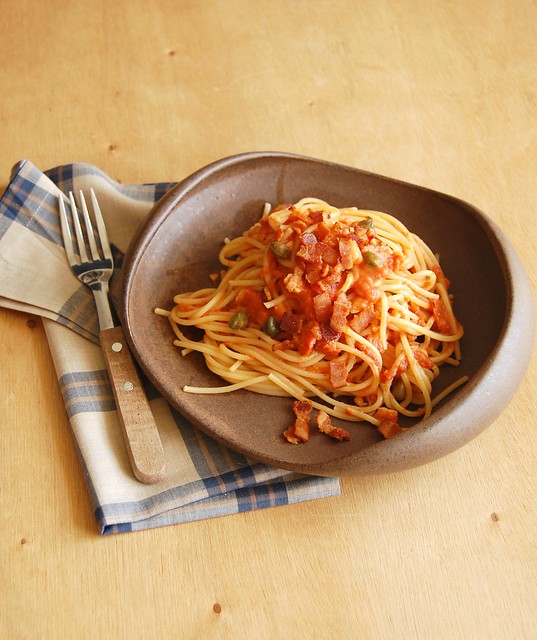
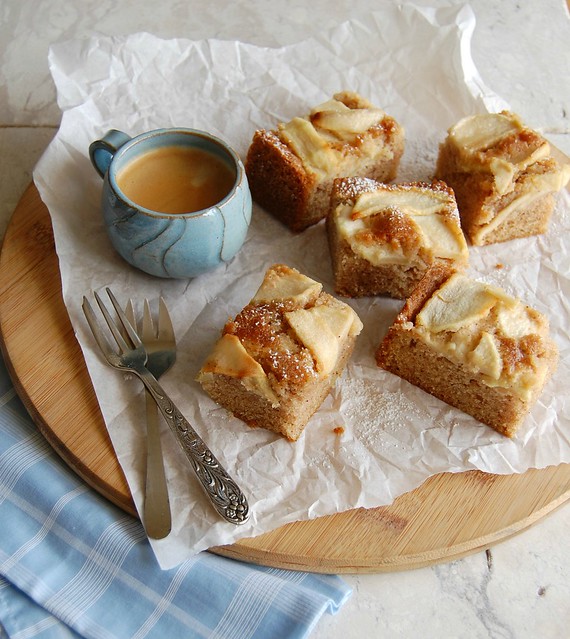
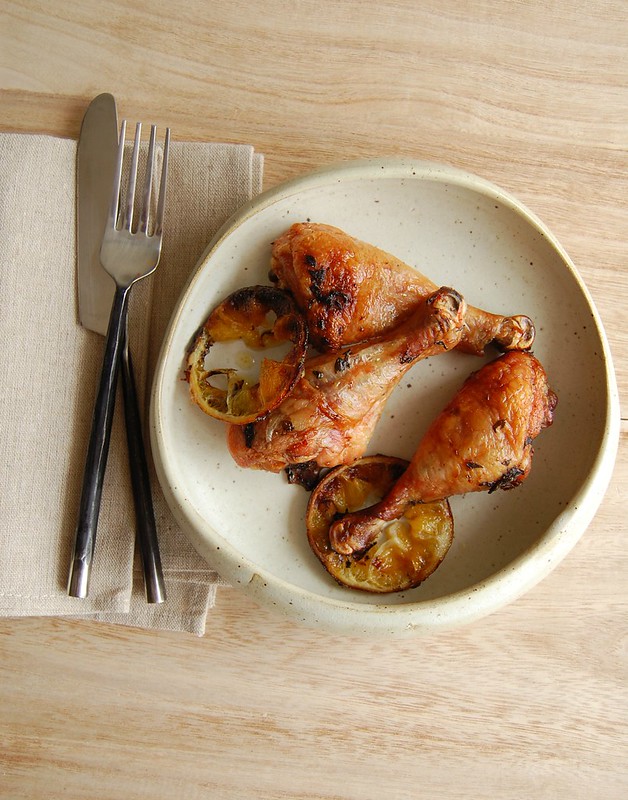
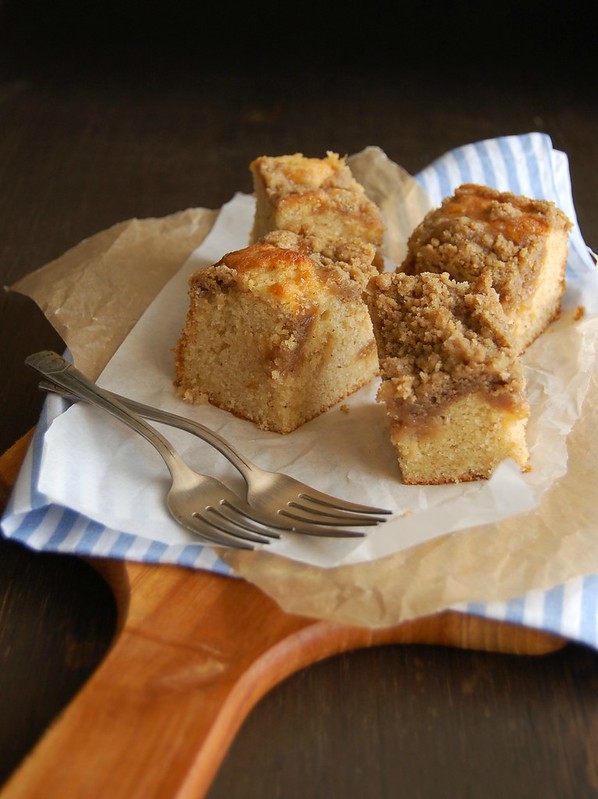
I think it is fair to say that the main reason why I love Christmas so much is because it reminds me of my mom: she loved it and I can’t forget all the preparation around the house while the holiday songs were playing on the record player. Because of that, I decided to finish my Christmas series this year with a recipe that I make every time I miss her more than my heart can bear: rice pudding.
Unfortunately this is not her recipe – once my father got married again his wife made sure everything related to my mother got destroyed and tossed away, and the recipe notebooks were then gone forever – but it doesn’t matter: it reminds me a lot of rainy afternoons with piping hot rice pudding and cartoons on TV.
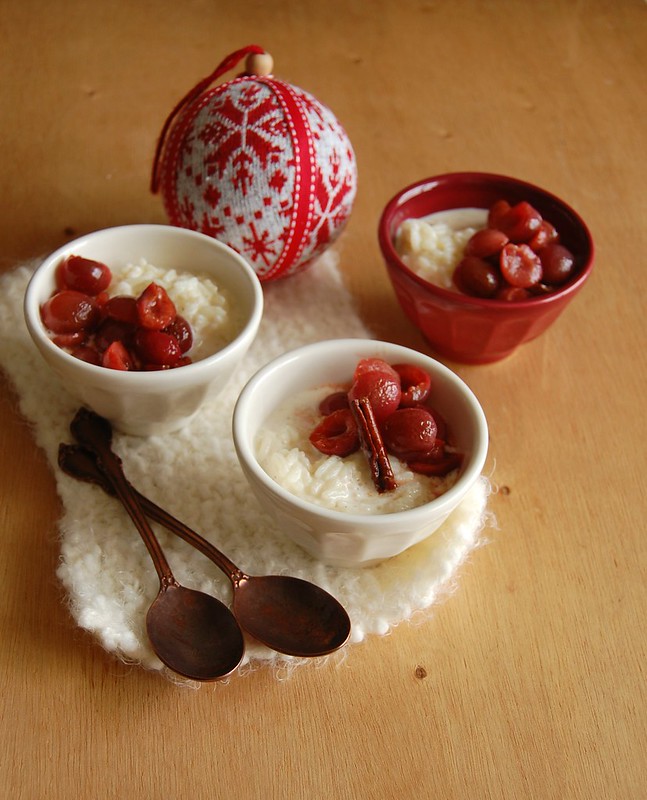
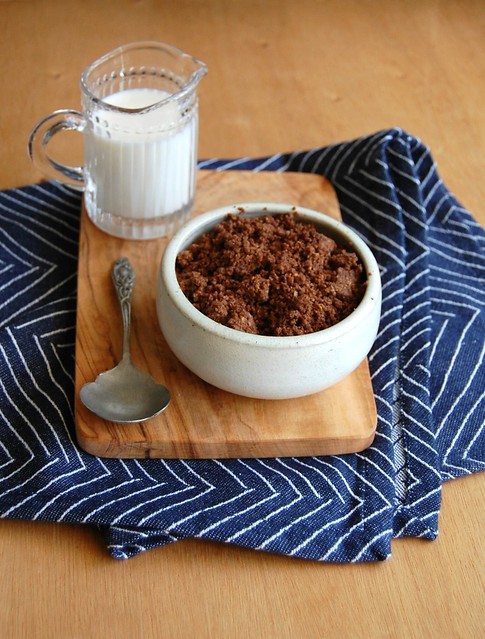
This time I served it cold because of the delicious roasted cherries I paired with it, and I added nutmeg and brandy to evoke the flavors of eggnog – it was delicious and it filled my heart with joy.
I wish you all a happy holiday season and a wonderful New Year – thank you for keeping me company all this time! xx
Eggnog rice pudding with roasted cherries
own creation
Roasted cherries:
150g fresh cherries
1 ½ tablespoons granulated sugar
juice of ½ large orange, freshly squeezed
1 small cinnamon stick
Rice pudding:
½ cup (110g) long grain rice
3 cups (720ml) whole milk
½ cup sweetened condensed milk
pinch of salt
½ teaspoon freshly ground nutmeg
1 tablespoon brandy
1 teaspoon vanilla extract
Start with the cherries: preheat the oven to 200°C/400°F. Cut cherries in half and remove the pits. Place them in a 4-cup shallow heatproof dish, stir in the sugar, orange juice and cinnamon stick, then roast for 20 minutes or until fruit is bubbly. Let cool completely, then cover and refrigerate.
While the cherries are roasting, make the rice: place the rice in a colander and wash it under the tap with cold water, rubbing the grains with your fingers until water runs clear. Set aside to drain for 10 minutes.
Place the rice, milk, sweetened condensed milk and salt in a medium saucepan and cook over high heat, stirring, until mixture starts to boil. Turn down the heat, add the nutmeg, brandy and vanilla and cook, stirring so mixture doesn’t catch in the bottom of the saucepan, until rice is tender, about 20 minutes. Set aside to cool, then cover and refrigerate.
Serve the rice pudding with the cherries on the side.
Serves 4
Thursday, December 22, 2016
Eggnog rice pudding with roasted cherries and the reason why I love Christmas so much
Monday, December 19, 2016
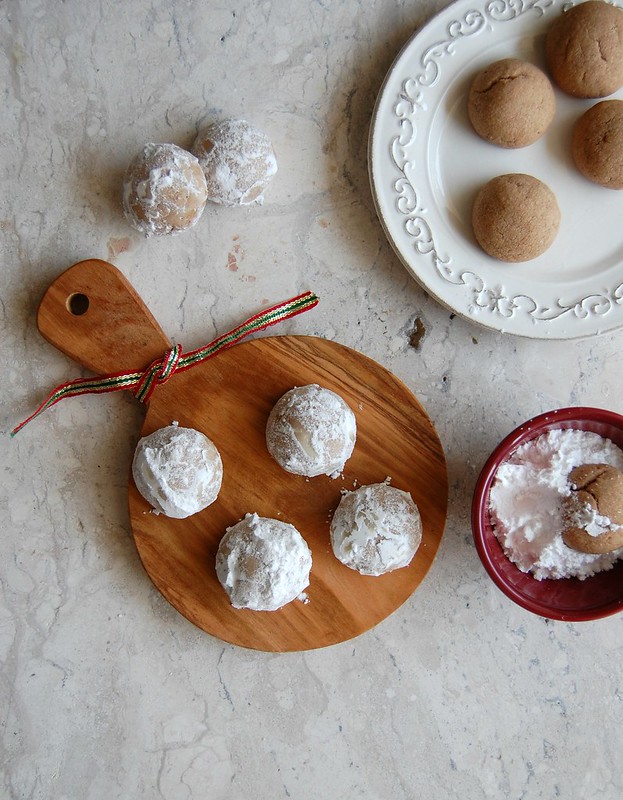
Rum nutmeg snowballs and handling cookie dough on a hot day
Weeks ago, while I was putting together the list of recipes I wanted to bake to give as gifts to my friends I saw these cookies on one of Martha’s digital magazine issues (the subscription that was a real bargain). So I decided to make that money count and use the recipe – the cookies looked adorable after all, and the flavor combo sounded delicious.
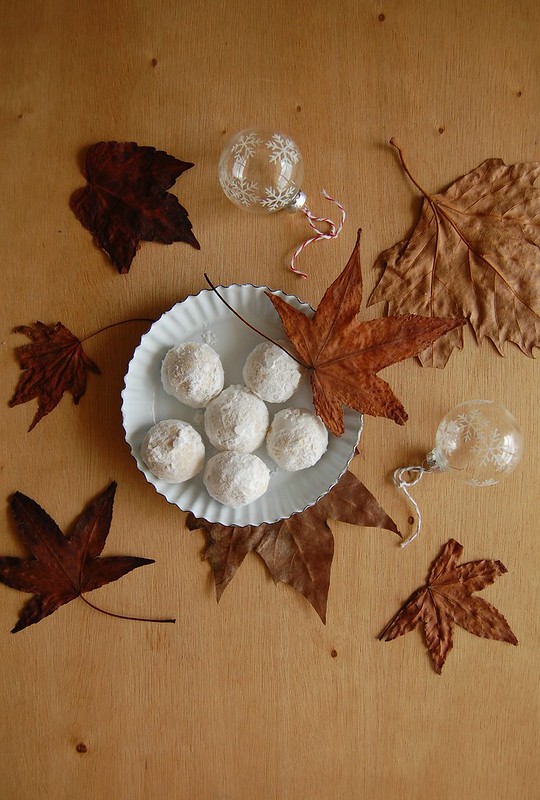
However, I was baking the cookies on a very hot day, so it was a nightmare trying to shape the dough into crescents – by the time I had finished shaping two cookies the whole dough was going soft. So I put it back in the fridge for a while and decided to turn the crescents into balls – snowballs, for that matter. In the end it was a good decision: cookies looked pretty and tasted great. Win/win situation. :)
Rum nutmeg snowballs
slightly adapted from Queen Martha
2 cups (280g) all purpose flour
1 ½ teaspoons freshly grated nutmeg – do not pack it in the spoon when measuring it
¼ teaspoon table salt
¾ cup (170g/1 ½ sticks) unsalted butter, room temperature
½ cup (70g) confectioners' sugar, sifted
2 tablespoons white rum (Martha uses brandy)
1 teaspoon pure vanilla extract
For rolling the cookies:
½ cup (70g) confectioners' sugar, sifted
Whisk together flour, nutmeg, and salt. In a large bowl, using an electric mixer, beat butter with confectioners' sugar on medium-high speed until light and fluffy, about 2 minutes. Add rum and vanilla; beat until combined. Reduce speed to low and add flour mixture, beating until just combined. Divide dough into 2 disks; wrap each in plastic and refrigerate until firm, at least 1 hour and up to overnight.
Preheat oven to 180°C/350°F. Line two large baking sheets with baking paper.
Working with one disk at a time (keeping the other refrigerated), scoop 1 leveled tablespoon of dough per cookie and roll into a ball. Arrange 2.5cm (1in) apart onto prepared sheets.
Bake until golden on the bottom, 16-18 minutes. Transfer cookies on sheets to wire racks; let cool 5 minutes. Working in batches, carefully toss warm cookies in confectioners' sugar, then transfer to racks and let cool completely.
Cookies can be stored in an airtight container at room temperature up to 3 days. Dust with more confectioners' sugar before serving.
Makes about 42
Thursday, December 15, 2016
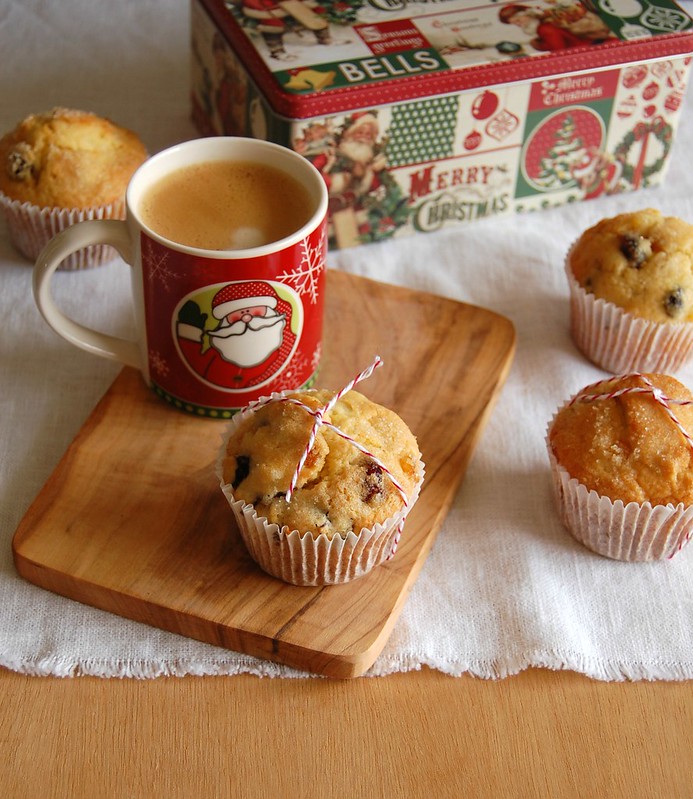
Panettone muffins - for the days with no time (or will) to work with yeast
Last weekend my oven worked like crazy: I baked different types of cookies to give as gifts to people I adore (one of them being pfeffernüsse, my favorite Christmas cookies) and I also baked these delicious, perfumed and oh, so tender panettone muffins – they are the perfect solution to those days when I crave panettone but don’t have the time (or sometimes the will, let’s be honest here) to work with yeast.
I used the same flavorings I had used for the actual panettone – orange and lemon zest, vanilla, Cointreau and Amaretto – and also the same dried fruit combo, with the addition of apricots. While I baked the muffins, my husband came to the kitchen to ask what I was making because of how wonderful it smelled. The muffins turned out insanely tender and really tasty, and two days later they were still great – just make sure you keep them tightly sealed in an airtight container at room temperature. They are also delicious toasted with a little butter on top – yum!
Panettone muffins
slightly adapted from King Arthur's little beauties
1 large orange
1/3 cup golden raisins
1/3 cup dark raisins
1/3 finely diced dried apricots
1/3 cup dried cranberries
¼ cup (60ml) orange juice
2 ¼ cups (315g) all purpose flour
2 teaspoons baking powder
¼ teaspoon table salt
¼ cup (56g) unsalted butter, softened
2 tablespoons canola oil
½ cup (100g) granulated sugar
finely grated zest of 1 lemon
2 large eggs
1 teaspoon vanilla extract
1 teaspoon Cointreau
1 teaspoon Amaretto
2/3 cup (160ml) whole milk, room temperature
2 tablesoons finely chopped crystallized orange peel
1 ½ tablespoons demerara sugar, for sprinkling over the muffins
Finely zest the orange and place the zest in a large bowl (you will use an electric mixer to make these muffins). Set aside.
Place the dried fruit and the orange juice in a small saucepan and heat over high heat until the juice starts boiling – remove from the heat and let cool completely.
In a large bowl, whisk together the flour, baking powder, and salt.
Preheat the oven to 190°C/375°F. Line a 12-hole muffin pan with paper cases.
To the large bowl with the orange zest, add the butter, oil, granulated sugar and lemon zest, then cream until smooth and light. Beat in the eggs, one at a time, beating well to combine. Beat in the vanilla, Cointreau and Amaretto.
With the mixer on low speed, mix in the flour mixture in three additions, alternating with the milk in two additions – start and end with the dry ingredients. Stir in the crystallized orange peel and the dried fruit with any remaining orange juice.
Divide the mixture evenly between the cases and sprinkle with the demerara sugar. Bake for about 20 minutes or until risen and golden and a skewer inserted in the center of a muffin comes out clean. Cool in the pan over a wire rack for 5 minutes, then carefully remove the muffins from the pan and transfer them to the rack. Cool completely.
Makes 12
Monday, December 12, 2016
Panettone
Even though I have been posting Christmas recipes at this time of the year for a long long time, I have not baked panettone – or chocottone, for that matter – in ages. We sometimes get panettones as gifts, and my husband sometimes buys some at this time of the year.
This year, however, Joao told me he wanted homemade panettone and since I was on a Christmas state of mind I decided to make it. It was a rainy Saturday, I did not want to go anywhere, so I made the panettone and watched Carol in between (by the way, I am still trying to understand all the fuss over the awards season).
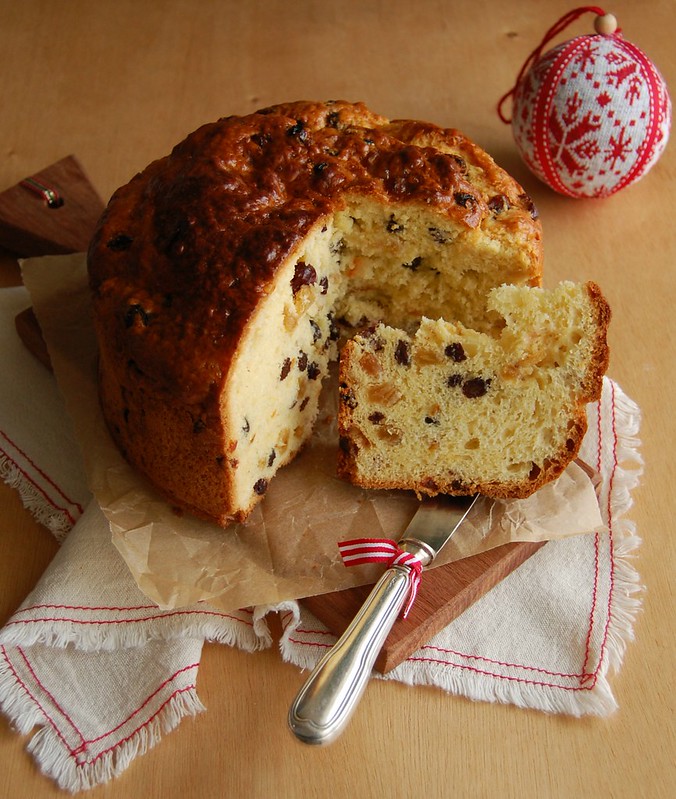
This is an adaptation of Paul Hollywood’s panettone and it turned out really delicious – the tender brioche dough perfumed with citrus and dotted with chewy and sweet raisins and dried cranberries. But unlike Paul’s brioche, that still tastes great a day after it is made, the panettone got a little tough on the following morning – it was still delicious, but texture-wise it was better freshly baked. If your family is big, I am sure the panettone will be gone in no time, but if there are not many of you around to eat it within a day no worries: it makes a killer French toast. ;)
Panettone
slightly adapted from Paul Hollywood
14g dried yeast
140ml whole milk, lukewarm
75g granulated sugar
500g all purpose flour
¼ teaspoon table salt
5 large eggs, room temperature
finely grated zest of 1 orange
finely grated zest of 1 lemon
1 teaspoon vanilla extract
1 teaspoon Cointreau
1 teaspoon Amaretto
200g unsalted butter, softened
120g dried cranberries
120g golden raisins
120g dark raisins
50g crystallized orange peel, finely chopped
Egg wash:
1 egg, lightly beaten with a fork
In the bowl of an eletric mixer, place yeast, milk and a pinch of the sugar and mix with a fork. Set aside for 5 minutes or until foamy. Add the flour, salt, remaining sugar, eggs, orange and lemon zest, vanilla, Cointreau and Amaretto, then mix on slow using the dough hook for two minutes. Increase the speed to medium and mix for a further 6-8 minutes until you have a soft dough.
Add the softened butter and mix for another 5-8 minutes, scraping the sides of the bowl occasionally. Dough will be very soft. Mix in the dried fruit and crystallized orange peel. Transfer the dough to a large buttered bowl, cover with plastic wrap and chill overnight until the dough has firmed up enough for you to able to shape it.
Prepare a 18cm/7in panettone pan by brushing the inside generously with melted butter*.
Remove the panettone dough from the fridge, knock back the dough, shape into a ball and place into the pan. Leave to prove at room temperature for a further 2-3 hours, until the dough just starts to dome over the top of the pan.
Preheat the oven to 180°C/350°F.
Brush the top of the panettone with egg wash and bake for about 25 minutes. Reduce the temperature to 150°C/300°F and bake for a further 35 minutes, or until a skewer comes out clean. Check the panettone periodically in case of oven hot spots. Bear in mind that the sugar and butter in the dough could brown too much before it is actually fully baked – if panettone starts to brown too quickly, cover it loosely with foil.
Remove the panettone from the pan immediately and allow to cool over a wire rack.
* I used a 20cm (8in) round cake pan to bake my panettone – I made a collar with a double sheet of baking paper folded in half (that way getting 4 layers of paper) and buttered it all with melted butter (there is a photo of the prepared pan on my Instagram).
Serves 8-10
Friday, December 9, 2016
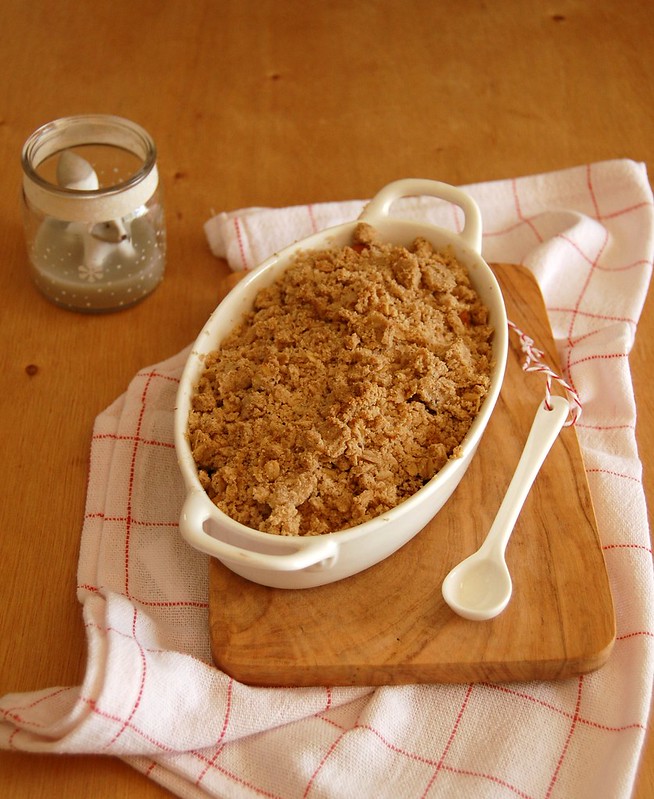
Apple gingerbread crumble and weekends
Today is Friday (thank you, Universe!), or as I call it the Universal day of people asking each other what they will do on the weekend. :D
I am a very talkative person and luckily I have a good relationship with most people at the office. On Fridays some of them usually stop by my desk and ask me what my big plans for the weekend are, and it is funny to watch the look on their faces when I tell them that I intend to bake and watch Netflix. :D
On Saturday and Sunday afternoons one of the things I like doing the most is making a crumble with whatever fruit I have in the fridge/freezer and then seat comfortably on my couch to watch a movie or a TV show – it relaxes me and makes me happy. I did exactly that last weekend with a handful of apples and since I have been on a Christmas vibe lately I added a few spices to the crumble topping – it turned out delicious, therefore I share it with you now.
Apple gingerbread crumble
own creation
5 Granny Smith apples
1 cup (140g) all purpose flour
5 tablespoons demerara sugar
½ teaspoon ground allspice
½ teaspoon ground ginger
½ teaspoon ground cinnamon
pinch of salt
70g unsalted butter, cold and diced
6 tablespoons rolled oats
Preheat the oven to 180°C/350°F.
Peel, core and dice the apples, then place them into a shallow 4-cup heatproof baking dish (if you prefer, make individual crumbles dividing the apples among four 1-cup heatproof ramekins).
In a medium bowl, whisk together the flour, sugar, spices and salt. Add the butter and rub the ingredients together with your fingertips until mixture resembles breadcrumbs. Using a fork, stir in the oats. Sprinkle over the apples and bake for about 25 minutes or until topping is golden and crispy.
Serve with heavy cream or vanilla ice cream.
Serves 4
Monday, December 5, 2016
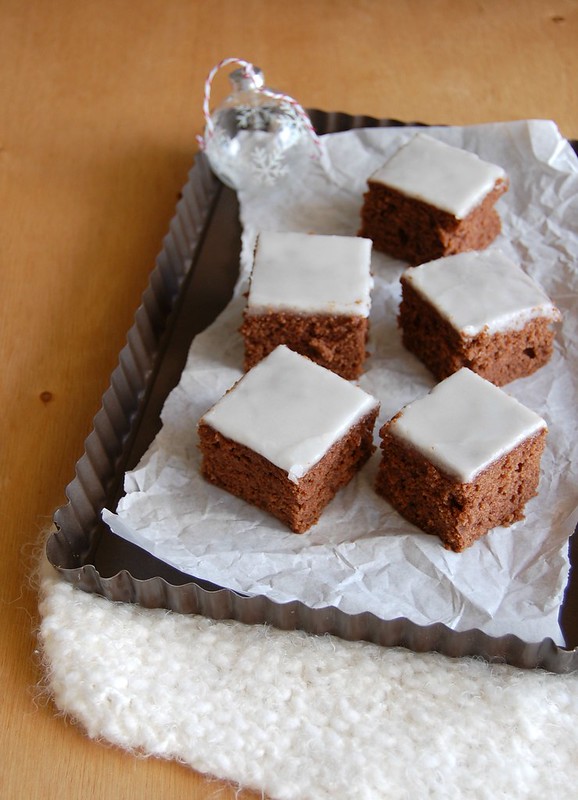
Spiced cake bars (gewürzschnitten) - flavors of my childhood on a recipe I had never seen before
In my searches for Christmas themed recipes every year I have learned about new types of baked goods, have seen beautiful photos and known gorgeous food blogs and websites. Some of the recipes were completely new to me, some were made of flavors I recognize from my childhood, from the sweets my German grandmother used to make.
These delicious bars, super easy to make, were new to as I did not know their name – gewürzschnitten; however, the taste was no stranger to me: as I bit into a square and tasted the mix of spices, chocolate and lemon from the glaze, my taste buds took a trip down memory lane. I don’t really remember what I ate as a kid that reminded me so much of these bars, but what started as inspiration found on this beautiful blog ended up as wonderful discovery – grandma Frida is no longer around for me to ask her this, but I can start my own tradition and bake gewürzschnitten every December from now on. <3
Spiced cake bars (gewürzschnitten)
slightly adapted from this beautiful blog
Cake:
1 ¼ cups (175g) all purpose flour
¾ cup (75g) ground almonds
2 tablespoons unsweetened cocoa, sifted
1 ½ teaspoons baking powder
pinch of freshly ground nutmeg
pinch of ground cloves
½ teaspoon ground ginger
½ teaspoon ground cinnamon
½ teaspoon ground allspice
2 large eggs, yolks and whites separated
pinch of salt
¾ cup (150g) granulated sugar, divided use
1/3 cup (75g) unsalted butter, softened
1 teaspoon vanilla extract
1 teaspoon Amaretto (optional)
100ml whole milk, room temperature
Glaze:
¾ cup (105g) icing sugar, sifted
2-3 tablespoons lemon juice
Preheat oven to 180°C/350°F. Lightly butter a 20cm (8in) square baking pan, line it with baking paper leaving an overhang on two opposite sides, then butter the paper.
In a medium bowl, whisk together the flour, almond meal, cocoa, baking powder and spices. Set aside.
In a small bowl, using an electric mixer, beat egg whites and salt until soft peaks form. Gradually add half of the granulated sugar (75g), beating until mixture gets thick, silky and shiny. Set aside.
In another large bowl, using again the electric mixer, beat the yolks, butter and remaining sugar until light and creamy, scraping the sides of the bowl occasionally. Beat in the vanilla and the Amaretto. Add the dry ingredients in three additions alternating with the milk in two additions, starting and ending with the dry ingredients. Fold in the egg whites. Spread onto the prepared pan and smooth the top. Bake for about 20 minutes or until risen and cooked through when tested with a skewer. Cool completely in the pan over a wire rack.
Glaze: mix the icing sugar and lemon juice until you get a thin glaze. Spread over cooked cake, set aside until set and then cut into squares to serve.
Makes 16
Thursday, December 1, 2016
Winter snowball cookies to kick off this year's Christmas series
My favorite time of the year has arrived – it is December! \0/
Last week I decorated my Christmas tree and scattered Christmas decorations around the house – that made me feel absolutely happy. I see golden candles and snowmen when I go to the kitchen for a glass of water and the big Santa Claus hanging on my door salutes me every morning before I go to work: it definitely feels like Christmas already. <3
A couple of days ago my husband and I were at the mall and Christmas songs were being played there – it seemed to be the very same songs my mother used to play at this time of the year when I was a little girl. I had tears in my eyes remembering her, but some of those tears were tears of joy because of how much I love the holiday season.
My Christmas series starts today with these delicious and light in texture snowball cookies – they are really easy to make and placed in a plastic bag tied with a beautiful ribbon can become a very nice gift.
Winter snowball cookies
slightly adapted from The Italian Baker
Cookies:
2 cups (280g) all purpose flour
2 tablespoons unsweetened cocoa, sifted
¾ cup (75g) almond meal
¼ teaspoon ground cinnamon
pinch of salt
200g unsalted butter, at room temperature
¾ cup (105g) icing sugar, sifted
1 teaspoon vanilla extract
1 teaspoon Amaretto
To dust the cookies:
1 cup (140g) icing sugar, sifted
Preheat the oven to 180°C. Line two large baking sheets with baking paper.
In a medium bowl, whisk together flour, cocoa, almond meal, cinnamon and salt. Set aside.
In the bowl of a stand mixer fitted with the paddle attachment, mix butter and icing sugar (the 105g) until light and creamy – scrape the sides of the bowl occasionally. Mix in the vanilla and the Amaretto. On low speed, add the flour mixture and mix just until combined.
Roll 1 leveled tablespoon of dough per cookie into a ball and place 2.5cm (1in) apart onto the prepared sheets. Bake for 18-20 minutes, until the bottom edges are golden.
Remove from the oven, cool on the sheets over a wire rack for 5 minutes, then carefully remove the cookies from the paper and roll them into the icing sugar, coating them generously. Transfer to a wire rack to cool completely.
Makes about 48
Tuesday, November 22, 2016
Banana, chocolate and peanut crumble to comfort a sad heart
I have told you several times already how much I love the Internet – this very blog would not exist if it wasn’t for it. On the other side, social networks sometimes make me sad – they make me think about lots of things sometimes.
For instance, I see people from my family sharing loads of photos and thoughts and… I feel like I don’t know those people. I did, in a very distant past, years and years ago, but life has changed so much and I no longer can relate to them – they are like complete strangers. I have a few close and dear friends I consider family much more than the people connected to me by blood – that is comforting, that puts my heart at ease. Those warm feelings make me feel good after dark thoughts cross my mind and usually I look for comfort in food form, too – not ideal, I know, but it is what it is.
Aside from my mom’s rice pudding, nothing comforts me more than a good crumble, eaten straight from the oven with a little cold heavy cream on the side. This time I added almond meal and cocoa to the topping, creating a delicious and tropical combination with the bananas.
Banana, chocolate and peanut crumble
own creation
3 large bananas, ripe yet firm, sliced in 1cm coins
Crumble topping:
1/3 cup (46g) all purpose flour
¼ cup (25g) peanut meal
½ tablespoon unsweetened cocoa powder, sifted
2 tablespoons demerara sugar
¼ teaspoon baking powder
pinch of salt
1 ½ tablespoons (21g) unsalted butter, cold and chopped
Preheat the oven to 180°C/350°F. Divide the bananas between two 240ml capacity ovenproof ramekins or cups.
In a medium bowl, whisk together flour, peanut meal, cocoa, sugar, baking powder and salt. Add butter and using your fingertips, rub the ingredients together until mixture resembles breadcrumbs. Sprinkle over the bananas and bake for 20-25 minutes or until topping is golden and crispy.
Serve with heavy cream or vanilla ice cream.
Serves 2
Monday, November 14, 2016
Strawberry rhubarb buckle and Mark Rylance
I have been able to catch up and watch all the Oscar movies of this year – it has not been a quick task but it certainly is a pleasant one. :)
One of the movies I have seen lately is Bridge of Spies – I was quite shocked when Mark Rylance’s name was announced as Best Actor in a Supporting Role and I know I was not the only one. I remembered him from Angels and Insects, a good movie I watched twenty years ago, but not much more than that, and I got very curious about his part alongside Tom Hanks.
The movie is… OK. Interesting story, but nothing out of this world (well, not a big fan of Spielberg here). And Mark Rylance’s performance is flat and silly - he should wrap his Oscar in bubble wrap and send it to Tom Hardy by Fedex. :)
I have a more interesting supporting “actor” here: strawberries – unlike Mr. Rylance, their flavor and smell work to create a super tasty buckle, in a beautiful combination with the rhubarb. I had trouble trying not to eat several squares in a row, so please be warned. :)
Strawberry rhubarb buckle
slightly adapted from here
Cake:
115g strawberries, trimmed and diced
225g rhubarb, trimmed and cut into 1cm pieces
¾ cup (150g) granulated sugar, divided use
1 cup (140g) all-purpose flour
¾ teaspoon baking powder
pinch of salt
85g unsalted butter, softened
finely grated zest of 1 small lemon
1 large egg
½ teaspoon pure vanilla extract
¼ cup sour cream*
Crumble topping:
½ cup (70g) all-purpose flour
2 tablespoons light brown sugar, packed
pinch of salt
2 tablespoons (28g) unsalted butter, melted
Butter a square 20cm (8in) baking pan, line it with foil, leaving an overhang on two opposite sides and butter the foil.
In a medium bowl, stir together the rhubarb, strawberries and ¼ cup (50g) granulated sugar. Let it macerate for 30 minutes – in the meantime, preheat the oven to 180°C/350°F.
Make the crumble topping: in a medium bowl, combine the flour, brown sugar, and salt. Using a fork, stir in the melted butter until mixture is crumbly. Refrigerate until needed.
Cake: in a large bowl, whisk together flour, baking powder, and salt.
In a stand mixer or another large bowl, beat the butter, lemon zest, and the remaining ½ cup (100g) of sugar until the mixture is light and fluffy. Beat in the egg and the vanilla. Add the flour mixture in 3 additions, alternating with the sour cream, beginning and ending with the flour mixture.
Transfer the batter to the prepared pan and smooth the top. Drain the macerated strawberries and rhubarb through a fine mesh strainer, discarding the liquid, and arrange them on top of the batter. Scatter the crumb topping on top.
Bake for about 50 minutes, or until the top is golden brown and a toothpick inserted in the middle comes out clean. Cool completely in the pan over a wire rack. Cut into squares for serving.
* homemade sour cream: to make 1 cup of sour cream, mix 1 cup (240ml) heavy cream with 2-3 teaspoons lemon juice in a bowl. Whisk until it starts to thicken. Cover with plastic wrap and leave at room temperature for 1 hour or until thicker (I usually leave mine on the counter overnight – except on very warm nights – and it turns out thick and silky in the following morning; refrigerate for a creamier texture)
Makes 16
Thursday, October 20, 2016
Linguine with creamy tomato, thyme, caper and bacon sauce
I believe that many of you reading me right now reach for a pasta package whenever there is the need of having food on the table in little to no time – I am guilty of that and I am not ashamed of it. :)
I make pasta often not only because of how fast it is: Joao and I love it and it is so versatile I can combine it with several different flavors and types of sauce. I saw this version of a tomato sauce on Olive magazine and it was so simple I had to try it: the sauce is delicious, the acidity of the tomatoes is softened by the addition of cream and the capers add a briny, salty touch to the sauce. Thyme is my favorite herb and one I love pairing with tomato.
Linguine with creamy tomato, thyme, caper and bacon sauce
slightly adapted from the always great Olive magazine
4 slices of bacon, cut into ½ cm pieces
2 large garlic cloves, crushed
6 sprigs of fresh thyme
1 x 400g can of chopped tomatoes
2 teaspoons granulated sugar
salt and freshly ground black pepper
2 tablespoons capers – soak them in cold water for 15 minutes before using, then drain
3 tablespoons heavy cream
200g linguine
In a medium saucepan, over high heat, cook the bacon, stirring occasionally, until crisp. Remove from the pan and set over paper towels. Remove the excess fat from the saucepan, leaving 1 tablespoon. On that fat, cook the garlic until fragrant, about 1 minute. Stir in the thyme and cook for 1 minute. Add the tomatoes, crush them with a potato masher, then fill the can by half with water and add to the tomatoes. Add the sugar, season with salt and pepper and cook partially covered, stirring occasionally, for about 20 minutes or until thickened.
In the meantime, cook the linguine in salted boiling water until al dente.
Stir in capers and cream and then cook for 3 minutes. Drain the linguine and toss with the sauce. Serve at once sprinkled with the bacon bits.
Serves 2
Friday, October 14, 2016
Spiced apple cake
I was telling you the other day about how the food magazines I subscribe to fulfill my need for new recipes and inspiration – they indeed to. I subscribe to a handful of magazines – the digital versions made it easy and cheaper and no more issues lost in the way (I got addicted). I had sworn that I would not subscribe to other magazines, but then I got an offer from Zinio to get 12 issues of Martha’s magazine for 5 dollars… I just did not resist it. ;)
The latest issue celebrates the fall and Thanksgiving, so among all the beautiful pies there I found this spiced apple cake, which was perfect for my Saturday baking: I had apples and heavy cream begging to be used. I tweaked the recipe just a little bit and ended up with a moist, tender and delicious cake – it perfumed my whole apartment for hours after it was baked.
I never tire of apple cakes and this one is definitely a keeper.
Spiced apple cake
slightly adapted from Martha’s magazine
2 Granny Smith apples (about 200g each)
juice of 1 large lime or 1 large lemon
2 cups (280g) all purpose flour
2 teaspoons baking powder
½ teaspoon baking soda
½ teaspoon table salt
1 teaspoon ground cinnamon
½ teaspoon ground ginger
½ cup (113g/1 stick) unsalted butter, melted and cooled
½ cup (120ml) canola oil
½ cup sour cream*
3 large eggs, room temperature
1 ¼ cups (250g) granulated sugar
1 teaspoon vanilla extract
2 tablespoons demerara sugar, for sprinkling over the apples
Preheat the oven to 180°C/350°F. Lightly butter a 20x30cm (12x8in) baking pan and line it with foil, leaving an overhang on two opposite sides. Butter the foil as well.
Peel and core the apples, then cut them in half and cut each half lengthwise in thin slices. Place them in a medium bowl and toss them in the lemon juice.
In a large bowl, whisk together flour, baking powder, baking soda, salt, cinnamon and ginger. Set aside. In a small bowl, mix together the butter, oil and sour cream.
In the bowl of an electric mixer, whisk eggs until light and thick. Gradually mix in the granulated sugar by the sides of the bowl, to avoid losing the air incorporated in the eggs – you do not want to disinflate the mixture. Whisk in the vanilla, then continue whisking until mixture is thick and glossy.
On slow speed, mix in the dry ingredients in two additions, alternating with the butter/oil/sour cream mixture. Mix only until combined – do not overmix.
Spread batter into prepared pan and smooth the top. Arrange the apple slices on top of the batter and push them into the batter slightly. Sprinkle with the demerara sugar. Bake for about 45 minutes or until golden and risen and a skewer inserted in the center of the cake comes out clean. Cool completely in the pan over a wire rack before serving.
* homemade sour cream: to make 1 cup of sour cream, mix 1 cup (240ml) heavy cream with 2-3 teaspoons lemon juice in a bowl. Whisk until it starts to thicken. Cover with plastic wrap and leave at room temperature for 1 hour or until thicker (I usually leave mine on the counter overnight – except on very warm nights – and it turns out thick and silky in the following morning; refrigerate for a creamier texture)
Serves 18
Thursday, October 6, 2016
Marjoram orange roast chicken
I was thinking the other day about how drastically I have decreased my cookbook purchase addiction – maybe because of how much bigger my workload is compared to years ago, maybe because the food magazines I subscribe fill that need for inspiration and new recipes, maybe because some books were such disappointments (I am speaking to you, Ms. Lawson)…
My last purchase, as far as I recall, was on Oct 20 last year – this is definitely a new world record or something. :)
However, when I saw that Diana Henry had a new book coming out, I could not wait until I had it in my hands, for I am a huge fan of her beautiful work, plus she is a total dear and have spoken to me on Twitter a few times, even saying “obrigada” in Portuguese once. <3
The book is stunning and the recipes look delicious – and are simple, like the name of the book says. I love that. I decided to start with a chicken recipe and used Diana’s as inspiration, however I made it even simpler than hers. It was indeed delicious and the chicken meat was falling off the bones after a night spent in the fridge swimming in the flavorsome marinade.
Maybe I am cured from my cookbook addiction? I don’t know. What I know is that next time Diana publishes a new cookbook I will have it on my Ipad on the very same day. ;)
Marjoram orange roast chicken
adapted from the beautiful Simple
handful of fresh marjoram leaves, chopped
3 garlic cloves, crushed then finely chopped
2 oranges
3 tablespoons extra virgin olive oil
salt and freshly ground black pepper
4 skin-on bone-in chicken thighs
In a bowl, mix the marjoram leaves, the garlic, finely grated zest and juice of 1 of the oranges, the olive oil, salt and pepper. Add the chicken and toss to coat. Cover with plastic wrap and refrigerate for at least 2 hours (overnight is great).
Preheat the oven to 200°C. Line a medium roasting tray with a double layer of foil and coat the foil with olive oil. Slice the remaining orange and arrange the slices on top of the foil. Arrange the chicken over the orange slices and pour over the marinade. Roast for about 60-80 minutes or until golden and cooked through – time might vary depending on how golden you like your chicken.
Serves 2
Tuesday, September 20, 2016
Peanut butter and raspberry mini cakes and the fantastic "The Night Of"
Weeks ago I told you I had dropped River because it made me feel miserable – I wanted something to cheer me up, not to bring me down.
Cut to a couple of days later and I started watching The Night Of – yes, I know, I don’t even understand myself, I don’t expect you to. :)
What an amazing TV show. What a fantastic cast – John Turturro was born to play John Stone, and I found him even more perfect for the part after reading that the first choice to play the lawyer had been James Gandolfini, and after Gandolfini died Robert DeNiro got cast. The movie gods were really watching this show, since that failed too. In my head those two actors would never be able to do John Stone justice – they lack the frailty that is so important in the character. I can’t imagine Galdonfini, so big, tall and with that characteristic loud and strong voice playing John Stone.
I can’t imagine Gandolfini doing what Philip Seymour Hoffman did with his Truman Capote.
I loved the show as a whole – writing, directing, cast, everything was beautifully put together, so perfectly as I hadn’t seen in quite a while (Breaking Bad comes to my mind, as you can imagine). Yes, the show was depressingly sad and dark and each night I would go to sleep with it engraved in my mind, but it was so great I could not drop it as I had done with River. Having some chocolate around for after each episode of The Night Of is the tip I give you – these mini cakes are a good idea, too (and the raspberries can be replaced by pieces of dark chocolate for a nice variation of the recipe).
Peanut butter and raspberry mini cakes
slightly adapted from this cookbook
3 eggs
200g smooth peanut butter
½ cup (100g) granulated sugar
3 tablespoons canola oil
½ teaspoon baking soda
½ teaspoon baking powder
pinch of salt
100ml whole milk, room temperature
1 teaspoon vanilla extract
3 tablespoons (30g) all purpose flour
about ½ cup fresh or frozen (unthawed) raspberries – I used 4 in each mini cake
Preheat the oven to 180˚C. Generously butter and then flour a 12-hole muffin pan.
In a bowl, whisk together the eggs and the peanut butter until smooth. Whisk in the sugar, oil, baking soda, baking powder, salt, milk and vanilla until smooth. Fold in the flour. Divide the mixture between the holes of the muffin pan. Top the batter with the raspberries, dividing them among the cakes, gently prodding them into their middles.
Bake for about 20 minutes, or until they are golden and puffed and a skewer inserted in the middle comes out clean.
Allow to cool in the pan over a wire rack for 5 minutes, then carefully remove the cakes from the pan and transfer to the rack to cool. Serve warm or at room temperature with ice cream if you want.
Makes 12
Monday, September 12, 2016
Nigel Slater’s brownies
Remember that I told you that some recipes get stuck in my head forever? One of them was this brownie recipe by Nigel Slater – I saw it on many, many blogs, people seemed to go crazy over them. However, I kept postponing making the recipe since it required creaming butter and sugar together, something I just do not associate with making brownies (the fact that it called for 250g of butter and 300g of sugar for a 23cm pan made me cringe, too).
The day came when I finally made them, and accordingly to my husband, who doesn’t like sweets but tastes all the brownies I make, these are the best brownies I made in quite a while. I must confess I did not go crazy for them (sorry, Nigel): too much work for this result. I like brownies recipes that are practical and fast and require no thinking ahead – melting the butter is always a plus when you forgot to take it out of the fridge.
These brownies are good, but nothing I would make again – but since my husband praised them so much I decided to share the recipe with you. I have cut down the sugar slightly (for I did not have 70% chocolate around), doubled the amount of chopped chocolate folded in the batter and also used a 20x30cm pan – when I looked at the amount of batter in the bowl I was sure it would never fit a 23cm square pan.
Nigel Slater’s brownies
Slightly adapted rom the one and only Nigel Slater, recipe found here
200g dark chocolate, finely chopped – I used one with 53% cocoa solids
60g all purpose flour
60g unsweetened cocoa powder, sifted
½ teaspoon baking powder
pinch of salt
250g unsalted butter, softened
250g granulated sugar
100g dark chocolate, coarsely chopped – I used one with 53% cocoa solids
3 large eggs + 1 egg yolk, all lightly whisked with a fork
1 teaspoon vanilla extract
Preheat the oven to 180°C/350°F. Lightly butter a 20x30cm (8x12in) metal baking pan, line it with foil leaving an overhang in two opposite sides and butter the foil as well.
Place the 200g finely chopped chocolate in a bowl and melt over a pan of simmering water, without letting the bowl touch the water. Remove from the heat and cool. In a small bowl, whisk together the flour, cocoa, baking powder and salt. Set aside.
Using an electric mixer, cream butter and sugar until light and creamy. Scrape the sides of the bowl occasionally. Beat in the eggs gradually, and scrape the sides of the bowl between additions. Beat in the vanilla. On slow speed, mix in the melted chocolate. Fold in the dry ingredients and the coarsely chopped chocolate – mixture will be thick. Spread it evenly into the prepared pan and smooth the top. Bake for about 30 minutes or until the top will have risen slightly but the middle is still soft – a toothpick inserted in the center should come out sticky, but not with raw mixture. Cool completely in the pan over a wire rack. Cut into squares to serve.
Serves 24
Saturday, August 13, 2016
Orange rhubarb giant financier, a TV show and beautiful things
So yes, I am officially a softie. :)
I was crying easily for days and feeling very emotional. Then I decided to start watching a new TV show, but it could not be Stranger Things for everyone had been talking about it so much I was already fed up with it (plus all those spoilers on Facebook, why to people do these things?).
I went for River because I adore Stellan Skarsgård (ever since he had loads of hair in Breaking the Waves). I watched the pilot and indeed, it is an excellent show, but I felt so miserable at the end I could not bring myself to watch the second episode – I just told my husband: “let’s please watch one episode of The Blacklist now?” – I needed some of Raymond Reddington’s witty lines to improve my mood.
Beautiful things improve my mood, too, and I felt incredibly happy when my husband arrived home with a bunch of rhubarb stalks – he definitely knows my favorite kinds of gifts. ;)
I ended up making two recipes with the rhubarb, both delicious, but decided to share with you the most beautiful of them: the giant financier I made using a rectangular tart pan – I was very pleased when I got it out of the oven, it looked amazing!
I used Bill Granger’s friand recipe, one that already worked so well with cherries and pears, and added orange zest for zing. It was delicious, with a nice texture and wonderful flavor. On top of tasting great, the giant financier looked beautiful, so I had a slice of it with a cup of coffee while watching Red Reddington and I was happy again.
Orange rhubarb giant financier
adapted from Bill Granger’s friands
140g (5oz) trimmed rhubarb, cut into sticks, about 8x1cm (3x½ in) each
2 tablespoons granulated sugar
finely zest of 2 oranges
1 cup + 2 tablespoons (160g) icing sugar, sifted
1 cup (100g) almond meal
½ cup (70g) all purpose flour
pinch of salt
6 egg whites
½ cup (113g/1 stick) unsalted butter, melted and cooled
2 teaspoons Cointreau – optional
Place the rhubarb in a bowl and sprinkle with the granulated sugar. Mix lightly, then set aside for 30 minutes.
Preheat the oven to 180°C/350°F. Generously butter a 30x10cm (12x4 in) rectangular tart pan with a removable bottom.
In a large bowl, mix the orange zest and the icing sugar and rub with your fingertips until sugar is fragrant. Whisk in the almond meal, flour and salt. Stir in the egg whites until just combined. Stir in the melted butter and Cointreau (if using).
Pour the batter in the pan and smooth the top. Drain the rhubarb sticks and place them gently on top of the batter, without pressing them onto the batter.
Bake for about 30 minutes or until golden and risen and a skewer inserted in the center of the financier comes out clean. Cool in the pan over a wire rack. Carefully unmold to serve.
Financiers are best eaten the day they are made, but can be stored in an airtight container for up to 2 days.
Serves 8-10
Thursday, August 4, 2016
Lime, coconut, poppy seed and blueberry cake and recipes stuck in my head
Some recipes get stuck in my head for a really long time: I see them once, twice, five times, and don’t make them for a number of reasons. Then, after a good while, I see them again and I don’t even remember if I actually made them already or if they are still part of my (very lengthy) mental to do list – I guess that is natural after ten years of blogging. ;)
I saw this cake on Good Food Magazine many months ago, and then saw it again a couple more times. I loved the idea of mixing blueberries and coconut, but each time I saw the recipe I did not have one of the two ingredients. Months went by and I found a handful of blueberries in my freezer, but it was half the amount requested in the recipe: I decided to spin the recipe a bit, added lime zest and poppy seeds, and instead of mixing the berries into the batter, I sprinkled them on top of the cake before baking it. The result as a very moist and tender cake, with a beautiful touch of citrus and with tiny pockets of blueberry deliciousness here and there – I don’t mean to brag, but my twists to the recipe worked like a charm (and I can cross that recipe off my mental to do list). ;)
Lime, coconut, poppy seed and blueberry cake
adapted from the great Good Food magazine
2 cups (280g) all purpose flour
2 teaspoons baking powder
2 tablespoons poppy seeds
pinch of salt
½ cup (50g) unsweetened desiccated coconut
1 cup (200g) granulated sugar
finely grated zest of 2 limes
1 cup (240ml) canola oil
3 eggs
1 teaspoon vanilla extract
175ml whole milk, room temperature
½ cup (70g) fresh or frozen (unthawed) blueberries
Preheat oven to 180°C/350°C. Generously butter and flour an 8-cup capacity Bundt pan.
In a medium bowl, whisk together the flour, baking powder, salt, poppy seeds and coconut. Set aside.
In a large bowl, combine sugar and zest and rub them together with your fingertips until sugar is fragrant. Whisk in the oil, eggs and vanilla. Alternately, fold in the flour in three additions and the milk in two additions, starting and ending with the flour.
Transfer the batter into the pan and smooth the top. Sprinkle with the berries. Bake for 50-60 minutes or until risen and golden and a skewer inserted in the center of the cake comes out clean.
Cool in pan for 20 minutes, then carefully unmold onto a wire rack. Cool completely.
Serves 8-10
Wednesday, July 27, 2016
Oatmeal dulce de leche choc chip cookies and some teary days
I don’t know why, but I have felt very sensitive in the past few days – I even thought it was PMS, but no.
I saw a photo of a father playing with his two little girls in a destroyed bathtub – someone posted it on Facebook – and cried my eyes out. I was not having a very good day, and when I saw those kids playing in a place completely destroyed by war I felt so insignificant… My problems were nothing compared to that.
Then I watched Michelle Obama’s amazing speech last night and the tears came down hard – wow, that woman touched my heart in so many ways! My husband was in the kitchen making dinner and he was like “what happened? Are you OK?”, and I was just watching Michelle being fantastic.
Minutes ago, as I reached for this recipe and started writing down the post, I thought of my nephew and how much he enjoyed these cookies: it was a matter of remembering him eating them and bam, there came the waterworks. Lately, actually, everything related to him makes me cry: as I spend time with him, watching him discover the world, I think of my mom and of how much she would enjoy sharing these moments with us. My nephew is a very smart kid – he has long conversations with us, even though we don’t understand everything he says – and he is very tender and sweet – I get kisses and hugs all the time, plus he sometimes calls me “mom”. I get emotional every time I think of her and of how much she would love her grandson if she was around. I have cried often lately, sometimes they are tears of joy and sometimes they are tears of sorrow. I guess that is life, right?
These are Martha’s oatmeal raisin cookies that got turned into something a bit different: as I grabbed the ingredients to bake them, I saw the dulce de leche left from making the molten cakes I posted days ago. So I added a very generous dollop to the batter – cutting back a bit of the sugar – and replaced the raisins for chocolate chips, since dulce de leche and chocolate go so well together.
The cookies turned out fabulous and if you don’t believe me take my nephew’s word for it. ;)
Oatmeal dulce de leche choc chip cookies
slightly adapted from the goddess Martha S.
2 cups (280g) all-purpose flour
¼ teaspoon table salt
½ teaspoon ground cinnamon
1 teaspoon baking powder
1 teaspoon baking soda
1 cup (2 sticks/226g) unsalted butter, room temperature
¾ cup (130g) packed light-brown sugar
½ cup (100g) granulated sugar
½ cup (150g) dulce de leche
1 tablespoon pure vanilla extract
2 large eggs
3 cups (240g) rolled oats
1 cup (165g) chocolate chips – I used ones with 53% cocoa solids
Preheat the oven to 180°C/350°F. Line two large baking sheets with baking paper.
In a medium bowl, whisk together flour, salt, cinnamon, baking powder, and baking soda. Set aside.
In the bowl of an electric mixer fitted with the paddle attachment, combine butter with both sugars, and beat until light and creamy. Beat in the dulce de leche and vanilla. Scrape the sides of the bowl occasionally. Beat in eggs, one at a time, and mix well. Add flour mixture, and mix on low speed just until just combined. On low speed, mix in the oats and chocolate chips.
Drop 2 leveled tablespoons of dough per cookie onto the prepared pans, 5cm (2in) apart. Bake the cookies for 12-15 minutes, or until they’re golden-brown around the edges. Cool completely in the pans.
Store the cookies in an airtight container at room temperature for up to 5 days.
Makes about 28
Wednesday, July 20, 2016
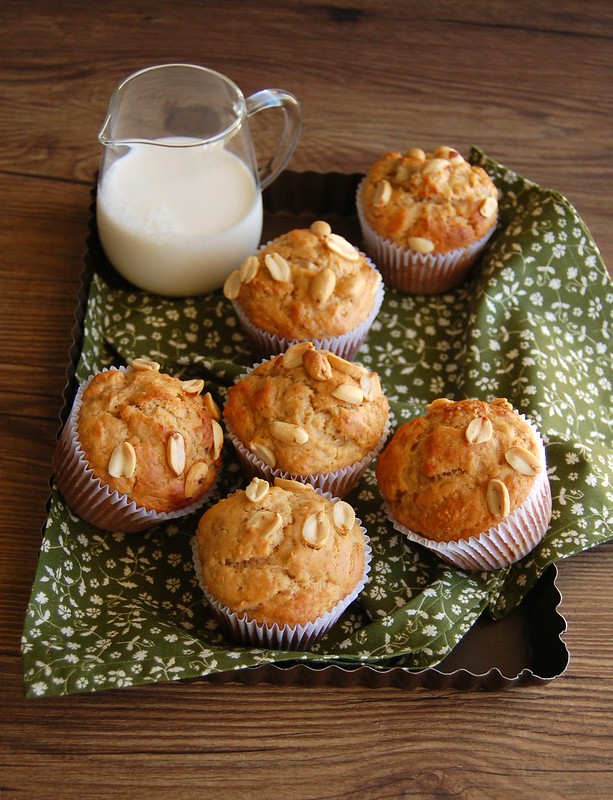
Banana peanut muffins
As much as I try to stick to the ingredients I have at home when baking, that doesn’t always happen: I sometimes cannot resist some fruits at the grocery store or buying another bar of chocolate and/or a jar of jam (I was much worse in the past, if that is any consolation). :)
It is like buying another book when you are not even close to finish reading the ones you already have (that, luckily, I no longer do). But the ingredients… I sometimes give in. :)
Last weekend, however, I reached for a batch of homemade vegetable stock in my freezer and saw a couple of bananas there. There was another ripe banana in the counter, so I decided to bake with them. The idea started as a cake, but changed to muffins when I saw these on Olive magazine – I had each and every ingredient at home and that made me feel like a winner. :D
On top of using the bananas, I was able to go through my giant peanut butter jar a little bit more, use up the remaining peanuts from this recipe and also the peanut meal I found in a shop weeks ago (and of course I had to bring it home). :D Don’t worry if you don’t have any peanut meal at hand: the original recipe calls for almond meal, so you can use either one.
Banana peanut muffins
slightly adapted from the always great Olive magazine
1 ¾ cups (245g) all purpose flour
2 ¾ teaspoons baking powder
¼ teaspoon table salt
3 tablespoons peanut meal (finely ground peanuts)
1/3 cup + 1 tablespoon (78g) demerara sugar
3 ripe bananas, being 2 mashed and 1 chopped
100g smooth peanut butter
2 eggs
½ cup (120ml) buttermilk*
½ teaspoon vanilla extract
handful of toasted peanuts (salted are fine)
Preheat the oven to 200°C/400°F. Line a standard 12-hole muffin pan with muffin cases.
In a large bowl, whisk together the flour, baking powder, salt, peanut meal and sugar. Set aside.
In a medium bowl, whisk together the 2 mashed bananas, the peanut butter, eggs, buttermilk and vanilla until well mixed. Pour the liquid ingredients into the dry ingredients and stir with a fork – do not overmix or your muffins will be tough; muffin batter is supposed to be lumpy, not smooth like cake batter. Stir in the chopped banana.
Divide the mixture between the cases and sprinkle with the peanuts – press them slightly with your fingers so they adhere to the batter. Bake for about 20 minutes or until risen and golden and a skewer inserted in the center of a muffin comes out clean. Cool in the pan over a wire rack for 5 minutes, then carefully remove the muffins from the pan and transfer them to the rack. Serve warm or let them cool completely.
* homemade buttermilk: to make 1 cup buttermilk place 1 tablespoon lemon juice in a 240ml-capacity measuring cup and complete with whole milk (room temperature). Wait 10 minutes for it to thicken, then use the whole mixture in your recipe
Makes 12
Friday, July 15, 2016
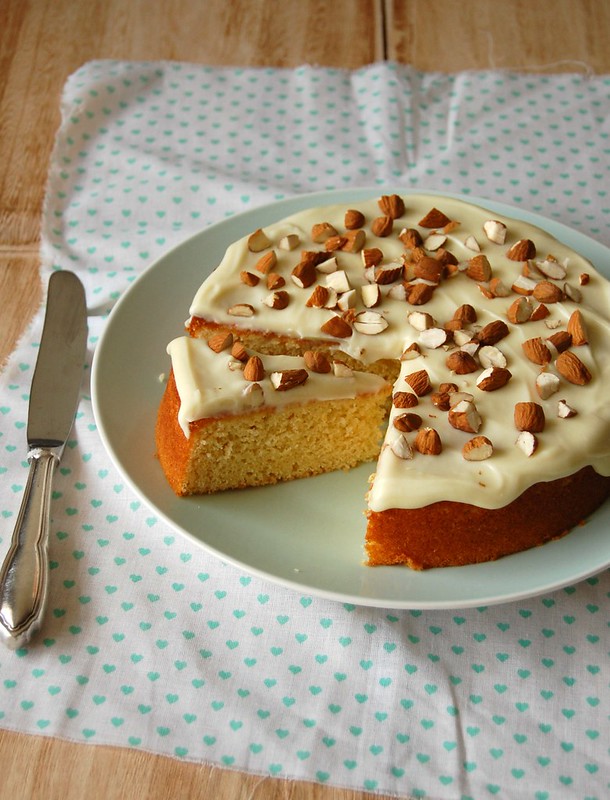
Yogurt, orange and almond cake with white chocolate and yogurt icing
I am completely drawn to beautiful food photos and I have a list of favorite people whose recipes I trust completely, so a couple of years ago, when I discovered Bill Granger’s column on The Independent I was really happy: his recipes always work and taste delicious and the photos posted on the paper website are truly gorgeous.
I found this cake recipe there and was curious to try it since I called for no butter and no oil. I twisted it around a little bit, but still ended up with a very moist and tender cake, perfumed with oranges. The icing goes a bit to the sweet side, but I am a fan of white chocolate, so no problem to me – if you are a white chocolate hater (as most of my coworkers seem to be), feel free to make a simple glaze with icing sugar and orange juice, it will make the cake shine, too.
Yogurt, orange and almond cake with white chocolate and yogurt icing
slightly adapted from the always great Bill Granger
Cake:
1 cup + 1 tablespoon (150g) all purpose flour
½ cup (50g) almond meal
1 ½ teaspoons baking powder
pinch of salt
1 cup (200g) granulated sugar
finely grated zest of 2 oranges
2 eggs
170g plain yogurt
½ teaspoon vanilla extract
2 teaspoons Cointreau (optional)
For the topping:
¼ cup (60g) plain yogurt, room temperature
100g white chocolate, melted and slightly cooled
2 tablespoons icing sugar
¼ cup (35g) whole almonds, toasted, cooled and then coarsely chopped
Preheat the oven to 180°C/350°C. Butter a 20cm (8in) round cake pan, line the bottom with a circle of baking paper and butter the paper as well.
Cake: in a medium bowl, whisk together the all purpose flour, almond meal, baking powder and salt. Set aside.
In the bowl of an electric mixer, rub sugar and orange zest together until sugar is fragrant. Add the eggs and using the mixer whisk until thick and creamy. Beat in the vanilla and the Cointreau (if using). On low speed, mix in the yogurt. Fold in the dry ingredients and pour batter in the prepared pan. Bake for around 40 minutes, until the cake is risen and golden and a skewer inserted in the center comes out clean. Cool in the pan onto a wire rack.
Icing: whisk in the yogurt into the chocolate until smooth. Sift in the sugar and stir to combine. Cover and chill in the fridge for 20 minutes, or until it reaches a spreadable consistency. Unmold the cake, carefully peel off the paper and place onto a serving place. Spread with the icing and top with the chopped almonds to serve.
Serves 8
Tuesday, July 12, 2016
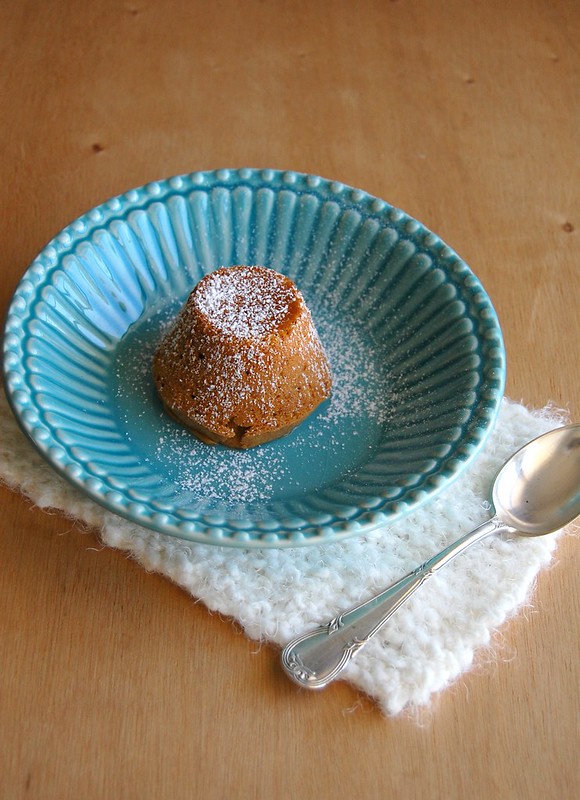
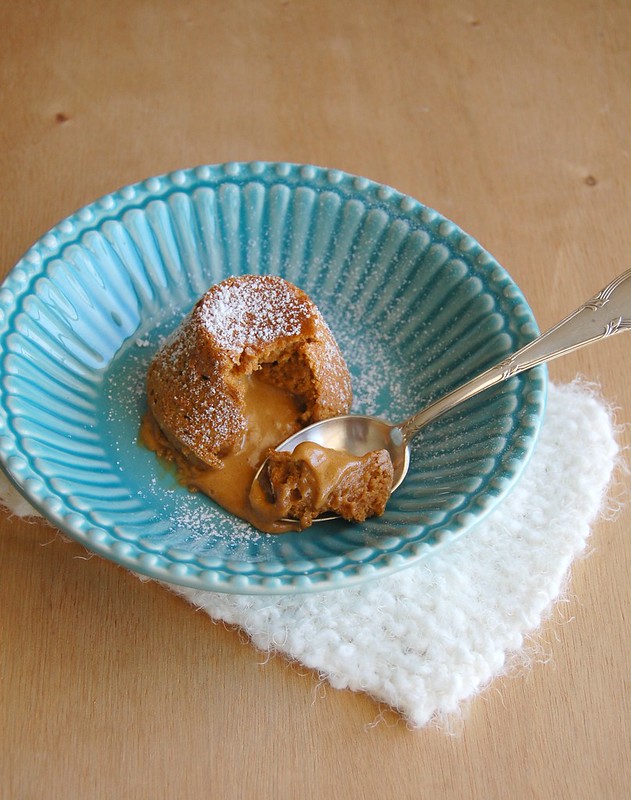
Dulce de leche molten cakes - an easy peasy recipe + a fantastic movie
I have a terrible habit that I think some of you might share: even though there are thousands of great movies out there I sometimes ended up watching the same ones over and over again. :)
There are times, however, when watching movies more than once is necessary: my husband hadn’t watched Whiplash yet, and since this was the best movie I saw last year I was more than willing to watch it again, this time with him. He absolutely loved it – Whiplash is, to me, the kind of fantastic movie which almost impossible to describe without using four letter words. :D
I got to watch J.K. Simmons being beyond fantastic again – he pulled a Cate Blanchett and won each and every award with that role, not to mention one of the most deserved Oscars in History.
I liked J.K. Simmons before – I am a Law and Order devotee, after all – but I really did not think he could be that great. What a pleasant surprise.
A surprise similar to the one I had with the recipe I bring you today: with so few ingredients and put together in a matter of moments, I did not expect these cakes to be so good – well, I was wrong, very wrong: they are delicious and so easy to make I see myself repeating this recipe to exhaustion – the same way I see myself watching Whiplash at least once a year from now on. :D
Dulce de leche molten cakes
from the always gorgeous and delicious Donna Hay Magazine
2 eggs
2 egg yolks
1 teaspoon vanilla extract
1 cup (300g) dulce de leche
4 tablespoons (40g) all purpose flour
pinch of salt
Preheat oven to 220°C/425°F. Generously butter six 120ml capacity muffin pans or mini cake pans.
Place the eggs, yolks and vanilla in the bowl of an electric mixer and whisk for 4–5 minutes or until very thick and pale. Add the dulce de leche and whisk on low speed until just combined.
Add the flour and salt and carefully fold through the mixture. Divide the mixture between the prepared pans.
Bake for 6-8 minutes or puffed and still slightly soft in the middle. Allow to stand in the pan for 1 minute, then very carefully run a knife around the edges to release the cakes from the pan and invert them onto a plate. Serve immediately with ice-cream.
Serves 6
Saturday, June 25, 2016
Apple and rye cake and there is no accounting for taste
To me part of growing up was understanding that there is no accounting for taste: I used to be too emphatic about the things I like – and sometimes still am – but I try not to be too pushy. Until a certain age I used to think that “OMG, the things I like are the best things” – not anymore. At least I try not to be like that (please note that I am not saying I am successful at that). :)
I think I told you ages ago how much I was enjoying Ra Ra Riot and I recently found out there was a new album by the band on Spotify (not sure when it was released, since lately I have been struggling with balancing work + personal projects, not much time left to constantly be updated on certain subjects). So I ended up googling a bit about it and read a text by a guy that hated the album and complained at how much the band sounded like a band from the 80s and also that they seemed possessed by Journey on Call Me Out – I smiled and thought: “well, that is one of the reasons I like the band and Call Me Out is my favorite song of the album”. There is no accounting for taste, indeed. :D
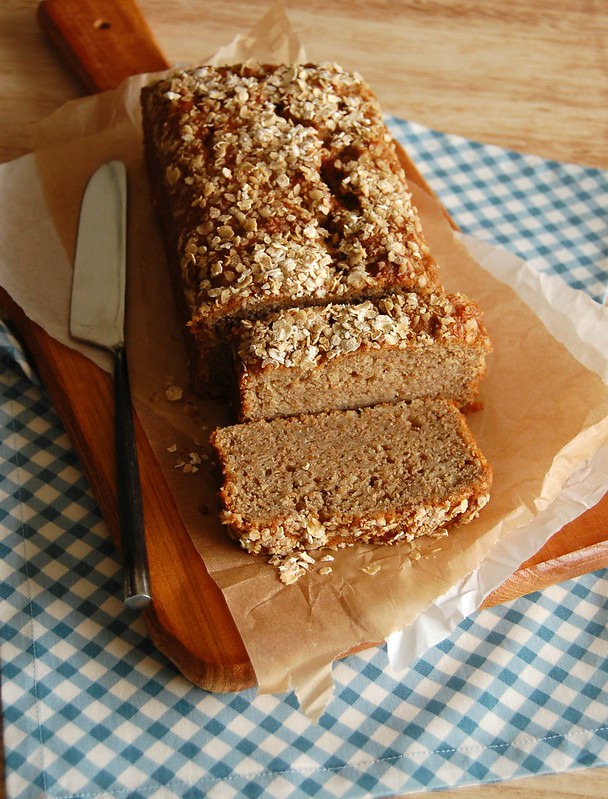
Maybe many of you won’t like the cake I bring today because it is dense, very moist and the rye flour gives it a nutty aftertaste – it you ask me that is exactly why I loved the cake so much. A matter of taste, or just what I felt like at the moment I ate it. If you want a light, fluffy cake, please check my recipe index for inspiration – but if you are in the mood for moist and dense, please go to the grocery store and buy a couple of apples. :)
Apple and rye cake
slightly adapted from Lucy Cufflin
1/3 cup (75g) unsalted butter
¾ cup (150g) demerara sugar
1/3 cup (80ml) whole milk, room temperature
2 Granny Smith apples, peeled and coarsely grated
1 large egg
½ teaspoons vanilla extract
½ cup (70g) all purpose flour
½ cup (70g) rye flour
½ cup (50g) almond meal
2 ½ teaspoons baking powder
½ teaspoon ground cinnamon
pinch of salt
1 ½ tablespoons rolled oats, to decorate
Preheat the oven to 180°C/350°F. Butter a 5-cup loaf pan, line it with baking paper and butter the paper as well.
Put the butter, sugar and milk into a saucepan and warm until the sugar has dissolved and the butter has melted. Remove from the heat and cool. In another bowl, whisk together the all purpose flour, rye flour, almond meal, baking powder, cinnamon and salt. Add the ingredients from the saucepan, the grated apples, egg, vanilla and mix until smooth.
Transfer to the prepared pan and sprinkle the top of the batter with the oats.
Bake for about 40 minutes until risen and golden and a skewer inserted in the cake comes out clean. Cool in the pan for 25 minutes, then carefully remove and transfer to a wire rack to cool completely. Carefully peel off the paper and serve.
Serves 8
Tuesday, June 21, 2016
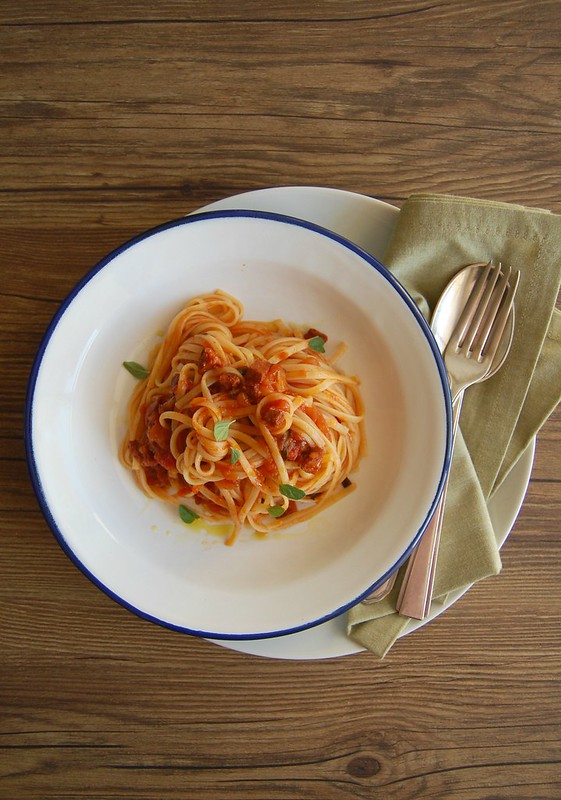
Linguine with chorizo tomato sauce
Even though I haven’t had the time to post here as often as I would like to, I have been cooking and baking quite regularly – family and friends thank me for that. ;)
I have been, however, a bit tired (too much work, I guess): days ago I was watching a rerun of Law & Order: Criminal Intent (you know how much I love that show!) and it took me a good while to recognize Carrie Preston in the episode: I was sure I knew her from somewhere, but she was a blonde then and without Arlene’s bold red hair my brain was very slow in processing the info. :D
And speaking of bold red hue, may I introduce you to the dish I made last weekend that got my husband asking for seconds? The idea was to make bolognese pasta, but when we arrived at the shop the meat grinder was broken. I’d already decided to make a simple tomato sauce when I opened the fridge to get the onion and garlic and spotted a piece of chorizo right there, in front of me – I chopped it in small cubes and used it to replace the beef mince. A bit of sherry to make things more Spanish, a handful of marjoram – a herb that I love pairing with pork – and lunch was served.
Linguine with chorizo tomato sauce
own creation
1 ¼ cups (175g) diced chorizo
½ large onion, finely diced
2 large garlic cloves, minced
2 tablespoons sherry
1 ½ tablespoons tomato paste
1 400g (14oz) can peeled tomatoes
1 tablespoon sugar
salt and freshly ground black pepper
2 bay leaves
handful of fresh marjoram leaves
300g dried linguine or other long pasta shape you prefer
parmesan or pecorino, to serve
Heat a medium saucepan over medium/high heat and add the chorizo. Cook until it releases its oils and starts getting crispy. Add the onion and cook until soft, 4-5 minutes, stirring occasionally so it doesn’t catch in the bottom of the pan. Add the garlic and cook until fragrant, about 1 minute.
Add the sherry and cook until reduced, about 2 minutes. Stir in the tomato paste, cook for 1 minute, then add the tomatoes and crush them with a potato masher. Fill the can by half with water and add to the sauce. Stir in the sugar, season with salt and pepper – gently, since the chorizo is already salty and spicy – and add the bay leaves and the marjoram. Cook over low heat, partially covered, stirring occasionally, for about 20 minutes or until slightly thickened.
In the meantime, cook the linguine in a large pot of boiling salted water until al dente, about 10 minutes (check the package instructions). Drain the linguine and stir it into the sauce. Serve immediately sprinkled with freshly grated pecorino or parmesan, or for an even more Spanish touch, manchego chese.
Serves 3
Friday, June 10, 2016
Nutty butter cookies and a wandering mind
As I was driving home from work days ago, in the middle of a massive traffic jam, I started listening to The Wallflowers and that led to a trip down memory lane: in the far, far away year of 1996, I spent months listening to Bringing Down the Horse, a CD I bought because I fell in love with One Headlight the minute I heard the song for the first time.
So there I was, driving in the rain listening to 6th Avenue Heartache (my second favorite track of that album), and my mind wandered a bit and I thought about the music video clip, so beautiful, directed by David Fincher, one of my all-time favorite directors.
One band, one song, one video clip, one favorite director.
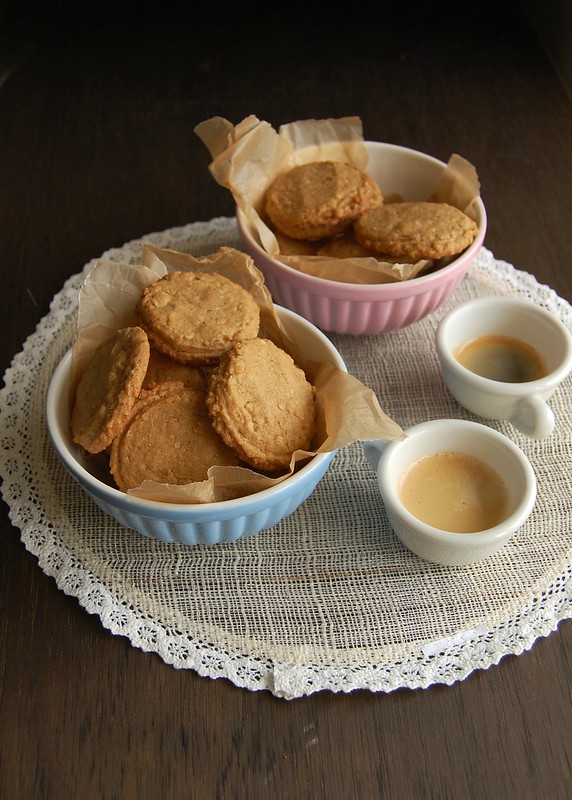
One good thing leading to another, like my purchase of a huge jar of peanut butter leading to a bunch of recipes made with it, like the super easy fudge I posted the other day and these cookies. These cookies are delicious – the oats are toasted in butter before being added to the cookie dough and that, combined with the demerara sugar that I decided to use instead of the granulated one, gives the cookies the most delicious caramel flavor (and I added a bit of whole wheat flour to help with the nuttiness of the whole thing).
Nutty butter cookies
slightly adapted from the always fabulous Martha
¾ cup (170g/1 ½ sticks) unsalted butter, softened – divided use
1 cup (90g) rolled oats
1 cup (140g) all purpose flour
2 tablespoons whole wheat flour
1 teaspoon baking soda
pinch of salt
1/3 cup (67g) demerara sugar
½ cup (88g) light brown sugar, packed
1 large egg
½ cup peanut butter
½ teaspoon vanilla extract
½ cup (70g) whole roasted salted peanuts
Melt ¼ cup (½ stick/56g) of the butter in a medium saucepan over medium heat. Add oats, and cook, stirring, until toasted, 5-7 minutes. Spread oat mixture on a baking sheet lined with baking paper. Let cool completely. Meanwhile, preheat oven to 180°C/350°F. Line two large baking sheets with baking paper.
Whisk together flour, baking soda, and salt. In a large bowl, using an electric mixer, beat together remaining ½ cup (113g/1 stick) butter and the sugars until pale and creamy. Add egg, and beat until combined. Add nut butter and vanilla, then beat on medium speed until well combined.
Add oat mixture and peanuts, and mix on low speed until combined. Add flour mixture, and mix just until combined.
Drop 2 leveled tablespoons of dough per cookie onto the prepared pans, 5cm (2in) apart. Bake the cookies for 12-15 minutes, or until they’re golden-brown around the edges. Cool completely in the pans
Store the cookies in an airtight container at room temperature for up to 5 days.
Makes about 28
Wednesday, June 1, 2016
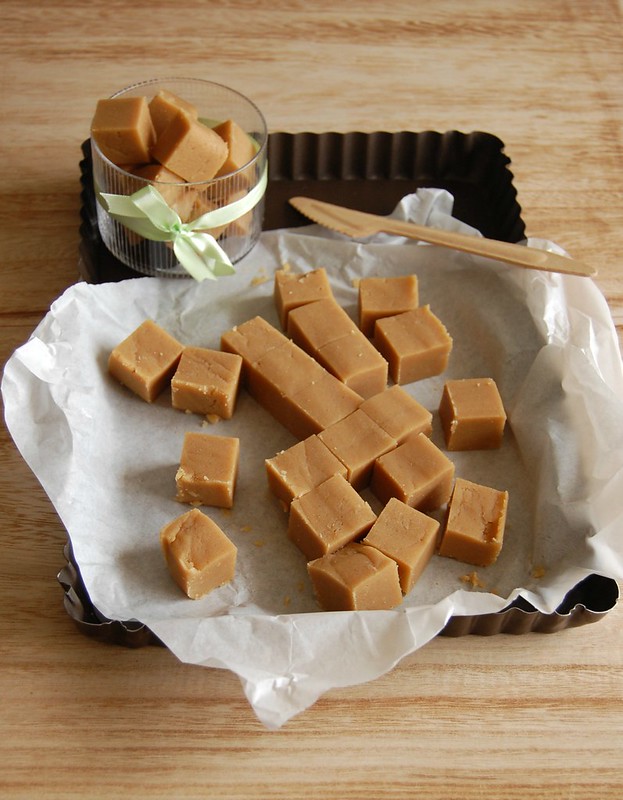
Oh-so-easy peanut butter fudge
Like many of you reading me right now (I am sure), I am the kind of person who has fun at the grocery store and supermarkets – I know that for many people going to such places is one very cruel way of torture, but I absolutely love it. And then there are the supermarkets where you find huge packages of products – a whole new level of fun! My heart is filled with joy when I think that in my cupboard right now there is a 5kg-package of sugar just waiting to become cake/bread/dessert on the weekend. :)
I do, also, buy things that I use much less than I use sugar, like peanut butter, for example, but how could I resist buying an 800g-jar of pb for the same price I’d seen a half this size jar? Naturally I brought it home and now I have been making some (or should I say many?) delicious recipes with it, like this fugde: it is really, really easy and can be put together in a matter of moments. You just need some patience to let it set before cutting it into small squares. I thought I would have to send these to friends in order not to eat them all myself, but my husband tried one and it was impossible to stop him from eating the whole thing himself – the same husband that doesn’t like sweets. :D
Oh-so-easy peanut butter fudge
slightly adapted from Lucy Cufflin
¼ cup (56g) unsalted butter
1 cup (200g) demerara sugar
3 tablespoons whole milk
generous 1/3 cup (100g) smooth peanut butter
1 teaspoon vanilla extract
pinch of salt
¾ cup (105g) icing sugar, sifted – you might not use all of it
Line a 20x10cm (8x4in) loaf pan with baking paper.
Put the butter, sugar and milk in a large saucepan over a gentle heat. Stir very gently until the all the sugar has dissolved.
Once the sugar has dissolved, bring to the boil and, without stirring, cook for 3 minutes. Remove from the heat and stir in the peanut butter, vanilla extract and salt. When well mixed, gradually add the icing sugar, beating with a wooden spoon – the mixture should be smooth and creamy, not dry (if too dry, add a few drops of water and stir vigorously).
Spoon the fudge into the prepared pan, press it down using an offset spatula or the back of a spoon and level the surface. Leave to cool, uncovered, for 4-5 hours or overnight.
Lift out the fudge in its paper and cut into neat, even squares – it can be stored in an airtight container at room temperature for up to two weeks.
Makes 36
Wednesday, May 25, 2016
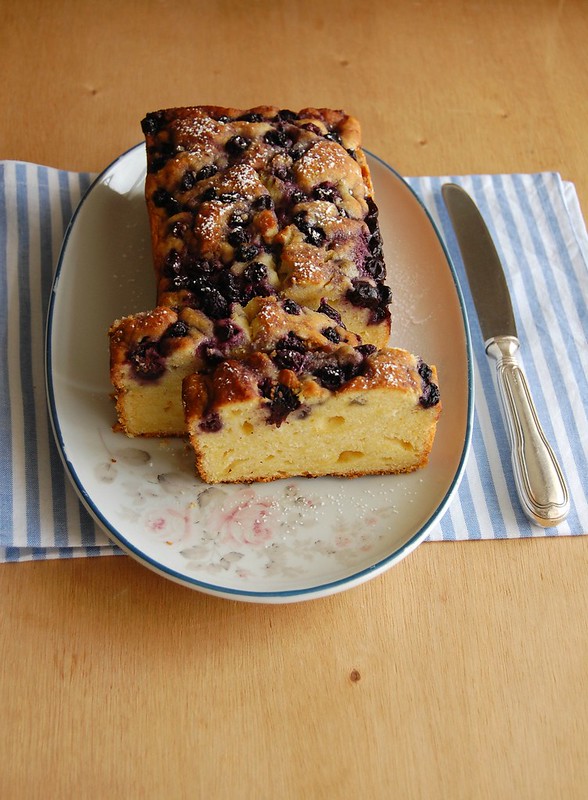
Cream cheese and blueberry cake
I have been busy at the kitchen again – thank heavens! – but I haven’t found the time to sit down and write posts – so, my apologies for those of you who have stopped by lately only to stare at the red wine cake for ages. :S
And a special hug to Ellen, a lovely and dear reader who makes the recipes and always sends me the sweetest and warmest comments. <3
A couple of weeks ago I was going through beautiful recipes online and found Emiko’s mascarpone and blackberry cake – it looked so beautiful! I felt like grabbing a slice from the screen, but since that is (still) not possible I went to the kitchen and made my version of her cake, changing a few things: there was a tub of cream cheese in my fridge begging to be used and a bag of blueberries in the freezer. The result was wonderful and pleased everyone who had a chance of snacking on it.
Cream cheese and blueberry cake
slightly adapted from Emiko Davies’ gorgeous blog
Blueberry compote:
1 cup (140g) blueberries – I used frozen, unthawed
2 tablespoons granulated sugar
Cake:
1 ½ cups (210g) all purpose flour
1 ½ teaspoons baking powder
1/8 teaspoon table salt
½ cup (100g) granulated sugar
finely grated zest of 1 large orange
½ cup (113g/1 stick) unsalted butter, softened
180g cream cheese, softened
2 large eggs
½ teaspoon vanilla extract
1 ½ teaspoons Cointreau (optional)
Start by making the compote: place the blueberries and sugar in a small saucepan and warm until the berries soften and the sugar dissolves, about 5 minutes – stir occasionally. Squash the berries with the back of a spoon as you stir. Cool completely.
Preheat the oven to 180°C/350°F. Butter a 5 ½ cup-capacity loaf pan, line it with baking paper and butter the paper as well.
In a medium bowl, whisk together the flour, baking powder and salt.
In the bowl of an electric mixer, rub the sugar and orange zest together with your fingertips until sugar is fragrant. Add the butter and cream cheese and cream until light and fluffy – scrape the sides of the bowl occasionally. Beat in the eggs, one at a time, mixing well after each addition. Beat in the vanilla and the Cointreau (if using). On low speed, add the flour mixture mixing only until incorporated – do not overmix.
Pour the cake into the prepared pan and smooth the top. Top with the blueberries, keeping most of the juice (so the cake don’t get soggy). Swirl the berries through the cake with a butter knife. Smooth out the top without mixing too much.
Bake for about 45 minutes or until golden brown and a skewer inserted into the cake comes out clean.
Serves 8
Friday, April 29, 2016
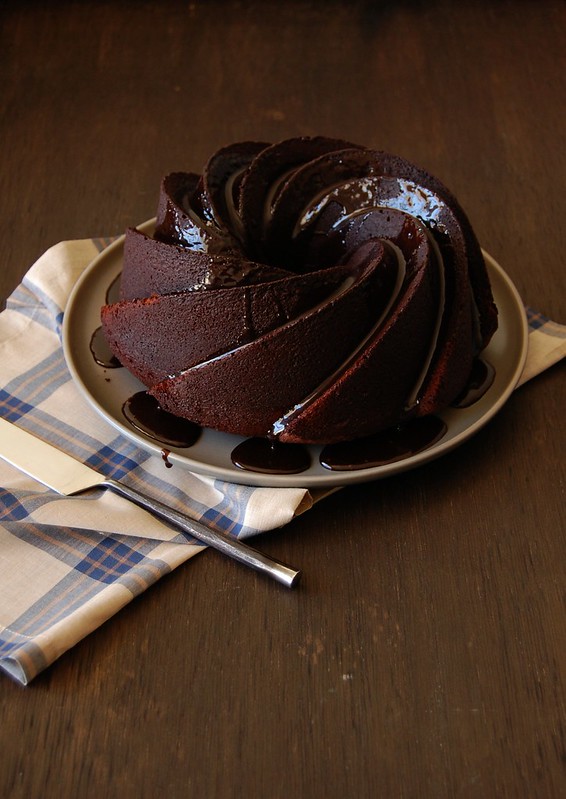
Red wine chocolate cake and Vincent, again
Days ago I finished watching season 2 of Daredevil and despite all the action the Punisher brought to the show I did not like this season as much as I liked the first one – the whole Elektra thing? Oh, so boring.
I was about to give up on the show when Vincent D’Onofrio showed up: it is no secret how much I love the guy and I might be a bit biased here, but the two episodes he was in were the best in the entire season – that is what a talented actor can do to a show/movie. He added even more depth to a character played by him to perfection on the previous season and also created great dynamic with Jon Bernthal’s Frank Castle – they were wonderful together.
The eternal Bob Goren added a wonderful layer to a show I was no longer very much excited about, even if for two episodes – after he appeared on the show, it became instantly more interesting. This is what the red wine does to the chocolate cake I bring you today: you cannot quite taste the flavor of it, but it adds depth to the chocolate flavor making it more intense, on top of making the texture insanely tender. Cheers!
Red wine chocolate cake
slightly adapted from the beautiful and delicious Delicious. Love to Cook
Cake:
200g all purpose flour
2 tablespoons unsweetened cocoa powder + a bit extra to dust the pan
1 teaspoon baking powder
½ teaspoon baking soda
1/8 teaspoon table salt
200g unsalted butter, softened
1 cup (200g) granulated sugar
4 eggs
1 teaspoon vanilla extract
200g dark chocolate, melted and cooled – I used one with 53% cocoa solids
½ cup (120ml) whole milk, room temperature
½ cup (120ml) red wine, room temperature
Glaze:
2 ½ tablespoons unsalted butter, room temperature
2 tablespoons whole milk, room temperature
2 tablespoons unsweetened cocoa powder, sifted
2 tablespoons granulated sugar
Heat the oven to 180°C/350°F. Generously butter a 10-cup capacity Bundt pan and dust it with cocoa powder, knocking off the excess. In a medium bowl, sift together the flour, cocoa, baking powder, baking soda and salt. Set aside.
Using an electric mixer beat the butter and sugar for 3-4 minutes until very creamy and pale. Add the eggs 1 at a time, beating well after each addition – scrape the sides of the bowl after each addition. Beat in the vanilla. On low speed, beat in the melted chocolate until combined. Still on low speed, beat in half of the flour mixture, then the milk and the wine, then the remaining flour mixture. Scrape the sides of the bowl and mix only until incorporated.
Spoon the batter into the prepared pan and smooth the top. Bake for 45-50 minutes or until risen and until a skewer comes out clean when inserted into the cake. Cool in the pan over a wire rack for 15 minutes, then carefully unmold onto the rack and cool completely.
Glaze: place all the ingredients in a small saucepan and cook them over a medium-high heat, stirring, until butter is melted and sugar is dissolved. Boil for 2-3 minutes or until shiny and thick. Remove from the heat, cool for 2-3 minutes, then pour over cake.
Serves 8-10
Monday, April 25, 2016
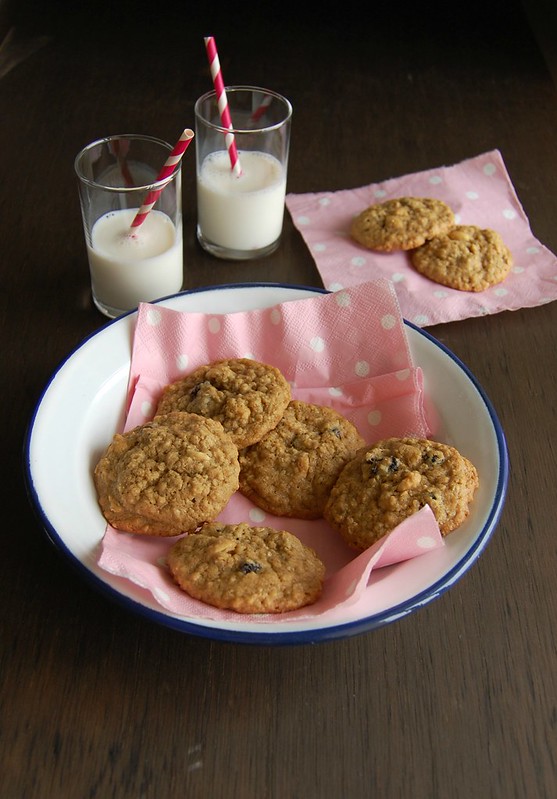
Cranberry and peanut oatmeal cookies
One quick look at the blog’s recipe index and one can quickly learn that I love oatmeal cookies – I have made them in many different ways, with many different add on ingredients, and they are always a crowd pleaser (not to mention are great to have on hand for a snack between meals).
There are many recipes on this blog, and today I bring you another – these are delicious, and the salty and crunchy peanuts go very well with the sweet and tender cranberries. I highly recommend you bake these if you like oatmeal cookies like I do – and the peanuts and cranberries can be swapped by other nuts and dried fruits – , but I feel the obligation to tell you that of all the oatmeal cookies on this blog the ones I made for last year’s Christmas series are my favorites. :)
From a cookbook I haven’t used much and I hope to change that – fingers crossed here for the cold weather to finally come our way.
Cranberry and peanut oatmeal cookies
slightly adapted from this cookbook
½ cup (113g/1 stick) unsalted butter, room temperature
½ cup (100g) granulated sugar
½ cup (88g) packed light brown sugar
1 large egg, room temperature
½ teaspoon vanilla extract
1 cup (140g) all-purpose flour
¼ teaspoon baking soda
pinch table salt
pinch freshly grated nutmeg
1 ¼ cups (112g) old-fashioned rolled oats
½ cup (85g) dried cranberries
½ cup (70g) whole salted, roasted peanuts, coarsely chopped
Preheat the oven to 180°C/350°F. Line two large baking sheets with baking paper.
In a large bowl, using an electric mixer, cream together the butter and sugars until creamy and light in color, 1-2 minutes. Add the egg, mixing well, and then add the vanilla extract. Scrape down the sides of the bowl as necessary. In a separate bowl, sift together the flour, baking soda, salt, and nutmeg. Add them to the butter-sugar mixture along with the oats and mix on low just until combined. Add the dried cranberries and peanuts. Mix on low briefly until well distributed.
Drop 2 leveled tablespoons of dough per cookie onto the prepared pans, 5cm (2in) apart. Bake the cookies for about 15 minutes, or until they’re golden-brown around the edges but still soft. Cool in the pans for 5 minutes, then carefully slide the paper with the cookies onto a wire rack to cool completely.
Store the cookies in an airtight container at room temperature for up to 5 days.
Makes about 22
Monday, April 11, 2016
Crumb cake with orange marmalade and "Girls"
I am here today to make a confession: after trying a couple of times to watch Girls, I finally binge watched the show on a weekend while in bed with a cold. As I watched the episodes, it became clearer to me why I’d hated it in the past: I had a hard time believing that people could be that stupid. I tried to remember things from my twenties and I kept thinking that well, thank heavens I did nothing (or almost nothing) like those girls. I finally understood the reason why watching Girls made me suffer so much: it bothered me to watch people making one mistake after the other, making one bad choice after another.
Maybe that makes a bad person. I don’t know. :S
I hope that I can make up for that by sharing baked goods with the people I love, like I did with this cake: I used orange marmalade and found it that its bitter taste went really well with the sweet of the cake batter and the topping, but if you’re not into bitter flavors swap the marmalade for any other jam you prefer.
Crumb cake with orange marmalade
slightly adapted from the always wonderful Food & Wine magazine
Streusel topping:
½ cup (88g) light brown sugar, packed
½ cup (70g) all-purpose flour
½ teaspoon cinnamon
¼ teaspoon table salt
4 tablespoons (56g) unsalted butter, cold and diced
Cake:
2 cups (280g) all-purpose flour
2 teaspoons baking powder
½ teaspoon ground cinnamon
¼ teaspoon table salt
½ cup (113g/1 stick) unsalted butter, softened
1 cup (200g) granulated sugar
3 large eggs
¾ cup (180ml) whole milk
½ cup orange marmalade
Preheat the oven to 180°C/350°F and butter a deep 20cm (8in) square metal baking pan.
Topping: in a medium bowl, mix the brown sugar with the flour, cinnamon and salt. Add the 4 tablespoons of diced butter and, using your fingertips, rub the dry ingredients with the butter until evenly moistened, then press the mixture into clumps. Refrigerate the streusel until chilled, about 15 minutes.
Meanwhile, make the cake: in a medium bowl, whisk the flour with the baking powder, cinnamon and salt. In a large bowl, using an electric mixer, beat the butter with the sugar at medium speed until fluffy, 2 minutes. Beat in the eggs, one at a time. Scrape down the side of the bowl, then beat in the dry ingredients and milk in 3 alternating batches, starting and ending with the dry ingredients, until just incorporated. Don’t overmix.
Transfer the batter into the prepared pan, spreading it in an even layer. Dollop the orange marmalade evenly over the batter and sprinkle the streusel evenly on top. Bake for about 50 minutes, until a toothpick inserted in the center of the cake comes out clean. (Some of the streusel will sink into the cake.) Transfer the pan to a rack and let the cake cool completely in the pan. Cut into squares and serve.
Makes 16
Monday, March 28, 2016
Spaghetti with meat and aubergine balls
I once told you that meatballs are a huge success at home, and I was not lying: I make them quite often, and always pop some of them (still uncooked) in the freezer – they can go to the oven directly from frozen, making my life a lot easier during weeknights (+ my husband can do that himself, which is always a plus). :)
I have posted meatballs made of beef, and meatballs made of eggplant, and today I present you a merge between those two kinds: eggplants get roasted, then their pulp is mixed with beef to create delicious, moist meatballs – they were very flavorsome and turned the spaghetti into something even more special.
Since this is a recipe by Antonio Carluccio there was no way it could go wrong.
Spaghetti with meat and aubergine balls
from the always delicious and beautiful Pasta
400g spaghetti
freshly grated parmesan or pecorino, to serve
Sauce:
2 tablespoons olive oil
1 large onion, finely chopped
2 large garlic cloves, finely chopped
100ml dry red wine
2 tablespoons tomato paste
680g tomato passata
salt and freshly ground black pepper
2 teaspoons granulated sugar
handful fresh basil leaves
Meatballs:
2 whole aubergines
olive oil, for drizzling the aubergines and for shallow-frying
300g minced beef
1 garlic clove, peeled and squashed to a paste
¼ teaspoon freshly grated nutmeg
50g parmesan, finely grated
1 egg, lightly beaten with a fork
100g fresh breadcrumbs
1 teaspoon table salt
freshly ground black pepper
Preheat the oven to 180°C/350°F. Line a large baking sheet with foil and brush it with olive oil. Cut the aubergines in half lengthwise and place them cut side up onto the foil. Drizzle with 2 tablespoons olive oil and bake for 30-40 minutes. Scoop the pulp out of the skins, transfer to a large bowl and mash the pulp. Cool. Discard the skins.
While the aubergines are roasting, make the sauce: heat the olive oil in a large saucepan, and fry the onion until soft, about 5 minutes. Add the garlic and cook until fragrant, about 1 minute. Add the wine and cook for 1 minute. Add the tomato paste and tomato passata. Season with salt and pepper, add the sugar, stir well and cook gently for 30–40 minutes. Stir in the basil and remove from the heat.
Meanwhile, continue with the meatballs by mixing together the beef mince, the aubergine pulp, garlic, nutmeg, parmesan, egg and breadcrumbs. Season with salt and pepper, mix well and shape into balls. Shallow-fry in olive oil to brown on all sides. Add the balls to the tomato sauce and keep warm.
Cook the pasta in plenty of boiling salted water until al dente. Drain. Mix the past and the sauce carefully and serve immediately sprinkled with parmesan or pecorino.
Serves 4
