Thursday, April 30, 2015

Penne with tomato and chickpea sauce - simple, honest food

Penne with tomato and chickpea sauce / Penne com molho de tomate e grão de bico

Because I like to try new recipes and new dishes I look for inspiration everywhere, even in cuisines I would never adopt as a way of life, such as vegan, for instance: I understand that there are great vegan recipes out there and I have made some myself, but I don’t intend to spend my life without milk, eggs, honey, butter or cheese – it’s just not who I am.

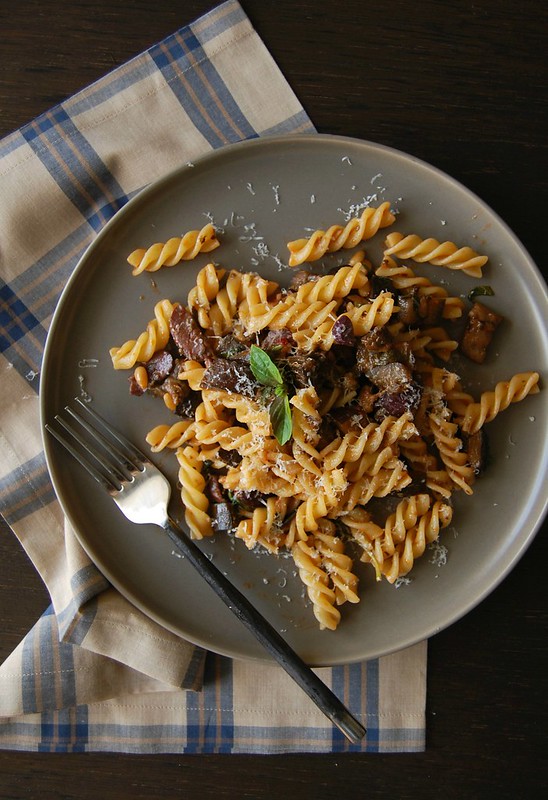
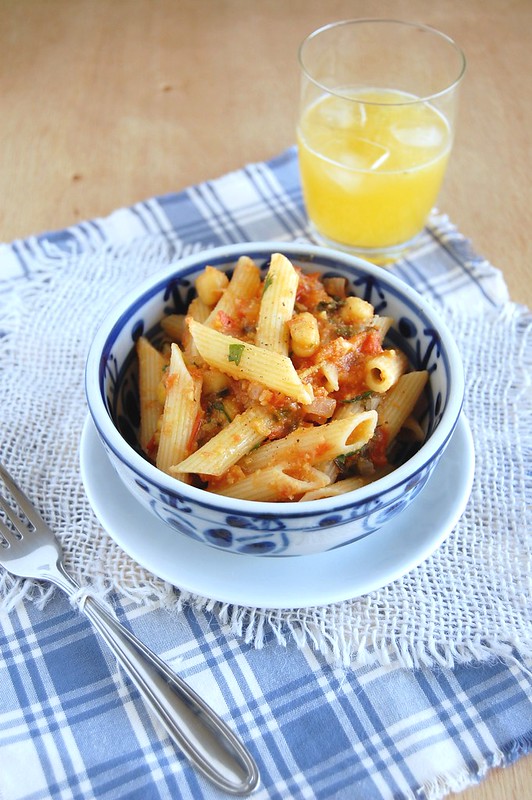
Having said that, I got curious when I read a recipe on Andrew Carmellini’s beautiful Urban Italian for a dish pasta that was rich without having loads of butter and cream – yes, I won’t give up on cream, that is for sure, but that doesn’t mean I have to eat it every single day. I am a sucker for pasta dishes, so I gave it a go and it turned out delicious: the chickpea puree thickens the tomato sauce in a lovely way, making it velvety, and the bacon (that I used instead of the sausages called for in the original recipe) adds a nice, salty touch.

This is simple, no fuss, honest food that I am eager to eat on a daily basis – I could not expect less from the guy responsible for the best gnocchi.

Penne with tomato and chickpea sauce
adapted from the delicious Urban Italian: Simple Recipes and True Stories from a Life in Food

1 can (420g/15oz) chickpeas
½ tablespoon olive oil
2 bacon rashers, finely sliced
3 cups your favorite tomato sauce – mine is here
½ teaspoon fennel seeds, ground
salt and freshly ground black pepper to taste
¼ teaspoon red pepper flakes
400g penne
2 tablespoons unsalted butter
2 teaspoons extra virgin olive oil
1 cup grated pecorino cheese

Drain the chickpeas well, reserving the liquid. Blend half the chickpeas (about 1 cup) and half their liquid on high until the mixture forms a smooth paste, about 1 minute.
Heat the olive oil in a large saucepan over high heat. Add the bacon and cook until crisp. Add the tomato sauce and stir to combine. Add the chickpea puree and the fennel seeds and stir to combine. Season to taste, then cook over medium heat stirring occasionally until the mixture forms a loose sauce and the flavors are combined, about 15 minutes. Stir in the pepper flakes and the remaining chickpeas and remove from the heat.

Cook the penne in a large saucepan of salted boiling water until al dente. Drain but do not rinse the pasta.
Return the rigatoni to the pot. Add the sauce and cook on medium-high heat, mixing well, until the pasta is well coated, about 1 minute. Remove the pot from the heat and stir in the butter, olive oil and half the pecorino cheese. Transfer the pasta and sauce to a large serving dish and top with the rest of the pecorino cheese and serve immediately.

Serves 4

Monday, April 27, 2015

Apple cake with maple glaze

Apple cake with maple glaze / Bolo de maçã com calda de xarope de bordo

As I sat here to write about this apple cake I automatically thought of the devil’s food loaf I posted a while ago, even though both cakes have nothing in common except for the fact that they’re both delicious. The same way I thought of Annie Bell when I wanted a chocolatey cake, I reached for Lisa Yockelson’s cookbook while thinking of a Bundt cake – she has great recipes that always turn delicious, even though I have to adapt them a bit for I don’t own a 15-cup capacity pan – or an 18-cup capacity pan, for that matter. :D

Math was never my strongest suit when I was at school but luckily I picked up enough of it to get me through life without much trouble (at least so far). ;) Today I bring you a wonderful apple cake adapted for an 8-cup capacity ring or Bundt cake – I hope you enjoy it.

Apple cake with maple glaze
slightly adapted from the delicious Baking Style: Art Craft Recipes

Cake:
2 cups (280g) all purpose flour
½ teaspoon baking powder
½ teaspoon baking soda
¼ teaspoon table salt
½ teaspoon ground cinnamon
½ teaspoon freshly grated nutmeg
pinch of ground ginger
1 cup (200g) granulated sugar
¼ cup (44g) light brown sugar, packed
2 large eggs
2/3 cup (160ml) canola oil
1 teaspoon vanilla extract
2 medium Granny Smith apples, peeled and coarsely grated

Glaze:
1/3 cup (80ml) maple syrup
2 tablespoons (28g) unsalted butter, chopped
pinch of salt
½ tablespoon brandy or Calvados (optional)
¼ teaspoon vanilla extract

Preheat the oven to 180°C/350°F. Butter and flour an 8-cup capacity ring or Bundt pan.
In a medium bowl, sift together the flour, baking powder, salt, cinnamon, nutmeg and ginger. Set aside.
Using an electric mixer, beat eggs and sugars for 2 minutes or until thickened. With the mixer on medium speed, gradually add the oil in a thin, steady stream, then beat for 2 minutes. Beat in the vanilla and the apples. On low speed, add the sifted ingredients in two additions, scraping the sides of the bowl after each addition.

Pour the batter into the prepared pan. Bake the cake for about 50 minutes or until risen and golden and a skewer inserted in the center comes out clean. Cool in the pan for 15 minutes – in the meantime, make the glaze: place maple syrup, butter and salt in a small saucepan. Set over low heat and bring to a simmer, stirring occasionally. Simmer for 1 minute, remove it from the heat and stir in the brandy or Calvados, if using. Simmer for another minute, then remove from the heat. Stir in the vanilla.

Carefully unmold the cake onto a rack and brush it generously with half the glaze, wait 10 minutes, then brush it with the remaining glaze. Cool completely.

Serves 8-10

Wednesday, April 22, 2015

Slice and bake chocolate chip cookies

Slice and bake choc chip cookies / Cookies com gotas de chocolate do tipo slice and bake

Since I’ve been hooked in slice and bake cookies – who can blame me, right? –, I thought “why not make the most iconic cookies in that same way?”

I found a recipe for slice and bake chocolate chip cookies in Fanny Zanotti’s cookbook and it looked wonderful, but I added a bit of whole wheat flour for the nutty flavor, decreased the amount of sugar and replaced the milk chocolate for dark chocolate: the cookies turned out delicious!

They are not super easy to slice because of the chocolate chunks, but I did not find that to be a problem: a bit of fixing with the tip of the fingers before baking and the cookies came out of the oven perfect.

I am sure that the idea of having a batch of chocolate chip cookies minutes away will make everyone reading me now quite happy, probably as happy as I am with the return of Mad Men, even though it is the last season.

Slice and bake chocolate chip cookies
slightly adapted from Paris Pastry Club: A Collection of Cakes, Tarts, Pastries and Other Indulgent Recipes

160g all purpose flour
40g whole wheat flour
½ teaspoon baking powder
¼ teaspoon table salt
90g unsalted butter, softened
110g light brown sugar
40g granulated sugar
1 teaspoon vanilla extract
1 egg
75g dark chocolate, chopped into small chunks – I used one with 70% cocoa solids

In a medium bowl, whisk together the flours, baking powder and salt. Set aside.
Using an electric mixer, beat butter and sugars until creamy and light. Beat in the vanilla, then the egg. Scrape the sides of the bowl. On low speed, mix in the dry ingredients just until combined. Stir in the chocolate.

Divide the dough into two equal parts. Place each on a piece of parchment paper; shape dough into logs. Fold parchment over dough; using a ruler, roll and press into a 3.5 cm (1.4in) log – like Martha does here – if dough is too soft, refrigerate it for 10 minutes before shaping into logs. Wrap in parchment. Chill in the fridge until very firm, about 3 hours (the dough logs can be kept in the fridge for up to 3 days or stored in the freezer for up to 1 month.)

Preheat oven to 180°C/350°F; line two large baking sheets with baking paper - I like Beyond Gourmet a lot.
Unwrap one log at a time (keep the other in the fridge). Cut log into 6mm (¼in) thick rounds; space 5cm (2in) apart onto prepared sheets. Bake until golden brown around the edges, about 10 minutes. Cool on the sheets for 5 minutes, then slide the paper with the cookies onto a wire rack and cool completely.

Packed airtight, the cookies will keep for about 5 days at room temperature or in the freezer for a month.

Makes about 25

Thursday, April 16, 2015

Pesto & courgette pasta bake for a courgette-eating husband

Pesto & courgette pasta bake / Rigatoni de forno com pesto e abobrinha

Those of you who cook for picky eaters know the feeling, I’m sure: when the person who always hated something starts eating that very thing it feels like a small victory.

When my husband decided to try mushrooms for the first time in his life and liked them, I started adding mushrooms to our meals and it was such a good thing (the vegetarian Bolognese is, indeed, delicious and I love cooking that recipe). Now that he’s come to the conclusion that he doesn’t really hate courgettes I have been adding them to our meals quite regularly, and this pasta bake was a really tasty way of having the vegetable.

I tweaked the recipe a bit – the original version called for crème fraîche, for instance, which I replaced for homemade ricotta – and got a lighter dish as a reward, not to mention the recipe is easy and tasted great: the crunchy bread and cheese topping makes the pasta extra special.

Pesto & courgette pasta bake
adapted from the always delicious Good Food magazine

150g rigatoni
1/3 cup basil pesto
200g ricotta – I used homemade
200g courgettes, coarsely grated
½ cup finely grated parmesan, divided use
salt and freshly ground black pepper
30g fresh breadcrumbs
extra virgin olive oil, for drizzling

Preheat oven to 180°C/350°F. Cook the pasta for 1-2 minutes less than the pack instructions say, so that it has a little more bite. Reserve 1 cup of cooking water.

Meanwhile, mix the pesto, ricotta, courgettes and half the parmesan together. Add the pasta and stir well, adding a little of the reserved water to create a good sauce consistency. Taste and season with salt and pepper.
Tip the pasta and sauce into a shallow baking dish and scatter over the breadcrumbs, then the remaining parmesan. Drizzle with a little olive oil and bake for about 15 minutes or until the topping is crisp.

Serves 2

Tuesday, April 14, 2015

Amaranth brownies and a hideous movie

Amaranth brownies / Brownies com amaranto

I was stuck in the mall days ago and there was nothing left for me to do but to watch a movie in the theater, but the problem is that there wasn’t much to choose from so I ended up watching Furious 7 – it was the first movie of the franchise I ever saw and my goodness, how can something be so awful, I’m still trying to understand.

I know I’m not the target audience, but I could not believe that something so poorly written – James Cameron’s school of embarrassing dialogues and bad jokes – and with such bad acting is this big of a hit and makes so much money at the box office, and don’t even get me started at the impossible stunts and naked ladies.

To each their own, I guess – there will probably be more of those hideous movies in the future, but I prefer my share of repetition in brownie form: there are about thirty brownie recipes on this blog and I bring you another one today, this time with amaranth flour: the ingredient leaves a bit of a gritty texture in the brownies and I don’t think that is a big deal, but if you don’t want that or don’t have any amaranth flour around use 150g all purpose flour instead and get yourself a really good traditional brownie.

Amaranth brownies
slightly adapted from trEATs: Delicious Food Gifts to Make at Home

150g unsalted butter, cubed
150g dark chocolate, finely chopped – I used one with 53% cocoa solids
1 cup (200g) granulated sugar
½ cup (88g) brown sugar, packed
3 eggs
1 teaspoon vanilla extract
¾ cup (105g) all purpose flour
1/3 cup (45g) amaranth flour
¼ teaspoon table salt

Preheat the oven to 180°C/350°F. Lightly butter a 20cm (8in) square baking pan, line it with foil leaving an overhang in two opposite sides and butter the foil as well.

Melt the butter and chocolate in a medium bowl over a saucepan of simmering water, ensuring that the water doesn’t touch the bottom of the bowl. Cool slightly.

Meanwhile, using the whisk attachment of an electric mixer, whisk the sugars, eggs and vanilla extract until the mixture is light and foamy. Whisk in the melted chocolate mixture. Fold in the all purpose flour, amaranth flour and salt.
Pour the mixture into the prepared pan. Bake for about 30 minutes: the sides and top should be set and the centre still moist.
Cool completely in the pan over a wire rack. Cut into squares to serve. Store in an airtight container for up to 1 week.

Makes 16

Friday, April 10, 2015

Simple banana cake for the weekend

Simple banana cake / Bolo simples de banana

I don’t know about you guys, but weekends for me mean cake: a slice for lazy breakfasts or to eat while watching a movie on the couch.

I told a while ago that it is difficult for me to bake with bananas because my husband and I eat them all in no time, but because of the summer that changed a bit: we continued to eat bananas like crazy, but because of the hot days they would become too ripe too fast, therefore now I have some bananas in my freezer and the first recipe I made with them was this cake, a recipe from the always great Stephanie Alexander.

The cake is insanely moist and tender, with a hint of cinnamon and a lovely banana flavor – I thought of icing it with a chocolate glaze, but then I thought that it was called “simple banana cake”, so I kept it simple and served it with a dusting of icing sugar only – it was a very good decision, for this cake needs nothing more than that.

Simple banana cake
slightly adapted from the oh, so wonderful The Cook's Companion: The Complete Book of Ingredients and Recipes for the Australian Kitchen

1 ½ cups (210g) all purpose flour
¼ cup (35g) whole wheat flour
1 teaspoon baking soda
pinch of salt
½ teaspoon ground cinnamon
125g unsalted butter, softened
1 ¼ cups (250g) granulated sugar
2 eggs
2 large ripe bananas, mashed with a fork
½ teaspoon vanilla extract
½ cup (120ml) buttermilk*
icing sugar, for dusting

Preheat oven to 180°C/350°F. Butter a 20cm (8in) square cake pan, line the base with baking paper and butter the paper as well. Sprinkle with flour and knock out the excess.

In a medium bowl, whisk together the flours, baking soda, salt and cinnamon. Set aside. Cream the butter and sugar until pale and fluffy. Beat in eggs, one at a time, beating well after each addition and scraping the sides of the bowl. On medium speed, beat in the banana and vanilla. On low speed, beat in the dry ingredients in three additions, alternating with the buttermilk in two additions, and mix just until incorporated. Pour into the prepared pan and bake for about 50 minutes, or until golden and risen and a fine skewer inserted in the center comes out clean. Cool cake completely in the pan over a wire rack. Dust with icing sugar before serving.

* homemade buttermilk: to make 1 cup buttermilk place 1 tablespoon lemon juice in a 240ml-capacity measuring cup and complete with whole milk (room temperature). Wait 10 minutes for it to thicken slightly, then use the whole mixture in your recipe

Serves 16

Tuesday, April 7, 2015

Fusilli with pine nuts and eggplant and the pasta dishes of my childhood

Fusilli with pine nuts and eggplant / Macarrão com pinoli e berinjela

Having Italian blood in my veins, pasta was something I ate my whole life: my mother, despite being from a German family, cooked pasta quite frequently, and when she died and my paternal grandmother came to live with us she cooked pasta a lot, too – my grandfather was Italian, so pasta was something quite natural for her.

There wasn’t, or at least I don’t remember, much variety when it came to pasta sauces: there were tomato sauce, Bolognese, béchamel and aglio e olio, and that was it. When I started buying cookbooks and reading recipes online, years ago, I realized that there was so much more that could be done with pasta, there were so many interesting sauces, that blew me away.

One way I love cooking pasta is using vegetables as sauce: you get tons of flavor while eating something delicious and good for you. This recipe comes from the great Antonio Carluccio and when I finished cooking the sauce and tried some it tasted to amazing I thought it could be also spread over crusty bread and served as bruschetta instead of tossed with pasta – that is how I intend to eat it next time. :D

Fusilli with pine nuts and eggplant
slightly adapted from the great Antonio Carluccio: The Collection

400g eggplants, trimmed and cut into small cubes
salt
90ml extra virgin olive oil
2 fat garlic cloves, finely chopped
4 tablespoons concentrated tomato paste
2 tablespoons pine nuts
2 heaping tablespoons capers, rinsed, drained and chopped
pinch of dried chilli flakes
freshly ground black pepper
15 large black olives, pitted and thorn into pieces
handful of fresh basil leaves, thorn
400g fusilli or other short pasta
finely grated parmesan, to serve

Leave the eggplant cubes in lightly salted water for 1 hour, then drain, squeeze out the water and pat dry on kitchen paper. Fry them in the oil for 3 minutes, stir in the garlic and fry, stirring occasionally, until the eggplant is golden brown. Add the tomato paste, pine nuts, capers, chilli flakes, black pepper and olives and cook over low heat for 10 minutes, stirring occasionally – add a little water if the mixture is too dry. Stir in the basil, cover and remove from the heat.
Cook the pasta in boiling salted water until al dente, then drain and mix well with the sauce. Serve with the parmesan.

Serves 4

Saturday, April 4, 2015

Almond and apricot slice-and-bake cookies

Almond and apricot slice-and-bake cookies / Biscoitos de amêndoa e damasco

Learning new things is something that I deeply love, no matter how simple they are, and I’ve told you already that having this blog has taught me a lot all these years: I’ve learned how to make great brownies, American pancakes, chocolate chip cookies… And that is just the food part.

There’s something else I’ve learned by having the blog: slice and bake cookies – having a cylinder of dough in the freezer that can be transformed in cookies whenever I want was a revelation to me, I couldn’t believe how easy that was. Since then I’ve been making these cookies quite regularly for they are both delicious and a great time saver (like the chocolate sablés I posted the other day).

These almond and apricot cookies are tasty and have a wonderful texture, it’s like they melt in the mouth – feel free to replace the apricots with other types of dried fruit to create your own flavor.

Almond and apricot slice-and-bake cookies
slightly adapted from Smitten Kitchen

1 cup (226g/2 sticks) unsalted butter, room temperature
2/3 cup (93g) confectioners’ sugar, sifted
2 large egg yolks
1 teaspoon vanilla extract
260g all-purpose flour
60g almond meal
pinch of salt
½ cup (60g) chopped dried apricots

Using an electric mixer, beat butter and confectioners’ sugar until light and creamy. Beat in the egg yolks, one at a time. Scrape the sides of the bowl. Beat in the vanilla. On low speed, beat in the flour, almond meal and salt just until combined. Stir in the apricots. Cover and refrigerate for 30 minutes.

Divide the dough into two equal parts. Place each on a piece of parchment paper; shape dough into logs. Fold parchment over dough; using a ruler, roll and press into a 3.5 cm (1.4in) log – like Martha does here. Wrap in parchment. Chill in the fridge until very firm, 2-3 hours (the dough logs can be kept in the fridge for up to 3 days or stored in the freezer for up to 1 month.)

Preheat oven to 180°C/350°F; line two large baking sheets with baking paper - I like Beyond Gourmet a lot.
Unwrap one log at a time (keep the other in the freezer). Cut log into 6mm (¼in) thick rounds; space 2.5cm (1in) apart onto prepared sheets. Bake until golden brown around the edges, 12-14 minutes. Cool completely on the sheets.

Packed airtight, the cookies will keep for about 5 days at room temperature or in the freezer for a month.

Makes about 50 cookies

Related Posts with Thumbnails