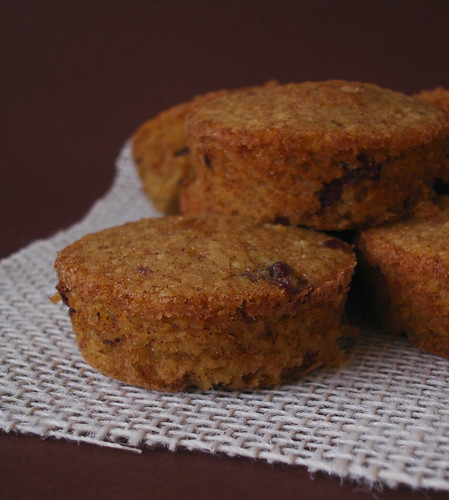
I might be a little disappointed with Twitter, but on the other hand I’m surrounded by wonderful people – and that feels great.
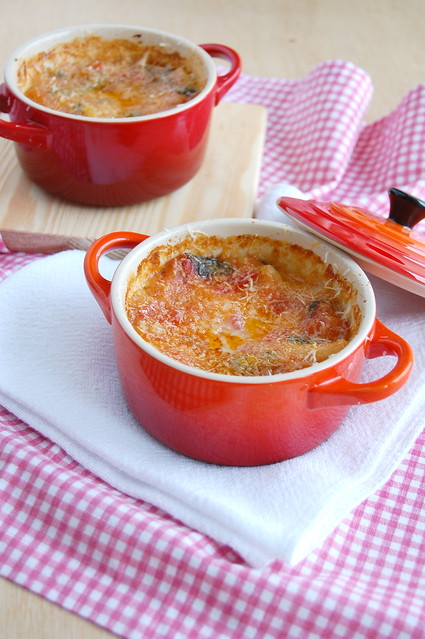
Not many of you know, but I work as an executive assistant and September, 30 is considered our day; the beautiful cocottes you see on the photo were a gift from one of my bosses – the one who also gave me the blowtorch for Christmas; needless to say, I was completely speechless after opening the gift wrap – I wasn’t expecting such thoughtful, beautiful gift.
And speaking of wonderful people, every time I post something savory around here I think of my dear friend Ivan – I’m just not sure he likes lasagna. :D
Mini lasagna
There’s no actual recipe for this: it’s just a matter of layering pasta, tomato sauce – Bolognese, if you prefer – and cheese; you can find great step-by-step photos on Tati’s blog – that is where I got the idea for this dish.
Thursday, October 7, 2010
Mini lasagna + great people
Wednesday, March 10, 2010
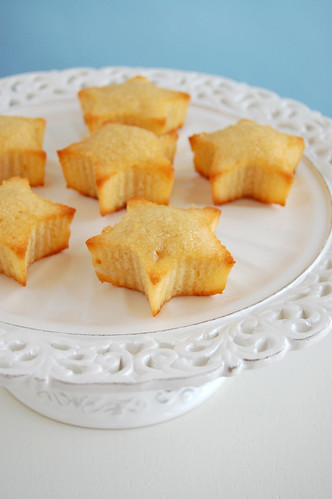
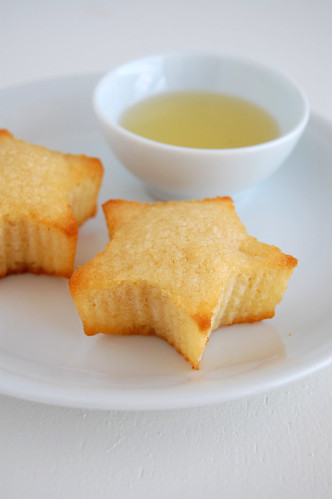
Pineapple coconut cakes with pineapple syrup
I heard a song on the radio yesterday that reminded me of my childhood days, when I spent wonderful vacations at my aunt Maisa’s - I used to sing that song while pretending my aunt’s floor polishing machine was a microphone... :) I was 8 back then.
Later on, once I’d started cooking and baking, she’d let me prepare whatever I wanted in her kitchen, savory or sweet – that was so much fun. One of the cakes I used to bake was a simple yellow cake with pineapple slices on the bottom of the pan – everyone loved it. These little cakes reminded me of the one I used to bake at my aunt’s, but are much simpler and equally delicious – the addition of coconut makes them extra special.
Pineapple coconut cakes with pineapple syrup
from Australian Gourmet Traveller
Cakes:
65g unsalted butter, softened
75g caster sugar
1 egg
90ml buttermilk
¾ cup + ½ tablespoon (110g) self-rising flour
1/3 cup (30g) unsweetened desiccated coconut
¼ cup (25g) sweetened shredded coconut
40g pineapple, finely diced
Pineapple syrup:*
350g pineapple, coarsely chopped
130g caster sugar
3 small limes, juice only
50ml white rum
For pineapple syrup, combine pineapple, sugar, lime juice and ½ cup (120ml) water in a saucepan and stir over medium-high heat until sugar dissolves. Bring to the boil and simmer for 15 minutes or until syrupy. Cool, add rum and strain, discarding solids (or eat them, like I did). :)
Preheat oven to 160°C/320°F. Butter and flour ten 1/3 cup (80ml) brioche or dariole pans.
Beat butter and sugar using an electric mixer until pale and fluffy, add egg and buttermilk and beat to combine. Stir in flour, the two types of coconut and pineapple, then spoon mixture into prepared pans. Bake for 20 minutes or until golden and a skewer withdraws clean. Turn cakes from moulds, pour over half the syrup and cool on a wire rack. Serve at room temperature with remaining syrup.
* too much syrup; half of this amount is enough for all the cakes
Makes 10 – I halved the recipe above and got 12 mini cakes (6 using 3 tablespoon capacity star shaped pans + 6 using 1/3 capacity muffin pans)
Thursday, March 4, 2010
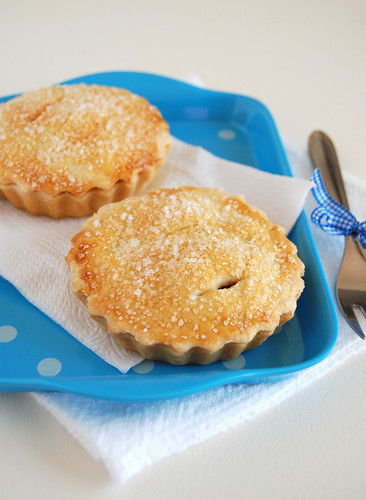
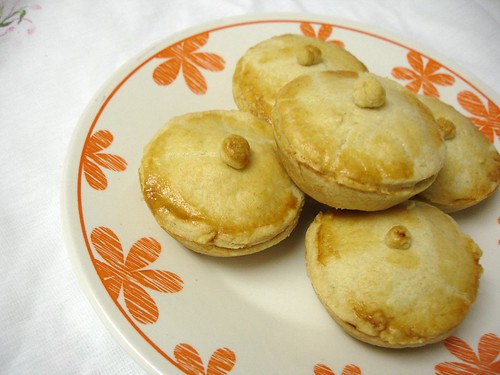
Apple and cinnamon mini pies
Thank you all for your votes and lovely comments – you guys are the best!
The award nomination may have been a huge surprise to me, but your reaction to it was not – you’ve supported me right from the start and have become a very important part of this blog. It is wonderful to share my kitchen experiments and love for food with you – it really makes my days a whole lot better. :)
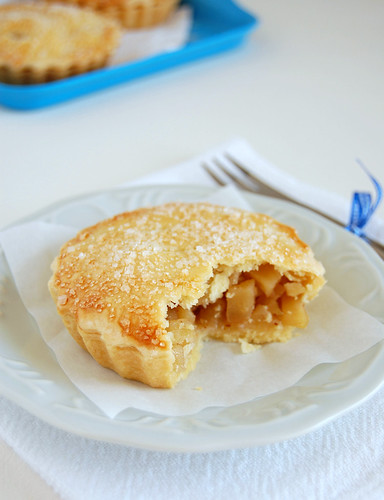
Speaking of surprises, these mini pies looked and sounded simple – and indeed making them was not hard – but I did not imagine the filling would be so good.
Apple and cinnamon mini pies
filling adapted from Donna Hay magazine, pastry from Modern Classics Book 2
Pastry:
1 cup + 1 tablespoon (150g) all purpose flour
1 ½ tablespoons caster sugar
1/3 cup (75g) cold unsalted butter, chopped
1-1 ½ tablespoons iced water
Filling:
1 tablespoon unsalted butter, room temperature
1 large apple, peeled, cored and finely diced
2 ½ tablespoons caster sugar
¼ teaspoon ground cinnamon
2 tablespoon golden raisins
½ teaspoon corn starch
½ teaspoon water
1 egg yolk, lightly beaten with 1 teaspoon milk
granulated sugar, for sprinkling
Start by making the pastry: process the flour, sugar and butter in a food processor until the mixture resembles fine breadcrumbs. White the motor is running, add enough iced water to form a smooth dough and process until just combined. Knead the dough lightly, wrap in plastic wrap and refrigerate for 30 minutes.
Now, prepare the filling: place the butter in a medium saucepan over medium heat and cook until melted. Add the apples, sugar, cinnamon and raisins and stir until the sugar is dissolved. Cook for 5 minutes or until the apples are just tender. Place the corn starch and the water in a bowl and stir to combine. Add to the apple mixture and cook, stirring, for a further minute. Remove from the heat and allow to cool completely.
Preheat the oven to 180°C/350°F; butter four 9cm tartlet pans.
Roll out the pastry on a lightly floured surface or between two sheets of non stick baking paper, until 3mm thick, and cut eight 12cm circles from it. Line the prepared pans with four of the dough circles – make sure you leave a tiny overhang of dough. Divide the filling between each pan and top with the remaining dough – make sure you seal the filling well inside the tartlets, sticking the overhand of dough and dough circle together, pressing the edges with the back of a spoon; otherwise the lid might get loose after the pies are baked.
Use a small kitchen knife to trim the excess and to score the tops of the tartlets. Brush with the egg wash and sprinkle with the sugar.
Bake for 25-30 minutes or until golden.
Makes 4
Friday, October 30, 2009
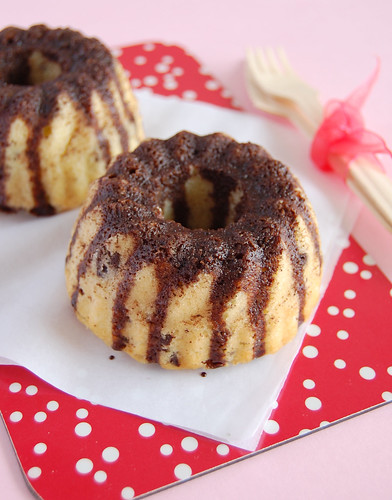
Chocolate chip pound cakes
Before today’s recipe, I should warn you about something: I’m completely in love with these mini bundt pans, so get ready to see them around here quite a lot. Even a simple recipe like a butter cake gets a whole new dimension baked in such pretty pans. :D
The original recipe called for just a sprinkling of cocoa powder over the cakes, but I thought they deserved more: the chocolate glaze my mom used to pour over her delicious carrot cake. :)
Chocolate chip pound cakes
from Donna Hay magazine
250g unsalted butter, softened
250g caster sugar
1 teaspoon vanilla extract
4 eggs
250g all purpose flour, sifted
¼ cup (60ml) milk
¾ cup (116g) chopped dark chocolate
Chocolate glaze:
2 tablespoons cocoa powder, sifted
3 tablespoons sugar
1 tablespoon unsalted butter, room temperature
1 ½ tablespoons milk
Preheat the oven to 160ºC/320ºF; lightly grease a 20cm (8in) round cake pan and line the base and sides with non-stick baking paper.*
Place the butter, sugar and vanilla in the bowl of an electric mixer and beat for 10-12 minutes or until light and creamy. Add the eggs, one at a time, beating well after each addition. Add the flour and beat well to combine. Fold through the milk and chocolate.
Spoon the mixture into the prepared pan and bake for 50-55 minutes or until cooked when tested with a skewer. Allow to cool in the pan, then unmold into a serving plate.
For the glaze: mix all the ingredients in a small saucepan and cook over high medium until it boils and cocoa and sugar are dissolved.
Remove from heat and pour over the cake.
* I halved the recipe, used 1-cup (240ml) capacity mini bundt pans and got 4 cakes; I generously buttered the pans and unmolded the cakes right after taking them out of the oven
Serves 8
Wednesday, May 6, 2009
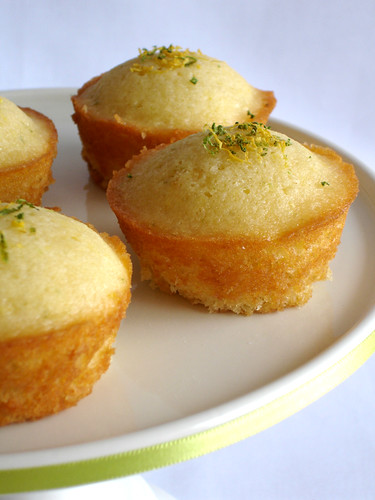
Mini citrus syrup sponges
These little darlings gave me such a hard time while unmolding them that I kept thinking of a song I love, Erasure’s “Here I go impossible again”. :D
The workout made me wonder why Ms. Lawson’s photo for these mini cakes shows them still in the pan they were baked, but it was worth it: the mini sponges were delicious and had an amazing texture – the syrup really gets into them, enhancing the citrus flavor. Yum!
I used both lemons and limes here but if you want to make the original recipe use just limes.
Mini citrus syrup sponges
from How to Be a Domestic Goddess
½ cup (113g) unsalted butter, softened
½ cup + 1 tablespoon (112g) sugar
2 large eggs
zest of 1 lime
zest of 1 lemon
1 cup + 2 tablespoons (160g) self-rising cake flour
pinch of salt
4 tablespoons milk
Syrup:
2 tablespoons lime juice, plus zest for decoration
2 tablespoons lemon juice, plus zest for decoration
½ cup (70g) confectioners’ sugar
Preheat the over to 180ºC/350ºF; generously butter an 8-cup mini-loaf pan.
Cream together the butter and sugar, and add the eggs and zest, beating them in well. Add the flour and salt, folding in gently, and then the milk. Spoon into the mini-loaf pan, and cook for 25 minutes.
While the cakes are cooking, prepare the syrup by putting the lime and lemon juices and sugar into a small saucepan and heating gently so that the sugar dissolves.
As soon as the mini-sponges are ready, take them out of the oven and prick them with a cake-tester all over. Pour over the syrup evenly. Try to let the middle absorb the liquid as well as the sides, then leave it to soak up the rest. Don’t try to take the cakes out of the pan until they have cooled slightly and the syrup looks like it has been absorbed, but be aware that if you leave these to cool completely they might be very difficult to get out of the pan.
So, after an hour or two, turn them out onto a rack and grate some lime zest over them before serving.
Makes 8 – I halved the recipe, used a muffin pan (each well holds 1/3 cup batter) and got 5 mini cakes
Wednesday, April 22, 2009
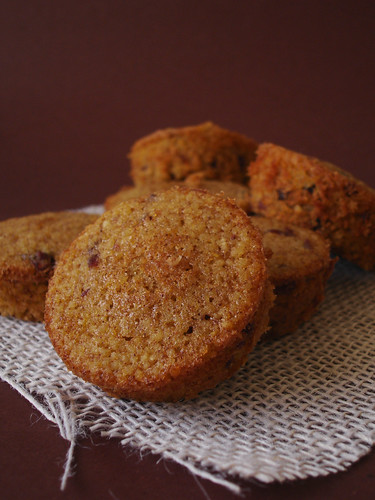
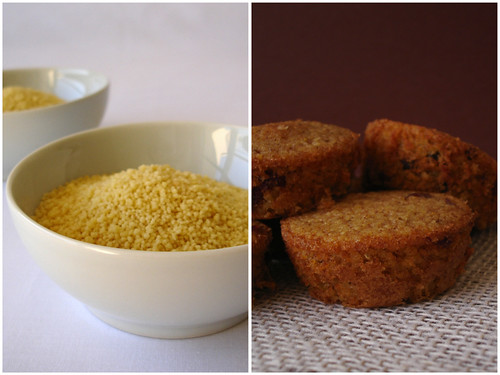
Little couscous cakes
I sometimes get the weirdest looks for saying this, but it’s true: I love the cold. To me, cold days are perfect for staying in, baking, watching TV under the covers... So good!
My mom was from Santa Catarina – in the South of Brazil - and I spent many vacations there as a little girl. My favorite time of the year there was in the middle of the winter, in July – my aunts used to prepare delicious treats and (very) hot chocolate for me and my brother. Some days were so freezing that my mom did not let us play outside, but I didn’t mind: I loved writing and playing school with my imaginary “students” – I was always the teacher, of course. :D
I saw these cakes and they screamed “fall” – perfect to celebrate my second favorite season.
Little couscous cakes
from Little Cafe Cakes
¼ cup (60ml) rum or brandy
½ cup (120ml) olive oil
finely grated zest and juice of 2 oranges
1 cup (180g) couscous
2 eggs
¾ cup (150g) sugar
½ cup (70g) flour, sifted
2 teaspoons baking powder
2 teaspoons ground cinnamon
¼ teaspoon salt
¾ cup (82g) dried cranberries
Preheat the oven to 170ºC/338ºF. Grease and flour 12 individual cake or muffin pans or one 20cm springform pan.
In a saucepan heat rum or brandy with oil, orange zest and juice. Place couscous in a bowl and pour over hot liquid. Cover with plastic wrap and leave to steam for 10 minutes. Uncover and fluff up couscous with a fork.
Whisk eggs and sugar together until thick and pale. Stir this mixture into couscous along with remaining dry ingredients and cranberries.
Spoon into prepared pans and bake for 15 minutes or until cakes spring back when touched.
Makes 12 – I halved the recipe and got 9 (my pans hold 1/3 cup batter each)
Thursday, November 8, 2007
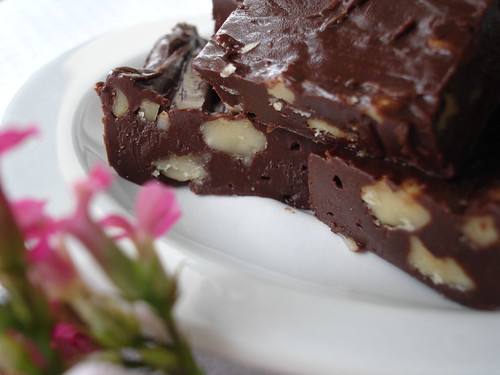
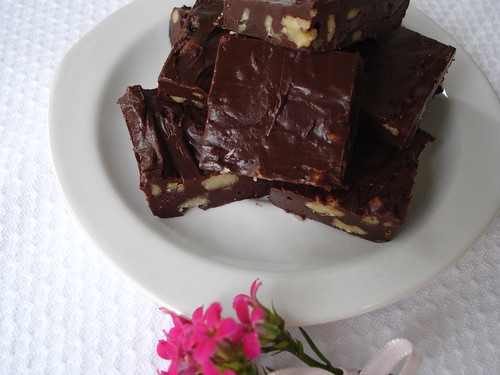
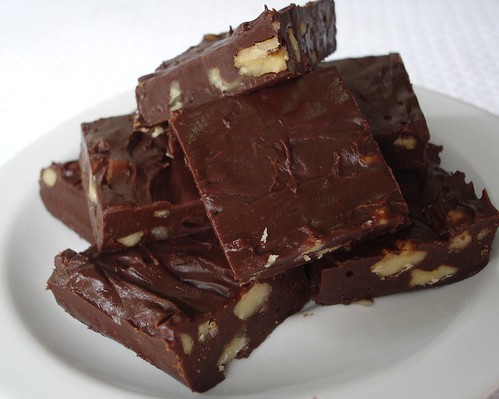
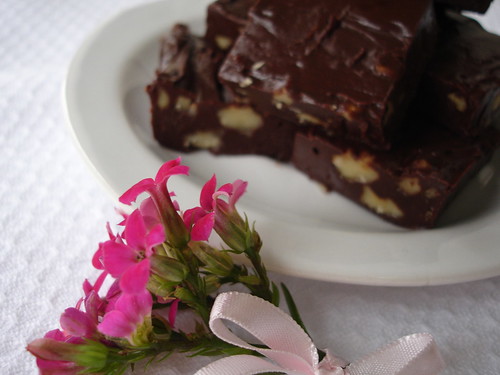
Fabulous five-minute fudge
One of my Brazilian blogger friends – a very witty and smart one, by the way – wrote a post a couple of months ago about how much her mother likes to prepare homemade gifts – food, to be more specific. There’s a kind of pie she makes for her friends and coworkers that is so famous I wish I lived nearby so she could bake one for me, too. :D
I like to made food gifts for my friends, and I’m sure many of you do, too. I’m always thinking of baking cookies for one, making candy for another…
I wanted to send a gift to a friend and the lovely Lynn helped me choose what to send. She suggested brownies or fudge – they would be easier to pack and sturdy enough to be mailed. I used this recipe – and what a wonderful website that is. So many great recipes and beautiful photos that it is almost impossible to choose one…
Ju, dear, it was wonderful to know you liked the gift!
Fabulous five-minute fudge
2 cups (12oz/336g) semisweet chocolate pieces
2/3 cup sweetened condensed milk (196g/one-half of a 14-ounce can)
1 tablespoon water
¾ cup (90g) chopped walnuts, toasted if desired
1 teaspoon vanilla
Line a cookie sheet with waxed paper; set aside. In a medium microwave-safe bowl, combine chocolate pieces, sweetened condensed milk, and water.
Microwave, uncovered, on 100% power (high) for 1 minute; stir. Microwave about 1 minute more, or until chocolate is melted and mixture is smooth, stirring every 30 seconds. Stir in nuts and vanilla. Pour mixture onto prepared cookie sheet and spread it into a 22x15cm* (9x6-inch) rectangle, or drop mixture by rounded teaspoons onto prepared cookie sheet.
Chill fudge about 30 minutes or until firm. Cut into 3.5cm (approx. 1-1/2-inch) squares
Makes 24 pieces
* I used a 27x15 cm baking sheet and spread the fudge completely inside it – I got 28 squares.
Tuesday, October 23, 2007
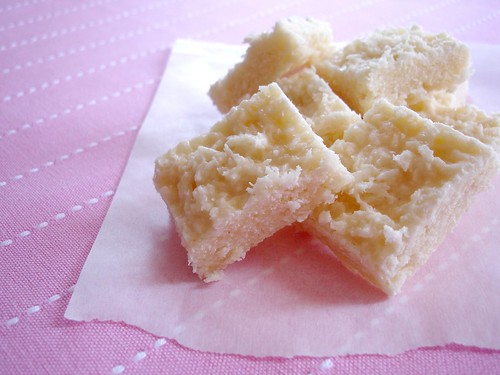
Sweetened condensed milk cocada
Going through one of my cookbooks in search of a salad recipe, I “accidentally” opened it in the sweet chapter. :)
In one of his twice a year sudden urges for sweets, João saw a photo of cocada (a very traditional candy made of coconut) and asked me to make it.
As I would not be able to find freshly grated coconut to make that specific recipe, I remembered something I had seen on a dear friend’s blog – a fantastic cocada recipe that called for sweetened condensed milk.
The cocadas were simply wonderful! I had only 1 – the horror, the horror – but João ate several.
While mixing the ingredients in the pan, I thought the dough was a bit dry and decided to add a little milk. On the following day, I wrote to my friend and she told me that after you start cooking the mixture it comes together correctly.
Anyway, the recipe worked perfectly and has already become one of this blog’s favorites.
Sweetened condensed milk cocada
1 can sweetened condensed milk (395g)
2 cans granulated sugar – use the empty condensed milk can to measure it
200g unsweetened desiccated coconut
1 teaspoon unsalted butter, room temperature
6 tablespoons milk – I used 1% fat, the one I had at home
Grease a 30x20 cm baking pan with butter. Set aside.
Mix the condensed milk, sugar, coconut, butter and milk in a heavy-bottom saucepan and cook over medium-low heat, stirring constantly – when the bottom of the pan starts to show and the mixture is a bit thicker (20-25 minutes), remove from heat and immediately pour the mixture into the prepared pan.
Set aside to cool and then cut into squares.
Makes 38 pieces
Monday, September 3, 2007
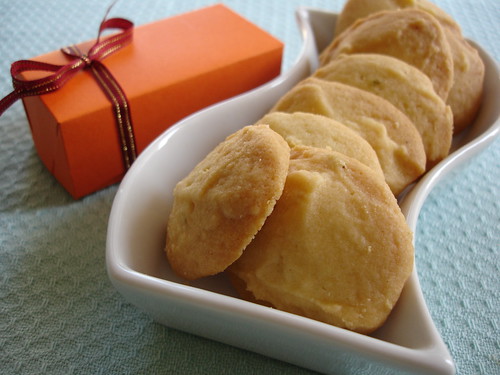
Melting moments (or how I can’t pipe to save my life)
Before I tell you guys about the cookies above, I’d like to answer one question made by a lovely friend of mine (too bad her blog is in Portuguese, she writes beautifully) – she asked me which are my all time favorite songs. I have been thinking of it for almost a week now and came up with the following list - which I think I’ll regret the moment I hit the “publish post” button:
- Reel around the fountain - Smiths
- A new flame – Simply Red
- Loving you hating me – Soft Cell
- The 7th stranger – Duran Duran (the Arena live version)
- Walking on broken glass – Annie Lennox
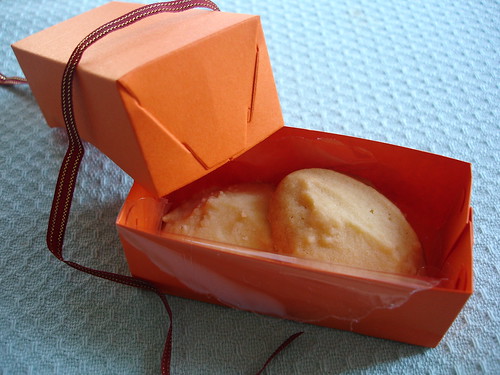
Now, the food: I made these small boxes of cookies for my sister’s birthday party – she gave them away as gifts for her guests.
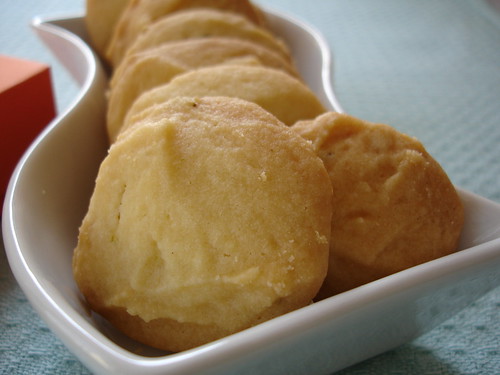
Everything was going well until I had to pipe the cookies onto the baking sheet. I had never seen so many deformed cookies in my entire life. They looked awful!
I baked the first batch anyway, somehow hoping they would morph into something pretty while in the oven – which of course never happened, since I’m not telekinetic.
I shaped the rest of the dough using 2 spoons. Everybody loved their little gifts and kept saying how cute they looked and how delicious they tasted and all I kept thinking was “you should have seen my face by the time I finished these…”
If you want to see some really beautiful melting moments, check the ones the sweet and talented Valentina made the other day.
Melting moments
adapted from Modern Classics Book 2
175g (6oz) butter, softened
¼ cup (32g) confectioner’s sugar
grated zest of 1 lime
1 cup (135g) all purpose flour, sifted
¼ cup (25g) cornstarch, sifted
Preheat the oven to 180ºC/350ºF. Place the butter, icing sugar and zest in a bowl and beat with electric beaters until light and fluffy. Stir in the flour and cornstarch until combined.
Place the mixture into a piping bag fitted with a fluted nozzle. Pipe 3cm (1in) round onto a baking tray lined with non-stick baking paper, allowing room for spreading.
Bake for 12-14 minutes or until golden. Cool on trays.
Makes 32
Friday, August 24, 2007
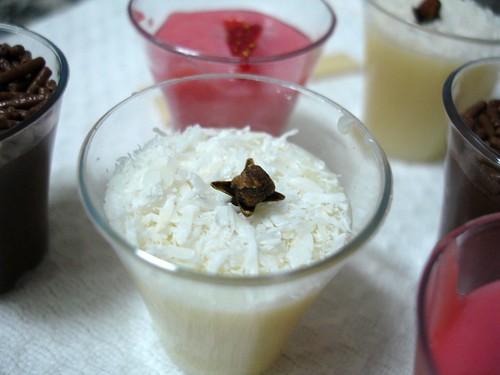
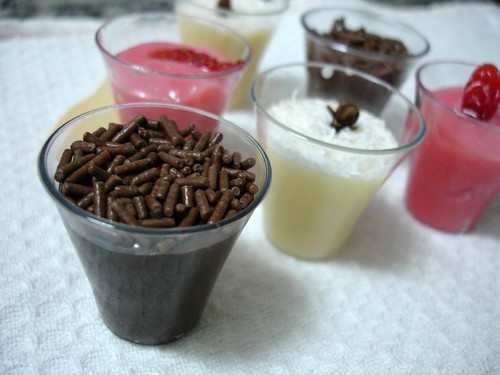
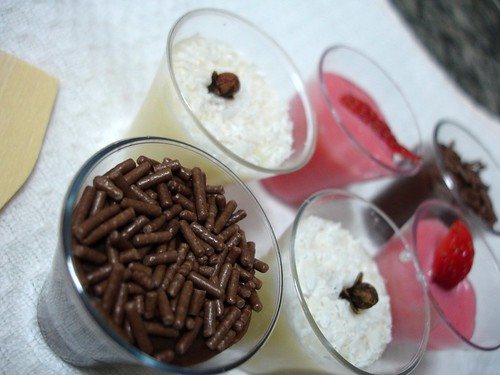
Brazilian candy in tiny cups: brigadeiro, beijinho and bicho-de-pé
Brigadeiro and beijinho are very popular types of candy served in parties here in Brazil - bicho-de-pé is a bit less usual, but equally adored.
They all start with a can of sweetened condensed milk - something we love around here. Many of our dessert/candy recipes call for it.
The difference is in the flavors: beijinho is made with coconut, brigadeiro is chocolatey and bicho-de-pé is (artificially) strawberry flavored.
After the candy is cooked and left to cool down, it is shaped into balls and rolled on some sort of coating (granulated sugar, desiccated coconut, chocolate sprinkles) and then placed into very small fluted paper cups (don’t mind the horrible photo, I made these for her birthday last year):
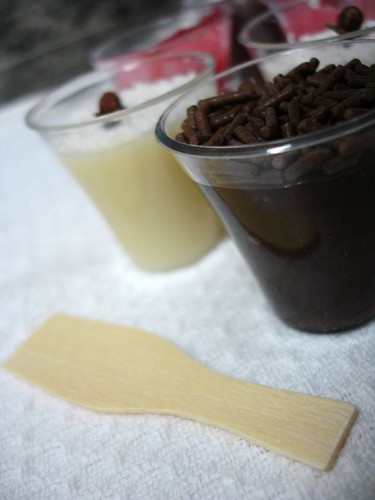
Since I was making all the candy without any help - my sister/birthday girl/sous chef had another birthday party to go to that afternoon - I decided to spare some time and use an idea I'd seen in a couple of websites - to serve the candy inside small cups. I bought tiny plastic cups (15ml each), poured the candy while still hot inside them (before the mixture starts to firm up) and served with small wooden spoons.
The candy was a huge hit at the party – a lot more than the cake! :)
Beijinho
1 can sweetened condensed milk (395g)
1 tablespoon unsalted butter
5 tablespoons unsweetened desiccated coconut
Mix the condensed milk, butter and coconut in a saucepan and cook over low heat, stirring constantly – when the bottom of the pan starts to show and the mixture is a bit thicker, remove from heat and immediately pour the candy into the cups.
After it’s completely cool, sprinkle with unsweetened desiccated coconut and decorate with a clove.
If you want to shape the candy into balls, pour the mixture onto a greased plate and let it cool completely before using. Lightly coat your hands with butter, grab small portions of candy and roll into balls. Roll them in unsweetened desiccated coconut or granulated sugar and place in small fluted paper cups. Decorate each ball with a clove.
Makes 25 tiny cups (15ml) or 40 balls (approx. 2cm each)
Brigadeiro
1 can sweetened condensed milk (395g)
1 tablespoon unsalted butter
2 tablespoons cocoa powder
Mix the condensed milk, butter and cocoa powder in a saucepan and cook over low heat, stirring constantly – when the bottom of the pan starts to show and the mixture is a bit thicker, remove from heat and immediately pour the candy into the cups.
After it’s completely cool, sprinkle with chocolate sprinkles.
If you want to shape the candy into balls, pour the mixture onto a greased plate and let it cool completely before using. Lightly coat your hands with butter, grab small portions of candy and roll into balls. Roll them in chocolate sprinkles and place in small fluted paper cups.
Makes 25 tiny cups (15ml) or 40 balls (approx. 2cm each)
Bicho-de-pé
1 can sweetened condensed milk (395g)
1 tablespoon unsalted butter
½ package (40g) strawberry flavored gelatin powder
Mix the condensed milk, butter and gelatin in a saucepan and cook over low heat, stirring constantly – when the bottom of the pan starts to show and the mixture is a bit thicker, remove from heat and immediately pour the candy into the cups.
After it’s completely cool, sprinkle with granulated sugar – I preferred to use a tiny piece of strawberry.
If you want to shape the candy into balls, pour the mixture onto a greased plate and let it cool completely before using. Lightly coat your hands with butter, grab small portions of candy and roll into balls. Roll them in granulated sugar and place in small fluted paper cups.
Makes 25 tiny cups (15ml) or 40 balls (approx. 2cm each)
Wednesday, June 6, 2007
Walnut camafeus
For this Monthly Mingle, I wanted to make something Brazilian – brigadeiro crossed my mind. But I decided to make something a little bit fancier and prettier.
Camafeus are bite-sized sweets served in parties here, especially weddings - it is a Portuguese candy that has become part of our cooking traditions.
I tried to find more info about the origin of camafeus but didn’t – I read many, many years ago somewhere that its name comes from cameo, but I’m not sure.
I used a recipe from a Brazilian website.
Happy Birthday, Meeta! And happy blog anniversary!
Walnut camafeus
250g ground walnuts
2 cans (395g each) sweetened condensed milk
½ tablespoon cocoa powder
1 tablespoon unsalted butter, room temperature
3 eggs
3 egg yolks
Decoration:
walnuts cut in 4 pieces – for this recipe I used 180g walnuts
fondant*
edible golden glitter
clear spirit – I used cachaça
Place all the ground walnuts, condensed milk, cocoa powder, butter, eggs and egg yolks in a large saucepan. Mix well. Cook over low heat, stirring constantly – when the bottom of the pan starts to show and the mixture gets thick, remove from heat. Pour into a large greased plate and set aside to cool. Don’t use it unless it’s completely cool.
Grease your hands with a little butter and grab small portions of the mixture. Form into small “sausages”, about 3.5cm long and 2cm thick. Set aside.
Place the fondant in a glass bowl and set over gently simmering water and until it’s melted – keep it warm otherwise it will harden again. Very carefully, drop each “sausage” into the fondant and remove quickly, covering it completely. Place over waxed paper. Place a ¼ walnut over each candy – you need to be quick and do this while the fondant is still soft.
Place the camafeus in paper cases.
I painted each ¼ walnut before using them: place some edible golden glitter in a very small bowl and add a few drops of clear spirit to dissolve the powder. Mix until a thin paste forms. Using a small paintbrush, paint each ¼ walnut and place on waxed paper. Set aside to dry for at least 2 hours.
*too complicated to make at home. I used store-bought – it’s not expensive and will last for a long time
Makes 120 camafeus
Monday, June 4, 2007
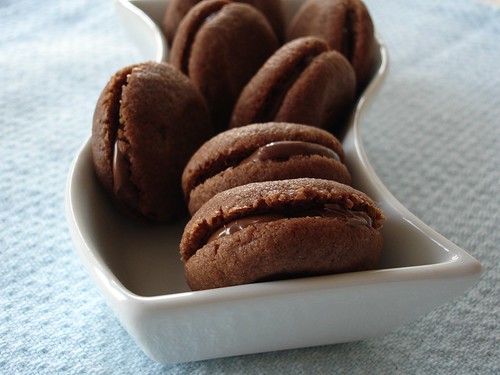
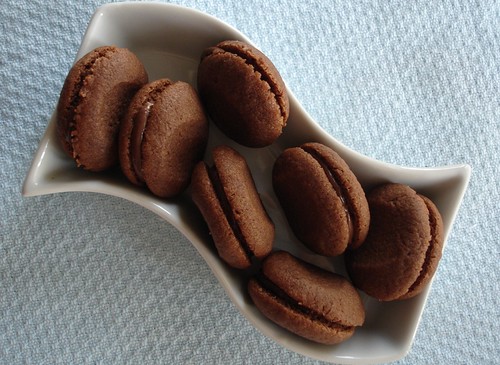
Nutella filled cookies
My husband is not into sweets but he tells everybody about the cakes, cookies and other stuff I make. It’s funny because I don’t even know more than half of those people. :)
When I started going to his dentist, the receptionists who work there kept asking me about my recipes, sweets, etc.
“Joao says they’re wonderful” – said one of the girls. “But he won’t even try them”, I replied. That was even funnier – how is he supposed to know if the sweets are good?
To clear that out, I baked these cookies and took them to the doctor’s office – maybe now the girls will believe my husband again. :)
Nutella filled cookies
adapted from Modern Classics Book 2
65g (2 oz) cold butter, chopped
32g (¼ cup) icing sugar
68g (½ cup) plain flour
2 ½ teaspoons cornflour (cornstarch)
1 tablespoon cocoa powder
1 egg yolk
Nutella
Preheat the oven to 180ºC/350ºF.
Process all the ingredients in a food processor until a soft dough forms – my processor is tiny so I made this by hand.
Wrap in plastic and refrigerate for 30 minutes.
Roll teaspoonfuls of the mixture into balls, place on baking trays lined with nonstick baking paper and flatten slightly.*
Bake for 5-7 minutes or until the bases are lightly cooked – the first batch was too soft so I baked the remaining cookies for 10 minutes.
Cool on trays.
Sandwich the cookies with chocolate ganache – I used Nutella. They’re really delicate, so be careful when spreading the filling.
* the cookies on the book were really flat – maybe I should have used less dough in each ball.
Makes 22 filled cookies – I got 18.
Sunday, May 20, 2007
Corn fudge
I had to make a recipe with corn to take part in one event for blogs written in Portuguese. You guys might think “Corn? So easy!” – but that’s the whole point: I wanted to make something different, unusual. Something new.
It took me forever to choose something but I finally did: this corn fudge, which I found at the Brazilian Nestlé website.
It’s similar to brigadeiro, but flavored with corn instead of chocolate. A pinch of cinnamon reminds us of curau – a sort of corn pudding I’ll be making soon to share with you here.
Different and new, indeed, and also delicious.
Corn fudge
1 can (200g) corn kernels, drained and rinsed
1 can (395g) sweetened condensed milk
1 ½ tablespoons milk – I used low fat
2 tablespoons unsalted butter
½ teaspoon ground cinnamon
butter, for greasing
granulated sugar, to coat the fudge balls
Place the corn kernels and the milk in a blender or food processor and purée them. Push the purée through a sieve and place it in a medium saucepan. Add the condensed milk, cinnamon and butter and mix well.
Cook over low heat, stirring constantly until the bottom of the pan starts to show – it will be thicker and bubbly (20 minutes). Remove from heat, pour in a greased plate and set aside to cool completely.
Grease your hands with a bit of butter and roll portions of fudge into balls – this will be easier if you refrigerate the fudge.
Roll them in the granulated sugar and place in small fluted paper cups.
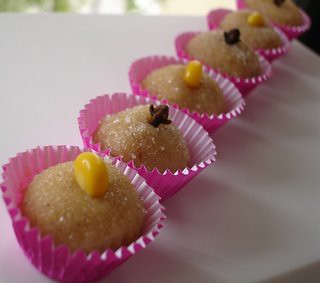
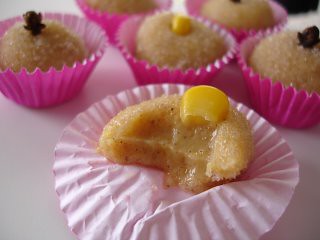
Decorate them as you wish – I had some extra kernels so I used them (an idea I saw at the website, too) and I also used cloves.
Makes 40-45
Monday, April 23, 2007
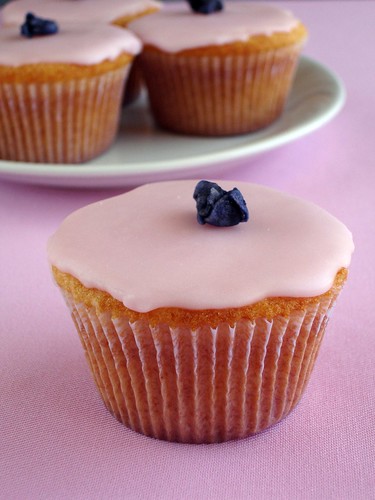
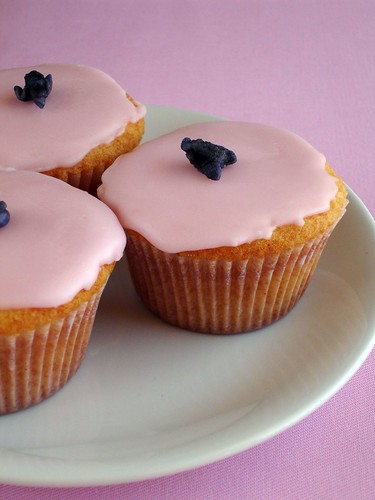
Pink cupcakes with crystallized violets
The theme for this Sugar High Friday, hosted by Monisha, is Flower Power. I had a hard time trying to find a recipe for that!

I ended up making these cupcakes decorated with these lovely crystallized violets I received as a gift from a dear friend.
Recipe taken from Donna Hay Magazine, issue 29 - I used a conversion table from one of her books to get the amounts in both cups and grams.
Pink cupcakes with crystallized violets
from Donna Hay magazine
250g unsalted butter, softened
225g (1 cup) sugar
1 teaspoon vanilla extract
4 eggs, lightly beaten
270g (2 cups) all-purpose flour
2 teaspoons baking powder
125ml (¼ cup) milk
Pink icing:
155g (1 ¼ cups) icing/confectioner’s sugar, sifted
1 tablespoon hot water – I added a little bit more and totally ruined it
1-2 drops rose food coloring
crystallized violets – as many as you want
Preheat the oven to 160ºC/320ºF. Sift flour and baking powder together and set aside.
Place the butter, sugar and vanilla in the bowl of an electric mixer and beat for 8-10 minutes, until light and creamy. Gradually add the eggs, beating well after each addition. Add the flour and baking powder, alternating with the milk, and beat until the mixture forms a smooth batter.
Spoon the mixture into ¼ cup capacity muffin tins lined with patty cases to ¾ full. Bake for 18-20 minutes – mine needed 30 – or until golden. Cool on a wire rack.
To make the icing, place the sugar, water and food coloring in a bowl and mix until smooth. Use a palette knife to spread the icing over the cupcakes.
Place 1-2 violets over each cupcake.
Makes 30 – I halved the recipe and got 12.
Thursday, April 19, 2007
Hearts of palm empadinhas and Limeade with raspberries
I loved this Blog Party theme, hosted by The Happy Sorcerer: picnic food!!! Yay!!!
My parents, my brother and I used to have great picnics when I was a kid. We spent great days in a park in São Paulo. My brother and I would play and run around and after all that “work out” we’d have the wonderful snacks prepared by my mom. That was great!
To take part I decided to make a very Brazilian recipe: empadinhas. These are my first empadinhas so I still need to get the hang of it – some of them almost opened up while in the oven.
Besides that, they are wonderful – the crust is flaky without being too crumbly and the filling completes it perfectly.
I got the dough recipe from a very talented Brazilian foodie and the filling was adapted from a Brazilian website.
Step-by-step photos by João.
Hearts of palm empadinhas
Dough:
450g (3 ¼ cups) all purpose flour
1 teaspoon salt
120g unsalted butter, cold and diced
100g shortening, cold and diced
1 large egg, lightly beaten
70ml ice water
Filling:
4 tablespoons vegetable oil – canola would be great 2 medium onions, chopped2 tomatoes, seeds removed, finely diced580g (4 cups) hears of palm, finely chopped60g (½ cup) olives, chopped4 tablespoons cornstarch 240ml (1 cup) milk salt
Egg wash:
1 egg yolk – I wasn’t paying attention and used the whole egg :S
1 tablespoon water
Place the flour, salt, butter and shortening in a food processor and pulse until it resembles breadcrumbs. Add the egg and water and process until a soft and smooth dough forms. Wrap in cling film and refrigerate for 30 minutes.
Since my food processor is tiny, I made the dough by hand: place the flour, salt, butter and shortening in a bowl and rub with the tip of your fingers until it resembles breadcrumbs. Add the egg and water, mix well and knead until a soft and smooth dough forms. Wrap in cling film and refrigerate for 30 minutes.
For the filling: in a large pan over high heat, heat the oil and add the onions. Cook until golden. Add the hearts of palm, tomatoes and olives and cook for 8-10 minutes.
In a cup, place the cornstarch and milk and mix well using a fork. Add this mixture to the hearts of palm and stir constantly until creamy. Season to taste, remove from heat and set aside to cool.
Preheat the oven to 180ºC/355 ºF.
Grab a small amount of dough and flatten it. Place it inside an empadinha pan - or use a muffin pan - and line the bottom and the sides with the dough. Repeat the process with other pans.
Place tablespoons of filling inside the prepared pans.
Roll portions of dough and cut circles. Place the circles on top of empadinhas and seal well.
Brush with the egg wash and bake for 30 minutes or until golden – in the last 5 minutes I raised the oven temperature to 200ºC.
Remove from the oven and set aside it cool for 5 minutes. Unmold the empadinhas and serve.
Makes about 45 empadinhas, about 5cm each
Limeade with raspberries
1 large lime
200ml water
1 ½ tablespoons frozen raspberries
sugar
ice
Squeeze the lime, add the water and sugar to taste. Pour in a nice glass and add the raspberries and ice.
Serve immediately.
Makes 1 glass.
Monday, April 16, 2007
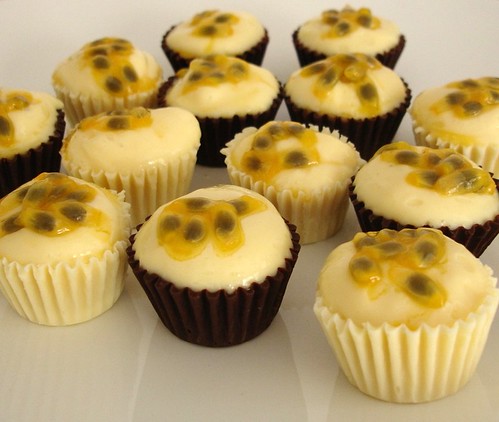
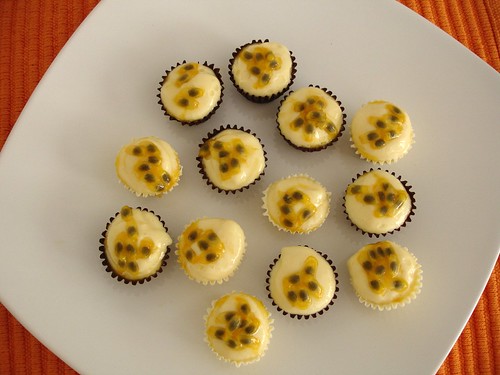
Hay, Hay, it's Donna Day: Passion fruit mousse in tiny chocolate cups
When Helene announced the theme for this HHDD I was petrified – despite playing around in the kitchen for as long as I can remember, I haven’t made many mousse recipes so far. Panic.
I wanted to make 100 mousse recipes and 10 seconds later I wanted to make none. And then I remembered little chocolate cups filled with ganache I had seen in some weddings and also in some websites. I thought: I’m filling the cups with mousse!
In theory everything sounded wonderful, but in the real world things didn’t work out the way I expected them to. The cups weren’t beautiful as the ones in my head and, camera in hand, I couldn’t find a nice way to photograph them.
As I missed Peabody’s HHDD about cheesecakes and I don’t want to miss another one, there you go.
One thing I must say in my defense: the condensed milk balances well the tart flavor of passion fruit – so you won’t look like her when you take a bite.
Passion fruit mousse in tiny chocolate cups
Chocolate cups:
200g chocolate – I used white and dark, 100g each
25 small fluted paper cups (the ones used for petit-fours, truffles, etc.)
Mousse:
90g sweetened condensed milk
65g cream
65ml concentrated passion fruit juice
Decoration:
pulp of half a large passion fruit – I think that mini chocolate curls would work fine too
For the mousse: place all the ingredients in a blender and blend well. You can place them in a bowl and beat well with a whisk – the key here is to incorporate air into the mixture to make it light.
Cover and refrigerate for 2-3 hours.
Make the chocolate cups: melt chocolate using a double-boiler or the microwave oven. Temper it – click here to learn how.
Using a small spoon, spoon chocolate inside each paper cup, spreading evenly and almost up to the edges – leave a thin line free of chocolate so you can tear the paper cup and remove the chocolate from it easily.
Place the cups on a plate and refrigerate until chocolate is firm (10 minutes or so).
Carefully, start tearing the paper molds unmolding the chocolate cups. Set aside.
Remove the mousse from the refrigerator and with a small spoon pour amounts of it inside each chocolate cup. Top with the passion fruit seeds and serve.
Chocolate cups can be made ahead and stored in a dry and cool place – never in the refrigerator.
Makes about 25 – I got 12 with the white chocolate and 13 with the dark chocolate.