Saturday, November 8, 2014

Pea pancakes

Pea pancakes / Panquequinhas de ervilha

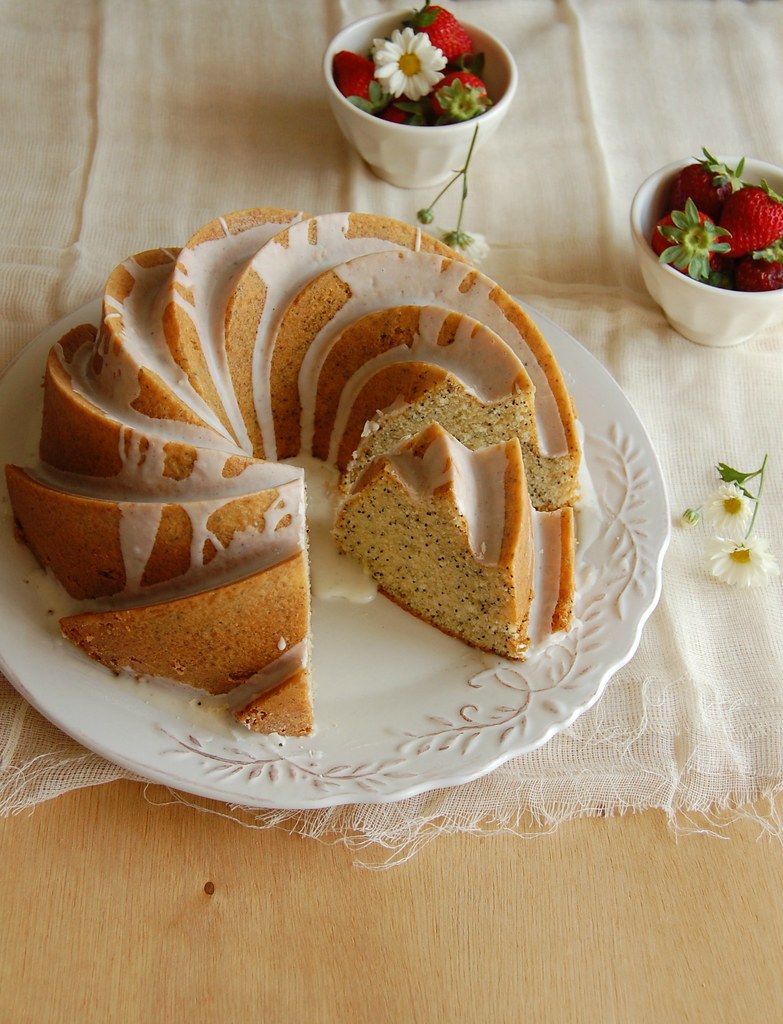
I’ve realized that I’ve been craving vegetables more and more each day, instead of meat: the more I eat vegetables, the more I want to eat them, in all sorts of ways – every time I see a great vegetarian recipe around I want to try it immediately.

(That said, I’ll cook Jamie Oliver’s roast beef tomorrow for lunch. :D My husband saw a bit of the show days ago while I was watching it and has been craving that dish ever since, with all the trimmings, including the Yorkshire puddings – I have made Jamie’s yorkies and they’re oh, so good).

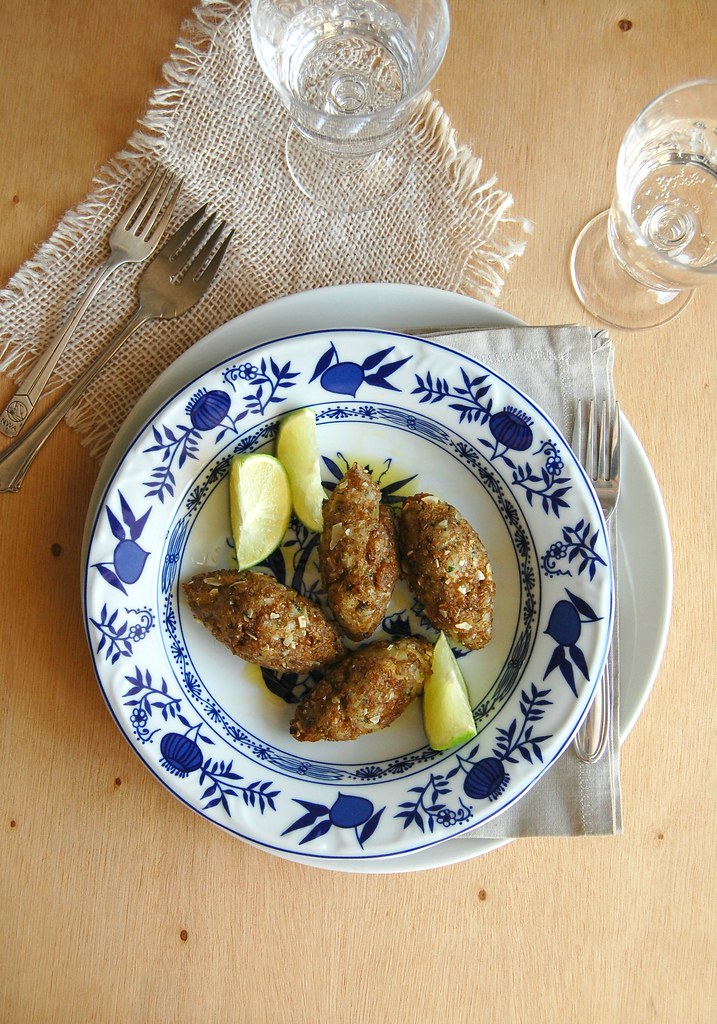
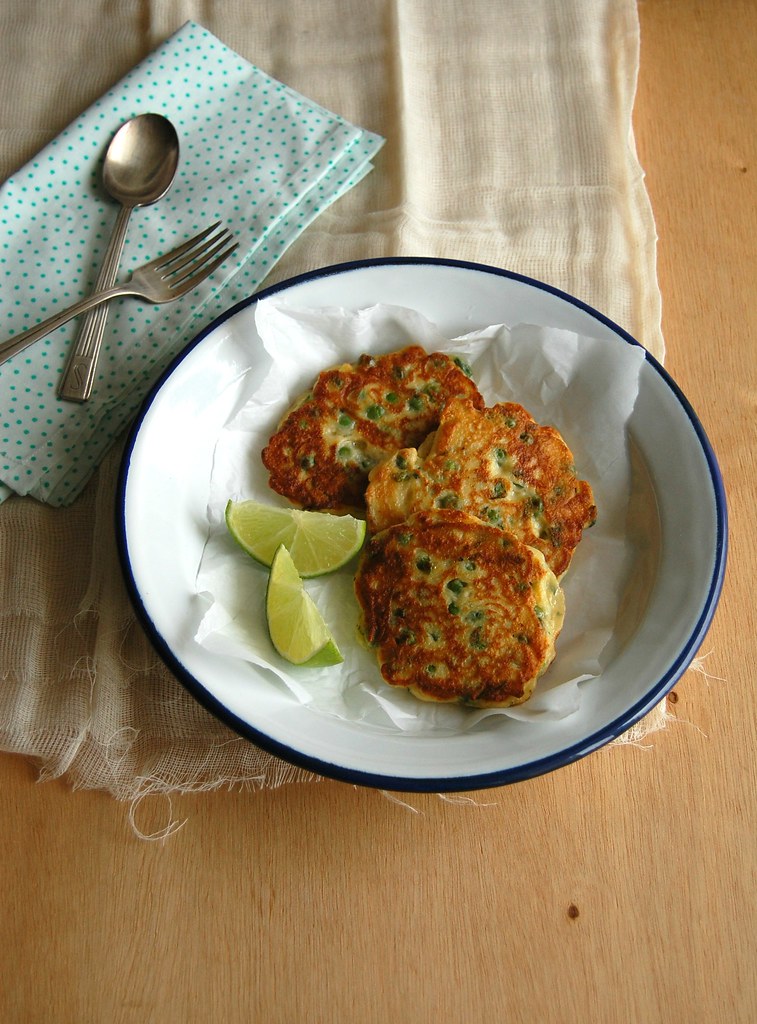
Back to the vegetables, I saw these pea pancakes on Valli Little’s stunning cookbook and right away thought that they would be great for a snack – I had everything in my fridge and pantry to make them, and on top of it all it would take me moments to put them together, even making the ricotta from scratch, which is super easy and I highly recommend you try – I doubt you’ll ever buy ricotta again.

The pancakes turned out delicious, light and fluffy, and I ate them with sweet chili sauce, as per the author’s suggestion – she also suggests the pancakes to be served with bacon, but even though I’m crazy about it I don’t think it was necessary here.

Pea pancakes
slightly adapted from the über beautiful Delicious. Love to Cook

120g frozen peas
2 eggs
200g fresh ricotta – I highly recommend using homemade
¼ cup finely grated parmesan
1 teaspoon olive oil + more for frying the pancakes
¼ cup (45g) all purpose flour
¼ teaspoon baking powder
salt and freshly ground black pepper
2 spring onions, white part only, finely chopped

Cook the peas in boiling salted water for 5 minutes, drain and refresh under cold water. Drain well and set aside.
Place eggs, parmesan, ricotta, 1 teaspoon olive oil, flour, baking powder, salt and pepper in a medium bowl and stir to combine. Stir in the peas and spring onions, cover and refrigerate for 30 minutes.

Heat ½ tablespoon of olive oil in a large nonstick frying pan over medium-high heat. Scoop two tablespoons of mixture per pancakes and place onto the pan, pressing each to 1cm (½ in) thickness. Cook for 3 minutes each side or until golden.
Serve immediately.

Makes 6

Wednesday, November 5, 2014

Lemon and coconut Bakewell bars and wondering about my food

Lemon and coconut Bakewell bars / Barrinhas de limão siciliano e coco

Sometimes I wonder what my cooking would be like if it wasn’t for the Internet: my food would certainly be different, I would not have this blog and I would not probably own all the cookbooks and food magazines I own today.

I have learned a lot about cooking and baking by reading all sorts of materials (maybe someday I’ll have the time and money to actually study the wonderful world of food), and I’ve come across many things I’d never heard of and those were things I doubt I would know today if it weren’t for all the reading.

For instance, before I had a blog I had no idea of what fruit curds were, and now they are such favorites of mine, lemon curd being #1 (though passion fruit curd easily gives lemon a run for its money). If the Internet did not exist, I would probably not know about curds and how delicious they are.

That sounds very silly, and I am probably in a very silly mood right now giving curds such huge importance; all I know is that they are yummy and the lemon one goes incredibly good with coconut, like in these irresistible Bakewell bars.

Lemon and coconut Bakewell bars / Barrinhas de limão siciliano e coco

Lemon and coconut Bakewell bars
adapted from the wonderful Feast: Food to Celebrate Life, inspired by the delicious John Whaite Bakes: Recipes for Every Day and Every Mood

Base:
145g all purpose flour
30g icing sugar
pinch of salt
150g unsalted butter, cold and chopped

Filling:
100g unsalted butter
2 eggs
100g granulated sugar
finely grated zest of 1 large lemon
½ teaspoon vanilla extract
100g unsweetened coconut
2/3 cup lemon curd

Preheat the oven to 180°C/350°F. Lightly butter a square 20cm (8in) baking pan, line with foil, leaving an overhang in two opposite sides. Butter the foil as well.

Start with the base: put the flour, icing sugar and salt into a food processor and blitz to combine and remove any lumps. Add the butter and process again to get a crumbly mixture that’s beginning to come together. Transfer mixture to the prepared pan and press into the base of the pan. Bake for 20 minutes or until lightly golden.

Make the topping: melt the butter and set aside. Put the eggs, sugar, lemon zest, vanilla and coconut into the bowl of the food processor. Process until smooth.

When the base is cooked, remove it from the oven and let cool for 5 minutes. Spread the curd evenly over the base. With the processor motor running, pour the slightly cooled melted butter down the funnel into the other ingredients and process until smooth. Pour it over the curd layer. Bake for 25-30 minutes or until golden and a skewer inserted in the center comes out clean. Cool in the pan, over a wire rack. Cut into slices to serve – it’s best warm, but it tastes delicious at room temperature as well.

Makes 16

Sunday, November 2, 2014

Red curry and coconut bread - the most unusual bread I have ever made

Red curry and coconut bread / Pão de pasta de curry vermelha e coco

Months ago I purchased a very interesting cookbook filled with recipes of bread and soups, two things I deeply love. I patiently and eagerly waited for the cold days of winter to show up around here, but unfortunately this year they were a handful only – it’s been hot for so long it feels like summer never ended.

For that reason, I postponed the plan of making the delicious soups I saw on the book and decided to focus on the bread instead: the recipes looked equally flavorsome.

I started with the one I found the most unusual bread, a loaf made with red curry paste and coconut – I had some paste in the fridge and could not wait to discover how it would flavor the bread. The loaf turned out very unusual, indeed, and I’ll admit it: it’s not everyone’s cup of tea – one has to like spicy food to enjoy the bread.

I thought it tasted great with a simple vegetable soup (the temperature dropped a day after I baked the bread, go figure), but I found that the killer way of having this bread was turning it into grilled cheese – it was delicious beyond words.

Red curry and coconut bread
slightly adapted from the delicious The Soup & Bread Cookbook: More Than 100 Seasonal Pairings for Simple, Satisfying Meals

scant ½ tablespoon dried yeast
½ tablespoon granulated sugar
100ml warm water
1/3 cup (80ml) unsweetened coconut milk
1 ½ tablespoons red curry paste
½ teaspoon table salt
2 cups (280g) all purpose flour

Place yeast, sugar and water in a large bowl and stir to combine. Set aside until foamy, about 5 minutes. Add the coconut milk, curry paste, salt and flour and mix until a dough starts to form. Cover and set aside for 15 minutes.

Knead for about 10 minutes (or 5 using an electric mixer) or until smooth and elastic. Place onto a large lightly oiled bowl, turn to coat, then cover with plastic wrap and set aside in a warm place for 1 hour or until doubled in volume.

Butter a 21.5x11.5cm (8.5x4.5in) loaf pan (6-cup capacity). Transfer the dough to a lightly floured surface and roll it into a 20x30cm (8x12in) rectangle. Roll it tight to form a cylinder, then place onto prepared pan. Cover and set aside again for 45 minutes – in the meantime, preheat the oven to 200°C/400°F.

Bake the bread until golden and loaf sounds hollow when tapped, about 30 minutes. Cool in the pan over a wire rack for 5 minutes, carefully unmold and transfer to rack to cool completely.

Makes 1 loaf

Friday, October 31, 2014

Fish kibbeh - a delicious and healthy way of cooking fish

Fish kibbeh / Quibes de peixe

A couple of posts ago I told you that in my opinion there are days for chocolate, cream and all things sweet and I firmly believe in that, but even I can’t eat that sort of food every single day: I crave salads, vegetables, fish and grains everyday and I feel really good when I eat them.

I am always interested in new ways of cooking fish other than the way my mom cooked at home when I was little: dusted with corn flour (not corn starch) and deep fried, which is absolutely delicious but not very healthy (I do avoid deep frying like the plague around here, and not only for health reasons).

My husband loves the corn flour dusted fish as well, but he’s willing to try fish prepared in other ways and last weekend I prepared one of Hugh Fearnley-Whittingstall’s recipes in which the fish is coated with spices like paprika and cumin and cooked with peas – it was a hit. Weeks before I’d made these fish kibbehs and they were a huge success, too: me being me I tweaked the recipe just a bit, adding more lime zest, using almonds instead of walnuts and shaping the mixture into small kibbehs instead of baking it pressed into a baking dish.

Both my husband and my sister loved the kibbeh and I thought it was a wonderful way of eating fish.

Fish kibbeh
slightly adapted from the gorgeous Brazilian chef Rita Lobo

1 tablespoon olive oil
2 small onions, finely sliced in half moons
sea salt and freshly ground black pepper
pinch of sugar
1 cup cracked wheat (fine bulgur)
500g white fish fillets
handful parsley leaves
finely grated zest of 2 limes
1/3 cup flaked almonds, finely chopped
1/3 cup (80ml) water
¼ teaspoon baharat
extra-virgin olive oil, for drizzling
lime wedges, to serve

Preheat the oven to 180°C/350°F. Line a large baking sheet with foil and brush it with olive oil.
In a nonstick frying pan over low heat, heat 1 tablespoon of the olive oil and add the onions. Sprinkle with salt and the sugar and cook, stirring occasionally, until caramelized, about 15 minutes. Cool.
Line a colander with a clean kitchen towel and place the cracked wheat on the towel. Rinse it with cold water, then squeeze it well to remove all excess water.
In a food processor, process the fish and parsley until finely chopped. Transfer to a large bowl, add the onions, the wheat, lime zest, almonds, water and stir to combine. Season with the baharat, salt and black pepper.
Using 1 ½ leveled tablespoons of mixture per kibbeh, roll into a football shape. Place onto prepared sheet 5cm (2in) apart. Drizzle generously with extra virgin olive oil and bake for 20-25 minutes or until golden and cooked through, turning them halfway the cooking time. Serve immediately with lime wedges.

Makes about 20

Monday, October 27, 2014

Vanilla milk cake and goodbye, Linden and Holder

Vanilla milk cake / Bolo de leite e baunilha

Days ago, I finished watching the last season of The Killing and I felt happy and sad at the same time: glad because the quality I’d seen throughout the show ever since the beginning wasn’t put aside at any moment of those last six episodes, the ending was a thing of beauty that made me shed loads of tears, and sad because now two of my favorite characters are gone for good – no more of Sarah’s beautiful red hair, no more Holderisms.

I know that TV shows cannot last forever and that it is better to finish with top notch episodes than to end with no quality whatsoever, but The Killing never really had a chance: if it wasn’t for Netflix there wouldn’t even be a fourth season, there would be no closure. Such a beautifully written, acted and directed show should have been on air for longer, but I’ve complained about that already.

As I prepared myself to say goodbye to Linder and Holder, I decided that a slice of cake would fit the occasion perfectly – I needed something sweet to calm my nerves down (after watching the episodes I knew it had been a smart decision, what a wonderful yet nerve-wracking season, my goodness). This simple cake, while delicious on its own with a cup of tea or coffee, was turned into a flavorsome dessert served with whipped cream and strawberries – I highly recommend it either way.

Vanilla milk cake
slightly from the beautiful and oh, so delicious Baking Style: Art Craft Recipes

Cake:
1 ½ cups (210g) all purpose flour
3 tablespoons (30g) corn starch
¼ teaspoon table salt
3 tablespoons poppy seeds
½ cup (1 stick/113g) unsalted butter, chopped
1 cup (240ml) whole milk
4 large eggs
1 ¾ cups (350g) granulated sugar
1 tablespoon vanilla extract
1 teaspoon baking powder

Icing:
1 cup (140g) icing sugar
1-2 tablespoons whole milk

Preheat the oven to 180°C/350°F. Generously butter a 10-cup Bundt pan, dust it with flour and remove the excess.
In a medium bowl, sift together the flour, corn starch, and salt. Stir in the poppy seeds.
Place butter and milk in a small saucepan and cook over medium heat until butter is melted and mixture begins to boil. In the meantime, using an electric mixer, beat the eggs at medium speed for 2 minutes. Gradually add the sugar, beating until a light mixture forms. Beat in the vanilla extract.
On low speed, add the dry ingredients in two additions, beating just until incorporated. With the mixer still on low speed, add the hot milk mixture gradually, then beat until completely incorporated (scrape the sides of the bowl). Immediately add the baking powder and mix it in.
Pour batter into prepared pan and bake for about 1 hour or until risen and golden and a skewer inserted in the center of the cake comes out clean. Cool in the pan over a wire rack for 20 minutes, then carefully unmold onto the rack and cool completely.

Glaze: sift the icing sugar into a small bowl. Add the milk and stir until you get a drizzable consistency (add more milk if necessary). Drizzle over cooled cake. Set aside for 15 minutes.

Serves 10-12

Related Posts with Thumbnails