Friday, January 30, 2015

Coconuttiest shortbread cookies and the amazing "Birdman"

Coconuttiest shortbread cookies / Amanteigados de coco

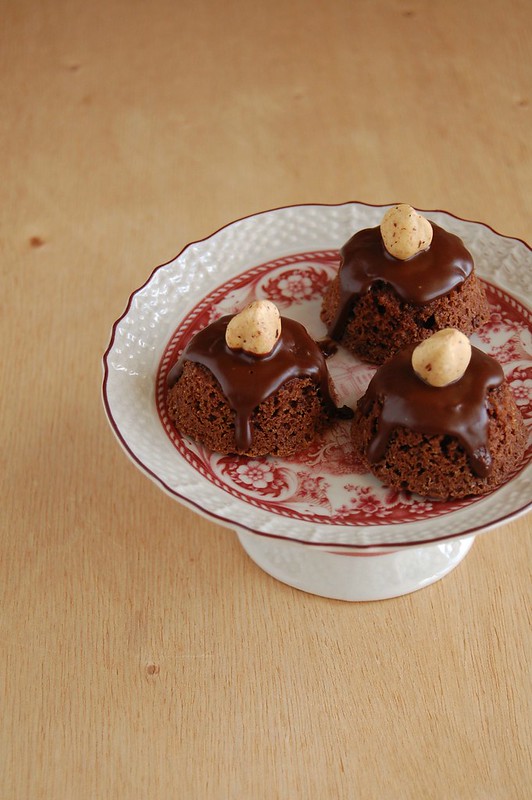
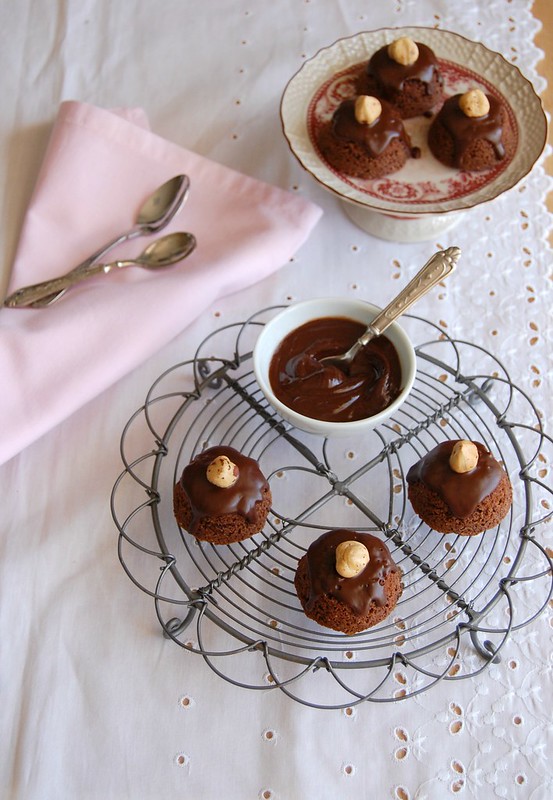
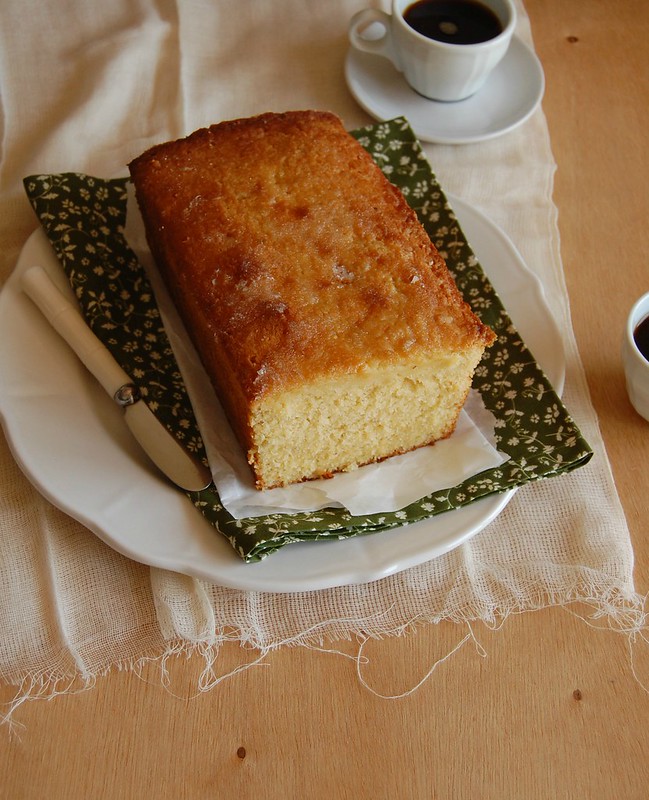
I have the feeling sometimes that coconut raises strong opinions pretty much like cilantro: people either love it or (really) hate it.

The same has happened with Birdman and I belong to the group of people who loved it: I found it sensational, intriguing, interesting, creative, with amazing acting – I never knew Michael Keaton could be so good! I left the theater with a deep appreciation for Iñarritu’s film – the way he moves the camera around is a thing of beauty (it reminded of how wonderfully Spielberg moved the camera around in Munich). And as I did last year with the ladies, I’m switching sides: I am so sorry, dear Steve, but I want the Oscar to go to Michael’s hands. :)

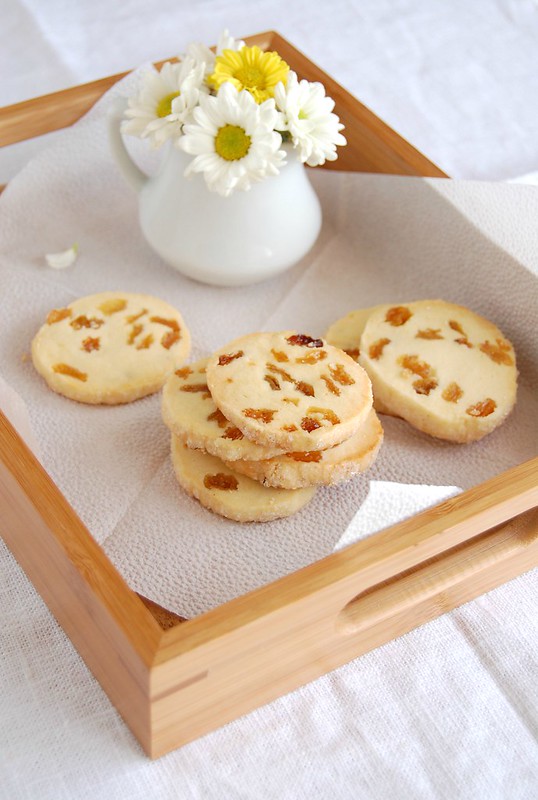
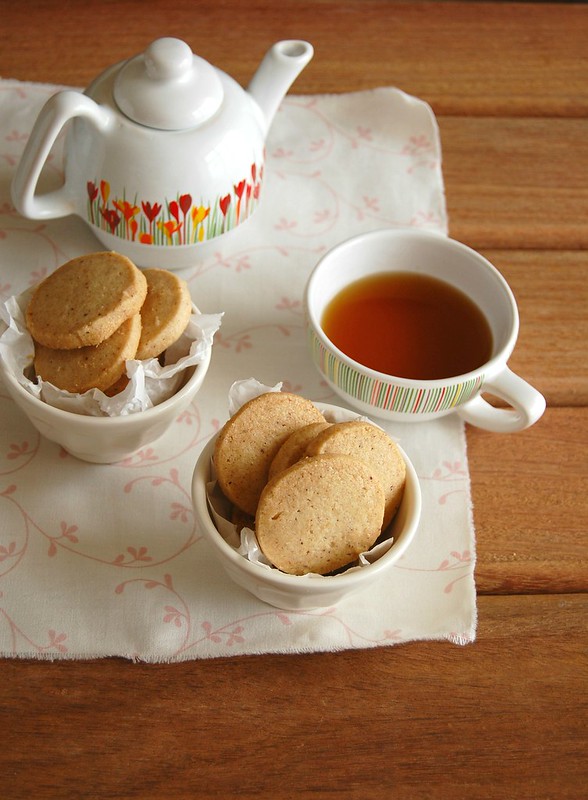
As for the coconut, I’m part of the loving group, too, so when I saw this recipe on Food52 I was more than willing to give it a go: coconut in two ways – both flour and oil – in shortbread cookies. They turned out delicious and have a lovely sandy texture, so just be careful when storing them (if there’s any left – I haven’t stopped eating mine ever since I removed them from the oven). :D

Coconuttiest shortbread cookies
from the wonderful Food52

2 cups (280g) all-purpose flour
¼ cup (25g) coconut flour
¼ cup (35g) confectioner's sugar
1/8 teaspoon table salt
½ cup (113g/1 stick) unsalted butter, room temperature
½ cup (120ml) coconut oil, room temperature
½ cup (100g) granulated sugar
2 egg yolks
½ teaspoon vanilla extract

In a small bowl, whisk the all purpose flour, coconut flour, confectioners’ sugar and salt. Set aside.

Combine the butter and coconut oil in the bowl of stand mixer. Cream on medium speed for two to three minutes, until the two are combined. Scrape the bowl down, and beat for another minute. With the mixture still running on medium, add the sugar in a slow stream. Beat for another two minutes, then scrape down the bowl. Add the egg yolks one at a time, scraping the bowl between each addition. Beat in the vanilla, then beat the mixture for another two minutes, until the mixture looks white and satiny. Add the flour mixture all at once. Mix on very low speed until a dough starts to form.

Divide the dough into two equal parts. Place each on a piece of parchment paper; shape dough into logs. Fold parchment over dough; using a ruler, roll and press into a 3.5 cm (1.4in) log – like Martha does here. Wrap in parchment. Chill in the freezer until very firm, 2-3 hours.

Preheat oven to 180°C/350°F; line two large baking sheets with baking paper - I like Beyond Gourmet a lot.
Unwrap one log at a time (keep the other in the freezer). Cut log into 6mm (¼in) thick rounds; space 2.5cm (1in) apart onto prepared sheets. Bake until golden brown around the edges, 12-14 minutes. Cool completely on the sheets.

Makes about 50

Tuesday, January 27, 2015

Chocolate hazelnut kisses and "Foxcatcher"

Chocolate hazelnut kisses / Mini bolinhos de avelã e chocolate

Last week I was finally able to watch the movie I’d been talking about for almost a year and I’ve come to the conclusion that it was directed by the wrong person: Bennett Miller played it too safe, directing in a very bureaucratic way, almost automatic, while such a dark and surprising story with fantastic acting deserved someone much more dedicated to the project.

As I watched the movie I kept thinking of how wonderful it would have been in the hands of Scorsese or Fincher, or even Cuarón.

Steve Carell, Mark Ruffalo and Channing Tatum are quite something in this movie and I was especially stunned by the latter: he portrays this character with such urge, with such passion and dedication that it turned out completely different from everything he’d done before, and even though I find Mark Ruffalo a terrific actor all the supporting actor nominations should have gone to Tatum.

Carell is equally wonderful, a whole new person thanks not only to the meticulous make up work but also for making the viewer forget completely who he is – I adore him in just about anything and he really shines when given a dramatic role (it is impossible to forget how sublime he was in Little Miss Sunshine). I’ll be rooting for him on February, 22, even though I know that Eddie Redmayne has taken the world by storm.

Foxcatcher is a good movie but not a great one, and I consider that a waste of a good story and great acting. I don’t like waste, not in movies and especially not in my kitchen, that is why I made these adorable mini cakes to use up the hazelnut meal that was about to go rancid in my freezer – they turned out super cute and oh, so delicious.

Chocolate hazelnut kisses / Mini bolinhos de avelã e chocolate

Chocolate hazelnut kisses
slightly adapted from here

Cakes:
120g dark chocolate, finely chopped – I used one with 53% cocoa solids
100g granulated sugar
95g unsalted butter, softened
3 eggs, separated
100g hazelnut meal
1 teaspoon strong coffee
1 teaspoon rum
½ teaspoon vanilla extract

Ganache:
100g dark chocolate
50g unsalted butter
24 hazelnuts, roasted and shelled, to decorate

Preheat the oven to 180°C/350°F. Butter a 24-hole mini muffin pan.

Melt the chocolate in a bowl over a saucepan of simmering water, then leave to cool. Beat the sugar and butter until light and fluffy, then add the egg yolks, beating well after each addition. Add the melted chocolate and mix well, then fold in the hazelnut meal, coffee, rum and vanilla.

Whisk the egg whites until they form soft peaks. Fold a third into the chocolate mixture to loosen it, then fold in the rest. Spoon the mixture into the muffin pan and bake for 10-15 minutes or until risen and a skewer inserted in the center of one mini cake comes out a little moist. Cool for a few minutes in the pan, then carefully unmold onto a cooling rack. Cool completely.

For the ganache, melt the chocolate and butter over a saucepan of simmering water. Remove from the heat and cool for 5 minutes or until slightly thickened. Pour a little ganache over each cake and decorate with a roasted hazelnut.

The cakes can be stored in an airtight container for up to 2 days at room temperature.

Makes 24

Friday, January 23, 2015

Lentil patties

Lentil patties / Bolinhos de lentilha

If you read my last post you already know that when I really like something I tend to cook or bake it quite often, and that doesn’t happen with sweets, only: I have my savory favorites as well, certain dishes I go back to again and again.

Lentil salad is one of those dishes, especially on hot days because it tastes so great straight from the fridge and the flavor develops beautifully after a night spent in it. After a couple of days, however, I did not want to made another salad with the cooked lentils I had in the fridge – I felt like making something completely different with them. Martha came to my rescue, and the lentils were transformed into these delicious patties.

I loved these, for I love lentils in just about anything, but the surprise of the day was my husband’s comment about the patties: he was never a fan of lentils and he told me that these could perfectly replace the beef patties in a burger. I was shocked – and really happy. :)

Lentil patties
slightly adapted from Martha

280g cooked lentils, drained and cooled
½ teaspoon ground cumin
½ tablespoon extra-virgin olive oil
1 teaspoon red wine vinegar
½ onion, finely diced
2 large eggs, lightly beaten
1 cup fresh breadcrumbs or Panko
handful fresh parsley leaves, chopped
salt and freshly ground black pepper
olive oil, for frying

Combine lentils, cumin, olive oil and vinegar in a large bowl and toss to combine. Add the onion, eggs, breadcrumbs, and parsley and season with salt and pepper. Transfer half of mixture to a food processor; pulse until smooth. Fold into remaining lentil mixture until well combined. Shape into patties, using 3 tablespoons of the mixture per patty - I used this cookie scoop to portion the mixture.

Heat a nonstick frying pan over medium-high heat. Drizzle with 1 teaspoon olive oil and swirl to coat bottom. Add patties in a single layer, working in batches if necessary. Cook, turning once, until crisp and brown, about 4 minutes each side.
Serve with a salad.

Makes about 10

Wednesday, January 21, 2015

Almond cake (with homemade marzipan)

Almond cake (with homemade marzipan) / Bolo de amêndoa (com marzipã caseiro)

As I flipped through a few cookbooks and magazines searching for inspiration, I thought of how I am attracted to similar recipes, over and over again – I can’t resist a brownie, I make oatmeal cookies quite often, and every time I see a citrus cake recipe I immediately bookmark it.

It might be a matter of taste, or it is because I seem to have the same ingredients at home time and time again, but I sometimes even tell myself that I will bake something different, only to end up making one of the favorites above.

Another recipe I cannot resist? Almond cakes – I’d probably make almond cakes every week if could. This recipe came in very handy for I’d made marzipan for a cookie recipe for my Christmas series (from this book), but the recipe failed miserably and I had to use up the marzipan left quickly.

This cake is easy to make, moist and absolutely delicious – if you’re nuts for almond cakes like me you should give it a go.

Almond cake (with homemade marzipan)
slightly adapted from the delicious and beautiful A La Grecque: Our Greek table

½ cup (100g) granulated sugar
finely grated zest of 1 orange
finely grated zest of 1 lime
250g unsalted butter, room temperature
200g marzipan, chopped – I used homemade
4 eggs
½ teaspoon vanilla extract
1/3 cup (45g) all purpose flour
¼ teaspoon baking powder
pinch of salt
½ cup (60g) flaked almonds

Preheat your oven to 180°C. Butter a 20x7cm (8x3in) round cake pan with a removable bottom, line the bottom with a circle of baking paper and butter it as well.

Place sugar, orange and lime zest in the bowl of an electric mixer and rub together until sugar is fragrant. Add butter and beat until pale and fluffy. Add the marzipan, beating well until it is completely incorporated.
Add the eggs one at a time, beating well after each addition. Beat in vanilla. Sift the flour, baking powder and salt together and fold into the cake mixture. Spoon into the cake pan and smooth the top. Sprinkle with flaked almonds. Bake for 45 minutes, or until golden and cooked (a skewer inserted in the center of the cake should come out clean).
Cool completely in the pan over a wire rack. Carefully unmold and serve.

Serves 8-10

Monday, January 19, 2015

Meatballs alla Norma

Meatballs alla Norma / Almôndegas alla Norma

As someone who loves anything related to food, I love reading about it, making and eating it (obviously), but I also find it amazing to talk about it with different people and learn what they like, what they don’t like and how their tastes change with time.

I have those conversations with my husband all the time, and he tells me about the food he ate as a kid, things he loved and things he couldn’t stand, how it took him so long to appreciate all sorts of vegetables, and that his mother would be really glad to see him finally eating like an adult (she passed away in 2011).

Every time Joao and I talk about those things I feel more inspired to cook, and when he asked me to make meatballs – one of his all time favorite dishes – I remembered Jamie Oliver’s meatballs alla Norma and thought that a bit of eggplant in the meatballs wouldn’t hurt.

I love eggplant. :)

The eggplant sauce tasted divine with the meatballs; Jamie served his over polenta, but since it was too hot here I went with spaghetti instead and some bread to mop up the sauce – a simple yet delicious meal that I get to replicate anytime I want with the meatballs I stashed in my freezer.

Meatballs alla Norma
slightly adapted from the always delicious Save with Jamie: Shop Smart, Cook Clever, Waste Less

Meatballs – recipe here

Sauce:
1 large eggplant
olive oil
2 cloves garlic, minced
2 tablespoons sweet chili sauce
2 tablespoons balsamic vinegar
1 400g (14oz) can diced tomatoes
salt and freshly ground black pepper
handful fresh basil leaves

Dice the eggplant into 1.5 cm cubes, then season well with salt and leave for 15 min in a colander.

Preheat the oven to 200°C/400°F. Line a large baking sheet with a double layer of foil and brush it with olive oil. Place the meatballs onto the prepared sheet and bake until firm and cooked through (about 30 minutes) – bake as many as you want, the recipe yields about 25 meatballs. You can freeze uncooked meatballs for up to 2 months and bake them directly from frozen.

While the meatballs are in the oven, make the sauce: take handfuls of the eggplant and squeeze out the excess salty liquid, then put into a saucepan on a medium heat with a lug of oil to cook for 10 min, or until golden, stirring occasionally. Add the garlic and cook until fragrant. Stir in the sweet chili sauce and balsamic, add the tomatoes and 3 tablespoons water. Season with salt and black pepper, then simmer for 10-15 min, or until thickened. Stir in the basil and remove from the heat.

Add the meatballs to the sauce and serve immediately.

Serves 4

Friday, January 16, 2015

St. Clement’s posset

St. Clement's posset / Potinhos de São Clemente

I try to eat in a healthy way most of my days, with a brownie or a cookie here and there, and even though it doesn’t look like it I don’t eat dessert every day, and when I do I try not to go overboard with it.

I adore possets for I’m a big fan of citrus flavors, but I don’t make them frequently because well, they’re not exactly lean: the dessert is purely heavy cream flavored with something (I’m aware of that, people). ;) There are, however, occasions that call for something special and easy to put together, and those are the days when a posset is most welcome.

Today’s recipe is something I saw on a Jamie Oliver magazine and it was the dessert I served for New Year’s Eve dinner – I made the posset in a matter of moments! The glasses sat beautifully in the fridge while I focused on the savory side of my dinner.

I love both oranges and lemons, they’re delicious together – in cake form as well – and the posset was a very refreshing finish to a delicious and celebratory meal in a very hot night.

St. Clement’s posset
from the always delicious Jamie Oliver magazine

400ml heavy cream
1/3 cup + 1 tablespoon (80g) granulated sugar
finely grated zest of 1 lemon
finely grated zest of 1 orange
¼ cup (60ml) freshly squeezed lemon juice
3 tablespoons freshly squeezed orange juice

Put the cream, sugar and lemon and orange zests in a saucepan over a medium-high heat. Bring to the boil and cook for 3 minutes. Add all the juices, bring back to the boil and continue to cook for another 3 minutes.

Pass the mixture through a fine sieve and let it cool slightly (to avoid cracking the glasses in which you’ll serve the posset). Pour it straight into 4 small wine glasses. Allow it to set for at least 3 hours in the fridge, or overnight.

Serves 4

Monday, January 12, 2015

Lime, ginger and coconut drizzle cake + the Golden Globes

Lime, ginger and coconut drizzle cake / Bolo de coco, limão e gengibre

I was up till 2 am this morning watching the Golden Globe Awards but it was worth it: some of my favorites won (The Affair, Ruth Wilson, Kevin Spacey), some of my favorites did not win (Steve Carell, Rosamund Pike), but overall I though the winners really deserved the awards (unlike previous years).

I did not understand, though, Fargo and Billy Bob taking the Globe home for I strongly believed that True Detective and Matthew were impossible to beat (I haven’t seen Fargo for I really don’t like the movie).

When it comes to award shows surprises can be a good thing, but when I’m in the kitchen I prefer to stick to what I trust – in this case, the Good Food magazine. Everything I’ve made from it turned out great, and this cake is no exception: the limes and the ginger add a refreshing touch to the good old lemon drizzle cake, and it turned out so tender it was hard to slice.

And to make things even better, there’s coconut in the batter as well – yum!

Lime, ginger and coconut drizzle cake
slightly adapted from Good Food magazine

Cake:
175g granulated sugar
finely grated zest of 3 limes
200g unsalted butter, softened
3 large eggs
200g all purpose flour
1 teaspoon baking powder
1 rounded teaspoon ground ginger
pinch of salt
50g desiccated coconut
2 tablespoons finely chopped crystallized ginger
2 tablespoons milk
juice of 1 ½ limes

Drizzle:
juice of 1 ½ limes
1 ½ tablespoons granulated sugar

Preheat oven to 180°C/350°F. Butter a 20x10cm (8x4in) loaf pan, line it with baking paper and butter the paper as well.

Place sugar and lime zest in the bowl of an electric mixer and rub them together with your fingertips until sugar is fragrant. Add butter and beat until light and fluffy. Gradually add the eggs, mixing well between each addition.
Sift together the flour, baking powder, ground ginger and salt in a medium bowl. Using a spatula, fold into the cake mixture with the coconut and chopped ginger. Add the milk and lime juice and mix until smooth. Spoon the mixture into the prepared pan and smooth the surface.

Bake for 60-70 minutes or until risen and golden brown – a skewer inserted into the middle of the cake should come out clean. Cool the cake in the pan for 10 minutes.
Use a wooden skewer to make holes all over the cake. Mix the drizzle ingredients and slowly spoon the sugary mixture over the top of the warm cake and leave in the pan until completely cold.

Serves 8

Friday, January 9, 2015

Rye ratatouille tart

Rye ratatouille tart / Torta de ratatouille e centeio

My craving for vegetables is still full on and I’m always looking for interesting ways of cooking them, especially because my husband has become a veggie convert – I love it that he’s realized that he doesn’t need all the meat he though he needed and that eating more vegetables is good for him (let’s forget that it took him forty-six years to finally get to that conclusion – better late than never, right?) ;)

I love tarts, both sweet and savory, so when I saw this ratatouille tart on a Brazilian TV show I fell in love with it: so colorful, so beautiful! I decided to make it but switched the pastry (pâte brisée) for the wonderful rye pastry I love so much – it worked like a charm! The flavorsome pastry paired beautifully with the roasted vegetables.

This tart is delicious and looks really beautiful – I’m all for food that tastes and looks good.

Rye ratatouille tart
adapted from this lovely book and from Rita Lobo

Pastry:
½ recipe rye pastry

Filling:
1 small eggplant
1 small zucchini
¾ cup cherry tomatoes
1 leek, white part only
1 small yellow pepper
1 onion
4 garlic cloves
salt and freshly ground black pepper
3 tablespoons extra-virgin olive oil
2 sprigs rosemary
4 sprigs fresh thyme

Slice the eggplant in 1cm slices (if too wide, cut the slices in half). Transfer to a bowl of lightly salted water. Set aside for 30 minutes.

Preheat the oven to 200°C/400°F.
Slice the zucchini in 1cm slices (if too wide, cut the sliced in half), cut the cherry tomatoes in half lengthwise, slice the leek in 1cm slices as well and cut the bell pepper in squares. Peel the onion and cut into eights, then slice the garlic cloves in half lengthwise.

Drain the eggplant, pat dry with paper towels and place the pieces on a baking sheet. Drizzle with 2 tablespoons olive oil and roast for 15 minutes. Place the other vegetables on the baking sheet with the eggplant, drizzle with 1 tablespoon olive oil and season with salt and pepper. Toss to coat, then roast for 30 minutes. Remove from the oven. Lower the oven temperature to 180°C/350°F.

Place the dough onto large piece of baking paper and roll into a rough 25cm (10in) circle. Transfer to a cool baking sheet. Arrange the roasted vegetables on the center of the pastry and top with the fresh herbs. Fold one edge in towards the center of the filling and continue folding all the way round, bringing the edge of the pastry towards and over the filling.

Brush the tart with the egg wash (only the pastry). Bake for about 30 minutes or until golden brown. The tart is delicious both warm and at room temperature.

Serves 4

Wednesday, January 7, 2015

Golden raisin cookies

Golden raisin cookies / Biscoitos de passas claras

One very common dish during the holiday season here is rice with raisins – it is served with the usual meat dishes for Christmas and New Year’s Eve dinners. I know people who love raisins in their rice, but most people I know hate it, including my husband and my sister – they’re 46 and 21, respectively, so you can imagine that the hate for rice with raisins is spread throughout different generations. :D

Growing up I was never a fan, either, for I did not understand why people would put something sweet in a savory dish – I thought it was such a waste of something as delicious as rice. :)

I grew up and learned that sweet and savory together in food is actually a good thing, but to be honest I’m still not a fan of rice with raisins: there are millions of other wonderful things to be cooked with rice and I prefer my raisins elsewhere, like in cookies – I used the golden raisins called for in the original recipe, but I am sure that they would be equally great with dark raisins, too.

I found that giving the dough a couple of hours in the freezer instead of the refrigerator is key here because the frozen raisins are much easier to slice.

Golden raisin cookies
from one of my favorite cookbooks

1 cup golden raisins
¼ cup (60ml) dark rum
½ cup (113g/1 stick) unsalted butter, softened
½ cup (70g) confectioner's sugar
1 large egg
pinch of salt
1 teaspoon vanilla extract
1 2/3 cups (235g) all-purpose flour
granulated sugar, for sprinkling

In a small bowl, combine the raisins and rum. Set aside to soak for at least 1 hour.
In the bowl of an electric mixer, using the paddle attachment, beat the butter and confectioners' sugar at medium-high speed until well blended and light, about 1 minute. Add the egg, salt and vanilla and beat until blended but not smooth (dough will look curdled at this point). Scrape down the sides of the bowl. At low speed, add the flour, mixing until just blended. Drain the raisins, discarding the rum, add them to the dough and mix until combined.

Divide the dough into two equal parts. Place each on a piece of parchment paper; shape dough into logs. Fold parchment over dough; using a ruler, roll and press into a 3.5 cm (1.4in) log – like Martha does here. Wrap in parchment. Chill in the freezer until very firm, 2-3 hours.

Preheat oven to 180°C/350°F; line two large baking sheets with baking paper.
Unwrap one log at a time (keep the other in the freezer). Roll dough logs in the extra sugar, coating them evenly, then cut into 6mm (¼in) thick rounds; space 2.5cm (1in) apart onto prepared sheets. Bake, rotating sheets halfway through, until golden brown around the edges, 15-20 minutes. Cool on the sheets for 5 minutes, then slide the paper with the cookies to a wire rack to cool completely.

Makes about 45 cookies

Sunday, January 4, 2015

Caponata - easy and delicious

Caponata

Caponata is something I ate a lot growing up, but never knew the real name – my grandmother used to make it all the time, especially when there were a lot of people to feed, and she served it with bread or on small toasts, canapé style. I loved it and would ask her to make it again and again – I used to call it “my grandma’s eggplant dish”, having no idea it was such a staple of Italian cuisine.

It took me forever to make caponata myself, maybe because it has always been something so attached to my grandma’s cooking, but my husband asked me to make it and I decided to give it a go, especially after going through some of my books and finding a recipe by Andrew Carmellini on one of my favorite cookbooks – it is his the most delicious gnocchi I’ve ever made, and I ate at both Lafayette and Locanda Verde when I was in NYC, so I trust the guy. ;)

Andrew’s caponata is very easy to put together and it tastes great, not to mention it benefits from a day of two in the fridge – I’m all for making things in advance, so this recipe has become part of my repertoire and I hope it becomes part of yours, too.

Caponata

Caponata
slightly adapted from the delicious Urban Italian: Simple Recipes and True Stories from a Life in Food

1/3 cup (80ml) extra-virgin olive oil
1 red onion, diced large
1 yellow pepper, diced large
1 Italian eggplant, diced large
3 stalks of celery, diced large
1 zucchini, diced large
½ teaspoon table salt
¼ teaspoon freshly ground black pepper
½ teaspoon red pepper flakes
2 cloves of garlic, sliced thin
1 400g (14oz) can chopped peeled tomatoes
1 tablespoon balsamic vinegar
2 tablespoons thyme leaves
3 tablespoons red wine vinegar – I used sherry vinegar

Heat olive oil in a large saucepot over high heat. Add the onion, pepper and eggplant. When the vegetables have softened a bit (about 5 minutes), add the celery and zucchini. Season with half the salt and black pepper. Mix the ingredients together and continue to cook.

After ten 10 minutes, add the red pepper flakes and garlic. Cover and reduce the heat to medium, and let the steam roast the vegetables for 5 minutes. Add the tomatoes, reduce the heat to low and simmer for 10 minutes, until vegetables are soft but not falling apart and the tomatoes are well incorporated. Mix in the balsamic vinegar and cook for 2 minutes.

Remove the saucepot from the heat, add the thyme and season with remaining salt and pepper (add more salt to taste if necessary). Mix in vinegar.

The caponata can be kept in an airtight container in the fridge for 4-5 days (I thought it tasted better the day after it was made).

Serves 8-10

Friday, January 2, 2015

Lemon poppy seed whipped cream cake, or how to use up heavy cream in a fantastic way

Lemon poppy seed whipped cream cake / Bolo de creme batido, limão siciliano e papoula

Here where I live one thing happens time and time again during the holidays: heavy cream disappears from the grocery stores. Because there were years I needed heavy cream for a number of recipes and couldn’t find any, now I usually stash two bottles of the ingredient before all the craze begins, and that way I can make desserts and ice cream (it is summer here after all).

I was too greedy last time, and ended up with a lot of heavy cream to be used – really, a lot. Shame on me. I made popsicles, a tart, and also a posset, but every time I opened the fridge I had the feeling that the cream was taking over the whole thing.

Pressed for time – heavy cream doesn’t last long, unfortunately – I came up with a wonderful solution: Rose Levy’s whipped cream cake, which I’d baked before and it was delicious, but this time I added lemon zest, limoncello and poppy seeds to make it even more interesting.

Lemon poppy seed whipped cream cake
slightly adapted from the wonderful Rose's Heavenly Cakes

225g cake flour (or 200g all purpose flour + 25g corn starch)
2 teaspoons baking powder
¼ teaspoon table salt
3 tablespoons poppy seeds
1 cup + 2 tablespoons (225g) granulated sugar
finely grated zest of 2 lemons
1 ½ cups heavy cream, chilled
3 large eggs, room temperature
½ teaspoon pure vanilla extract
2 teaspoons limoncello (optional) – I used homemade
icing sugar, for dusting

Preheat oven to 190°C/375°F (180°C/350°F if using a dark pan). Butter and flour a 10-cup fluted metal tube or Bundt pan.

In a medium bowl, whisk together flour, baking powder, salt and poppy seeds. In another bowl, rub sugar and lemon zest together with your fingertips until sugar is fragrant.
In the bowl of an electric mixer fitted with the whisk attachment, whip cream on low, gradually increasing speed to medium-high as cream thickens, until stiff peaks form.
In a medium bowl, whisk together eggs, vanilla and limoncello. With the mixer on medium-high, gradually add egg mixture; beat until thickened (like mayonnaise) and well combined. Gradually add sugar, about 30 seconds.
On low speed, beat in the flour mixture until flour is dissolved and well combined. Transfer batter to prepared cake pan and smooth surface.

Bake until a cake tester inserted into cake comes out clean and springs back when lightly pressed with your finger, 25-35 minutes. Transfer cake pan to a wire rack and let cool 20 minutes; cake will begin to shrink from sides of pan.
Carefully unmold cake onto the rack and cool completely. Dust with icing sugar before serving.

Serves 8-10

Related Posts with Thumbnails