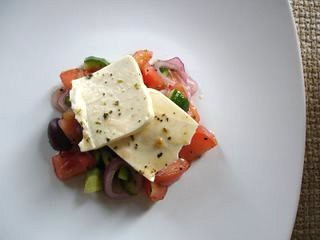
Showing posts with label onion. Show all posts

Monday, August 24, 2020

Cauliflower balls and feeling nostalgic

Bolinhos de couve-flor / Cauliflower balls

I have been feeling nostalgic lately, thinking of my mom a lot. Some ingredients and foods remind me of her so much, it is impossible not to think of her and of some moments of my childhood. Cauliflower, for instance, is something that immediately takes me back to the past, it is as if I could almost hear my mom telling me “eat the little trees, my dear, for they are very good for you”. Cauliflower, to me, will always be “little trees”.

As much as I love these little trees, I’ll admit that sometimes they need a little push when it comes to flavor: cauliflower can be pretty bland depending on how it is prepared. It is not the case with these balls: they are delicious! Very flavorful, crunchy on the outside and tender on the inside.

I served these balls as part of a meal with rice, beans and cooked kale, but they would be wonderful to nibble on with a cold beer. By the way, I recommend adding a few drops of Tabasco to the balls when eating them – they taste even better.


Cauliflower balls

own recipe, inspired by these lentil patties


400g cauliflower, cut into florets – a little more than ½ small cauliflower

salt

½ small onion, finely diced

1 egg, room temperature

2 tablespoons finely chopped parsley leaves

½ tablespoon olive oil

¼ cup finely grated parmesan

¾ cup breadcrumbs – I used homemade

freshly ground black pepper


Place the cauliflower in a large saucepan and cover with water. Heat over high heat and when the water starts to boil, add a pinch of salt and cook until cauliflower is tender, about 10 minutes. Drain well, then refresh under cold water until cauliflower is cool. Drain again and chop finely. Transfer to a large bowl.

Preheat the oven to 200°C/400°F. Line a large baking sheet with foil, then brush with olive oil

Add all the remaining ingredients to the chopped cauliflower and mix well. Season with salt and pepper. With a handheld mixer, process half the mixture (use a food processor if you don’t have a mixer). Stir well, then shape small balls with your hands using 1 ½ leveled tablespoons per ball. Place the balls into the prepared pan leaving 2.5cm (1in) between them. Bake for 15 minutes, then carefully turn the balls. Bake for another 15 minutes and serve.

Makes about 22 – we ate half of the balls on the day I made them, and I froze the rest for some other time

Thursday, April 2, 2020

Quarantine vegetable soup

Sopa de legumes da quarentena

Hello everyone, long time no see. Ages ago I decided to be honest with myself and accept the fact that I no longer had time to write on this blog, unfortunately – I can barely update the one in Portuguese. But with these crazy, uncertain times we are living I thought I should ask you how it has been for you.

This is my third week isolated, went out only once to buy groceries. How is it going for you? I miss my nephew, miss going to work and to the gym, miss buying things like fresh veg whenever I want to, miss going to the movies. But I know I am privileged and one of the lucky people who can work from home and I have food on my table.

I have been cooking a lot, trying to make everything stretch as much as possible to avoid unnecessary trips to the grocery store. I also try to make each batch of food last for at least 2 meals. I have baked bread, but no sweets: my husband does not like them, and I don’t want to eat everything myself.

I made this soup earlier this week and it was enough for 2 dinners – my husband loves soup and if he wasn’t so eager to eat it the soup would have probably lasted for 3 meals. :D It is a riff on another soup I make regularly. I hope you like this recipe and I also hope to hear from you. xx

Quarantine vegetable soup
own recipe, a riff on this one

1 ½ tablespoons olive oil
½ large onion, finely chopped
1 leek, light part only, finely sliced
1/3 cup finely diced celery - I used frozen, unthawed
2 garlic cloves, finely chopped
1 ripe tomato, deseeded and chopped
3 large carrots, peeled and diced
3 large potatoes, peeled and diced
1 large courgette, diced
boiling water, enough to cover the vegetables (about 1,5 liters, but it will depend on the size of your saucepan)
salt and freshly ground black pepper
2 bay leaves
150g frozen spinach, unthawed - here in Brazil that would be 5 portions

Heat olive oil in a large saucepan over medium-high heat. Add the onion and cook until transparent, stirring occasionally, about 2 minutes. Add the leek and cook for 1 minute. Add the celery and cook, stirring occasionally, for 2 minutes – if you use frozen, like me, cook for 4 minutes, because it will cool the bottom of the saucepan slightly. Add the garlic and cook until fragrant – do not let it burn or it will taste bitter.

Add the tomato and a pinch of salt and cook until it is mushy. Add the carrots, potatoes and courgette and stir to combine. Cover with boiling water, season with salt and pepper and add the bay leaves. When the soup comes to a boil, reduce the heat to low, cover partially and cook until vegetables are tender, 25-30 minutes – this will depend on the size you cut them; I test the carrots and if they are tender the soup is ready.
Turn off the heat and with an immersion blender, blitz the soup for a couple of seconds – you want the mixture to be half chunky, half smooth. Add the spinach and stir slowly, until it defrosts and gets mixed into the soup – this will cool the soup a little bit and make it ready to serve.

Serves 5-6

Monday, February 19, 2018

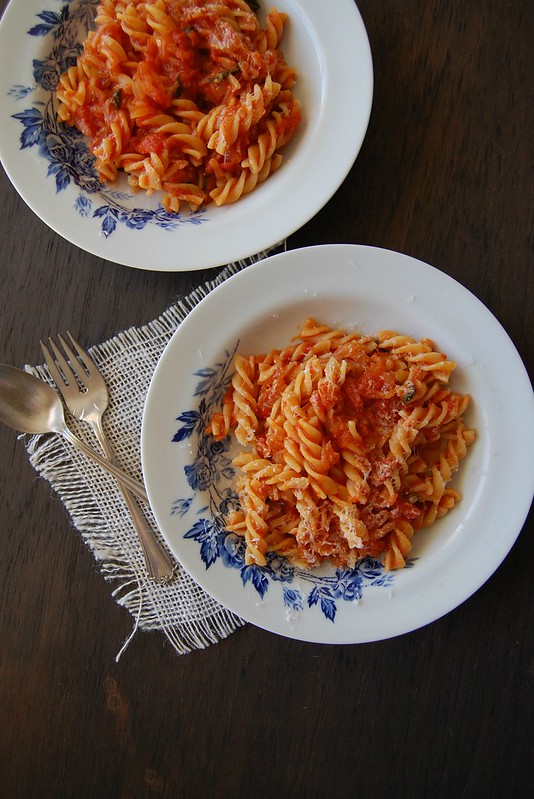
Pasta with onion and tomato sauce and the change in my cooking habits

Pasta with onion and tomato sauce / Macarrão com molho de tomate e cebola

I was talking to my husband the other day about how my cooking and baking have changed in the past year or so: I don’t bake as much anymore (lack of time + my lactose intolerance) and I also don’t test so many new recipes as I used to. Sometimes I flip through my books and magazines and the photos make me drool, however, I have been feeling the need of eating dishes I am familiar with.

I keep coming back to recipes I call “the classics” at my house, food that comforts and nourishes. Tomato sauce is something I make quite regularly (also to keep some in the freezer for emergencies or lazy days/nights), but there are times I vary it a bit (when I am not pressed for time) and make the recipe I bring you today: it is delicious and a hit with my husband and I – we are both dying hard onion fans. What I love to use with this sauce is orecchiette, for they are like small pools of sauce. :)

Pasta with onion and tomato sauce
slightly adapted from the wonderful Antonio Carluccio

2 tablespoons olive oil
2 medium onions (300g), peeled, cut in half and finely sliced into half-moons
1 tablespoon dry red wine
1 400g (14oz) can peeled chopped tomatoes
1 tablespoon tomato paste
1 teaspoon granulated sugar
1 bay leaf
salt and freshly ground black pepper
handful of fresh basil leaves
200g short pasta
finely grated parmesan or pecorino, to serve

Heat the oil in a large nonstick saucepan over medium-low heat, add the onions and fry them very gently until they become transparent and soft, about 20 minutes – stir occasionally so the onions do not catch in the pan. Add the wine and deglaze the pan. Add the tomatoes and tomato paste, followed by 1/3 of the can filled with water, the sugar, the bay leaf, season with salt and pepper and continue to cook, now on a low heat, for 15 minutes. Stir in the basil and turn of the heat.
In the meantime, cook the pasta in plenty of boiling salted water until al dente (follow the instructions in the package). Drain well, then mix with the sauce and stir to coat all the pasta. Serve immediately with finely grated parmesan or pecorino.

Serves 2

Tuesday, February 14, 2017

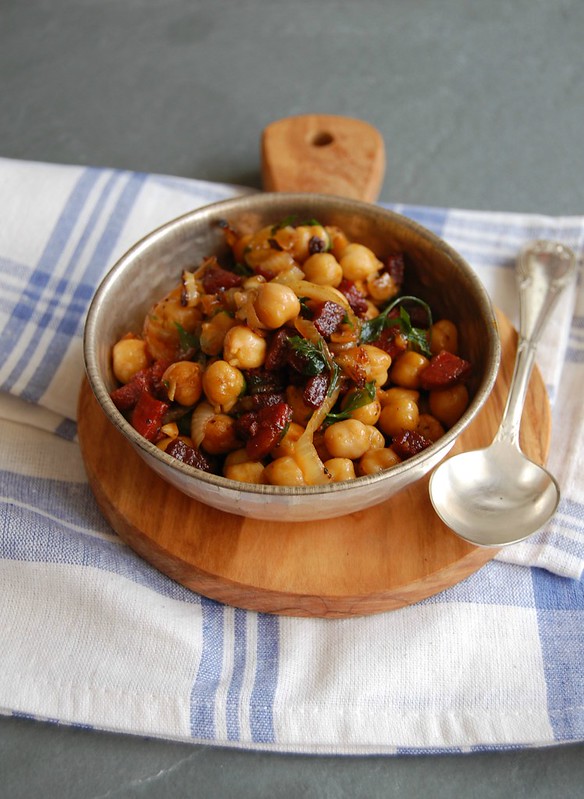
Chickpea and chorizo warm salad and a brain filled with food photos

Sherry-glazed chorizo and chickpeas / Grão de bico com chorizo e xerez

Usually, when I am very tired – which has been a constant lately, since the last weeks have been really intense at work – I flip through cookbooks, food magazines and take a look at Instagram maybe trying to boost my brain with beautiful food photos (it is either that or watching some episodes of Sex and the City for the fortieth time – that helps a lot, too). :)

That amount of food photos on someone’s brain might come in handy: I was taking a look at my fridge to prepare the weekly shopping list when I bumped into half a can of chickpeas – leftovers from a salad I had made on the weekend. Minutes before that I had seen a package of chorizo on my cupboard, and the connection was formed in my head: chickpeas and chorizo with sherry. I just was not sure exactly where I’d seen it – on a cookbook? On a magazine? A food blog? Instagram? All of the above? :) –, so I decided to freestyle and it tasted fabulous. I ate it as a warm salad, but I am sure it would work well as a side dish, too.

Chickpea and chorizo warm salad
own creation, inspired by several recipes

1 teaspoon olive oil
70g diced chorizo
½ large onion, thinly sliced in half-moons
2 garlic cloves, minced
200g cooked chickpeas, rinsed and drained
salt and freshly ground black pepper
2 tablespoons sherry
handful of fresh parsley leaves

Heat the oil in a large nonstick frying pan over high heat. Add the chorizo and cook it, stirring occasionally, until crispy. Add the onion and cook until onion is tender, stirring occasionally to avoid catching in the bottom of the pan. Stir in the garlic and cook for 1 minute or until fragrant. Add the chickpeas, season with salt and pepper and cook, stirring once or twice, for 3 minutes. Stir in the sherry and cook for 2 minutes or until sherry is reduced. Turn off the heat and mix in the parsley. Serve warm.

Serves 2


Tuesday, June 30, 2015

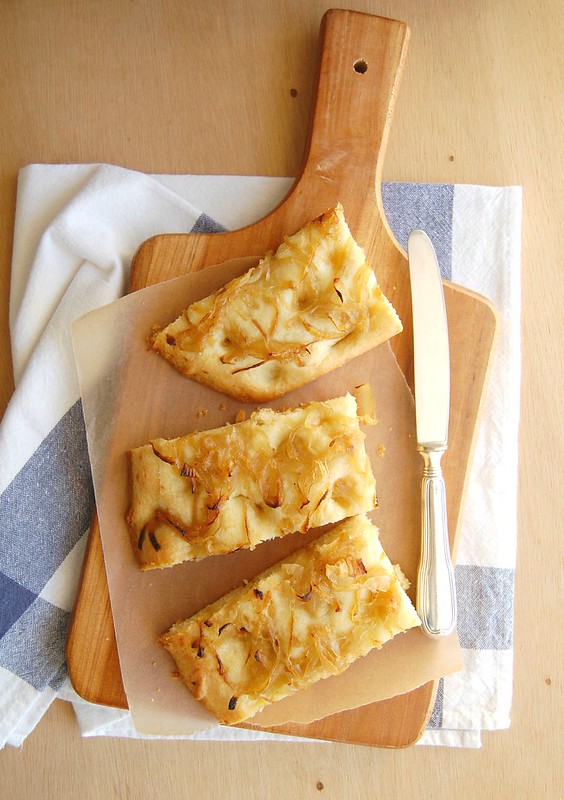
Caramelized onion and gruyere focaccia and the excellent "Bloodline"

Caramelized onion and cheese focaccia / Focaccia de queijo e cebola caramelizada

Now that I have brought my husband to the dark side – the side of the addicted to TV series – he keeps asking me what we’ll watch next: I find it both funny and lovely and I hope he stays this way for good. :)

We finished watching the first season of The Americans and while Netflix doesn’t bring us more episodes – I cannot wait! – I suggested we watched Bloodline, for its great cast and because Ben Mendelsohn had impressed me very much in the great Animal Kingdom. One of my readers had told me it was a wonderful show and she was right: it is well written, well directed and definitely spot on in acting – my husband loved it, too, and as we moved on through the episodes things got more and more interesting, to the point my husband said that he hoped there would be a second season (good news: there will be).

If you like dramas like the ones I usually write about here on the blog I can’t recommend Bloodline enough, and if you like baking bread and having something tasty to nibble on with a glass of sparkling wine or beer go to the kitchen and make this focaccia: it is not complicated to make and it tastes absolutely fantastic.

Caramelized onion and gruyere focaccia
slightly adapted from the delicious Home Baked Comfort (Williams-Sonoma) (revised): Featuring Mouthwatering Recipes and Tales of the Sweet Life with Favorites from Bakers Across the Country

Dough:
2 ¼ teaspoons (7g/1 sachet) active dry yeast
1 teaspoon granulated sugar
1 cup (240ml) warm water
3 1/3 cups (465g) all-purpose flour
¼ cup (60ml) olive oil
1 scant teaspoon table salt
150g (5oz) Gruyere cheese, shredded

Topping:
3 tablespoons olive oil
2 yellow onions, halved and thinly sliced
1 teaspoon granulated sugar
salt

In the bowl of a stand mixer, dissolve the yeast and sugar in the warm water. Let stand until foamy, about 5 minutes. Add the flour, oil, salt and cheese. Attach the dough hook and knead on medium-low speed until the dough is smooth and elastic, about 10 minutes. Form the dough into a ball, put it back in a lightly oiled large bowl, cover with plastic wrap and let the dough rise in a warm, draft-free spot until it doubles, about 1 hour.

Meanwhile, in a large frying pan, heat 1 tablespoon of the olive oil medium-low heat. Add the onions and sauté over medium-low heat until they start to wilt, about 3 minutes. Stir in the sugar and a good pinch of salt and continue to cook until the onions are golden brown and caramelized, about 20 minutes. Remove from the heat and let cool.

Oil a rimmed baking sheet with 1 ½ tablespoons of the olive oil. Dump the dough onto the prepared pan and press it into a rough rectangle. Using your fingers, stretch the dough into a rectangle about 20x30cm (8x12in). Cover the dough loosely with a kitchen towel and let rise in a warm, draft-free place until puffy, about 1 hour.

Position a rack in the middle of the oven and preheat to 220°C (425°F). Dimple the surface of the dough with your fingertips. Gently brush the remaining oil, then sprinkle evenly with the onion. Bake until gorgeously golden, about 20 minutes. Cut into squares and serve while warm.

Makes 1 flatbread (serves 6-8)

Sunday, January 4, 2015

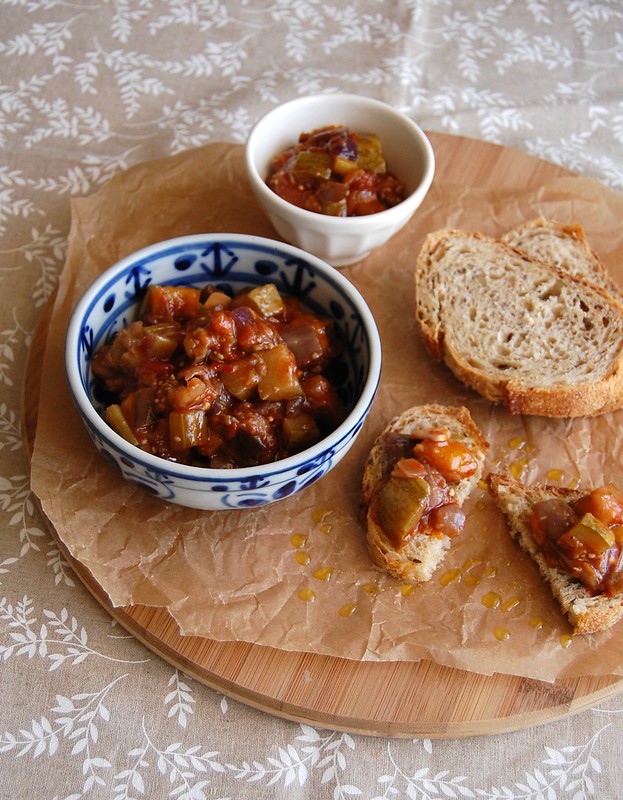
Caponata - easy and delicious

Caponata

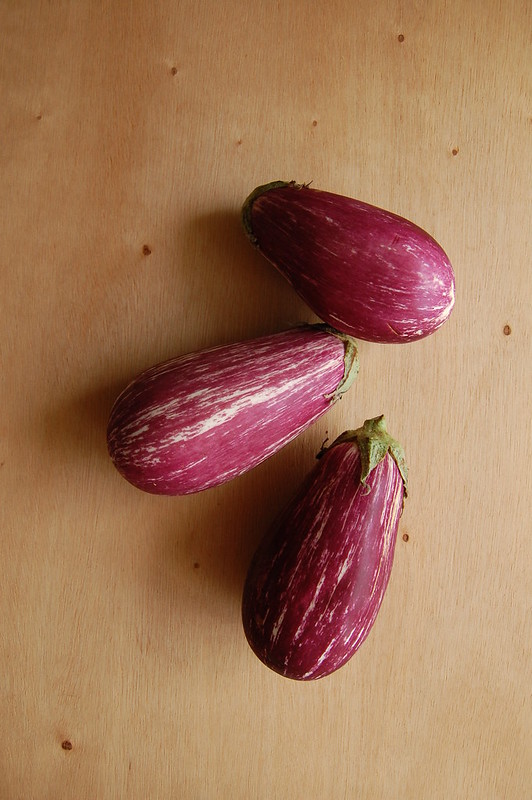
Caponata is something I ate a lot growing up, but never knew the real name – my grandmother used to make it all the time, especially when there were a lot of people to feed, and she served it with bread or on small toasts, canapé style. I loved it and would ask her to make it again and again – I used to call it “my grandma’s eggplant dish”, having no idea it was such a staple of Italian cuisine.

It took me forever to make caponata myself, maybe because it has always been something so attached to my grandma’s cooking, but my husband asked me to make it and I decided to give it a go, especially after going through some of my books and finding a recipe by Andrew Carmellini on one of my favorite cookbooks – it is his the most delicious gnocchi I’ve ever made, and I ate at both Lafayette and Locanda Verde when I was in NYC, so I trust the guy. ;)

Andrew’s caponata is very easy to put together and it tastes great, not to mention it benefits from a day of two in the fridge – I’m all for making things in advance, so this recipe has become part of my repertoire and I hope it becomes part of yours, too.

Caponata

Caponata
slightly adapted from the delicious Urban Italian: Simple Recipes and True Stories from a Life in Food

1/3 cup (80ml) extra-virgin olive oil
1 red onion, diced large
1 yellow pepper, diced large
1 Italian eggplant, diced large
3 stalks of celery, diced large
1 zucchini, diced large
½ teaspoon table salt
¼ teaspoon freshly ground black pepper
½ teaspoon red pepper flakes
2 cloves of garlic, sliced thin
1 400g (14oz) can chopped peeled tomatoes
1 tablespoon balsamic vinegar
2 tablespoons thyme leaves
3 tablespoons red wine vinegar – I used sherry vinegar

Heat olive oil in a large saucepot over high heat. Add the onion, pepper and eggplant. When the vegetables have softened a bit (about 5 minutes), add the celery and zucchini. Season with half the salt and black pepper. Mix the ingredients together and continue to cook.

After ten 10 minutes, add the red pepper flakes and garlic. Cover and reduce the heat to medium, and let the steam roast the vegetables for 5 minutes. Add the tomatoes, reduce the heat to low and simmer for 10 minutes, until vegetables are soft but not falling apart and the tomatoes are well incorporated. Mix in the balsamic vinegar and cook for 2 minutes.

Remove the saucepot from the heat, add the thyme and season with remaining salt and pepper (add more salt to taste if necessary). Mix in vinegar.

The caponata can be kept in an airtight container in the fridge for 4-5 days (I thought it tasted better the day after it was made).

Serves 8-10

Friday, January 24, 2014

Corn fritters with tomato salsa and a TV show you can't miss

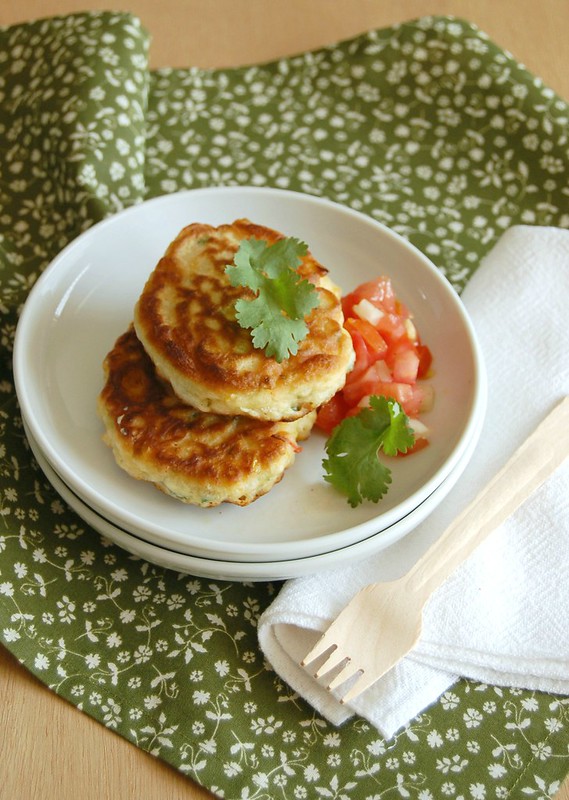
Corn fritters with tomato salsa / Panquequinhas de milho com salada de tomate

With Hannibal still more than a month away and the ages Sony has been taking to air the last two episodes of The Blacklist I started watching another TV series, a very short one – six episodes only for the first season – but immense when it comes to quality: Rectify was a fantastic surprise, and I got to it thanks to the lovely Amanda (thanks, dear).

The show is about Daniel Holden – portrayed beautifully by Aden Young –, a man who spent 19 years on death row and is released because of DNA evidence. Definitely not an easy subject and one that could easily be treated in a foolish and/or corny way, but not here; the writing is superb and so is the cast, and the great news is that there will be a second season, with four more episodes. \0/

Some more great news is that the once picky eater Mr. Scarpin continues to gladly try new dishes (thank heavens it was not something ephemeral linked to the trips to China and NY), and he loved these corn fritters, even though corn isn’t one of this favorite veggies. The idea was to serve the fritters with an avocado salsa just like the magazine suggested but the avocado I’d bought never got ripe, so a simple tomato salsa it was – and it tasted delicious.

Corn fritters with tomato salsa
slightly adapted from the always mouthwatering Delicious Australia

Salsa:
3 ripe tomatoes, seeds removed, diced
1 large onion, finely diced
juice of 1 lemon
2 tablespoons extra-virgin olive oil, or to taste
salt and freshly ground black pepper

Fritters:
150g all purpose flour
1 teaspoon baking powder
1 teaspoon granulated sugar
½ teaspoon table salt
½ cup (120ml) whole milk, room temperature
2 eggs
2 large corn cobs, kernels removed
½ small onion, finely chopped
1 red chili, deseeded if too hot, finely chopped
¼ cup fresh parsley leaves, chopped
2 tablespoons chopped cilantro leaves
salt and freshly ground black pepper
canola oil, for frying

Salsa: place the tomatoes and onion in a medium bowl, add the lemon juice and olive oil, season with salt and pepper and mix to combine. Cover with plastic wrap and refrigerate while you make the fritters.

Fritters: sift flour, baking powder, sugar and salt into a large bowl. In a small bowl, whisk together the milk and the eggs. Pour over the dry ingredients and stir to combine. Add the corn, onion, chili, parsley and cilantro, season with black pepper and fold to combine.
Heat a drizzle of canola oil in a nonstick frying pan over medium-high heat. Working in batches, add 2 tablespoonfuls of batter for each fritter and cook for 1-2 minutes or until golden. Flip each fritter and cook until golden on the other side and cooked through. Keep them warm while you fry the remaining batter.
Serve the fritters immediately with the salsa on the side

Serves 4


Thursday, August 23, 2012

Cheese and onion scrolls and changing my mind after the first bite

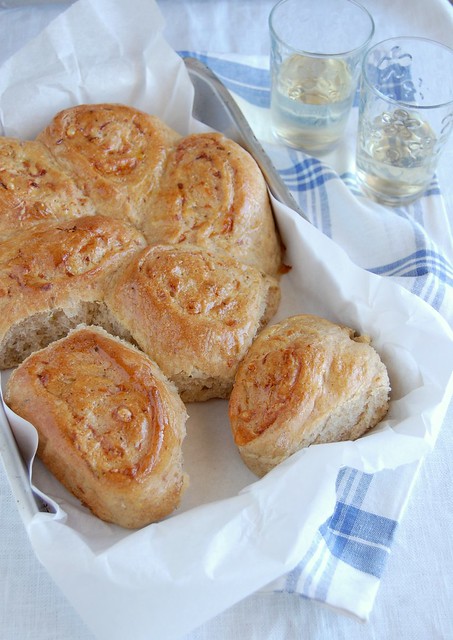
Cheese and onion scrolls / Pãezinhos de cebola e queijo

The minute I pulled these rolls out of the oven I decided not to publish the recipe on the blog – they did not look cute like the ones on the magazine, and being the perfectionism-freak that I am I got really disappointed at how they’d turned out. But the smell in my kitchen was so wonderful that I felt the urge to try one scroll, and that was when I completely changed my mind: it tasted so delicious I would have to share the recipe with you. I immediately grabbed my camera because the rolls were so good I did not think there would be any left for the photos afterwards. :D
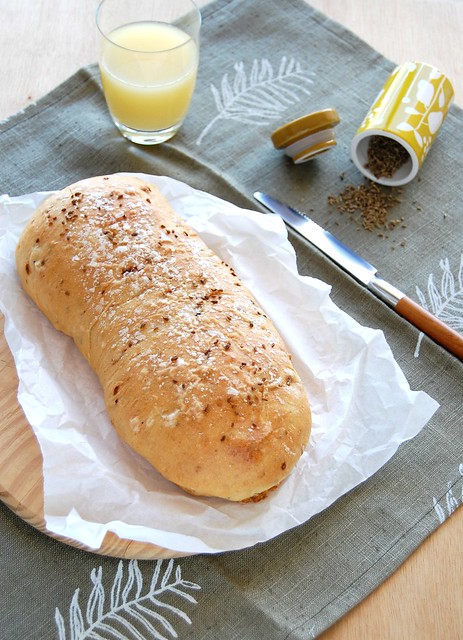
The dough is super soft and that made it difficult to shape the scrolls, but I advise you not to add more flour to it, even if you feel tempted to: you’ll love the oh, so tender texture of the rolls, and that great texture did not change after the bread cooled down.

Cheese and onion scrolls
adapted from the always gorgeous and delicious Australian Gourmet Traveller

1 onion, halved lengthwise then thinly sliced
1 tablespoon olive oil
1 ¾ cups + 1 tablespoon (255g) all purpose flour
¾ cup (105g) whole wheat flour
1 ½ tablespoons light brown sugar, packed
2 ¼ teaspoons (7g) dried yeast
2 tablespoons finely chopped chives
150g fontina cheese, coarsely grated, divided use
1 teaspoon salt
½ cup (120ml) whole milk, plus extra for brushing
1/3 cup (80ml) water

Stir onion and oil in a saucepan over medium-high heat until tender (4-5 minutes), set aside. Combine flours, sugar, yeast, chives, 50g of the fontina cheese, onion mixture and salt in the bowl of an electric mixer fitted with a dough hook. Warm milk and water in a saucepan over low heat until lukewarm, add to flour mixture, knead until smooth and elastic (4-5 minutes). Transfer to a lightly oiled large bowl, cover and stand in a warm place until doubled in size (45 minutes-1 hour).
Preheat oven to 180°C/350°F. Line a 20x30cm (8x12in) baking pan with foil, leaving an overhang in two opposite sides.
Knock back dough and roll out on a lightly floured surface to a 20x40cm (8x16in) rectangle. Scatter with remaining fontina cheese then roll to form a long cylinder. Cut into 8 pieces, place cut-side down onto prepared pan, 1cm (½in) apart. Cover and stand until slightly risen (10-15 minutes). Brush tops with milk and bake until golden (20-25 minutes). Serve warm (they tasted delicious at room temperature, too).

Makes 8

Tuesday, August 30, 2011

Fennel seed and onion loaf

Fennel seed and onion loaf / Pão com cebola e erva-doce

I’ve been trying to find a way to convince you to bake this bread but all I can think of is that it tastes delicious and goes really well with a glass of ice cold beer (which is always a winner imho). :)

Oh, and the leftover slices are great lightly buttered and toasted on a nonstick frying pan. There - I hope you give it a try.

Fennel seed and onion loaf
slightly adapted from the always gorgeous Australian Gourmet Traveller

¼ cup + 2 tablespoons (90ml) olive oil, divided use
1 onion, finely chopped
2 teaspoons fennel seeds, plus extra for dusting
3 ½ cups (490g) all purpose flour, plus extra for dusting
4 teaspoons (12g) dried yeast
2 teaspoons superfine sugar
¾ teaspoon salt
1 cup (240ml) warm water
milk, for brushing
crushed coarse salt or sea salt, for sprinkling – I used Maldon

Heat ¼ cup (60ml) of the olive oil in a small saucepan over medium heat, add onion, sauté until very tender (6-8 minutes), stir through fennel seeds, cook until fragrant (1 minute), remove from heat, season to taste and cool.
Combine flour, yeast, sugar, fennel mixture and salt in the bowl of an electric mixer fitted with a dough hook and mix to combine. With motor running, add water and remaining oil, knead until smooth and elastic (6-8 minutes), then transfer to a lightly oiled bowl, turn to coat, cover and rest in a warm place until doubled in size (30-45 minutes).
Preheat oven to 180°C/350°F; line a large baking sheet with foil.
Knock back dough, divide in half and roll each piece on a lightly floured surface into a 35cm (14in) long cylinder. Place onto prepared baking sheet, cover loosely with plastic wrap, stand until risen (15-20 minutes). Brush with milk and scatter with extra flour, fennel seeds and coarse/sea salt. Bake until golden and cooked through (25-30 minutes), then cool completely in the pan over a wire rack. Store in an airtight container until required. Bread is best eaten on day of making.

Serves 6 – I halved the recipe above and made a 30cm (12in) loaf of bread

Thursday, June 16, 2011

Onion soup – a classic dish for a chilly fall

Onion soup / Sopa de cebola

Classics don’t become classics for nothing: there must be something special, different, unusual about them to be considered as such; I’m particularly fond of some: movies, music bands, wardrobe items, and for that reason I do not know why it took me so long to try a classic dish like this soup; it is delicious, rich and comforting, not to mention simple and easy to make – everything classic food should be.

Onion soup
adapted from the great Feed Me Now and Jamie at Home

¼ cup (60ml) olive oil
3 garlic cloves, crushed
6 large onions, halved lengthwise then thinly sliced in half-moons
salt
15 sage leaves, chopped
3 tablespoons balsamic vinegar
1 liter vegetable, chicken or beef stock
4 slices sturdy bread (ciabatta, sourdough, etc.)
unsalted butter, to taste
150g fontina, cheddar or gruyère cheese, grated

Heat the olive oil in a large heavy-based saucepan* over high heat. Add the garlic and cook for 30 seconds or until fragrant. Add the onions with a little salt and the sage leaves and cook for 7 minutes, stirring constantly. Reduce the heat to medium and continue to cook for 25 minutes or until onions are golden brown, stirring occasionally.
Add the balsamic vinegar and cook until the vinegar has evaporated. Pour in the stock and simmer for 10 minutes.
Preheat the oven to 200C. Lightly butter each bread slice and place onto a baking sheet. Toast in the oven for 5-7 minutes or until golden. Remove from the oven, spread the cheese over the bread slices and bake for another 2-3 minutes or until the cheese melts.
Ladle the soup into individual bowls, top each with a slice of cheesy toast and serve.

* I halved the recipe and had to use a very large saucepan to hold so many onion slices; make sure to use a very big saucepan if you’re making the recipe as it is printed here

Serves 4

Friday, June 19, 2009

Onion tartlets

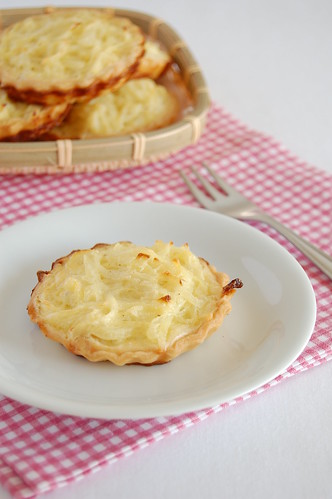
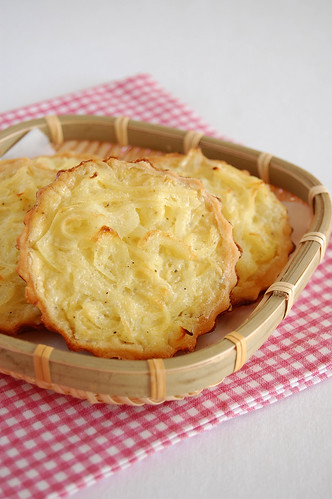
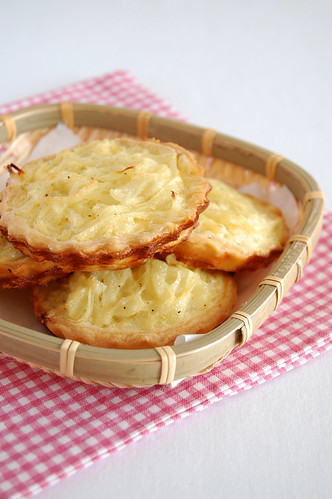
Onion tartlets / Tortinhas de cebola

Two people I hold very dear will be turning away at the blog upon seeing this recipe: my brother JP and my good friend C. - they hate onions with every fiber of their beings! :D

I’m not a fan of raw onions, but love them cooked or roasted. In these tartlets the onion slices are cooked in butter for a good while and after being mixed with the other filling ingredients and baked they became really soft, almost sweet.

The dough shrunk in the oven, resulting in smaller tart cases – because of that, there wasn’t much room for the filling, causing it to leak (I used loose-bottomed pans). The great flavor made me forget all the trouble. :D

Onion tartlets / Tortinhas de cebola

Onion tartlets
from Australian Gourmet Traveller

Tarte:
250g plain flour
125g cold unsalted butter, diced
1 teaspoon salt
1 egg

Onion filling:
60g unsalted butter
600g (about 2 large) onions, cut in half then thinly sliced
3 eggs, beaten
200ml crème fraîche*
½ teaspoon freshly grated nutmeg
salt and freshly ground black pepper

Start with the dough: process flour, butter and salt in a food processor until mixture resembles breadcrumbs. Add egg, then while pulsing gradually add 2-3 tablespoons iced water until pastry forms into a ball. Transfer to a floured surface, knead for 30 seconds, wrap in plastic wrap and refrigerate for 30 minutes.
Preheat oven to 200ºC/400ºF. Roll out pastry to 5mm thick on a floured surface, cut out four 16cm-diameter rounds and use to line four 12cm-diameter tart pans, trimming excess pastry with a knife. Prick dough with a fork and place pans in freezer for 10 minutes, then bake for 12 minutes or until golden. Set aside until ready to use.
For onion filling, melt butter in a large saucepan over low heat, add onions and cook, stirring occasionally, for about 30 minutes or until softened but not brown. Transfer to a bowl and cool. Whisk eggs, crème fraîche and nutmeg together and season with salt and black pepper. Add to onions and combine well. Divide filling among tart pans and bake for 15 minutes or until golden. Serve warm or cold.

* I’ve never seen crème fraîche around here, so I added lime juice to heavy (whipping) cream and set aside, in room temperature, until thick

Serves 4 – I halved the recipe and got six 9cm tartlets

Onion tartlets / Tortinhas de cebola

Thursday, January 10, 2008

Autumn spicy rice

Autumn spicy rice

I know, I know, it’s not autumn anymore – and the hot days here in Sao Paulo keep me pretty aware of that… but being a rice lover it was impossible for me to resist this recipe.

I don’t eat meat and you know it – and even when I did, back in the day, I would never eat pork. It’s nothing religious or anything, I just don’t like it.

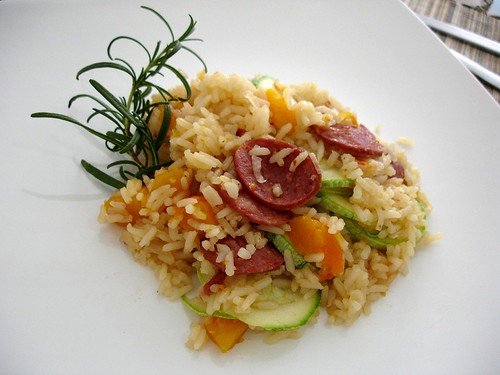
I always have chorizo sausages in the fridge since Joao loves them – there’s a kind called calabresa that is used in barbecues and also as a pizza topping. I decided to put my prejudices aside for a moment and try this recipe with the calabresa sausage. And I’m glad I did – the rice was packed with flavor and most of it due to that ingredient.

There’s no rosemary in this recipe – I just thought it would make the dish look prettier. :)

whb-two-year-icon

This is my entry for the Weekend Herb Blogging, this time hosted by Vani, from the blog Batasari.

One last thing: the results for this DMBLGIT (in which one of the judges was yours truly) are up - congratulations to all the winners!

Autumn spicy rice
from Donna Hay magazine

1 tablespoon olive oil
1 red onion, sliced
3 chorizo sausages, sliced
200g (7oz) butternut squash, peeled and chopped
½ teaspoon chilli flakes
2 cups long-grain rice
3 cups (24fl oz) chicken stock
2 zucchinis (courgettes), thinly sliced

Heat a deep frying pan over medium heat. Add the oil, onion, chorizo, squash and chilli and cook for 2-3 minutes or until the onions are soft. Add the rice and cook, stirring for 1 minute.
Add the stock and bring to the boil. Reduce the heat to low, cover with a tight-fitting lid and cook for 15 minutes or until the stock is absorbed and the rice is cooked. Stir through the zucchini and allow to stand for 2 minutes.

Serves 4

Thursday, August 30, 2007

Almost Greek salad

Almost Greek salad

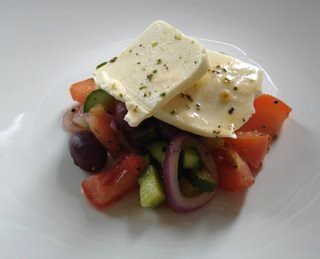
Yep, almost Greek. Because I used a different type of cheese to replace feta – queijo Minas frescal. And I used lime juice in the dressing, instead of red wine vinegar.

The verdict? I had a huge bowl of this salad. HUGE. I mean it – it was all I had for lunch, with a glass of wine. Ok, 2 glasses of wine. :)

I still want to try it with feta, but my Brazilian twist worked so well I’m submitting this salad to this Weekend Herb Blogging, this time hosted by its creator, the lovely Kalyn, of Kalyn’s Kitchen.

aaWeekendHerbBlogging

Almost Greek salad
adapted from Kitchen: The Best of the Best

4 ripe tomatoes
2 Lebanese (short) cucumbers
1 red onion
175g (1 cup) Kalamata olives
½ teaspoon dried oregano
200g queijo fresco or creamy feta

Dressing:
juice of 1 small lime
3 tablespoons extra virgin olive oil
salt
freshly ground black pepper

Cut the tomatoes into chunks and arrange on a serving platter.
Thickly cut the cucumbers; cut the onion in paper thin slices. Add to the tomatoes and scatter the olives over the plate. Cut the cheese in thick slices and arrange over the vegetables. Sprinkle the salad with the oregano.
Make the dressing: mix well the ingredients. Drizzle over the salad and serve.

You can present the salad as I did, inspired by one episode of Take Home Chef: mix the vegetables in a bowl, sprinkle with oregano and drizzle with the dressing.
Place amounts of salad on serving plates and top with the slices of cheese. Drizzle once more with the dressing.

Serves: 4 (as a side dish)

Almost Greek salad

Related Posts with Thumbnails