Days ago I asked my Instagram followers what they like to see on the blog the most, the recipes they immediately feel like making in their homes when I post: cakes and cookies were the champions, followed by brownies and bread. Some followers told me they love my savory recipes, to vary the daily meals, and soups were also mentioned.
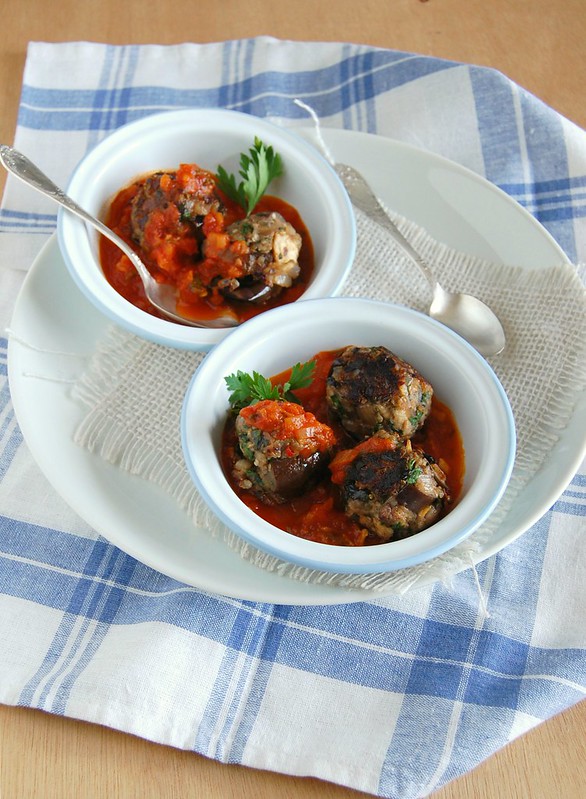
I must confess that I love baking and photographing (and eating!) cakes and cookies, but one cannot live on these alone, especially now that I am no longer exercising daily as I used to. Therefore, I will continue posting the sweet recipes my Brazilian followers love so much, but will focus on the savory ones, like these stuffed eggplants I bring you today: they are delicious! A vegetarian meal full of flavor and that looks beautiful on the plate.
I would also love to hear what you, my foreign readers, like to see around here the most – please share with me your thoughts. Thanks. xx

Stuffed eggplants with tomato and cheese
own recipe
Eggplant “boats”:
2 large eggplants (about 350g/12oz each)
2 teaspoons olive oil
Filling:
2 tablespoons olive oil
1 small onion, finely chopped
2 garlic cloves, minced
2 ripe tomatoes, seeded, in small dice
sal and freshly ground black pepper
2 teaspoons dried oregano
a few fresh basil leaves
2 cups (140g) coarsely grated yellow mozzarella* - set aside 3 tablespoons
to sprinkle over the dish
8 large black olives, pitted and finely chopped
Preheat the oven to 200°C/400°C. Line a large baking sheet with foil.
Cut the eggplants lengthwise, making little “boats” with them, and then
make crisscross cuts on the flesh, but be careful not to pierce the skins.
Brush the cut side with the olive oil and place it upside down, facing the
foil. Bake for 30 minutes.
In the meantime, start the filling: heat the olive oil in a large frying pan (nonstick is better) over medium-high heat. Add the onion and cook, stirring occasionally, until translucent. Add the garlic and cook for 1 minute – do not let it burn or it will become bitter. Add the tomatoes, season with salt and pepper and cook, stirring occasionally, until the tomatoes start to break down. Add the oregano and cook for 2 more minutes. Stir in the basil and turn off the heat.
Remove the eggplants from the oven (keep it on), and very carefully not to get burned, using a spoon remove the flesh from the eggplants, but not too deep so the “boats” stay intact. Add the flesh to the cooked filling, stir in the cheese (do not forget to set aside 3 tablespoons for topping the dish) and the olives. Stuff the eggplant shells with the filling, sprinkle with the remaining cheese and place them back on the baking sheet. Bake for another 25 minutes. Serve immediately.
* the yellow mozzarella I used is not like fresh mozzarella balls, therefore it does not release too much liquid. Replace by cheddar or something similar texture wise.
Serves 4 – I served my stuffed eggplants with rice and a green salad on the side, so 1 “boat” (1/2 eggplant) was enough per person; if you intend to serve this as a single dish, I believe 2 “boats” (1 eggplant) per person should be enough