Those of you with picky eaters at home will probably agree with me: it’s not easy and sometimes not pleasant at all to cook for them. :/ For that reason, when my husband requests something in particular for lunch or dinner I feel relieved – I know I won’t need to spend hours (and brain cells) thinking of the menu.
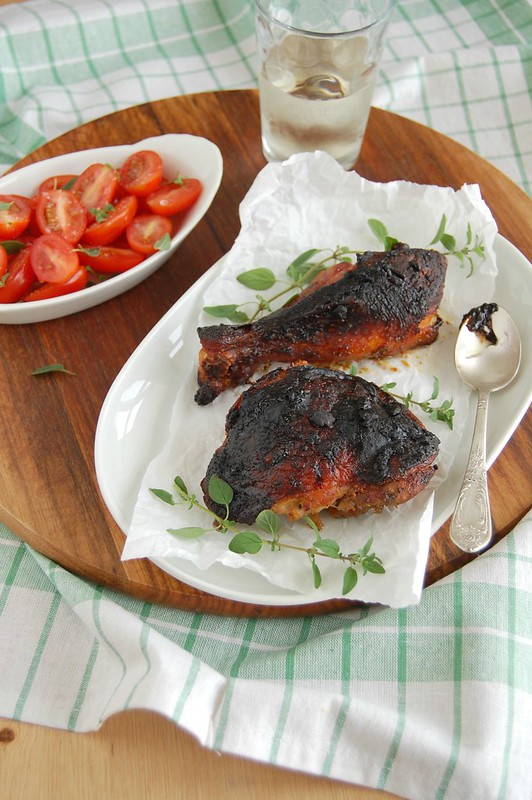
While watching Nigel Slater's Simple Suppers a couple of weeks ago we saw Nigel making golden and caramelized chicken pieces when Joao said: “how about that for lunch?” – I immediately agreed since we’re both crazy for roasted chicken. Nigel’s chicken is dead easy to make – the refrigerator and the oven do all the work – and turned out delicious, crunchy and sticky on the outside and absolutely tender and juicy on the inside, falling off the bone. It was so good that my husband placed it on the #1 spot with Donna Hay’s chicken baked with chorizo, which up to that day had been his favorite way of eating chicken.
Sticky chicken with lemon and honey
slightly adapted from the always wonderful Nigel Slater
4 large chicken pieces, bone in and skin on – use your favorite cuts
juice of 2 lemons
1 tablespoon runny honey
½ tablespoon Dijon mustard
3 garlic cloves, crushed into a paste
salt and freshly ground black pepper, to taste
soft butter, for preparing the baking dish
Place the chicken in a medium bowl. In a small bowl, whisk together with a fork the lemon juice, honey, mustard, garlic, salt and pepper. Pour over the chicken, mix to coat all the pieces and cover with plastic wrap. Refrigerate overnight or at least for 4 hours.
Preheat the oven at 200°C/400°F. Line a baking dish with a double layer of foil and brush the foil with the butter.
Transfer the chicken to the prepared dish and pour over any left marinade. Bake for about 45 minutes, or until cooked to your liking – we like our chicken very golden brown, as you can see on the photo, so I baked it for 1 ½ hours.
Serve immediately.
Serves 2
Saturday, July 6, 2013
Sticky chicken with lemon and honey
Thursday, December 16, 2010
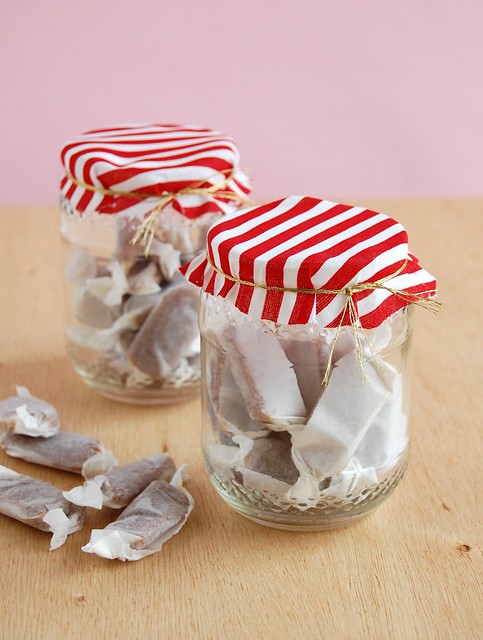
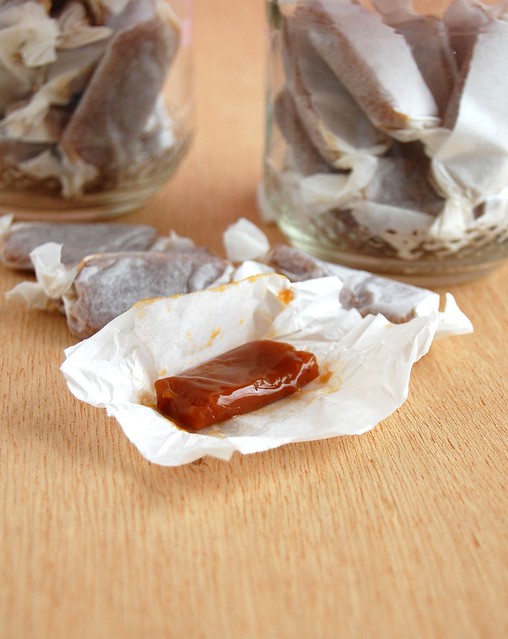
Gingerbread caramels
My friend Ana Elisa’s adventure in making torrone reminded me of how much work these caramels were: it took forever for the mixture to achieve the desired temperature, and I was melting in my kitchen while stirring it; after that, another century went by before I finished cutting them, oiled knife and all. Not to mention they were super soft and hard to wrap, too.
You’ll probably ask me why on earth I am posting such recipe – well, all the trouble slipped my mind the minute I tasted one caramel. :)
Gingerbread caramels
adapted from Pure Dessert, flavor idea from here
¾ cup corn syrup
¼ cup molasses
2 cups (400g) caster (superfine) sugar
¼ teaspoon salt
2 cups (480ml) heavy cream
½ teaspoon ground cinnamon
¼ teaspoon ground ginger
¼ teaspoon freshly ground nutmeg
1/8 teaspoon ground cloves
3 tablespoons (42g) unsalted butter, cut into chunks, softened
Line the bottom and sides of a 22cm (9in) square pan with aluminum foil and grease the foil. Combine the corn syrup, molasses, sugar, and salt in a heavy 3 liter (3-quart) saucepan and cook over medium heat, stirring with a silicone spatula or wooden spoon, until the mixture begins to simmer around the edges. Wash the sugar and syrup from the sides of the pan with a pastry brush dipped in water. Cover and cook for about 3 minutes. (Meanwhile, rinse the spatula or spoon before using it again later.) Uncover the pan and wash down the sides once more. Attach the candy thermometer to the pan, without letting it touch the bottom of the pan, and cook, uncovered (without stirring) until the mixture reaches 150°C/305°F. Meanwhile, heat the cream with the spices in a small saucepan until tiny bubbles form around the edges of the pan. Turn off the heat and cover the pan to keep the cream hot.
When the sugar mixture reaches 150°C/305°F, turn off the heat and stir in the butter chunks. Gradually stir in the hot cream; it will bubble up and steam dramatically, so be careful. Turn the burner back on and adjust it so that the mixture boils energetically but not violently. Stir until any thickened syrup at the bottom of the pan is dissolved and the mixture is smooth. Continue to cook, stirring occasionally, to about 118°C/245°F. Then cook, stirring constantly, to 126°C/260°F for soft, chewy caramels or 129°C/265°F for firmer chewy caramels.
Remove the pan from the heat pour the caramel into the prepared pan. Let set for 4 to 5 hours, or overnight until firm.
Lift the pan liner from the pan and invert the sheet of caramel onto a sheet of parchment paper. Peel off the liner. Cut the caramels with an oiled knife. Wrap each caramel individually in wax paper or cellophane.
* the flavor of the spices was very discreet in the finished caramels, so you might want to increase the amounts for a real gingerbread kick
Makes about 80 – I got 100
Monday, March 9, 2009
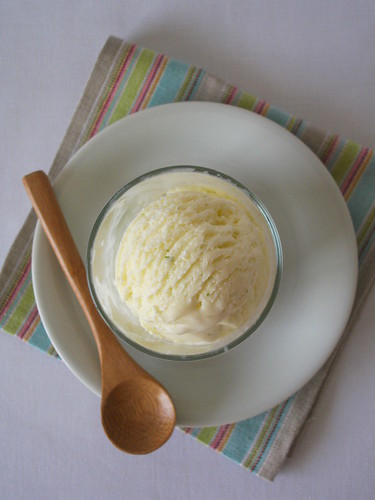
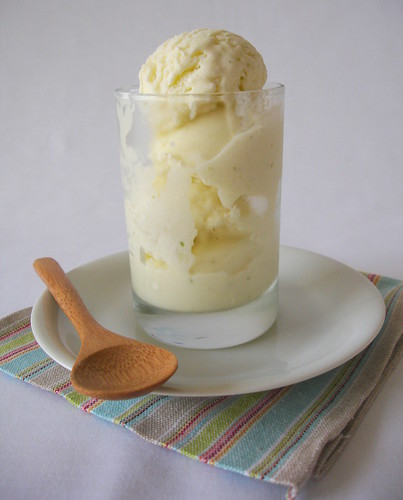
Super lime ice cream
There are simple things in life that have the power of lighting up our day – like arriving home and finding a package or your favorite magazine waiting for you in the mailbox. I love that.
My copy of David Lebovitz’s ice cream bible was delivered Friday and Saturday morning I was in the kitchen, preparing a recipe from it. Are you surprised my first choice was a citrus flavor?? Didn’t think so. :D
Super lime ice cream
adapted from The Perfect Scoop
2 large limes
½ cup + 2 tablespoons (125g) caster sugar
½ cup (120ml) freshly squeezed lime juice (from about 3 large limes)
1 cup (240ml) whole milk
1 cup (240ml) heavy cream
pinch of salt
Zest the limes directly into a food processor or blender. Add the sugar and lime juice and blend until the sugar is dissolved. Blend in the milk and heavy cream.
Chill for 1 hour, then freeze the mixture in your ice cream maker according to the manufacturer’s instructions.
Makes about 1 quart (1 liter)
Monday, March 2, 2009
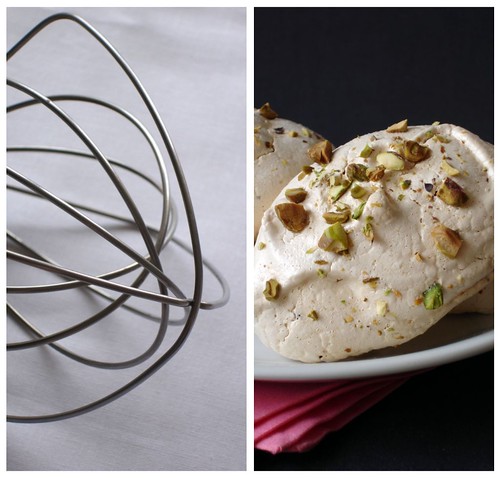
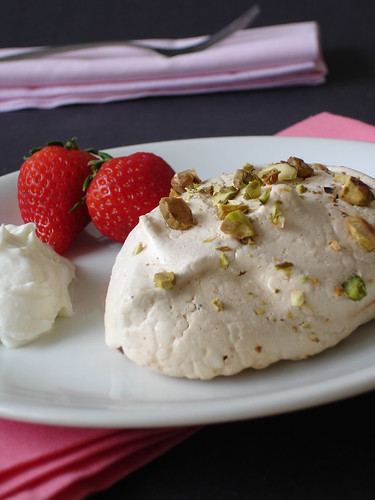
Very berry meringues
After so many batches of custard based ice creams – there are recipes I’ve made three or four times – I had several egg whites left. I did freeze some but there were a couple of whites still in the fridge – that seemed like the perfect excuse to make meringues.
I’d bookmarked this recipe ages ago – I just love Delicious. magazine’s website – and it called for only 5 ingredients, all of them in my pantry/fridge... The perfect treat for those moments when you are feeling much too lazy/tired for a trip to the grocery store.
Very berry meringues
4 large egg whites, room temperature
225g caster sugar
75g mixed dried berries, coarsely chopped – I used dried cherries and cranberries
20g shelled unsalted pistachios, chopped
140ml double cream, to serve
Preheat the oven to 140ºC/284ºF. In a large, grease-free bowl, using an electric mixer, whisk the egg whites to soft peaks. Gradually whisk in the caster sugar, 1 tablespoon at a time, until you have a thick, glossy meringue. Using a large metal spoon, briefly fold in the mixed dried berries to evenly distribute through the meringue.
Line 2 baking trays with baking paper, fixing the paper in place with a tiny blob of meringue in each corner. Using 2 large metal spoons, take a spoonful of the meringue and scoop it from 1 spoon to the other to shape it into an oval ‘quenelle’ shape; alternatively, just dollop large, craggy spoonfuls of the meringue onto the baking sheets.
Drop onto the baking paper, then repeat to make 8 large meringues, spacing them 5cm (2in) apart as they will expand as they cook. Sprinkle with the chopped pistachios.
Bake the meringues in the oven for 1h15min for mallowy centers, or 1h30min for crisper meringues – swap the trays halfway to ensure even cooking. Turn off the oven and leave the meringues inside to dry out for at least 4 hours, or overnight.
To serve, transfer the meringues to serving plates. Whip the cream to soft peaks and serve a dollop with each berry meringue.
The cooked meringues will keep in an airtight box in a cool place for up to 4 days.
Serves 8 – I halved the recipe and got 5 large meringues
Wednesday, January 28, 2009
Lavender marshmallows
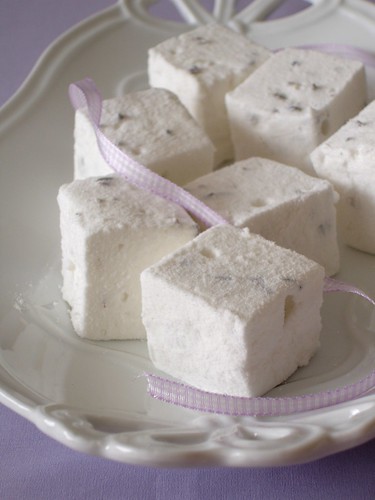
It seemed like a good idea – something delicate, almost ethereal. But it did not turn out as I expected...
Have you tried lavender marshmallows? I remember seeing a photo on a magazine, months ago, but there was no recipe – it was an ad from a bakery or something. I decided to use a vanilla marshmallow recipe from DH mag #36 adding the dried lavender instead of vanilla extract.
The marshmallow was actually quite good – delicious and fluffy. But the problem was biting into the lavender buds – they tasted sort of bitter. Maybe grinding them with the sugar before making the syrup would solve this problem – I would love to hear your opinion about it.
Lavender marshmallows
adapted from Donna Hay magazine
4 tablespoons powdered gelatin
1 cup (240ml) warm water
660g caster sugar
1 1/3 cups glucose syrup
2/3 cup water, extra
3 tablespoons dried edible lavender*
200g confectioners’ sugar, sifted
35g (about 3 tablespoons) corn starch
Place the gelatin and warm water in the bowl of an electric mixer, stir well to combine and set aside. Place the sugar, glucose and extra water in a saucepan over medium heat. Bring to the boil and cook without stirring for 5-6 minutes or until soft ball stage (115ºC/240ºF) on a sugar thermometer.
With the mixer running at high speed, gradually add the hot syrup to the gelatin mixture. Add the lavender and beat for 10 minutes or until thick and fluffy. Pour into a lightly greased 25x35cm (10x14in) baking dish lined with non-stick baking paper, cover with lightly greased non-stick baking paper and refrigerate overnight (I used regular baking paper and oiled it very well).
Place the icing sugar and corn starch in a bowl and stir to combine. Turn the marshmallow onto a surface lightly dusted with a little of the icing sugar mixture and carefully remove the paper. Cut into 5cm (2in) squares – to make cutting easier, dip the knife in boiling water and wipe dry between each incision.
Dust with remaining icing sugar mixture and store in an airtight container
Makes 25 - I halved the recipe above, used a 20cm (8in) square pan and got 36 smaller marshmallows
Monday, January 5, 2009
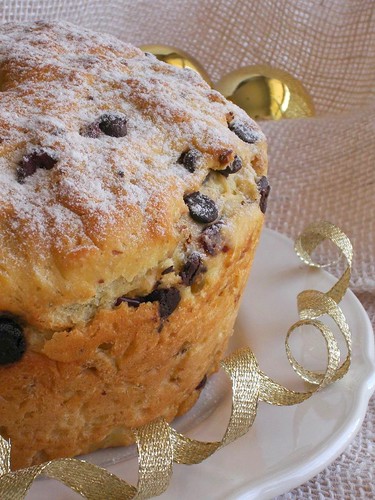
Chocolate, pistachio and cranberry panettone
Happy New Year, everyone!
Thank you for your comments and emails – I took some time off and haven’t posted here or visited my favorite blogs. I intend to correct that as soon as possible and I start this panettone. I adapted this recipe, replacing the raisins and hazelnuts for dried cranberries and pistachios.
I wish you all a great year, full of joy, love and hope. May all our dreams come true!
Chocolate, pistachio and cranberry panettone
from Delicious magazine
125g unsalted butter, softened, divided
350g strong white bread flour, plus extra for dusting – I used 380g all purpose flour
½ teaspoon salt
7g sachet (2 ¼ teaspoons) fast-action dried yeast
50g caster sugar
50g dried cranberries
50g shelled, unsalted pistachios, roughly chopped
finely grated zest of 1 orange
3 large eggs, lightly beaten
4 tablespoons warm milk, plus extra, if needed
50g semisweet chocolate chips or chunks
icing sugar, to dust
Grease and line a fluted savarin or kugelhopf pan (or a 18cm round x 9cm deep pan)*.
Sift the flour and salt into a large bowl. Stir in the yeast, sugar, cranberries, nuts and zest.
Make a well in the centre and add the eggs, 100g of the butter and the milk. Mix. Knead in the bowl for 5 minutes or until it is smooth and elastic (add a little extra milk, if it’s dry). Turn out onto a floured surface and knead for a further 5 minutes or until smooth - – I used my Kitchen Aid with the hook attachment for the whole kneading process.
Put in a lightly greased bowl and cover with cling film. Leave in a warm place for at least 1 hour or until doubled in size.
Punch the dough in the bowl to ‘knock back’, then knead for another 5 minutes on a floured surface. Gradually knead in the chocolate as quickly as possible to avoid the chunks melting. Place the dough into the pan. Cover and leave for another 30 minutes or until risen again.
Meanwhile, preheat the oven to 180ºC/350ºF. Melt the remaining 25g butter and brush over the top of the loaf. Bake for 30-35 minutes or until risen and cooked through. Wrap in a thick tea towel and set aside to cool.
Dust with icing sugar to serve.
* I used a regular 20cm ring pan.
Makes 1 large loaf
Sunday, December 21, 2008
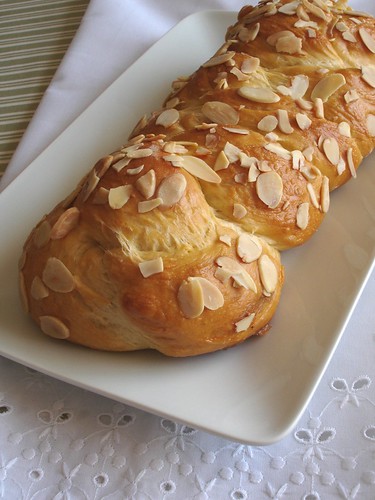
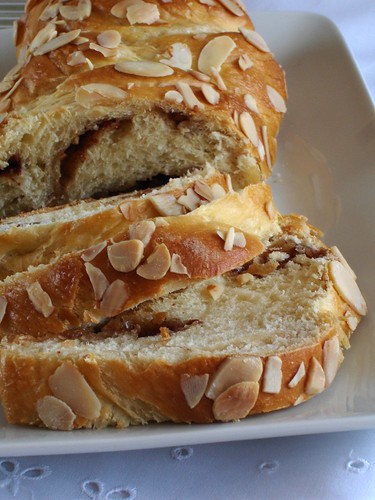
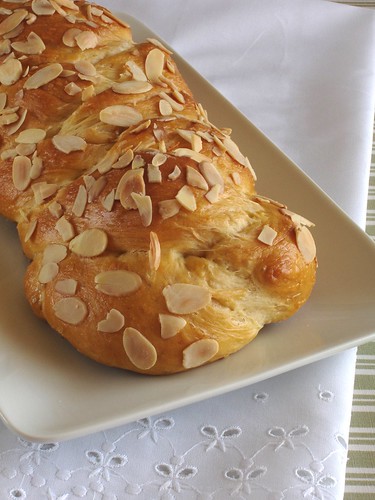
Cinnamon scented challah
I was watching music videos on TV other day when I saw the ugliest creature ever. Really – at the moment he took off his shirt and opened his mouth I felt like running, running like there was no tomorrow.
A quick visit to a certain profile on imdb was essential to avoid being scarred for life. :D
Making something pretty also helps. I decide for this challah, inspired by the gorgeous one Jaden made a while ago. The recipe is from Zoe’s wonderful book.
Cinnamon scented challah
from Artisan Bread in Five Minutes a Day
Master Challah dough*:
1 ¾ cups (420ml) lukewarm water
1 ½ tablespoons instant yeast
1 ½ teaspoons table salt
4 large eggs, slightly beaten
½ cup honey
½ cup (113g) unsalted butter, melted
7 cups (980g) unbleached all-purpose flour
Filling and topping:
½ cup (100g) granulated sugar
1 teaspoon ground cinnamon
a small handful sliced almonds
egg wash: 1 egg beaten with 1 tablespoon of water
Mix the yeast, salt, eggs, honey and butter with the water in a 5-quart bowl, or a lidded (not airtight) food container.
Mix in the flour without kneading, using a spoon, a 14-cup capacity food processor (with dough attachment) or a heavy duty stand mixer, with dough hook. If you are not using a machine, you may need to use wet hands to incorporate the last bit of flour.
Cover (not airtight) and allow to rest at room temperature until the dough rises and collapses (or flattens on top), approximately 2 hours.
For the filling, mix together sugar and cinnamon in a small bowl. Set aside.
The dough can be used immediately after the initial rise, though it is easier to handle when cold. Refrigerate in a lidded (not airtight) container and use over the next 5 days. Beyond 5 days, freeze in 1 pound (450g) portions in an airtight container for up to 4 weeks. Defrost frozen dough overnight in the refrigerator before using. Then allow the usual rest and rise time.
On baking day, line a baking sheet with non stick baking paper or buttered regular baking paper.
Dust the surface of the refrigerated dough with flour and cut off a 1-pound/450g (grapefruit-size) piece. Dust the piece with more flour and quickly shape it into a ball by stretching the surface of the dough around to the bottom on all four sides, rotating the ball a quarter-turn as you go.
Let’s shape the challah: use the palm of your hands and roll the dough into a thick, even log. Cut the dough into 3 equal pieces with knife or dough scraper. (It’s easier to cut even pieces when the dough is not round). Roll each piece with your hands to stretch into a long 1 ½ in (approx. 3.75 cm) thick rope. Try not to just stretch it out by pulling, the dough will break. Easiest way is to place dough on counter and roll back and forth with palms of hands, starting in the middle and hands move out which stretching the dough a bit. Don’t worry about getting it to look pretty, just try to get each piece even sized.
Take one piece of dough. Use side of your hand to press and create an indent in the middle of the strand. Spread 1/3 of the filling in this indent.
Bring up the sides of the dough, encasing the filling, and pinch dough closed. Repeat with other strands.
Now, time to braid the bread: start in the middle and braid. Pinch ends, tuck under. Now braid the other side, pinch and tuck. Start braid from the middle (instead of top) so that it tapers evenly at both ends. Place on prepared sheet, over paper.
Cover with towel and let rest for 1 ½ hours; 20 minutes prior to baking, preheat your oven to 180ºC/350ºF.
When dough is ready, brush top with egg wash and sprinkle with almonds. Bake for 25 minutes or until golden.
* this amount of dough is enough to make four 1-pound (450g) challahs – you may keep the remaining dough in the fridge or freeze it (as explained in the recipe) and use as desired
Makes 1 challah
Wednesday, November 12, 2008
Yeasted banana bread
I have to start this post by deeply thanking a Brazilian reader of mine, Debora – after reading my desperate request for a good yeasted banana bread, she left a comment with a link for a recipe, and it looked like what I wanted.
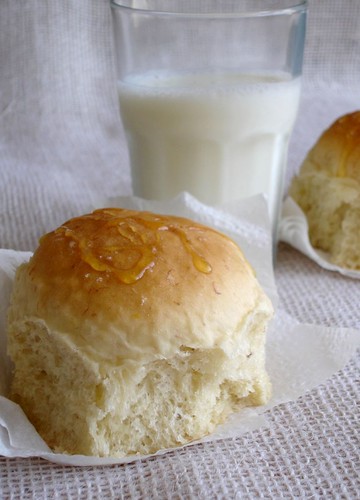
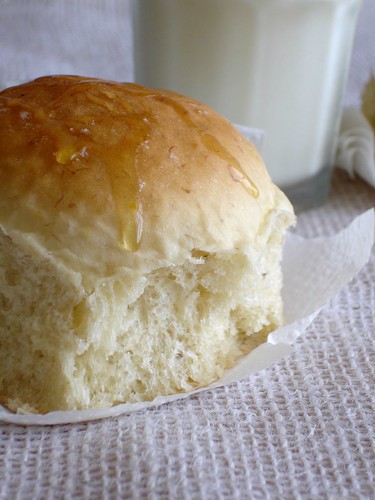
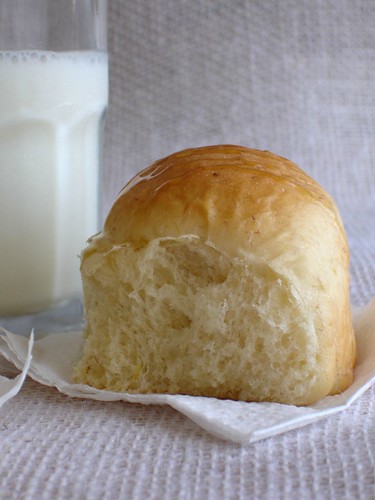
I finally baked the bread and what a wonderful recipe this is! The rolls came out extremely tender and with a delicious banana hint. Since they are not overly sweet, you can use your imagination and slather them with butter, jam, or make sandwiches with multiple choices of fillings.
I used this recipe and Dominic sent me a very kind email after I left him a comment - he suggests the addition of ground cardamom to the bread. I only reduced the amount of salt and proofed the yeast before mixing all the other ingredients.
I knew I could count on my readers and fellow food bloggers to put an end on my banana bread quest. Thank you!
Yeasted banana bread
2 teaspoons instant yeast
3 tablespoons sugar
¾ cup (180ml) lukewarm water
3 cups (420g) unbleached all purpose flour
1 teaspoon salt
4 tablespoons (56g) unsalted butter, softened
¼ cup nonfat dry milk
1 ripe banana, slightly mashed
Place the yeast in the bowl of a stand mixer, add 1 pinch of the sugar and cover with the water. Mix well and set aside until foamy.
Add the flour, salt, remaining sugar, butter, dry milk and banana and mix them using the dough hook (or knead by hand) until you've made a smooth, soft dough – 5 minutes were enough for me. It should be barely tacky. Don't add a lot of extra flour - you'll end up with a dry loaf. Place in an oiled bowl and cover with plastic wrap. Allow to rise 1 to 1 ½ hours until almost doubled in bulk.
Remove dough from bowl and place it onto a lightly floured surface; knead it lightly for 10 seconds, then cut it into 8 pieces and roll into balls. Butter a 25cm (10 in) round cake pan and place the balls inside it, forming a circle. Cover with a clean kitchen towel and let it rise again for 1 hour.
Preheat the oven to 180ºC/350ºF; bake bread for 35-40 minutes, until golden. If it seems to be getting too brown toward the end of cooking, you can tent with foil.
Remove from oven and transfer the pan to wire rack for at least an hour to cool completely. Unmold bread.
Makes 8
Monday, August 25, 2008
Sake panna cotta
My dear and sweet friend Clarice is hosting a special event to celebrate 100 years of Japanese Immigration in Brazil. She is a Brazilian of Japanese ascendancy and has been living in Japan for almost 2 decades now.

The event is about cooking or baking with Japanese ingredients. I thought about so many different recipes, but ended up choosing this one – all I did was use sake instead of grappa. It was my first time making a panna cotta and I was pleased with the result – the sake flavor is very subtle and the cooked apples and syrup compliment it beautifully.
Clarice, darling, I hope you like my entry! It took me a while to post it because I wanted to make it in my brand new kitchen. :)
Sake panna cotta
adapted from Australian Gourmet Traveller
300ml double cream
300ml pouring cream
110g caster sugar
Zest of 1 lemon, removed with a peeler
60ml sake
2½ leaves of gelatin (titanium strength)*, softened in cold water
Sake apples:
2 pink lady apples, cored and cut into thin wedges – I used Gala apples
juice of 1 lemon
165g caster sugar
grated zest of ½ lemon
12 cloves
125ml sake
Heat creams, caster sugar, lemon zest and half the sake and stir over low heat until combined (4-5 minutes). Increase heat to medium and cook gently until mixture comes to the boil (4-5 minutes). Squeeze excess water from gelatin, add to cream mixture and stir to dissolve, remove from heat and cool to blood temperature. Strain, add remaining sake, stir and pour into six ½-cup-capacity dariole moulds rinsed with water. Refrigerate overnight or until set.
For sake apples, combine apples and lemon juice in a bowl and set aside. Heat sugar, lemon zest, cloves and ¾ cup water in a saucepan and bring to the boil over medium heat, reduce heat to low and simmer gently until reduced to ¾ cup (8-10 minutes). Drain apples, reserving liquid, add apples and half the sake to sugar syrup, return to the boil over medium-high heat, then simmer very gently over low heat, stirring occasionally, until apples are tender and translucent (35-40 minutes), add reserved lemon juice and remaining sake and cook until syrupy (8-10 minutes). Cool to room temperature.
To serve, briefly dip panna cotta moulds into boiling water and invert onto serving plates. Serve with sake apples to the side, drizzled with extra syrup.
* I had no idea of kind of gelatin this was, so I used 6 leaves of regular gelatin. I think I could have done with 5.
Serves 6
Friday, August 1, 2008
Waiter, there's something in my... picnic! Olive, herb and parmesan sticks
I haven’t taken part in blog events lately – I never seem to keep the deadlines in mind – but picnics are something I hold very dear and they are the theme for this “Waiter, there’s something in my...”, hosted by Johanna, Jeanne and Andrew.
When I was little, my parents used to take me and my brother to parks on the weekends, and we had wonderful picnics there (I once wrote about it here). To this day I can remember the towel over the grass and all the yummy snacks prepared by Mom – she was a magnificent cook/baker.
After she was gone, my paternal grandmother - who looked after us for a couple of years - would let my brother and I have picnics on the living room; she would lay the towel on the carpet for us to eat, just like my mom did on the grass.
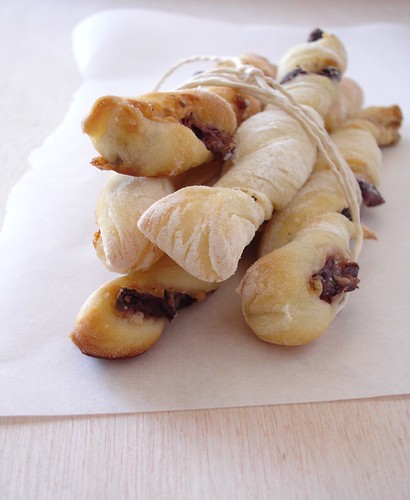
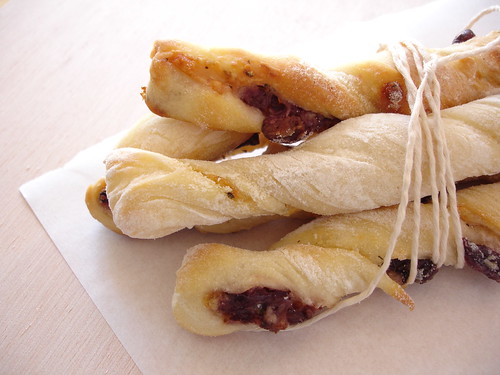
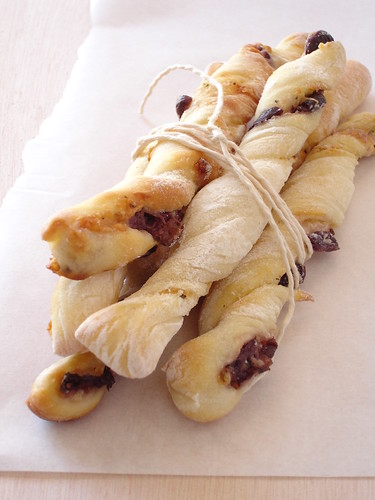
These delicious bread sticks are my contribution to the event. Just stay away from them as they come out of the oven – otherwise, there will be none left for the picnic.
Olive, herb and parmesan sticks
from Dough: Simple Contemporary Breads
Dough:
5g fresh yeast or ½ envelope (3.5g) active dry yeast – I used dry
250g white bread flour
1 teaspoon salt
¾ cup (180ml) water, room temperature
Filling:
¾ cup purple olives, such as Kalamata, with pits in
1 cup grated parmesan cheese
1 teaspoon herbes de Provence
cornmeal, for dusting – I didn’t have any at home, so I used flour instead
Start with the dough: using a mixer with the dough hook, put the flour in the mixer bowl and rub in the yeast (if using dry, just mix in). Switch the mixer onto the slowest speed, add the salt and then the water, and mix for 2 minutes, then turn up to the next slowest speed and mix for another 6-7 minutes until the dough becomes smooth and elastic. Remove the dough from the bowl, transfer to a lightly floured counter and mold into a ball.
Place in a lightly floured large bowl, cover with plastic/cling film and let rise in a draft-free area for 1 hour.
Make the filling: pit the olives and cut each one roughly into three (I cut into more pieces). Mix the olives, cheese and herbs together in a bowl. Set aside.
Assembling: with the help of the rounded end of your scraper, turn the dough onto the counter, lightly dusted with cornmeal. Using your hand, flatten out a rectangle about ¾-inch (2cm) thick. Sprinkle the filling on top and press it into the dough with your fingertips. Fold one third of the dough into the center and press down with your fingertips. Then fold the opposite side over on top (as if you were folding a letter to put into an envelope). Press with the palms of your hands to work the olives into the dough. With the flat edge of your scraper, cut the dough widthwise into 10-12 strips about ½-inch (1cm) wide. Flour the counter with cornmeal. Twist each strip (I pressed the sides together so the filling wouldn’t fall off) and roll them a little on the counter so they stretch to the length of your baking try (nonstick or covered with foil so the cheese in the dough won’t stick to the tray) and place the strips on top, leaving a gap between them – 1 inch (2.5cm) is fine.
Cover with a lintfree dishtowel and let rise for 30-45 minutes.
Preheat the oven to 220ºC/428ºF; put the baking dish into the oven and mist the inside with a water spray. Bake for 10-12 minutes or until golden brown.
Use a spatula to lift them from the baking tray. Cool on a wire rack.
Makes 10-12 – I got 16
Monday, July 21, 2008
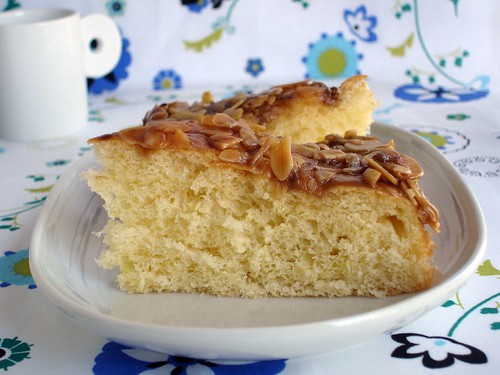
Honey-almond coffee cake
Almonds are delicious – my favorite kind of nut. I also love honey – when I was little, my mom used to mix honey and lime juice and feed me by spoonfuls when I had colds and coughs.
Put almonds and honey together and you’ll have a super delicious combo.
It’s like De Niro and Scorsese. They are both wonderful, but when they are together... Magic is made.
Hey, Marty, enough with the DiCaprio obsession, ok? Start calling Bobby to work with you again.
Thanks,
Patricia.
Honey-almond coffee cake
from Coffee Cakes: Simple, Sweet, and Savory
1 package (2 ¼ teaspoons) active dry yeast
¼ cup (60ml) warm water (105º to 115ºF/40º to 46ºC)
pinch of granulated sugar + 1/3 cup (67g)
½ cup (120ml) milk
8 tablespoons (1 stick/113g) unsalted butter, room temperature
½ teaspoon salt
2 ½ to 2 ¾ cups (350 to 385g) unbleached all purpose or bread flour – I used 400g all purposed flour
3 large eggs
2 tablespoons grated lemon zest
1 teaspoon almond extract
Almond topping:
1/3 cup (58g) firmly packed light brown sugar
2 tablespoons honey
2 tablespoons (28g) unsalted butter, room temperature
2 tablespoons heavy cream
¾ cup sliced almonds
In a small bowl, sprinkle the yeast over the water, sprinkle with the pinch of sugar and stir to dissolve. Let stand until foamy, about 10 minutes.
In a small saucepan, heat the milk and butter over low heat until the butter melts. Combine the 1/3 cup sugar and the salt in a large bowl and pour the milk mixture over; let cool to warm, 105º to 115ºF/40º to 46ºC. Stir in the yeast mixture. Using a wooden spoon or a heavy-duty electric mixer, add 1 cup of the flour and beat until smooth. Add the eggs and beat until blended. Beat in the lemon zest and almond extract. Gradually add enough of the remaining 1 ½ to 1 ¾ cups flour to make a soft dough. Turn the dough out onto a floured board and knead until smooth and elastic, 8-10 minutes – the dough was too soft for kneading and to avoid adding more flour I did the whole process using my Kitchen Aid with the hook attachment.
Place the dough in a lightly buttered bowl, turn to coat and cover with plastic wrap or a damp tea towel - I did not turn it, since it was very soft- I just lightly sprinkled the top with flour to avoid sticking. Let rise in a warm place until doubled in size, about 1 ½ hours.
Butter a 12 inch (30cm) round cake pan, preferably with a removable bottom.
Punch down the dough. Turn out onto a floured board and knead lightly until smooth, 1-2 minutes. Place the dough on the prepare pan and press it with your fingers until it occupies the whole pan. Cover with a tea towel and let rise until doubled in size, about 1 hour.
Preheat the oven to 180ºC/350ºF. Bake the bread for 15 minutes.
Meanwhile, make the almond topping: in a small saucepan, combine the brown sugar, honey, butter and cream. Place over medium heat and cook, stirring, until thickened, about 3 minutes. Stir in the almonds. Remove the bread from the oven and carefully spread the topping over it. Bake for 10-15 minutes longer, or until nicely browned – since the topping made the bread brown already, I inserted a knife into it to check for doneness.
Let cool for 5 minutes, then unmold right side up on a wire rack and let cool completely.
Cut into wedges to serve.
Makes one 12-inch cake, serves 10-12
Tuesday, July 8, 2008
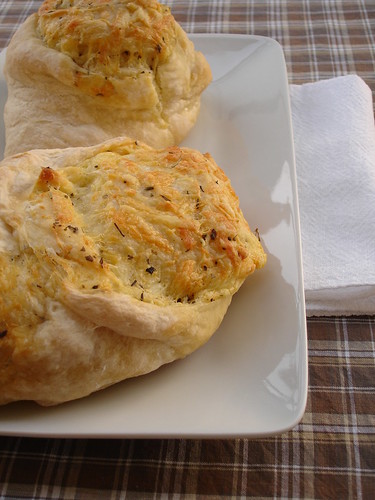
Cheese Stuffed Crusty Rolls
Choosing something doesn’t always have to be a difficult task – and that coming from the one who can take forever to decide which recipe to prepare is quite an improvement. Sometimes, we just know where to find it.
If you have a twisted, weird, crazy-looking role, you get Gary Oldman. Very simple. And if you want beautiful, delicious, out of this world desserts, you just go to Helen’s blog. But she can bake some seriously good savory recipes as well – yeah, I know, there’s nothing to be surprised here. :)
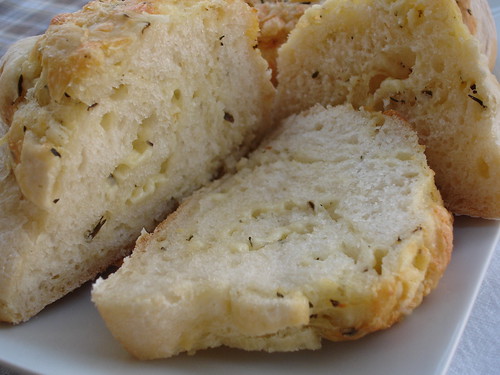
The cheese stuffed crusty rolls she posted in May were fantastic and the idea of using herbes de Provence in their filling sounded brilliant.
I have a challenge for you: make these and DO NOT eat them all the minute they are out of the oven. :)
Cheese Stuffed Crusty Rolls
Starter:
1 ¼ cups (175g) bread flour
½ teaspoon salt
½ teaspoon instant yeast
½ cup (120ml) cool water
Dough:
all of the starter
1 cup (240ml) + 2 tablespoons to 1 ¼ cups (300ml) lukewarm water – I used 300ml
½ teaspoon salt
3 ½ cups (490g) all purpose flour
½ teaspoon instant yeast
Filling:
1 ½ cups (280g/10oz) grated Monterey Jack cheese – I used the yellow mozzarella we have here, that seems to be really similar to Monterey Jack
1 cup grated parmesan
2 tablespoons herbes de Provence
To make the starter: mix the 1 ¼ cups flour, salt, yeast, and ½ cup water in a medium-sized bowl. Mix till well combined. Cover with plastic and let rest overnight at room temperature.
Make the filling: mix well all the ingredients in a bowl. Set aside.
To make the dough: combine the risen starter with the water, salt, flour, and yeast. Knead by hand or with a stand mixer for a few minutes (I went with 5 minutes by hand, like Helen did). Place it in a lightly greased bowl, cover, and let it rise for 1 ½ to 2 hours, until it’s nearly doubled in size. Gently deflate the dough, and pat and stretch it into a ¾ inch-thick rectangle, about 9x12in (23x30cm). Spritz with water, and sprinkle with the grated cheese and the herbs. Starting with a long side, roll it into a log, pinching the seam to seal. Place the log, seam-side down, on a lightly floured or lightly oiled surface. Cover it and let it rise for 1 to 1 ½ hours, till it’s puffy though not doubled in size. Towards the end of the rising time, preheat the oven to 220ºC/425ºF. Gently cut the log into four crosswise slices, for mini-breads; or simply cut the dough in half, for two normal-sized loaves. Place them on one (for two loaves) or two (for four mini-loaves) lightly greased or parchment-lined baking sheets, cut side up. Spread them open a bit, if necessary, to more fully expose the cheese and close the other end. Spritz with warm water, and immediately place them in the preheated oven. Bake for 20 minutes (for the mini-loaves), or 35 minutes (for the full-sized loaves), or until the cheese is melted and the loaves are a very deep golden brown. Remove them from the oven, and cool on a rack.
Note: You can also roll the log and cut 12 slices from it and set them on a parchment paper lined baking sheet and proceed with the recipe as written.
Thursday, July 3, 2008
Marbled lemon-blueberry butter cake
I’m afraid of certain things. Robert de Niro and his long nails, Dakota Fanning – they scare the bejeesus out of me. And I almost had a heart attack the night I dreamed that Amy Winehouse was my doctor.
Making jam?? That is pretty scary. I think I could mix the ingredients together and check the jam for doneness, but I couldn’t sterilize jars correctly if my life depended on it.
That’s why this recipe seemed perfect – I love lemon and love berries. I would never be able to resist combining both in a jam to become the filling for a luscious butter cake, no sterilizing involved. Of course, a picture of the cake in the book was pretty convincing as well. :)
Don’t be put off by the different stages of this recipe – the result is worth every minute of the making. I halved the recipe and used two 15cm (6in) pans - don't do it like me and use larger pans.
Marbled lemon-blueberry butter cake
from Sky High: Irresistible Triple-Layer Cakes
Lemon-blueberry preserves:
3 cups blueberries, fresh or frozen*
¾ cup (150g) sugar
2 tablespoons freshly squeezed lemon juice
1 ½ teaspoons grated lemon zest
1 teaspoon grated fresh ginger
Cake:
8 ounces (224g) unsalted butter, at room temperature
2 cups (400g) sugar
2 teaspoons grated lemon zest
1 ½ teaspoons lemon extract – I used lemon juice
7 egg whites
3 cups (420g) cake flour**
4 teaspoons baking powder
½ teaspoon salt
1 ¼ cups (300ml) milk
Lemon buttercream frosting:
1 cup (200g) sugar
¼ cup (60ml) water
2 eggs
12 ounces (336g) unsalted butter, at room temperature
2 tablespoons freshly squeezed lemon juice
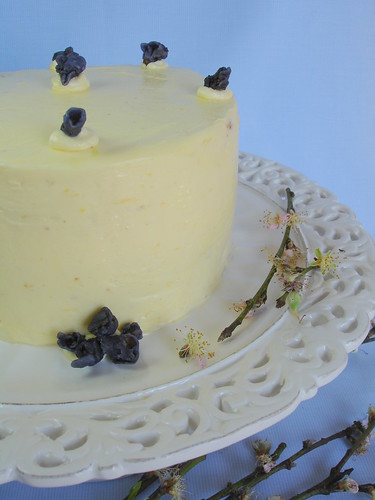
Fresh blueberries, for decoration – I used crystallized violets
Make the preserves first, since you’ll swirl some of it into the cake batter: purée the blueberries, with any juices they have exuded, in a blender or food processor. Pass the puré e through a coarse strainer or the medium disk of a food mill to remove the skins.
In a heavy medium nonreactive saucepan, combine the blueberry purée with the sugar, lemon juice, lemon zest, and ginger. Bring to a gentle boil over medium heat, stirring frequently to dissolve the sugar. Continue cooking, stirring often, for 20 minutes, until the preserves have thickened and are reduced to 1 cup. To check for proper thickness, place 1 to 2 teaspoons on a small china or glass plate and put it in the freezer until cold. Drag your finger through the thickened purée: a clear path should remain. If it's not ready, cook 5 minutes longer and repeat the test. Let the preserves cool, then cover and refrigerate for up to 5 days.
Prepare the cake: preheat the oven to 350ºF (175ºC). Butter the bottom and sides of three 8-inch (20cm) round cake pans. Line the bottom of each pan with a round of parchment or waxed paper and butter the paper.
In a mixer bowl, cream the butter, sugar, lemon zest, and lemon extract until light and fluffy. Gradually add the egg whites, 2 or 3 at a time, beating well between additions and stopping occasionally to scrape down the sides of the bowl.
Combine the flour, baking powder, and salt; whisk gently to blend. In 2 or 3 alternating additions, beat the dry ingredients and milk into the butter mixture, scraping down the sides of the bowl several times. Beat on medium-high speed for about 1 minute to smooth out any lumps and aerate the batter.
Scoop 1 cup of the batter into a small bowl. Divide the remainder equally among the 3 prepared cake pans, smoothing the tops with a rubber spatula. This gives you a "clean canvas" to work with. Add 2 1/2 tablespoons of the Lemon-Blueberry Preserves to the reserved batter and blend well. Drizzle heaping teaspoons of this blueberry mixture over the batter in the pans. Using a skewer or paring knife, swirl the blueberry mixture in short strokes to drag it down through the lemon batter without mixing it in.
Bake for about 25 minutes, or until a cake tester or wooden toothpick stuck into the center comes out clean and the cake begins to pull away from the sides of the pan. Let the layers cool in their pans for about 10 minutes, then turn out onto wire racks, carefully peel off the paper liners, and let cool completely, at least 1 hour.
Make the frosting: in a small nonreactive saucepan, combine the sugar and water. Bring to a boil over medium heat, stirring to dissolve the sugar. Continue to boil without stirring, occasionally washing down the sides of the pan with a wet pastry brush, until the syrup reaches the soft-ball stage, 238ºF (114ºC) on a candy thermometer. Immediately remove from the heat.
In a large mixer bowl, with an electric mixer on medium speed, beat the eggs briefly. Slowly add the hot syrup in a thin stream, pouring it down the sides of the bowl; be careful to avoid hitting the beaters, or the syrup may splatter. When all the syrup has been added, raise the speed to medium-high and beat until the mixture is very fluffy and cooled to body temperature. This can take 15 to 20 minutes.
Reduce the mixer speed to medium-low and gradually add the softened butter, 2 to 3 tablespoons at a time, beating well between additions. As you're adding the last few tablespoons of butter, the frosting will appear to break, then suddenly come together like whipped butter. Beat in the lemon juice, and the frosting is ready for use.
To assemble the cake: place a cake layer, flat side up, on a cake stand or serving plate. Spread half of the Lemon-Blueberry Preserves over the top. Place a second layer on top of the first and spread the remaining preserves over it. Finally, place the third layer on top of the second and frost the sides and top of the cake with the lemon buttercream Frosting. Decorate with fresh blueberries.
* if using frozen berries, measure them while frozen, then thaw completely in a bowl, saving any juices, before proceeding with the recipe.
** there’s no cake flour here in Brazil, so I used a substitute I found on the web: 1 cup cake flour = 7/8 cup (123g) all purpose flour + 2 tablespoons corn starch
Serves 16-20
