Showing posts with label cream. Show all posts

Friday, June 23, 2017

Baked figs with streusel topping and Marsala whipped cream and the reason why we like certain things

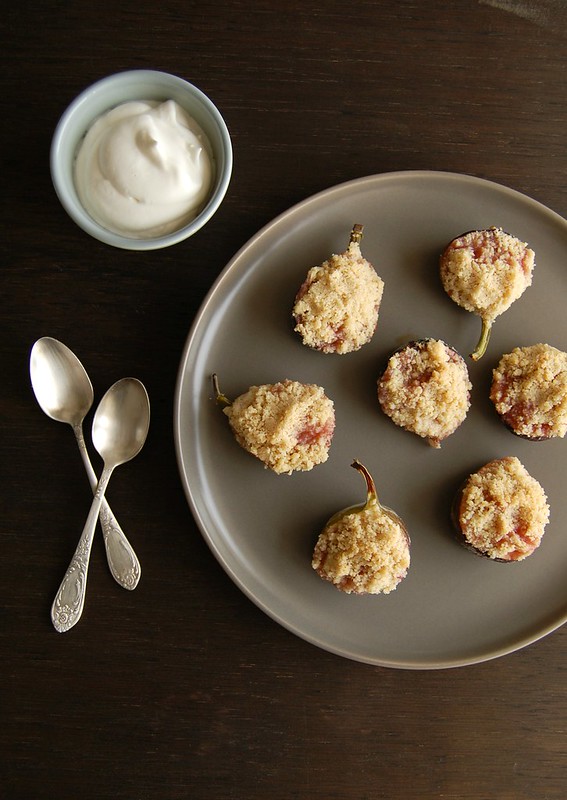
Baked figs with streusel topping and Marsala whipped cream / Figos assados com cobertura de farofinha e chantilly de Marsala

Do you ever wonder why you like certain things?

I was making lunch the other day and listening to some music – Toto’s Rosanna was playing. My husband said “I did not know you liked Toto”. I replied “I like this song, because I had an English teacher that loved it, for her name was Rosana”. She was one of the best teachers I had, and on top of that I found her so, so beautiful: she was a redhead and covered with freckles – it was then, at the age of 15, that I started liking my own freckles for until that moment I felt completely awkward with them (no one else in my family, at school or at my street had freckles).

Because of my teacher Rosana I stopped covering my arms in long sleeves even when it was insanely hot. Because of her I stopped hating the way my face looked with freckles everywhere – she never knew that, but she had a big part in my acceptance of my own features. That is why I think of her when I listen to “Rosanna” and my heart is filled with joy.

Now, the figs… I like figs because I first tried them in my godmother’s house, maybe at around 7 or so. The smell of the fruit takes me back to the days I spent with her – figs and peppermint tea, it is impossible for me to try these things without thinking of my godmother. She died a long time ago, however I have lots of fond memories of her.

My godmother was a very sophisticated woman who had travelled the world, so I believe she would like this dessert very much – the figs sort of turn into a creamy jam while in the oven and the Marsala whipped cream pairs beautifully with them. I don’t think the fruit skin benefits from the heat, though, therefore I recommend you eat the pulp and the crumble topping using a spoon and consider the skin a vessel for the deliciousness only. :)

Baked figs with streusel topping and Marsala whipped cream
own creation

For the figs:
6 small figs
½ cup (70g) all purpose flour
3 tablespoons demerara sugar
3 tablespoons (42g) unsalted butter, cold and diced
¼ teaspoon ground cinnamon
pinch of salt

Marsala whipped cream:
½ heavy cream, very cold
1 tablespoon granulated sugar
1 teaspoon Marsala

Preheat the oven to 200°C. Line a small baking sheet with foil.

In a small bowl, combine flour, sugar, salt and cinnamon. Add the butter and rub ingredients with your fingertips until mixture resembles coarse breadcrumbs.
Cut figs in half lengthwise and place them cut side up on top of the foil. Sprinkle the crumble topping over each fig half, packing it slightly with your fingers to make it adhere to the fruit. Bake for 20-25 minutes or until crumble is golden.

In the meantime, place the cream, sugar and Marsala in a small bowl and whisk until soft peaks form. Serve the figs warm with the whipped cream.

Serves 4


Friday, March 21, 2014

Ham and arugula quiche and something good that won't last long

Ham and arugula quiche / Quiche de presunto e rúcula

As I move towards the last episodes of The Killing, I keep thinking of how unfair it is for such a fantastic TV show to be cancelled at such an early stage (the show’s been cancelled twice, actually, which is even more shocking). I’ve read that Netflix has ordered a fourth season consisting of six episodes to conclude the series – thank you, Netflix – but it is still hard for me to understand how something so good can last so little – the über boring Frasier had eleven seasons, for crying out loud.

Quiches are something I never eat unless I make them (or my grandmother – she makes mean quiches) – the soggy pastry usually tastes like nothing and the filling is tough and equally flavorless. :S When I eat quiche I want the pastry to be buttery and flaky and the filling to be silky, with a little wobble. The recipe I bring today is slightly different: the base is made with puff pastry – which was perfect for me since I was short on time that day – and the parmesan sprinkled on top of the filling creates a golden and crisp topping. Yum – thank you, Donna.

I guess that good food made properly is like good TV series: we don’t get them often, so when we do we should enjoy them to the fullest.

Ham and arugula quiche
from the always delicious Donna Hay magazine

1 ½ tablespoons unsalted butter
1 onion, finely chopped
8 eggs
1 cup (240ml) single cream
salt and freshly ground black pepper
2 sheets store-bought puff pastry, thawed
250g sliced ham, torn
2 cups baby arugula leaves
½ cup finely ground parmesan

Preheat the oven to 200°C/400°F and place a large baking sheet inside to heat up. Heat a frying pan over high heat, add the butter and onion and cook for 1-2 minutes or until golden. Transfer to a large bowl and cool. Add the eggs, cream, salt and pepper and whisk to combine. Line two 18cm loose-bottomed lightly buttered fluted tart pans with the pastry and trim the edges. Prick the cakes with a fork. Refrigerate for 10 minutes. Divide the ham and arugula between the tart shells and carefully pour over the egg mixture. Sprinkle with the parmesan and transfer to the oven (onto the baking sheet). Bake for about 30 minutes or until tops are puffed and golden.
Cool slightly and serve.

serves 8 - I made three 10cm (4in) tartlets eyeballing the amounts of rocket and ham and using 1 300g-sheet of puff pastry, 3 eggs, 1/3 cup cream, pinch of freshly ground nutmeg, ½ onion, 1 tablespoon butter and 3 tablespoons parmesan
Wednesday, November 27, 2013

Flourless chocolate and hazelnut cake + "Bronson"

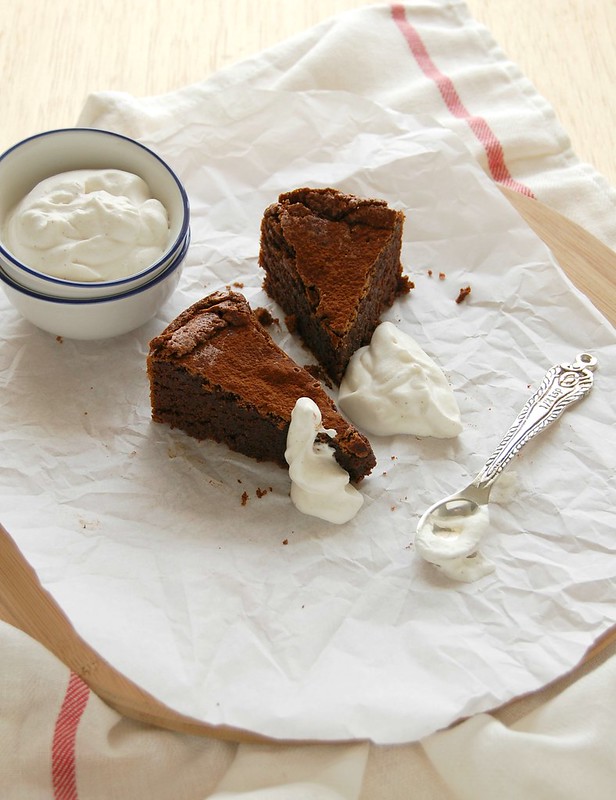
Flourless chocolate and hazelnut cake / Bolo de chocolate e avelã (sem farinha de trigo)

Not only do I love watching movies but I also love reading about them (I am a very curious person, I’ll admit it), and when a guy I’d never heard of before won the best director prize in Cannes in 2011 I knew I would watch that movie as soon as possible (Ryan Gosling being the leading actor wouldn’t hurt either). ;) I did, and it became one of my all-time favorites, and up to this day I still listen to the soundtrack almost on daily basis.

Days ago I watched another movie directed by Nicolas Winding Refn and it made me think that we were all paying attention to Sean Penn playing Harvey Milk back in 2009, while we should have paid attention – and given all the awards – to Tom Hardy for Bronson: at first I was shocked by the physical transformation (and by how much he looked like the real Charlie Bronson), but his performance is so much more than that – it’s a tiring, intense and perfect acting exercise that goes beyond the pushups he had to make to get those muscles. It’s not an easy movie to watch – the amount of violence is disturbing – but I found it was worth every second (and if you like acting in its essence I am sure you’ll like it, too). It’s such a shame that a great performance like that didn’t get the buzz it deserved, and it is rarely mentioned among the great performances of all time – what Hardy did shouldn’t be forgotten.

And since good things shouldn’t be forgotten, I’ve been having a lot of fun rediscovering Bill Granger’s Holiday – I hadn’t used the book for ages (for no reason at all) and after making those great chocolate and caramel bars I’ve been reaching for it quite regularly. This chocolate cake is an easy and delicious idea for dessert – you can make it in advance and when the meal is over all you need to do is whip up the cinnamon cream (I skipped the electric mixer and did it manually in order to burn some of the calories I was about to ingest). ;)

Flourless chocolate and hazelnut cake
slightly adapted from the always delicious Holiday

Cake:
200g dark chocolate, chopped – I used one with 53% cocoa solids
125g unsalted butter, room temperature
225g light brown sugar
100g hazelnut meal (ground hazelnuts)
5 eggs, separated
1 ½ teaspoons vanilla extract
pinch of salt
1 tablespoon cocoa powder

Cinnamon cream:
1 cup (240ml) whipping cream
½ teaspoon ground cinnamon
1 teaspoon vanilla extract
1 tablespoon icing sugar, sifted

Preheat the oven to 180°C/350°F. Butter a 20cm springform cake pan (I used a pan with a removable bottom), line the bottom with a circle of baking paper and butter the paper as well.
Put the chocolate and butter in a heatproof bowl over a saucepan of simmering water (making sure the base of the bowl does not touch the water). Stir occasionally until the chocolate and butter have melted. Remove from heat and set aside to cool slightly.
Add the sugar and hazelnut meal to the melted chocolate and stir until there are no lumps. Add the egg yolks one at a time, stirring well after each addition, then stir in the vanilla. In a clean bowl, whisk the egg whites with the salt until firm peaks form. Gently fold the egg whites into the chocolate mixture.

Spoon the mixture into the tin and bake for 40-45 minutes until firm but still gooey in the center. Leave to cool completely in the pan. Sift the cocoa over the top of the cake.

Cinnamon cream: place the cream, cinnamon, vanilla and sugar in a bowl and whisk until soft peaks form. Serve with the cake.

Serves 8

Tuesday, April 5, 2011

Peaches and cream ice pops - updated

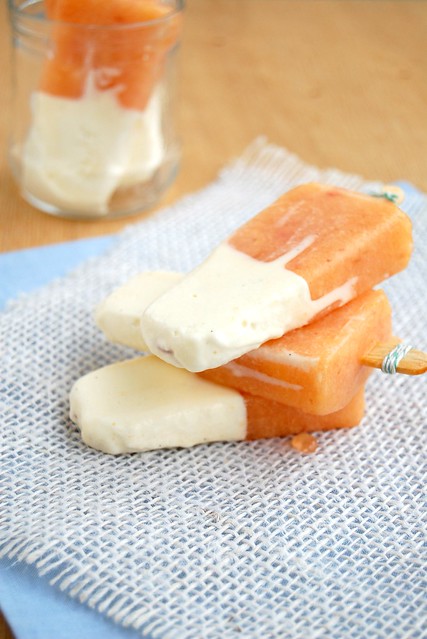
Peaches and cream ice pops / Picolés de pêssego com chantilly

My summer issue of the DH mag has finally arrived, but unfortunately summer is already gone. I could not resist the ice pops spread, though – each and every flavor looked so good I would have to make at least one. :)
My initial idea was making the raspberry yogurt popsicles, but I’d used my raspberries in other recipes. Luckily I still had a couple of peaches – the last ones of the season – and a bottle of heavy cream in the fridge.

The popsicles turned out so delicious that I don’t think they will last until next weekend – and yes, there were 12 of them. :)

UPDATE: Don't forget to nominate your favorite blogs on Saveur's 2011 Best Food Blog Awards!

Peaches and cream ice pops
from Donna Hay magazine

Sugar syrup:
½ cup + ½ tablespoon (106g) caster (superfine) sugar
¾ cup (180ml) water

Cream layer:
½ cup (120ml) heavy cream, lightly whipped
1 ½ tablespoons icing sugar, sifted
½ vanilla bean, halved lengthwise, seeds scraped with the back of the knife

Peach layer:
300g peaches, peeled, pitted and chopped
sugar syrup, cool

Start by making the sugar syrup: place sugar and water in a small saucepan over medium heat and stir until the sugar is dissolved. Let come to a boil, boil for 1 minute then remove from heat and cool completely.
Place the cream, icing sugar and vanilla seeds in a bowl and fold gently to combine. Spoon the mixture into twelve ¼ cup (60ml) capacity popsicle molds and place in the freezer for 10-15 minutes, or just until they start to firm. Insert a stick in each mold and freeze for 1 ½ hours.
Place the peach and sugar syrup in a blender and process until very smooth. Divide the peach mixture between the popsicle molds, topping the cream layer. Freeze for 4 hours or until completely frozen.
To unmold the pops, remove the molds from the freezer 5 minutes before serving and run the bottoms under some cold water. Remove carefully for the cream layer is very creamy and might break.

Makes 12

Friday, February 19, 2010

Mini meringues with boozy cherries and orange cream

Mini meringues with boozy cherries and orange cream / Mini suspiros com creme de água de flor de laranjeira e cerejas secas

Some people say – and several of them are from my family – that the best things in life are the simple ones. As much as I hate agreeing with my grandmother – and she knows that – this orange cream is a good example: ridiculously simple, but it has got to be one of the most delicious things I have ever tasted. In 31 years of existence. :)

The original recipe called for fresh cranberries, but I can’t get hold of them here in Brazil – the wonderful, plump dried cherries I got from a lovely friend replaced them beautifully.

Mini meringues with boozy cherries and orange cream / Mini suspiros com creme de água de flor de laranjeira e cerejas secas

Mini meringues with boozy cherries and orange cream
adapted from Delicious magazine

Meringues:
400g caster sugar
200g (about 5 large) free-range egg whites

Topping:
about ½ cup (72g) dried cherries*
3 tablespoons vodka
40g caster sugar
600ml heavy (whipping) cream
2 tablespoons icing sugar, sifted
1-2 tablespoons orange flower water, to taste
Handful unsalted shelled pistachios, chopped

Preheat the oven to 220°C/428°F. Spread the sugar evenly over a shallow baking tray, lined with baking paper, and place in the oven for about 10 minutes until really hot.

Place the egg whites in an electric mixer fitted with a whisk. Whisk on high speed until the whites begin to froth, then gradually pour in the hot sugar. Continue whisking on a high speed for 10 minutes until the meringue is beautifully silky and holds its shape.
Reduce the temperature to 110°C/230°F. Line two large baking sheets with baking paper - stick the baking paper to the baking sheets with a little meringue.
Fill a piping bag with the meringue and pipe golf ball-size rounds on to the baking sheet – I used two small spoons to shape the meringues and made them a little bigger. Have a bowl of water nearby; dip a teaspoon in the water and use the back of it to create a nest shape. Repeat, spaced apart – you should get about 60 mini meringues.
Bake the mini meringues for 1 hour, or until crisp to touch. Turn off the oven and leave inside to cool completely.
Gently heat the cherries, vodka and caster sugar in a small pan for 3-5 minutes until the sugar is dissolved and the cherries plump up a bit. Cool a little. In a bowl, whip the cream, icing sugar and orange flower water, to taste, to soft peaks.
To assemble: place the meringues on serving plates, and spoon a small dollop of orange cream onto each one. Spoon a boozy cherry and a little syrup over the top, then sprinkle with chopped pistachios.

* the amount of cherries will depend on the number of meringues you end up with, since there has to be one cherry to top each mini pavlova

Makes 60 – I made ¼ of the recipe above, used two spoons to shape the meringues (instead of a piping bag) and got 8 mini pavlovas

Monday, July 6, 2009

Sky-high strawberry shortcake

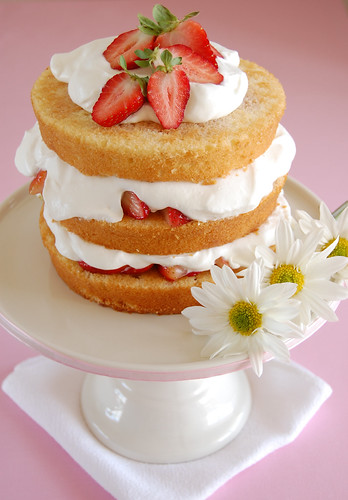
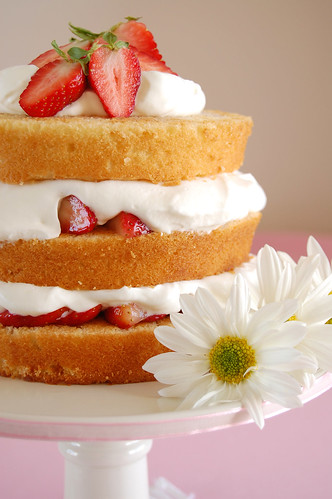
Sky high strawberry shortcake / Bolo de camadas com morangos e chantilly

I hadn’t used one of my favorite books in quite a while and looking at its cover I knew exactly what recipe to choose from it. Yes, strawberries again – I’ve warned you, remember? :D
This cake is so pretty I’d an eye on it since buying the book, but I ended up making other cakes from it and all of a sudden the strawberry season was gone. I would not make the same mistake this time, oh, no!

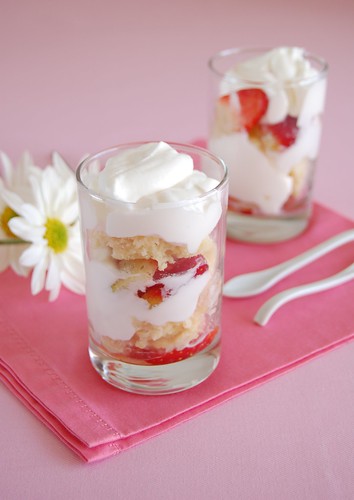
It is, indeed, a beautiful dessert and it tastes wonderful, but it’s really unstable and difficult to slice (even after 5 hours in the fridge, more than the recipe calls for). There was some filling and cream left, so combined them with some cake scraps to make a trifle:

Sky high strawberry shortcake / Bolo de camadas com morangos e chantilly

Sky-high strawberry shortcake
from Sky High: Irresistible Triple-Layer Cakes

Cake:
5 tablespoons (70g) unsalted butter, room temperature
¾ cup (150g) caster sugar*
1 teaspoon vanilla extract
2 eggs
1 ½ cups (210g) all purpose flour
2 ½ teaspoons baking powder
¼ teaspoon salt
2/3 cup (160ml) buttermilk

Fresh strawberry filling:
4 cups strawberries, small if possible
2 teaspoons rosewater
2 teaspoons vanilla extract
½ cup (100g) caster sugar*

Whipped cream:
1 ½ cups (360ml) heavy cream
2 tablespoons caster sugar*

Garnish:
a few whole strawberries, sliced in half if desired, leaves on

Sky high strawberry shortcake / Bolo de camadas com morangos e chantilly

Start by baking the cake: preheat the oven to 180ºC/350ºF. Grease the bottoms and sides of three 15cm (6in) round cake pans. Line the bottom of each with a round of parchment or baking paper and grease the paper.

In a large mixing bowl, cream the butter, sugar and vanilla with an electric mixer until light and fluffy. Add the eggs, one at a time, scraping down the sides of the bowl and beating well after each addition.
Sift together the flour, baking powder and salt. Add these dry ingredients to the batter, alternating with the buttermilk, in 2 or 3 additions. Beat well. Divide the batter among the three prepared pans.

Bake the cake layers for 20-25 minutes or until a cake tester or wooden toothpick inserted in the center comes out clean. Allow to cool in the pans for 10 minutes then invert onto wire racks, carefully peel off the paper and allow to cool completely – I removed the paper after the cakes were completely cool.

Now, the filling: wash and hull the berries and slice into pieces about the thickness of a nickel. Place in a bowl and add the rosewater, vanilla and sugar. Stir to coat them well, cover the bowl, and let the berries macerate at room temperature until they exude their juices, about 1 hour.

Whip the cream: in a large chilled bowl, with chilled beaters, whip the cream with the sugar until stiff – there will be about 3 cups.

Assembling the cake: place one cake layer, flat side up, on a small cake stand or serving plate. Top with 3/4 cup of the fresh strawberry filling, spooning it over the entire layer and making sure any juices go onto the cake layer and not the plate, if possible. Top this with 1 cup of the whipped cream, spreading it evenly over the berries. Repeat with the second cake layer and another ¾ cup filling and 1 cup whipped cream. Top with the final cake layer flat side up. Cover with the last of the whipped cream and garnish with the whole berries. For best flavor, cover the dessert with a cake dome or loose plastic wrap and refrigerate for about 2 hours before slicing. Serve with the remaining strawberry filling on the side.

* I used vanilla infused sugar

Serves 8-10

Sky high strawberry shortcake / Bolo de camadas com morangos e chantilly

Monday, June 22, 2009

Vanilla cream cupcakes... and a bit of soccer

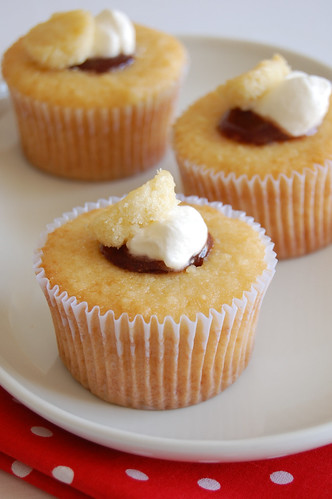
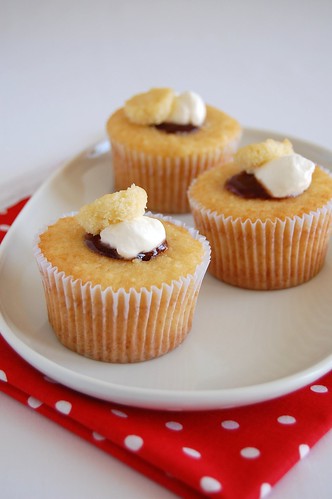
Vanilla cream cupcakes / Cupcakes com geléia e creme

When the Brazilian soccer team lost the World Cup to France in 1998 I was so shocked I made a promise: I would never cheer for the team again (because the whole thing looked like a huge set up involving $$$). I’m a soccer freak – love the sport – and even though it was a bit hard I was able to keep my promise. At least until yesterday – I could not resist watching Brazil x Italy, the greatest soccer classic ever. I felt that old flame back again: the team played beautifully and scored 3 goals – it was an amazing game.

I might no longer be able to keep the soccer promise, but will honor the one I made here a couple of weeks ago: more cupcakes!

Vanilla cream cupcakes / Cupcakes com geléia e creme

Vanilla cream cupcakes
from Donna Hay magazine

125g unsalted butter, softened
¾ cup + 1 tablespoon (162g) caster sugar
2 teaspoons vanilla extract
2 eggs
1 cup + 4 tablespoons (180g) all purpose flour, sifted
1 teaspoon baking powder, sifted
½ cup (120ml) milk, room temperature

Vanilla cream:
½ cup (120ml) heavy cream
1 tablespoon icing sugar
½ teaspoon vanilla extract
¼ cup strawberry jam

Preheat the oven to 160ºC/320ºF. Place the butter, sugar and vanilla extract in the bowl of an electric mixer and beat for 10-12 minutes or until light and creamy. Gradually add the eggs and beat well. Add the flour, baking powder and milk and beat until just combined. Spoon into twelve ½ cup-capacity muffin pans lined with cupcake papers. Bake for 18-20 minutes or until cooked when tested with a skewer. Cool completely on wire racks.
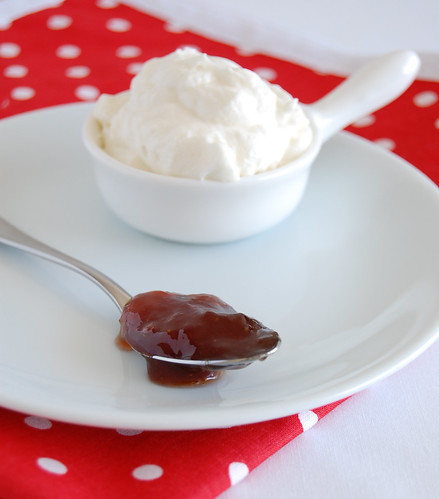
To make the vanilla cream, place the cream, icing sugar and vanilla in a bowl and whisk until stiff peaks form. Cut a small, round hole in the middle of each cupcake and remove the top; fill the holes with the jam and top with about 1 rounded teaspoon of cream. Place the lids by the side of each cream mound and serve.

Makes 12 – I halved the recipe, used 1/3-cup capacity muffin pans and got 6 cupcakes

Vanilla cream cupcakes / Cupcakes com geléia e creme

Monday, September 8, 2008

Blueberry macarons

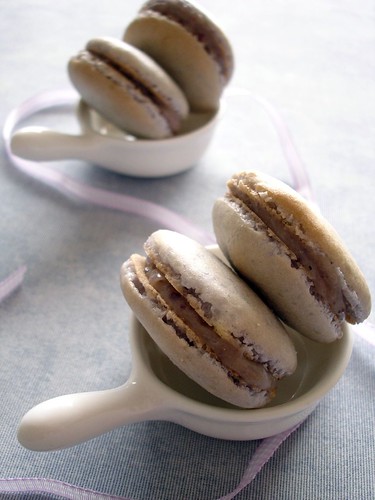
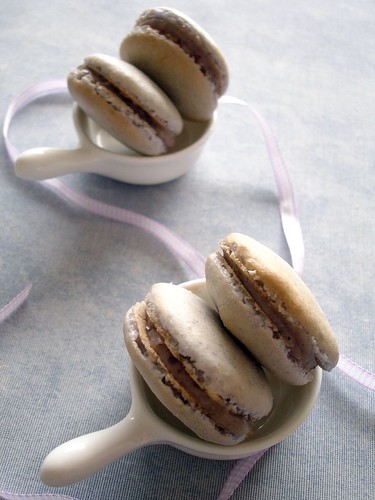
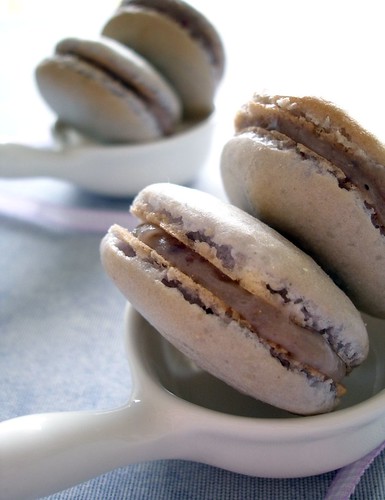
Blueberry macarons

Making macarons – talk about a brave decision! And here I thought that chopping off 4 inches of hair, like I did a couple of months ago, had been a bold move.

I’d had an eye on these pink beauties for quite a while but it was Helen’s wonderful tutorial that gave me the courage to finally try making macarons. And even though they don’t look like hers or the Master’s – which I was lucky enough to try – I was very glad with the results. So glad that I intend to make a new batch next weekend. :)

Recipe adapted from here (shells) and here (filling).

Blueberry macarons

Blueberry macarons

50g ground almonds
140g icing sugar
2 large egg whites
1 tablespoon caster sugar
violet food coloring paste

White chocolate blueberry ganache:
¾ cup chopped white chocolate
¼ cup cream
1 tablespoon blueberry jam

Start by making the macarons: grab two large pieces of baking paper and, using a cookie cutter, trace 4cm-circles, 3cm apart from each other, all over the paper. Turn the paper sheets around and line 2 large baking trays with them.
Sieve the ground almonds and icing sugar together into a large bowl. Put the egg whites into a separate bowl, and using an electric hand whisk, beat to soft peaks. Add the caster sugar, and whisk until glossy. Fold into the almond and icing sugar mixture, along with a very small amount of the food coloring – it’s easier to use a toothpick to remove coloring from the bottle. Mix until just combined and evenly violet – the mixture will reduce as the air bubbles in the meringue burst.
Put the mixture into a disposable piping bag, snip off 1cm from the end. Pipe blobs onto the circles on the baking paper so you have about 28-30 in total. Set aside for 30 minutes to dry – this is important as it gives the macaroons the correct texture.
Preheat the oven to 190ºC/375ºF. Bake for 5 minutes, then turn the baking sheet and bake for another 4 minutes. Remove from the oven and cool.

Make the filling: pour the cream in a small saucepan and heat over medium-high heat until hot. Remove from heat, add chocolate and jam and mix vigorously until chocolate is melted and ganache is smooth. Set aside to cool until firm enough to be piped or spooned between macarons shells.

Peel off the baking paper from the macaroons, then sandwich 2 together with a blob of blueberry ganache in the center. Repeat to give you 14-15 in total.

Store the macaroons in an airtight container for up to 3 days – I kept mine in the fridge.

Makes about 15

Blueberry macarons

Monday, September 1, 2008

Little hazelnut tartlets with caramel fudge icing

Little hazelnut tartlets with caramel fudge icing

Bad hair days. Those merciless, cruel days when you look in the mirror and all you see is a member of some band from the 80s.
We can have bad hair days when it comes to cooking, can’t we? This recipe qualifies as one.

In some pans, the batter overflew and the ones that didn’t delivered funny-looking tartlets. To make me feel even worse, the icing wasn’t spoonable as the one on the original recipe.

Before you start thinking “what the heck is she posting this for?” and my friend gets mad at me again, let me tell you that these tartlets were delicious. Delicious. Worth all the hair I pulled out while they were in the oven. :)

I’m completely hooked on the Australian Gourmet Traveller’s website, so get ready to see lots of their recipes around here.

Little hazelnut tartlets with caramel fudge icing

Little hazelnut tartlets with caramel fudge icing
from Australian Gourmet Traveller

100g cold butter, coarsely chopped
1 vanilla bean, scraped seeds only
3 egg whites
180g pure icing sugar, sieved
70g hazelnut meal
50g plain flour
finely grated zest of 1 orange
crème fraîche, to serve

Caramel fudge icing:
330g light brown sugar
100ml pouring cream
1 tablespoon light corn syrup
20g butter, room temperature

Butter and flour 4 12cm-diameter fluted tart pans*; set aside.

Cook butter and vanilla seeds in a small saucepan over medium-high heat until dark nut brown in color (4-5 minutes), then set aside until completely cool.

Preheat oven to 170ºC/338ºF. Using an electric mixer, whisk egg whites until soft peaks form, gradually add icing sugar, whisking continuously until thick and glossy. Fold in hazelnut meal, flour and orange rind, then cooled butter. Divide among the prepared pans and bake until golden (20-25 minutes). Stand for 5 minutes, then remove from moulds and cool on a wire rack.

For caramel fudge icing, combine ingredients in a saucepan and stir over medium-high heat until butter melts and sugar dissolves (2-3 minutes). Bring to the boil and cook until mixture reaches 114ºC/237ºF on a candy thermometer (4-5 minutes).Transfer to an electric mixer, add 80ml of hot water and whisk until glossy. Working quickly, spoon onto tarts and stand until set. Serve with crème fraîche – I served it with whipped cream.

* I used 8.5cm pans and ended up with 8 tarts

Serves 4

Friday, July 18, 2008

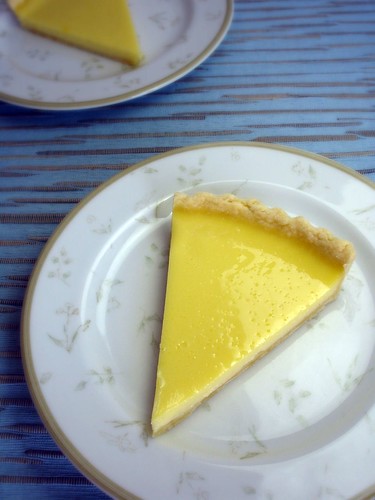
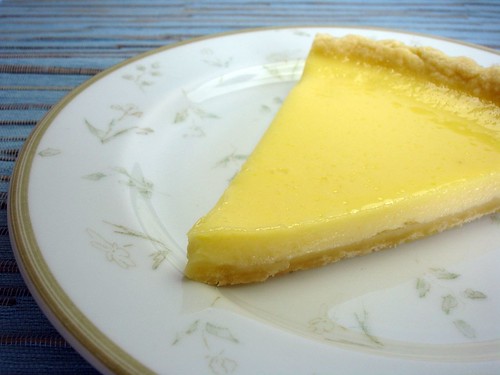
Lemon tart

Lemon tart

I love listening to music while I’m cooking/baking. And I sing along, too – oh, my poor neighbors... :)

Certain recipes remind me of certain songs, probably because I was listening to them on repeat mode – another bad habit of mine – while preparing the food. The Darkest Chocolate Crepe Cake, for example, instantly brings Steve Winwood’s “Valerie” to my mind, and vice versa. Crash Hot Potatoes = Clapton’s “It’s in the way that you used it”. The list goes on and on.

The radio was off when I made this tart, but something tells me that this song would go with it very well. :)

Lemon tart

Lemon tart
from Donna Hay magazine

- metric and imperial measurements found in the magazine; I used my scale

Dough:
1 1/3 cups (200g/7oz) all purpose flour
100g (3 ½oz) cold unsalted butter, chopped
1 tablespoon caster sugar
1 egg, lightly beaten
¼ teaspoon vanilla extract

Lemon filling:
1 cup (8 fl oz) single or pouring cream
2 eggs
3 egg yolks
½ cup (110g/3 ¾oz) caster sugar
½ cup (4 fl oz) lemon juice

Place the flour, butter and sugar in a food processor and process until the mixture resembles breadcrumbs. Add the egg and vanilla and process in short bursts until the pastry just comes together. Turn out and bring together to form a ball. Flatten the pastry, wrap in plastic and refrigerate for 15 minutes.
Roll out the pastry on a lightly floured surface until 3mm (1/8 in) thick. Line a deep 22cm (9in) round pastry ring* with the pastry, trim and prick the base with a fork. Refrigerate for 30 minutes.
Preheat the oven to 180ºC/360ºF. Line the pastry with non-stick baking paper, fill with baking weights or dried beans and bake for 15 minutes. Remove the weights/beans and paper and bake for a further 2-3 minutes or until golden. Set aside.
Reduce the oven to 140ºC/285ºF. To make the lemon filling, place the cream, eggs, egg yolks, sugar and lemon juice in a bowl and whisk to combine. Pour the mixture into the tart shell and use the back of a metal spoon to skim the surface to remove any bubbles. Bake for 20 minutes or until just set. Allow to cool and refrigerate until completely set.

* I used a shallow pan and there was some dough left; I froze it and to avoid wasting lemon filling I halved the recipe.

Serves 8

Monday, July 14, 2008

Dulce de leche cake for my dad's birthday

Dulce de leche cake

My father has a weakness for dulce de leche; well, pretty much everyone I know does. :) So it was easy to choose his birthday cake.

His birthday is today, but we celebrated it last Saturday – a small group of great people, good food... I’m glad Dad liked it.

I laughed my heart out when he arrived and looked at the cake – there were two big candles with the numbers “6” and “0”.
“Not anyone needs to know I’m turning 60...” he said.
“Apparently, my sister thinks they do – she’s the one who bought the candles and, not only are they huge, but they’re also covered in glitter!” :)

Happy birthday, Dad!!

Dulce de leche cake

Dulce de leche cake
adapted from The Whimsical Bakehouse and from Sky High: Irresistible Triple-Layer Cakes

Cake:
8 eggs
1 1/3 cups (233g) packed light brown sugar
1 2/3 cups (233g) cake flour*
1 teaspoon ground cinnamon
3 tablespoons (42g) unsalted butter, melted and cooled to lukewarm

Syrup:
¼ cup (50g) vanilla scented caster sugar
½ cup (120ml) water
¼ teaspoon vanilla extract

Dulce de leche cream:
2 cups (480ml) heavy cream
1 cup dulce de leche

Make the cake: preheat the oven to 175ºC/350ºF. Line the bottoms of three 20cm (8-inch) round cake pans with rounds of parchment or waxed paper, but do not grease the pans.
In a large heatproof bowl, beat the eggs lightly. Gradually whisk in the brown sugar. Set over a pot of barely simmering water and whisk constantly until the brown sugar dissolves and the mixture warms to body temperature. Remove from the heat and, with an electric mixer, beat on medium speed until the mixture holds slowly dissolving ribbons when the beaters are lifted.
Put the flour and cinnamon in a sifter and sift about 1/3 over the top of the eggs. Gently fold in with a large metal spoon. Repeat 2 more times with the remaining flour, folding only until mixed, with no trace of flour.
Drizzle the melted butter over the batter and fold in, now with a rubber spatula, taking care not to deflate the batter or to leave pockets of butter not folded in. Divide the batter among the 3 prepared cake pans.
Bake for about 15 minutes, or until a cake tester or wooden toothpick inserted in the center comes out clean – mine took 25 minutes. Let cool completely in the pans. Run a blunt knife around the edge of each cake to release it from the pan. Turn out onto a wire rack and carefully peel off the paper.

Now, the syrup: boil the sugar and water over medium heat until the mixture reduces to ½ cup. Remove from heat, add the vanilla extract and allow to cool before using.

Prepare the dulce de leche cream: Place the cream in the freezer for 4 minutes.
In a large chilled mixer bowl with chilled beaters, combine the cream with the dulce de leche. Beat on low speed to combine and dissolve the dulce de leche. Raise the mixer to medium-high and whip until stiff peaks form.

Assemble the cake: place one cake layer, flat side up, on a cake stand or serving plate. Brush it with the rum syrup to moisten evenly. Cover the layer with about 2/3 cup of the dulce de leche cream, spreading it evenly to the edges. Repeat with the next layer, moistening it with the syrup as well.
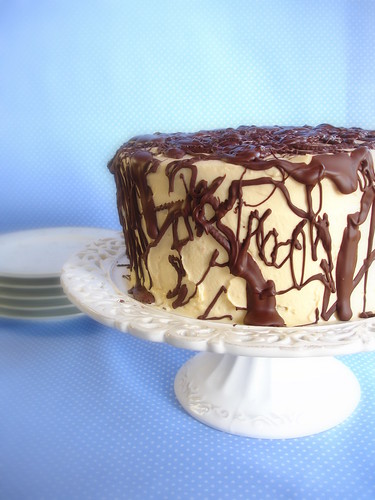
Top with the third layer. Moisten it with the syrup. Frost the top and sides of the cake completely with the remaining dulce de leche cream (there was about ¼ cup left in the end). Then, using a cake comb or the cutting edge of a serrated knife, run it around the side of the cake to make a grooved pattern all around – I melted 100g dark chocolate (60% cocoa solids) and drizzled it over the cake, Jackson Pollock style (idea from here).

* there’s no cake flour here in Brazil, so I used the following: 1 cup cake flour = 7/8 cup (123g) all purpose flour + 2 tablespoons corn starch

Serves 12-16

Dulce de leche cake

Monday, March 17, 2008

Caipirinha truffles

Caipirinha truffles

The sweet and lovely Emiline is hosting her first food event: St. Paddy's Day Pub Crawl!!
I’m not Irish like her, but I do have my share of Italian/German/Portuguese blood and I like some alcohol sometimes. :)

Crawl2

It took me a while to decide what to prepare for the event (today is the deadline to take part in it) because I wanted something with a Brazilian feel. Finally, I went for these caipirinha truffles (the ones I had previously in mind when I made these).

I think the truffles are OK, but not as good as I expected. The cachaça flavor was strong and I think some lime juice would have worked well to replace part of the liquor.

Emiline, I hope you like my Brazilian booze recipe!

Caipirinha truffles

Caipirinha truffles
loosely adapted from here

400g white chocolate, finely chopped
grated zest of 1 lime
¼ heaping cup (70ml) cream*
3 tablespoons cachaça
cocoa powder, enough to cover the truffles

Combine chocolate, zest and cream in a heatproof bowl; place it over a saucepan of gently simmering water.

Stir until chocolate is melted. Remove from heat, add the cachaça and mix vigorously until mixture is silky and smooth. Cover with cling film and refrigerate for 2-3 hours or until firm enough to form balls.

Scoop out rounded teaspoons of the mixture (while it’s still cold and firm) and form balls – you don’t want your truffles to be perfectly rounded. Roll the truffles in cocoa powder and place in small fluted paper cases or on a plate. Keep refrigerated.

* Once again, I used a type of cream we have here that is packaged in small Tetra Pak boxes; it contains 25% fat. I did it to avoid wasting an almost full jar of heavy cream.

Makes 35 truffles

Caipirinha truffles

Wednesday, August 15, 2007

Caramel banana pie (and a trip down memory lane)

Caramel banana pie

We have been celebrating Father's Day with a get together/lunch at my house ever since I got married, in 2005. I love it - besides my father, who is the star of the day, my brother and sister come too and they are both great people to have around (of course I'm biased. And I don't care). :)

Since I didn't want to make the same old desserts again (the sweetened condensed milk custard is my usual choice), I called my dad and asked what he wanted for dessert - he's not into sweets and not into chocolate, so I had to ask him.
His answer was a big surprise: "I'd like to have that banana pie your mother used to make for me. The one with the "dough snakes" on top".
"Ok, of course, I'll make it".

The thing is...
...


...


...

…I don't have the original recipe. I remembered my mother's banana pie, even in a detailed sort of way, but that was all. No recipe!!!! I started to panic.

My salvation: a recipe for pie crust found in Bon Appetit (July issue) + remembering a pie filling I used to make as a teenager for fruit pies + memories of the caramel banana topping.
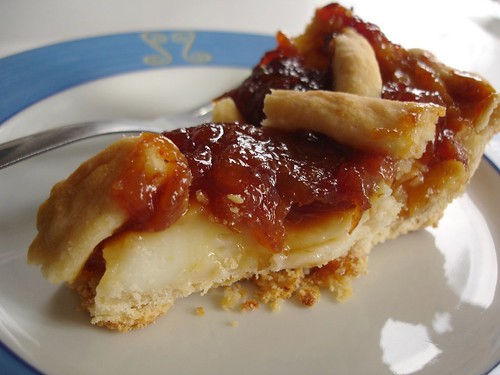
My father loved the pie and told me it was exactly like my mom's. Even though I know he said that not to hurt my feelings, there's a smile on my face every time I think of his words. :D

Caramel banana pie

Crust:
2 ½ cups unbleached all purpose flour
1 ½ teaspoons sugar
1 teaspoon salt
½ cup (1 stick) chilled unsalted butter, cut into 1.25cm (½-inch) cubes
½ cup chilled lard or frozen nonhydrogenated solid vegetable shortening, cut 1.25cm (½-inch) cubes – I used regular vegetable shortening
5 tablespoons (or more) ice water – I needed 6

Filling:
2 cups (480ml) + 3 tablespoons milk
5 tablespoons sugar
4 tablespoons corn starch
1 egg yolk - I forgot to add but I liked the result anyway
1 teaspoon vanilla extract

Topping:
6 small bananas, sliced - approx. 2 1/2 cups
1 ½ cups sugar

Start making the crust: Blend flour, sugar and salt in processor. Add butter and lard; using on/off turns, blend until mixture resembles coarse meal. If making by hand (which I did): pinch and rub flour and fat between your thumb and fingertips (this works well if you have cook hands).
Transfer mixture to medium bowl. Add 5 tablespoons ice water and mix with fork until dough begins to clump together, adding more water by teaspoonfuls if dry. Gather dough together. Divide dough – I used ¾ of the dough for the crust and ¼ for the “snakes”; flatten each part into disk. Wrap each disk in plastic and refrigerate at least 1 hour.
Dough can be made 3 days ahead. Keep refrigerated. If necessary, soften slightly at room temperature before rolling out.

Preheat the oven to 180ºC/355ºF.
Roll out dough from the center out, lifting and rotating it frequently, clockwise and counterclockwise – I kept the dough wrapped in plastic while rolling it out.
Using the rolling pin, transfer the dough from countertop to pan (22cm/8.5in) and unfold it. Press it gently on the pan and cut off excess.
Blind bake until the crust starts to get golden; remove from the oven.

For the filling: pour 2 cups milk into a medium saucepan. Add sugar and mix well.
In a cup or small bowl, mix the 3 tablespoons milk and the corn starch until well dissolved. Add to saucepan and mix well.
Cook over low heat, stirring constantly, until cream thickens.
Remove from heat, add vanilla and mix well. Set aside to cool, stirring every now and then to keep it free of lumps.

Make the topping: Place sugar in a large saucepan and cook it over low heat until caramels forms. Add the bananas, being careful not to get burned. Stir every once in a while and cook over low heat until the bananas soften and melt a little.
Remove from heat and set aside.

Assemble the pie: Pour the filling over crust and top it with the banana caramel mixture.
Make “snakes” with the remaining chilled dough and place them on the top of the pie, forming a sort of lattice effect.
Bake again, in a 200ºC/390ºF oven, this time for 25-30 minutes, until the “snakes” are baked.
Set aside to cool and refrigerate before serving.

Serves 8.

Caramel banana pie

Saturday, December 30, 2006

Baked carbonara

I’m a walking contradiction. Although I don’t eat red meat and can’t stand pork, I love bacon... :D
I’d been meaning to prepare this recipe for quite some time but João (my husband) doesn’t like cream so I always decided to prepare pasta with other types of sauce.
That day I decided to give it a try. After cooking the pasta, I prepared some for him with different ingredients and made the recipe with the remaining pasta. I loved it!
A simple, delicious and quick to put together dish that I’ll be certainly making again.

Baked carbonara
from

400g ziti or fettuccine – I used Barilla's Maccheronci
4 rashers of bacon, chopped
4 eggs
500ml cream
375ml milk - I used low fat

50g grated parmesan cheese
salt
Cook the pasta until al dente; drain.
Cook the bacon until crisp – I always use the microwave oven for this ‘cause the bacon gets crispier this way.
Whisk together the eggs, cream, milk, parmesan and salt.

Place the pasta in a 2 liter capacity ovenproof dish and top with the bacon and the egg mixture.
Bake in a pre-heated oven (180ºC) for 30 minutes or until set – my pasta needed 35 minutes in a 200ºC oven.
Serves 4.
Related Posts with Thumbnails