Thursday, November 27, 2008

Alfajores

Alfajores

I’m kind of tired of war movies – don’t get me wrong, there are wonderful ones out there, I just think that maybe I have seen too many in a short period of time. But tell me, how will I be able to resist such a beautiful poster?

In the same way, you must be tired of seeing so many cookies around here. Bear with me, please – it’s just one more thing I cannot resist. :)

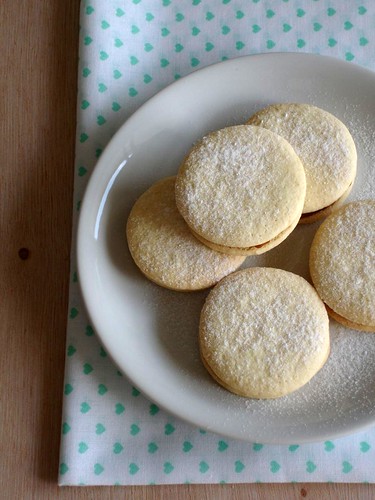
The alfajores were a present for a dear coworker of mine, Adriana – it was her birthday last week and I made these especially for her.

I used Katia’s recipe and the alfajores turned out wonderful – the dough is not hard to work with and yields a good amount of cookies. Just make sure you use firm dulce de leche – a runny kind won’t stay put inside the alfajores.

Alfajores

Alfajores

1 ¼ cup (150g) cornstarch
1 cup (140g) flour
1 teaspoon baking powder
½ cup (113g/1 stick) unsalted butter, room temperature
¾ cup (150g) sugar
2 egg yolks
2 tablespoons cognac
dulce de leche
icing sugar

Sift cornstarch, flour and baking powder in a bowl. Set aside.

In large mixer bowl cream the butter and sugar until light and fluffy. Add the egg yolks one at a time and mix until incorporated. Add cognac and mix well.

In slow speed, add the sifted ingredients and mix until the dough comes together – don’t overmix.

Preheat the oven to 180ºC/350ºF; line two large baking sheets with baking paper.

Roll out dough between two pieces of baking paper to ¼ inch (0.60cm) thickness. Using a 2-in (5cm) round cutter, cut cookies and place on prepared sheets – don’t reroll the dough more than twice. If you are working on a warm place, refrigerate the dough for a couple of minutes before rolling it.
Bake for 10-15 minutes or until barely brown on the bottom - tops will be pale. Set on cooling rack to cool.
Sandwich the cookies with the dulce de leche and dust with icing sugar before serving.
This recipe can be easily doubled.

Makes 25 sandwich cookies

Alfajores

Monday, November 24, 2008

Chewy strawberry almond bars

Chewy strawberry almond bars

You know that feeling? When something is so good we don’t want it to get ruined?

I was watching “August Rush” on the weekend and, besides crying my eyes out, I kept thinking “Oh, please don’t let this adorable boy get lost. Don’t let him grow up and become an idiot, a crackhead, a wife beater, or anything like that”

I’d cried and laughed with Freddie Highmore before, but this time I felt like wrapping him in a very warm blanket and serving him a plate of these cookies, with some hot cocoa sprinkled with lots of marshmallows.

Chewy strawberry almond bars

Chewy strawberry almond bars
adapted from here

1 cup (226g) unsalted butter, softened
2 cups (350g) packed brown sugar
2 teaspoons baking powder
1 egg
1 teaspoon almond extract*
2 cups (280g) all-purpose flour
2 cups (230g) regular rolled oats
½ cup sliced almonds
¾ cup strawberry preserves
3 tablespoons sliced almonds, extra, for the topping

Preheat oven to 180ºC/350ºF. Line a 30x20x5cm (8x12x2in) baking pan with foil, extending foil over the edges of the pan. Grease foil; set pan aside.

In a large bowl, beat butter with an electric mixer on medium to high speed for 30 seconds. Add brown sugar and baking powder. Beat until combined, scraping side of bowl occasionally. Beat in egg and almond extract until combined. Add flour, oats, and ½ cup almonds and mix it all in slow speed – dough will be stiff.

Remove ¾ cup of the dough and set aside. Press the remaining dough evenly into the bottom of the prepared baking pan. Spread with preserves. Crumble the remaining dough evenly over preserves layer and sprinkle over the almonds.

Bake for about 35 minutes or until lightly browned. Cool completely in pan on a wire rack. Using the edges of the foil, lift the uncut cookies out of the pan. Cut into bars.

* I thought the flavor was much too strong – I’d use half the amount next time, or even replace it with vanilla

Makes about 27 bars

Chewy strawberry almond bars

Wednesday, November 19, 2008

Pasta with eggplant and pine nuts

Pasta with eggplant and pine nuts

Thank you all for your comments and emails – the nerd girl that never fit in is feeling pretty popular right now. :)
I’m looking forward to my next blogging year!

After all that icing – so much it could block one’s arteries just by looking at it – I thought you deserved something fresh and a lot lighter. Pasta + veggies seemed perfect.

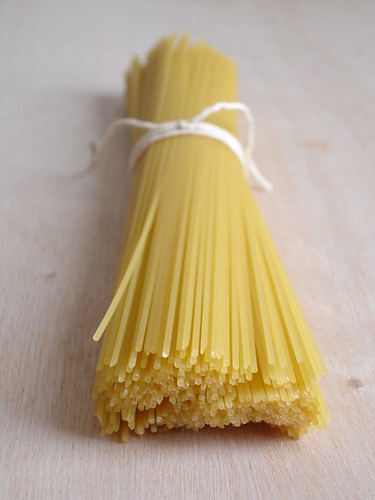
Despite the tiny list of ingredients, this is one of the most delicious pasta dishes I have ever tried. Make it, even if you don’t have pine nuts around – it tastes great anyway.

Pasta with eggplant and pine nuts

Pasta with eggplant and pine nuts
slightly adapted from here

400g pasta
2 large eggplants
olive oil, for brushing
4 tablespoons extra virgin olive oil
a large handful of basil leaves
4 tablespoons pine nuts
fleur de sel and freshly ground black pepper
juice of 4 small limes

Preheat oven to 200ºC/400ºF.
Cut each eggplant in half lengthways, then make criss cross cuts on the flesh nearly all the way down to the skin. Brush with olive oil, place in a lightly oiled baking pan and bake for 25 minutes or until soft. In the meantime, cook the pasta until al dente and toast the pine nuts on a non stick frying pan.Remove the eggplant from the oven and, using a spoon, scrape the flesh out of the skins and place in a bowl. Pour the extra virgin olive oil gradually mixing it with eggplant until you get to a smooth paste. Season it with fleur de sel and pepper
Drain the pasta and mix it with the eggplant to coat it really well. Add the basil , pine nuts and lime juice.

Serves 4

Monday, November 17, 2008

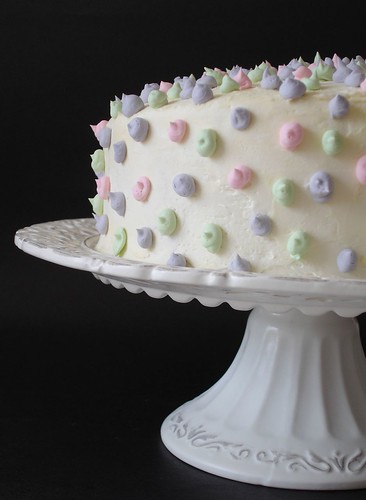
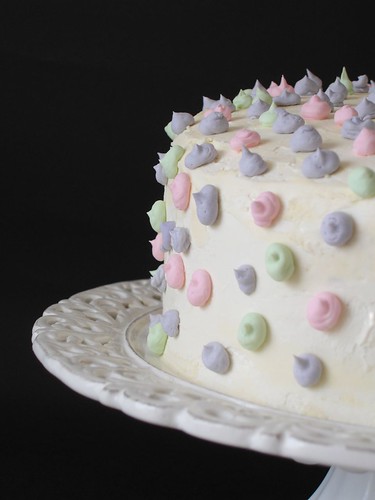
Two years of blogging and a polka dot cake to celebrate it

 Two years of blogging and a polka dot cake to celebrate it

Lots of recipes and photos. Tons of comments and emails that have put hundreds of smiles on my face. So many wonderful people I have lost track of.
These are the results of 2 years of blogging – one of the most positive things I have ever done.

I read “The Hairy Ape” almost ten years ago and that book kept me thinking about several things. One of them was the feeling of “belonging”. That is something I used to have trouble with – I just did not fit in. The people I knew were very different from me – we did not have anything in common. I felt like a stranger most of the time. And my love for cooking and the idea of having fun in the kitchen were considered weird by others.

Blogging has opened an entire new world to me and knowing people who share my passion for cooking and baking has changed my life in many levels. I do feel like I belong now. And you, my dear readers and fellow bloggers, are responsible for this.

Thank you for standing by me for so long. I wish I could send each and every one of you a slice of this cake, with a big hug on the side.

 Two years of blogging and a polka dot cake to celebrate it

Polka dot cake
Cake and filling recipes adapted from The Whimsical Bakehouse; buttercream recipe from Sky High: Irresistible Triple-Layer Cakes

Golden butter cake:
170g (1 ½ sticks) unsalted butter, room temperature
1 ½ cups (300g) sugar
4 large egg yolks
1 teaspoon vanilla extract
2 ½ cups + 2 tablespoons (370g) cake flour*
1 tablespoon baking powder
generous pinch of salt
1 cup + 2 tablespoons (270ml) milk

Grease two 20x5cm (8x2 inch) round pans. Preheat the oven to 180ºC/350ºF.
Sift together the flour, baking powder and salt. Set aside.
In the bowl of an electric mixer, beat butter and sugar at high speed until light and fluffy. Add the yolks and vanilla and beat on medium speed until fluffy.
At low speed, add the dry ingredients, alternately with the milk, beating until incorporated.
Divide the batter between the prepared pans and bake for 30-35 minutes or until a skewer inserted into the center of the cake comes out clean.
Cool the cakes on a wire rack for 15-20 minutes before turning them out of their pans. Let them cool completely before continuing with the recipe.


Syrup:
½ cup (120ml) water
2 tablespoons sugar
¼ teaspoon vanilla extract

Place water and sugar in a small saucepan and mix well to combine. Heat over medium heat until it boils. Remove from heat, add the vanilla and set aside to cool.


Cookies and cream filling:
450ml heavy cream
3 tablespoons confectioners’ sugar
½ teaspoon vanilla extract
15-18 chocolate sandwich cookies, such as Oreos, crushed into medium pieces (place them inside a thick plastic bag and crush them with a rolling pin)

In the bowl of an electric mixer at high speed, whip the cream, sugar and vanilla until stiff. Gently fold in the crushed cookies.


Vanilla buttercream:
1 cup (200g) sugar
¼ cup (60ml) water
3 egg whites
1 ½ cups (340g/3 sticks) unsalted butter, at room temperature
2 teaspoons vanilla extract

In a small heavy saucepan, combine the sugar and water, stirring to dissolve sugar. Bring to a boil over medium heat, stirring to dissolve the sugar. Continue to boil without stirring, occasionally washing down the sides of the pan with a wet pastry brush, until the syrup reaches the soft-ball stage, 238ºF (114ºC) on a candy thermometer. Immediately remove from the heat.

In a large mixer bowl, with an electric mixer on medium speed, beat the egg whites until frothy. Continue beating while gradually adding the hot syrup in a thin, slow stream, pouring it down the sides of the bowl; avoid hitting the beaters, or the syrup may splatter. When all the syrup has been added, raise the speed to medium-high and beat until the mixture is very fluffy and cooled to body temperature.

Reduce the mixer speed to medium-low and gradually add the softened butter, 2 to 3 tablespoons at a time, beating well between additions. As you're adding the last few tablespoons of butter, the frosting will appear to break, then suddenly come together like whipped butter. Beat in the vanilla extract.


To assemble the cake: using a long, serrated knife cut each cake in half. Place a cake layer, flat side up, on a cake stand or serving plate. Brush it lightly with the syrup and spread 1/3 of the cookies and cream filling. Repeat the procedure with the remaining cake layers and filling, brushing all the cakes with syrup and finishing it all with a cake layer. Frost the sides and top of the cake with a thin layer of vanilla buttercream frosting. Place the cake in the refrigerator until the crumb coat firms up. Frost the cake completely with more buttercream.
Tint the remaining buttercream with desired colors and decorate the cake as you desire.

* there’s no cake flour here in Brazil, so I used the following: 1 cup cake flour = 7/8 cup (123g) all purpose flour + 2 tablespoons corn starch

Serves 12-14
 Two years of blogging and a polka dot cake to celebrate it

Friday, November 14, 2008

Hawaiian macadamia coconut cookies

Hawaiian macadamia coconut cookies

“Oh, no. Walnut cake. Why does he always ask for walnut cakes??” :(

That used to be little Patricia complaining about her uncle’s birthday cakes always being walnut flavored cakes. And little Patricia did not like walnuts. In fact, little Patricia thought that walnuts tasted weird.
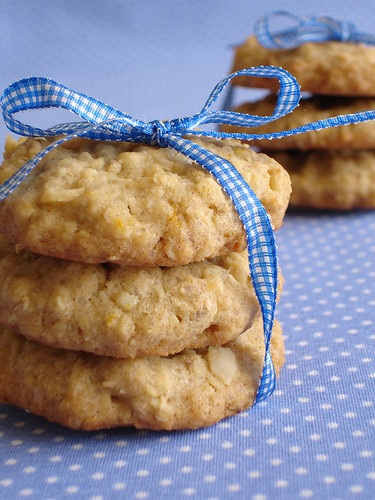
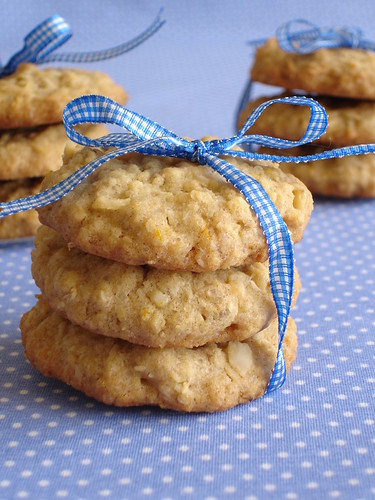
But little Patricia has become a big girl – she’s 30 now! – and has learned to love not only walnuts, but all things nuts. And the buttery, delicious macadamias are now one of her favorite ingredients, not to mention they are wonderful paired with coconut.

Patricia has become such a centered, responsible adult that she has made everyone eat oats disguised as cookies. Again! :)

Hawaiian macadamia coconut cookies

Hawaiian macadamia coconut cookies
from here

1 cup (226g) unsalted butter, at room temperature
¾ cup (150g) granulated sugar
¾ cup (132g) firmly packed brown sugar
1 egg
grated zest of 1 large orange
1 ½ cups (210g) all-purpose flour
1 ¼ cups (145g) rolled oats
1 teaspoon baking powder
½ teaspoon salt
¾ cup (68g) sweetened desiccated coconut
¾ cup (100g) macadamia nuts, coarsely chopped

Preheat oven to 180ºC/350ºF; line 2 large baking sheets with baking paper.

In a large bowl, cream butter and both sugars. Add egg and beat well. Add orange rind and beat well.
In a separate bowl, combine flour, oats, baking powder and salt. Beat into creamed mixture. Stir in coconut and macadamia nuts.

Make balls with 1 tablespoon full of dough – it’s soft, so don’t roll it too much - and place them on the sheet, about 5cm (2in) apart. Press down the tops with a lightly floured fork to flatten slightly. Bake for 12 to 15 minutes or until edges are golden – mine took 18 minutes for that.

Cool for 5 minutes before removing from sheet. Cool on wire racks.

Makes about 3 dozen – I got 38

Related Posts with Thumbnails