One of my cooking/baking pet peeves – and I have several – is that I hate it when I choose a certain recipe and it says there that there will be some frosting/filling/whatever left: it immediately puts me off making it because I know that the frosting/filling/whatever will probably go to waste.
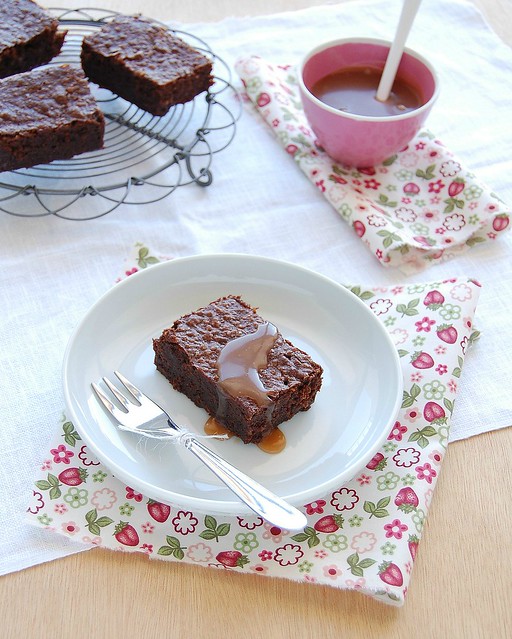
After much delay I decided to make these brownies – even though there would be caramel sauce left. OK, let’s make an exception. The funny thing was that I went from “damn, there is a lot of caramel left” to “damn, there is not enough caramel left!” in a matter of moments – all it took was a spoonful of the mixture. :D
See? Movies are not the only thing I change my mind about. :D
Caramel brownies
slightly adapted from the gorgeous Baked Explorations
Caramel:
1 cup (200g) superfine sugar
2 tablespoons corn syrup
½ cup (120ml) heavy cream
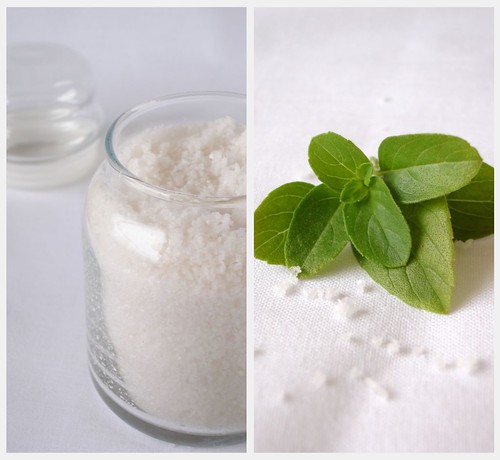
½ teaspoon fleur de sel - I used Maldon salt
¼ cup sour cream*
Brownie:
1 ¼ cups (175g) all purpose flour
1 teaspoon salt
2 tablespoons unsweetened cocoa powder
308g (11oz) dark chocolate (60-72% cocoa solids), chopped – I used 100g of 70% chocolate + 208g of 53%
1 cup (226g) unsalted butter, diced
1 ½ cups (300g) granulated sugar
½ cup (88g) packed light brown sugar
5 large eggs
2 teaspoons vanilla extract
Make the caramel: in a medium saucepan, combine the sugar and the corn syrup with ¼ cup water, stirring them together carefully so you don’t splash the sides of the saucepan. Cook over high heat, without stirring, until mixture is dark amber in color, 6-8 minutes. Remove from the heat and slowly add the cream, stirring, and the fleur de sel – be careful because mixture will bubble like crazy. Whisk in the sour cream and cool completely.
Now the brownie: preheat the oven to 180°C/350°F. Butter a 22.5x32.5cm (9x13in) light-colored metal or glass pan**, line the bottom and sides with foil, leaving an overhang on two opposite sides, forming “handles”. Butter the paper, too.
In a medium bowl, whisk together the flour, salt and cocoa powder.
Place the chocolate and butter in a large heatproof bowl and set over a pan of barely simmering water, stirring occasionally until the ingredients are completely melted and combined. Turn off the heat, but keep the bowl over the water, and add both sugars. Whisk until completely combined and remove the bowl from the water. Mixture should be at room temperature.
Add 3 eggs and whisk until just combined. Add the remaining eggs and whisk until just combined. Add the vanilla and stir – do not overbeat the batter at this stage or your brownies will be cakey.
Sprinkle the dry ingredients over the batter and, using a spatula, fold them into the batter until there is just a trace amount of the flour mixture visible.
Assembling: pour half the batter into the prepared pan. Drizzle ¾ cup of the caramel over the batter in a zigzag pattern, making sure it doesn’t reach the foil or it will burn. Use an offset spatula to spread the caramel evenly over the batter. In heaping spoonfuls, scoop the remaining brownie batter over the caramel. Smooth the brownie layer with a spatula, covering the caramel layer completely.
Bake for 30 minutes, rotating the pan halfway through the baking time, and check if the brownies are done by inserting a toothpick into the center of the pan – it should come out with a few moist crumbs (mine needed 45 minutes in the oven).
Remove from the oven and cool completely over a wire rack. Cut into squares and serve (with the remaining caramel sauce if you like).
* homemade sour cream: mix ¼ cup (60ml) heavy cream with 1 teaspoon lemon juice in a bowl. Whisk until it starts to thicken. Cover with plastic wrap and leave in room temperature for 1 hour or until thick
** I made the exact recipe above using a 20x30cm (8x12in) pan
Makes 16 large brownies
Tuesday, July 19, 2011
Caramel brownies and changing my mind in a matter of moments
Wednesday, July 8, 2009
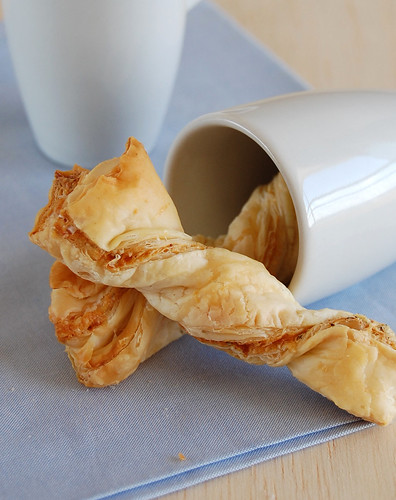
Puff pastry cheese twists
Do you know anyone who doesn’t like puff pastry? I don’t – it is so good that even my picky hubby loves it. :D
He had some cheese twists in Ottolenghi and absolutely loved them. I’ve been making these for him ever since, but usually at night – no good light for taking pictures. Luckily this time there were some twists left, but they were devoured right after I turned off my camera. :D
Puff pastry cheese twists
from a Brazilian magazine
1 pre rolled sheet frozen puff pastry (300g/10oz)
1 egg yolk
3 tablespoons unsalted butter, melted and cooled
½ cup (50g) finely ground parmesan
1 teaspoon fleur de sel – less if using table salt
freshly ground black pepper
Preheat the oven to 200ºC/400ºF; line one large baking sheet with baking paper and brush it lightly with oil.
Thaw puff pastry according to the package instructions; open it, forming a rectangle – keep the plastic wrap under it. In a small bowl, whisk the egg yolk and butter together and brush the entire pastry with the mixture (there will be some left). Sprinkle with the parmesan, the fleur de sel and pepper. Fold the pastry in half and lightly press it to seal the filling. Using a very sharp knife or pizza wheel, cut the pastry vertically in 1.5cm (a little over ½ in) strips, then cut the strips in half (horizontally). Twist each strip pressing the ends together again to enclose the filling. Place the twists onto the prepared pan ½-in apart.
Bake for 15-20 minutes or until golden.
Makes 18-20
Friday, March 6, 2009
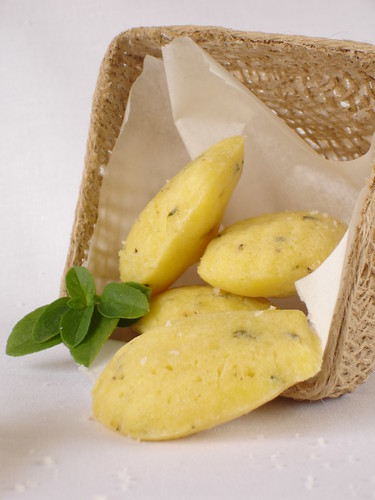
Basil and parmesan madeleines
Even though I have my pride – I’m a Scorpio, after all – I will admit it when I’m wrong and apologize.
After telling you that I wasn’t in the mood for Mr. Benjamin Button, I changed my mind and decided to watch it – with a little push from my good friend C. I’m so glad I did - what a beautiful movie. It touched my heart like very few have. David Fincher really gets the best out of Brad Pitt, every time.
Something similar happened here. I wasn’t so sure savory madeleines would work. So I kept postponing making them. And now, a year after bookmarking the recipe, I finally tried it. And it’s good. I was wrong.
My only thought here is that both flavor and texture are much better when the madeleines are hot/warm. But let me know if you disagree.
Basil and parmesan madeleines
8 tablespoons (113g/1 stick) unsalted butter, melted
1 cup (140g) cake flour – I used all purpose flour
3 teaspoons finely minced fresh basil
1 teaspoon fleur de sel, plus more for sprinkling
¼ teaspoon freshly ground pepper
4 eggs
¼ teaspoon cream of tartar
2 tablespoons sugar
1 cup grated parmesan cheese, plus more for sprinkling
Position a rack in the lower third of an oven and preheat to 190ºC/375ºF (I preferred to bake them in the higher part of the oven so they would not burn).
Brush the molds of two 12-well madeleine pans with 2 tablespoons of the butter and dust with all-purpose flour; tap out the excess.
Sift the cake flour into a bowl and gently stir in the basil, the 1 teaspoon fleur de sel and the pepper. Set aside.
In the bowl of an electric mixer fitted with the whisk attachment, beat the eggs on high speed until yellow and fluffy, about 3 minutes. Add the cream of tartar and sugar and beat until the mixture drops from the whisk in ribbons, about 3 minutes. Using a rubber spatula, gently fold in the flour mixture and the 1 cup cheese, then fold in the remaining 6 tablespoons butter*.
Spoon the batter into the prepared molds so the batter is even with the rims. Bake until the madeleines spring back when pressed lightly, about 12 minutes. Immediately remove them from the pan and let cool on a wire rack. Sprinkle with a pinch of fleur de sel and cheese and serve.
* the recipe doesn’t call for it, but I refrigerated the batter overnight
Makes 18 madeleines – I halved the recipe and got 15 madeleines (I used a 15-well pan and each well holds 1 tablespoon batter)
Wednesday, November 19, 2008
Pasta with eggplant and pine nuts
Thank you all for your comments and emails – the nerd girl that never fit in is feeling pretty popular right now. :)
I’m looking forward to my next blogging year!
After all that icing – so much it could block one’s arteries just by looking at it – I thought you deserved something fresh and a lot lighter. Pasta + veggies seemed perfect.
Despite the tiny list of ingredients, this is one of the most delicious pasta dishes I have ever tried. Make it, even if you don’t have pine nuts around – it tastes great anyway.
Pasta with eggplant and pine nuts
slightly adapted from here
400g pasta
2 large eggplants
olive oil, for brushing
4 tablespoons extra virgin olive oil
a large handful of basil leaves
4 tablespoons pine nuts
fleur de sel and freshly ground black pepper
juice of 4 small limes
Preheat oven to 200ºC/400ºF.
Cut each eggplant in half lengthways, then make criss cross cuts on the flesh nearly all the way down to the skin. Brush with olive oil, place in a lightly oiled baking pan and bake for 25 minutes or until soft. In the meantime, cook the pasta until al dente and toast the pine nuts on a non stick frying pan.Remove the eggplant from the oven and, using a spoon, scrape the flesh out of the skins and place in a bowl. Pour the extra virgin olive oil gradually mixing it with eggplant until you get to a smooth paste. Season it with fleur de sel and pepper
Drain the pasta and mix it with the eggplant to coat it really well. Add the basil , pine nuts and lime juice.
Serves 4
Tuesday, May 13, 2008
Caramel-dark chocolate truffles with fleur de sel
Cookies, cakes, bread. I do love baking. But I also love making candy and working with chocolate as well. There was an Easter, a couple of years ago, when I made almost 50 chocolate Easter eggs. Some of them had creamy and gooey fillings, like this heart shaped chocolate I posted last year. YUM!
I printed a recipe for tangerine truffles but the result was a much too soft, messy – although quite delicious – mixture; something impossible to be shaped into balls. As I was determined to make truffles that day, I started searching the net and Epicurious came to the rescue.
These looked and sounded amazing enough to make me forget the tangerine fiasco.
I hadn’t tried salted caramel till then – even though I’d seen it popping around on some food blogs – and that stuff is so good. The truffles were great and the salty touch is an unusual surprise.
Both the truffle mixture and the shaped balls must be refrigerated for quite a while, so plan ahead.
Caramel-dark chocolate truffles with fleur de sel
560g (20oz) bittersweet or semisweet chocolate, finely chopped, divided – I used 51% cocoa solids
1/3 cup (67g) sugar
2 tablespoons water
2/3 cup whipping cream
¼ teaspoon fleur de sel
½ cup (45g) unsweetened cocoa powder
additional fleur de sel
Place 224g (8oz) chocolate in metal bowl over saucepan of barely simmering water (do not allow bottom of bowl to touch water); stir until chocolate is smooth. Remove chocolate from over water.
Combine sugar and 2 tablespoons water in small saucepan. Stir over medium heat until sugar dissolves, occasionally brushing sides of pan with wet pastry brush. Increase heat; boil until syrup is deep amber color, brushing down sides and swirling pan occasionally, about 4 minutes. Add cream (mixture will bubble). Stir over very low heat until caramel is smooth. Mix caramel and ¼ teaspoon fleur de sel into melted chocolate. Chill until truffle filling is firm, at least 3 hours.
Place cocoa in bowl. Using 1 tablespoon truffle filling for each truffle, roll into balls, then roll in cocoa. Arrange on baking sheet. Cover; chill overnight.
Line a 32x22x5cm (13x9x2-in) baking sheet with foil. Place remaining 336g (12oz) chocolate in medium metal or glass bowl over saucepan of barely simmering water (do not allow bottom of bowl to touch water); stir until chocolate is melted and smooth and thermometer inserted into chocolate registers 46ºC/115ºF. Remove bowl from over water. Working quickly, submerge 1 truffle in melted chocolate.
Using fork, lift out truffle and tap fork against side of bowl to allow excess coating to drip off. Transfer truffle to prepared sheet. Repeat with remaining truffles. Sprinkle truffles lightly with additional fleur de sel while coating is still wet. Let stand until coating sets, at least 1 hour. (Can be made 1 week ahead. Cover and chill. Bring to room temperature before serving.)*
*I decided to temper the chocolate so the coating would be firm and the truffles could be kept in room temperature. If you decide to do that too, don’t roll the truffles in cocoa powder (skip that part). Just make the balls, refrigerate for at least 4 hours and dip directly into tempered chocolate.
To learn how to properly temper chocolate, click here.
Makes about 32 – I halved the recipe and got 14 truffles
Thursday, April 10, 2008
Artichoke and lemon linguine and I've won a book!
Food bloggers are the best, aren’t they?
The talented Allen had his first book giveaway and I won! Yay!!
He’s sending me this amazing book, which comes with a DVD. I can’t wait to start making recipes from it!
Thank you, Allen!
I once tried a no-carb diet. Needless to say, it was a huge failure. I avoided rice and potato and bravely resisted cakes and cookies. But there are two things I can’t live without: bread and pasta.
Even those who are not that crazy about pasta will admit that, if you need a quick meal, that is the way to go. And to make it even faster, sometimes you don’t even need to cook the sauce.
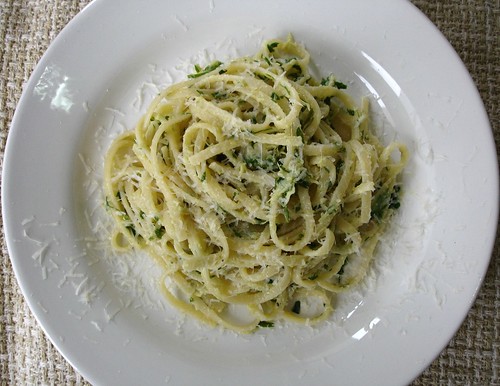
If you decide to give this fabulous recipe a try, I promise you that dinner will be on the table in 10 minutes. Maybe 12, if you grill some bread with olive oil and serve along. :)
Recipe found on Fernanda’s beautiful blog – she used coriander in her pasta, but I did not have any around and went for parsley instead.
This will be my entry for the Weekend Herb Blogging, this time hosted by Jai and Bee, from Jugalbandi.
Artichoke and lemon linguine
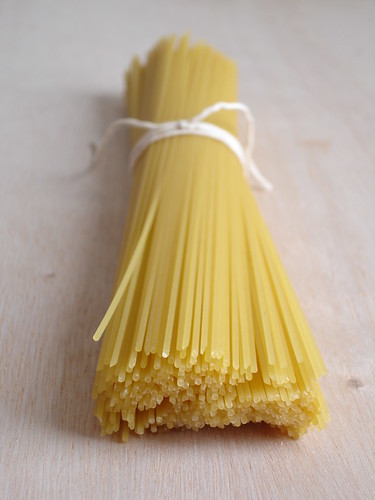
200g linguine
8 canned artichoke hearts – rapidly rinse them to remove any excess brine
juice and grated zest of 1 lemon
1 large handful of parsley
fleur de sel
freshly ground black pepper
4-5 tablespoons extra virgin olive oil
grated parmesan, to serve
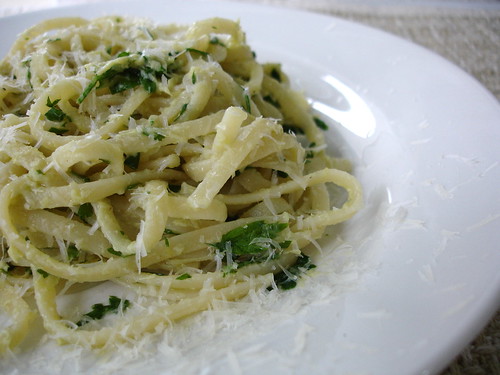
Cook the linguine in a large saucepan of salted boiling water until al dente; drain and set aside.While the pasta cooks, make the sauce: place the artichoke hearts, lemon zest and juice, parsley, fleur de sel, pepper and olive oil in a food processor and process until you get a smooth mixture. Stir the sauce through the pasta, top with the parmesan and serve at once.
Serves 2
