Showing posts with label breakfast. Show all posts

Friday, September 3, 2021

Lime poppy seed waffles and memories of traveling

Waffles de limão e sementes de papoula


Living in pandemic times is tiresome, and one of the things I miss the most is traveling: from time to time I browse the photos I took in past trips. First I thought that it would be painful to see those photos, but actually it felt really good to realize the privilege I had to know so many wonderful places. Even with the vaccination process going forward, traveling abroad will no longer be like it used to, given the Brazilian currency is completely devaluated. Traveling abroad is now only for a selected group of people, like it used to be in the past, when I was a kid and a teenager.

I look at the photos and think of the wonderful places I visited, the beautiful museums and parks, the restaurants and delicious meals I had. It makes me nostalgic, but happy at the same time.

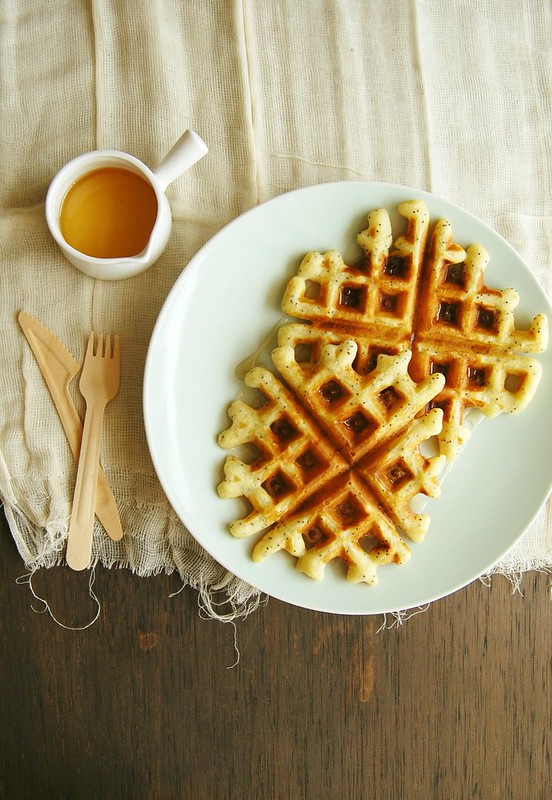
While browsing my travel photos on a flash drive, I found a folder with recipes I made a good while ago but, for some reason, I did not post here because I did not like the photo, did not like the recipe result, or because of a certain ingredient, like these waffles: poppy seeds have been hard to find in Brazil, therefore I ended up forgetting about the recipe.

Weeks ago I was finally able to buy some poppy seeds and immediately baked an orange cake with them – after that, I posted these 
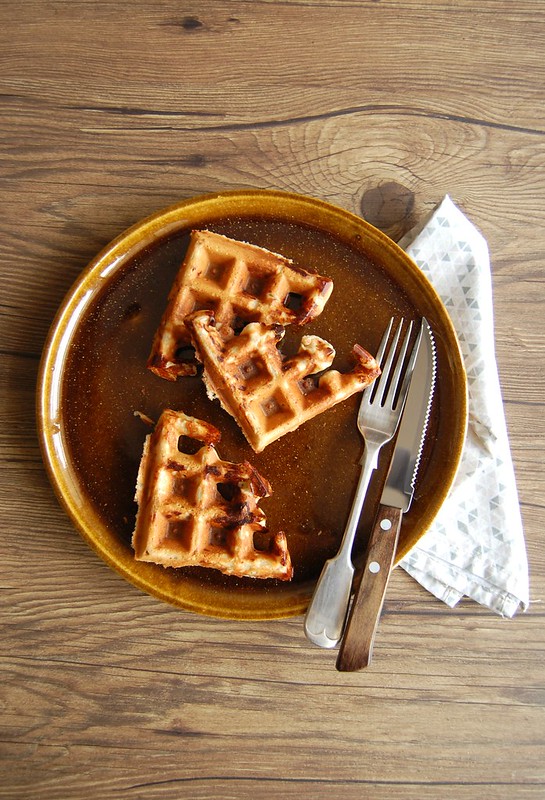
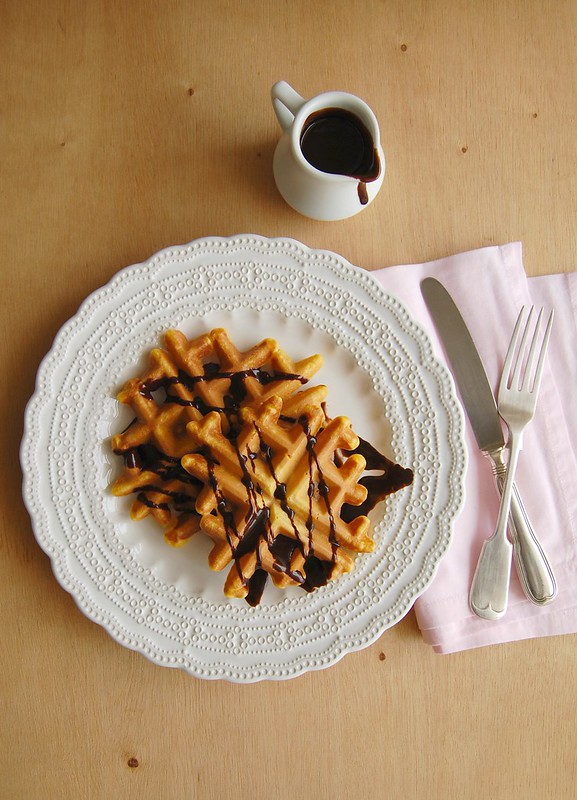
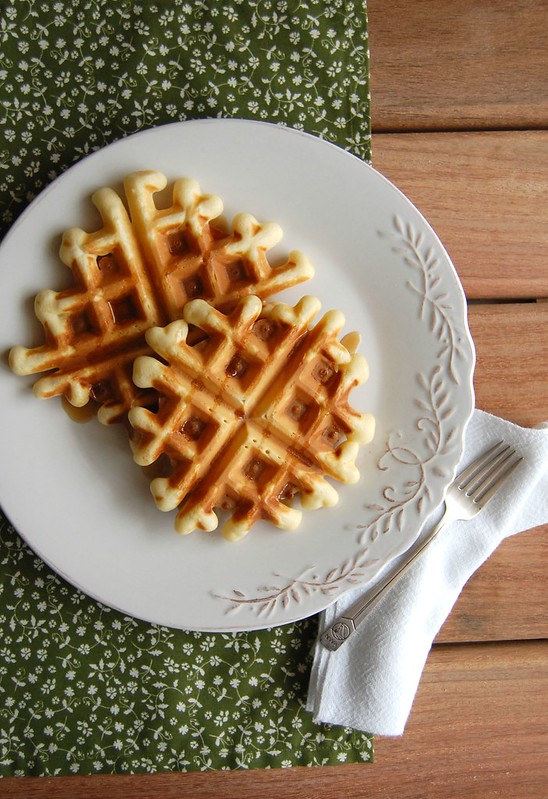
waffles on my blog in Portuguese, and now I post them here too. The waffles are delicious, perfumed with lime and with an extra crunch from the poppy seeds – I hope you like them.


Lime poppy seed waffles

own recipe, adapted from these waffles


2 tablespoons granulated sugar

finely grated zest of 2 large limes

1 ¼ cups (175g) all purpose flour

2 teaspoons baking powder

pinch of salt

1 tablespoon poppy seeds

1 large egg, room temperature

¼ cup (60ml) extra virgin olive oil

¾ cup (180ml) whole milk, room temperature

2 teaspoons lime juice

½ teaspoon vanilla extract


In a medium bowl, place the sugar and lime zest and rub them together with your fingertips until sugar is fragrant. Add the flour, baking powder, poppy seeds and salt and whisk well.

In a small bowl, whisk together the egg, olive oil, milk, lime juice and vanilla. Pour over the dry ingredients and stir just until incorporated – do not overmix.

Heat a waffle iron until very hot; lightly coat with nonstick spray – my waffle maker is nonstick, so I do not coat it.

Working in batches, cook waffles until golden and cooked through. Transfer to a wire rack set inside a baking sheet and keep warm in oven until ready to serve.


Makes 5-6 waffles

Wednesday, May 12, 2021

Orange and olive oil granola

Granola de laranja e azeite de oliva - v.2


I told you the other day that once I started making my own granola I never went back to store bought – not only I can control the amount of sugar and fat in the recipe, I can also vary the flavors and create new types of granola depending on my own taste. 

My chocolate granola is an absolute favorite – it is so delicious I have to refrain myself from eating the whole batch while it cools on the counter. But the granola I bring you today is also wonderful: perfumed with orange zest and juice, flecked with tart cranberries, full of good-for-you sesame seeds and quinoa flakes. You can use honey or make the granola vegan by replacing honey with agave.

This granola is a hit with my dear friend Tania Pereyra, who lives in NY and is a very special woman, who I adore and admire. Let me know if you give it a try too.


Orange and olive oil granola

own recipe


250g jumbo oats

50g quinoa flakes

50g de flaked almonds

3 tablespoons sesame seeds

finely grated zest of 2 small oranges

¼ teaspoon freshly ground nutmeg

¼ teaspoon ground cinnamon

1/8 teaspoon table salt

1/3 cup (80ml) honey or agave

1 tablespoon light brown sugar, packed

1/3 cup (80ml) freshly squeezed orange juice

3 tablespoons extra virgin olive oil

½ cup (65g) dried cranberries, cut in half if too large


Preheat the oven to 180°C/350°F. Line a large baking sheet with foil.

In a large bowl, mix together the oats, quinoa flakes, almond, sesame seeds, orange zest, nutmeg, cinnamon and salt. Set aside.

In a small saucepan, combine honey/agave, brown sugar, orange juice and olive oil and whisk over medium heat until melted and sugar is dissolved.

Remove from the heat and pour over dry ingredients. Stir well to coat. Spread mixture evenly over prepared baking sheet and bake for 15 minutes. Stir the granola around with a rubber spatula (careful not to tear the foil), spread it evenly again and bake for another 15 minutes – the granola will still be soft and will get crunchy once cooled.

Remove from the oven and stir the granola around again. Let cool completely, then stir in the cranberries.

Store in an airtight container at room temperature for up to 2 weeks.

Serves 10-12 

Tuesday, May 4, 2021

Cocoa waffles with caramelized bananas

Waffles de cacau com bananas caramelizadas

Sometimes I think about how many times we change our minds throughout different phases of life, ages, etc. I always say that I don’t get a tattoo because I am not able to like something forever – I would probably regret the tattoo right after getting inked.

When I was younger I thought that breakfast in bed was oh, so cool: the romcoms I watched as a teenager gave me the impression that having breakfast in bed was truly romantic. Now, at the age of 42, I don’t want to eat anything in bed – dirty sheets, crumbs prickling me at night? Thanks, but no thanks. :)

So I would rather have my breakfast on the table, and for the weekend, when I have more time, waffles go really well: I love this recipe for I believe chocolate and bananas are a match made in heaven. And of course you can serve these waffles as dessert, too.


Cocoa waffles with caramelized bananas

own recipe


Waffles:

1 cup (140g) all purpose flour

3 tablespoons unsweetened cocoa powder

½ teaspoon baking powder

¼ teaspoon baking soda

pinch of table salt

3 tablespoons granulated sugar

¼ cup (56g) unsalted butter, melted and cooled – for crispier waffles, replace butter with olive oil or canola oil

1 cup (240ml) buttermilk

1 teaspoon vanilla extract


Caramelized bananas:

2 ½ tablespoons - 35g – unsalted butter

1 ½ tablespoons granulated sugar

¼ teaspoon ground cinnamon

4 medium bananas, sliced in coins

1 ½ tablespoons whisky, Marsala, rum or water (if you don’t want to use booze)


In a large bowl, sift the flour, cocoa, baking powder, baking soda and salt. Set aside.

In a medium bowl, whisk together the sugar, butter, buttermilk and vanilla. Pour over the dry ingredients and fold until incorporated – batter will be sort of lumpy, that is OK.

Heat a waffle iron. Add about 1/3 cup of batter per waffle (adjust the amount of batter depending on the size of your machine), then cook following the manufacturer's instructions, until the waffles are golden brown.

While the waffles cook, prepare the bananas: melt butter in a large nonstick frying pan over high heat. Add the sugar and the cinnamon and mix with a spatula until sugar starts to melt. Add the bananas and cook them ever so slightly on both sides until golden. Add the booze (if using) carefully not to get burned. Mix to dissolve the caramel in the frying pan and cook for another minute. Remove from the heat and serve immediately with the waffles.

Serves 4

Friday, February 26, 2021

Oatmeal porridge - comfort food for troubled times

Mingau de aveia


I have a small notebook in which I write down food ideas I want to test and also the recipes I make at home, so I can then post them here on the blog. The poor notebook has been so forgotten lately it is almost getting dusty, for I haven’t made anything new, but I keep it on the coffee table, with my iPad and my cell phone charger, hoping that maybe, sometime, I’ll look at it and feel like testing new recipes again.

This is how things are going here, some days seem slower and/or longer than others, sometimes I feel a little bit more energy, while other times I have less disposition, but everyday seems like the previous one, very “Groundhog Day” indeed. At least workwise things are truly great, working with a new boss since September 2020, a wonderful woman who is beautiful both on the inside and out, and that makes me eager to face this never-ending quarantine.

I want vaccines, but there aren’t hardly any, I want a better government for my country, which is not possible right now. I want to get up in the morning without feeling I am in an episode of “The Handmaid’s Tale” – not possible now either.

As far as food goes, things are a bit boring around here: very basic recipes, preferably quick dishes that do not result in a sink full of dishes to do. Lots of pasta and salads

Sometimes at night I don’t feel like eating, even when I exercise, which generally makes me hungry. To avoid going to bed on an empty stomach, I make myself some porridge: quick, easy and so comforting – it is like being hugged on the inside. I top it with chia seeds, coconut chips or cashew nuts and serve it with some fruit on the side. It is not a traditional dinner, but it comforts me and makes me feel fed and happy.


Oatmeal porridge

own recipe


¼ cup (25g) rolled oats

½ cup (120ml) milk or plant-based milk – I like to use cashew nut milk, it is so creamy!

¼ cup (60ml) cold water

pinch of salt

sugar, to taste – you can replace it with honey or agave

pinch of ground cinnamon, or 1 teaspoon unsweetened cocoa powder


Place all the ingredients in a small saucepan and cook over medium heat, stirring a few times to dissolve the sugar. When it starts to boil, reduce the heat and stir constantly until mixture thickens. Cook for 2-3 minutes, depending on how thick you want the porridge.

Transfer to a bowl and serve.

Serves 1


Thursday, September 17, 2020

Pizza flavored whole wheat waffles and very different vacations

Waffles integrais sabor pizza

I was on vacation for most of July and it was very different from all the other previous vacations I ever took: in quarantine, I stayed home all the time. I had plans to go back to NYC this year, but unfortunately had to postpone the trip to god knows when due to the pandemic. On my vacation there was no travelling, no walking around the city, no nothing. I saw one movie a day, some TV shows, cooked a lot. I organized my books and my closet, took naps after lunch and rested.

In one of the afternoons watching movies I felt like nibbling on something, and there was freshly baked cake, but I really wanted something savory. I adapted my recipe for orange olive oil waffles to make it flavored like pizza, with cheese and dried oregano, and also added a bit of whole wheat flour to make the waffles more interesting and nuttier in flavor. The waffles turned out delicious, therefore I share the recipe with you today.


Pizza flavored whole wheat waffles

own recipe


100g all purpose flour

75g whole wheat flour

2 teaspoons baking powder

pinch of salt

2 teaspoons dried oregano

1 large egg, room temperature

¼ cup (60ml) extra virgin olive oil

¾ cup (180ml) whole milk, room temperature

1 cup (70g) coarsely grated yellow mozzarella*

2 tablespoons finely grated parmesan


In a medium bowl, whisk together the flours, baking powder, oregano and salt. Set aside.

In a small bowl, whisk together the egg, olive oil and milk. Pour over the dry ingredients and stir just until incorporated – do not overmix. Stir in the cheeses.

Heat a waffle iron until very hot; lightly coat with nonstick spray – my waffle maker is nonstick, so I do not coat it.

Working in batches, cook waffles until golden and cooked through. Transfer to a wire rack set inside a baking sheet and keep warm in oven until ready to serve.

* the yellow mozzarella I used is not like fresh mozzarella balls, therefore it does not release too much liquid. Replace by cheddar or something similar texture wise.

Makes 5-6 waffles


Saturday, May 27, 2017

Brazilian carrot cake waffles with chocolate glaze

Brazilian carrot cake waffles with chocolate glaze / Waffles de cenoura com calda de chocolate

One of the childhood memories I most cherish is the image of my mom in the kitchen baking cakes – she was a hell of a cook but was also famous for her sweet treats.

The two cakes I remember the most are the chocolate cake and the carrot cake – the Brazilian carrot cake, with chocolate glaze: oh, so delicious (there is a recipe here for those of you not familiar with it).

One day I got myself thinking about mom’s carrot cake, but I would not have time to bake it. Since I wanted instant gratification I decided to tweak the recipe ever so slightly and turned the cake into waffles – they were really good!

I have been making these sometimes ever since, for they are super quick and fuss free to make – instant gratification with a touch of nostalgia.

Brazilian carrot cake waffles with chocolate glaze
own creation

Waffles:
2 small carrots (200g/7oz), peeled and chopped
2 large eggs
½ cup (100g) granulated sugar
1/3 cup (80ml) canola oil
1 cup (140g) all purpose flour
½ teaspoon baking powder
pinch of salt

Chocolate glaze:
1/3 cup (30g) unsweetened cocoa powder, sifted
¼ cup (50g) granulated sugar
2 tablespoons (28g) unsalted butter, room temperature
¼ cup (60ml) whole milk, room temperature

Waffles: place the carrots, eggs and oil in a blender and blitz until smooth. Transfer to a large bowl and whisk in the flour, baking powder and salt until a smooth batter forms.

Heat a waffle iron until very hot; lightly coat with nonstick spray – my waffle maker is nonstick, so I don’t coat it.
Working in batches, cook waffles until golden and cooked through. Transfer to a wire rack set inside a baking sheet and keep warm in oven until ready to serve.
Serve waffles with the chocolate glaze.

Chocolate glaze: place all the ingredients in a small saucepan and cook over high heat, whisking constantly, until mixture starts to boil. Cook, whisking constantly, for 2-3 minutes or until slightly thickened. Remove from the heat and set aside for 5 minutes – glaze will thicken a bit more as it cools. Serve over waffles.

Serves about 6

Wednesday, August 12, 2015

Waffles for crazy, hectic days

Waffles

My days have been pretty hectic lately, too much to learn in a short period of time – I haven’t cooked much and I don’t remember the last time I actually baked something (I made chocolate mousse last weekend for Sunday’s lunch, let’s pretend that counts). :) The crazy routine is not supposed to last forever, and while it does I’ll try not to let it get in the way of my posts here, but I won’t make promises I cannot keep – I just hope that those of you who have been around for so long bear with me during these days and do not jump ship. :)

I made these waffles a couple of weeks ago to go with an episode of Hannibal (I am brave enough to eat while watching it) and they turned out so good I had to share them with you: crunchy on the outside, tender on the inside, perfumed with vanilla, they are absolutely delicious, and the good thing is the batter is put together in no time and can be refrigerated overnight if tightly covered – if you’re pressed for time like I have been lately, this recipe should be permanently on your refrigerator door.

Waffles
from the beautiful Falling Cloudberries: A World of Family Recipes

2 eggs, separated
pinch of salt
1/3 cup (67g) granulated sugar
½ teaspoon vanilla
4 ½ tablespoons (63g) unsalted butter, melted and cooled
1 ½ cups (210g) all purpose flour
½ teaspoon baking powder
¾ cup (180ml) whole milk, room temperature

Whisk the egg whites and the salt until they’re fluffy and just holding soft peaks.
In a large bowl, whisk the egg yolks with the sugar and vanilla until creamy. Whisk in the butter, then the flour and baking powder (batter will be thick). Add the milk, then fold in the egg whites.

Heat a waffle iron. Add about 1/3 cup of batter per waffle, then cook following the manufacturer's instructions, until the waffles are golden brown. Serve immediately.

Makes about 6

Saturday, November 29, 2014

Buttermilk pancakes - easy and delicious

Buttermilk pancakes / Panquecas de buttermilk

One of the things I have this blog to thank for is learning how to make pancakes, or American style pancakes as we call them here – I grew up eating what we call pancakes here, which are thin like crepes and filled with savory fillings like beef mince or chicken, and covered with tomato or Béchamel sauce (they’re very much like manicotti).

The pancakes I grew up with are delicious, indeed, and I still make them every now and then, but they are not fit for breakfast or those afternoons when you crave something sweet and there isn’t much in the pantry or refrigerator to bake or cook with – for those occasions, fluffy pancakes drizzled with syrup are perfect.

These are fluffy, delicious and super easy to make – I have lost track of how many times I have made this recipe, always with wonderful results. When I’m not in a hurry to watch something on TV I cook a sliced banana in a bit of butter, sugar and cinnamon until it’s caramelized and eat with the pancakes – so, so good.

Buttermilk pancakes
from the delicious Bill's Basics

100g all purpose flour
1 ½ teaspoons baking powder
pinch of salt
1 tablespoon granulated sugar
1 egg, lightly beaten with a fork
½ teaspoon vanilla extract
1 tablespoon (14g) unsalted butter, melted and cooled + a bit extra for frying the pancakes
150ml buttermilk*

In a large bowl, sift together the flour, baking powder and salt. Stir in the sugar, egg, melted butter and vanilla. Stir in the buttermilk.

Heat a large nonstick frying pan over medium heat and brush it lightly with butter. Using about 2 tablespoons of batter per pancake, pour the batter onto the pan and cook the pancakes for 2-3 minutes – when bubbles appear on the surface, turn the pancakes and cook for 1-2 minutes on the other side.
Serve with maple syrup, honey, dusted with icing sugar or with whatever strikes your fancy.

* homemade buttermilk: to make 1 cup buttermilk place 1 tablespoon lemon juice in a 240ml-capacity measuring cup and complete with whole milk (room temperature). Wait 10 minutes for it to thicken slightly, then use the whole mixture in your recipe

Makes about 10

Monday, October 13, 2014

Banana waffles with chocolate sauce

Banana waffles with chocolate sauce / Waffles de banana com calda de chocolate

My sister came over the other day for lunch and she spent the afternoon here with me, but this time, instead of playing Super Mario, I suggested we watched Willy Wonka & the Chocolate Factory, for she had never watched the original version – I’m really biased here for this is one of my all time favorite movies and I cannot conceive the idea of a Willy Wonka other than Gene Wilder (sorry, Johnny, but you really sucked at playing that part). :)

She loved the movie – which was no surprise to me – but at some point she told me it wasn’t easy watching it without having something to snack on: all that chocolate made my sister crave something sweet, and since we’d had such a light lunch I thought that waffles would make our afternoon even nicer.

I used a recipe from a Brazilian blog I adore but instead of adding chocolate chips to the batter as my friend Richie did, I made a chocolate glaze to pour over the waffles – Willy Wonka would be proud. ;)

Banana waffles with chocolate sauce
slightly adapted from a beautiful Brazilian blog

Waffles:
1 cup (140g) all-purpose flour
1 tablespoon granulated sugar
½ tablespoon baking powder
¼ teaspoon salt
200ml whole milk, room temperature
1 medium banana, mashed
3 tablespoons vegetable oil
1 large egg
1 teaspoon vanilla extract

Chocolate sauce:
2 tablespoons unsweetened cocoa powder
2 tablespoons granulated sugar
1 tablespoon unsalted butter
2 tablespoons milk

Waffles: place ingredients in a large mixing bowl and combine until well blended and smooth. Let batter sit for 5 minutes before using.
Heat the waffle maker until very hot; lightly coat with nonstick spray. Pour about 1/3 cup of batter into the machine, close and cook until cooked through and golden.

Make the chocolate sauce: mix all the ingredients in a small saucepan and cook over high heat, whisking, until it comes to a boil. Cook for 2-3 minutes, whisking, until thickened.
Remove from heat and let it stand for 5 minutes before pouring it over the waffles

Serves 4

Monday, March 17, 2014

Dark chocolate waffles and Super Mario

Dark chocolate waffles / Waffles de chocolate

It took me a good while, but I finally gave in and bought a waffle maker. :)

For years I avoided buying a waffle iron because I would be the only one eating the waffles, and I really did not need more baked goods going straight to my waistline. :S It also seemed like a waste of money. But then, many months ago, I found out that my partner in crime for all things movie and sweet – my sister – loved waffles, too, and then it hit me: I would have someone to share them with from time to time, someone who appreciates them like I do, and the gadget no longer seemed so unnecessary. :D

So last Saturday we had an afternoon of Super Mario – it’s a modern version of the game, so she kicked my ass big time – followed by freshly made chocolate waffles drizzled with honey. We had loads of fun together – we almost drove my husband nuts with all the laughing – and she loved the waffles (I did, too). :)

Next time I’ll challenge her to play the old Super Mario version (so I can kick her ass) – I’ll just have to choose another waffle recipe to try. :D

Dark chocolate waffles
slightly adapted from Bon Appétit

2 cups (280g) all-purpose flour
½ cup (45g) unsweetened cocoa powder
¼ cup (44g) brown sugar, packed
2 tablespoons granulated sugar
2 teaspoons baking powder
1 teaspoon baking soda
½ teaspoon table salt
3 large eggs, separated
2 cups (480ml) buttermilk*
½ cup canola oil
1 teaspoon vanilla extract
170g (6oz) dark chocolate, finely chopped – I used one with 53% cocoa solids

Preheat oven to 120°C/250°F. Whisk flour, cocoa powder, sugars, baking powder, baking soda, and salt in a large bowl. Make a well in the center and add egg yolks, buttermilk, oil, and vanilla. Blend with a fork, then gradually incorporate dry ingredients, mixing just until combined.
Using an electric mixer on medium-high speed, beat egg whites in a small bowl until soft peaks form. Working in 2 batches, fold egg whites into batter just until combined. Fold in chocolate.
Heat a waffle iron until very hot; lightly coat with nonstick spray. Working in batches, cook waffles until cooked through. Transfer to a wire rack set inside a baking sheet, cover loosely with foil, and keep warm in oven until ready to serve.
Serve waffles with honey.

* homemade buttermilk: to make 1 cup buttermilk place 1 tablespoon lemon juice in a 240ml-capacity measuring cup and complete with whole milk (room temperature). Wait 10 minutes for it to thicken slightly, then use the whole mixture in your recipe

Makes 6 – I got 5

Sunday, July 31, 2011

Cinnamon crunch muesli and an important question for the readers

Cinnamon crunch muesli / Muesli crocante de canela

I have finished reading "The Girl Who Kicked the Hornet's Nest", therefore finishing the Millennium Trilogy – the books are fantastic and it’s a pity that Lisbeth Salander’s adventures have come to an end. My idea now is to go for one of the classics, maybe "Moby Dick", but I’m not sure yet. That is why I ask you for suggestions: would you help me out choosing the next book I’m reading? I’m all ears. :D

Now, if you’ll excuse me, it’s rather early and I haven’t had breakfast yet – this delicious muesli with some yogurt will be perfect.

Cinnamon crunch muesli
from the gorgeous Feed Me Now

½ cup + 1 tablespoon (127g) unsalted butter
1/3 cup (58g) light brown sugar, packed
2 teaspoons ground cinnamon
2 ¾ cups (316g) rolled oats
1 cup (150g) almonds (with skin), roughly chopped

Preheat the oven to 180°C/350°F. Line a large baking sheet with baking paper.
Place the butter, sugar and cinnamon in a large saucepan over medium heat. Stir until the butter has melted and sugar dissolved. Remove from the heat, add the oats and almonds and stir to coat evenly.
Spread the mixture evenly on the prepared sheet. Bake for about 30 minutes, stirring occasionally, until lightly browned. Allow to cool completely before storing in an airtight container.
Serve with milk, yogurt or/and fruit.

Makes 16 portions

Sunday, February 27, 2011

Mini buckwheat pancakes

Mini buckwheat pancakes / Panquequinhas de trigo sarraceno

For some people, retail therapy means lots of clothes, shoes, DVDs... To me, it means ingredients for my recipes. :)

After buying this beautiful book, I went crazy and started buying lots of different types of flour: buckwheat, barley, rye... Time went by and I haven’t baked with them as I should have. Not good, Patricia. Not good.

Buckwheat flour begging to be used + Bill Granger’s recipe + my obsession with teeny-weeny food = these pancakes. :)

Mini buckwheat pancakes
from bills open kitchen

1 cup + 2 ½ tablespoons (165g) buckwheat flour
6 tablespoons (60g) all purpose flour
1 teaspoon baking powder
2 teaspoons caster sugar
pinch of salt
4 eggs, separated
2 cups (480ml) buttermilk
butter, for greasing the pan
to serve: yogurt, maple syrup, honey, fresh fruit or jam

Preheat the oven to 120°C/248°F. Place the buckwheat flour, all purpose flour, baking powder, sugar and salt in a bowl and stir to combine. Place the egg yolks and buttermilk in another bowl and stir well to combine. Add the buttermilk mixture to the flour and mix lightly until just combined. A few lumps are fine, so do not overmix. In another bowl, whisk the egg whites until soft peaks form, then gently fold them into the batter.
Heat a large non-stick frying pan over a medium heat and brush with a small portion of butter. For each mini pancake, ladle 1 tablespoon of batter* into the pan and cook for 30-40 seconds or until bubbles appear on the surface of the pancake. Turn the pancakes and cook for another 20-30 seconds. Transfer to a plate and keep warm in the oven while you make the remaining pancakes.
Serve with whatever strikes your fancy.

*to make larger pancakes, use ¼ cup of batter per pancake

Serves 4

Saturday, November 13, 2010

Baked’s granola, getting older and embarrassing secrets

Baked's granola / Granola da Baked bakery

I’ve decided to confess some of my deepest secrets today in order to celebrate my 32nd birthday. :)

Secret #1: I don’t like hazelnuts. I used to, but not anymore (only in creamy, chocolatey form). That’s why next time I make this granola I’ll be using almonds only.

Not embarrassing enough? Watching (again) “Miami Vice” the other day I thought that Colin Farrell looked really good as Sonny Crockett, mustache and hair included. :D

Baked's granola / Granola da Baked bakery

Baked’s granola
from Baked: New Frontiers in Baking

2 cups (230g) rolled oats
1 teaspoon ground cinnamon
1 teaspoon salt
3 tablespoons + 1 teaspoon vegetable oil
¼ cup honey
¼ cup (44g) packed light brown sugar
1 teaspoon vanilla extract
1/3 cup (50g) whole almonds
1/3 cup (48g) whole hazelnuts
2/3 cup (75g) dried cranberries

Preheat the oven to 160°C/325°F; line a baking sheet with parchment paper.
In a large bowl, toss the oats with the cinnamon and salt.
In a medium bowl, stir together the oil, honey, brown sugar and vanilla. Whisk until completely combined. Pour the honey mixture over the oats mixture and use your hands to combine them: gather up some of the mixture in each hand, and make a fist. Repeat until all the oats are coated with the honey mixture.
Pour the mixture onto the prepared baking sheet. Spread it out evenly, but leave a few clumps here and there for texture. Bake for 10 minutes, then remove from the oven and use a metal spatula to lift and flip the granola. Sprinkle the almonds over the granola and return to the oven.
Bake for 5 minutes, then remove from the oven and use a metal spatula to lift and flip the granola. Sprinkle the hazelnuts over the granola and bake for another 10 minutes. Remove from the oven, let cool completely, then sprinkle the cranberries and use your hands to transfer the granola to an airtight container.
The granola will keep for 1 week.

Makes 450g (1 pound)

Wednesday, April 21, 2010

Banana pancakes

Banana pancakes / Panquequinhas de banana

I love holidays – who doesn’t? :)

Lazy days like today call for a special breakfast, like these banana pancakes – they are delicious with fresh fruit, especially strawberries. A wonderful way to start the day. :)

Banana pancakes / Panquequinhas de banana

Banana pancakes
from Simple Essentials Fruit

2 cups + 2 tablespoons (300g) all purpose flour
3 teaspoons baking powder
2/3 cup (116g) brown sugar, packed
1 cup (240ml) buttermilk
2 eggs
4 ripe bananas, mashed
1 ½ tablespoons (21g) unsalted butter
½ cup maple syrup or honey, to serve

Place the flour, baking powder, sugar, buttermilk, eggs and bananas in a large bowl and mix to combine. heat a large non-stick frying pan over medium heat. Add a little of the butter and pour 1/3 cup (80ml) of the mixture into the pan and cook, in batches, until bubbles appear on the surface. Turn the pancakes and cook for 1 minute or until golden. Repeat with the remaining mixture.
Serve in stacks layered drizzled with the maple syrup or honey.

Serves 4 – I halved the recipe, used ¼ cup (60ml) of batter per pancake and got 12

Friday, March 26, 2010

Blueberry and pistachio toasted muesli

Blueberry and pistachio toasted muesli / Muesli com pistache e mirtilos secos

After parading five hundred tons of sweets around here I thought it was time for something a little bit healthier – but it had to be good, because food that tastes like cardboard is definitely not allowed on this blog. :)

This muesli is delicious and easy to make – even if you and your oven are not very close friends. :)

Blueberry and pistachio toasted muesli / Muesli com pistache e mirtilos secos

Blueberry and pistachio toasted muesli
slightly adapted from Donna Hay magazine

60g unsalted butter
⅓ cup (80ml) honey
2 ¼ cup (258g) rolled oats
½ cup (70g) slivered almonds
¾ cup (75g) sweetened shredded coconut
1 cup (170g) dried blueberries
½ cup pumpkin seed kernels (pepitas)*
¾ cup (105g) chopped pistachio kernels
milk, to serve
plain yogurt, to serve

Preheat the oven to 160°C/320°F. Place the butter and honey in a small saucepan over low heat and stir until the butter is melted.
Place the oats, almonds and coconut in a large bowl, pour over the butter mixture and toss well to combine. Spread evenly over the base of a baking dish and bake for 10 minutes. Stir and bake for a further 5−10 minutes or until crisp and golden. Allow to cool and stir through the blueberries, pumpkin seeds and pistachios. Serve with the milk and yoghurt.
The muesli can be stored in an airtight container for up to 1 week.

*I used sunflower seeds instead but did not like the result

Serves 6-8.

Friday, August 14, 2009

Crunchy-top pear muffins

Crunchy-top pear muffins / Muffins de pêra com cobertura crocante

I have received several comments and emails regarding the better than brownie cookies I posted a while ago - the recipe worked out fine for some of you but not so much for others... I’m sorry to hear that and have updated the post with info on the chocolate I used and on cooling the chocolate + butter mixture for 5 minutes prior to adding the other ingredients - I hope it helps!

If you’ve had a hard time baking the better than brownie cookies, may I suggest these muffins? A stress-free recipe that will cheer you up. And even if you haven’t baked those cookies, make the muffins anyway – they are really good. :D

Crunchy-top pear muffins / Muffins de pêra com cobertura crocante

Crunchy-top pear muffins
adapted from Holiday

1 ¼ cup + 1 tablespoon (185g) all purpose flour
3 teaspoons baking powder
2 teaspoons ground cinnamon
100g rolled oats
½ cup + ½ tablespoon (94g) brown sugar, both packed
2 eggs
1 cup (240ml) plain yogurt
½ cup (120ml) vegetable (light-flavored) oil
1 pear, peeled and diced

Topping:
¼ cup (44g) brown sugar, packed
1/3 cup (50g) unblanched almonds, finely chopped

Preheat the oven to 180ºC/350ºF; line six 240ml (1 cup) muffin pans with paper cases (or just grease well).

Sift the flour, baking powder and cinnamon into a large bowl, add the oats, brown sugar and stir together. Make a well in the centre.
Whisk together the eggs, yogurt and oil. Pour into the well in the dry ingredients and stir with a fork until just combined. Fold through the pear, being careful not to overmix. Spoon into the muffin cases.
To make the crumble topping, mix the brown sugar and almonds. Sprinkle over the muffin mixture and then bake for 20–25 minutes until golden brown.

Makes 6 – I halved the recipe, used 1/3 cup (80ml) capacity muffin pans and got 7 muffins

Monday, August 4, 2008

Cinnamon French toast

Cinnamon French toast

I love breakfast food. In a perfect world, people should be able to eat pancakes, waffles, muffins and bread all through the day. :)

This was the first time I tried french toast, though. We do eat something really similar here in Brazil, called rabanada, but it’s usually prepared around Christmas time and it’s not a daily breakfast meal for us. It’s equally delicious: the bread is soaked in a mix of milk and sweetened condensed milk, fried and sprinkled with cinnamon sugar.

I had drained some yogurt and was looking for something good to use it with - Pea’s “refund” muffins crossed my mind, but the amount of yogurt was not enough. The answer was on this book.

I used plain sandwich bread (which was the only kind around the house that day) and it worked fine, even though they were not very thick. I just had to be careful when frying and flipping them over.

Cinnamon French toast

Cinnamon French toast
from Kitchen: The Best of the Best

4 thick slices white bread, crusts removed
1 egg
1 tablespoon sugar – I used vanilla scented sugar
1 teaspoon ground cinnamon
½ cup (120ml) milk
butter, for frying
extra sugar, for sprinkling
175g plain yogurt, to serve
fresh seasonal fruit, to serve
100ml maple syrup, to serve – I used honey
toasted pecans, to serve

Cut each slice of bread in half to make rectangles. Beat the egg, sugar and cinnamon in a bowl, then add the milk and combine well. Melt 1 tablespoon butter in a frying pan – I used non-stick - over medium heat. Dip the bread into the milk mixture, covering both sides. Sprinkle one side of each piece of bread with sugar and gently fry, sugar-side down, for 3 minutes, or until the undersides are golden. Sprinkle the tops with a little sugar and flip over. Cook until golden. Serve with yogurt, fresh fruit, maple syrup/honey and sprinkle of pecans.

Serves 4

Cinnamon French toast

Friday, July 11, 2008

Lemon curd

Lemon curd

Reading food blogs and cookbooks is wonderful. But it can also be devastating for a curious person like me. I won’t rest until I make/try something new... And lemon curd was absolutely new to me.

Lemon curd is not part of our food habits here in Brazil and I had not known about it until I started blogging. Being the citrus freak that I am, it immediately caught my attention. No lemon curd in grocery stores around here?? No problem – off to the kitchen to make some.

I had some egg yolks left from the Zuger Kirschtorte and, with Rose Levy’s book on one hand and some beautiful lemons on the other, I was determined to taste what my fellow foodies loved so much.

It was... Sublime. I would never have thought that something so delicious would come up from mixing only eggs, butter and lemons. I want to use it as a cake filling, too.

It says on the recipe that the curd can be refrigerated for up to 3 weeks, but I think that after the first week the flavor was a little off, kind of eggy.

Lemon curd

Lemon curd
from The Cake Bible

4 large egg yolks
½ cup + 2 tablespoons (125g) sugar
3 fl oz (93ml or about 2 ½ large lemons) lemon juice, freshly squeezed
4 tablespoons (56g) unsalted butter, softened
pinch of salt
2 teaspoons finely grated lemon zest

In a heavy noncorrodible saucepan beat the yolks and sugar until well blended. Stir in the remaining ingredients except the lemon zest. Cook over medium-low heat, stirring constantly, until thickened and resembling a thin hollandaise sauce, which thickly coats a wooden spoon but is still liquid enough to pour. The mixture will change from translucent to opaque and being to take on a yellow color on the back of wooden spoon. It must not be allowed to boil or it will curdle. Whenever steam appears, remove briefly from heat, stirring constantly to keep from boiling. When the curd has thickened, pour at once into a strainer. Press with the back of a spoon until only coarse residue remains; discard the residue. Stir in the lemon zest and cool – more sugar can be added to taste while the curd is still warm, but I did not think it was necessary.
Pour into an airtight container. The curd will continue to thicken while resting and chilling.

Makes 1 full cup

Lemon curd

Tuesday, July 8, 2008

Cheese Stuffed Crusty Rolls

Cheese stuffed crusty rolls

Choosing something doesn’t always have to be a difficult task – and that coming from the one who can take forever to decide which recipe to prepare is quite an improvement. Sometimes, we just know where to find it.

If you have a twisted, weird, crazy-looking role, you get Gary Oldman. Very simple. And if you want beautiful, delicious, out of this world desserts, you just go to Helen’s blog. But she can bake some seriously good savory recipes as well – yeah, I know, there’s nothing to be surprised here. :)

The cheese stuffed crusty rolls she posted in May were fantastic and the idea of using herbes de Provence in their filling sounded brilliant.

I have a challenge for you: make these and DO NOT eat them all the minute they are out of the oven. :)

Cheese stuffed crusty rolls

Cheese Stuffed Crusty Rolls

Starter:
1 ¼ cups (175g) bread flour
½ teaspoon salt
½ teaspoon instant yeast
½ cup (120ml) cool water

Dough:
all of the starter
1 cup (240ml) + 2 tablespoons to 1 ¼ cups (300ml) lukewarm water – I used 300ml
½ teaspoon salt
3 ½ cups (490g) all purpose flour
½ teaspoon instant yeast

Filling:
1 ½ cups (280g/10oz) grated Monterey Jack cheese – I used the yellow mozzarella we have here, that seems to be really similar to Monterey Jack
1 cup grated parmesan
2 tablespoons herbes de Provence

Cheese stuffed crusty rolls

To make the starter: mix the 1 ¼ cups flour, salt, yeast, and ½ cup water in a medium-sized bowl. Mix till well combined. Cover with plastic and let rest overnight at room temperature.

Make the filling: mix well all the ingredients in a bowl. Set aside.

To make the dough: combine the risen starter with the water, salt, flour, and yeast. Knead by hand or with a stand mixer for a few minutes (I went with 5 minutes by hand, like Helen did). Place it in a lightly greased bowl, cover, and let it rise for 1 ½ to 2 hours, until it’s nearly doubled in size. Gently deflate the dough, and pat and stretch it into a ¾ inch-thick rectangle, about 9x12in (23x30cm). Spritz with water, and sprinkle with the grated cheese and the herbs. Starting with a long side, roll it into a log, pinching the seam to seal. Place the log, seam-side down, on a lightly floured or lightly oiled surface. Cover it and let it rise for 1 to 1 ½ hours, till it’s puffy though not doubled in size. Towards the end of the rising time, preheat the oven to 220ºC/425ºF. Gently cut the log into four crosswise slices, for mini-breads; or simply cut the dough in half, for two normal-sized loaves. Place them on one (for two loaves) or two (for four mini-loaves) lightly greased or parchment-lined baking sheets, cut side up. Spread them open a bit, if necessary, to more fully expose the cheese and close the other end. Spritz with warm water, and immediately place them in the preheated oven. Bake for 20 minutes (for the mini-loaves), or 35 minutes (for the full-sized loaves), or until the cheese is melted and the loaves are a very deep golden brown. Remove them from the oven, and cool on a rack.

Note: You can also roll the log and cut 12 slices from it and set them on a parchment paper lined baking sheet and proceed with the recipe as written.

Cheese stuffed crusty rolls

Monday, May 5, 2008

Cardamom coffee rolls and loads of gifts

Cardamom coffee rolls

These delicious and incredibly tender rolls are the result of a recipe taken from the book I won at Allen’s giveaway a couple of weeks ago. But that’s not all: Allen is such a dear that he sent me not only the book but also lots of other gifts!

Allen's gifts

Inside the huge box, there were dried cherries, lavender and 2 products from the Martha Stewart line: a gorgeous plate (the one holding the roll on the photo) and the beautiful and wonderful recipe box! The one I have been meaning to buy for months. I was going to buy it later this year, since Joao and I were planning a trip to the US. Unfortunately, it will have to be postponed to 2009.

Allen's gifts

I was so glad with my presents I started screaming and jumping around the house – Tom Cruise/Oprah’s couch style. :)

Allen, thank you very, very much for your kindness and generosity, my friend.

Cardamom coffee rolls

Cardamom coffee rolls
from A Baker's Odyssey

Sponge:
1 cup (240ml) whole milk
1 ½ cups (210g) unbleached all-purpose flour
1 package (2 ¼ teaspoons) active or dry yeast

Dough:
½ cup (100g) granulated sugar
1 large egg, at room temperature
1 large egg yolk, at room temperature
4 tablespoons (½ stick – 56g) unsalted butter, very soft
1 teaspoon ground cardamom, preferably freshly ground
½ teaspoon salt
1 ¼ cups (175g) unbleached all purpose flour, plus more if needed

Topping:
¼ cup sliced or slivered almonds, chopped into small pieces – I preferred not to chop them
2 tablespoons granulated sugar
¼ teaspoon ground cardamom, preferably freshly ground
1 large egg yolk, beaten with 1 teaspoon water, for egg wash

To make the sponge: scald the milk in a small saucepan over medium heat – you’ll see steam rising from the surface of the milk and small bubbles forming around the edges. Remove the pan from the heat and cool the milk until it is between 120 and 130ºF (48 – 54ºC).
In a medium bowl, whisk together the flour and yeast. Add the hot milk and whisk to make a smooth, thick batter. Bang the whisk on the rim of the bowl to remove any clinging batter, and scrape the sides of the bowl with a rubber spatula. Cover the bowl tightly with plastic wrap. Let rise until the sponge has double in volume, about 1 hour.

To make the dough by hand, scrape the sponge into a large bowl. Whisk in the sugar, egg, egg yolk, butter, cardamom and salt. Beat vigorously with a wooden spoon for about 5 minutes, until the dough is smooth and very elastic. Stir in the flour and beat again for 5 minutes. The dough should be elastic, soft and just slightly sticky. Sprinkle your work surface with 2 tablespoons flour and place the dough on it. Knead for 2-3 minutes, until the dough is only slightly tacky. Wash and dry the bowl, lightly oil it or coat with cooking spray, and replace the dough in the bowl, turning to coat.

To make the dough with a stand mixer (which is what I did): scrape the sponge into the mixer bowl and add the sugar, egg, egg yolk, butter, cardamom and salt. Attach the flat beater and beat on low speed for 1 minute. Increase the speed to medium and beat for 5 minutes or until the dough becomes ropy, masses onto the beater and begins to pull away from the sides of the bowl. Scrape the bowl and beater, and remove the paddle. With a wooden spoon, stir in the flour. Attach the dough hook and knead on low speed, then increase the speed to medium to medium-high and beat for 5 minutes to make a soft, elastic, slightly sticky dough. Scrape the bowl and remove the dough hook.
Sprinkle the dough with 1 tablespoon flour. Cover the bowl tightly with plastic wrap and let the dough rise until doubled in size, about 1 ½ hours.
Sprinkle your work surface lightly with flour, and scrape the dough onto it with a pastry scraper. Turn to coat both sides of the dough lightly with flour. Divide the dough into 15 equal portions with a pastry scraper or a sharp knife. Cover loosely with a kitchen towel and let the dough rest for 10 minutes.

Butter a 13x9x2in (32x22x5cm) baking pan or coat with cooking spray. Shape each piece of dough into a ball, sealing the seam on the underside of the dough firmly. Place the balls seam side down in the pan, 3 across and 5 down, leaving a bit of space between them. Coat the tops of the rolls lightly with cooking spray and drape a sheet of plastic wrap loosely over them. Let rise until the rolls have doubled in size, about 1 hour. The rolls will be touching each other with small gaps between them.

Adjust an oven rack to the lower third position and preheat the oven to 375ºF/190ºC (I chose to bake them in the center of the oven).
To make the topping, stir together the almonds, sugar and cardamom in a small bowl.
When the rolls have risen, uncover them and brush them with the egg wash. Sprinkle with the almond mixture. Bake for 20-25 minutes, until the rolls are nicely browned, the nuts are toasted and the rolls spring back when gently pressed. Cool the rolls in their pan on a wire tack for 10 minutes, then, with a wide metal spatula, remove them from the pan and set them on the wire rack. Serve warm or at room temperature.

Wrapped tightly in plastic wrap or in a plastic bag, the rolls can be stored at room temperature for up to 2 days. They can be reheated successfully, one at a time, in a microwave oven set on defrost for about 30 seconds. The rolls can be frozen once completely cool. Place them on a baking sheet and freeze until solid. Transfer them to a heavy-duty plastic resealable plastic bag and freeze for up to 1 month. To refresh them, thaw them completely in their wrapping, then unwrap the rolls, place them on a baking sheet and pop into a preheated 325ºF/165ºC oven for about 10 minutes.

Makes 15

Related Posts with Thumbnails