I have a small notebook in which I write down food ideas I want to test and also the recipes I make at home, so I can then post them here on the blog. The poor notebook has been so forgotten lately it is almost getting dusty, for I haven’t made anything new, but I keep it on the coffee table, with my iPad and my cell phone charger, hoping that maybe, sometime, I’ll look at it and feel like testing new recipes again.
This is how things are going here, some days seem slower and/or longer than others, sometimes I feel a little bit more energy, while other times I have less disposition, but everyday seems like the previous one, very “Groundhog Day” indeed. At least workwise things are truly great, working with a new boss since September 2020, a wonderful woman who is beautiful both on the inside and out, and that makes me eager to face this never-ending quarantine.
I want vaccines, but there aren’t hardly any, I want a better government for my country, which is not possible right now. I want to get up in the morning without feeling I am in an episode of “The Handmaid’s Tale” – not possible now either.
As far as food goes, things are a bit boring around here: very basic recipes, preferably quick dishes that do not result in a sink full of dishes to do. Lots of pasta and salads.
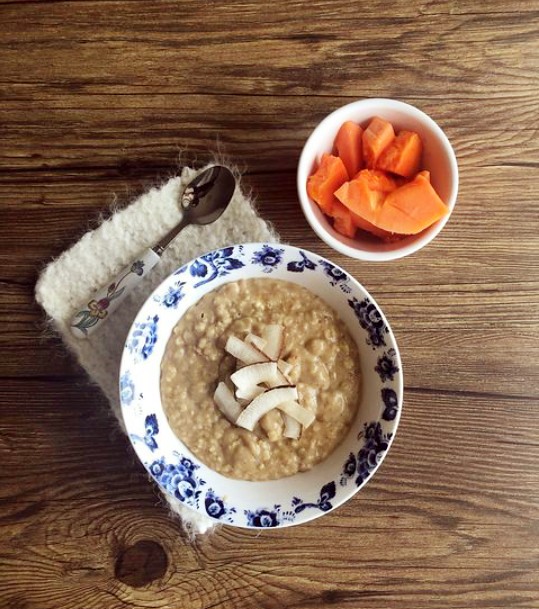
Sometimes at
night I don’t feel like eating, even when I exercise, which generally makes me
hungry. To avoid going to bed on an empty stomach, I make myself some porridge:
quick, easy and so comforting – it is like being hugged on the inside. I top it
with chia seeds, coconut chips or cashew nuts and serve it with some fruit on
the side. It is not a traditional dinner, but it comforts me and makes me feel
fed and happy.
Oatmeal porridge
own recipe
¼ cup (25g) rolled oats
½ cup (120ml) milk or plant-based milk – I like
to use cashew nut milk, it is so creamy!
¼ cup (60ml) cold water
pinch of salt
sugar, to taste – you can replace it with honey
or agave
pinch of ground cinnamon, or 1 teaspoon unsweetened cocoa powder
Place all the ingredients in a small
saucepan and cook over medium heat, stirring a few times to dissolve the sugar.
When it starts to boil, reduce the heat and stir constantly until mixture
thickens. Cook for 2-3 minutes, depending on how thick you want the porridge.
Transfer to a bowl and serve.
Serves 1