Thursday, September 28, 2017

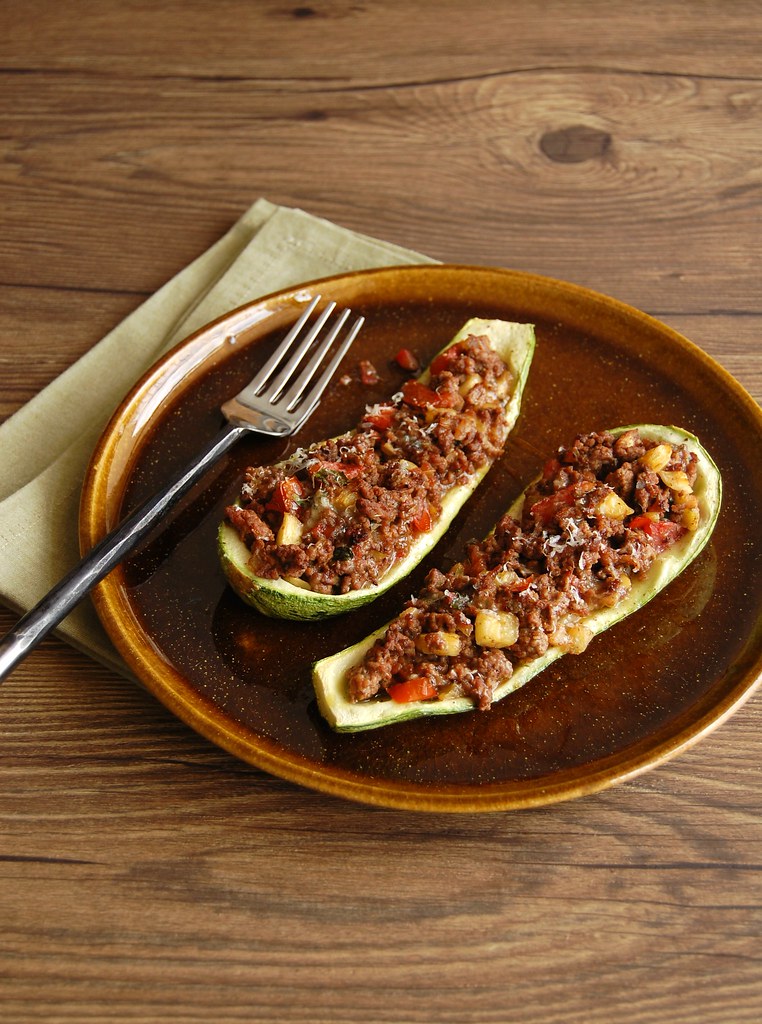
Stuffed zucchini, not like my grandma's

Stuffed zucchini / Barquinhas de abobrinha

One of the dishes that remind me of my grandmother the most is stuffed zucchini: she would make these quite often when she lived with us because my father liked it a lot.

I did not like meat growing up and back then I did not understand why my grandma would make this dish so often, but now that I am all grown up it makes a lot of sense to me: it is delicious – when prepared properly – and it makes things quite easier for the cook, since you only need a green salad on the side to call it a complete meal.

This is my version of stuffed zucchini: out with the mushy rice mixed with pale beef, in with with wine, tomatoes, fresh marjoram and gorgonzola – absolutely delicious (sorry, grandma). :)

Stuffed zucchini / Barquinhas de abobrinha

Stuffed zucchini
own recipe

4 zucchini, about 250g/8oz each
3 tablespoons extra virgin olive oil
1 onion, finely diced
3 garlic cloves, minced
400g (14oz) beef mince
salt and freshly ground black pepper
¼ cup (60ml) dry white wine
2 tablespoons tomato paste
2 ripe tomatoes, deseeded and chopped
handful of fresh marjoram leaves
150g (5oz) gorgonzola, coarsely grated or crumbled
finely ground parmesan, for serving

Preheat the oven to 200°C/400°F. Line a large baking sheet with foil and brush it with some of the olive oil.

Cut the zucchini in half lengthwise – you should then get 8 halves that look like little boats. With a small spoon, scrape some of the flesh – do not carve the zucchini halves too much or they will be too flimsy. Chop the flesh and set aside. Place the zucchini on the prepared sheet and brush the inside of each half with some of the olive oil.

Bake for 20 minutes – in the meantime, make the filling: heat the remaining olive oil in a large nonstick frying pan over high heat. Add the onion and cook, stirring occasionally, until translucent. Stir in the garlic and cook for 1 minute or until fragrant – do not let the garlic burn or it will turn bitter. Stir in the mince and cook, stirring occasionally, until golden. Season with salt and pepper – go easy on the salt since the cheeses can be salty. Stir in the wine and cook again for 2-3 minutes or until wine is reduced – using a wooden spoon, scrape the brown bits in the bottom of the saucepan for extra flavor. Stir in the tomato paste, chopped tomatoes, ¾ cup of the reserved zucchini flesh (you can freeze the remaining flesh and use it to make vegetable stock) and the marjoram. Cook for about 5 minutes or until tomatoes are soft. Remove from the heat, stir in the gorgonzola and divide the meat filling among the zucchini halves. Bake for 15 minutes. Sprinkle with the parmesan and serve immediately.

Serves 4

Wednesday, September 27, 2017

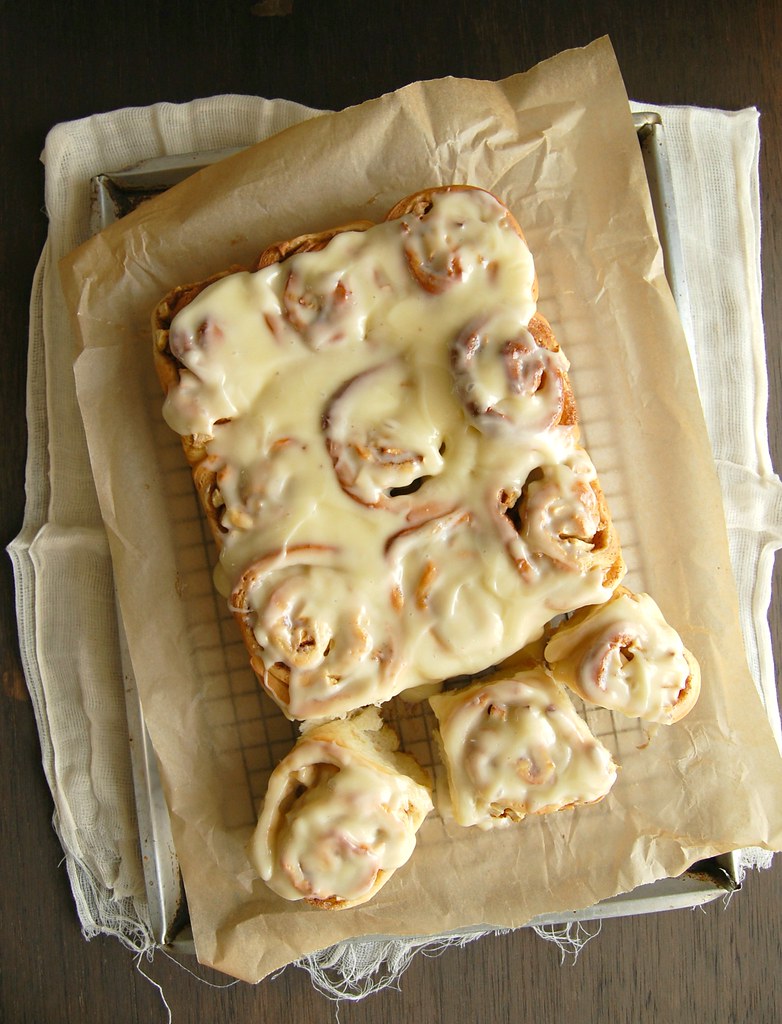
Apple cinnamon rolls with cream cheese icing

Apple cinnamon rolls with cream cheese icing / Pãezinhos de maçã e canela com cobertura de cream cheese

Baking bread is something I deeply enjoy, even though I have not done that much lately. Unless you have access to good artisanal bakeries (which are very few here in Sao Paulo), it is the only guaranteed way of having good bread on the table.

These apple rolls were my idea to turn the humble cinnamon roll into something even more special, to get people interested in them again – like Nic Pizzolatto casting Mahershala Ali for the third season of True Detective, after that not-so-great season 2. :D

I was very happy with the recipe: the rolls are tender and perfumed with cinnamon and the tangy icing compliments the apples beautifully. They disappeared quite quickly every time I made them, and next time I prepare this recipe I intend to use pears + nutmeg instead of apples + cinnamon – I believe it will be just as delicious.

Apple cinnamon rolls with cream cheese icing
own recipe

Dough:
200ml whole milk
¼ cup (56g) unsalted butter, room temperature and chopped
2 ¼ teaspoons (7g) dried yeast
¼ cup + 2 tablespoons (75g) granulated sugar
1 large egg, room temperature
pinch of salt
½ teaspoon vanilla extract
3 ¼ cups (455g) all purpose flour

Filling:
¼ cup (56g) unsalted butter, softened
4 Granny Smith apples (about 650g/1 ½ pounds), peeled, cored and cut into small dice*
¼ cup (50g) granulated sugar
¼ cup (44g) light brown sugar, packed
1 ½ teaspoons ground cinnamon

Icing:
½ cup (113g) cream cheese, very soft
¼ cup (56g) unsalted butter, very soft
1 teaspoon vanilla extract
1 cup (140g) icing sugar, sifted

Start by making the dough: in a small saucepan, heat milk until it starts to boil. Remove from the heat, stir in the butter and let it melt. Once the mixture is lukewarm, pour it into the bowl of an electric mixer and stir in the yeast and sugar. Set aside until foamy, about 5 minutes. Add the egg, salt, vanilla and flour and mix with the dough hook for 8-10 minutes or until smooth and elastic. Transfer to a lightly buttered large bowl and cover with plastic wrap. Set aside in a draft-free area until doubled in volume, about 1 ½ hours.

Generously butter a 20x30cm (8x12in, and 13x9in also works) baking pan. Set aside.
Transfer the dough to a lightly floured surface and roll it into a 30x40cm (12x16in) rectangle. Spread the butter over the dough leaving a 1cm (½in) border. In a medium bowl, stir the apples with the sugar and cinnamon until well coated, then spread evenly on top of the butter layer. Starting from the longest side, roll the dough into a tight cylinder, then slice into 12 equal pieces. Place the slices side-by-side in the prepared pan, cover loosely with a clean kitchen towel and set aside to prove again, 40-45 minutes – in the meantime, preheat the oven to 200°/400°F.

Bake the buns for 25-30 minutes or until risen and golden. Cool in the pan over a wire rack for 5 minutes, then carefully unmold the buns onto the rack. Now, make the icing: in a small bowl, whisk the ingredients together until smooth. Spread over the buns and set aside to cool completely, or serve them warm.

* it is important to keep the apple pieces small otherwise they will not bake properly inside the dough

Makes 12

Tuesday, September 26, 2017

My tuna salad sandwiches

My tuna salad sandwiches / O meu patê de atum

My husband and I are not people who swap meals for sandwiches very often – we do like our rice and beans, soups, pasta dishes, and now Joao has some serious competition on my Bolognese sauce, since my 2 ½ year-old nephew loves it as much as Joao does. <3

However, when burgers or tuna salad sandwiches are involved we are happy to have sandwiches for lunch or dinner, and more recently, the sardine rillette has become part of that small list. I did not imagine my husband liked tuna salad sandwiches until the day I made this recipe, which I have been making for over 20 years. He went crazy for the tuna salad and it instantly became part of our favorite things to eat on lazy weekends.

This tuna salad goes very well with all kinds of bread – including the soft rye bread I posted a while ago – but I find it very important to have the slices toasted if the kind of bread chosen is not very sturdy: it prevents the sandwiches from getting soggy.

My tuna salad sandwiches
own recipe

1 can of tuna preserved in water (120g/4oz drained weight)
1 carrot (about 100g/3oz) peeled and coarsely grated
1 small onion, finely diced*
handful of fresh flat leaf parsley leaves, finely chopped
½ cup green olives, pitted and chopped
1 teaspoon extra virgin olive oli
2/3 cup mayonnaise – homemade is even better
salt and freshly ground black pepper

Drain the tuna very well, then transfer to a large bowl and flake it with a fork. Mix in the carrot, onion, parsley and olives. Drizzle with the olive oil and mix well. Mix in the mayonnaise, season with salt and pepper and serve immediately with your favorite kind of bread.

* this recipe is delicious too if you replace the onion with celery

Makes 5-6 sandwiches using regular, white bread


Friday, September 15, 2017

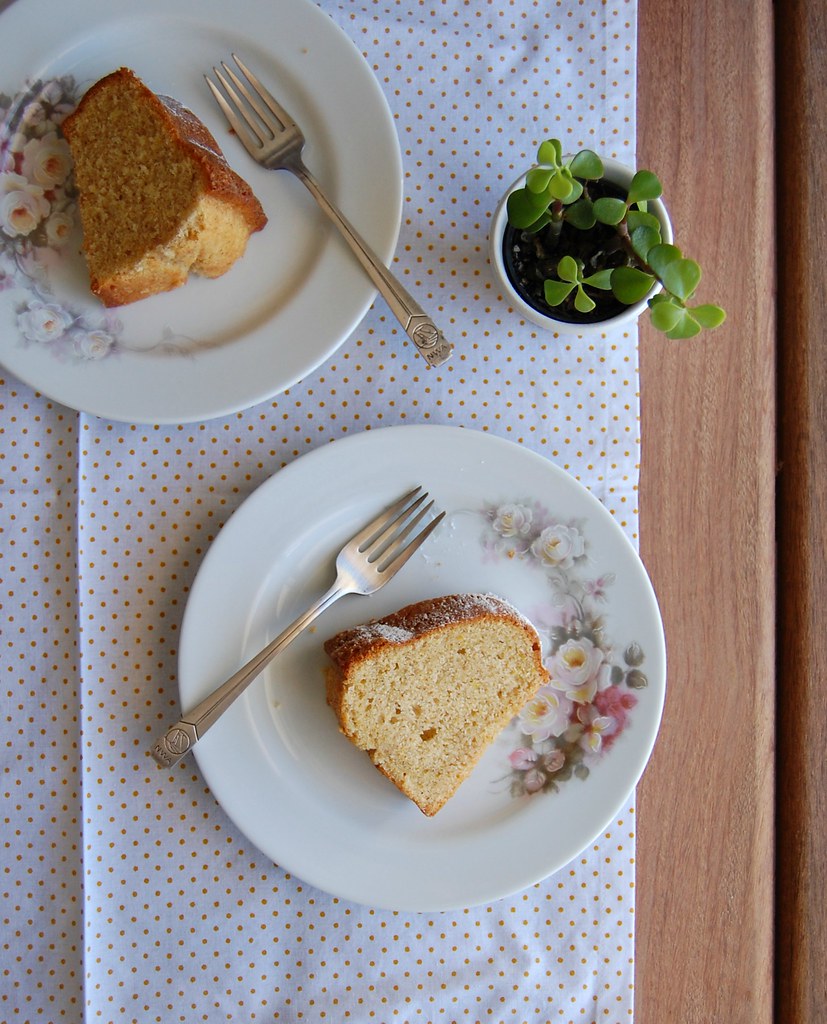
Orange, cinnamon and clove cake and the second recipe I ever learned

Orange, cinnamon and clove cake / Bolo de laranja, canela e cravo

Most people who know me or read the blog know that the first recipe I ever learned how to make was a Brazilian cornmeal cake, the one I published a while ago. I was 11 years old and right then and there a whole new world opened up in front of me: from that day on I engaged in a relationship with food and cooking that changed my life for good.

What not everyone knows is that the second recipe I learned how to make was an orange cake – very simple, yet so delicious, I can almost smell it if I close my eyes for a moment. For that reason (aside from the fact that I am a citrus nut) orange cakes have a special place in my heart and I am always looking for new ways to make them.

The one I bring you today is perfumed with both cinnamon and cloves and the inspiration for this combo of flavors came from the sablés I posted a couple of years ago, when I was saying goodbye to my dear Peggy Olson.

Orange, cinnamon and clove cake
own recipe

2 cups (280g) all purpose flour
2 teaspoons baking powder
1/8 teaspoon table salt
1 teaspoon ground cinnamon
¼ teaspoon ground cloves
1 cup (200g) granulated sugar
finely grated zest of 2 oranges
¾ cup (170g) unsalted butter, softened
2 large eggs, room temperature
½ teaspoon vanilla extract
1 cup (240ml) sour cream*
Icing sugar, for dusting the cake

Preheat the oven to 180°C/350°F. Butter and flour a 2-liter capacity Bundt pan.
In a medium bowl, whisk together the flour, baking powder, salt and spices. Set aside.
In the bowl of an electric mixer, combine granulated sugar and orange zest and rub them together until sugar is fragrant. Add the butter and using the mixer beat until creamy and light in color – scrape the sides of the bowl occasionally throughout the making of the recipe. Beat in the eggs, one at a time, beating well after each addition. Beat in the vanilla.

On slow speed, beat in the dry ingredients in three additions, alternating with the sour cream in two additions (start and end with the dry ingredients). Beat just until incorporated. Pour into prepared pan and smooth the top. Bake for 40-45 minutes or until cake is golden and risen and a skewer inserted in the center comes out clean. Cool in the pan over a wire rack for 20 minutes, then carefully unmold onto the rack and cool completely.
Dust with icing sugar before serving.

* homemade sour cream: to make 1 cup of sour cream, mix 1 cup (240ml) heavy cream with 2-3 teaspoons lemon juice in a bowl. Whisk until it starts to thicken. Cover with plastic wrap and leave at room temperature for 1 hour or until thicker (I usually leave mine on the counter overnight – except on very warm nights – and it turns out thick and silky in the following morning; refrigerate for a creamier texture)

Serves 8

Wednesday, September 13, 2017

Asparagus and gorgonzola galette with corn flour pastry and creative days

Asparagus and gorgonzola galette with corn flour pastry / Galette de aspargo e gorgonzola com massa de fubá

I could start several posts with “when I was still working on the book project” because during that time I exercised my creativity almost on a daily basis. Everything I saw was a source of inspiration, and a trip to the grocery store or the farmers’ market would turn into an idea, that turned into a recipe, that turned into several tests in my kitchen. Several times my husband and I ate the tests for lunch, and whoever came to my house would be served cake or cookies I had been working on – everyone became my guinea pigs. :)

I was at the grocery store with my husband one day when I saw beautiful asparagus – I brought them home with the idea of making a frittata, but I decided for a galette instead: I love galettes, they are my favorite kind of tart – they are easy to put together (no blind baking involved) and they always look stunning.

We ate this galette for lunch 3 times – I was going to make it a few times anyway to test the recipe in different occasions, however it tasted so delicious that making it again never felt like a chore.

Asparagus and gorgonzola galette with corn flour pastry
own recipe

Pastry:
1 cup + 1 tablespoon (150g) all purpose flour
¼ cup (35g) corn flour (finely ground cornmeal, not corn starch)
¼ teaspoon table salt
100g unsalted butter, very cold and diced
¼ cup (60ml) sour cream*, very cold
2 tablespoons iced water

Filling:
100g fresh ricotta – I use homemade
50g gorgonzola, coarsely grated or crumbled
1 tablespoon sour cream
salt and freshly ground black pepper
200g fresh asparagus, already trimmed

Egg wash:
1 egg yolk whisked with 1 teaspoon sour cream

Start by making the pastry: in a food processor, pulse all purpose flour, corn flour and salt until well combined. Add the butter and pulse a few times until mixture resemble coarse breadcrumbs. Mix sour cream and water in a small bowl, then with the motor running, gradually add the mixture and process just until a dough forms. Form dough into a ball, wrap in plastic wrap and refrigerate for 1 hour.

Place the dough onto large piece of baking paper, cover with another piece of paper and roll into a rough 20x35cm (8x14in) rectangle. Slide the paper with pastry into a baking sheet and remove the paper from the top. In a medium bowl, whisk together the ricotta, gorgonzola, heavy cream until a paste forms. Season with salt and pepper (go easy on the salt since gongonzola can be salty). Spread the dough with the filling leaving a 2.5cm (1in) border. Arrange the asparagus on top of the filling, pressing them slightly to adhere. Carefully fold one edge in towards the center of the filling and continue folding all the way round, bringing the edge of the pastry towards and over the filling/asparagus. Freeze the galette for 15 minutes – in the meantime, preheat the oven to 200°C/400°F.

Brush the pastry with the egg wash and bake for 30-40 minutes or until pastry is golden. Serve warm.

* homemade sour cream: to make 1 cup of sour cream, mix 1 cup (240ml) heavy cream with 2-3 teaspoons lemon juice in a bowl. Whisk until it starts to thicken. Cover with plastic wrap and leave at room temperature for 1 hour or until thicker (I usually leave mine on the counter overnight – except on very warm nights – and it turns out thick and silky in the following morning; refrigerate for a creamier texture)

Serves 4 with a green salad on the side

Related Posts with Thumbnails