Even though I have been posting Christmas recipes at this time of the year for a long long time, I have not baked panettone – or chocottone, for that matter – in ages. We sometimes get panettones as gifts, and my husband sometimes buys some at this time of the year.
This year, however, Joao told me he wanted homemade panettone and since I was on a Christmas state of mind I decided to make it. It was a rainy Saturday, I did not want to go anywhere, so I made the panettone and watched Carol in between (by the way, I am still trying to understand all the fuss over the awards season).
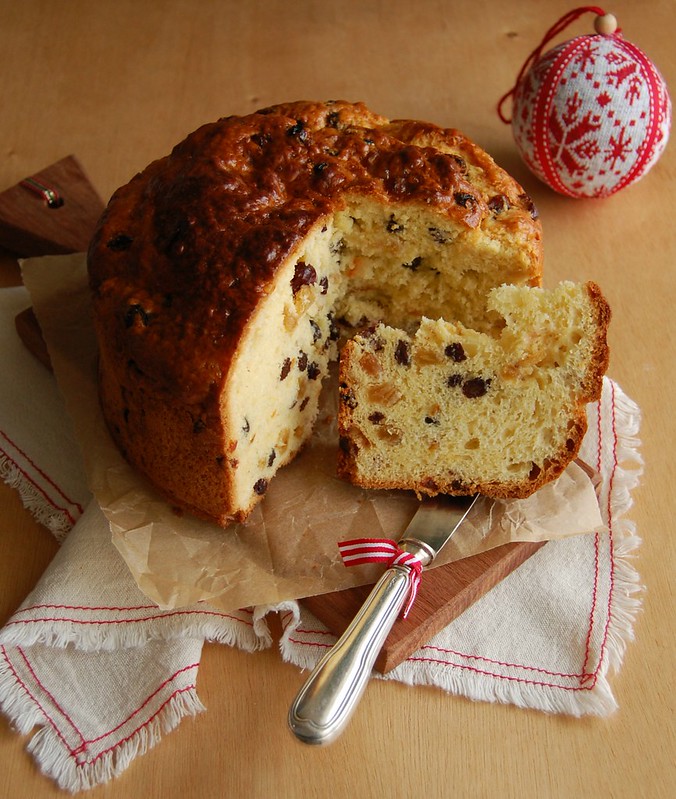
This is an adaptation of Paul Hollywood’s panettone and it turned out really delicious – the tender brioche dough perfumed with citrus and dotted with chewy and sweet raisins and dried cranberries. But unlike Paul’s brioche, that still tastes great a day after it is made, the panettone got a little tough on the following morning – it was still delicious, but texture-wise it was better freshly baked. If your family is big, I am sure the panettone will be gone in no time, but if there are not many of you around to eat it within a day no worries: it makes a killer French toast. ;)
Panettone
slightly adapted from Paul Hollywood
14g dried yeast
140ml whole milk, lukewarm
75g granulated sugar
500g all purpose flour
¼ teaspoon table salt
5 large eggs, room temperature
finely grated zest of 1 orange
finely grated zest of 1 lemon
1 teaspoon vanilla extract
1 teaspoon Cointreau
1 teaspoon Amaretto
200g unsalted butter, softened
120g dried cranberries
120g golden raisins
120g dark raisins
50g crystallized orange peel, finely chopped
Egg wash:
1 egg, lightly beaten with a fork
In the bowl of an eletric mixer, place yeast, milk and a pinch of the sugar and mix with a fork. Set aside for 5 minutes or until foamy. Add the flour, salt, remaining sugar, eggs, orange and lemon zest, vanilla, Cointreau and Amaretto, then mix on slow using the dough hook for two minutes. Increase the speed to medium and mix for a further 6-8 minutes until you have a soft dough.
Add the softened butter and mix for another 5-8 minutes, scraping the sides of the bowl occasionally. Dough will be very soft. Mix in the dried fruit and crystallized orange peel. Transfer the dough to a large buttered bowl, cover with plastic wrap and chill overnight until the dough has firmed up enough for you to able to shape it.
Prepare a 18cm/7in panettone pan by brushing the inside generously with melted butter*.
Remove the panettone dough from the fridge, knock back the dough, shape into a ball and place into the pan. Leave to prove at room temperature for a further 2-3 hours, until the dough just starts to dome over the top of the pan.
Preheat the oven to 180°C/350°F.
Brush the top of the panettone with egg wash and bake for about 25 minutes. Reduce the temperature to 150°C/300°F and bake for a further 35 minutes, or until a skewer comes out clean. Check the panettone periodically in case of oven hot spots. Bear in mind that the sugar and butter in the dough could brown too much before it is actually fully baked – if panettone starts to brown too quickly, cover it loosely with foil.
Remove the panettone from the pan immediately and allow to cool over a wire rack.
* I used a 20cm (8in) round cake pan to bake my panettone – I made a collar with a double sheet of baking paper folded in half (that way getting 4 layers of paper) and buttered it all with melted butter (there is a photo of the prepared pan on my Instagram).
Serves 8-10
Monday, December 12, 2016
Panettone
Friday, May 2, 2014
Hasselback potatoes with oregano and lemon crumbs, a great song and simple things
Some songs have been favorites of mine for as long as I can remember, and I never get tired of listening to them.
As I was listening to “Sweet Sixteen” yesterday I kept thinking of the beauty of the song’s arrangement, and of how simple it is, with just a couple of instruments. Then I listened to it four or five times in a row, savoring those chords. It is truly a beautiful song (despite the sad story behind it), one that I first listened to when I was a kid and that I’m pretty sure I’ll be listening to when I’m 70.
From time to time I write here about simple things, how great they are to me. I guess that one doesn’t need much to create something beautiful like Billy Idol’s song, and that can be applied to food. Like cakes, simple savory dishes are also something close to my heart, something I feel like eating on a daily basis, and adding a twist here and there doesn’t change their essence – it just makes them even more delicious.
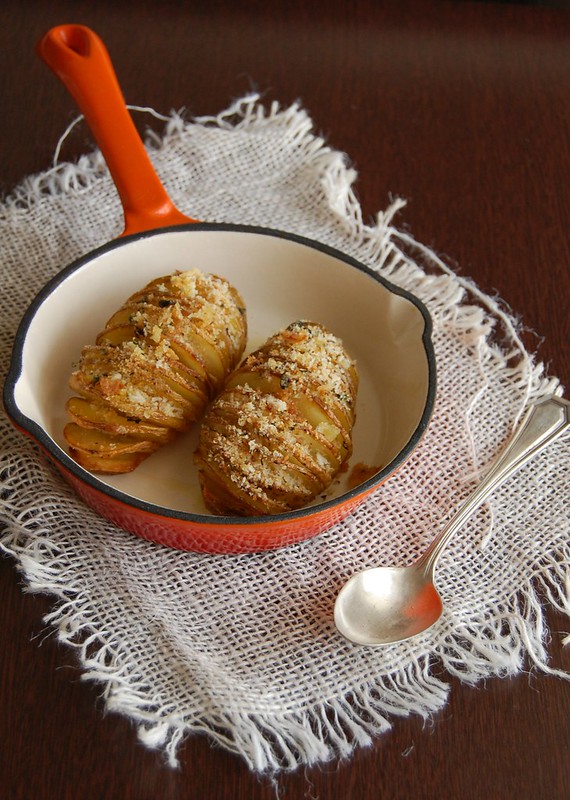
In today’s recipe, the humble potato, a root veggie I love (the German blood in my veins is probably responsible for part of that love) gets transformed into a flower, with full of flavor petals. The potatoes would be delicious already roasted with olive oil, salt and pepper only, but the zesty crumbs on top makes them extra special and irresistible.
Hasselback potatoes with oregano and lemon crumbs
slightly adapted from the always delicious Olive magazine
8 small potatoes
olive oil
salt and freshly ground black pepper
1 tablespoon fresh oregano, finely chopped
2 tablespoons dried breadcrumbs
finely grated zest of 1 lemon
Preheat the oven to 200°C/400°F.
Place the potatoes on a wooden spoon then slice downwards thinly until the knife touches the spoon (don’t slice all the way through).
Place the potatoes cut side up on a roasting pan and brush with some oil – making sure the oil drips among the slices – then season with salt and pepper. Roast for 50 minutes.
Mix the oregano, breadcrumbs, lemon zest in a small bowl, season with salt and pepper, then sprinkle over the potatoes and roast them for another 10 minutes or until topping is golden and potatoes are tender.
Serves 4
Monday, April 14, 2014
Pear and almond muffins and the joys of fall
I know that many people feel sad when they look out the window and see a cloudy, rainy day, but not me: I actually feel joy in my heart when the weather is like that, as it is today here in Sao Paulo (for the record, I do like sunny days when the weather is cold – I think it’s the best of both worlds).
It’s fall here now (but let’s keep it down or the temperatures might decide to go over 30°C again), time for soups and stews, hot cocoa, and for apples and pears, fruits I adore – and this year I intend to bake with quinces, too. These tender, delicious muffins, with a hint of lemon and almond, were worth all the trouble I had getting them out of the pan – their delicate texture paired with the moisture from the pears made it difficult for me to unmold them, but nothing that a bit of patience and some cursing couldn’t solve. ;)
Pear and almond muffins
slightly adapted from the über beautiful Love, Bake, Nourish: Healthier cakes and desserts full of fruit and flavor
Fruit topping:
2 small pears, cored and thinly sliced
20g unsalted butter, melted
1 tablespoon demerara sugar
Muffins:
125g unsalted butter, softened
65g mild honey
100g granulated sugar
2 large eggs
1 teaspoon vanilla extract
150g all purpose flour, sifted
1 heaping teaspoon baking powder
pinch of salt
60g almond meal (finely ground almonds)
50ml whole milk, room temperature
finely grated zest of 1 lemon
Preheat the oven to 180°C/350°F. Generously butter a 12-cup muffin pan or line it with paper cases (I buttered mine but it was hard to remove the cakes from it, so I suggest using paper cases, like my friend Valentina did).
Place the pear slices in a bowl, drizzle with the melted butter and sprinkle with the demerara sugar. Toss to coat, then lay the slices in the bottom of each muffin cup, pressing firmly.
Muffins: using an electric mixer, cream butter, honey and sugar until light and fluffy. Beat in the eggs, one at a time, adding a spoonful of the flour if the mixture looks curdled. Scrape the sides of the bowl. Beat in the vanilla. With a rubber spatula, fold in the remaining flour, baking powder, salt, almond meal, milk and lemon zest, mixing just until incorporated. Spoon the batter over the pear slices, then bake the muffins for 20-25 minutes or until golden and a skewer inserted in the center comes out clean. Cool in the pan over a wire rack for 5 minutes, then carefully unmold and transfer to the wire rack. Serve warm or at room temperature.
Makes 12
Monday, January 6, 2014
Roscón de Reyes (King Cake)
My favorite time of the year is coming to an end, and later on today I’ll put away all my Christmas decorations – it’s such a pity, I love seeing them throughout the house.
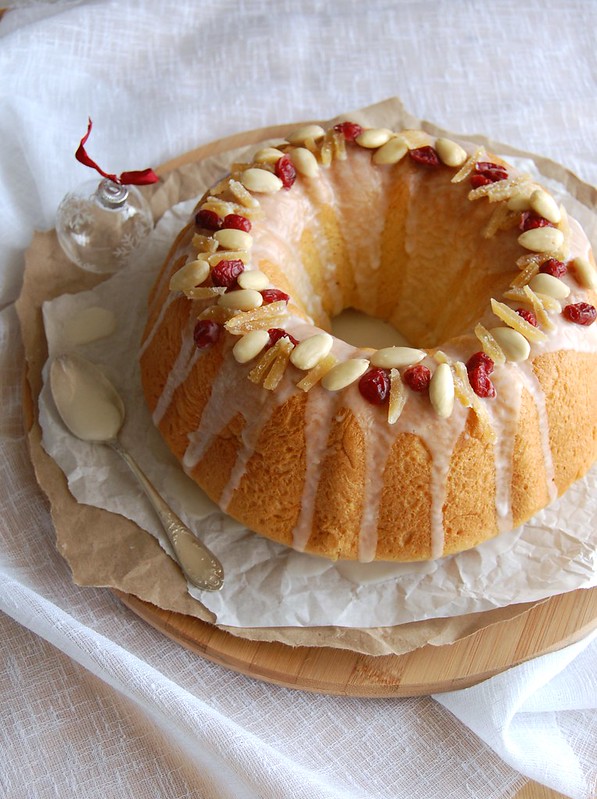
The sixth of January is also the day to celebrate the Three Kings, and to do so I bring you this delicious recipe, a sort of brioche topped with a lemon glaze – unlike the King Cake I’d seen on this book, Gourmet Traveller’s version is a lot prettier, with no plastic baby hidden inside: just tender sweet bread with almonds, ginger and cranberries.
Who said atheists can’t enjoy some of the Catholic traditions? ;)
Roscón de Reyes (King Cake)
slightly adapted from the always gorgeous Gourmet Traveller
110ml whole milk
2 ½ teaspoons dried yeast
60g granulated sugar
500g all-purpose flour
pinch of salt
55ml olive oil
finely grated zest of 1 lemon
finely grated zest of 1 orange
2 large eggs
1 teaspoon vanilla extract
75g unsalted butter, coarsely chopped and softened
glacé ginger, halved glacé cherries and blanched almonds, for decoration – I used dried cranberries instead of cherries
Lemon glaze:
100g confectioners’ sugar
juice of 1 lemon
Warm milk and 100ml water in a small saucepan over low heat until lukewarm, add yeast and 1 teaspoon of the sugar and set aside in a warm place until foaming (4-5 minutes). Combine flour, salt, oil, citrus zest and remaining sugar in an electric mixer fitted with a paddle attachment, gradually add milk mixture, beat for 5 minutes, add eggs and vanilla and beat to combine. Beating continuously, gradually add butter and beat until a soft dough forms (3-4 minutes). Cover and set aside in a warm place until doubled in size (1-1½ hours).
Knock back dough, cover and set aside to rest (10 minutes). Lightly butter a 10-cup capacity Bundt pan.
Turn onto a lightly floured surface, roll into a 30cmx50cm rectangle, then roll into a long cylinder, pinch edge to seal firmly, then bring ends together to form a ring and pinch to seal. Place seam-side down in prepared pan. Cover with greased plastic wrap and set aside in a warm place until nearly doubled in size (30-40 minutes). In the meantime, preheat oven to 180°C/350°F.
Bake the bread for 25-30 minutes or until loaf sounds hollow when tapped. Cool in the pan over a wire rack for 10 minutes, then carefully unmold onto rack. Cool completely.
Lemon glaze: sift the icing sugar into a small bowl and gradually add the lemon juice, stirring until drizzling thick drizzling consistency. Drizzle roscón with glaze, set aside until icing is almost set, then top the glaze with ginger, cherries and almonds and serve.
Serves 8-10
Thursday, November 21, 2013
Citrus coconut snack cake, good casting and bad casting
One of the many things that make Breaking Bad the best TV show ever made is the cast: each and every actor is brilliant and they were perfectly chosen to play those characters, and I don’t even have to start with the leading men – for instance, how will anyone be able to forget Bob Odenkirk’s Saul Goodman? It’s pure genius.
That kind of amazing casting is not something we see every day – and yes, I’m considering movies, too – and what happens with The Blacklist is the extreme opposite: I don’t remember seeing Megan Boone before but in the TV show she sucks, big time. Her inability to show emotion is impossible to disguise and her lack of talent to play that character is even more evident when James Spader is onscreen – he was born to play Red and by the looks of it is having the time of his life doing so. I find his performance a great one, but I believe he would benefit from having an equally great actress to share his scenes with.
“Another coconut cake?” you might say – the reason for this was the two oranges I had in my fridge, completely naked after I stripped them out of their zest to make the cornmeal financiers. I didn’t want to waste their delicious juice, so I decided to pair it with coconut – unlike Spader and Boone, they go really well together, and since I needed a couple of lemons for a marinade I used their zest in this cake, too.
Citrus coconut snack cake
slightly adapted from the delicious Better Homes and Gardens Baking: More than 350 Recipes Plus Tips and Techniques
3 cups (360g) cake flour (homemade: 310g all-purpose flour + 50g corn starch)
2 cups (400g) granulated sugar
1 teaspoon baking soda
½ teaspoon baking powder
¼ teaspoon table salt
1 cup (240ml) whole milk, room temperature
½ cup freshly squeezed orange juice
⅔ cup (160ml) canola oil
finely grated zest of 2 lemons
1 teaspoon vanilla extract
2 eggs
¾ cup (75g) sweetened flaked coconut
Preheat oven to 180°C/350°F. Butter a 32.5x22.5cm (13×9in) baking pan*.
In a very large mixing bowl stir together flour, sugar, baking soda, baking powder, and salt. Add the milk, orange juice, vegetable oil, zest and vanilla. Beat with an electric mixer on low to medium speed until combined. Beat in eggs. Scrape sides of bowl; continue beating on medium speed for 2 minutes more. Spread batter into prepared pan. Sprinkle the batter with the coconut.
Bake for about 35 minutes or until top springs back when lightly touched and a wooden toothpick inserted in the center comes out clean. Cool thoroughly in pan on a wire rack.
* I made the exact recipe above using a 20x30cm (8x12in) baking pan
Serves 20-24
Wednesday, November 13, 2013
Blueberry and coconut cake, female directors, a beautiful movie and a versatile actor
I believe that the movie industry would be a better place if more women stepped behind the camera: there aren’t many female directors out there, which is a shame. Jane Campion wowed the world twenty years ago with one of my all time favorite movies, and I’m forever in her debt for introducing me to Mark Ruffalo *sigh*. :) Nora Ephron added romance to our lives, Vera Farmiga discussed religion, Kathryn Bigelow makes movies many men would like to make, and Lynne Ramsay gave us one of the best movies of 2011 (with certainly the best acting of that year, the glorious Tilda).
A couple of days ago I watched the beautiful After the Wedding and then I could see how fantastic Susanne Bier is (In a Better World is one of the best movies I have seen in the last ten years, maybe fifteen). Never dull or boring, After the Wedding is a delight to watch – it is well written and well played by a very good cast, and what a breath of fresh air it is to watch actors with crooked teeth, facial hair, lines around their eyes – more “human” than most of people from Hollywood. If that still hasn’t convinced you to watch After the Wedding, Mads Mikkelsen *sigh* plays the lead and delivers another great performance, something completely different from Le Chiffre, Hannibal Lecter, Draco or Ivan (the guy is a chameleon, isn’t he?). Oh, and ladies: there are a couple of scenes in which he is shirtless. Just saying. ;)
Now that I have spent all my convincing cards on the movie I don’t have much left to say to convince you to make this cake; I’ll give you this: it is super tender, it is delicious, and coconut and blueberry are great together – I hope that is enough. :D
Blueberry and coconut cake
slightly adapted from one of my favorite cookbooks (I bought mine here
)
200g all purpose flour
2 teaspoons baking powder
pinch of salt
1 cup (2 sticks/226g) unsalted butter, softened
1 cup (200g) granulated sugar
4 large eggs
finely grated zest of 1 lemon
1 teaspoon vanilla extract
¼ cup (25g) sweetened flaked coconut
150g blueberries, fresh or frozen (unthawed), dusted with 1 heaping teaspoon all purpose flour
icing sugar, for dusting
Preheat the oven to 180°C/350°F. Lightly butter a 20x7cm (8x2.8in) cake pan, line the bottom with a circle of baking paper and butter the paper as well.
In a medium bowl, sift together the flour, baking powder and salt. Set aside.
With an electric mixer, cream butter and sugar until light and fluffy. Add the eggs, one at a time, beating well after each addition and scraping the sides of the bowl. Beat in the lemon zest and vanilla. On low speed, beat in the dry ingredients and coconut and mix just until incorporated. Fold in the blueberries.
Transfer the batter to the prepared pan and smooth the top. Bake for about 45 minutes or until risen and golden and a skewer inserted in the center comes out clean. Cool completely in the pan over a wire rack. Carefully unmold, remove the paper, then turn the cake onto a serving plate. Sift with icing sugar to serve.
Serves 8-10
Friday, October 25, 2013
Blackberry and almond upside down cake + a memory from long ago
The first upside down cake I ever saw was a pineapple one made by Ofelia on TV – I believe it’s fair to say that she was the Brazilian equivalent to Julia Child and I loved her cooking show when I was younger (11-12 years old, to be more precise). Back then, her show was aired weekday mornings, while I was at school, but my brother would tape it every day for me – you might think he did that out of sheer kindness but in fact he did it because he knew that I would cook and bake all those delicious recipes as soon as I got home. :D
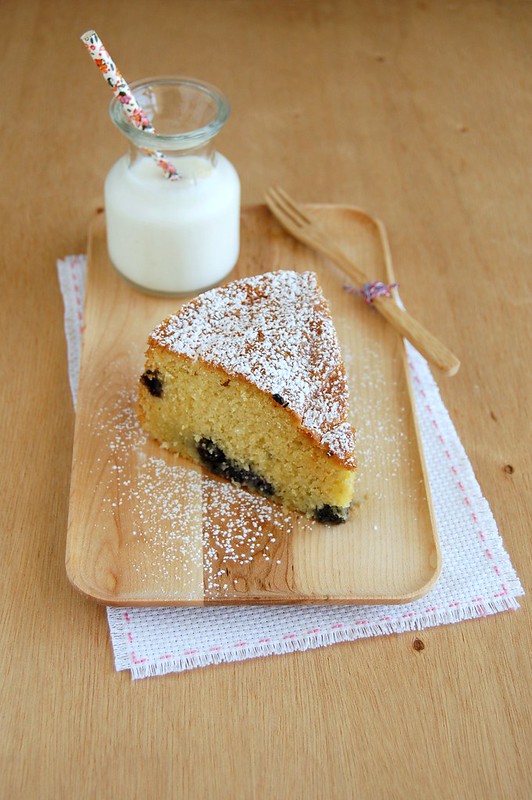
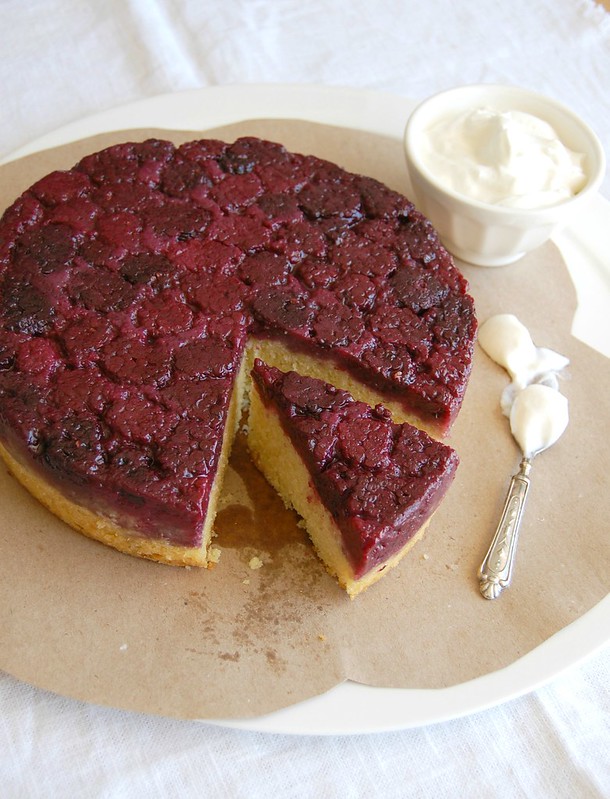
Many years later, when I started blogging, I saw Martha’s gorgeous cranberry upside down cake and fell in love with it, but unfortunately fresh cranberries do not exist here in Brazil. That image got stuck in my head, though, and after that I ended up making upside down cakes with other flavors, but I have to say: this blackberry version, a recipe from DH magazine, is the prettiest and tastiest of them all.
Blackberry and almond upside down cake
slightly adapted from the always amazing Donna Hay Magazine
450g frozen blackberries
1 ¼ cups (250g) granulated sugar, divided use
125g unsalted butter
finely grated zest of 1 lemon
2 eggs
1 teaspoon vanilla extract
200g all purpose flour
1 teaspoon baking powder
slightly heaping ¼ teaspoon baking soda
pinch of salt
½ cup (50g) almond meal
2/3 cup (160ml) buttermilk*
Preheat the oven to 180°C/350°F. Butter a 20x7cm round cake pan (do not use one with a removable bottom or the juices will escape), line the bottom with a circle of baking paper and butter the paper as well.
Place the blackberries on paper towels and let them thaw slightly while you make the cake batter.
In the bowl of an electric mixer, cream butter, 180g of the sugar and lemon zest until light and fluffy, scraping the sides of the bowl occasionally. Beat in the eggs, one at a time, beating well after each addition. Beat in the vanilla. Add the flour, baking powder, baking soda, salt, almond meal and buttermilk and beat on low speed just until incorporated. Set aside for a moment.
Cover the bottom of the baking paper with the blackberries and sprinkle with the remaining sugar (70g). Spoon the batter over the berries, then bake for about 50 minutes or until golden and risen and a skewer inserted in the center comes out clean. Cool in the pan over a wire rack for about 2 hours or until just warm. Carefully invert the cake onto a serving plate, remove the pan, then the paper.
Serve it on its own or with whipped cream.
* homemade buttermilk: to make 1 cup buttermilk place 1 tablespoon lemon juice in a 240ml-capacity measuring cup and complete with whole milk (room temperature). Wait 10 minutes for it to thicken slightly, then use the whole mixture in your recipe
Serves 8-10
Tuesday, June 26, 2012
Almond cake (Tarta de Santiago) + DDL
A long time ago I watched “Magnolia” – because lots of people had told me it was my kind of movie – and got really disappointed; despite the bunch of awards and great cast – including my beloved Julianne Moore – I did not think the movie was all that. A while later, I decided to give Paul Thomas Anderson another chance and watched “Boogie Nights”, which to me was a far superior movie (despite having been made before “Magnolia”). I liked it and added one more strong performance to the handful I have seen by Mark Wahlberg so far. Last week, I finally watched "There Will Be Blood" – because of my love for Daniel Day-Lewis – and wow, he’s fantastic beyond belief as Daniel Plainview. The movie is amazing as a whole, well directed with a beautiful cinematography, and Lewis’ performance is absolutely unforgettable (as are many of his performances), but I don’t think it was better than Viggo’s Nikolai – and that is the only thing I did not love about “There Will Be Blood”. :)
***
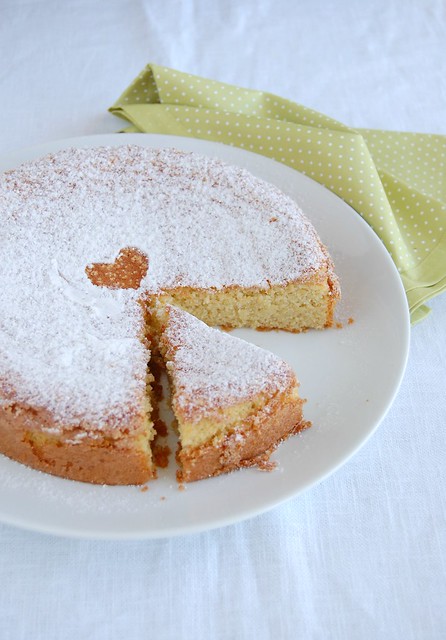
A month or so ago I baked the most delicious almond cake up until then – the recipe by Tamasin Day-Lewis (who happens to be DDL’s sister) became my favorite almond cake the minute I tasted the first bite. But Claudia Roden’s Tarta de Santiago
, a cake from a book I want to buy as soon as possible and made with almond meal and almost nothing more, made me rush to the kitchen to try it – and now I love both cakes so much I no longer have one favorite almond cake: I have two. :D
Almond cake (Tarta de Santiago)
slightly adapted from Epicurious; the recipe comes from a book I cannot wait to buy
6 large eggs, separated
pinch of salt
1 ¼ cups (250g) granulated sugar
grated zest of 1 orange
grated zest of 1 lemon
1 tablespoon Amaretto
1 teaspoon vanilla extract
2 ¼ cups (225g) almond meal (finely ground almonds)
confectioners’ sugar for dusting
Preheat the oven to 180°C/350°F. Butter and flour a 28cm (11in) springform pan*, preferably nonstick.
With an electric mixer, beat the egg whites and the salt in a large bowl until stiff peaks form. Transfer to another bowl and set aside. Wash and dry the used bowl and the whisk. Again with the electric mixer, beat the egg yolks with the granulated sugar to a smooth pale cream. Beat in the zests, Amaretto and vanilla extract. Add the ground almonds and mix very well.
Fold the whites into the egg and almond mixture (the mixture is thick, so that you will need to turn it over quite a bit into the egg whites).
Pour into the prepared cake pan and smooth the top. Bake for 40 minutes, or until it feels firm to the touch and a skewer inserted in the center of the cake comes out clean. Let cool before turning out.
Just before serving, dust the top of the cake with confectioners' sugar. Or, if you like, cut a St. James cross out of paper. Place it in the middle of the cake, and dust the cake with confectioners' sugar, then remove the paper (I preferred to use a heart-shaped piece of paper).
* I made ¾ of the recipe above and used a 20cm (8in) round cake pan with a removable bottom (regular – not nonstick); I lined the bottom of the pan with a circle of baking paper and buttered and floured the paper as well.
Serves 10
Sunday, May 13, 2012
Roasted tomatoes stuffed with goat cheese
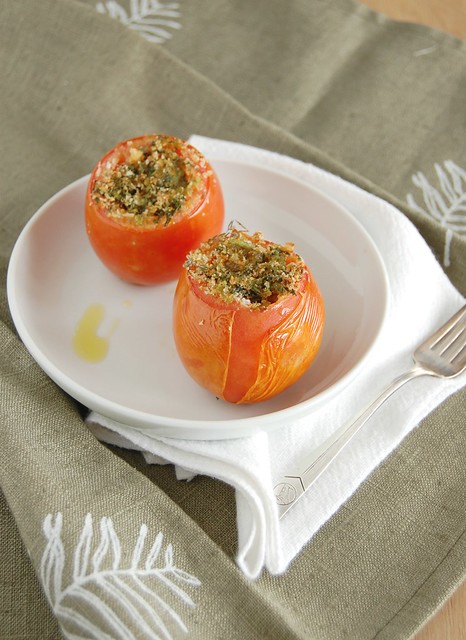
Weekends are when I have more time to cook and bake: that is wonderful and one of the many reasons why I love Saturdays and Sundays so much, but even I want quick meals sometimes, and these stuffed tomatoes are the perfect answer for that: the assembling is super quick and they don’t need much time in the oven. If you can’t find goat cheese easily I believe that these would be equally delicious with ricotta – homemade, please. :D
I know nothing about wines but I found these tomatoes really good with sparkling white wine – my weekends are not complete without a bit of booze, you know. ;)
Roasted tomatoes stuffed with goat cheese
slightly adapted from the gorgeous The Country Cooking of France
4 tomatoes
salt and freshly ground black pepper
100g goat cheese
2 garlic cloves, finely chopped
2 tablespoons chopped parsley
2 tablespoons chopped chives
1 tablespoon fresh thyme leaves
finely grated zest of 1 lemon
2 tablespoons breadcrumbs
extra-virgin olive oil, for drizzling
Preheat the oven to 200°C/400°F and line a small baking dish with foil.
Slice off the top of each tomato and scoop out the cores and seeds. Cut a very thin sliver off of the bottom of each tomato to help them stand up straight and sprinkle the insides with salt and pepper.
In a small bowl, crumble the goat cheese. Set aside.
In another small bowl, combine the garlic, parsley, chives, thyme, lemon zest and breadcrumbs. Season with salt. Fill the tomatoes with half this mixture, then crumble over the goat cheese, without packing it. Cover the cheese with the remaining herb mixture, arrange the tomatoes onto the prepared dish and drizzle with a little olive oil. Bake for 15-20 minutes or until cheese is very hot and the tomato skins start to split.
Serves 2
Wednesday, May 2, 2012
Ricotta and feta tart
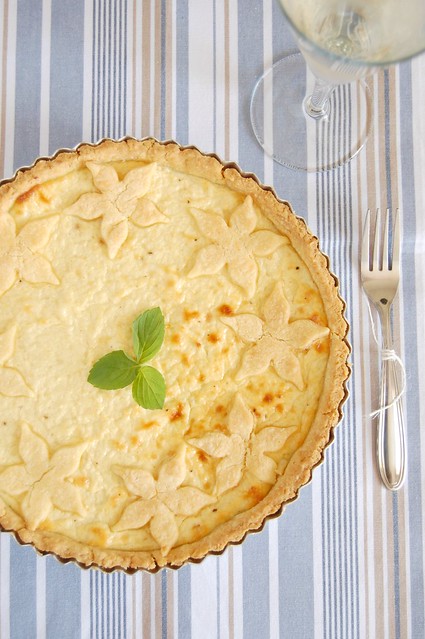
Because Jamie Oliver’s delicious escarole and salami tart was a great dish for lunch both at my house and at the office I felt like baking another savory tart – this time I had no smoked ham in my fridge (as the original recipe called for) but a tart made entirely of cheese (there’s parmesan in the pastry!) did not sound like a bad thing. And, indeed, it was not; I just regretted not adding a handful of chopped parsley to the filling before spreading it on the pastry.
Ricotta and feta tart
slightly adapted from the always delicious and beautiful Donna Hay Magazine
Pastry:
1 ¼ cups + 1 tablespoon (185g) all purpose flour
pinch of salt
½ cup + ½ tablespoon (120g) unsalted butter, cold and diced
½ cup (50g) finely grated parmesan
2 tablespoons sour cream*
2 egg yolks
Filling:
230g ricotta – I used homemade
50g feta, crumbled
1 egg
1 clove garlic, crushed
1 teaspoon Dijon mustard
finely grated zest of 1 lemon
salt and freshly ground black pepper
Make the pastry: place the flour, salt, butter and parmesan in a food processor and process for 1-2 minutes or until the mixture resembles coarse meal. Add the sour cream and yolks and process for 1-2 minutes or until a dough forms. Wrap in plastic and refrigerate for at least 30 minutes.
Lightly butter a 24cm round pie dish or tart pan. Roll the pastry between two pieces of lightly floured baking paper until you get a 30cm round. Line the prepared dish with the pastry leaving a 5cm border overhanging the sides of the dish. Set aside
Preheat the oven to 200°C. Place the ricotta, feta, egg, garlic, mustard, lemon zest, salt and pepper in a bowl and mix well to combine. Spread the filling over the pastry and fold the border to form the outer crust of the tart**. Bake for 25-30 minutes or until golden.
* homemade sour cream: to make 1 cup of sour cream, mix 1 cup (240ml) heavy cream with 2-3 teaspoons lemon juice in a bowl. Whisk until it starts to thicken. Cover with plastic wrap and leave at room temperature for 1 hour or until thicker (I usually leave mine on the counter overnight – except on very warm nights – and it turns out thick and silky in the following morning; refrigerate for a creamier texture)
** I had trouble making the pastry border, so I removed the excess pastry and cut flower shapes with it using a cookie cutter, then I placed them on top of the filling before baking the tart
Serves 4
Monday, November 7, 2011
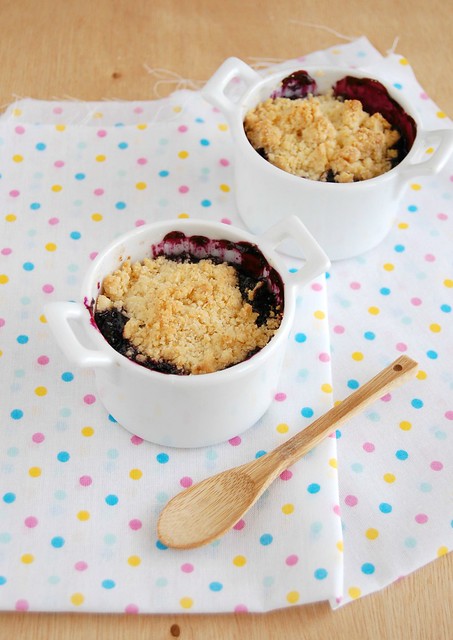
Blueberry crumble and my love for crumbles
I’ve come to a conclusion: crumbles have become my favorite dessert. As much as I love ice cream and fruit tarts crumbles are now to me a synonym to feel-good-food. The flavors can vary from traditional to tropical, it doesn’t matter: crumbles make me happy. :)
I ate my first crumble in my late twenties and first made one myself in my early thirties, yet I feel that it could have easily become a childhood favorite had I been introduced to it earlier in life – it would have been perfect for all those afternoons watching "Seven Faces of Dr. Lao" over and over again. :D
Blueberry crumble
inspired by the gorgeous Tender, Volume 2: A Cook's Guide to the Fruit Garden
150g blueberries – I used frozen, unthawed
finely grated zest of ½ lemon
3 teaspoons granulated or caster (superfine) sugar
¼ teaspoon corn starch
Crumble topping:
1/3 cup + ½ tablespoon (50g) all purpose flour
2 ½ tablespoons (35g) unsalted butter, room temperature, chopped
1/3 cup (33g) almond meal (finely ground almonds)
2 ½ tablespoons granulated or caster (superfine) sugar
Preheat the oven to 200°C/400°F. Have ready two 200ml capacity ovenproof ramekins or cups.
In a small bowl, mix the blueberries, lemon zest, sugar and corn starch. Divide equally between the ramekins.
In a medium bowl, place flour and butter and, using your fingertips, rub the ingredients together until mixture resembles breadcrumbs. Add the almond meal and sugar and mix. Sprinkle over the blueberries and bake for 30 minutes or until topping is golden and fruit is bubbling.
Serve with heavy cream or vanilla ice cream.
Serves 2 – but I must confess that I ate both ramekins myself. ;)
Thursday, September 22, 2011
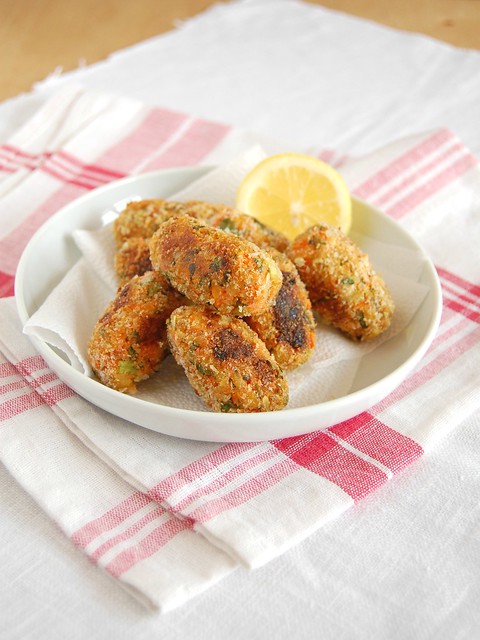
Carrot and apricot croquettes and a little white lie
I might be a cookbook junkie but certain cookbooks don’t appeal to me – I would never buy this book, for example. Never. I hate the idea of deceiving kids in order to make them eat veggies and fruit. They should eat good food and be aware of that. They should know what beetroots and carrots and eggplants look and taste like. That’s how my mom fed me as a kid and how I fed my sister when she was little.
But life is full of surprises and I ended up marrying a picky eater. Yes, go ahead and laugh now. :)
Therefore, when he asked me which ingredients there were in these croquettes, I lied. I LIED, people. I did not tell him there were dried apricots in it. No, sir. Just plain carrots and a pinch of herbs. Nothing more.
I probably should feel guilty for lying to him but I do not. He ate several croquettes and said they were delicious. I guess I’ll keep on lying about ingredients – hell, I might even turn it into an Olympic sport. :D
Carrot and apricot croquettes
slightly adapted from the always delicious and beautiful Australian Gourmet Traveller
650g carrots (about 5 medium), peeled and coarsely chopped
90g day-old white breadcrumbs
5 dried apricots, finely diced
2 spring onions, thinly sliced
3 tablespoons flaked almonds
1 garlic clove, crushed
½ cup packed flat-leaf parsley leaves, finely chopped
finely grated zest of 2 lemons
1 egg
salt and freshly ground black pepper
breadcrumbs, extra, for rolling the croquettes
2 tablespoons olive oil, for shallow-frying
Steam carrot in a steamer over a saucepan of boiling water until tender (20-25 minutes). Transfer to a bowl, mash to a smooth purée, add the breadcrumbs, apricots, spring onions, almonds, garlic, parsley, lemon zest, egg, season to taste and mix to form a soft dough, adding more breadcrumbs if dough is too sticky. Roll 1 ½ leveled tablespoons of mixture into cigar shapes then place on a tray lined with baking paper and refrigerate until firm (1-2 hours).
Preheat the oven to 200°C/400°F. Heat olive oil in a deep-sided frying pan over medium-high heat. Roll the croquettes in the breadcrumbs, then cook them in the olive oil, in batches, until golden on the outside. Transfer to a baking sheet and bake for 15-20 minutes or until cooked through.
Serve immediately with lemon wedges.
Makes about 25
Sunday, July 10, 2011
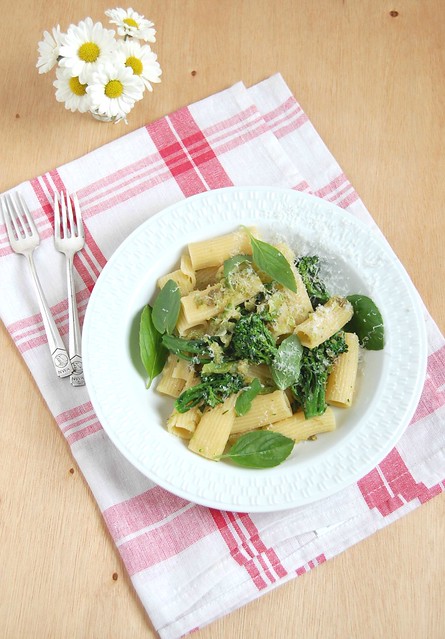
Broccolini rigatoni - delicious food in almost no time at all
I love being in the kitchen, but that doesn’t stop me from enjoying quick meals too – they have been a great idea in these cold days, when all I want is to be wrapped in a blanked, reading or watching TV.
After watching several episodes of the wonderful “Jamie’s 30-minute meals” I ended up buying the book - which is absolutely beautiful - and the first recipe I tried was this pasta dish: broccolini is in season and the hubby loves it. It instantly became one of his favorites – and heaven knows how rarely that happens. :)
Broccolini rigatoni
slightly adapted from the wonderful Jamie Oliver's Meals in Minutes; I bought it on amazon.co.uk
250g broccolini or broccoli
½ small onion
1 garlic clove
1 tablespoon capers, rinsed and drained
1 tablespoon olive oil
salt and freshly ground black pepper
finely grated zest of ½ lemon
a few sprigs of fresh thyme, stalks removed
200g rigatoni
generous handful finely grated parmesan, plus more to serve
handful of basil leaves
Slice all the broccolini florets from the stalks and set the florets aside. Place the stalks, the onion, the garlic and the capers in a food processor and process until a rough paste forms.
Heat the olive oil in a large saucepan and add the broccolini paste. Cook over medium heat, stirring occasionally. Add ¼ cup (60ml) hot water, season with salt, pepper, the lemon zest and the thyme leaves and stir.
Meanwhile, cook the rigatoni in a large saucepan of rapidly boiling salted water until al dente, adding the broccolini florets to the water in the last minutes of the cooking time.
Drain the pasta and broccolini florets reserving about ½ cup (120ml) of the cooking water. Transfer the pasta and broccolini to the pan with the paste, add the parmesan and basil leaves and mix to combine everything together. If necessary, add a little of the reserved cooking water to loosen the pasta sauce.
Drizzle with olive oil, sprinkle with more parmesan and serve at once.
Serves 2
Wednesday, May 25, 2011
Swedish visiting cake + music lyrics
One of my favorite things about learning English was being able to understand music lyrics – I think some of you agree with me on that. :)
That said, there are times I want to listen to complex lyrics and there are others when almost no lyrics is the way to go. I feel the same about the cakes I bake: there are times for complex, layered beauties, and times when only simple will do. ;)
Swedish visiting cake
from Dorie’s baking bible
1 cup (200g) superfine sugar + a little more for sprinkling
finely grated zest of 1 lemon
2 large eggs
¼ teaspoon salt
1 teaspoon vanilla extract
1 vanilla bean, cut lengthwise, seeds scraped with the back of a knife – or use ½ teaspoon almond extract, as per the original recipe
1 cup (140g) all purpose flour
½ cup (113g/1 stick) unsalted butter, melted and cooled
about ¼ cup sliced almonds (blanched or not)
Preheat the oven to 180°C/350°F. Butter a seasoned 23cm (9in) cast iron skillet or other heavy ovenproof skillet, a 23cm (9in) round cake pan or pie pan.
Combine the sugar and the lemon zest in a large bowl and rub them together with your fingertips until sugar is fragrant. Whisk in the eggs, one at a time, until well blended. Whisk in the salt and the extracts/vanilla seeds. Using a silicone spatula, stir in the flour, and then fold in the butter.
Transfer batter to the prepared pan and smooth the surface. Sprinkle with the almonds and extra sugar (if you’re using a cake or pie pan, place it on a baking sheet).
Bake for 25-30 minutes or until golden and a little crisp at the edges – the inside of the cake will remain moist. Remove from the oven, let the cake cool 5 minutes in the pan, over a wire rack, then run a thin knife around the sides and bottom of the cake to loosen it*. Serve the cake warm or cool.
* I used a fluted tart pan and it was impossible to do that; I cooled the cake in the pan completely then carefully unmolded it, first loosing some of the edges with the handle of a teaspoon, then loosing the bottom of the cake with a large metal spatula
Serves 8-10
Thursday, February 17, 2011
Blueberry tea cake and cookbooks that make me cry
Something I’d never imagined possible has happened to me – and twice so far: I cried reading cookbooks.
Reading about Barbara Lynch’s childhood years brought tears to my eyes; I became a huge fan of hers even before trying her recipes. But it all started with John Barricelli’s beautiful book
: a couple of lines about him growing up without his parents and I was crying like a baby – maybe because I know the feeling so well.
After wiping out the tears I went to the kitchen and baked this cake.
Blueberry tea cake
from The SoNo Baking Company Cookbook
Cake:
2 ½ cups (350g) all purpose flour + 1 teaspoon for blueberries and zest
2 teaspoons baking powder
1 cup (226g/2 sticks) unsalted butter, room temperature
1 cup (175g) firmly packed light brown sugar
1 cup (200g) granulated sugar
¼ teaspoon salt
4 large eggs, room temperature
1 teaspoon vanilla extract
1 cup (240ml) buttermilk
2 cups blueberries – I used frozen, unthawed
2 tablespoons grated lemon zest
Glaze:
2-3 tablespoons lemon juice
2 cups (280g) confectioners’ sugar, sifted
Preheat the oven to 180°C/350°F. Generously butter a 12-cup Bundt pan. Set aside.
Make the cake: in a medium bowl, whisk together the 2 ½ cups flour and the baking powder. Set aside.
In the large bowl of a stand mixer fitted with the paddle attachment, beat the butter, sugar and salt on medium-high speed until light and fluffy, 2-3 minutes. Add the eggs, one at a time, beating after each addition. Beat in the vanilla. On low speed, add the dry ingredients in three batches, alternating with the buttermilk, and beginning and ending with the flour. Beat just until the flour is absorbed.
In a bowl, toss the blueberries and lemon zest with the remaining 1 teaspoon flour, and fold into the batter with a rubber spatula. Scrape the batter into the prepared pan and smooth the top. Place the pan on a baking sheet and bake until a cake tester inserted into the center of the cake comes out clean, about 65 minutes. Cool in the pan on a wire rack for 20 minutes, then invert the pan on the rack to turn the cake out. Let cool completely on the rack.
Make the glaze: in a small bowl, whisk the lemon juice into the confectioners’ sugar, adding the second tablespoon gradually, so that the glaze is just liquid enough to pour easily but still opaque. Spoon the glaze over the cooled cake, then allow it to firm completely, about 30 minutes, before serving.
Serves 12 – I halved the recipe above and used a regular 6-cup capacity ring pan
Wednesday, September 15, 2010
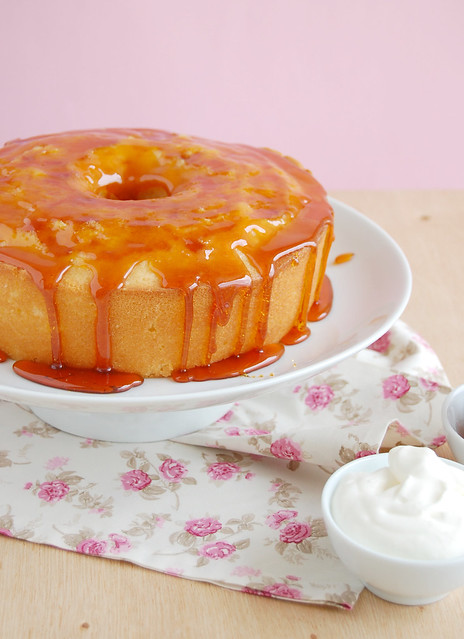
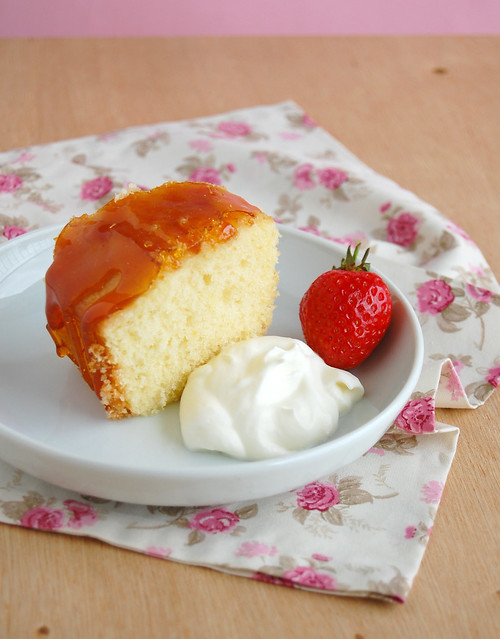
Lemon cake with crackly caramel glaze
If there are no limits to the number of apple cakes I’m willing to try, do I need to say anything about lemon cakes? :)
I saw this recipe a couple of weeks ago and went completely crazy over it – I felt like running home to bake it, but unfortunately I had to work. I ended up making it a couple of days later, but switched to another cake recipe – the thought of whipping the egg whites separately made me feel instantly lazy.
The caramel glaze did not work as the recipe said it would – ask Joao about the nice words coming from the kitchen while I was making it – so I made another batch of caramel and simply poured it over the cake. It was a bit hard to slice, but tasted good – and absolutely crackly. :)
The reason why I’m posting this recipe, bad caramel and all, is that I had to share with you my favorite lemon cake so far. Did I say lemon cake? Sorry – my favorite cake. Period. :D
Lemon cake with crackly caramel glaze
adapted from Baking by Flavor
Cake:
2 ¾ cups (385g) all purpose flour
1/3 cup (46g) cake flour*
½ teaspoon baking powder
½ teaspoon baking soda
¾ teaspoon salt
1 cup (2 sticks/226g) unsalted butter, room temperature
2 cups (400g) caster sugar
finely grated zest of 2 lemons
2 tablespoons lemon juice
4 large eggs
1 cup less 2 tablespoons buttermilk, well shaken
Lemon syrup:
¼ cup (60ml) water
¼ cup (50g) caster sugar
2 tablespoons lemon juice
Crackly caramel glaze:
1 cup (200g) caster sugar
¼ teaspoon cream of tartar
2 tablespoons water
Preheat the oven to 180°C/350°F. Generously butter a 25cm (10in) Bundt pan.
Sift the all purpose flour, cake flour, baking powder, baking soda, and salt into a medium bowl. Set aside.
Cream the butter in the large bowl of an electric mixer on moderate speed for 3 minutes. Add the sugar in three additions, beating in moderate speed for 1 minute after each addition. Beat in the lemon zest and juice. Add the eggs, one at a time, beating for 30 seconds after each addition.
On low speed, alternatively add the sifted ingredients in three additions and the buttermilk in two additions, beginning and ending with the sifted mixture. Scrape down the sides of the bowl frequently to keep the batter even textured. Transfer the batter to the prepared pan and level the top.
Bake the cake for 55 minutes or until risen, set and a wooden toothpick inserted in the cake comes out clean. Let the cake stand in the pan on a wire rack for 5-8 minutes then invert onto another wire rack.
Make the syrup: in a small saucepan, simmer the water and sugar over moderate heat just until the sugar is dissolved, about 5 minutes. Let cool, then stir in the lemon juice. While the cake is still hot, brush it with the glaze, taking care to dampen the sides of the cake as well. Cool completely before drizzling the cake with the caramel.
Make the caramel glaze: in a heavy saucepan, stir the sugar with the cream of tartar and water until sandy. Wash down the sides of the pan with a moistened pastry brush to remove any sugar crystals. Bring the mixture to a boil over moderately high heat and cook without stirring until a deep honey-colored caramel forms, about 5 minutes. Remove from the heat. Carefully swirl the pan to cool the caramel slightly, then pour it over the cake.
* homemade cake flour: 1 cup (140g) all purpose flour minus 2 tablespoons + 2 tablespoons corn starch
Serves 16 – I halved the cake and lemon syrup recipes and used a 6 cup capacity ring pan; I did not halve the caramel recipe, though
Saturday, July 24, 2010
Lemon cloud tea cookies
Let me tell you a secret: sometimes I feel like one of Mr. Ivan Pavlov’s dogs when I hear (or read, for that matter) the word “lemon”. :)
That is why I could not resist this recipe when I saw it on Joy’s blog – and I’m glad I didn’t, because these little cookies are delicious.
Lemon cloud tea cookies
1 ½ cups (210g) all purpose flour
¾ cup cornstarch
4 teaspoons baking powder
1/8 teaspoon salt
113g (8 tablespoons/1 stick) unsalted butter, softened
1 cup (140g) confectioners’ sugar
2 large eggs
1 teaspoon vanilla
1 teaspoon lemon juice
1 teaspoon finely grated lemon zest
Preheat oven to 160°C/325°F; line two large baking sheets with baking paper.
Sift the flour, cornstarch, baking powder and salt in a bowl. Set aside.
Combine the butter and confectioners’ sugar in the bowl of an electric mixer. Beat on low speed with the paddle until well mixed. Increase the speed to medium and continue beating until light, about 2 minutes.
Beat in the eggs one at a time. Batter may look broken and curdled. Beat in the juice and zest.
Decrease the speed to low and beat in the flour mixture. Remove the bowl from the mixer and give the dough a few good turns with your spatula to bring it all together.
Arrange rounded teaspoons of the dough on prepared pans. Space the balls about 5cm (2in) apart. After all the cookies have been placed on the pan, flour a fork and press a crisscross design into the top of each mound of dough. Bake the cookies until they spread and become golden, about 20 minutes. Slide the parchment paper off the pan to cool completely.
Makes 48 tiny cookies – I halved the recipe above and still got 32 cookies
Friday, July 16, 2010
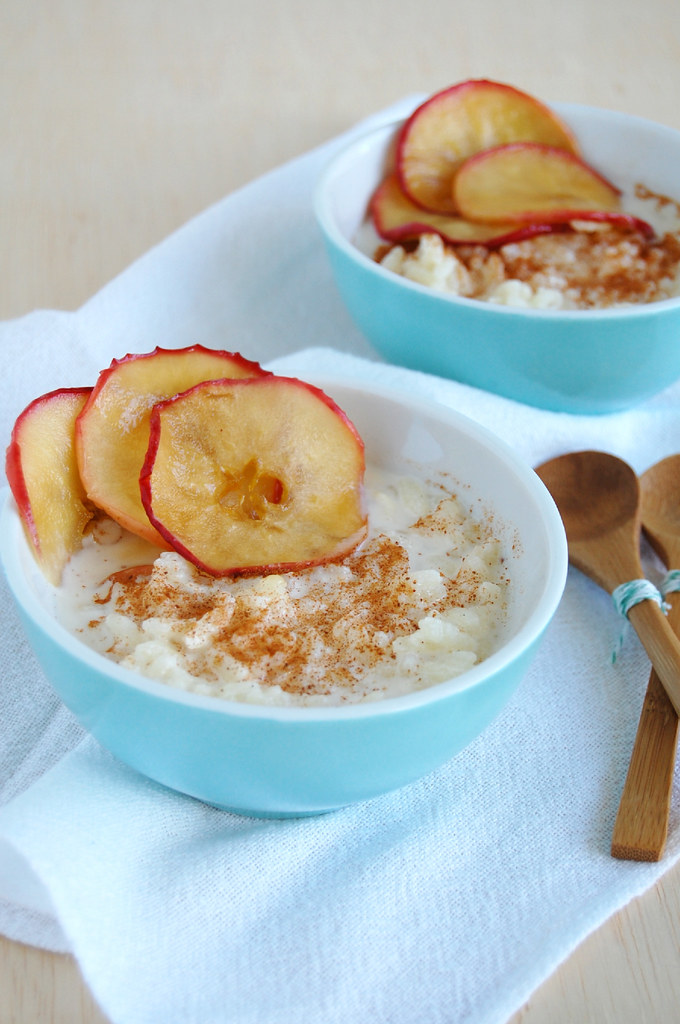
Baked rice pudding with honeyed apples
As you can see, I’m still on comfort food mode on. :)
I remember seeing these apples on the magazine and thinking “wow, they look so good!”, but did not feel as enthusiastic about the porridge; don’t get me wrong, I love oats, but those golden, beautiful apple slices deserved more – so I decided to pair them with rice pudding. And that was absolutely brilliant – modest mode off. :)
Baked rice pudding with honeyed apples
recipes adapted from Donna Hay magazine
Rice pudding:
½ cup Arborio rice
4 cups (960ml) whole milk
1 vanilla bean, split and seeds scraped
4 tablespoons caster sugar
2 pieces lemon zest – 5cm (2in) each
ground cinnamon, for sprinkling
Honeyed apples:
3 red apples, sliced
3 tablespoons honey
Preheat oven to 160°C/320°F. Place the rice in the base of a 7 cup-capacity shallow ovenproof dish. Combine the milk, vanilla bean and seeds, sugar and lemon zest, pour over the rice and stir to combine. Cover tightly with foil and place on a baking tray. Bake for 1 hour, remove the foil and stir. Bake, uncovered, for a further 30 minutes or until al dente.
Make honeyed apples: heat a large frying pan over high heat. Cook the apples for 1 minute each side. Add honey and cook for a further 1–2 minutes or until golden and caramelized.
Divide the rice pudding among 6 bowls, dust with the cinnamon, top with the apples and serve.
Serves 6
Wednesday, July 14, 2010
Leek and chickpea soup
If someone asked me what I would like to be doing right now, I’d say that I’d like to be on my couch, under the blankets, having this soup for lunch – and Lisa’s cherry peach almond crisp for dessert. :)
Leek and chickpea soup
adapted from Kitchen: The Best of the Best
2 tablespoons (28g) unsalted butter
8 saffron threads
1 large leek, cleaned and finely sliced
grated zest of 1 small lemon
1 carrot, peeled and coarsely grated
2 tablespoons roughly chopped flat leaf parsley
2 ¼ cups (540ml) chicken stock
150g dried chickpeas, soaked overnight and cooked in salted water for 40 minutes or until al dente (or canned chickpeas, if you prefer)
salt and freshly ground black pepper
Heat the butter and saffron threads in a medium saucepan over medium heat. Add the leek when the butter begins to bubble, and cook until it is soft and transparent. Add the zest, carrot and parsley and cook for a further minute before adding the stock and chickpeas. Season to taste and bring to the boil, then reduce the heat and simmer for 15 minutes.
Note: I’ve made this soup twice already and the second time I added small macaroni to it - the soup was even better!
Serves 2
Sunday, June 13, 2010
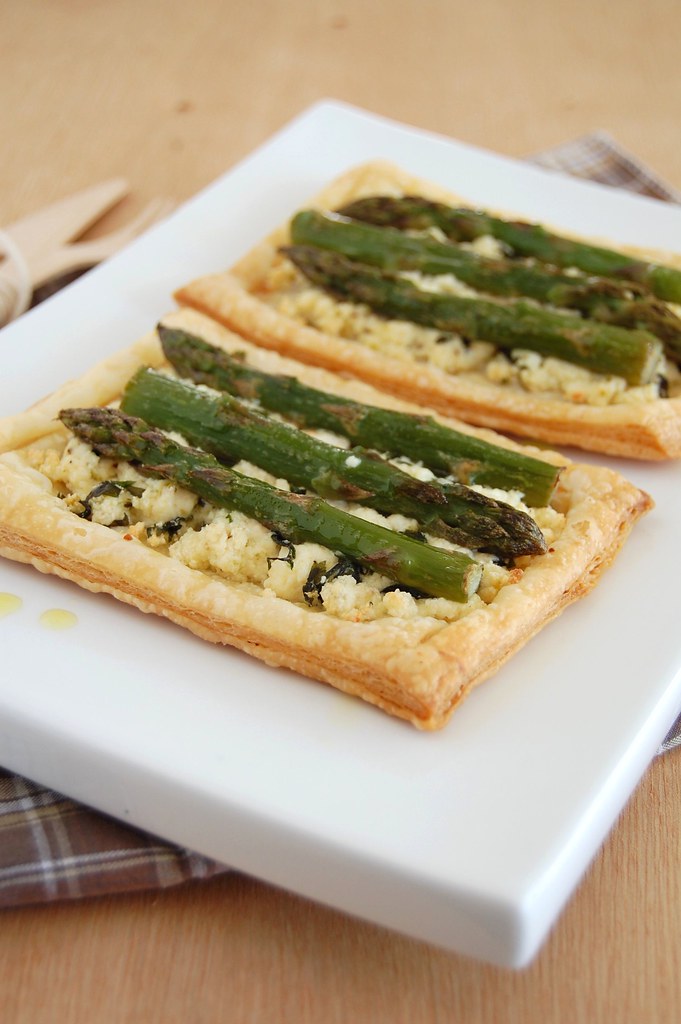
Asparagus and ricotta tarts
Joao bought a bunch of asparagus a while ago and, for some reason I can’t remember now we did not eat them right away – I ended up freezing the asparagus but wasn’t sure if that would work.
I decided to make tartlets to check if the asparagus were still good and they turned out delicious – I place the asparagus still frozen on top of the ricotta filling and baked according to the recipe.
No asparagus around? Don’t fret – I think these tartlets would be great with other veggies, such as broccolini and zucchini.
Asparagus and ricotta tarts
adapted from Donna Hay magazine
1 sheet ready-prepared butter puff pastry, thawed
¾ cup (150g) fresh ricotta
1 cup finely grated parmesan
¼ cup parsley leaves, chopped
finely grated zest of 1 lemon
1 teaspoon olive oil – I used garlic infused
salt and freshly ground black pepper
12 asparagus spears, trimmed
olive oil extra, for brushing
Preheat the oven to 200°C/390°F. Line a large baking sheet with foil.
Cut out four 12x6cm rectangles from the pastry sheet and place on the prepared sheet. Score a 1cm border on each rectangle.
Place the ricotta, parmesan, lemon zest, parsley, salt and pepper in a bowl and stir to combine. Spoon the ricotta mixture onto the pastry and top with the asparagus. Brush the pastry borders with the oil. Bake for 12–15 minutes or until the pastry is puffed and golden. Serve immediately.
Serves 4.
